#espressif esp32 flash download tool
Explore tagged Tumblr posts
Visit Tumblr Blog
Explore Tumblr blogs with no restrictions, modern design and the best experience.
Last Seen Tumblr Blogs


Fun Fact
US Tumblr user growth rate is estimated to slow down to 4.1%.
Text
Flash Download Tool como Gravar Binários no ESP32
Este post é um tutorial de como gravar binários no ESP32 usando a Flash Download Tool disponibilizado pela Espressif.
Flash Download Tool é uma ferramenta disponibilizado pela Espressif para exportar arquivos binários para o ESP32. Baixar e instalar Flash Download Tool Antes de tudo é necessário baixar o programa Flash Download Tool no site de Espressif, após baixar, abra e defina chipType como ESP32. Além disso, haverá outras configurações mas não serão necessárias, por ultimo click ‘ok‘. Entendendo o Flash…
Ver no WordPress
#download flash tool exe#esp 32#esp32 arduino#esp32 arduino ide#esp32 board#esp32 bootloader#esp32 flash download tool command line#esp32 wroom#esp8266 flash download tool#espressif esp32 flash download tool#flash download tool esp32#flash download tool for esp32#flash download tools#flash download tools (esp8266 e esp32 & esp32-s2)#usb flash download tool
0 notes
Photo

[Amazon Web Services] ESP32-DevKitCにAmazon FreeRTOSをインストールする https://ift.tt/33JmN95
Amazon FreeRTOS(以下FreeRTOS)は様々なデバイスにインストールすることができエッジ側にAWSの環境を拡張する手段を提供しているが、ここでは手に入りやすいEspressif ESP32-DevKitC(以下ESP32)にFreeRTOSをインストールする手順を示す。
Espressif ESP32-DevKitC と ESP-WROVER-KIT の開始方法 (Amazon Web Services)
waves ESP32 DevKitC V4 ESP-WROOM-32 ESP-32 WiFi BLE 技適取得済 国内発送AMAZON JP
動作環境
FreeRTOSを使うにあたりあらかじめ以下をインストールしておく。
⦿ Pytyoh 2.7.10以降 (3.xでよいが、2.xを使う場面あり) ⦿ pip ⦿ AWS SDK for Python (boto3) ⦿ AWS CLI
$ python --version Python 3.6.8 $ python2 --version Python 2.7.15+ $ pip --version pip 19.3.1 from /usr/local/lib/python3.6/dist-packages/pip (python 3.6) $ pip list | grep boto3 boto3 1.9.253 $ aws --version aws-cli/1.16.263 Python/3.6.8 Linux/4.15.0-65-generic botocore/1.12.253
ツールチェーンインストール
まずEspressif公式サイトからUbuntu用のツールチェーンをダウンロードしてインストールする。
https://docs.espressif.com/projects/esp-idf/en/v3.1.5/get-started-cmake/linux-setup.html
⦿ 以下をダウンロード & インストール
xtensa-esp32-elf-linux64-1.22.0-80-g6c4433a-5.2.0.tar.gz
$ mkdir ~/esp $ cd ~/esp $ tar zxvf ~/Downloads/xtensa-esp32-elf-linux64-1.22.0-80-g6c4433a-5.2.0.tar.gz
⦿ 環境変数��定
export PATH="$PATH:$HOME/esp/xtensa-esp32-elf/bin"
⦿ バージョン確認
$ xtensa-esp32-elf-gcc --version xtensa-esp32-elf-gcc (crosstool-NG crosstool-ng-1.22.0-80-g6c4433a) 5.2.0 Copyright (C) 2015 Free Software Foundation, Inc. This is free software; see the source for copying conditions. There is NO warranty; not even for MERCHANTABILITY or FITNESS FOR A PARTICULAR PURPOSE.
CMakeインストール
次にFreeRTOSビルド用のCMakeをインストールする。
Amazon FreeRTOSではCMake 3.13以降がサポートされるが、Ubuntuのパッケージリポジトリには3.10しか用意されていないためCMake公式サイトからダウンロードしてインストールする。
https://cmake.org/download/
⦿ 以下をダウンロード & インストール
cmake-3.15.4-Linux-x86_64.tar.gz
$ mkdir ~/tmp $ cd ~/tmp $ tar zxvf ~/Downloads/cmake-3.15.4-Linux-x86_64.tar.gz $ sudo cp -r cmake-3.15.4-Linux-x86_64/{bin,doc,share} /usr/local
manファイルについては格納場所/usr/local/manが/usr/local/share/manへのシンボリックリンクのためmanファイルのみ以下のようにしてコピーする。
$ sudo cp -r cmake-3.15.4-Linux-x86_64/man /usr/local/share
⦿ バージョン確認
$ cmake --version cmake version 3.15.4
Amazon FreeRTOSダウンロード & 設定
ビルドの準備が整ったらAmazon FreeRTOS公式GitHubからソース一式をダウンロードする。
https://github.com/aws/amazon-freertos
$ cd ~/tmp $ git clone https://github.com/aws/amazon-freertos.git --recurse-submodules
次��セットアップスクリプト用の設定ファイルを編集する。
$ cd amazon-freertos/tools/aws_config_quick_start $ vi configure.json { "afr_source_dir":"../..", <----------- 上記ダウンロードディレクトリ(amazon-freertosディレクトリのフルパス) "thing_name":"$thing_name", <--------- ESP32に付けるThing Name "wifi_ssid":"$wifi_ssid", <----------- Wi-FiネットワークのSSID "wifi_password":"$wifi_password", <--- Wi-Fiネットワークの接続パスワード "wifi_security":"$wifi_security" <---- Wi-Fiネットワークのセキュリティタイプ }
設定ファイルが編集できたらセットアップスクリプトを実行する。
$ python SetupAWS.py setup
これによりAWS IoT上のリソースが自動的に作られ、リソース間の関連付けも行われる。
⦿ モノ(Thing)作成

⦿ 証明書作成
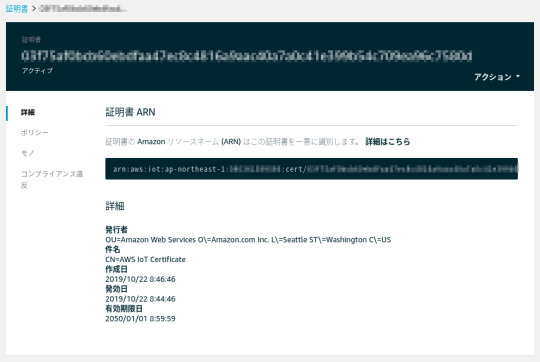
⦿ ポリシー作成
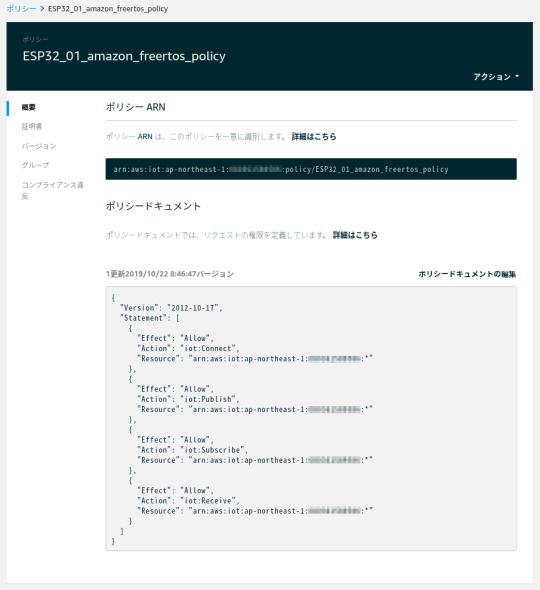
⦿ 証明書にポリシーをアタッチ
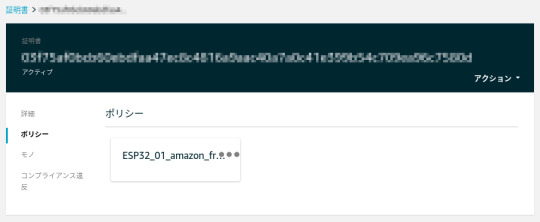
⦿ モノに証明書をアタッチ

⦿ 証明書関連のファイル作成
$ ls -l ESP32_01_* -r--r--r-- 1 xxx xxx 64 10月 22 08:46 ESP32_01_cert_id_file
⦿ MQTTエンドポイント、Wi-Fiネットワーク情報をデモ用aws_clientcredential.hファイルに追加
$ cat -n ../../demos/include/aws_clientcredential.h : 35 /* 36 * MQTT Broker endpoint. 37 */ 38 #define clientcredentialMQTT_BROKER_ENDPOINT "xxxxxxxxxxxxxx-ats.iot.ap-northeast-1.amazonaws.com" 39 40 41 /* Use of a "define" and not a "static const" here to be able to 42 * use pre-compile concatenation on the string. */ 43 #define clientcredentialIOT_THING_NAME "ESP32_01" : 56 /* 57 * Wi-Fi network to join. 58 */ 59 #define clientcredentialWIFI_SSID "xxxxxxxxxxxxxxxx" 60 61 /* 62 * Password needed to join Wi-Fi network. 63 */ 64 #define clientcredentialWIFI_PASSWORD "xxxxxxxxxxxxx" 65 66 /** 67 * @brief Security type 68 * WPA2 Security, @see WIFISecurity_t 69 * Possible values are - eWiFiSecurityOpen, eWiFiSecurityWEP, eWiFiSecurityWPA, 70 * eWiFiSecurityWPA2 71 */ 72 #define clientcredentialWIFI_SECURITY xxxxxxxxxxxxxxxxx 73 74 #endif
⦿ 証明書とプライベートキーをBase64エンコードしてデモ用
aws_clientcredential_keys.hファイルに追加
$ cat -n ../../demos/include/aws_clientcredential_keys.h : 29 /* 30 * PEM-encoded client certificate 31 * 32 * Must include the PEM header and footer: 33 * "-----BEGIN CERTIFICATE-----\n"\ 34 * "...base64 data...\n"\ 35 * "-----END CERTIFICATE-----\n" 36 */ 37 #define keyCLIENT_CERTIFICATE_PEM \ 38 "-----BEGIN CERTIFICATE-----\n"\ : 57 "-----END CERTIFICATE-----\n" 77 /* 78 * PEM-encoded client private key. 79 * 80 * Must include the PEM header and footer: 81 * "-----BEGIN RSA PRIVATE KEY-----\n"\ 82 * "...base64 data...\n"\ 83 * "-----END RSA PRIVATE KEY-----\n" 84 */ 85 #define keyCLIENT_PRIVATE_KEY_PEM \ 86 "-----BEGIN RSA PRIVATE KEY-----\n"\ : 112 "-----END RSA PRIVATE KEY-----\n" :
FreeRTOSデモプロジェクトビルド & ESP32書き込み & 実行
設定が終わったのでCMakeでFreeRTOSをビルドし、ESP32に書き込んで実行する。
⦿ ビルド
$ cd ../.. $ cmake -DVENDOR=espressif -DBOARD=esp32_devkitc -DCOMPILER=xtensa-esp32 -S . -B build $ cd build $ make all -j4 : [100%] Built target app
⦿ ESP32書き込み
ここでESP32をホストPCに接続し、まず以下を実行してESP32の中身を消去する。
$ cd .. $ ./vendors/espressif/esp-idf/tools/idf.py erase_flash -B build ESP-IDF currently only supports Python 2.7, and this is Python 3.6.8. Search for 'Setting the Python Interpreter' in the ESP-IDF docs for some tips to handle this.
ただ当該環境ではPython3がデフォルトなので上記のエラーになる。
idf.pyを書き換えてPython2を明���的に指定して再度実行する。
$ vi ./vendors/espressif/esp-idf/tools/idf.py (変更前) #!/usr/bin/env python (変更後) #!/usr/bin/env python2 $ ./vendors/espressif/esp-idf/tools/idf.py erase_flash -B build Setting IDF_PATH environment variable: ... : Chip erase completed successfully in 3.8s Hard resetting via RTS pin... Done
続いてFreeRTOSをESP32に書き込む。
$ cd build $ make flash [ 0%] Built target blank_ota_data [ 1%] Built target partition_table [ 1%] Built target idf_component_ulp : Wrote 953520 bytes (585067 compressed) at 0x00020000 in 14.5 seconds (effective 526.8 kbit/s)... Hash of data verified. Leaving... Hard resetting via RTS pin... [100%] Built target flash
⦿ AWS上のMQTTメッセージのモニタリング
AWS IoTコンソールでMQTTクライアントを使ってESP32がAWSに送信するメッセージをサブスクライブしておく。
[テスト]をクリックするとMQTTクライアントが開くので[トピックのサブスクリプション]フィールドに「iotdemo/#」と入力して[トピックへのサブスクラ…]をクリックする。

いまサブスクライブしたトピックの[iotdemo/#]をクリックしてメッセージを待ち受ける。

⦿ デモプログラム実行
この状態でデモプログラムを実行するとMQTTでパブリッシュが行われ、AWS IoTコンソール上でもメッセージが受信できていることが確認できる。
$ cd .. $ ./vendors/espressif/esp-idf/tools/idf.py monitor -p /dev/ttyUSB0 -B build : 157 914 [iot_thread] [INFO ][DEMO][9140] Demo completed successfully. 158 918 [iot_thread] [INFO ][INIT][9180] SDK cleanup done. 159 918 [iot_thread] [INFO ][DEMO][9180] -------DEMO FINISHED------- -> Ctrl + ]で終了

参考サイト
AWS IoT情報 (Qiita)
元記事はこちら
「[Amazon Web Services] ESP32-DevKitCにAmazon FreeRTOSをインストールする 」
November 13, 2019 at 12:00PM
0 notes
Text
ESP32 Bluetooth Tutorial: Using the BTstack library
The objective of this ESP32 tutorial is to explain how to get started with the Bluetooth functionalities that are supported by the ESP32 hardware. The Bluetooth tests of this tutorial were performed using a DFRobot’s ESP32 module, integrated in a ESP32 development board. Introduction
The objective of this ESP32 tutorial is to explain how to get started with the Bluetooth functionalities that are supported by the ESP32 hardware.
We are going to use the BlueKitchen’s BTstack library, which can be obtained from GitHub here. You can also read more about this library on its website. BTstack supports both Bluetooth Classic and Bluetooth Low Energy, making it a versatile choice to use.
This library has ports for many platforms, as can be seen here. Fortunately, the ESP32 is one of the supported microcontrollers. You can check at the GitHub page the setup guide for the ESP32, although we are also going to cover it on this tutorial.
We will be using the ESP32 IDF in order to use the BTstack library. If you don’t have IDF configured, please follow Espressif’s guide here. Setting up IDF is relatively straightforward since the guide is very comprehensive and most of the tools are already compiled for us. Nonetheless, using it is not so easy as the Arduino core.
Note that the BTstack exposes a very low level API. Although it gives us much more control over the functionalities, it is also more complex to use and it needs some knowledge about the Bluetooth stack. So, we are going to start with a very simple example that will start the Bluetooth on our ESP32 and make it discoverable for other Bluetooth devices.
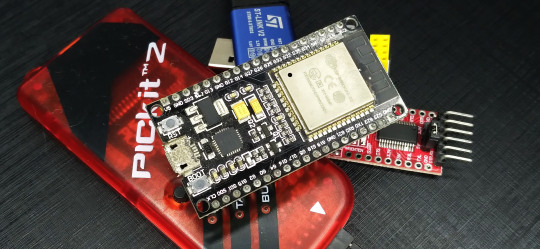
The Bluetooth tests of this tutorial were performed using a DFRobot’s ESP32 module, integrated in a ESP32 development board.
Setting up the BTStack
As said in the introductory section, using the BTstack library requires a previous installation of the ESP32 IDF tool. If you have followed Espressif’s guide, then you should have installed msys32 somewhere on your computer.
In my case, I have my IDF folder under C:/msys32/home/myUser/esp/esp-idf. So, what we need to do next is getting the BTstack library from GitHub. You can either clone it using Git or manually download it from the GitHub page.
Note the download button in figure 1, which allows to get a copy of the libraries. In my case, I’ve manually downloaded it.

Figure 1– Downloading BTstack library from GitHub.
Then you need to save it on your msys32 working environment. In my case, I have it on the same folder of the IDF project, in C:/msys32/home/myUser/esp/.Once you have it on your working folder, open the msys32 terminal and navigate to the BTstack project folder. Then, still using the command line, navigate to the /port/esp32 folder. You can use the cd (change directory) command to navigate on the folders of the project.In that directory, you need to run the following command for the project example folders to be created [1]:
./create_examples.py
On that same directory, you should now have a lot folders with different examples from BTstack. In order to create our new program easily, we are going to copy one of these example folders and use most of the configurations already defined. So, make a copy the spp_counter folder in the same directory and rename it hello_world.Then, enter on the new hello_world folder and after that on the main folder. There, you should have a file called spp_counter.c. Rename it to hello_world.c.Finally, you can open the file and clear its contents, since we are going to write the code on the next section.
The code
On the top of our file, we will need to have the include for the btstack.h file, which contain some configurations and initialization. We will not change that file for this simple tutorial.
#include "btstack.h"
Now we are going to move on to the main function, which is called btstack_main. There we will put our Bluetooth code. In this simple tutorial, it will mainly consist on some initialization.
int btstack_main(int argc, const char * argv[]){ // ... }
Next, we need to call the l2cap_init function, which makes the setup of L2CAP and registers it with the HCI layer [2].On the Bluetooth stack, L2CAP (Logical Link Control and Adaptation Protocol) provides connection oriented and connectionless data services to the protocols built on upper layers [3]. One of the responsibilities of this layer is to provide multiplexing between the higher layer protocols, enabling multiple applications to utilize the same lower layer links [3].The mentioned HCI (Host Controller Interface) layer provides a uniform interface for accessing the Bluetooth hardware capabilities [4].
l2cap_init();
Next we need to call the sdp_init function, which sets up SDP (Service Discovery Protocol). This layer allows advertising services and discovering services provided by other Bluetooth devices.
sdp_init();
In the next steps, we will configure some settings of GAP (Generic Access Profile). GAP is a profile from the Bluetooth stack that defines how devices find each other and how they establish a connection [5].Keeping this in mind, we will first make the device discoverable by calling the gap_discoverable_control function, passing as input the value 1. This way, we will be able to discover the ESP32 from other Bluetooth devices.
gap_discoverable_control(1);
We will also set the name of the device, by calling the gap_set_local_name
function and passing as input the name that we want to set. We will call it “Hello world”. Note that this needs to be defined before the Bluetooth stack starts [2].
gap_set_local_name("Hello world");
Finally, we call the hci_power_control function to turn on the the power of the hardware Bluetooth controller. It receives as input a variable of HCI_POWER_MODE enum. In this case, since we want to turn it on, we should pass HCI_POWER_ON.The final code is shown bellow.
#include "btstack.h" int btstack_main(int argc, const char * argv[]){ l2cap_init(); sdp_init(); gap_discoverable_control(1); gap_set_local_name("Hello world"); hci_power_control(HCI_POWER_ON); return 0; }
Testing the code
First of all, we need to set the correct configurations to upload the code for our FireBeetle ESP32 board. To access the configurations menu, go the the msys32 command line and on the hello_world directory hit the following command:
make menuconfig
Note that this is a IDF specific command and not a BTstack particularity. A menu like the one shown in figure 2 should pop.

Figure 2 – ESP32 IDF menu config.
Navigate to serial flasher config entry and hit enter. There you should put the board’s specific configurations needed to upload the program. For the FireBeetle board / ESP-WROOM-32 module, you should put the ones shown in figure 3.

Figure 3– ESP32 FireBeetle board flash configurations.
Note that on the default serial port entry you should put you device’s serial port, which may differ from mine. If you are coming from a Arduino background, then using the Arduino IDE to find the port of your device is a simple way to do it.
Note that you can also find at the Arduino IDE the flashing configurations for your board if it is already supported in the Arduino environment. It can be found under the tools menu. You can also find a lot of board’s configurations here
.After configuring, go to the save button and hit enter to save the content and then go to exit. Back on the msys32 command line, with your board connected to the PC, hit the following command do compile and flash the code:
make flash
The code should now start to compile. Note that the first time it compiles it may take a while. After being compiled, the flashing to the ESP32 should start automatically. After the procedure is finished, it should end up like shown in figure 4.

Figure 4– Upload of the code finished.
To make sure the code is executing, you can send the following command on the terminal to open a serial monitor tool.
make monitor
Other alternative is using the Arduino IDE serial monitor. In my case I was having some problems with the msys32 monitor, so I used the Arduino IDE to confirm that the board was indeed running the Bluetooth program. A message like the one shown in figure 5 should be printed on the console.

Figure 5 – Output of the BTstack hello world program on Arduino IDE.
Note that you may need to reset the board with the onboard reset button or unplug and replug the power because after uploading a program the board sometimes stays in download mode.
It’s important to take in consideration that the output we see on the command line printed to the serial port was not defined in our code. It is defined on a file on hello_world/components/btstack/main.c. You can confirm in that file that there are indeed the prints defined, in the app_main function.
Finally, you can try to find the ESP32 from some Bluetooth device. In my case, I���m finding it from my computer, as shown in figure 6. Note that I’m on a laptop with Bluetooth classic, so we don’t need a BLE device to find the ESP32.

Figure 6 – Finding the ESP32 as a Bluetooth device.
DFRobot supply lots of esp32 arduino tutorials and esp32 projects for makers to learn.
0 notes