#gifmakerresource
Text

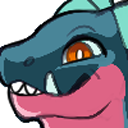
@lgbtqcreators bingo: quotes
the ring (dir. gore verbinski) + "ring" by koji suzuki
#horroredit#userlgbtq#horror#horrorwomensource#the ring#the ring 2002#samara morgan#naomi watts#rachel keller#userriel#usernaia#heymax#usertj#gifmakerresource#tusermiles#usermicu#userizuku#usercowboy#usermaplecroft#userzesty#usermaguire#tuserjen#alexlook#usersage#*horror#*gifs#reiko was gonna be in here but the coloring washed her skin out and when i fixed it the other colors clashed with the one of rachel#so i'm gonna make a separate gifset for reiko <3 just gotta think of ideas. i love her terribly i shan't neglect her
17 notes
·
View notes
Photo

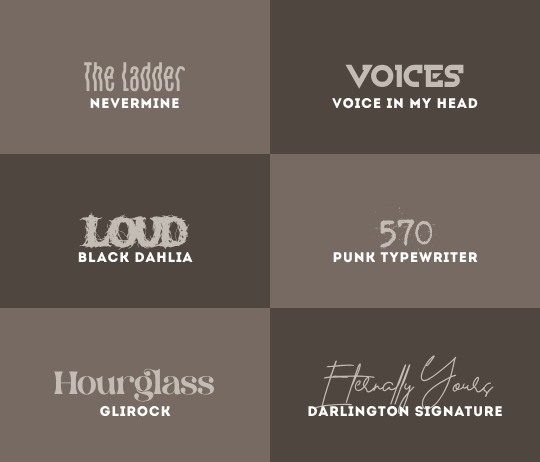
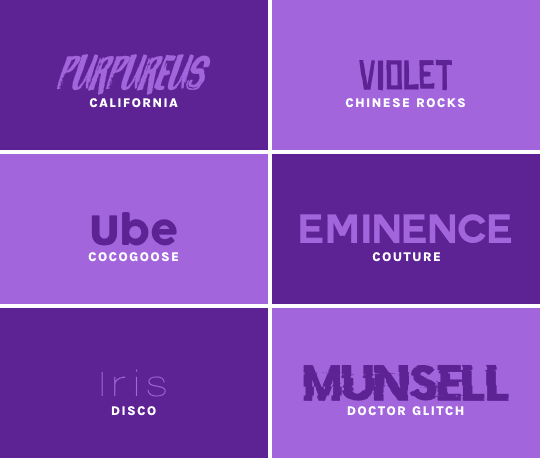
rats / queen for queen / necessary evil / soft / untouchable / not my type / the ladder / voices / LOUD / 570 / hourglass / eternally yours
i do not take ownership of any of these fonts, so there’s no need to credit me — but please reblog this post if you found it helpful at all! :)
#resources#fonts#font packs#font#font pack#gifmakerresource#completeresources#dailyresources#usertj#userangelic#usertiny#userallisyn#userspacey#userridge#userraffa#tuserheidi#mystuff#myfontpacks
380 notes
·
View notes
Text

I had to delete my previous bokeh overlay pack because zight died on me and I no longer had the file, so here is a new one.
Please like or reblog if you use
Do not repost
Download
#completeresources#sadresources#onlyresources#usergif#allresources#gifmakerresource#gif overlay#hisources#dailyresources#overlay#*#textures
255 notes
·
View notes
Text

COLOR CORRECTION BASE PSD PACK
please reblog if you plan to use!
credit is super appreciated but not required:)
don't repost/claim as your own
optional: tag me in your creations with #usercam!!!
download here (mediafire) | more gif help
more info + instructions under the cut
these are base PSDs which each include two adjustment layers for color correcting scenes with various oversaturated colored lighting. the gifs above have additionally been brightened and sharpened.
you will still need to play around with all the adjustments to make your gifs look perfect! these are just meant to get you started:) please send me an ask if you have any questions. if you use these psds and choose to give credit (thank you!) please add a link to this post!
Instructions for use:
1. Save the PSD files to your computer
2. Open your gif in photoshop. In a separate tab open the PSD file
3. CTRL + click or right click on the adjustment layers folder (titled: group 1) in the “layers” box. Click duplicate folder, and choose your gif as the destination for the duplicate.
4. Finish editing your gif and save!
#this is my 2k celebration post btw. thank u ily guys#psd pack#photoshop#my psds#🪐#gif help#psdresources#psd coloring#usergif#pshelp#completeresources#gifmakerresource#tv psd#ajlook#alielook#athenagranted#tuserdaria#icecreampotluck#gonna reblog with more tags later probably
338 notes
·
View notes
Text
gif tutorial
i was asked to make a tutorial for this set i made, so let's get right into it!

first things first, i downloaded the music videos from youtube in 1080p using 4k video downloader. unfortunately, the quality of youtube videos always seems... not great, to put it simply. plus these music videos are from the 90s, so they've been upscaled to 1080p after the fact. all of this works against us, but i've definitely worked with videos of lesser quality than these, so at least there's that!
when i gif, i import video frames to layers rather than screencapping. this comes down to personal preference. after everything has loaded, i group all my layers together and set the frame delay to 0.05. i then cropped my gif to 540x500.
the next step in my process is sharpening. i did play around with my settings a bit given the quality of the footage and the dimensions of the gif. i compared both @hellboys low-quality video gif tutorial to my regular sharpening action and my vivid sharpening action and in this case, i preferred my normal vivid sharpening action. i used this tutorial to create the action for myself, and you can find other sharpening tutorials here. this action converts my frames to video timeline and applies sharpening.
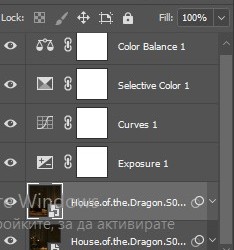
once my gif is sharpened and i'm in timeline, i begin coloring. i wanted to simplify the amount of colors used in these gifs, again because of the video quality -- i knew it wasn't going to have the crispness i would normally like for my gifs. here are my coloring adjustment layers and their settings (not pictured: my first layer is a brightness/contrast layer set to screen) (explanation in alt text):


all of these layers and their settings will vary depending on your footage and its coloring (and obviously, feel free to make the gradient map whatever colors you like if you aren't going for this exact look).
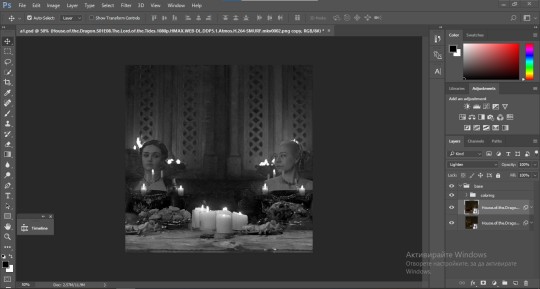
pretty basic coloring, especially with just slapping a gradient map on top (my beloved), but at this point, i still didn't like the quality of the gif, so i added a couple textures/overlays.


i put the left one down first and set the blending mode to soft light and the opacity to 8%. depending on what look you're going for, you could increase or decrease the opacity or play around with different blending modes. i like using this texture with lower quality footage because even when it's sized up a bit, it adds some crispness and makes things feel more defined. for the second texture, i set it to overlay and 75% opacity. we love and respect film grain in this house.
now for the typography! sometimes i really enjoy typography and other times it's the bane of my existence for the sole reason of just how many fonts i have installed. anyway, here are the settings i used for this set:

make sure the color of your font is white and then set the blending mode to either difference or exclusion. i can almost never see a difference between the two, but for this set, i used exclusion. below are the blending options (double click on your text layer to bring up this menu or right click and select blending options).


now we have to add the warp effect. with your text tool still selected, click this icon at the top of your screen:

from the dropdown menu, select twist. these were my settings, but feel free to play around with different warp options and their settings. the ones i use most often are flag, fish, and twist.

this last step is completely optional, but it's an effect i use in most of my sets with typography. duplicate your text layer (select the layer and ctrl+j), turn off the layer effects (click the eye icon next to effects), and set the blending mode to normal. right click on the layer and select rasterize type. right click on the layer icon itself and choose select pixels.

at this point, you should see the moving black and white dotted line showing that only your text is selected. then go to edit > stroke. here are the settings i almost exclusively use.

this is what your text should look like now:

using ctrl+T, move the layer off the canvas so you can't see any of the text anymore. you should be left with only your outline. click anywhere on your canvas to de-select the text we just moved. use ctrl+T again as well as your arrow keys to nudge the outline over to the left 2px and up 2px. this is personal preference as far as the positioning, but i almost never move it any other way. you can leave it like this, which i sometimes do, or you can set the blending mode to soft light like i did for a more subtle effect.
and that's it! rinse and repeat for each gif in your set or use a different warp effect on each gif to switch it up! if you have any questions about this tutorial or would like me to make one for anything else, please feel free to ask any time!

#gif tutorial#my tutorials#gifmakerresource#completeresources#dailyresources#chaoticresources#userdavid#coloring tutorial#typography tutorial#tutorial#photoshop tutorial
172 notes
·
View notes
Note
Hii you're so talented!! i wonder if you could explain how you did this gif effect with the squares? and do you have any tips on colouring because yours is always top notch <3333
heyy thank you so much 🥹 and of course! i've never really done a tutorial before but i'll try my best to explain it in a way that makes sense 😅

so i start off with making my two gifs seperatly and colouring them as i normally would, once i've done that i load both gifs into the same project and once i've done all that i started on the grid part:
now go to view -> add guides and this window should pop up:
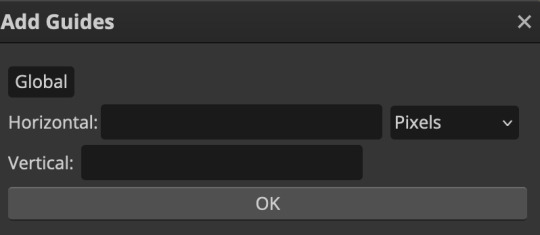
(it's was so daunting at first when i saw this i was like ????? and started putting in random numbers and was like oh that's how this works 🤣)
here's the settings i used for my gif which is 540px x 500px in size with 5 squares x 4 squares: (if you want more or less you just have to play around with it)
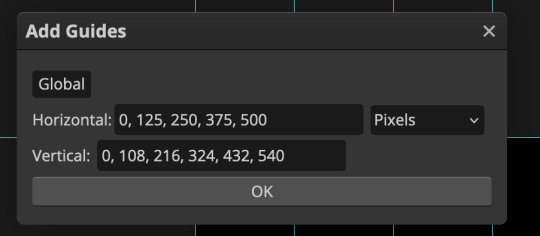
once you've done that it should look something like this:
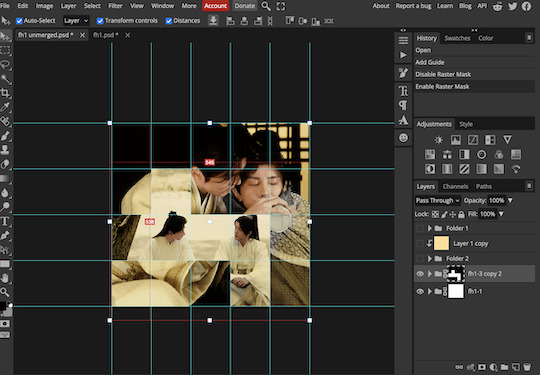
now the next part is really up to preference again: add a vector mask onto the gif that's above the other one like this: (ignore the name of my folder that is irrelevant 🤣)

and then i used the rectangle select tool (this is because the rectangle select should lock onto the grid squares making it easier to erase certain sections) + a black brush tool to erase the squares to show the other gif that's underneath (you can reposition both gifs to your liking which is what i did)
before & after:
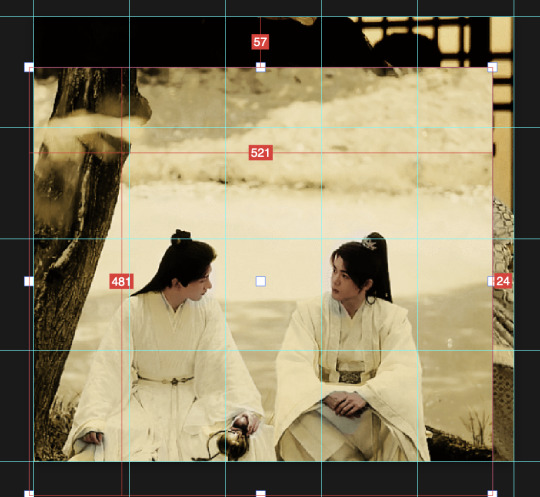

so my vector mask looks like this afterwards

(you don't have to do the squares so close together like i did it was just how i liked it & because of the scenes i had chosen that mine turned out this way)
now onto the grid lines: i used the line tool with these settings

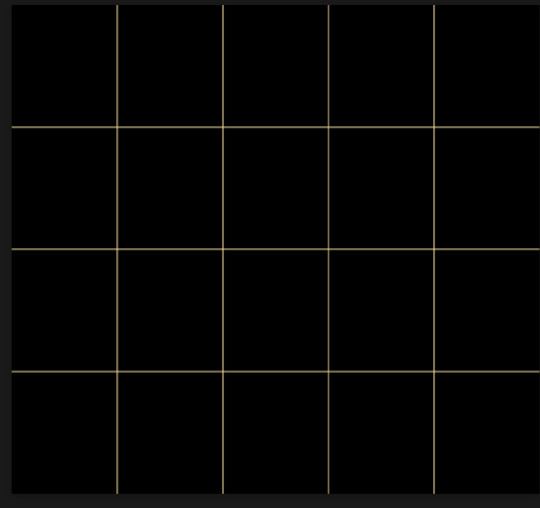
just like with the rectangle select tool the line tool should lock onto the grid line you want to redraw, do this for every line that you want/have for your grid & once you're done go to view -> clear guides and it should look something like this: (added a version with just a black background so it can be seen a little easier)

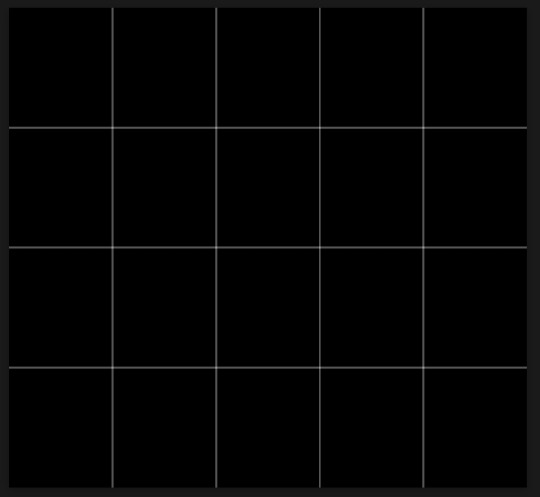
(i'm ngl idk why my lines ended up kinda faded and not white 🤣 i think it might be because i used a white fill instead of white stroke but it doesn't really matter to me because i got my ideal outcome anyway 🤣)
bonus step: you can stop here if you'd like but i wanted my lines to match my colouring & my intended typography so i put all my line layers into a folder and set the mode to difference & added a yellow fill layer with a clipping mask, like this:
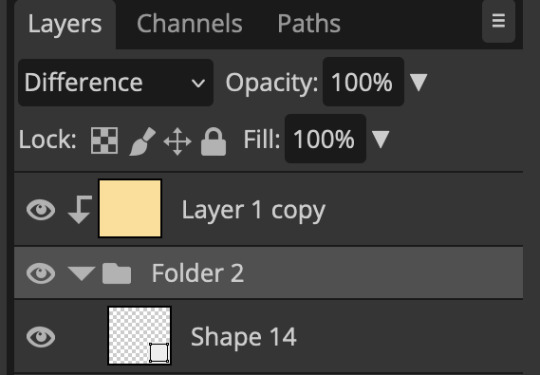
and it should look like this:
you can also play around with the opacity of the lines too which is what i tried out but i prefered for my set the lines being at 100% opacity but it's really up to you with what you want to play around with
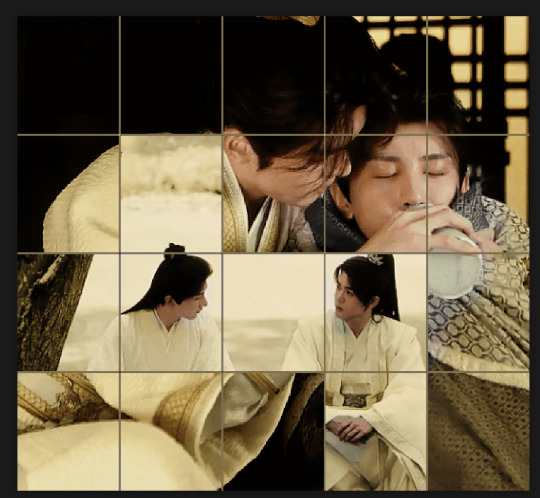
now once you're happy with everything merge those layers together (make sure they have the same amount of frames first before merging them) and either save as it is or add some typography like i did and you should end up with this:
for tips when it comes to colouring it really depends on what you're colouring, if you want to manipulate the colours as much as i do i recommend choosing a colour within the scene so you're not having to change too much, or finding scenes that have colours that can be manipulated more easy (any colour that aren't skin tones, unless you're working with red or yellow like i did here, i chose yellow because one of the outfits in the gif was yellow toned and it looked better with the gifset being yellow than my original colour which was blue), also looking for scenes were the people in it don't move as much also is a big help!
i hope this helps :) feel free to ask more questions if you didn't understand or want some more tips i honestly don't mind!
#replies#mrmalcolmslist#photopeablr#tutorials#photopea tutorials#completeresources#usergif#mine | tutorials#gif tutorial#photopea#resources#gif resources#gifmakerresource#i hope i didn't forget anything aksjdskds#photopea tutorial#tutorial#gif tutorials
123 notes
·
View notes
Note
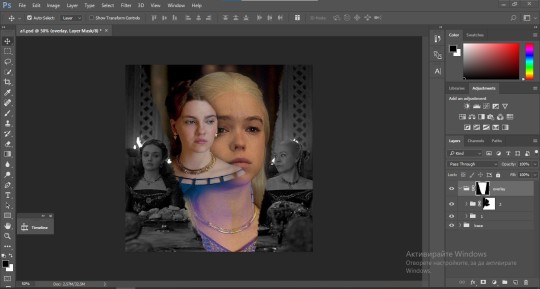
could you please do a tutorial of your game of thrones 'so much for stardust' gifs where it has the ripped paper textures? it's so pretty, and i'd like to learn how to do one with just the texture in the middle and two gifs on either side, like half and half and just having a rip in the middle. it's so cool how you did a gif in the middle though so i wanted to ask as well! all of them are so cool looking. you are extremely talented. if you don't want to though i understand :) thank you
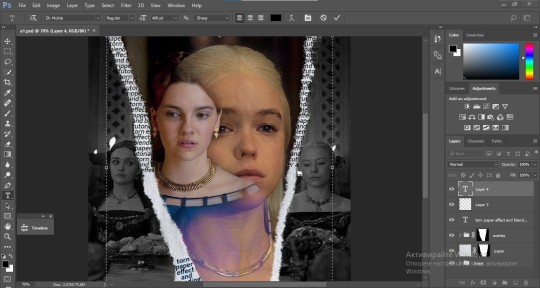
TORN PAPER EFFECT + BLENDING TUTORIAL
thank you so much for your sweet words, dearest anon and i'm sorry it took so long to answer but it's here now so i'll try my best to explain <3
disclamer: this is the first tutorial i ever made, it's very screenshot heavy and it assumes the basic knowledge of ps and gifmaking. if there's something you don't understand, don't hesitate to ask <3 so, let's get to it!
1. PREPARING THE BASE
As you can see in this shot there's a lot of space between Rhaenyra and Alicent and that makes it perfect for the ripped paper overlay without hiding much of the base gif. So the first thing i did was to crop it like this:
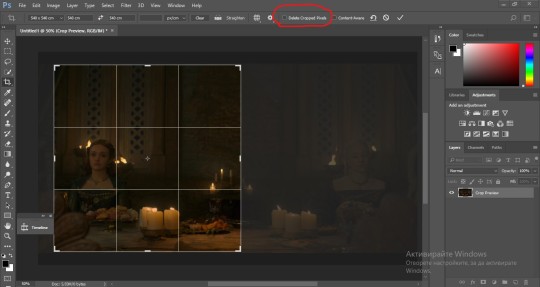
Also you want to make sure that the highlighted box (delete cropped pixels) is unchecked! After taking the usual steps for the animation (creating frames from layers, reversing the frames, setting frame delay) you continue with the video timeline and convert your frames into a smart object.
psa: if you don't have the motivation or the time to play around with coloring here are some psds i recommend: 1, 2; as for the sharpening i think this one is the best.
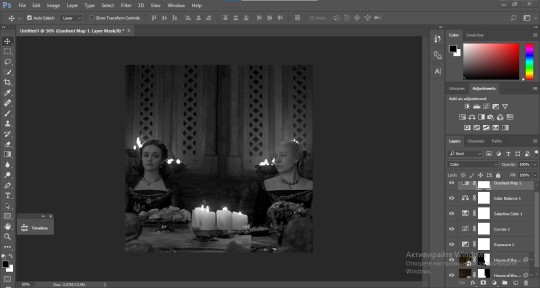
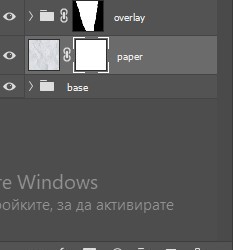
now that you have your smart object sharpened and colored what you want to do next is drag it to the end of the canvas and duplicate it. after that you move the copy on the other end like the original and make sure it's under the coloring layers, like this:
After that you have to create layer masks (the highlighted icon above) for both smart object and the copy and change the blending option of the copy to screen or lighten (whatever looks best!). So this is how it looks now:
pls ignore that there are no layer masks on the smart objects i just added them after changing the blending rip </3
Now, as you see both gifs are like fighting eachother for their rightful place on the canvas. (fgfgfdf) To fix that you have to use a soft round brush to delete the parts you don't want. (feel free to play around with the brush however you want to get the result you want!) Here's my result:
2. THE OVERLAY
Now for the both gifs you want to use for the ripped paper effect you pretty much apply the same steps as the ones you did with the gifs for the base. Here are the two gifs i chose:

Before blending both gifs however you want to create a clipping mask for each of the smart objects coloring layers, like this:
And now you're ready to blend both gifs together! You choose the group with one of the gifs and change the blending again to screen or lighten and place the said group on top of the other. So this is how it looks now:
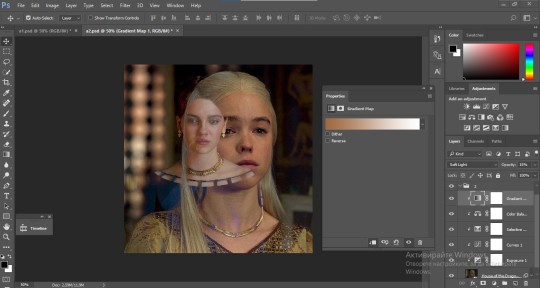
optional: if you feel like the base gif doesn't pop out enough you can always add a gradient map on one of both gifs and play around with the opacity and the color you think fits best.
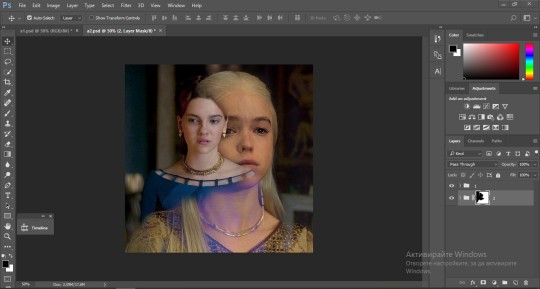
Then you add a layer mask on the overlay gif group and again play around with the brush to delete what you don't want. So this is the final result:
ps - don't repeat my mistake by placing the group with the layer mask under the other group. it should be on top and the blending option should be lighten or screen.
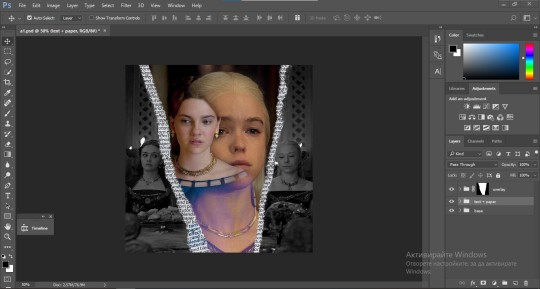
After blending both gifs together, you're ready to place them on the base. So first thing you want to do first is place both groups of each gif in one single group together. Then you duplicate the said group in the psd of the base gif and create a layer mask. This is how it should looks:

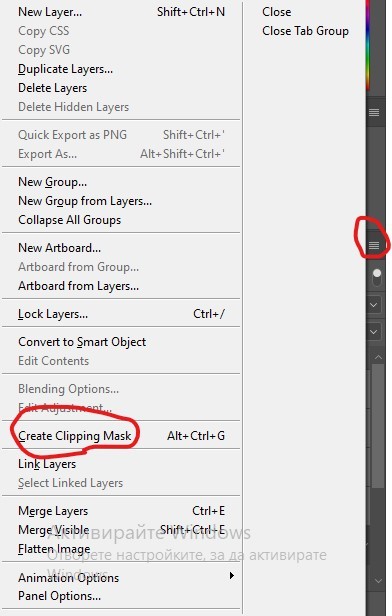
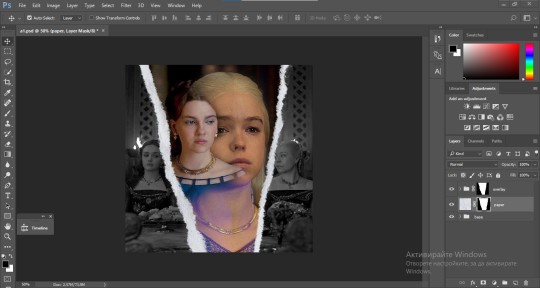
Now, in order to create the ripped paper effect, you'll have to download a ripped paper brush pack. This is the one i use. After loading the brushes in ps (if you don't know how here is explained) you're ready to begin! Change the size and angle however you'd like to make it look how you want. And if you want you can move the overlay gif by choosing both groups in case you aren't happy with the adjustment. This is how it looks like so far:
We're almost done! Now you have to find a paper texture, (i got mine from google) place it between both groups of your gifs and create a layer mask, like so:
What you have to do here is pretty much the same thing you did with the overlay gifs. Still, make sure there's enough space for the text you want to write in. However, if you think that the space isn't enough you can just delete a bit more of the overlay gifs. Here's mine:
3. THE TEXT
You're finally ready to type out the text you want! If you're having troubles with choosing the right font and size, here are my text settings:
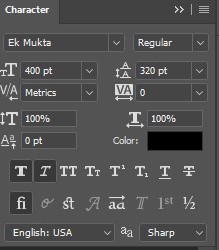
You can always play around with the angle and if your text is too small, zoom in so you can place it just how you like it. And since i'm a bit lazy to deal with it later, i choose to add the highlight color while it's still zoomed. You just have to add an layer above the text and use a soft round brush with opacity from 70-75% and flow from 15-18%.
For the repeated text you want to make sure you create a big space for writing so it can contain the whole space of the torn paper. Also, write where the text will be seen only and use the tab button to skip the space where the gif is. This is how it looks:
Once you're done with writing the repeated text, you want to select all the character layers and the highlight layer and move them under the overlay gif and on top of the paper, like this:
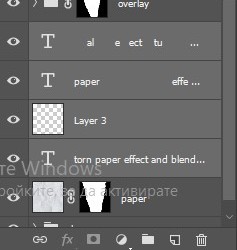
With the layers still selected and in order to contain the text within the paper the last thing you want to do is create a clipping mask. And that's It. You're done! This is the final result:
#allresources#dailyresources#usergif#chaoticresources#gifmakerresource#hisources#onlyresources#alielook#usermaguire#userrobin#usernik#userpat#userbells#gif tutorial#ps help
62 notes
·
View notes
Text

WELCOME TO FICTIONALCATS 🐱
FictionalCats is a source blog for cat lovers dedicated to fictional felines in media. Big or small, animated or live action, all kitties are welcome here!
We're tracking #fictionalcats so tag us in your cat related edits! please tag us I would like to see the babies
We're also currently taking applications for affiliates.
Please signal boost to get the word out.
Thanks! I hope you get to see a cat today! 😻
#signal boost#source blog#tuserkit#tusercourtney#usersource#usertina#obligatorytag#tuservaleria#userbunnies#usercreate#disneynetwork#tusercat#gifmakerresource#userrobin#usertj#cats#userlaro#useralison#tuserjen#userriel#underbetelgeuse#userkbee#userelio#fictionalcats
88 notes
·
View notes
Text


Hey, I'm gonna get you too
Another one bites the dust
#ronald speirs#matthew settle#band of brothers#bobedit#hbowaredit#hboedit#hbo war#hbowardaily#queen band#perioddramaedit#tvedit#tvgifs#tvfilmsource#tvfilmedit#userregan#mc*#gifs *#usergif#gifmakerresource
134 notes
·
View notes
Note
hey there ! are you willing to share the psd you used on the hill house gifset??? it's so beautiful!!!!!
hi!! thank you so so much 🥰 I'll do you one better! here are three psds I've made while giffing this show and here are some before & afters so you know what you're getting into:
I used this coloring for this set. for luke's scenes, I tweaked it a bit (brightness/contrast, selective color & levels) but that's just personal preference :)
this is the one that I assume you're referring too from the hugh & olivia set! heads up, there's a lot of duplicate layers so feel free to adjust as needed. I also added some reds/yellows in color balance for hugh's scenes because I wanted them to look warmer
and this is one from a work in progress!
credit isn't necessary if you end up using them, just please don't claim them as your own even if you only use mine as a base. I hope you enjoy these and please feel free to ask any more questions if you have any!!
#sorry for taking so long to respond#i stressed myself out thinking about how to put this together#but i hope these help!!#allresources#completeresources#gifmakerresource#dailyresources#psds#mine*#resources#asks#anon
74 notes
·
View notes
Text

EASTHIGH’S MONSTOBER 2023 EVENT 🎃👻😈
Boo! Halloween is one of the most beloved and exciting times on Disney Channel and this year EastHigh is celebrating by hosting a challenge event.
To participate just post a creation based on the weekly prompts below with the caption: "EASTHIGH’S MONSTOBER 2023 EVENT" + the week/prompt and use the tag #usereasthigh to make sure we see it and can reblog it here!
You can make any type of creation: gifs, edits, art, etc. Also, you don't have to do every prompt if you don't want to, just whatever you're comfortable with and feel free to interpret the prompts however you like. It's meant to be fun so don't stress over it!
Just remember that this is a Disney Channel themed event so your creations must be based around Disney Channel properties.
Don't hesitate to send us an ask if you have any questions about the event and we'd really appreciate if you reblogged this post to get the word out.
We can't wait to see what you all create! 🧡
Prompts:
Week 1 [1-6 Oct]: DCOMs
Week 2 [7-12 Oct]: Episodes
Week 3 [13-18 Oct]: Costumes
Week 4 [19-24 Oct]: Villains
Week 5 [25-31 Oct]: Monsters OR Free Choice
#monstober 2023#signal boost#disney channel#disneyedit#disneychanneledit#disneynetwork#userjessica#userzackmartin#tuserkit#rogerhealey#dcomedit#halloweenedit#completeresources#gifmakerresource#halloweensource#cinematv#tvarchive#usercreate#usersource
73 notes
·
View notes
Text


PSD 151 BY COLORING-PSD!
Like or reblog this post if you download.
Please, don’t repost or claim as your own!
Respect our work!ps
download.
#psds#dailyresources#gifmakerresource#bridgerton#simone ashley#regé jean page#india amarteifio#corey mylchreest#psd for gifs#gifs#dark#mars#**#151#bridgerton edit
45 notes
·
View notes
Photo

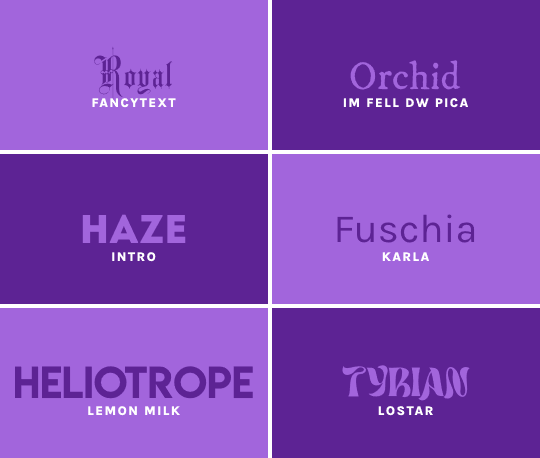
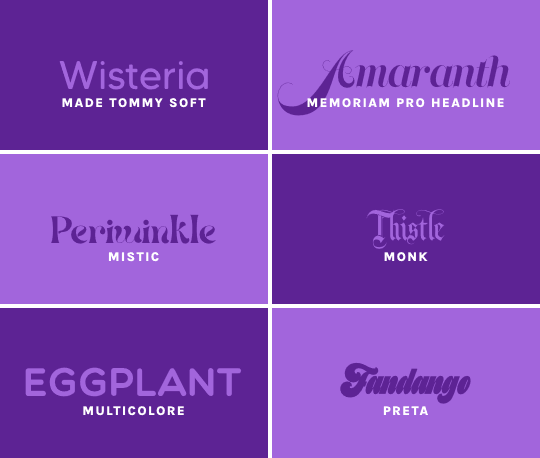

amethyst / indigo / grape / plum / lilac / mauve / purpureus / violet / ube / eminence / iris / munsell / royal / orchid / haze / fuschia / heliotrope / tyrian / wisteria / amaranth / periwinkle / thistle / eggplant / fandango / mulberry / lavender / hibiscus / raisin / byzantium / fig
i do not take ownership of any of these fonts, so there’s no need to credit me — but please reblog this post if you found it helpful at all! :)
#resources#fonts#font packs#font#font pack#gifmakerresource#completeresources#dailyresources#usertj#userangelic#usertiny#userallisyn#userspacey#userridge#userraffa#tuserheidi#mystuff#myfontpacks#here yall go!! thirty of my personal fave fonts <3#and many of my most used fonts as well#in making this i realized i dont really use script fonts that much which is interesting#sunydale and adelia tho >>> only script fonts i need apparently HSJBHDJFSL
319 notes
·
View notes
Text

Please like or reblog if you use
Do not repost
Download
#completeresources#usergif#dailyresources#gifmakerresource#hisources#onlyresources#allresources#textures#overlay#gif overlay#*
323 notes
·
View notes
Text

🎃 TJ MIKELOGAN'S HALLOWEEN 2023 EVENT 🎃
RULES:
Use the tag #USERTJ to share your creations (and so I can reblog them)
Include "TJ MIKELOGAN'S HALLOWEEN 2023 EVENT" + that day's prompt in your caption
Reblog this post
THINGS TO KNOW:
This event is open to anyone who wants to participate -- gifmakers, editors, etc. -- and you do not have to be following me if you don't want to! Create gifsets, graphics, moodboards, whatever you enjoy!
You can do as many or as few prompts as you want! This is supposed to be fun, so no need to put unnecessary pressure on yourself.
Interpret the prompts however you see fit; stick to them as loosely or as rigidly as you want!
Make sure to check out the #USERTJ tag as well so you can see what everyone else is coming up with and share what they've created! Even if you're not participating in the event yourself, we love reblogs!
If you have any questions, don't be afraid to ask!
PROMPTS:
DAY 1: A movie you watch every spooky season
DAY 2: A Halloween comedy
DAY 3: Based on real events
DAY 4: Your favorite horror movie
DAY 5: A Halloween TV show episode or special
DAY 6: Favorite animated villain(s)
DAY 7: Vampires
DAY 8: A horror franchise or series
DAY 9: Favorite movie monster
DAY 10: Favorite horror director(s)
DAY 11: A non-scary Halloween movie or show
DAY 12: Found footage
DAY 13: Ghosts
DAY 14: A classic horror film
DAY 15: Your favorite horror TV show
DAY 16: Favorite gore/slasher film
DAY 17: A spooky musical
DAY 18: Black cats
DAY 19: An animated Halloween movie or show
DAY 20: Fictional serial killers
DAY 21: A recent horror film (from 2010 or later)DAY 22: Favorite thriller(s)
DAY 23: Haunted houses
DAY 24: Favorite live action villain(s)DAY 25: A movie or show that isn't horror, but still scared you
DAY 26: Witches
DAY 27: LGBT+ in horror
DAY 28: Favorite final girl
DAY 29: Mike Flanagan films and shows
DAY 30: Take a piece of media that isn't horror and make it horror
DAY 31: Wildcard -- your choice
Below the cut, I'm tagging those who reblogged my original poll regarding this event and were either interested in participating or signal boosting, as well as some moots who've expressed interest in all things Halloween and horror.
@connie-rubirosa @laurabenanti @heroeddiemunson @ianmckellen @gatortillmans @evermoredlx @fabines @katieskrsgard @jakeperalta @finalgirlsidney @ghouls-ghoul @azrphales @sculien @katesharmasheart @natscatorrcio @magicaplin @logangarfield @tutontawan @ghosttfaces @iichliwps @nessa007 @antlerqueer @emmaswns @captain-hen @bloodcrimsonrain (so sorry if i missed anyone!)
#halloween 2023#halloweenedit#gifmakerresource#completeresources#dailyresources#userbbelcher#tuserhan#ramblings#tuserheidi#userraffa#userdahlias#nessa007#usermaguire#tusermiles#usercats#userautie#alexlook#userairi#tuseraicr#userriel#wish i could fit more tags but alas lmao#but yeah basically signal boost if you can or are willing!#and make something lmao i'll be so sad if this flops 😂#i'm planning on doing all 31 days so wish me luck#just wanted to give everyone enough time to start planning/creating/queueing!
211 notes
·
View notes
Text

Welcome to ruedit! This is a blog dedicated to all post-soviet (made after 1991) russian media, including movies, TV, music etc! We appreciate canon works (gifsets, screenshots) and fanworks too! Feel free to subscribe and to tag us #ruedit or #russianedit!
Добро пожаловать в сообщество RUEDIT! Мы постим и ребложим контент про пост-советское и современное российское кино, серики, музыку и тд, как канонное (гифки, скрины), так и фанатское (фанарты, коллажи, мудборды)! Подписывайтесь, тегайте нас в своих постах #ruedit или #russianedit, тумблеру нужно больше руфандома!
— Mod @walterkov ►
Наши ивенты:
- Неделька космонавтики
#signal boost#dailyworldcinema#pscentral#gifmakerresource#perioddramaedit#perioddramasource#dailykino#russianperioddrama#ruedit#russianedit
27 notes
·
View notes
Last Seen Blogs