#how install node js
Explore tagged Tumblr posts
Visit Tumblr Blog
Explore Tumblr blogs with no restrictions, modern design and the best experience.
Last Seen Tumblr Blogs


Fun Fact
Tumblr has been banned in Indonesia for providing people with access to pornographic content.
Text
Know the step-by-step process of installing Node.js on cPanel effortlessly and elevate your web development experience with this comprehensive guide.
0 notes
Note
Hi!! I wanted to say that I loved reading about your journey of creating a personal website. I'm still unsure between Vercel and Netlify. I have a small question to ask. See, one of the reasons I want to make a website is to archive drawings and journal/sketchbook. Would you have any tips for creating an area on my website just for the diary/journal, which has tags, files for each entry, etc.?
Bello!

Really happy to hear about your interest in websites! I want everyone to make their own site so I don't have to log into social media and get instant tummyaches ♥
Vercel vs Netlify: I think I settled on Vercel for absolutely no reason whatsoever. I just made a site on Netlify, then tested on Vercel, and now I have like 5 websites on Vercel so I just kept using it LOL. I'm sure a more tech-savvy person would know the difference - I think they have certain integrations with specific programs.
Creating a diary or journal with tags:
There's a couple of different ways you can do that, with different levels of work needed.
you got me yapping again:
This sadgrl tutorial might be outdated and may or may not work, but explains the process better than I can.
Easiest: make a journal on Dreamwidth, or another blogging site (wordpress??) that allows easy tags and RSS feed, and embed that RSS feed onto your site.
This requires almost no HTML set-up, and the easiest to organize tags, but you don't truly have the data on your own site since it's just embedded.
When I snuck into a web design class at college, this was one of the methods that the professor used for a blog within a portfolio site LOL.
Shit like wordpress is what a LOT of ~professional~ sites do for their blog section. They code it separately from the main site haha. It's the most popular thing, but not necessarily the best. And wait til you read on what the CEO of wordpress has been having meltdowns about... he owns tumblr too!
It's made with a tutorial for Neocities if that's what you use.
Medium: Set up zonelets.
It will require some HTML and JS editing, but will help automate making headers/footers for each page of a blog.
I've never used it myself, but I see other people speak highly of it.
HARD FOR ME CUZ I'M A GORILLA: I believe a lot of professional web devs will slap your face with their coding cock until you use a static site generator (SSG) to make your site.
You will need some coding knowledge to set up the tagging system since it doesn't come with it enabled by default. But it's made explicitly to be an alternative to big Static Site Generators which are...
It requires some more intimidating knowledge, because it's a lot of scripts that turn files that are not HTML/CSS/JS into plain HTML.
Also you have to use the command line, and that doesn't come with buttons that tell you what you can do. You have to copy/paste all that shit or memorize the code to 'dev build astro' and it all looks silly.
I've used Eleventy, and now am using Astro. Other people use Hugo or Jekyll or some other stuff with crazy names like Glup Shitto. I hate all these sites cuz none of the words mean anything to me. This is a common theme for me and tech. I don't know what NODES or CONTENT or ISLANDS are!!!
I had the most success attempting to learn how to use a SSG by downloading a template and altering it with github + VScodium. Here's the template page for Astro. You click on a theme you like, and it takes you to its github page. (If you don't want to use evil Microsoft stuff sorry. Skip this entire section.) Follow the instructions on the page for "forking" the glup shitto. When it tells you to run commands, I run those commands through the terminal window in VScodium. These tutorials never tell you what these commands do cuz they assume you already know. Usually those commands automatically install the files you need onto your computer, and create the final files.
You can see my wip here for a "tag system" that SHOULD show members of a web listing haha but I don't know what I'm doing and I have a reading disorder AND don't know cumputer good.
THEORETICALLY this will be the simplest and easiest way to maintain tags and files, because after you set it up you just have to write the "content" of the blog page. And you don't have to set up the header/footer ever again. I see the vision, and potential, but I am not there yet when it takes me 5 hours a day to figure out what any of the words in the documentation mean and I don't want to ask an actual tech person cuz they will be like 'obviously just press the Blip on the Repository and then Suck My Ass in the command line".
(side note I haven't updated fujofans in like a year cuz I'm struggling with this part to make updating easier).
Con: the final HTML/CSS code is really ugly if it's "minified", and a lot of themes use """"""professional"""""" CSS libraries like Bootstrap and Tailwind that I honestly think are ugly cuz that's what every fuckin' tech website uses to style their pages and make them look Professional and Minimalist with stupid code like style="500-w dark-gray-balls D-cup-bra" on every single element. Even Toyhouse uses Bootstrap. Eugh!
But maybe you're smarter than me and can wrangle these things better!
That was really long. Woops. I hope you can slug through this wall of text and find something helpful. Feel free to email me if you have any more specific questions. I may or may not be helpful.
If someone else sees this and has better suggestions for making BLOGS, please chime in. I'm begging you.
64 notes
·
View notes
Text
i want to keep tumblr because i like aesthetics
aesthetic aggregation is important because it allows for intimate relationships to develop outside of life-long domesticated-servile contracts
you transfer
love energy,
actually, when you share your aesthetic, and merge, like that
however
i don't think its possible to make organic relationships the same way it was a decade ago, no, entirely too sanitized
i highly doubt, since the algorithm that i'll ever oganically run into; actually its absurd to even finish that sentence
luckily, i became a sysadmin / programmer, in the interem period, and can actually build the tools this time around
i have an idea for an aesthetic aggregator portal place that combines dump.fm & tumblr with cellular automata, like a living pool you gaze into and everything's a ripple on a wave, man, that's like connected, woah
and i'm schemeing on it, i love lisp, when i go looking everything i want to do is available to me like channeling a spell... somebody already wrote scheme to wasm, that really shouldn't be too hard... still looking for alternate ways to chat :D hmu on xmpp it's exactly like AIM
i've tried node/npm, python, package managers... the best most satisfying one if you're going to go and install a big library, blob thing like that, is probably some flavor of emacs... for me, this is a personal preference, the fact that you 'can' do anything that rust/python/go/js can do in LISP... is enough for me, because, it is elegant, it is more pleasant to look at and easier to read, idk. loving my time with it recently and have been knocking it out of the park most days recently... the past 7 years i've been working on a top secret project, which will have a working alpha demo of the basic features by the end of next week :D
the best os rn is a freeBSD jail with guixSD GNU/linux-libre there's also hyperbola/BSD in the works you want to try to phase out the linux kernel because of all the google/microsoft shenanigans creeping in, you don't need unix/linux any more you can do all your daily driver stuff on an embedded, low power risc soc that costs under a hundo you need less overhead for embedded systems, there's microkernels like genome, and platforms like zephyr, its ok to move away idk one thing i learned its good to take a step back and look at the scope of what you're trying to achieve, try to strip away all the unneccessary parts... a mhz is 1,000,000 calculations a microsecond or whatever, when you sit down and write a piece of code how many calculations exactly do you need to do to do your business, honestly.
^these are the 3 am ramblings of a minimalist
i'm trying to find peers here on my site that's connected to the internet that's why i'm sending messages to it about my interests, pardon me, sir please send $1 to this address
3 notes
·
View notes
Text
The ways to develop a website

You can approach various ways to developer website but depending on your goals, technical skill, and also resources. Below is an overview of the primary methods to develop a website:
1. Using website builders
Website builders are allow you to create website without calling knowledge and it is user friendly platform also. They offer pre designed templates and drag and drop interfaces.
• Popular tools: wordpress. com, shopify for eCommerce, wix, squarespace etc.
• How it works:
° You can choose the template that you want.
° Customize the design, layout and also content with using visual editor of the platform.
° You can also add forms, eCommerce, or blogs to plugins or also in built tools.
° Then publish the site with hosting that provided by the platform.
• Pros:
° No coding required and it is beginner friendly.
° Fast setup and development.
° Hosting, security and also updates are included.
• Cons:
°Compared to coding it have limited customisation.
° Monthly subscription costs.
° Migrating can be challenging because of platform dependency.
2. Content management system(CMS)
It require minimal coding and it allows you to manage website content efficiently with the customizable themes and plugins.
• Popular tools: wordpress. org, Joomla, drupal
• How it works:
° Install the CMS on a web server.
° With the basic coding or in built tool, you can select a theme and customize.
° To add functionality you can use plugins.
° Then you can manage content through dashboard.
• Pros:
° It is flexible and scalable and also it have thousands of themes and plugins.
° Provide community support and resources.
° It is useful for portfolios or blogs and also Complex sites.
• Cons:
° You should require some technical knowledge for the set up and maintenance.
° It have hosting and domain cost.
° It need security updates as also backups.
3. Coding from scratch (custom development)
Build a website with the raw code, it can give you complete control over design and functionality.
• Technologies:
° Frontend: HTML, CSS, JavaScript.
° Backend: python, PHP, Ruby, and node. JS
° Database: MySQL, mongoDB,postgreSQL.
° Tools: code editor, hosting, version control.
• How it works:
° You can design the site structure and visuals by using HTML/ CSS/ or JavaScript.
° For dynamic features build back end logic.
° You can connect to a database for data storage.
• Pros:
° Offers full customisation and flexibility.
° Unique functionality and also optimized performance.
° No platform restrictions.
• Cons:
° It requires coding expertise.
° Costly and also time intensive.
° Require ongoing maintenance such as security, updates.
4. Static site generator
It can create fast, and also secure website by pre rendering HTML files. It is useful for Blogs, or portfolios.
• Popular tools: Hugo, Jekyll, Next. js.
• How it works:
° You can write content in markdown or also similar format.
° Use template to generate static HTML, CSS, or JavaScript files.
° Use hosting platform like netlify,or vercel.
• Pros:
° It is fast and Secure and no server side processing.
° It provide free or low cost hosting.
° Easy to scale.
• Cons:
° It has Limited functionality.
° It required some technical knowledge.
5. Headless CMS with frontend frameworks
A headless CMS can provide a backend for content management with the conctent frontend for flexibility.
• Popular tools:
° Headless CMS: Strapy, contentful etc.
° Frontend framework: React, Vue. js etc
• How it works:
° To manage content via APIs, use headless CMS.
° With JavaScript framework built a custom frontend.
° To display the dynamic content connect both via APIs.
• Pros:
° Very much flexible and scalable.
° Allowing reuse across platforms such as web, mobile.
° Modern and also performant.
• Cons:
° It require coding skill and also familiarity with APIs.
° The setup can be complex.
6. Hiring a developer or agency
If you don't have time or lack of Technical skill, you can you can hire developer or agency.
• How it work:
° For custom development you can higher freelancers or agencies.
° They can provide your requirement such as design , features, and budget.
° In collaborate on design and functionality then launch the website.
• Pros:
° They provide professional result with your needs.
° Save time.
• Cons:
° Cost can be higher.
° Depend on third parties for maintenance.
7. Low code platforms
Low code platforms fill the gap between no code Builders and custom coding. And they offering visual development with the coding flexibility.
• Popular tools: bubble, Adalo, Outsystems.
• How it works:
° To design and configure the site, use Visual interface.
° And some custom code for specific features.
° Use built in or external hosting.
• Pros:
° It is faster than coding from scratch.
° You can offer more customizable than website Builders.
• Cons:
° Learning curve for advanced features.
° Require subscription or hosting cost.
Choosing the right method
• Beginners: if you are a beginner you can start the with the website Builders or wordpress.
• Budget conscious: if you are conscious about your budget you can use static site generators or also free CMS options.
• Developers: opt for custom coding or headless CMS for whole control.
• Businesses: for businesses, it is good to consider hiring professionals or using scalable CMS platform.
If you are looking for a website development with design, it is smart to work with an experienced agency. HollyMinds Technologies is a great choice, because they are the best website development company in Pune, and they make websites that are perfectly coded and structured to stand the test of time. The algorithms are set to bring visitors from across the globe. A structured website with right content, can bring more visitors to your business.
1 note
·
View note
Text
Start Coding Today: Learn React JS for Beginners

Start Coding Today: Learn React JS for Beginners”—will give you a solid foundation and guide you step by step toward becoming a confident React developer.
React JS, developed by Facebook, is an open-source JavaScript library used to build user interfaces, especially for single-page applications (SPAs). Unlike traditional JavaScript or jQuery, React follows a component-based architecture, making the code easier to manage, scale, and debug. With React, you can break complex UIs into small, reusable pieces called components.
Why Learn React JS?
Before diving into the how-to, let’s understand why learning React JS is a smart choice for beginners:
High Demand: React developers are in high demand in tech companies worldwide.
Easy to Learn: If you know basic HTML, CSS, and JavaScript, you can quickly get started with React.
Reusable Components: Build and reuse UI blocks easily across your project.
Strong Community Support: Tons of tutorials, open-source tools, and documentation are available.
Backed by Facebook: React is regularly updated and widely used in real-world applications (Facebook, Instagram, Netflix, Airbnb).
Prerequisites Before You Start
React is based on JavaScript, so a beginner should have:
Basic knowledge of HTML and CSS
Familiarity with JavaScript fundamentals such as variables, functions, arrays, and objects
Understanding of ES6+ features like let, const, arrow functions, destructuring, and modules
Don’t worry if you’re not perfect at JavaScript yet. You can still start learning React and improve your skills as you go.
Setting Up the React Development Environment
There are a few ways to set up your React project, but the easiest way for beginners is using Create React App, a boilerplate provided by the React team.
Step 1: Install Node.js and npm
Download and install Node.js from https://nodejs.org. npm (Node Package Manager) comes bundled with it.
Step 2: Install Create React App
Open your terminal or command prompt and run:
create-react-app my-first-react-app
This command creates a new folder with all the necessary files and dependencies.
Step 3: Start the Development Server
Navigate to your app folder:
my-first-react-app
Then start the app:
Your first React application will launch in your browser at http://localhost:3000.
Understanding the Basics of React
Now that you have your environment set up, let’s understand key React concepts:
1. Components
React apps are made up of components. Each component is a JavaScript function or class that returns HTML (JSX).
function Welcome() { return <h1>Hello, React Beginner!</h1>; }
2. JSX (JavaScript XML)
JSX lets you write HTML inside JavaScript. It’s not mandatory, but it makes code easier to write and understand.
const element = <h1>Hello, World!</h1>;
3. Props
Props (short for properties) allow you to pass data from one component to another.
function Welcome(props) { return <h1>Hello, {props.name}</h1>; }
4. State
State lets you track and manage data within a component.
import React, { useState } from 'react'; function Counter() { const [count, setCount] = useState(0); return ( <div> <p>You clicked {count} times.</p> <button onClick={() => setCount(count + 1)}>Click me</button> </div> ); }
Building Your First React App
Let’s create a simple React app — a counter.
Open the App.js file.
Replace the existing code with the following:
import React, { useState } from 'react'; function App() { const [count, setCount] = useState(0); return ( <div style={{ textAlign: 'center', marginTop: '50px' }}> <h1>Simple Counter App</h1> <p>You clicked {count} times</p> <button onClick={() => setCount(count + 1)}>Click Me</button> </div> ); } export default App;
Save the file, and see your app live on the browser.
Congratulations—you’ve just built your first interactive React app!
Where to Go Next?
After mastering the basics, explore the following:
React Router: For navigation between pages
useEffect Hook: For side effects like API calls
Forms and Input Handling
API Integration using fetch or axios
Styling (CSS Modules, Styled Components, Tailwind CSS)
Context API or Redux for state management
Deploying your app on platforms like Netlify or Vercel
Practice Projects for Beginners
Here are some simple projects to strengthen your skills:
Todo App
Weather App using an API
Digital Clock
Calculator
Random Quote Generator
These will help you apply the concepts you've learned and build your portfolio.
Final Thoughts
This “Start Coding Today: Learn React JS for Beginners” guide is your entry point into the world of modern web development. React is beginner-friendly yet powerful enough to build complex applications. With practice, patience, and curiosity, you'll move from writing your first “Hello, World!” to deploying full-featured web apps.
Remember, the best way to learn is by doing. Start small, build projects, read documentation, and keep experimenting. The world of React is vast and exciting—start coding today, and you’ll be amazed by what you can create!
0 notes
Text
Getting Started with Blockchain Application Development

Blockchain technology is transforming industries by providing a secure, transparent, and decentralized way to record transactions. As the demand for blockchain applications increases, developers are presented with new opportunities to create innovative solutions. In this post, we’ll explore the fundamentals of blockchain application development and how you can get started building your own dApps.
What is Blockchain?
Blockchain is a distributed ledger technology that records transactions across multiple computers in a way that ensures the security and transparency of data. Each block in the chain contains a list of transactions, and once a block is added to the chain, it cannot be altered without consensus from the network.
Key Features of Blockchain
Decentralization: No central authority; data is distributed across a network of nodes.
Transparency: All transactions are visible to participants, ensuring accountability.
Security: Cryptographic techniques secure data, making it difficult to tamper with.
Immutability: Once recorded, transactions cannot be changed or deleted.
Common Blockchain Platforms
Ethereum: The most popular platform for building decentralized applications (dApps) using smart contracts.
Hyperledger Fabric: A permissioned blockchain framework for enterprise solutions.
Binance Smart Chain: A blockchain network running smart contract-based applications.
Solana: Known for its high throughput and low transaction costs, suitable for scalable dApps.
Cardano: A blockchain platform focused on sustainability and scalability through a layered architecture.
Understanding Smart Contracts
Smart contracts are self-executing contracts with the terms directly written into code. They automatically execute actions when predefined conditions are met, eliminating the need for intermediaries. Smart contracts are primarily used on platforms like Ethereum.
Example of a Simple Smart Contract (Solidity)
pragma solidity ^0.8.0; contract SimpleStorage { uint public storedData; function set(uint x) public { storedData = x; } function get() public view returns (uint) { return storedData; } }
Building Your First dApp
Set Up Your Development Environment:
Install Node.js and npm.
Use frameworks like Truffle or Hardhat for development.
Install a wallet like MetaMask for interacting with the blockchain.
Write a Smart Contract: Use Solidity to define the contract's logic.
Deploy the Contract: Deploy to a test network (e.g., Rinkeby, Kovan) using tools like Remix.
Create a Frontend: Use libraries like web3.js or ethers.js to interact with the smart contract from a web application.
Test and Iterate: Test your dApp thoroughly on test networks before deploying to the mainnet.
Best Practices for Blockchain Development
Write modular, reusable, and easily understandable code for smart contracts.
Implement proper error handling and validation to prevent vulnerabilities.
Conduct thorough testing, including unit tests and integration tests.
Stay updated with the latest security practices and common vulnerabilities (e.g., reentrancy, overflow).
Utilize code audit tools to review your smart contracts before deployment.
Conclusion
Blockchain application development offers exciting opportunities to create decentralized solutions that can change the way we interact and transact online. By understanding the basics of blockchain, smart contracts, and development tools, you can begin your journey into this innovative field. Start small, experiment, and build your way up to more complex dApps!
0 notes
Text
How to Learn Angular: A Step-by-Step Guide for Beginners
Angular, a robust and powerful front-end framework developed by Google, is widely used to build dynamic, single-page web applications (SPAs). Whether you're a beginner or an experienced developer, learning Angular can significantly enhance your skill set and boost your career in web development. If you're in Pune and want to excel in this popular technology, enrolling in an Angular course in Pune is a smart move. This guide will walk you through the key steps to effectively learn Angular and become proficient in building high-quality, interactive applications.
Why Learn Angular?
Before diving into the learning process, it's important to understand why Angular is such a popular choice for developers:
Modular Architecture: Angular’s modularity allows developers to break down applications into smaller, manageable parts, making it easier to maintain and scale.
Two-Way Data Binding: With Angular’s two-way data binding, changes made in the model immediately reflect in the view and vice versa, creating seamless real-time updates.
Large Ecosystem: Angular boasts a large ecosystem with a plethora of libraries, extensions, and third-party tools to aid in development.
Cross-Platform: You can use Angular to build web, mobile, and desktop applications, ensuring versatility.
Step-by-Step Guide to Learning Angular
Here’s a structured approach to learning Angular from scratch:
1. Master the Basics of Web Development
Before you start learning Angular, it's important to have a solid understanding of web development fundamentals. Ensure you are comfortable with:
HTML and CSS: The building blocks of web design.
JavaScript: Angular is built on top of JavaScript, so a strong command of JS is essential.
TypeScript: Angular is developed using TypeScript, which is a superset of JavaScript. Understanding TypeScript basics like types, classes, and interfaces will ease your Angular learning journey.
2. Understand Angular’s Core Concepts
Angular has several core concepts that form the foundation of the framework. Begin by familiarizing yourself with the following:
Modules: Angular apps are divided into modules, each responsible for a different part of the application.
Components: Components are the building blocks of Angular applications. They define the view (HTML) and the logic (TypeScript).
Templates: Angular uses templates to define the layout and structure of the application.
Services: Services in Angular provide functionality that can be reused across multiple components.
Dependency Injection: This powerful feature allows for the efficient handling of services and other dependencies.
3. Set Up Your Development Environment
To start coding in Angular, you'll need the right development tools. Here's what you need:
Node.js and npm: Angular requires Node.js to install dependencies and manage packages. Download and install Node.js, which comes with npm (Node Package Manager).
Angular CLI (Command Line Interface): Install the Angular CLI by running the command npm install -g @angular/cli. The CLI simplifies the development process by providing useful commands for creating components, services, and modules.
Text Editor/IDE: Use a text editor like Visual Studio Code or WebStorm for writing and managing your code efficiently.
4. Start with Basic Angular Projects
Once your environment is set up, it's time to create your first Angular project. Use the Angular CLI to generate a new project:
bash
Copy code
ng new my-first-app cd my-first-app ng serve
This command will create a new Angular application and start a development server. Visit http://localhost:4200 to see your project in action. Experiment with the default setup and try making simple modifications to the code to get a feel for how Angular works.
5. Learn Angular Routing
Routing is essential for building single-page applications. Angular’s router enables developers to navigate between different pages without refreshing the entire page. Learn how to:
Define routes in your application.
Set up links between different views.
Use route parameters to pass data between components.
6. Build Interactive User Interfaces
Angular provides several tools to build dynamic and responsive UIs. Focus on these key areas:
Forms: Learn how to create both template-driven and reactive forms to handle user inputs.
Directives: Directives like *ngIf, *ngFor, and ngClass allow you to manipulate the DOM dynamically.
Two-Way Data Binding: This core Angular feature synchronizes data between the view and the model in real-time.
7. Explore Angular Services and Dependency Injection
To build scalable applications, you'll need to understand services and how Angular implements Dependency Injection (DI). Services allow you to share logic across components, while DI provides a clean way to manage those services without manual instantiation.
8. Work with APIs and HTTP Requests
Most modern web applications require communication with back-end servers. Angular’s HTTP client allows developers to make API calls to retrieve or send data. Learn how to:
Use HttpClientModule to handle API requests.
Implement GET, POST, PUT, and DELETE methods.
Handle responses and errors using RxJS observables.
9. Testing in Angular
Angular provides built-in tools for testing components and services. Learn how to write unit tests with Karma and Jasmine to ensure your code is robust and bug-free.
10. Create a Real-World Application
Once you’ve grasped the basics, build a full-fledged real-world application. This could be anything from a simple to-do list app to a more complex e-commerce site. This hands-on project will reinforce your learning and help you apply theoretical concepts in a practical scenario.
Recommended Resources for Learning Angular
Official Angular Documentation: The Angular Docs provide a detailed explanation of every aspect of the framework.
YouTube Tutorials: Channels like Academind, Traversy Media, and Programming with Mosh offer comprehensive video tutorials.
Courses on Platforms Like Udemy, Coursera, and Pluralsight: Many of these platforms offer structured Angular courses with hands-on projects.
Angular GitHub Repositories: Check out open-source Angular projects on GitHub to learn best practices and see how experienced developers structure their applications.
Conclusion
Learning Angular can seem intimidating at first, but with a structured approach, you can master it in no time. Start by understanding the basics of web development, then dive into Angular’s core concepts like components, services, and routing. Practice by building small projects, and gradually move on to more complex applications.
By following the steps in this guide and staying committed, you'll become proficient in Angular and be well on your way to building dynamic, scalable web applications. Whether you’re aiming for a career in front-end development or want to expand your full-stack skills, Angular is a valuable tool to have in your developer toolkit.
Ready to take your Angular skills to the next level? If you're based in Pune, consider joining ITView’s Angular course in Pune to get hands-on training from industry experts. Our comprehensive curriculum covers everything from Angular fundamentals to advanced concepts, ensuring you're ready for real-world projects. Enroll today and fast-track your career in web development!
0 notes
Video
youtube
How to Install Node JS on Windows 10/11 #React #ExpressJS #Angular #npm...
0 notes
Text
Install Node JS in Ubuntu – Node JS is a popular JavaScript runtime that allows developers to build scalable network applications using JavaScript. It’s widely used in web development, backend services, and even for running scripts on the server side. Installing Node.js on Ubuntu is a straightforward process, but ensuring that it’s done correctly will save you from potential issues down the line.
Whether you are new to Ubuntu or an experienced user, this guide will walk you through the most effective ways to install Node.js on your system.
0 notes
Text
#1 Digital Marketing Company | Dcrayons Consultancy Private Limited
Do you know about how to create a shopify partner account?
Ready to elevate your business? When you join the Shopify Partner Account , you unlock revenue possibilities and tap into a thriving network of Shopify merchants. This straightforward guide will help you kickstart your journey and maximize your Shopify Partner Account.
Joining the shopify partner account – for a successful business
Developing an application for Shopify is enjoyable and easy because Shopify provides numerous applications and resources that users can easily utilize. This guide will cover all of the steps from development environment installation to your app distribution. It has a guide for making an Instagram feed app, with step-by-step instructions. This helps understand the steps discussed.
What is the process of shopify partner account?
Here we are describing some steps of a shopify partner account. some steps of shopify partner accounts.
Step-1: Setting Up Your Shopify Partner Account
The newly launched consultation journey starts from creating a Shopify Partner account. Thus, if you did not have an account, you would have to get one before proceeding with the next steps. Here’s how to do it. Let us discuss some steps.
To open a Shopify account, start by signing up or logging in. Then, visit the official Shopify Partner Program page. If you don’t have an account yet, create one. If you already have an account, just log in.
Navigate to Apps: After logging in to the portal go to the ‘Apps’ tab.
Create a New App: Go to ‘Create App’ and enter app name and URL for the app. This process will create important credentials, such as the API key and secret key-API, that are necessary for your application.
Step 2: Initializing Your Shopify App
Congratulations! You have successfully opened your Shopify Partner Account. Now, it’s time to start your Shopify application. Open your terminal and run the following command:
npm init @shopify/app@latest
This command pulls up your app and creates a shopify.app.toml file. This config file contains details like client id, the name of your application, URL of your application and the scopes needed for the application. Furthermore, you will have to prepare a . file named env and then specify SHOPIFY_API_KEY.
Step 3: Installing Dependencies
To ensure your app has all the necessary dependencies to function correctly, run the following command in your terminal
npm install
This command installs all the packages needed in your application .In this case is React.js for the frontend and Node.js for the backend.
Step 4: Running Your Application
Once all dependencies are installed, you can start your development server by running
npm run dev
Step 5: Building the Frontend and Backend
Again, for our instance, we will be developing the frontend of the app using the help of the React library of JavaScript and the backend with Node. Here’s a brief overview of how to set up both. let describe some steps.
Frontend with React.js
Create React Components: Create React components to be used within your application for headers, footers and other sections of your application.
Navigation Links: As to create different pages, the labels and destinations have to be included in the navigation Link component in App.jsx. That way, you are able to surf from one area of your application to the other.
Backend with Node.js
Set Up Express Server: Please use express Js to set up your server and control the backend procedures.
API Routes: Define API routes which will handle the request and response between the front end and the back end.
Practical Example: Instagram Feed App…
Let’s apply the above steps to create a practical example: an application that is used in feeding the user’s Instagram account. This application will let the users login through the Instagram account, pull the media, and then the media can be showcased in a grid or slider view.
Main Functionality
The landing page of the app features a button which says “Connect to Instagram.” When the users tap on this button, they are transferred to the Instagram login page. If the login is complete, the app will retrieve pictures and videos from their Instagram profile and provide it in slider or grid view.
Authentication and Authorization
We use an authentication URL containing the following parameters: In this method, the parameters included are client Id, redirect Uri, scope, response Type, and auth Url. This URL corresponds to the redirection to Instagram’s login page. Once a user logs in, Instagram gives an authorization ID and using this ID, an access token is given by our back end..
Here is how the process works in detail.
Auth URL: Create an auth URL with the necessary parameters.
Redirect and authorization: Redirect users to Instagram’s login page. Once successfully logged in, get a license ID.
Access token request: To request an access token from the backend, use an authorization ID with client id, client secret, grant type, and redirect uri.
Introducing news reports and displaying content
Once we have the access token, we can then retrieve all the media id from the user’s Instagram profile. We use these media id to retrieve the URLs of the images and videos. These media items are then displayed in our app, which has various styling options.
Here is a detailed analysis of this phenomenon.
Retrieve Media IDs : Use an access token to retrieve media IDs from the Instagram API.
Accept media URLs : Assign a corresponding media URL (image or video) for each media ID.
Display Media: Use React components to display media objects in a grid or slider format.
Optimizing the Instagram feed
One of the main features of our app is that we can customize the Instagram feed. Here are some options to change.
Width: Adjusts the spacing between images.
Rounded corners: Apply rounded corners to images.
Viewable posts: Check how many posts can be viewed at one time.
These CSS and React state settings can be used to update the layout dynamically based on the user’s preferences.
Deploying Your Shopify App
Once your app is fully developed and tested, you can deploy it to any store created in Shopify. Here’s a brief overview of the deployment process:
Build Your App: Run the build command to prepare your app for production.
Upload to Shopify: Use the Shopify CLI or Partner Dashboard to upload your app to the Shopify store.
Submit for Review: If you intend to publish your app on the Shopify App Store, submit it for review to ensure it meets Shopify’s standards and guidelines.
How to Maximize Your Shopify Partner account?
Promote your services: Use the Shopify Partner Dashboard to promote your design services, apps or themes. Emphasize what makes your offers unique and how they benefit Shopify merchants.
Use Shopify’s resources: Take advantage of the training materials and support provided. These resources will help you stay up to date with Shopify’s latest features and best practices.
Connect with the community: Join the Shopify forums and partner communities to connect with other professionals. Sharing knowledge and learning from others can help you improve your services and grow your business.
Track Your Performance: Monitor your earning potential and performance with the Affiliate Dashboard. This will help you understand what is working and where you can make improvements..
Conclusion
Creating a Shopify app involves several key steps, from setting up your development environment to deploying your app. By following this comprehensive guide, you can create a functional and customizable app to meet various needs. Our example of an Instagram feed app demonstrates how you can integrate third-party services and enhance your app’s functionality, offering users a dynamic and engaging experience. Whether you’re a seasoned developer or just starting, Shopify provides the tools and resources to help you succeed
0 notes
Text
#How to Upgrade Node JS to a Specific Version in Ubuntu#update node version in ubuntu#upgrade node js in ubuntu#node update ubuntu#upgrading node version ubuntu#upgrade node ubuntu#ubuntu update node#node ubuntu update#ubuntu update node to 18#upgrade node js ubuntu#how to update node js ubuntu#ubuntu upgrade node#upgrade node version linux#ubuntu nodejs update#ubuntu upgrade node to 16#ubuntu update nodejs version#update node version ubuntu#upgrade nodejs on ubuntu#upgrade nodejs version ubuntu#linux upgrade nodejs#ubuntu upgrade nodejs#upgrade nodejs ubuntu#upgrade node js ubuntu 20.04
0 notes
Text
Adding Markers and Custom Icons on Google Maps in React.js

Google Maps is a powerful tool for displaying and interacting with geographic information in web applications. In this blog post, we will explore how to add markers with custom icons to a Google Map using React.js. Custom markers can help you make your maps more visually appealing and informative.
Prerequisites: Before we begin, make sure you have the following prerequisites in place:
A basic understanding of React.js and JavaScript.
Node.js and npm (Node Package Manager) installed on your development machine.
A Google Cloud Platform (GCP) account with billing enabled and the Maps JavaScript API enabled.
Let’s get started!
Step 1: Set Up a React.js Project If you don’t already have a React.js project, you can create one using Create React App or your preferred React.js project setup.
npx create-react-app custom-marker-map
cd custom-marker-map
npm start
Step 2: Create a Google Maps Component Next, let’s create a React component that will display the Google Map.
// src/components/GoogleMap.js
import React, { Component } from 'react';
class GoogleMap extends Component {
componentDidMount() {
// Load the Google Maps JavaScript API
const script = document.createElement('script');
script.src = `https://maps.googleapis.com/maps/api/js?key=YOUR_API_KEY&libraries=places`;
script.async = true;
script.defer = true;
script.onload = this.initMap;
document.head.appendChild(script);
}
initMap() {
// Initialize the map
const map = new window.google.maps.Map(document.getElementById('map'), {
center: { lat: 37.7749, lng: -122.4194 }, // Set your initial map center coordinates
zoom: 12, // Set the initial zoom level
});
// Add markers to the map
const marker = new window.google.maps.Marker({
position: { lat: 37.7749, lng: -122.4194 }, // Set marker coordinates
map: map,
icon: 'path/to/custom-marker.png', // Path to your custom marker icon
title: 'Custom Marker',
});
}
render() {
return <div id="map" style={{ width: '100%', height: '400px' }}></div>;
}
}
export default GoogleMap;
In this component, we load the Google Maps JavaScript API using a script tag and initialize the map with a specified center and zoom level. We then add a custom marker to the map using the google.maps.Marker class and provide the path to the custom marker icon.
Step 3: Display the Map Component Now, import and render the GoogleMap component in your main App.js file or any other desired location within your React app.
// src/App.js
import React from 'react';
import './App.css';
import GoogleMap from './components/GoogleMap';
function App() {
return (
<div className="App">
<h1>Custom Marker Map</h1>
<GoogleMap />
</div>
);
}
export default App;
Step 4: Customize the Marker Icon To use a custom icon for your marker, replace 'path/to/custom-marker.png' with the path to your custom marker icon image. You can use a PNG or SVG file for your marker.
Step 5: Run Your React App Start your React app by running:
npm start
You should now see a Google Map with a custom marker icon at the specified coordinates.
Conclusion: In this blog post, we’ve learned how to add markers with custom icons to a Google Map in a React.js application. Custom markers can help you personalize your maps and provide valuable information to your users. You can further enhance your map by adding interactivity and additional features, such as info windows, by exploring the Google Maps JavaScript API documentation. Happy mapping!
React Company provides access to a team of experienced React developers who are ready to answer your questions and help you solve any problems you may encounter.
For any inquiries or further assistance, please don’t hesitate to contact us.
For more details you can connect with bosc tech labs.
0 notes
Text
Nginx
참고: https://smali-kazmi.medium.com/setup-nginx-node-js-on-mac-os-x-b31eda9f7d5d
how to read (pronounce): 엔��� 엑스
Nginx currently supports 7 scripting languages: Go, Node.js, Perl, PHP, Python, Ruby, and Java Servlet Containers
(the last is an experimental module)
It enables you to run applications written in different languages on the same server.
how to install: https://dev.to/logrocket/how-to-run-a-node-js-server-with-nginx-588
how to install by M2: 1. homebrew install with terminal commands
/bin/bash -c "$(curl -fsSL https://raw.githubusercontent.com/Homebrew/install/HEAD/install.sh)"
2. PATH for homebrew: (2-lines)
(echo; echo 'eval "$(/opt/homebrew/bin/brew shellenv)"') >> /Users/nika/.zprofile
eval "$(/opt/homebrew/bin/brew shellenv)"
3. run:
To start nginx now and restart at login:
brew services start nginx
Or, if you don't want/need a background service you can just run:
/opt/homebrew/opt/nginx/bin/nginx -g daemon\ off\;
[like this] nginx, "http://localhost:8080/"
4. stop
nginx -s stop
5. 에러 확인:
nginx -t
nginx: the configuration file /opt/homebrew/etc/nginx/nginx.conf syntax is ok
nginx: configuration file /opt/homebrew/etc/nginx/nginx.conf test is successful
6. 리로드:
nginx -s reload
sudo nano /opt/homebrew/etc/nginx/nginx.conf (after password)
디폴트 구성 바꾸기, (nano: vim, emacs 같은 에디터로 수정하게끔 슈퍼유저 설정 권한을 준다)
나노 명령어:
^G : 도움말 보기
^X : 끝내기
^O : 파일 저장(저장할 파일명 입력, 디폴트는 최초 파일명)
^R : 파일 읽기(현재 파일에 새로운 파일 추가)
^W : 텍스트 검색
^\ : 검색 후 바꾸기
^K : 선택한 문자열 잘라내기
^U : 잘라낸 문자열 붙이기
^J : 양쪽 정렬(한줄로 표시)
^T : 맞춤법 체크
^C : 현재 커서 위치
^- : 입력한 행번호, 열번호로 이동
^A : 현재 행의 처음으로 이동
^E : 현재 행의 마지막으로 이동
Mac 폴더 생성 명령어: mkdir servers
mkdir -p /var/www/sena.com
Mac 파일 생성 명령어: touch ~/servers/examplePage/example.com (~ kite까지 포함)
touch ~/servers/examplePage/app.js
nano 안 쓰고 에러 해결법:
sudo vi 만드려는 파일명 or 저장 할 때
:w !sudo tee % > /dev/null
the page eXample:
make folder and "example.com" file
make app.js (javaScript file)
edit /etc/hosts (add 127.0.0.1 example.com)
새 포트 추가하는 법:
이걸 하고 싶으면 이러면 된다: sudo nano /opt/homebrew/etc/nginx/nginx.conf
링크
0 notes
Text
How to Install Node.js on Linux Using Different Methods?
Node JS is an open-source, back-end Javascript code outside a web browser. Here are the steps on how to install Node.js on Linux using various methods. hire node js develoepr
Node.js is a cross-platform that runs on the V8 engine and executes Javascript code outside a web browser. It also allows developers to use Javascript to write command-line tools and run scripts server-side to produce dynamic web page content before the page is sent to the user’s web browser.
.js is a standard filename extension for Javascript code, but Node.js doesn’t refer to a file in this context.
Overview of Node.js
Node.js allows the creation of web servers and networking tools using Javascript and modules that handle various core functionalities. Javascript is the only language that Node.js supports natively. As a result, Node.js applications can be written in Clojure script, Dart, and others. It is officially supported on macOS, Linux, and Microsoft Windows 8.1.
Node.js brings event-driven programming to web servers and allows the development of fast web servers in JavaScript. It connects the ease of a scripting language with the power of Unix network programming. It was built on top of Google’s V8 Javascript engine since it was open-sourced under the BSD license. The Node.js developer community has developed web frameworks to accelerate the development of applications. The frameworks include Socket.IO, Derby, Express.js, Feathers.js, and others.
Modern desktop IEDs provide debugging features for Node.js applications. These IDEs include JetBrains, Microsoft Visual Studio, or TypeScript with Node definitions. It is supported across several cloud hosting programs like Google Cloud Platform, Joyent, and others.
Install NodeJS on Linux Using NVM
This is the best way to install Node.js. NVM is a bash script used to manage multiple Node.js versions. It allows us to install and uninstall Node.js and switch from one version to another. The best thing is we can install any available Node.js version of our choice using NVM.
Install Node.js on Linux using your distribution’s package manager
It is available in the default repositories of most Linux distributions. If you want to have a stable Node.js on your Linux, you can install it using the distribution package manager.
On Arch Linux and its derivatives like Antergos, Manjaro Linux, run the “$ sudo pacman -S nodejs npm” command to install it.
On RHEL, CentOS, you need to enable the EPEL repository first. $ sudo yum install epel-release and then install Node.js using $ sudo yum install nodejs npm command.
For More Info: mobile app development company in india
React Native Development Company
web development
0 notes
Text
How to Generate and Download PDF in Node JS
PDF (Portable Document Format) files are an effective way to save and share HTML documents while preserving their original layout and content. Using a suitable HTML to PDF conversion library ensures that the file keeps its exact layout and content, regardless of the software, operating system, or device it's viewed on. Moreover, PDFs are versatile, supporting a wide range of content types like vector graphics, audio, animations, interactive fields, buttons, hyperlinks, and even 3D models. This versatility makes PDFs a popular choice for creating portfolios, reports, and presentations.
But how do you generate a PDF file on the web server side? Besides using an HTML-to-PDF converter, you will need Node.js on the web server.
About Node.js
Node.js is a free, open-source server environment that can run on various platforms, including Mac OS X, Unix, Windows, and Linux. It relies on JavaScript on a server to open a file and return its content to the client. One of its benefits is eliminating wait times, as it can proceed with the next request. Plus, it runs memory-efficient non-blocking and single-threaded asynchronous programming.
Using Node.js
Having a comprehensive HTML to PDF library simplifies downloading web pages and online invoices into a more portable format. In addition, it helps to create and download a PDF in NodeJS. Here’s how:
After downloading Node.js to your web server, pick an appropriate installer and run and install it without changing the default settings.
With a new project, make a new folder called pdf make
Go to that folder and run the command line with npm install pdf make to create the index.js
Add the code in the index.js file to create the PDF file.
Why Node.js?
Node.js is a versatile solution that can do the following:
Create dynamic page content
Generate, read, open, delete, close, or write files on the server
Obtain form data
Delete, modify, or add data to the database
Simplify HTML to PDF conversion.
An online HTML-to-PDF converter can be a more convenient alternative to Node.js. With the right HTML to PDF library, it can convert any HTML file quickly and accurately. Just be sure to use a reliable product like HiQPdf Software.
Download HiQPdf today and start converting HTML to PDF quickly and securely. You can also try the online demo to learn more about how it works.
0 notes
Text
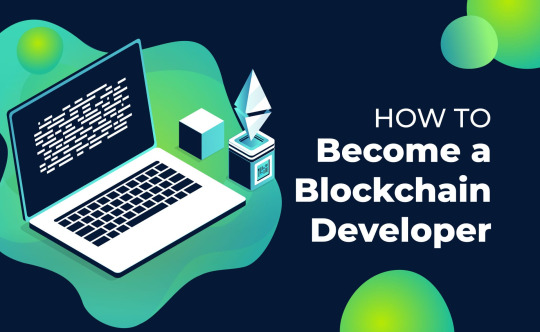
How to become a blockchain developer in 2024
You won’t get into web3 right away There is no question of any 3 months of study when you learn programming from scratch, especially in web3. Get ready to spend at least six months or a year on mastering the base, and the same amount on practice. I didn’t meet anyone who took courses, including top companies, and immediately began to write good valid code. Yes, the language itself, including Solidity, can, and its syntax learns pretty quickly, but the ability to use it comes only with practice. So where do you start? First of all, when talking about web3, you need to decide which blockchain you want to work with in the future. The most popular at the moment are Ether and Solana with Solidity and Rust languages. Initially, it was Ether that aroused more trust and confidence in me, so I will continue to talk about it from the standpoint of my experience. So, if you want to become a full-fledged blockchain developer, then you need to start from the very basis: html, which creates the site skeleton, and css, which adorns this skeleton. At the same time, html itself has advanced quite a lot, and a lot of new things have appeared there. Having learned it, you will be able to correctly and beautifully design the base of your future project so that it is well indexed on the web. Getting started learning javascript If learning html and css with regular classes and practice will take you about a month, then you will have to spend a lot of time on js. We learn syntax, functions, OOP, practice with mini projects. Youtube videos have great tutorials for this. When you feel confident, you can connect libraries and add-ons over js. And without fail, we first learn typescript. Next is the Node.js software platform. Fortunately for web3, you don’t have to delve deep into node to understand how it works and is used. It is enough to be able to install packages and run nodes. After that, we choose react.js or vue.js for further study, while already within the framework of typescript. I would also recommend learning one of the project styling frameworks after that, such as Bootstrap, Materialize or Tailwind. This is not required, but a bonus on a resume would be nice! Only according to preliminary estimates, all this training will take you from six months. From now on, you can try to get a job with new knowledge to get more practice. And only now web3 Having learned javascript and everything related, you can start learning Solidity. The language itself is quite modest and simple. Having worked with js, you will have no problems understanding the new syntax. Along with it, you will also have to learn how to work with Hardhat or Truffle, some kind of development and testing environment for smart contracts. After that, there are two ways: to focus solely on writing smart contracts, for which you will already have sufficient knowledge, or to grow further to a full-fledged blockchain developer. As a smart contract developer, those who can conduct security audits and improve the quality of code and currency transfers are highly valued. The job of a blockchain developer goes beyond just writing contracts. Here you will not only have to learn how to work with third-party services like TheQraph, Chainlink, Apollo, Gnosis, but also get the skills to connect to decentralized exchanges like Uniswap or Pancake. Moreover, you may be asked to write a full-fledged application for clients that will query and send data to the blockchain. And all this will take much more than six months or a year. By the way, it should be mentioned here that if you learned Python, then it is also suitable for a blockchain developer. However, you will meet an order of magnitude less documentation on this than for javascript. Finally You should not believe advertising messages that convince you that you can become a good programmer in a month or two. Yes, syntax is easy to learn, but it’s all about practice. Six months ago, I was absolutely sure: “If you want to learn a language, start doing a project in it”, but now this has changed a bit. Only by studying the field, you can learn about the tools that create convenience for development. For example, you will learn that in a particular example, you can “not fence crutches”, but use a third-party solution. Also, do not worry that learning a new profession takes so much time. This is knowledge that will be relevant for a long time, and in any case, even with a base, you can find a good job. If You Want To Learn More How To Make Money With Cryptocurrency Click Here Affiliate Disclosure: The links contained in this product review may result in a small commission if you opt to purchase the product recommended at no additional cost to you. This goes towards supporting our research and editorial team and please know we only recommend high quality products. Read the full article
0 notes