#how to create custom theme in wordpress step by step
Explore tagged Tumblr posts
Visit Tumblr Blog
Explore Tumblr blogs with no restrictions, modern design and the best experience.
Last Seen Tumblr Blogs


Fun Fact
The Tumblr app for Google Glass was released on May 16, 2013.
Text
What is a Website? A Complete Beginner’s Guide

In today’s digital age, having an online presence is not a luxury — it’s a necessity. Whether you're a business owner, content creator, or just someone curious about the web, understanding what a website is and how it functions is essential. In this guide, we’ll cover everything you need to know about websites, their components, types, benefits, and how to create one.
What is a Website?
A website is a collection of publicly accessible web pages that are linked together and share a single domain name. These pages are hosted on a web server and can include text, images, videos, forms, and other elements that users interact with online.
In simpler terms, a website is your virtual space on the internet — like your home or office in the digital world. It allows you to communicate, sell, educate, entertain, or showcase anything to a global audience.
Why is a Website Important Today?
In a world dominated by smartphones, search engines, and social media, a website acts as your central hub online. Here's why it’s important:
Visibility: A website helps you appear in search results when people look for your products, services, or information.
Credibility: A professional-looking site builds trust among your audience.
Accessibility: Your website is available 24/7, allowing customers to reach you anytime.
Marketing: It's the foundation for all your digital marketing efforts.
Sales: With e-commerce, your website can directly generate revenue.
Core Components of a Website
Every website has several key components that make it function properly:
1. Domain Name
This is your site’s address (e.g., www.digitalcreator.org.in). It’s what users type in their browser to visit your site.
2. Hosting Server
Web hosting stores your website’s data and serves it to users when requested.
3. Content Management System (CMS)
A CMS like WordPress, Joomla, or Shopify makes it easy to build and manage content on your website without coding.
4. Web Pages
These include the homepage, about us, contact, services, blog, etc., that make up your website.
5. Navigation
Menus and internal links guide visitors through your website.
Types of Websites
Different websites serve different purposes. Here are some common types:
1. Business Website
Used by companies to promote services, share information, and connect with clients.
2. E-commerce Website
Allows users to buy and sell products online. Examples include Amazon and Flipkart.
3. Portfolio Website
Ideal for creative professionals to showcase their work.
4. Blog or Personal Website
Used by individuals to share ideas, stories, or niche content regularly.
5. Educational Website
Used by schools, institutions, or educators to provide learning materials.
6. Non-profit or Government Website
Focused on delivering information and services to the public.
How to Create a Website (Step-by-Step)
Creating a website doesn’t require you to be a tech expert. Follow these steps:
Step 1: Choose a Domain Name
Pick a short, relevant, and memorable domain name. Make sure it reflects your brand or purpose.
Step 2: Get Web Hosting
Choose a reliable hosting provider like Bluehost, SiteGround, or Hostinger.
Step 3: Select a CMS or Website Builder
Use platforms like WordPress, Wix, or Shopify to start building your website.
Step 4: Design Your Website
Choose a theme or template. Customize colors, fonts, and layout to match your brand.
Step 5: Add Content
Create and publish pages like Home, About, Services, and Contact. Use quality visuals and optimized text.
Step 6: Optimize for SEO
Use keywords (like website) naturally, optimize images, and ensure fast load speed.
Step 7: Launch and Promote
Once satisfied, make your website live. Share it on social media and start your SEO or ad campaigns.
Best Practices for a Great Website
Responsive Design: Ensure your site works well on all devices.
Fast Loading Speed: Use compressed images and optimized code.
Clear Navigation: Make it easy for users to find what they need.
Secure (HTTPS): Use an SSL certificate to protect data.
Call-to-Action (CTA): Guide visitors toward actions like “Buy Now” or “Contact Us.”
Examples of Great Websites
A well-designed and fully functional example is www.digitalcreator.org.in. It demonstrates how a website can showcase services, build trust, and attract new clients efficiently.
LSI Keywords to Keep in Mind
While writing or optimizing your website, include these Latent Semantic Indexing (LSI) keywords to enhance search performance:
Web design
Online presence
Website development
Internet site
Web page
Digital platform
Domain and hosting
CMS (Content Management System)
Website builder
E-commerce site
Frequently Asked Questions (FAQs)
1. What is the purpose of a website?
A website helps individuals or businesses share information, sell products, provide services, or connect with others online.
2. How much does it cost to build a website?
Costs vary based on design, features, and hosting. Basic websites can cost as low as ₹3,000–₹10,000, while advanced ones may go up to ₹1 lakh or more.
3. Do I need coding skills to create a website?
No. Tools like WordPress or Wix allow you to build a full website without writing any code.
4. How long does it take to build a website?
A simple website can be built in 1–2 days. More complex sites may take a few weeks.
5. What makes a website successful?
A successful website is user-friendly, fast, mobile-optimized, secure, and offers valuable content with clear calls-to-action.
Conclusion
Understanding what a website is is the first step toward establishing your digital footprint. Whether you're planning to launch a personal blog, online store, or professional portfolio, your website will serve as the foundation of your online presence.
If you're ready to build or improve your website, visit www.digitalcreator.org.in — your one-stop destination for digital marketing and website development solutions.
2 notes
·
View notes
Note
How do you make a blog? I want to make my own blog of my own but I don't know where to start.
Blogging has become an excellent way to share your thoughts, ideas, and experiences with the world. In this digital era, almost everyone has their own blog, and if you're interested in making one, I'm here to help you. I'll discuss how to make a good blog and how to write a blog that is informative and engaging.
Before we dive into the details, let's understand what a blog is. A blog is a website containing written content that is updated regularly. The content can be about anything you want, such as your personal experiences, your passions, your business, or current events. A blog can be an excellent way to establish yourself as an expert in your field, connect with like-minded people, and build your brand.
Here are some essential steps you should follow to make a good blog:
Step 1: Choose a Blogging Platform
The first step in creating a blog is to choose a blogging platform. There are many platforms available, such as WordPress, Tumblr, and Wix. Each platform has its own advantages and disadvantages, so you need to choose one that best suits your needs. WordPress is one of the most popular platforms and offers a lot of customization options. And Tumblr is one of the easiest and self-customizable blogging websites.
Step 2: Choose a Domain Name and Hosting
Once you have chosen your blogging platform, you need to choose a domain name and hosting. Your domain name should be memorable, easy to spell, and relevant to your blog's content. Hosting is a service that allows your blog to be accessible on the internet.
(Also be sure to think of a blog name before doing this step, for example my blog/brand name is 'The Write Advice For Writers')
Step 3: Customize Your Blog
After you have chosen your domain name and hosting, you need to customize your blog. You can select a theme that suits your blog's content and customize it to your liking. You can also add plugins to enhance your blog's functionality.
Step 4: Create Quality Content
The most important aspect of a blog is its content. You need to create quality content that is informative, engaging, and relevant to your audience. You should also use keywords that are relevant to your blog's content to improve your blog's search engine rankings.
Step 5: Promote Your Blog
Once you have created quality content, you need to promote your blog. You can use social media platforms such as Facebook, Twitter, and Instagram to promote your blog. You can also participate in online communities related to your blog's content to gain exposure.
Now that you understand how to make a good blog, let's discuss how to write a blog that is informative and engaging.
Step 1: Choose a Topic
The first step in writing a blog is to choose a topic. You should choose a topic that you are passionate about and that is relevant to your audience. You can also use keyword research tools to find popular topics related to your blog's content.
Step 2: Create an Outline
Once you have chosen a topic, you need to create an outline. An outline will help you organize your thoughts and ensure that your blog post is well-structured. Your outline should include an introduction, main points, and a conclusion.
Step 3: Write Your Blog Post
After you have created your outline, you need to write your blog post. Your blog post should be informative, engaging, and easy to read. You should also use subheadings, bullet points, and images to break up your content and make it more visually appealing.
Step 4: Edit Your Blog Post
Once you have written your blog post, you need to edit it. You should check for grammar and spelling errors and ensure that your content flows well. You can also use online tools such as Grammarly to check your grammar and spelling.
Step 5: Publish Your Blog Post
After you have edited your blog post, you need to publish it. You should also promote your blog post on social media and other online communities related to your blog's content.
In conclusion, making a good blog requires patience, dedication, and hard work. You need to choose the right blogging platform, create quality content, and promote your blog to gain exposure. Writing a blog that is informative and engaging requires choosing the right topic, creating an outline, writing your blog post, editing it, and publishing it. By following these steps, you can create a successful blog that will attract readers and establish you as an expert in your field.
#thewriteadviceforwriters#on writing#writing#writers block#how to write#tc blog#blogger#how to blog#creative writing#girl blog#tumblog
20 notes
·
View notes
Text

How To Migrate Your Site To WordPress: A Seamless Journey With Sohojware
The internet landscape is ever-evolving, and sometimes, your website needs to evolve with it. If you're looking to take your online presence to the next level, migrating your site to WordPress might be the perfect solution. WordPress is a powerful and user-friendly Content Management System (CMS) that empowers millions of users worldwide.
However migrating your site can seem daunting, especially if you're new to WordPress. Worry not! This comprehensive guide will equip you with the knowledge and confidence to navigate a smooth and successful migration. Sohojware, a leading web development company, is here to help you every step of the way.
Why Choose WordPress?
WordPress offers a plethora of benefits that make it an ideal platform for websites of all shapes and sizes. Here are just a few reasons to consider migrating:
Easy to Use: WordPress boasts a user-friendly interface, making it easy to manage your website content, even for beginners with no coding experience.
Flexibility: WordPress offers a vast array of themes and plugins that cater to virtually any website need. This allows you to customize your site's look and functionality to perfectly match your vision.
Scalability: WordPress can grow with your business. Whether you're starting a simple blog or managing a complex e-commerce store, WordPress can handle it all.
SEO Friendly: WordPress is built with Search Engine Optimization (SEO) in mind. This means your website has a better chance of ranking higher in search engine results pages (SERPs), attracting more organic traffic.
Security: WordPress is constantly updated with the latest security patches, ensuring your website remains protected from potential threats.
The Migration Process: A Step-by-Step Guide
Migrating your site to WordPress can be broken down into several key steps.
Preparation: Before diving in, it's crucial to back up your existing website's files and database. This ensures you have a safety net in case anything goes wrong during the migration process. Sohojware offers expert backup and migration services to ensure a smooth transition.
Set Up Your WordPress Site: You'll need a web hosting provider and a domain name for your WordPress site. Sohojware can assist you with choosing the right hosting plan and setting up your WordPress installation.
Content Migration: There are several ways to migrate your content to WordPress. You can use a plugin specifically designed for migration, manually copy and paste your content, or utilize an XML export/import process, depending on your previous platform. Sohojware's team of developers can help you choose the most efficient method for your specific situation.
Theme Selection: WordPress offers a vast library of free and premium themes. Choose a theme that aligns with your brand identity and website's functionality.
Plugins and Functionality: Plugins extend the capabilities of your WordPress site. Install plugins that enhance your website's features, such as contact forms, image galleries, or SEO optimization tools.
Testing and Launch: Once your content is migrated and your website is customized, thoroughly test all functionalities before launching your new WordPress site. Sohojware provides comprehensive website testing services to guarantee a flawless launch.
Leveraging Sohojware's Expertise
Migrating your website to WordPress can be a breeze with the help of Sohojware's experienced web development team. Sohojware offers a comprehensive suite of migration services, including:
Expert Backup and Migration: Ensure a smooth and secure transition of your website's data.
Custom Theme Development: Create a unique and visually appealing website that reflects your brand identity.
Plugin Selection and Integration: Help you choose and implement the right plugins to enhance your website's functionality.
SEO Optimization: Optimize your website content and structure for better search engine ranking.
Ongoing Maintenance and Support: Provide ongoing support to keep your WordPress site running smoothly and securely.
FAQs: Migrating to WordPress with Sohojware
1. How long does the migration process typically take?
The migration timeframe depends on the size and complexity of your website. Sohojware will assess your specific needs and provide an estimated timeline for your migration project.
2. Will my website be down during the migration?
Typically, no. Sohojware can migrate your website to a temporary location while your existing site remains live. Once the migration is complete, the new WordPress site will be seamlessly switched in place, minimizing downtime and disruption for your visitors.
3. What happens to my existing content and SEO rankings after migration?
Sohojware prioritizes preserving your valuable content during the migration process. We can also help you implement strategies to minimize any potential impact on your SEO rankings.
4. Do I need to know how to code to use WordPress?
No! WordPress is designed to be user-friendly, and you don't need any coding knowledge to manage your website content. Sohojware can also provide training and support to help you get the most out of your WordPress site.
5. What ongoing maintenance does a WordPress website require?
WordPress requires regular updates to ensure optimal security and functionality. Sohojware offers ongoing maintenance plans to keep your website updated, secure, and running smoothly.
By migrating to WordPress with Sohojware's expert guidance, you'll gain access to a powerful and user-friendly platform that empowers you to create and manage a stunning and successful website. Contact Sohojware today to discuss your website migration needs and unlock the full potential of WordPress!
2 notes
·
View notes
Text
Dream Site Pro Review - Good or Bad?
In today’s digital age, having a strong online presence is not just an option, but a necessity. Whether you’re a small business owner, a freelancer, or an entrepreneur, your website is your digital storefront, the place where first impressions are made and lasting relationships are built. But let’s face it—building a professional, eye-catching website can be a daunting task, especially if you’re not a tech wizard. Enter Dream Site Pro, the game-changing platform designed to simplify website creation with the power of AI.
What is Dream Site Pro?
Dream Site Pro is a revolutionary AI-powered tool that allows anyone to create stunning, professional WordPress websites in just minutes. Whether you’re an experienced web designer or a complete beginner, Dream Site Pro provides the tools and templates you need to bring your vision to life without the headaches of coding or design complexities.
How Does It Work?
Dream Site Pro’s magic lies in its simplicity and AI-driven features. Here’s a step-by-step look at how it works:
1. Select a Theme: Start by choosing from over 200 beautifully designed templates, organized into more than 30 niches. Whether you’re looking to create a site for a coffee house, a travel blog, or a dental clinic, there’s a template that fits your needs.
2. Customize with Ease: With the intuitive drag-and-drop editor, you can easily tweak the layout, colors, fonts, and other design elements to match your brand. The AI tools also offer suggestions to enhance your site’s appearance and functionality, ensuring it looks professional and is user-friendly.
3. Enhance with Features: Dream Site Pro comes packed with built-in features like call-to-action management, Google Maps integration, and social media tools to boost engagement. For e-commerce needs, the seamless WooCommerce integration allows you to set up an online store effortlessly.
4. Publish and Optimize: Once you’re happy with the design, you can publish your site with a single click. Dream Site Pro handles all the technical details, ensuring your website is fast, secure, and optimized for SEO.
5. Manage and Grow: The platform includes advanced lead management and analytics tools, helping you track performance and refine your strategies. Plus, with the built-in autoresponder integration, you can automate your email marketing to nurture leads and drive conversions.
Why Choose Dream Site Pro?
AI-Powered Efficiency: Dream Site Pro leverages AI to simplify and accelerate the web design process. From automatic SEO optimization to compliance with ADA and GDPR regulations, the AI handles it all, letting you focus on what matters most—your business.
Cost-Effective Solution: Forget about expensive developers or recurring monthly fees. Dream Site Pro offers a one-time payment for lifetime access, making it a budget-friendly choice for entrepreneurs and small business owners.
Versatility and Customization: With a wide range of templates and customization options, Dream Site Pro is versatile enough to cater to any industry or niche. The drag-and-drop editor and AI enhancements ensure that your site is not only unique but also highly functional.
Commercial Licensing: Looking to expand your business? Dream Site Pro comes with a commercial license, allowing you to create and sell unlimited websites to clients. It’s a fantastic opportunity for freelancers and agencies to boost their revenue.
Comprehensive Support and Training: Dream Site Pro provides extensive training resources and dedicated customer support to help you every step of the way. Whether you’re setting up your first website or managing multiple client projects, you’re never alone.
Real Success Stories
Dream Site Pro isn’t just another web design tool—it’s a catalyst for success. Take Sarah, for example, who skyrocketed her website traffic by 200% after switching to Dream Site Pro’s AI-powered designs. Or John, who saw a 300% increase in revenue within three months of using the platform. These are just a few examples of how Dream Site Pro is transforming businesses and lives.
Conclusion
In a world where digital presence is key to success, Dream Site Pro offers an unparalleled solution to web design challenges. It’s more than just a tool; it’s a partner in your entrepreneurial journey, empowering you to create stunning websites with ease and efficiency. Ready to take your online presence to the next level? Discover the power of AI with Dream Site Pro today and watch your business soar.
So why wait? Unleash your creativity and build your dream website with Dream Site Pro now. Your digital future awaits!
#dreamsitepro#dreamsiteproreview#dreamsiteprooto#AIpoweredwebsitebuilder#dreamsiteprobundle#dreamsiteprocouponcode#dreamsiteprobonuses#WordPresswebsitetemplates#easywebsitecreationtool#Bestwebsitebuilder2024#Draganddropwebsiteeditor#Affordable web design software#SEO optimized website builder#AI-driven web design tool#One-time payment website builder#Small business website builder#Professional website templates#Fast website creation tool#Website builder for beginners#Best WordPress themes 2024#E-commerce website builder#AI website design software#Website builder with lead management#AI tools for web design#Commercial license website builder#Customizable website templates
2 notes
·
View notes
Text
Getting Started with WordPress Development — The Best Tips to Get Started
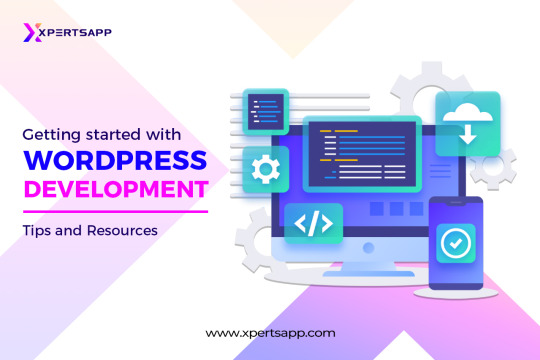
In the world of digitalization, every business must focus on having a digital presence for their brand to increase their traffic for their business to retain more customers. One of the best ways to have a unique digital presence for your brand is through WordPress web development. One of the most known platforms known for creating a website is WordPress web development. You’re choosing to become a part of the WordPress user community worldwide. The platform is maintained by thousands of web developers who work tirelessly to add new features, enhance functionality, and strengthen security. Even better, it’s far more straightforward than you might imagine joining the WordPress community. You must follow the trend to stay under the umbrella of updates to track your business’s growth.
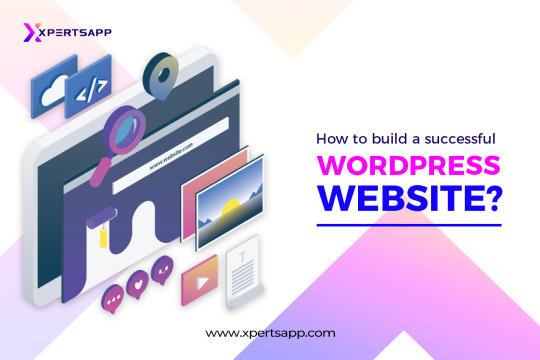
How to build a successful WordPress website?
Once you choose WordPress web development, you must know about the requirements while developing a WordPress website to have a unique and distinctive digital presence for your target audience online and get to know about your brand. Today, launching a website is simpler than ever. The procedure still has several steps. If you pay attention to these steps, your site’s launch might run smoother than you’d like. Additionally, launching a website without any forethought is a formula for catastrophe.
We’ll go through further steps and tips in this article that must be completed before developing a WordPress website. Everything you need to do, from the planning stages of your website to its launch debut, will be covered.
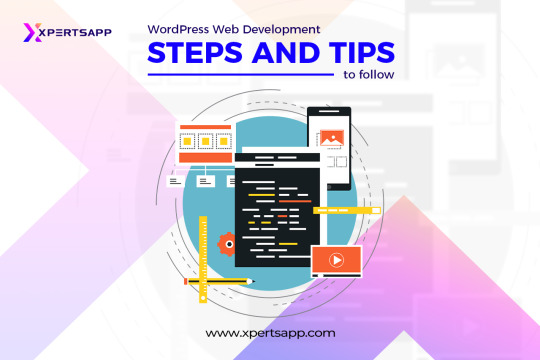
WordPress web development: Steps and tips to follow
Develop the Concept for Your Website
Every successful Website has a concept at its core. You could write about computer lessons, video game reviews, or even movies. Each of those suggestions ought to have a specific objective.
For instance, a website specializing in computer lessons may want to sell products or encourage visitors to enroll in an online course. Before starting to build your website, you must have a solid concept. Otherwise, you’ll aimlessly wander around and squander time.
What you want your website to emphasize should be listed in writing.
Define the main objective of your website (i.e., making you money, positioning you as an expert in your field, just a hobby, etc.).
Consider the demographic of your desired audience.
Think about possible names for your website.
It can take time to identify your intended audience, though. The key is to consider your target audience, which should constitute most of your traffic while choosing the type of material you wish to post. Finally, choosing a name for your website is a very subjective choice. However, since you’ll need to purchase a related domain, we advise sticking with something simple to remember and type.
Choose and Buy a Domain for your WordPress Web Development
Now that the conceptual phase of learning how to establish a website is complete, let’s move on to the technical side. You should sign up for a domain for your website. You can purchase a domain name in many different locations. We advise using a specialized domain registrar in most situations because they frequently have the best selection of Top-Level Domains (TLDs) at affordable pricing. Most of the time, because they are well-established options that people are familiar with, it is usually advised to stick with “.com” TLDs. It’s a minor investment for your website’s future to purchase a regular.com domain, which should cost you roughly $10 per year.
Identify Suitable WordPress Hosting
Finding the web host that will house your website is the next step in your quest. Your choice of provider will be significantly influenced by the platform you use to develop your website. Naturally, it is advised to use WordPress as your Website’s platform because it offers a wealth of tools, plugins, and themes that make it relatively simple to create a unique website. This is the significant role of WordPress when you think of developing a website for your business to have its digital presence. Therefore, the best choice one could make for hosting while developing a website for an online company to a vast audience.
Create the critical content for your website
The majority of new websites launch discreetly. The initial content is mainly ignored until traffic levels go up after an indefinite period. But that doesn’t mean it’s not crucial to start developing the most important content for your website immediately. A new website needs help to gain popularity, especially right after launch. In our experience, writing long-form web copy and blog content focusing on keywords you believe will rank well is the best way to increase traffic numbers.
To make this work, you’ll need to research Search Engine Optimization marketing (SEO) and develop several practical topic ideas. Next, try to write an article that is superior to anything the opposition has on the same topic. In the end, you want to become well-known right away. However, more than a single article will be required, which is where the final step comes into play.
Decide on the ideal theme for your website.
It’s time for your website to start taking shape now that WordPress has been installed and your actual content has been written. Installing a theme that fits the look you want for your website is the first thing we advise you to do.
You can utilize two different types of themes. Also, niche themes are created with a particular kind of Website in mind. You may also look at multipurpose themes, which focus on flexibility and the ability to fit almost any type of Website. Your theme selection should ideally be a long-term choice. In light of this, we advise you to choose the ideal option for you, try it, and proceed to the next stage only after. Your theme selection should ideally be a long-term choice. In light of this, we advise you to choose the ideal option for you, try it, and proceed to the next stage only after.
Install the Required Plugins
It would help if you used “plugins,” one of WordPress’s key selling features, to power the extra functionality on your website. They are simply add-ons, and the ones you choose will primarily rely on the functionality your site will have. The greatest thing you can do is take some time to explore around. The WordPress.org Plugin Directory alone contains over 50,000 free plugins. It has little risk in testing out a plugin if it intrigues you.
However, we advise avoiding plugins with ratings of fewer than four stars and those without any updates in the previous six months. Keeping this general guideline in mind is essential because those can have bugs that haven’t been patched and other vulnerabilities.
Make Your Site’s Design Specific to Your Content and Goals
This process step typically has a big head start because WordPress has a large selection of pre-designed themes and page builders. You get to start with the default design of your parent theme and then modify it to suit your needs. It will probably take some time to combine your site’s design, especially if this is your first attempt. However, it pays to ensure everything looks perfect, so the rest of your site’s launch goes smoothly. Keep in mind to constantly create each page and article to achieve that goal.
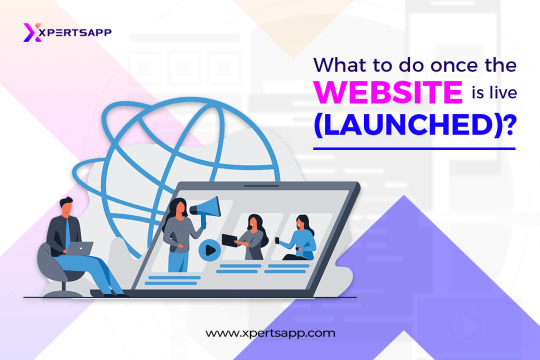
What to do once the Website is live (launched)?
The Website is made once as it has gone through the whole development process. It would help if you created a schedule for new postings after publishing your new site’s first piece of content. An excellent strategy to grow an audience for a new website is to blog at least once every week. It makes sense to compose your website’s critical content before you even launch. As a result, you may devote your whole post-launch weeks or even months to marketing and link-building.
It would be best if you had a social media presence and backlinks to engage with your expanding audience and build an email list. You can launch campaigns and set up autoresponders using a list, which will eventually help drive visitors to your website. How you proceed from here will ultimately depend on your long-term objective. For instance, creating a “passion blog” is not the same as monetizing your website. Finding and fostering guests, however, is a constant concern.
Conclusion
It’s easier to set up a WordPress website than it originally was. Thanks to WordPress’s community-driven, ongoing platform improvements, you can now create a website in a few easy steps. However, you might still require assistance with the trickier aspects. In that case, don’t worry. We are available to you.
For all of your website needs, we provide 24/7 assistance. With the help of our Website Builder, we even further streamline the website-building procedure. Use our Website Builder to access XpertsApp and have your site up and running.
#wordpress#webdevelopment#web developing company#web developers#website design#web hosting#ecommerce#shopify#technology#digital marketing#search engine optimization#search engine marketing
2 notes
·
View notes
Text
From Zero to Hero: Building Your First Affiliate Blog from Scratch

Alright, fellas, strap in because today we're diving deep into the world of affiliate blogging. We're talking about going from absolutely nothing to being the hero of your own online success story. It's time to build your first affiliate blog from scratch and carve out your slice of the digital pie.
So, where do you start on this epic journey? Well, first things first, you need a game plan. You can't just dive in blindly and hope for the best. Take a moment to map out your vision for your blog. What niche are you passionate about? What products or services do you want to promote? Get crystal clear on your goals because clarity is key to success.
Once you've got your vision locked in, it's time to get technical. Don't worry, you don't need to be a coding whiz to build a killer blog. Platforms like WordPress make it easy for even the tech-challenged among us to create professional-looking websites. Choose a clean, user-friendly theme and start customizing to make it your own.
Now, onto the fun part: content creation. This is where you really get to flex your creative muscles and showcase your expertise in your chosen niche. Whether you're into fitness, finance, or fashion, there's an audience out there hungry for your knowledge. Start brainstorming topics that will resonate with your target audience and get to writing.
But hold up, bro, before you hit publish on that first blog post, there's one crucial step you can't skip: keyword research. This is how you'll ensure your content gets seen by the right people. Use tools like Google Keyword Planner or SEMrush to identify high-volume, low-competition keywords related to your niche. Sprinkle these keywords strategically throughout your content to boost your blog's visibility in search engine results.
With your content live and kicking, it's time to start promoting like a madman. Share your blog posts on social media, join relevant online communities, and reach out to influencers in your niche for collaborations. The more eyeballs you can get on your content, the better chance you have of driving traffic and, ultimately, making those sweet affiliate commissions.
Speaking of affiliate commissions, let's talk monetization. This is where the magic happens, my friends. Sign up for affiliate programs relevant to your niche and start embedding those affiliate links into your blog posts. But here's the golden rule: only promote products or services you genuinely believe in. Your audience can smell a sellout from a mile away, so stay authentic and only endorse stuff you'd actually use yourself.
Now, I know what you're thinking: "But bro, how long until I start seeing some serious cash flow?" Here's the truth, my friend: Rome wasn't built in a day, and neither is a successful affiliate blog. It takes time, dedication, and a whole lot of hustle to make it in this game. But if you stay consistent, keep learning, and never lose sight of your goals, you'll be well on your way to affiliate marketing glory.
So there you have it, guys. Building your first affiliate blog from scratch might seem daunting at first, but trust me when I say it's worth the grind. Follow these steps, stay true to yourself, and before you know it, you'll be the hero of your own online success story. Now get out there and start hustling!
3 notes
·
View notes
Text
How do I use WordPress for Ecommerce?
WordPress is a versatile platform that can be effectively used for e-commerce. Here's how to make the most of it:
Choose the Right E-commerce Plugin: WordPress offers several e-commerce plugins like WooCommerce, Easy Digital Downloads, and more. Choose one that suits your needs. For most, WooCommerce is a robust and user-friendly option.
Select a Hosting Provider: Opt for a reliable hosting provider that can handle your e-commerce website's traffic and security requirements. Managed WordPress hosting can be a good choice.
Install and Configure Your E-commerce Plugin: Once you've set up WordPress, install your chosen e-commerce plugin. Follow the plugin's documentation to configure it, add products, set prices, and define shipping options.
Select a Suitable Theme: Choose a WordPress theme optimized for e-commerce. Many themes are designed to work seamlessly with e-commerce plugins, ensuring a cohesive look and feel for your online store.
Customize Your Store: Customize your website to match your brand's identity. This includes adding your logo, selecting colours, and arranging elements to create an appealing and user-friendly design.
Add Products and Content: Populate your online store with products or services. Write detailed product descriptions, set prices, and include high-quality images. Ensure that your content is engaging and SEO-friendly.
Implement Payment Gateways: Integrate payment gateways that allow customers to make secure transactions. PayPal, Stripe, and Authorize .net anywhere are popular choices.
Set Up Shipping Options: Configure shipping options based on your business model. Offer choices like standard shipping, express delivery, or local pickup.
Focus on SEO: Optimize your website for search engines. Use relevant keywords, write meta descriptions, and create high-quality content to improve your site's visibility in search results.
Ensure Mobile Responsiveness: Many shoppers use mobile devices. Ensure your site is responsive and looks great on smartphones and tablets.
Implement Security Measures: Security is crucial for e-commerce. Install security plugins, use SSL certificates, and regularly update your plugins and WordPress core for protection against threats.
Test Your Site: Before launching, thoroughly test your website. Check for broken links, ensure the checkout process works flawlessly, and test the loading speed.
Launch and Market Your Store: Once you're confident everything works as expected, launch your e-commerce store. Promote it through social media, email marketing, content marketing, and other online channels.
WordPress can be a powerful platform for e-commerce when used correctly. Following these steps and staying committed to ongoing optimization can create a successful online store with WordPress.
2 notes
·
View notes
Text
How to design Interactive Web Design in best price?
Designing an interactive web design on a budget requires careful planning, creativity, and efficient use of resources. In this guide, I'll provide you with a step-by-step approach to creating an engaging and interactive web design within the best price constraints.
Interactive web design is a powerful tool for creating memorable and effective online experiences that benefit both users and businesses alike. As technology continues to evolve, web designers must keep innovating and adapting interactive elements to cater to the ever-changing expectations of users.
Set Clear Goals and Scope
Before starting any project, define your goals and project scope. Understand the purpose of the Interactive Websites, its target audience, and the specific Interactive Websites elements you want to include. Having a clear vision will help you stay focused and avoid unnecessary expenses.
Choose the Right Platform and Tools
Select a web development platform that aligns with your budget and requirements. Popular cost-effective options include WordPress, Joomla, or using a website builder like Wix or Squarespace. These platforms often come with built-in interactive features and templates that can save you time and money. Utilize free or affordable design tools like Canva or GIMP for graphics and image editing.
Responsive Design
Ensure your web design is responsive, meaning it adapts to different screen sizes and devices. Responsive Interactive Websites design eliminates the need for separate mobile versions, reducing development costs.
Minimalistic Design Approach
Embrace a minimalistic design approach that focuses on simplicity and clean aesthetics. Fewer design elements mean less time spent on development and lower costs. Use negative space effectively and choose a cohesive color palette to create an elegant yet cost-efficient design.
Open-Source Templates and Themes
Explore free and open-source website templates and themes available online. Platforms like WordPress offer a wide range of themes with Interactive Websites elements that can be customized to suit your needs, saving you both time and money.
DIY vs. Hiring Professionals
Assess your skills and expertise in Interactive Websites and development. If you have the required knowledge, consider doing some parts of the design yourself. For complex interactive features, like animations or custom coding, it may be worth hiring freelancers or a web development agency. Compare prices and portfolios to find the best fit for your budget.
Optimize for Performance
Performance optimization is crucial for user experience and search engine rankings. Compress images, minify CSS and JavaScript, and enable caching to reduce loading times. Faster-loading pages often lead to higher engagement and conversion rates with your Interactive Websites.
User-First Approach
Place user experience at the forefront of your design. Ensure that Interactive Websites elements enhance usability and engagement, rather than complicating the navigation. Conduct user testing and gather feedback to refine your design iteratively.
Integrate Social Media
Use social media integrations to increase user engagement and expand your online presence. Social media plugins and sharing buttons can be easily added to your Interactive Websites for little to no cost.
Educational Content and Tutorials
Create educational content and Interactive Websites tutorials that provide value to your audience. Informative videos, infographics, and interactive guides can be cost-effective ways to engage users and establish your expertise.
Continuous Maintenance and Updates
Regularly update and maintain your website to ensure it stays relevant and functional. Promptly fix any bugs or issues that arise to avoid costly repairs in the future.
Therefore creating an interactive web design on a budget requires smart decision-making and resourceful use of available tools and platforms. By following these guidelines and maintaining a user-centric approach, you can design an engaging website without breaking the bank. Remember to regularly evaluate the performance and user feedback to make improvements over time.
Interactive Web Design
Interactive web design refers to the process of creating web pages or applications that engage users and allow them to interact with the content and functionality. The primary goal of interactive web design is to enhance user experience, encourage user participation, and make the website or web application more enjoyable and effective.
Key Elements of Interactive Web Design:
User Interface (UI): The UI is the visual and Interactive Websites elements of the website that users interact with, such as buttons, menus, forms, and navigation. A well-designed UI makes it easy for users to understand and use the website's features.
User Experience (UX): UX focuses on creating a positive and seamless experience for users while they interact with the website. This involves considering user needs, preferences, and behaviors to design intuitive and efficient interactions.
Animation and Transitions: Adding subtle animations and transitions to elements can make the website feel more dynamic and responsive. However, it's essential not to overdo it, as excessive animation can lead to a cluttered and distracting experience.
Responsiveness: Interactive web design should adapt to different devices and screen sizes. This means the website should be mobile-friendly and work well on various devices, including smartphones, tablets, and desktop computers.
Feedback and Validation: Providing real-time feedback to users when they interact with elements like forms or buttons helps them understand their actions and prevents errors. Validation messages for form inputs are crucial to guide users and reduce frustration.
Microinteractions: These are small, subtle interactions that serve a specific purpose, such as liking a post, clicking a button, or expanding a menu. Microinteractions add a sense of delight and engagement to the user experience.
Scroll and Parallax Effects: Scrolling can be used creatively to enhance storytelling or to trigger animations and effects as users move down the page. Parallax effects, where background elements move at a different speed than foreground elements, can create a sense of depth and immersion.
Gamification: Incorporating game-like elements, such as points, badges, or progress bars, can make the website more fun and encourage users to explore and engage with the content.
Multimedia Elements: Using images, videos, audio, and interactive elements like sliders and carousels can make the website more engaging and visually appealing.
Personalization: Tailoring the user experience based on individual preferences and behavior can make the website feel more relevant and user-centric.
Remember that interactive web design should not sacrifice usability and accessibility for the sake of novelty. The goal is to strike a balance between creativity and user-friendliness, ensuring that all visitors can easily interact with and enjoy the website.
Interactive web design is a powerful and essential approach to creating engaging and user-friendly websites. By incorporating interactive elements, such as animations, hover effects, interactive forms, and dynamic content, web designers can enhance the user experience and encourage visitors to stay longer on the site.
One of the key benefits of interactive web design is its ability to create a more memorable and enjoyable browsing experience. Users are more likely to connect with a website that responds to their actions and provides instant feedback. This increased engagement can lead to higher user retention, increased conversions, and improved brand perception.
Furthermore, interactive web design plays a crucial role in keeping up with the ever-evolving digital landscape. As technology advances and user expectations grow, static and traditional web designs may fall short in delivering the desired user experience. By embracing interactive design principles, websites can adapt to various devices and cater to different user preferences, ensuring they remain relevant and competitive in the online space.
Additionally, interactive web design fosters better communication and interaction between businesses and their customers. Through interactive elements like chatbots, feedback forms, and interactive product showcases, companies can gather valuable insights, understand their audience better, and provide personalized solutions to their users' needs.
However, while interactive web design can be highly beneficial, it should be approached with care. Overloading a website with unnecessary animations or complex interactions can lead to slow loading times and a cluttered user interface, which can be counterproductive and frustrating for users. Thus, striking the right balance between functionality, aesthetics, and user-friendliness is crucial.
Interactive web design is a vital component of modern web development that can significantly impact user engagement, brand perception, and business success. By creating dynamic, user-centric, and visually appealing experiences, web designers can elevate their websites and ensure they stay ahead in an increasingly competitive digital world.
2 notes
·
View notes
Text
How to Improve Website Conversions with Better WordPress Design

Your website isn’t just a digital business card—it’s your best salesperson. But what if you're getting traffic and still not getting leads, signups, or sales? The problem often lies in poor website design and user experience.
If your site is built on WordPress, good news: it's one of the most flexible platforms for improving conversions. In this blog, we’ll show you how to design your WordPress site to not just look good—but convert visitors into customers.
Why Website Conversion Matters More Than Ever
A "conversion" can mean many things:
Filling out a contact form
Signing up for a newsletter
Buying a product
Booking a consultation
Downloading an eBook
The average website conversion rate is just 2–3%. But with the right design tactics, you can double or triple that. WordPress offers the tools—if you use them correctly.
1. Simplify Navigation to Reduce Drop-offs
Users don’t stay long on confusing sites. Your menu should be clear, concise, and structured based on user intent.
Best Practices:
Keep top menu to 5–7 items
Use logical labels (e.g., “Services” not “Solutions”)
Include CTAs in the header or sticky nav
Add breadcrumbs on internal pages for navigation clarity
A web design company in Udaipur can help you map the most intuitive layout based on visitor behavior.
2. Improve Page Load Speed for Better UX
Speed directly affects user satisfaction and SEO. A 1-second delay in page load time can reduce conversions by 7%.
Quick Speed Tips for WordPress:
Use a caching plugin like WP Rocket
Compress images with tools like ShortPixel or Smush
Host on a fast server with SSD storage
Remove unused plugins and scripts
Use a lightweight, optimized theme
Speed isn’t just technical—it’s psychological. A fast site feels more trustworthy and professional.
3. Use Visual Hierarchy to Guide Attention
Don’t overwhelm users with scattered content. Arrange elements based on importance using a clear visual hierarchy.
Visual Strategy:
Place the main CTA (Call to Action) above the fold
Use larger fonts and buttons for primary actions
Apply color contrast to guide attention
Use whitespace to break up sections
Bold your value proposition in the hero area
A good first impression can cut bounce rates significantly.
4. Optimize Your WordPress Forms
Your contact or lead form is the final step in the conversion path. If it's confusing or too long, users will abandon it.
Form Optimization Tips:
Ask only for essential info (name, email, message)
Use inline validation for real-time error checking
Add trust elements (privacy note, testimonials)
Make buttons action-oriented: “Get My Quote” vs “Submit”
Use mobile-friendly form layouts
Tools like WPForms or Gravity Forms help create beautiful and responsive forms without coding.
5. Make Your CTAs Impossible to Ignore
Your call-to-action (CTA) is what drives results. If it's weak or hard to find, you're missing out.
Effective CTA Tactics:
Use active language: “Get Started,” “Book Now,” “Claim Offer”
Use buttons with high-contrast colors
Place CTAs at strategic points (top, middle, bottom of the page)
Test pop-ups and sticky bars for lead magnets
Align CTA text with the offer’s value
Use A/B testing to discover what CTA text, color, or position works best for your audience.
6. Add Trust Signals to Boost Confidence
Visitors are more likely to convert when they trust your business. WordPress makes it easy to add trust-building features.
Trust Elements You Should Include:
Customer reviews and star ratings
Client logos or “As Featured In” badges
Secure SSL badge (https and padlock)
Clear contact info with map
Certifications, memberships, or awards
Social proof works—especially in industries like hospitality, healthcare, education, and services.
7. Use Conversion-Focused WordPress Themes
Not all WordPress themes are designed for business growth. Some focus too much on design and forget functionality.
What to Look For:
Mobile-responsive layout
Optimized for fast load times
Easy integration with marketing plugins
Customizable header, footer, and CTA areas
SEO-friendly markup
A custom-coded theme from a WordPress Development Company in Udaipur can give you both performance and pixel-perfect design.
8. Add Live Chat or WhatsApp Integration
Modern users want immediate responses. Adding live chat or WhatsApp can dramatically increase inquiries and reduce bounce.
Recommended Plugins:
Tidio
WP-Chatbot
WhatsApp Chat Button by Cresta
HubSpot Live Chat (also integrates with CRM)
Just make sure someone’s actively managing it—or use chatbots for off-hours.
9. Track & Analyze User Behavior
WordPress easily integrates with tracking tools to help you understand how users behave—and where they drop off.
Top Tools:
Google Analytics
Microsoft Clarity (heatmaps and session recordings)
MonsterInsights (WordPress plugin for analytics)
Hotjar
Data-driven design decisions help you focus on what actually increases conversions—not just what looks good.
10. Update Your Content & Offers Regularly
Stale websites drive users away. Keep your WordPress site fresh with:
Seasonal offers or time-limited deals
New blog posts or success stories
Updated FAQs
Changed pricing, testimonials, or CTAs
Your homepage should evolve as your business does.
Final Thoughts
Great WordPress design isn’t about flashy visuals—it’s about clarity, speed, trust, and action. Every design element, layout decision, and plugin you use should serve one purpose: driving conversions.
0 notes
Text
Best WordPress Course in Jalandhar
WordPressCourse #LearnWordPress #WordPressTraining #WordPressTutorial WordPressClasses
If you’re in Jalandhar and want to learn how to create stunning, functional websites without needing to code from scratch, TechCadd’s WordPress course in Jalandhar is the perfect solution.
Why Choose WordPress?
WordPress is user-friendly, customizable, and ideal for anyone looking to build websites for personal blogs, eCommerce stores, portfolios, or business ventures. Whether you’re a student, entrepreneur, freelancer, or digital marketer, WordPress skills can significantly boost your career opportunities and income potential.
Why TechCadd?
TechCadd is one of Jalandhar's premier IT and digital skill training institutions. Praised for its practical, hands-on teaching style, TechCadd has a WordPress training program for both freshers and those with basic web development experience.
At TechCadd, there is emphasis on practical skills, and their curriculum is crafted by industry professionals to align with the latest web development trends and employment market needs. The course is practical in nature, with students being able to develop live websites throughout the training.
Location and Time
TechCadd's Jalandhar WordPress classes are conducted in detailed, step-by-step instructions in:
WordPress installation and setup
WordPress dashboard and settings understanding
WordPress themes selection and customization
Essential plugin use for functionality
Construction and management of pages, posts, menus, and widgets
Contact forms, image galleries, and blog construction
Construction of eCommerce websites with WooCommerce
SEO fundamentals for improved site visibility
Site security, backups, and performance optimization
This in-depth WordPress tutorial guarantees students with a thorough knowledge of constructing and maintaining a professional site.
Who Can Join?
The course is perfect for:
New students and graduates pursuing IT or digital marketing careers
Freelancers who wish to add web development services to their portfolios
Small business owners who host their own sites
Bloggers, content creators, and influencers
No coding background is needed—TechCadd begins with the fundamentals and progressively increases to more advanced matter.
Certification and Career Guidance
On completing the course successfully, students are awarded a professional certification in WordPress. TechCadd also offers placement assistance, with the company assisting the students in securing internships, freelance assignments, or full-time employment in prominent enroll now
If you’re ready to take your skills to the next level, don’t miss the opportunity to learn from the best. TechCadd’s WordPress course in Jalandhar is the stepping stone to a successful digital career. Join hundreds of students who’ve transformed their futures with practical, job-ready training.
Visit TechCadd today to schedule a free demo session and start your journey toward becoming a WordPress pro.
visit now:
https://techcadd.com/best-wordpress-course-in-jalandhar.php
#WordPressCourse #LearnWordPress #WordPressTraining #WordPressTutorial #WordPressClasses
0 notes
Text
How to Start Blogging in India: A Complete Guide for Beginners
In the digital age, blogging has evolved into a powerful tool for sharing knowledge, building a brand, and even earning a sustainable income. For aspiring writers and entrepreneurs wondering how to start blogging in India, this article will provide a simple yet effective roadmap to get started.
1. Choose Your Niche
The first step is choosing a niche that aligns with your interests and has a good audience. Popular blogging niches in India include travel, tech, fashion, finance, health, education, and lifestyle. A focused niche helps you stand out and build authority.
2. Pick a Blogging Platform
To start blogging, you need a platform. WordPress.org is the most popular and flexible choice for professional blogging. It requires purchasing a domain and hosting plan, but it gives you full control. Other options include Blogger, Wix, and Medium for beginners who want to start without investing money initially.
3. Buy a Domain and Hosting
Choose a domain name that reflects your blog’s topic and is easy to remember. Hosting services like Bluehost, Hostinger, and SiteGround offer affordable plans suitable for Indian bloggers. Make sure the host provides fast speeds and good customer support.
4. Set Up Your Blog
Once hosting and domain are set, install WordPress (most hosts offer one-click installation). Choose a clean, responsive theme. Customize it with your logo, color scheme, and essential plugins like Yoast SEO, Jetpack, and Google Analytics.
5. Create Quality Content
Content is king. Start writing high-quality, original posts that solve problems or provide value to readers. Use keywords wisely to optimize your content for search engines (SEO). Create a content calendar and stay consistent with publishing.
6. Promote Your Blog
Use social media platforms like Instagram, Twitter, LinkedIn, and Facebook to share your posts. Join blogging communities and forums to network and gain visibility. Email marketing can also help build a loyal reader base.
7. Monetize Your Blog
Once you gain traffic, you can monetize your blog through ads (Google AdSense), affiliate marketing, sponsored posts, or selling digital products like eBooks and courses.
Alternatively, if you're more interested in building websites than writing, consider exploring the web development roadmap. It starts with learning HTML, CSS, and JavaScript, and moves into frameworks like React or backend skills like Node.js and databases. Web development is also a great skill to complement blogging, especially if you want full control over your site’s design and performance.
Final Thoughts
Starting a blog in India is easier than ever, thanks to accessible tools and a growing online audience. Whether your goal is to share your story, educate others, or build a business, now is the perfect time to start. Just stay consistent, keep learning, and adapt to feedback—and success will follow.
0 notes
Text
Learn How to Build a WordPress Block Theme Style Variation — Speckyboy
New Post has been published on https://thedigitalinsider.com/learn-how-to-build-a-wordpress-block-theme-style-variation-speckyboy/
Learn How to Build a WordPress Block Theme Style Variation — Speckyboy
WordPress block themes offer plenty of flexibility. You can make style and layout changes within your web browser – no coding knowledge is required. They can also include extras like block patterns and style variations.
Style variations give you a head start on design. They allow us to create multiple color and typography combinations. They also house custom block styles defined in the Site Editor. Anything in a theme.json file can also be included in a style variation.
This is handy for web professionals and users alike. Choose the variation that suits your needs and start building your site.
Creating a custom block theme style variation is easier than you think. The entire process takes place in the WordPress Site Editor. A simple variation can be built in minutes.
So, follow along as we build a style variation! We’ll show you how to point and click your way to a custom design.
Style Variation Project Requirements
The requirements for building a custom style variation are minimal. You’ll need:
We don’t recommend using a production website for this process. A staging or local WordPress installation is the safer way to go.
Let’s Build a Style Variation
Now, it’s time to start building! Log in to your WordPress website and follow the steps below.
Step 1: Open the WordPress Site Editor
First, navigate to Appearance > Editor in the WordPress admin to open the Site Editor. Then, click the Styles link in the left sidebar.
The Styles panel includes links for Typography, Colors, Background, Shadows, and Layout. You’ll also find a Browse Styles link that displays available style variations for the theme.
Finally, the Blocks link allows you to customize individual block styles across the site.
Step 2: Change Your Theme’s Styles
This step is all about personal preference. Work your way through the Styles panel and start making changes.
Color and typography are the most obvious changes, but you can take things further. For example, you can change the layout width and spacing. Plus, every block included with WordPress can be customized. Add margins, padding, borders, or custom CSS.
We covered the basics in our variation, including:
Created a custom color palette;
Installed new fonts from Google Fonts;
Added custom spacing for the Group and Paragraph blocks;
Changed the look of the Button block;
The result is an earthy look that aims for simplicity. But you can do as much or as little as you like. Just remember to save your changes when done.
Step 3: Save Your Style Variation
Our next task involves saving our custom style variation. This functionality is part of the Create Block Theme plugin.
The feature is located within the Site Editor. Here’s how to find it:
While in the Site Editor, click on the right panel, highlighted in green below:
Click the wrench icon on the upper right of the screen and select Create Theme Variation:
Name the variation and ensure the Save Fonts box is checked. We’ll call ours “Beautiful Earth.”
Click the Create Theme Variation button to save the settings.
Once saved, the new variation is added to the list in the Browse Styles area of the theme editor. Hovering over the variation reveals its name.
How to Use Your Style Variation on Another Site
Style variations are portable and can be used on multiple websites. The process involves copying the generated JSON file and adding it to the desired site.
Locate the style variation’s JSON file in /wp-content/your-theme/styles/ Replace your-theme with the name of the theme you’re using (ours is twentytwentyfive).
For reference, our JSON file is called beautiful-earth.json
Copy your style variation’s JSON file.
On your new website, paste the file into /wp-content/your-theme/styles/ – you may need to upload the file via SFTP or your web host’s file manager.
You’ll now be able to choose the style variation within the Site Editor.
About Custom Fonts
Earlier, we mentioned the ability to add custom fonts to a style variation. It requires a few extra steps to work when moving your variation to a new site.
Locate the custom fonts you added at /wp-content/themes/your-theme/assets/fonts/
Copy each font’s respective folder.
Paste the font folders into the same directory on your new site. Once again, you may need to upload them.
Give Your Block Theme a Custom Look
Style variations are a convenient way to add personality to your block theme. You can build them to suit your project requirements.
They also act as a starting point for designers. You can continue to add custom styles after applying a variation. The changes you make will be saved in the site’s database.
There’s also an option to reset the styles to the variation’s defaults. That makes it easy to experiment without losing the key elements of your design.
The best part is that style variations don’t require coding expertise. That puts custom design within everyone’s reach.
Related Articles
Related Topics
Written by Eric Karkovack
Eric Karkovack is a web designer and WordPress expert with over two decades of experience. You can visit his business site here. He recently started a writing service for WordPress products: WP Product Writeup. He also has an opinion on just about every subject. You can follow his rants on Bluesky @karks.com.
Read more articles by Eric Karkovack
#ADD#admin#Articles#assets#background#borders#box#browser#Building#Business#change#coding#Color#colors#content#CSS#Database#Design#designers#displays#earth#easy#folders#fonts#Google#google fonts#green#how#how to#How to Use
1 note
·
View note
Text
Cryptiva elementor Template Kits

Cryptiva Elementor Template Kits: The Ultimate Solution for Cybersecurity Websites Introduction to Cryptiva Elementor Template Kits In today's digital landscape where cybersecurity threats loom large, having a professional online presence is crucial for security service providers. The Cryptiva Elementor Template Kits offer a complete design solution tailored specifically for cybersecurity firms, IT security consultants, and digital protection services. These premium templates empower you to create a stunning, conversion-focused website without any coding knowledge. Why Choose Cryptiva Elementor Template Kits? The Cryptiva Elementor Template stand out as the perfect choice for cybersecurity businesses looking to establish trust and authority online. Designed with security professionals in mind, these templates feature: Dark-mode optimized designs that convey security and professionalism Specialized sections for security services, threat monitoring, and client case studies Conversion-focused layouts that highlight your unique value proposition Fully responsive designs that work perfectly on all devices Key Features and Benefits Professional Cybersecurity Design The Cryptiva Elementor Template feature sleek, modern designs with security-focused visual elements that immediately communicate your expertise to potential clients. Complete Template Collection These kits include: Pre-designed homepage layouts Service pages for different security offerings Team member profiles Case study templates Contact forms with security verification Easy Customization with Elementor Using the drag-and-drop Elementor builder, you can easily customize every aspect of these templates to match your brand identity without touching a single line of code. Technical Specifications Compatible with WordPress 5.0+ Requires Elementor 3.0+ 100% responsive design SEO-optimized structure Fast loading times Perfect Use Cases The Cryptiva Elementor Template Kits are ideal for: Cybersecurity consulting firms Penetration testing services Network security providers Data protection consultants Security software companies How to Install and Use Getting started with your Cryptiva Elementor Template Kits is simple: Download the template files from our website Ensure you have WordPress and Elementor installed Import the templates through Elementor's template library Customize with your content, images, and branding Publish and launch your professional cybersecurity website For additional functionality, consider pairing these templates with our collection of nulled WordPress themes to expand your design possibilities. Frequently Asked Questions Do I need coding experience to use these templates? Not at all! The Cryptiva Elementor Template Kits are designed for complete beginners. The intuitive Elementor interface makes customization simple and visual. Are updates included with my download? Yes, you'll receive all future updates to ensure compatibility with the latest WordPress and Elementor versions. Can I use these templates for multiple client websites? Absolutely! These templates can be used across unlimited projects, making them perfect for web designers serving cybersecurity clients. What if I need additional form functionality? For advanced form features, we recommend complementing your site with wpforms nulled to create powerful security contact forms. Final Thoughts The Cryptiva Elementor provide everything you need to launch a professional, trustworthy cybersecurity website quickly and efficiently. With their specialized design elements and easy customization, you can establish your online presence and start attracting high-value clients immediately. Download your copy today and take the first step toward building a website that reflects the quality of your security services.
0 notes
Text
How to Add JavaScript to WordPress: A Simple Guide for Beginners
JavaScript is a powerful scripting language meant for bringing life into WordPress websites. JavaScript takes away all the staticness from your site and turns it into an interesting user experience with interactive forms, content that updates dynamically, and smooth animations. The newbie in WordPress finds it quite confusing as a matter of fact: how, really, does one typically add JavaScript to a WordPress site?

Worry not- including JavaScript in WordPress is far from the daunting task one might think. In this very guide, we present several easy methods to include JavaScript on your site, some best practices to keep the exercise smooth, and a few tips on avoiding common pitfalls.
Why Add JavaScript to Your WordPress Site?
Before diving in, here is a quick review of the importance of adding JavaScript:
Enhances User Experience: Makes the website interactive and engaging.
Dynamic Content: Updates content without loading the page.
Form Validation: Validates forms and instantly gives feedback.
Animations: Adds sliders, fades, or even hover effects.
Third-party Tools: JavaScript is required by many third-party services such as chatbots or tracking software.
Now that you know why it’s beneficial, let’s see how you can add it to your WordPress site.
Method 1: Using the Theme Customizer (Small Scripts)
If your script is just one small snippet (say, a tracking code), then the WordPress customizer can be used.
+ Step 1: Go to Your WordPress Dashboard
Log in and navigate to Appearance > Customize.
+ Step 2: Find Additional CSS/JS or Additional Code
Some themes and plugins offer the ability to add small code snippets (labeled Custom JavaScript or something to that effect).
+ Step 3: Enter Your Script
Paste the JavaScript code between the <script></script> tags.
+ Step 4: Publish
Click Publish to make the changes live.
Example:
<script>
console.log("Hello, this is my custom JS!");
</script>
Note: This method works great for short snippets, but anything bigger will require the use of a child theme or plugin.
Method 2: Using the “Header and Footer” Plugin (Easiest for Non-Coders)
For the average user, installing this plugin is probably the easiest method.
Installation of Plugin
Navigate to Plugins > Add New and search for “Insert Headers and Footers.” Install and activate it.
Access to the Plugin
Navigate to Settings > Insert Headers and Footers.
Provide Your JavaScript
Insert your JavaScript code in the appropriate box (Header, Body, or Footer).
Save
Save, and you're done!
Advantages of this method:
- No editing is done in the theme files.
- Compatible with most themes.
- Safe and plugin-managed.
Method 3: Adding JS to a Child Theme (For More Control)
If you’re comfortable with a bit of coding, using the child theme is a serious way to introduce JavaScript.
Why would one want to use a child theme?
Because editing those core theme files directly can cause your site to break during a theme update. The child theme keeps your modifications out of harm’s way.
The steps are:
Create a Child Theme
If you haven't yet, create a child theme with a style.css file and a functions.php file.
Enqueue JavaScript
Open your child theme's functions.php and insert this code to enqueue your JavaScript file:
function my_custom_scripts() {
wp_enqueue_script('my-custom-js', get_stylesheet_directory_uri() . '/js/custom.js', array('jquery'), null, true);
}
add_action('wp_enqueue_scripts', 'my_custom_scripts');
What it does:
- tells WP to load your JavaScript file custom.js;
- and, of course, this file should lie in the /js/ folder inside your child theme.
Create the JavaScript File
Create a new file named custom.js in the /js/ folder inside your child theme.
Write Your JavaScript
Put in your code in custom.js.
document.addEventListener("DOMContentLoaded", function() {
console.log("Custom JavaScript loaded!");
Clear Cache
Clear your browser and site cache to see the changes.
Method 4: Through WordPress Block Editor (Individual Posts/Pages)
If you want the JavaScript only on a very particular page or post, you can add the code to it right in the Block Editor (Gutenberg).
Edit Your Page/Post
Open the page or post inside the editor.
Add a “Custom HTML” Block
Search for a block named "Custom HTML" and insert that.
Add Your Script
Paste the script inside the block.
<script>
alert("Hello! This is a page-specific script.");
</script>
Preview and Publish
Preview it to test and publish!
Best Practices for Adding JavaScript to WordPress
Enqueue Scripts Properly
Make use of wp_enqueue_script() instead of manually editing header.php or footer.php so that compatibility is ensured.
Avoid Inline Scripts for Large Code
Large inline scripts tend to slow down a website. Instead, keep the JavaScript in external files.
Use a Child Theme
Never keep directly editing the parent theme so that your changes don't get wiped out upon update.
Minify and Combine
Consider minifying JavaScript files and combining them for better performance (using plugins like Autoptimize).
Test Before Publishing
Tests should always be done for your JavaScript in a staging environment prior to pushing it to a live site.

Troubleshooting Common Issues
Script Not Loading?
Check to see if the file paths are indeed correct and if all caches have been cleared.
JavaScript Errors?
Look into your browser's console for any errors; trace those errors back and resolve them.
Plugin Conflicts?
Plugins might sometimes load conflicting scripts. Disable the plugins one at a time to find the culprits.
Adding JavaScript to the WordPress site is a complete game-changer in the high-level interactions and engagements of users. The path may be simple if you are using a simple plugin, editing a child theme, or injecting snippets into the editor. Key Takeaways for You:
• Plugins like Insert Headers and footers should be used for quick and easy jobs.
• Use a child theme and enqueue scripts for more involved use.
• Lastly, try to test always and follow the best performance and security practices.
This guide can help you kick-start some dynamic and interactive stuff for your WordPress site! Looking to make the switch? Talk to a Digital Marketing Company in Chandigarh that knows exactly how to take you from the street corner to the top of Google.
0 notes
Text
Expert Digital Growth Solutions for Branson Businesses
Elevating Local Brands with Smart Web Solutions A strong digital foundation is essential for every modern business, especially in competitive markets like Branson. Investing in Website Development Service in Branson ensures companies stand out with a responsive, functional, and aesthetically pleasing site that reflects their brand identity. With user experience becoming a decisive factor, a professionally built website sets the tone for customer engagement. Today’s businesses demand fast-loading pages, mobile responsiveness, and easy navigation, all achievable with the right development service in Branson. These features are more than aesthetic—they directly influence conversion rates and online visibility.
Responsive Design and Scalable Features Matter Scalability and responsiveness are two vital aspects often overlooked during initial site creation. By leveraging a reputable Website Development Service in Branson, local businesses can access tailor-made solutions that grow with them. As businesses expand, their websites must accommodate more content, product listings, and interactive features. A well-developed site not only supports these needs but also maintains speed and reliability under growing traffic. It positions the brand as trustworthy and future-ready.

Optimizing for Search Engines with a WordPress Focus Search engine optimization is crucial to drive organic traffic, especially for WordPress-based platforms. Specialized SEO For Wordpress Website In Branson helps tailor content, structure, and back-end performance to align with Google’s ever-evolving algorithm. When done correctly, WordPress SEO enhances page load time, metadata usage, internal linking, and keyword density. Local businesses benefit significantly by appearing in geo-specific searches, connecting them with high-intent users seeking their services or products.
Content Strategy and Performance Analytics Integration Building a site and optimizing it is only the beginning. The next step involves creating a content strategy that speaks directly to the target audience. With SEO For Wordpress Website In Branson, companies can integrate valuable blog posts, service pages, and visual content that resonate with user intent. Performance analytics provide insights into visitor behavior, bounce rates, and click patterns, guiding ongoing improvement efforts. This continual refinement builds domain authority and maintains visibility in search results.
Security and Maintenance to Support Long-Term Success Beyond the design and SEO elements, technical security and routine maintenance ensure long-term success. Using a reliable Website Development Service in Branson, businesses can implement SSL certificates, firewalls, and regular backup protocols. A secure website boosts customer confidence and prevents potential data breaches. Simultaneously, maintenance updates keep plugins, themes, and overall WordPress infrastructure functioning optimally, ensuring a seamless experience for users across devices.
Combining Strategy, Design, and Search Performance When digital marketing efforts are combined with high-performing websites, the results are substantial. Using focused SEO For Wordpress Website In Branson, brands in the area are finding greater visibility, improved conversion rates, and stronger customer loyalty. An optimized WordPress website functions not just as a digital storefront but as a lead generation machine when paired with solid technical and content strategies.
Building a Reputation Through Digital Excellence Establishing credibility online goes beyond just having a website. Consistency in branding, ease of navigation, and on-page SEO all play a part in how users perceive a business. With the help of Website Development Service in Branson, businesses can create platforms that reflect professionalism and reliability. The attention to detail in development enhances the user's journey and keeps them coming back. This digital reputation becomes a cornerstone of broader business growth in today’s competitive landscape.
OZARKSEO is dedicated to helping Branson businesses make their digital presence not just visible—but powerful. With their support, companies can fully capitalize on both development and SEO strategies tailored to WordPress.
check out our site for more details.
SEO Service Provider in Ozarks
Local SEO Help in Springfield
0 notes
Text
How to Launch Your First Business Website Using WordPress
Launching your first website can feel overwhelming — especially when you're just starting a business. But with the right platform and guidance, it becomes a manageable, even exciting, milestone. And that platform, more often than not, is WordPress.
Used by over 40% of all websites globally, WordPress is beginner-friendly, flexible, and scalable — making it the top choice for startups, freelancers, and local businesses. In this guide, we’ll walk you through the exact steps to launch your first professional WordPress website, and highlight how expert help can make the process even smoother.
Why WordPress is Perfect for First-Time Website Owners
If you’re new to web development, you want something:
Easy to manage
Affordable
Customizable without coding
Reliable and secure
Optimized for SEO
WordPress checks all the boxes. You can build blogs, portfolios, landing pages, or even online stores — all under one roof.
And when paired with professional assistance from a trusted WordPress Development Company in Udaipur, your website can be set up the right way from day one — saving you time, stress, and costly mistakes.
Step-by-Step: Launching Your First WordPress Website
Let’s break down the process into actionable steps.
Step 1: Buy a Domain Name
Your domain is your web address (e.g., yourbusiness.com). Choose something:
Short and memorable
Easy to spell
Reflective of your business name or service
Buy it through registrars like GoDaddy, Namecheap, or Google Domains.
Step 2: Choose a Hosting Provider
Hosting is where your website lives on the internet. For WordPress, select a host that offers:
One-click WordPress installation
Fast load times
99.9% uptime
Good support
Recommended options include SiteGround, Hostinger, Bluehost, or A2 Hosting.
Step 3: Install WordPress
Most hosts allow you to install WordPress with a single click. Once installed, you can log into your dashboard (yourdomain.com/wp-admin) and start building.
Step 4: Pick a Theme That Matches Your Brand
A theme controls your site’s design. WordPress offers thousands of free and premium themes.
For beginners, use lightweight and customizable themes like:
Astra
Neve
OceanWP
Hello Elementor
Want a fully unique and brand-aligned design? Hire a professional web design company in Udaipur to customize a theme or build one from scratch.
Step 5: Add Essential Plugins
Plugins add functionality without needing to code. Start with these:
Elementor – drag-and-drop builder
Yoast SEO – optimize your site for search engines
WPForms – create contact forms
Smush – optimize image size
UpdraftPlus – automatic backups
Wordfence – security protection
Only install what you need to keep your site light and fast.
Step 6: Create the Core Pages
At minimum, your website should include:
Home – your value proposition
About – your story and credibility
Services/Products – what you offer
Contact – how to get in touch
Privacy Policy & Terms – especially if collecting user data
A blog page is also recommended to improve SEO and build trust.
Step 7: Customize with Your Branding
Upload your logo and favicon
Set your brand colors and fonts
Use real photos where possible
Write authentic, conversion-friendly copy
Consistency builds credibility. Your website should look and sound like your business.
Step 8: Set Up Google Tools
To track performance and improve SEO:
Connect your site to Google Analytics
Submit your sitemap via Google Search Console
Optimize for local search with Google Business Profile
WordPress plugins like Site Kit make this easy, or you can have your developer handle it.
Step 9: Optimize for Speed and Mobile
Google ranks mobile-first. Ensure:
Responsive layout
Fast load times
Compressed images
Minified CSS/JS
Mobile testing on tools like PageSpeed Insights
If you're unsure, have your site tested and fine-tuned by experts.
Step 10: Launch and Promote
Once your site is ready:
Test all pages, links, and forms
Enable SSL (https)
Share your site on social media and with clients
List it on local directories and map listings
Start blogging or updating content regularly
Remember — your website isn’t a one-time project. It’s a living, evolving asset.
Why Get Professional Help for Your First WordPress Site?
While DIY WordPress is possible, having experts on board can fast-track your launch and ensure your site is:
Custom-built for your audience
SEO-optimized from day one
Secure and backed up
Built with speed and scalability in mind
Integrated with tools and plugins professionally
The right developers also offer ongoing support so you can focus on growing your business, not fixing bugs.
Real-Life Example: A Freelancer’s First Website
A graphic designer in Udaipur wanted to go online. They bought a domain and used a free theme but struggled with:
Contact form not working
Poor mobile layout
Slow speed on mobile
Zero traffic after weeks of launch
After partnering with a professional agency, their site was redesigned, optimized, and integrated with Google tools. Within 30 days, they ranked on Google for “freelance designer in Udaipur” and started receiving inquiries.
Final Thoughts
Launching your first WordPress website is more than just picking a theme and hitting “publish.” It’s about creating a strategic online presence that reflects your brand, builds trust, and drives results.
By following this roadmap — and leaning on the support of a trusted web design company in Udaipur — you can confidently build a website that grows with your business.
0 notes