#i watched their rendering tutorial vid
Explore tagged Tumblr posts
Visit Tumblr Blog
Explore Tumblr blogs with no restrictions, modern design and the best experience.
Last Seen Tumblr Blogs


Fun Fact
BuzzFeed published a report claiming that Tumblr was utilized as a distribution channel for Russian agents to influence American voting habits during the 2016 presidential election in Feb 2018.
Text

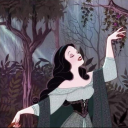
The scrumblos (did i use that word right?)
#not a ship post#its a duo appreciation#ah whatever#geminitay#geminitay fanart#pearlescentmoon#pearlescentmoon fanart#shinyduo#life series#trafficblr#hermitcraft#hermitblr#mcytblr#mcyt#also yes#the rendering is similar to bluebiscuits'#i watched their rendering tutorial vid#hahahahah (^∀^;)#bre4yd art
672 notes
·
View notes
Note
How do you do your TS4 renders there sooo good!!!!!
Thank you so much!!
I use blender 4.3, sims4studio, and sim ripper. There are a plethora of sims 4 render youtube tutorials floating around that I'm sure you would find useful if you'd ever like to start rendering. I would try to learn as much as you can from tutorials (especially non-sim blender videos). Everything I know in blender is in large part due to youtube tutorials. I spent a massive amount of my free time just watching and replicating!
Youtube channel recs:
Blenderguru
Theducky3d
CGgeek
5minutesblender (bit robotic but beginner friendly focused vids)
Blendermadeeasy
A great tumblr account I'd recommend with tutorials (not just blender) is @thefoxburyinstitute
18 notes
·
View notes
Note
2, 4, 5, 6, 8, 10, 15, 16, 19 for the artist asks 👍
hi ghost!!! thanks for the ask :D [ask game]
4. Favourite things to draw?
Eyes and noses!!!!! i love drawing eyes and noses!!!!!!!!!!!!!!! my LOVE EYES AND NOSES!!!!!
5. Anything you haven’t drawn yet but want to?
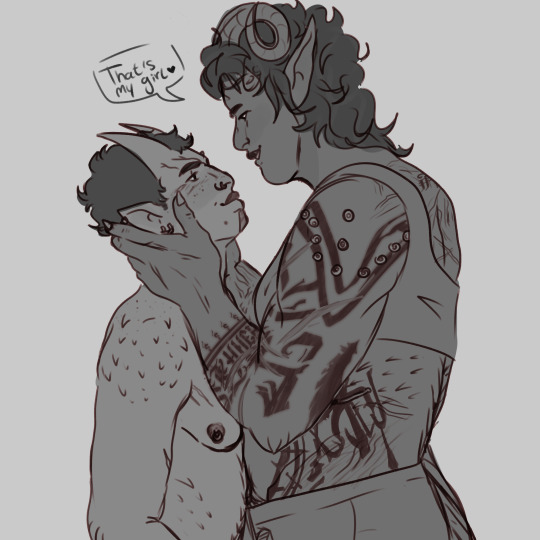
Therése and Harding. I won't lie. They rotate in my mind often yet i don't take action to draw em....... i really should though theyre very cute
6. Which artists inspire you right now?
Obvious answer: my lovely mutuals inspire me a lot. CURRENTLY am having a bit of a love for Vincent van Gogh's painting style because we talked abt him in school again recently... the way he painted is so crunchy. Which! did inspire me to take a shot at painting (which is going FINE so far. my paitings..)
8. What do you like most about your own work?
Answered here! But I also like how I draw character interaction a lot. This is consistently also what people say they like about my art so must be doing something right there!
10. What’s that one thing that inspired you to make drawing your consistant hobby?
Definitely just watching cartoons a lot growing up. When I saw stuff like Teen Titans, ATLA/LOK, Adventure Time and Steven Universe I always went "I WANNA DO THAT!!!!!!" which inspired me to draw like a lot!! Never actually properly animated anything
15. Biggest artist pet peeve?
MMmmm. Maybe when people delete art video tutorials? Like! I understand updating an art tutorial because you learned new things, but I'd argue it's good to keep it to kind of show you improved, how, and maybe incorporating that into the new vid. (can you tell a tutorial i had saved to watch later got removed)
16. What’s the most daunting part of your process? Ex, planning, sketching, lineart, rendering etc
RENDERING. BACKGROUNDS. I DONT LIKE THOSE. I NEED TO GET BETTER AT EM BUT LORD I DONT WANNA!!!!!!!!!
19. Favourite character(s) to draw?
My own OCs mostly LMAO. rn im still using my friend sigrid as a muse. my sigrid!!!!!!!
2. 5 favourites of your own work?
Answered here too! But I'll pull up 5 more
my siglach.... STILL very proud of that karlach hand.

the milf emira drawing i wont lie. look at her
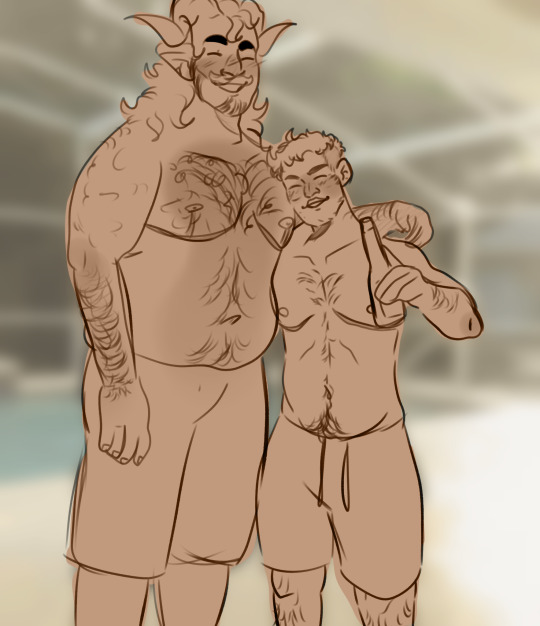
I LIKE THIS KREM AND CHRONOS PIECE A LOT!!!!!!!!!!!!! THEYRE BUDDIES

this ones a bit older but this drawing still means much to me. that's varric's emotional support lesbian DONT touch her

this sig sketch i never finished....... my elegant girl..
#TY AGAIN FOR THE ASK <3<3#i'll share one of my paintings maybe when i finish the one i have planned..#RAGHHHH I LOVE YOU ART I LOVE BEING AN ARTIST#my art#roscoe rambles
5 notes
·
View notes
Text
Disrupt Project Week 8 - 3D Printing Workshop with Jose Berna Moya
Above: The finished animation.
For week eight I ended up signing up for the 3D Printing Workshop, even though I didn't have much in the way of ideas on how to incorporate that into my disrupt project. Basically like always I kinda just signed up for whatever workshop was still available Sunday night.
Our tutor Jose ran us through the basics of 3D printing before helping us brainstorm on how we might leverage that process for our projects. This was a huge help to me and I really have to give Jose credit for going above and beyond to help us out.
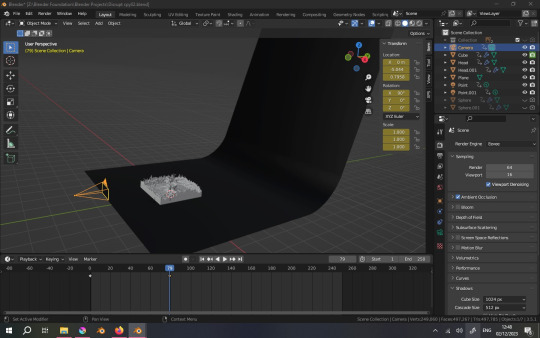
The plan he helped me formulate was to model a 3D version of my clay man in Blender, figure out how to run a destruction simulation on said model, and then 3D print a few select frames of the resulting animation. Walk in the park...

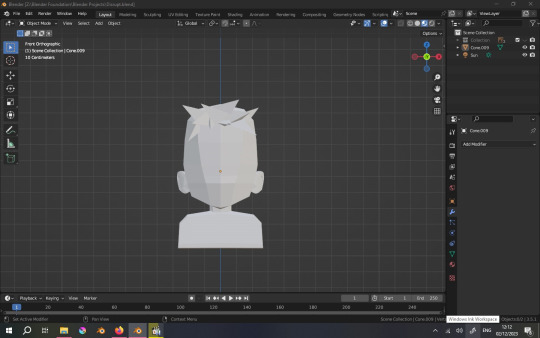
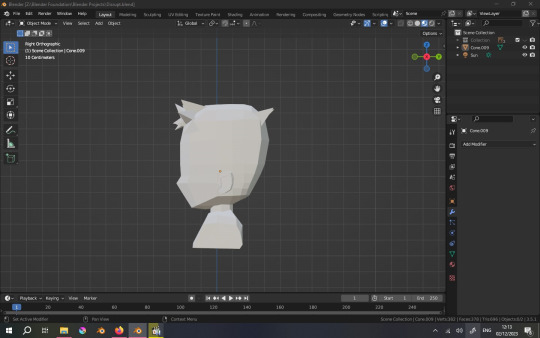
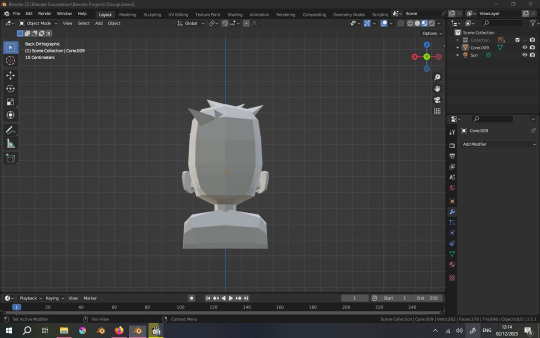


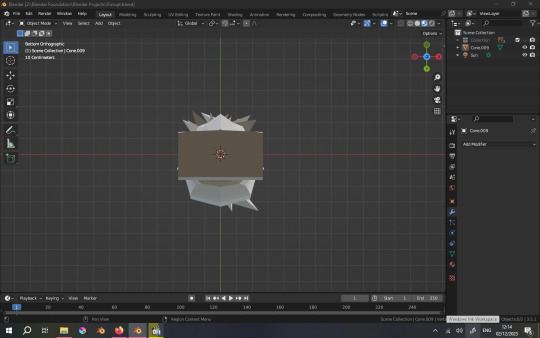
Above: The modelling process.
I engaged in a battle of attrition with Blender over the summer and came out the other side as someone who arguably knows how to use the software, arguably...
In translating the design I decided to use a character design by Katsuyoshi Nakatsuru as a base for the model. I thought the funny square heads he did for the Digimon anime would read well in a low poly style. I wanted this to be a younger version of my much older looking clay sculpture. I thought basing the model off a favourite childhood series of mine added real substance to this. As you can see in the final render I did still end up giving him a beard and moustache in the end.
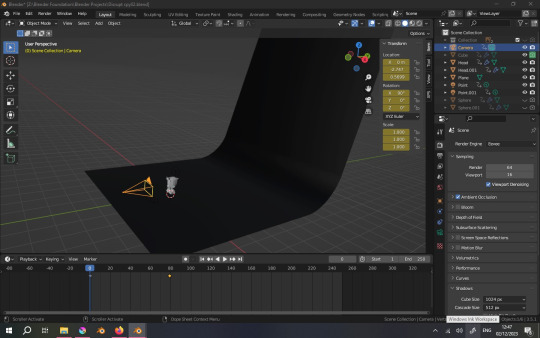
Above: The animating process.
With the model done, the next step was figuring out a good destruction simulation and the animating that. I was familiar with modelling in Blender but this part was all new to me. Luckily there's a great online community around this kind of stuff and finding helpful tutorials on Youtube was 90% of the work.
youtube
youtube
youtube
youtube
Above: The top two vids are what I watched for this project, and the bottom two are what I used to learn Blender over the summer.
All told this took a lot less time than I thought it might. This project isn't over yet though, as I still need to actually 3D print a couple of frames. I'll update my Tumblr again when I get to that, for now I just felt the need to explain what I've been up to over this week. A lot of my projects are nearing completion now, it's just that the timeframe of them doesn't always fit neatly into the weekly workshop format. The clay man for instance...


Above: Soon...
11 notes
·
View notes
Text
VR Project: Week 4 Blog 3;
Normal map baking Research
I followed a tutorial that walked through the process of baking a normal map in Maya. I’ve heard about normal maps before, but this was the first time I actually tried generating one myself.
youtube
Vid; Figura, 2022. Maya Tutorial - How to Bake Normal Maps from High Poly to Low Poly. [video] YouTube. Available at: https://www.youtube.com/watch?v=I9IVtq3wrbs (Accessed: 8 March 2025)..
The basic idea is to transfer details from a high-resolution model onto a low-resolution one using textures. This helps keep the geometry optimized while still holding on to that detailed look. In the example used, there was a high-res sculpted shield and a simplified low-poly version of it. The normal map projected the sculpted details onto the low-poly model and made it look nearly identical under lighting. I started by importing both versions of my mesh into Maya, naming them properly (like "man_low" and "man_high"), and making sure the low-poly version had clean UVs set within the 0-1 space. After checking that, I enabled texture display in the viewport to see the results as they update. Then I headed over to the Transfer Maps section under the Rendering tab. Here, I added the low-poly mesh as the target and the high-poly mesh as the source. One important thing I learnt was adjusting the envelope — this part determines how much of the high-poly mesh gets captured during the bake. If it's too small, some details get left out. So I played around with the settings until the envelope fully covered the sculpt. For the output map, I selected "normal" and saved the file as a PNG in a custom folder. I kept the resolution to 1K for faster testing, and made sure tangent space was selected, since that's usually what engines like Unreal or Unity prefer. I also enabled "connect maps to shader" so I could see the results directly in Maya’s viewport. Once I hit bake, Maya generated the normal map and automatically hooked it up to my material’s bump map. It did show up in the viewport, and I even checked it in the Hypershade window to make sure everything was properly connected. Everything seemed to work fine — until I noticed the problem. Some of the shadows and lighting effects were bleeding into areas they shouldn’t be. It looked like the normal map was creating artifacts, especially around edges where there were sharp details in the high-poly model. I’m guessing it might be due to overlapping geometry or how the envelope was set. So yeah, even though I followed the steps carefully, the result wasn’t quite clean. The baked map had issues that would show up in a game engine. I’ll probably need to go back and tweak either the envelope size, the mesh spacing, or try using a different baking tool altogether. Still, this was a solid intro to the process. Definitely learned a lot.
0 notes
Note
Do you have any tips on how to make my blender renders come out more clean? I don’t have a high tech computer, the company lied to me when they said I have a bunch of space, a good graphics card and all that jazz. I’ve been able to do my renders but i’m starting to get into deeper sim projects that’s gonna take a lot out of my computer. So is there anything i can do to make my work come out nice?
good lighting and since you have a lower spec computer, use evee for your renders over cycles. as long as you keep your scenes manageable (ie low amount of textures/using less pbr to reduce rendering time, good lighting) you should be fine wiht a low to mid spec computer.
i really suggest watching youtube tutorials on nodes and rendering with evee because there's a lot of tricks on there that i had no idea about.
here's some vids i can recommend
youtube
youtube
youtube
7 notes
·
View notes
Note
Hi! I really like your art style. Do you do speedpaints or tutorials on how to draw? If not, do you think you would ever do some in the future?
Hi! I’m flattered that you would ask. I don’t have any speedpaint vids and honestly have never thought to make any. Will I ever? At this point, I don’t know. We’ll see. As for tutorials, lol, I’m still on the learning path myself so I don’t think I’m going to be making any of those any time soon. I can recommend some though, if you like. I watch a lot of proko and sinix design on youtube. And lately also jyundee because she’s amazing and i’m trying to learn Medibang paint. Bonus, and i know this isn’t a video but i still refer to it from time to time. It’s a rendering tute from @kauriart because i absolutelyove her style. I hope these help.
Thanks for the ask and happy drawing!
4 notes
·
View notes
Note
24 33 47 48
Hi anon!
24. What's your step by step? How do you organize your editing process? First, I pick a song or a theme for the vid. Then, I shorten the music if necessary. I select which clips to use for specific parts of the song (I visualize what I want it to look like first). Next, I go back to the beginning of the vid and add transitions and color grading. I end my editing time by adding overlays and rewatching the vid a couple of times. During that time, I edit my transitions or add different clips. Basically, I play around until I like what I see. The last step is to render the video, watch the final product, and then publish it. I sometimes add transitions as I’m adding clips, so sometimes I don’t work in the aforementioned order.
33. What's your editing program of choice? I work with DaVinci Resolve. It’s not the most popular editing software, but I like using it.
47. What advice would you give to someone who’s just started creating? Be sure to get the best looking footage (1080p or higher) and 5 layered audio (that way you can remove the background noise when you need to). I recommend keeping a library of overlays for your vids (you can find lots of freebies/giveaways on YouTube). If you are unsure about something, watch a tutorial ( they really help when it comes to color grading!). Watch other people’s videos. They’ll give you ideas. Be patient with yourself. Editing can be challenging, but the end result is super rewarding😊
48. What inspired you to start creating at first? I discovered lots of fanvids on YouTube. I found some that I liked and some that I didn’t. When I couldn’t find specific vids (with specific songs or themes), I decided to play around with editing and make my own vids.
Thanks for your questions!! 🥰
Creator Asks
#creator asks#anon#broadwaylover17 asks#vidding#fanvidding#vidder#fanvidder#thanks for the questions!
0 notes
Video
youtube
transparent render tutorial/process vid, v2: beginners’ edition! (written walkthrough under the cut)
yeah okay the last video was really only helpful if you already know the basics of making caps, so here’s another manga panel rendering tutorial for anyone who’s never made a cap in their life, complete with drop-down menus instead of keyboard shortcuts! I tried to be pretty explicit, keeping in mind what things I had to figure out myself when I was learning... still, steps are under the cut!
oh, and bonus: watch me do this at 1500% speed
final product:

Note: i’ve changed a few of my keyboard shortcuts, so yours might not be identical; as such, I tried to avoid them as much as possible!
first of all, useful GIMP navigation shortcuts:
ctrl+R = reset view
scroll wheel = scroll up/down
shift+scroll wheel = scroll left/right
ctrl+scroll wheel = zoom in/out
and tools we’re gonna use:

and finally, the how to:
1. open the page with your panel in GIMP or copy-paste it in, and save your project
2. use the crop tool (shift+C or yellow above) to select the area around what you want to render, then click on that area to crop it
3. click your foreground color (in blue above) and change it to any color you like
4. create a new layer (either by going to Layer>New Layer or Ctrl+Shift+L), and make sure “foreground color” is selected, then click OK
5. drag your new layer below the manga panel layer on the right, then select your manga panel layer again so that it’s highlighted in blue
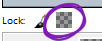
6. click the little squares (indicated in purple above) to reset your fg/bg colors, then the arrows (in green above) to switch them so that white is your foreground color
7. Layer>Transparency>Color to Alpha, make sure it’s set to pure white (it should be by default) and hit OK
8. Layer>Mask>Add Layer Mask, make sure “White (full opacity)” is selected and click OK! This creates a “layer mask”, which basically lets you erase without permanently erasing
(you should probably save here)
9. Click the lasso tool (in red above) and start carefully clicking points to outline the spot you want to render. You don’t have to be as precise as I am (I’m really anal about it), but notice what spots i’m cutting out:
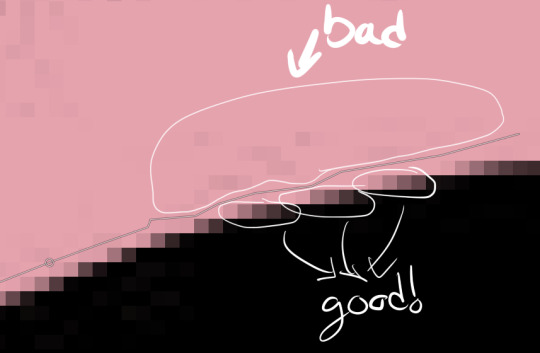
you also might need to cut out certain spots, but I’m a complete idiot and used keyboard shortcuts for this in the video so here’s how you do it:

I made a note of it in the video itself, too! Also, I don’t know if Feather Edges is on by default, but if it is, TURN IT OFF IMMEDIATELY. it’s the absolute worst just trust me
(you might wanna save again)
10. Select>Invert (Ctrl+I) and hit the DEL key, then Select>None (Ctrl+Shift+A)
11. Right click on your layer>Duplicate Layer, right click>Apply Layer mask, right click>duplicate layer (again), & hide the bottom version (the one that still has the layer mask) by clicking the eyeball- it’s just there to be a backup
12. select the top layer and then go to Layer>Transparency>Threshold Alpha, i usually set it to about 123-127 but you may want to go lower; a higher number means it’ll be sharper, but you may have holes in the outline you’ll need to fill in
13. click this little icon to lock the layer:
then Ctrl+F to fill with white, then that little icon again to unlock the layer
14. use the magic wand tool on the area that’s going to be transparent, using Add to Selection if needed, invert the selection, and Ctrl+F to fill with white (NOTE: if there are gaps you’ll need to either fill them or go back and do it again but with a lower threshold for threshold alpha. You can see me do the former in this one)
15. drag the white layer below your other visible copy, crop how you like, and you’re done! I recommend exporting two versions: one with the colored background visible, and one without it. make sure they’re .png files too!
congrats friend u just made a transparent render like a pro
that got a bit wordy but don’t worry, it’s really not that complicated! It took me longer to write this than it did to make the render pffft
feel free to ask if you have any questions!
#world trigger#wtgraphics#mangacap tutorial#graphic tutorial#gimp tutorial#this time ft izuchika#theyre rly easy!! seriously#i made this like 3 days ago and forgot to post it#cookie's edits#//emerges from the dumpster
54 notes
·
View notes
Note
Hi! I really loved your Nirvana in Fire vid, it was PERFECT and EMOTIONAL and *chef's kiss* aaaAAAAAA. Do you have any advice, recs, or tutorials for anyone who's looking to get started on vidding?
Thank you very much, I'm very happy to hear that! <3 I can't really give vidding advice since I'm still new to it and know too little, but here are some things that worked for me: 1) If you're working with lyrics and you don't have to translate anything, lay down the subtitle track first. I used to add subtitles last, but I found that if I added them first, I could see them on the timeline which made it easier to drag/align video clips to the right place. 2) If you're using someone else's translation, it's good form to credit them (and, if possible, link them to your vid after—I’m sure they will appreciate seeing their work on yours). 3) You can also vid on your phone these days, I’m just sadly not up to date with apps. I use InShot (free, with ads) to sub/compile short clips. (It also allows you to upload your own fonts, though I haven’t tried that.)
Recs/Tutorials
Youtube has a lot of free tutorials, just search "[program] + [effect]". XD Sorry if this isn’t helpful, but this is genuinely what I do. If it’s a complex program, I recommend watching a tutorial/walk-through for the kind of video you want to do without trying to follow it, just to get an overview of the interface/controls you want to use. Idk what program you're using or are planning to use, but if you're looking for recs for a program that is both free AND powerful, I AM recommending DaVinci Resolve, which is what I'm using now! The downside is that it doesn't quite look like Adobe or work quite like Adobe, and there may be fewer step-by-step tutorials to achieve specific effects, but if you're just looking to edit video/audio clips together and add a text or subtitle track, it will do the job perfectly! Coloring can also be done with Curves, as you do with Photoshop, you just have to... find the controls...... (that's what Youtube is for XD) (The Coloring tab in DVR is actually very powerful, but a lot of it is technical/professional-level; I stick to the Curves because it’s familiar and good enough for the adjustments I want to make.)
DaVinci Resolve also gives you a surprising amount of control with type/text, but:
a) I am still trying to figure it out (if it allows me to use OpenType features or enable/disable ligatures, I haven’t found those options yet. ALSO, for SOME REASON, the fonts that are available to me to use when I use Text tool vs Text+ tool are different, which is a mystery for another day).
b) It’s not intuitive or beginner-friendly. I definitely did not find the gradient/glow options on DVR until my fourth vid (the latest Nirvana in Fire one) lol. But it’s possible. (As a disclaimer, I’ve been self-learning graphics programs since my early teens so I’m pretty used to finding and figuring out the features I want to use in a program.)
tl;dr
DaVinci Resolve (what I use) PROS & CONS:
https://href.li/?https://www.blackmagicdesign.com/products/davinciresolve
(+) PROS:
Free!
Can do all the basic things AND MORE!
Easy to add audio/video tracks, subtitle tracks, basic text/title tracks
Has an entire Coloring tab (you can use Curves and ignore the more technical controls). It’s not as easy to find at first but it’s also less overwhelming (for me) to see it as a separate process that I can tab in and out of.
You can prettify your text (with difficulty).
You can make text move, fairly easily.
(-) CONS:
Layout/interface is confusing, esp. if it’s your 1st video-editing program.
Fewer resources/tutorials compared to Adobe.
Adding visual effects like gradient/shadow/glow to text is definitely harder AND you still have less control over text, compared to Adobe.
OpenType support is dicey.
Might require more processing power (every now and then the program crashes for me).
I may just be bad at this program, but unless you pre-cut the video clips you want to use—and I don’t, because I’m lazy—and then fiddle a bit with the settings and render your clip library, the playback/preview for your vid gets really laggy with every transition and effect that you add. Not sure if this is true for all video editing programs!
OTHER programs I’ve heard were good for vidding but have not personally tried:
1) Adobe Premiere (Pro???) - USER-FRIENDLY, powerful, tons of tutorials for both basic features and for special effects that they make easy for you. It probably lets you do a lot of fancy type things too. If you have experience with Photoshop or any image-editing program, Adobe products have a lot of the same controls, so they’re easier to pick up.
2) Hitfilm - I have no idea what this is, but a friend of mine mentioned it to me once (she hasn’t used it either) XD
The best thing to do is to jump right in, really! I’ve been enjoying vidding because working with audio and timing keeps me stimulated (whereas gif-ing is purely visual and harder for me to focus on). Good luck, have fun! FINAL DISCLAIMER: I’ve only done 4 or so fanvids, and I only started this year and used that one program (and AfterEffects, once), so please take everything I say with a grain of salt lol.
#replies#omg i'm so sorry for this wall of too much not-very-useful information#i've bolded my recs!!!!!!!!!!
1 note
·
View note
Video
youtube
Insta Vid Review 💯 Create Videos in SECONDS 💯💯💯 Grab Your Copy ▶️ http://bit.ly/2JMv19m Insta Vid Review. Question: what is the number 1 thing you need to make money online? TRAFFIC! However, not just ANY kind of traffic - you need High Quality Traffic that actually converts into sales! Video Traffic is the best traffic you can get... unfortunately not everyone is a video creation expert! That's why I created Insta Vid - it creates videos for you in minutes - without filming, without editing, without rendering and without uploading! It's not only a massive time saver but allows people who are camera shy to create High Quality videos in minutes! Oh and of course the amount of Free Traffic you can get from these is in the thousands of clicks - in ANY NICHE! Watch the demo for details ;) Insta Vid Review, Insta Vid Honest Review, Insta Vid Review and Bonus, Insta Vid Review and Bonuses, Insta Vid Demo, Insta Vid Bonus, Insta Vid Bonuses, Insta Vid Scam, Insta Vid Blackhat, Insta Vid, Get Insta Vid, Buy Insta Vid, Insta Vid Preview, Insta Vid Tutorial, Insta Vid Walkthrough, Insta Vid Free, Insta Vid Giveaway, Insta Vid Free Giveaway, Art Flair, Declan Mc, Zeeshan Ahmed, Art Of Marketing Blog --- If you've enjoyed this Insta Vid Review video, please Subscribe to this YouTube channel for more! Grab Your Copy ▶️ http://bit.ly/2JMv19m SUBSCRIBE 👉 http://bit.ly/2Gd594e SUBSCRIBE to my 2nd YT Channel (IM Product Reviews) 👉 http://bit.ly/2IlDG1C Share this Video 👉 https://youtu.be/mwJbOYAE_iE - Art #ihelpyoumakemoneyonline #workfromhome #howtomakemoneyonline DISCLAIMER: Some of the links mentioned in the video and in the description might be affiliate links, which means that if you use it and will end up buying something, I’ll receive a small commission. These commissions help support the channel and allow me to continue to record more of these Free Training videos for you guys. Thank so much for your support! Please note that results may and will vary. I cannot guarantee that you or anyone else will make any sum of money - it all depends on each person's situation, drive and even luck. I highly suggest you simply look into it and draw your own conclusions.
0 notes
Link
Insta Vid Review 💯 Create Videos in SECONDS 💯💯💯 Grab Your Copy ▶️ http://bit.ly/2JMv19m Insta Vid Review. Question: what is the number 1 thing you need to make money online? TRAFFIC! However, not just ANY kind of traffic - you need High Quality Traffic that actually converts into sales! Video Traffic is the best traffic you can get... unfortunately not everyone is a video creation expert! That's why I created Insta Vid - it creates videos for you in minutes - without filming, without editing, without rendering and without uploading! It's not only a massive time saver but allows people who are camera shy to create High Quality videos in minutes! Oh and of course the amount of Free Traffic you can get from these is in the thousands of clicks - in ANY NICHE! Watch the demo for details ;) Insta Vid Review, Insta Vid Honest Review, Insta Vid Review and Bonus, Insta Vid Review and Bonuses, Insta Vid Demo, Insta Vid Bonus, Insta Vid Bonuses, Insta Vid Scam, Insta Vid Blackhat, Insta Vid, Get Insta Vid, Buy Insta Vid, Insta Vid Preview, Insta Vid Tutorial, Insta Vid Walkthrough, Insta Vid Free, Insta Vid Giveaway, Insta Vid Free Giveaway, Art Flair, Declan Mc, Zeeshan Ahmed, Art Of Marketing Blog --- If you've enjoyed this Insta Vid Review video, please Subscribe to this YouTube channel for more! Grab Your Copy ▶️ http://bit.ly/2JMv19m SUBSCRIBE 👉 http://bit.ly/2Gd594e SUBSCRIBE to my 2nd YT Channel (IM Product Reviews) 👉 http://bit.ly/2IlDG1C Share this Video 👉 https://youtu.be/mwJbOYAE_iE - Art #ihelpyoumakemoneyonline #workfromhome #howtomakemoneyonline DISCLAIMER: Some of the links mentioned in the video and in the description might be affiliate links, which means that if you use it and will end up buying something, I’ll receive a small commission. These commissions help support the channel and allow me to continue to record more of these Free Training videos for you guys. Thank so much for your support! Please note that results may and will vary. I cannot guarantee that you or anyone else will make any sum of money - it all depends on each person's situation, drive and even luck. I highly suggest you simply look into it and draw your own conclusions.
0 notes