#lowpoly workflow
Explore tagged Tumblr posts
Visit Tumblr Blog
Explore Tumblr blogs with no restrictions, modern design and the best experience.
Last Seen Tumblr Blogs


Fun Fact
Celebrities use Tumblr as well.
Text


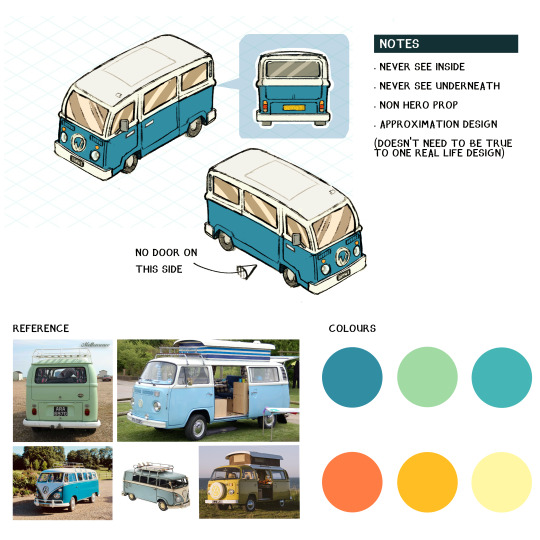
#lowpoly#campervan#blender#b3d#cute#stylised#vehicle#gamedev#gameart#made for a uni presentation on workflow#hand painted#unity
27 notes
·
View notes
Text

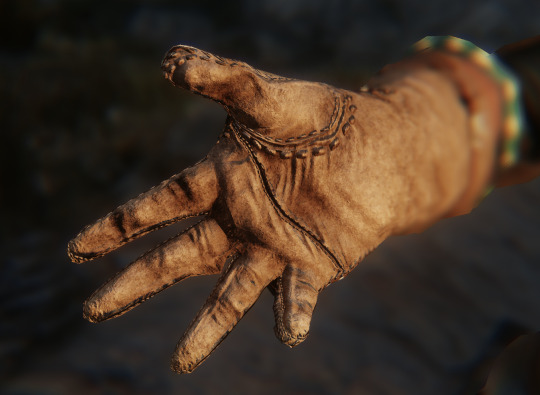
Working on my Squire’s Plate redo is partly an exercise of looking back and seeing how I’ve progressed. I finished the gauntlets today, and I’d like to take the opportunity to compare the textures for the inside of the glove for all the gloves I’ve textured so far. The reason I chose this area is because it’s easy to ignore during gameplay and barely gets shown during screenshots, yet it has the potential for the most personality as it’s literally the palm of the hand. Furthermore, this has been an area that I have always needed to texture, no matter the design of the glove. It allows for a good 1:1 comparison between things.
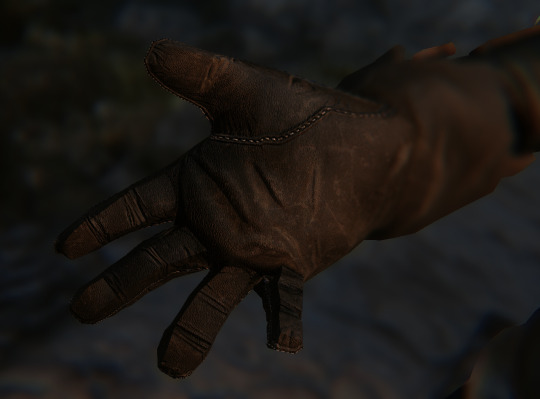
Starting off with the Blackened Steel Vambrace, I must say the leather texture has nice folds and creases showing off personality. It is very rough around the edges, and could use more detail in the color maps and more nuanced creases in the finger areas. The seam work is done quite messily, too. At the time I was set out on creating a good leather material both up close and at a distance, and not so much on creating a leather glove. I can tell you right now that my current work, which I will show last, still does not meet my imagination’s standards.


Moving up, the leather on the Evermorin Gauntlet is downright disappointing. I put in very little effort in the palm texture and only added the bare minimum: the cushioning but at the base of all fingers is accentuated, that’s all. There aren’t even any creases worth mentioning in the fingers. That’s not to say this gauntlet sucks, because if you flip it over you’ll find something I’m proud of to this day. This texture work perfectly illustrates my earlier point of the palm being easily missed, meaning shoddy texture work goes unnoticed.
My first venture into Substance Painter was with the Lorisian Glove. You’ll see that t he seams are way cleaner and not as squiggly as the previous two gloves. I went in the right direction by adding yellowish highlights to the top of the creases to simulate natural wear. Too bad it’s not enough and the palm is not exactly convincing. The thumb, however, looks fucking nice though. Note the lack of detail around the fingers, once again.
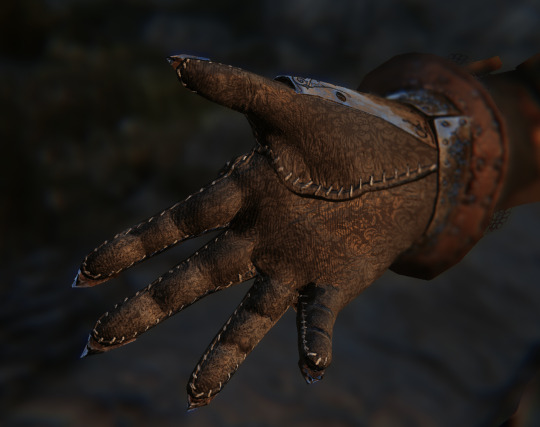
Then we have the Dragonstar Gauntlet. The leather was supposed to be a rough suede esque thing, which means it starts to look crusty really fast. The creases, however, are done pretty nicely. There is defined geometry, with major and minor details. Note the shaping around the base of the fingers, which is cleaner than the previous work. Apart from some deformed stitching, I’d say this is a pretty okay texture. This work builds upon my previous stuff because it uses both larger and smaller creases. None are hand-drawn, all are the result of a rotated overlay and clever masking. All in all, it doesn’t come across as convincing leather.
The Dark Witch Gauntlet technically isn’t leather. But a palm’s a palm. The fingers are very detailed and got a splendid 3d-look to them. The palm, however, is relatively barren. That’s because fabric doesn’t leave crease marks with use like leather does, but I could have added a few here and there because the thing is being used, and it would make it look less like shrink wrapped latex. The few creases that are there are subtle because they are supposed to convey the pulling of fabric close to the seams. Overall, I paid a lot of attention to actually painting the shape of a hand in this one, which you can see around the thumb webbing and the base of the fingers.
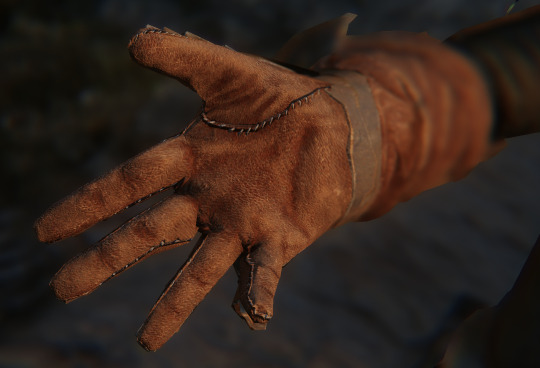
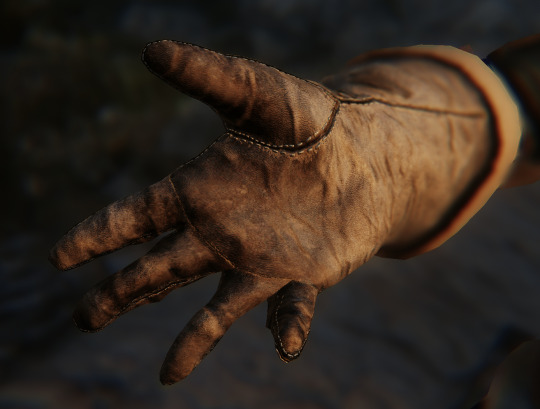
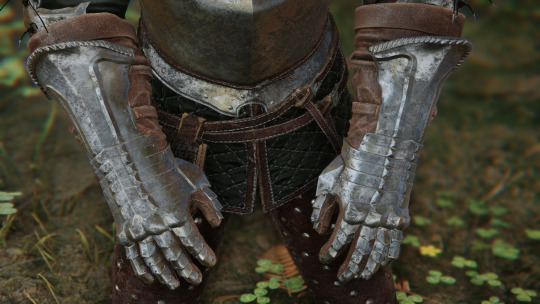
Closing up, we have the palm of the Squire’s Plate. The redo. This is the first gauntlet I textured using a high poly bake. I sculpted all the finger details in blender and transferred them to the lowpoly. The thumb has creases running perpendicular to its axis. The details that I’ve added to other gloves are here, with a few more. What this workflow allowed me to do, though, is to add worn areas based on the sculpt data. So you’ll see that the top of the creases are lighter and their bottoms are darker. One thing to note is that I underestimated the normal strength resulting the baking process, because areas like the base of the fingers are not as defined as I’d like.
The workflow that I used for my most recent project, the Squire’s Plate redo, has allowed me to produce the most lively glove out of them all. Yet I must say that the dragonstar glove has the most intricate details, with creases everywhere running in directions that make sense. The Lorisian glove was made with a good mindset, I just lacked skill and experience. My first glove, the Blackened Steel Vambrace, remains a great work for the time. For a while it was head and shoulders above my other leather work.
This post was for showing you my journey thus far, and for me to learn from my older successes and mistakes. I’ll definitely go back to the Squire’s gauntlet for a little bit to add some more juicy creases because I still have the project files so it’s literally no big deal.
Included are also some pics of the Gauntlet as it looks like right now!
20 notes
·
View notes
Text
"I should get into blender"
Many artists often joke about this.
But honestly, please don't force yourself to do it or think that this is the best way to getting better at 2D art. 3D is its own, very huge, complex and confusing medium of art with a high learning curve. You can easily get frustrated at the start. There's plenty of other ways to use 3D tools to help you.
But if you're scared and still looking to break into it here's some ideas you can do to start small and/or use it to help with your 2D art:
If you just want to model objects for you to trace/use as references: -> Basic lowpoly modelling is enough, especially if you just wanna get a background perspective right. Get some cubes, extrude faces and move around their faces/edges/verts. -> Alternatively, go to sketchfab and look for models, get it into position, screenshot and trace it. No modelling needed. -> Learn how to block out scenes or characters!
If you want to make characters: -> Learn 3D Sculpting! It's a lot more intuitive for a 2D artist. Blender has a sculpting feature. There's also NomadSculpt on iPad but it costs a little money. -> Also helps immensely with anatomy practise! Look up some anatomy references and really work out the details by blocking out the shapes of muscles. -> You can also do other props with sculpting, it's called Hard Surface but it's more difficult to do than organic shapes.
The infamous Blender Donut tutorial: -> This may be subjective but I've seen many 3D artists actually recommend against doing the Blender Donut. It doesn't cover all of the basics. -> Look for tutorials that aren't Blender Guru. You could also just look up individual steps such as "blender lowpoly modelling" or whatever. -> There are multiple ways to start out with a model. I personally like to do lowpoly (also known as low-to-high workflow) without using the subdivision modifier. Find something that's right for you!
3D taught me a ton about art and did make my 2D art improve. But I also do it because it's fun on its own. Don't think you have to do it. You're doing fine.
Also these are just ideas, i am not a professional. I'm simply going off from my own and other art students' experiences.
If you do try it, i wish you good luck and have fun!
#3d#art tips#blender#b3d#this isnt negative i just think the statements of '3d helps you improve your art' and 'dont push yourself to get into 3d' can coexist#every time i see people joke about 'getting into blender is the 'ill work out' for artists' i get upset#bc you dont need to! you are fine#and even if you do want to try it out. you can start small! you dont need to know everything. it doesnt have to be scary#dont learn 5 steps at once just learn one
138 notes
·
View notes
Text


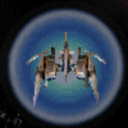
still adjusting the spec map so its not blinding in some lights but its almost thereee. tinkering w body sculpt still too, but a little at a time so it dosnt mess too much w animations. also think i gotta adjust textures as well, im so used to a realistic pbr workflow n matching the stylization is a bit of a challenge. normal map too strong for fabric texture i think. gotta study some of the texture maps from the game up close
but very happy w the base texture/diffuse n retopo, even though i still hate working w something so lowpoly. but good practice n i do need to put in more effort into optimization in general


#her arms hehe... i keep forgetting how tiny they made her in game#still wanna bulk her up more but normal map is gonna help a lot too#mesh is too lowpoly starting to have areas that might get too pointy#jackie makes stuff#think im gonna redo her body sculpt think i messed a bit too much w the placement of her wrist n elbow so anims r looking weird#but tbh good excuse to make her much beefier so i dont mind#still need to make full tanktop tshirt n long sleeve version
3 notes
·
View notes
Text
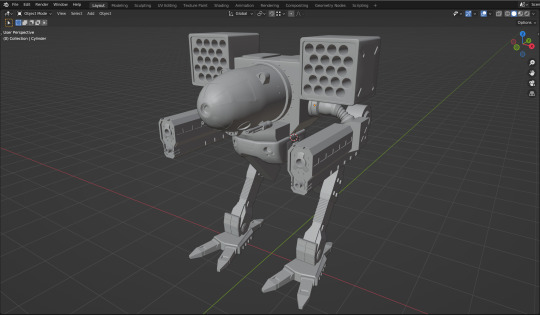
Second shot on this robot, redoing with my full workflow. Highpoly -> lowpoly. Previously I skipped high poly stage and result was far from satisfying. I hoped for decals but, well, they didn't save.
4 notes
·
View notes
Text
Modelling the Main Character - Process pt.1
Previously, I had modelled characters in ZBrush and imported them into Blender, but I remembered that workflow as being very extensive, with manual retopologizing and remeshing of everything. This time, I decided to try out making the whole character on blender itself, and instead of sculpting with a high poly mesh, I would be modelling the character like blocks, in a low poly format.


The style I was going for was chibi and lowpoly eitherway but with smoother edges, so I plan to finish modelling the whole base mesh of the character and then testing out clothing and such afterwards.
0 notes
Text
Producer Meeting 1
(15/11/24)
Confusion - A feeling of unfamiliarity and unsettling nature.
What other ways could could you convey this message? (moving rooms, labyrinth - movie and board game - use procedural generation to make it work). - Mazes that change shape, never letting you get familiar with the layout.
Tasks - why task? What are they for? - Mainly for a doctor's sort of note, or left by a care worker so we know what needs to be done for the day.
Music is memory cue - how are you using this in the game? What evidence do you have for this being a memory cue for those with dementia? - Music Helps for people with Dementia, sometimes evoking old memories and being a common thing that old people remember, even if they don't remember their family.
Visual themes - ps1 lowpoly crushed textures - Old and Unsettling.
Current workflow with pbr is more efficient but doesn’t fit the theme that you are going for. - With enough atmospheric building, the game would look a lot better.
Amining for Ambiguity - Silent hill fog - Mainly for brain fog, and old-school style.
Character elderly man - Older people tend to suffer from dementia.
Care home - colour palette - It will most likely be beige due to the how care homes actually look like, also inspired slightly by the Backrooms.
Our meeting confirmed that the game we have is good, although we needed to provide good reasoning for each of our mechanics, which I've labeled reasons above next to each mechanic. I currently believe that our game idea is also very good and will most likely be our final idea. Alzheimer's is
0 notes
Photo
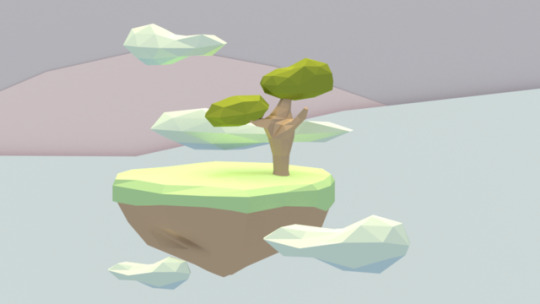

#3d#3d model#lowpoly#blender#playing around#i like this workflow#it's pretty quick and i get to skip uv unwrapping
23 notes
·
View notes
Photo


ハイポリの素体に添わせて各パーツを製作開始。
今の段階だとただのグレイだね
2 notes
·
View notes
Photo

Creación de assets para videojuegos 🌠 ¡Muy pronto! #Blender3D #lowpoly #uvmapping #zbrush #highpoly #sculpting #wacom #ArtistaWacomCentroamérica #substancepainter #handpaintedtextures #stylizedart #gameassets #gameprops #workflow #tutorial #gameart #gameartist #gamedev (en Guatemala) https://www.instagram.com/p/CIsTMzQDhJG/?igshid=wd6d3g93blv0
#blender3d#lowpoly#uvmapping#zbrush#highpoly#sculpting#wacom#artistawacomcentroamérica#substancepainter#handpaintedtextures#stylizedart#gameassets#gameprops#workflow#tutorial#gameart#gameartist#gamedev
0 notes
Photo

Made another lowpoly/highpoly character, this workflow is super fun
38 notes
·
View notes
Photo

Town-Low poly #3d #lowpoly #assets #texture #gamedev #wip #shader #art #diseño #color #preview #game #design #render #test #workflow #digitalart #zombie
#art#workflow#test#render#wip#shader#assets#diseño#design#preview#lowpoly#color#gamedev#texture#game#digitalart#3d#zombie
1 note
·
View note
Text
Samara’s New Armor mod: Workflow
For posterity and hopefully helping someone else along the way, I made a series of posts detailing the work I did when making the Samara’s New Armor mod.
I’m going to be using a lot of 3D jargon and generally gloss over a lot of information. I.e. it’s not a tutorial on how to do 3D nor for how to mod Mass Effect, just me talking freely about the programs I use, my thought process and my workflow. If there are any specific questions, just send an ask and I’ll try to explain!
Part 1: Motivation • Part 2: References • Part 3: zBrush/highpoly • Part 4: Maya/lowpoly • Part 5: UV-mapping • Part 6: ID-Map • Part 7: Substance Painter/Textures • Part 8: Skin-binding • Part 9: Testing/Finalizing • Part 10: Aftermath
6 notes
·
View notes
Note
I've been a big fan of your art for a while now, and for the past few months i've been learning zbrush, and I really enjoy it. Do you have any tips/tutorials for a more stylized workflow? also I'm curious, what do you typically use to texture/render? :0
Hello!
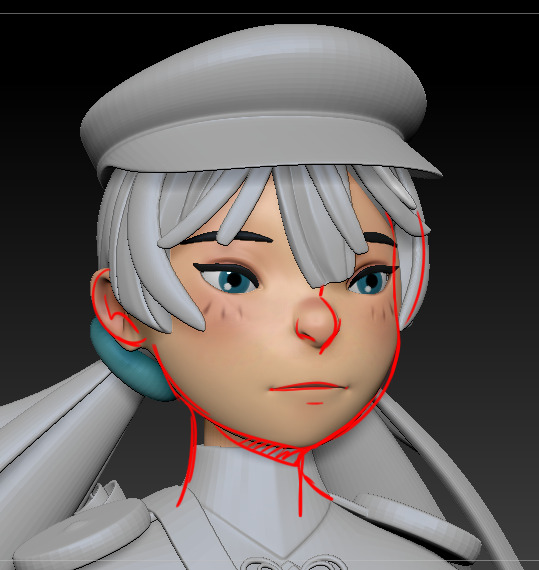
Well the first thing I do before working on ZBrush is gather lots and lots of references for the style I’m trying to achieve. Anime figurines are usually pretty good references for hair and clothing. I also look at 3D artists like Ana Mendes, Dmytro Badja and Blair Armitage, who are very good at stylized highpoly.
After that, I usually create a very lowpoly base in Maya just to block the character’s proportions and silhouette. (I prefer doing it Maya because the ZBrush tools can be tricky to use, but it’s not a mandatory step).
Something that helps me a lot: whenever I feel stuck in my sculpt, I take a screenshot of my model and I redline it in Photoshop to make it match with the concept art. I find it very useful when trying to translate a 2D concept into 3D, especially with faces.
I hope it helps!
Also nowadays I usually texture my models in Substance Painter and render them in Maya with Arnold.
67 notes
·
View notes
Photo

Final Render 💎 Swipe to see the workflow 👁⚡ . . . . . . #render #3dart #concept #3dmodeling #blender3d #cgi #car #3dsmax #vfx #motiondesign #3drender #3dmodel #c4d #blendercommunity #3dartist #cinema4d #zbrush #3danimation #blenderrender #b3d #autodesk #cgart #blenderart #simulation #blendercycles #lowpoly #3dmodelling #3dartwork #3drendering #crushtomize https://www.instagram.com/p/ChaOx8uN1Pm/?igshid=NGJjMDIxMWI=
#render#3dart#concept#3dmodeling#blender3d#cgi#car#3dsmax#vfx#motiondesign#3drender#3dmodel#c4d#blendercommunity#3dartist#cinema4d#zbrush#3danimation#blenderrender#b3d#autodesk#cgart#blenderart#simulation#blendercycles#lowpoly#3dmodelling#3dartwork#3drendering#crushtomize
0 notes
Text
Resources for mask builders
It's getting to be that time of year again. I'm working on a Maratus volans costume, or at least a similarly-designed jumping spider.
Making the skull
I generally start from an existing open-licensed 3d model of the skull or head I'm working from. In the past, I've used a scan of a fossil from Thingiverse, and a lowpoly triceratops model from Thingiverse.
Supplies, ho boy. This is a list of everything that went into my 2016 triceratops skull. It's a substantial investment in things.
At bare minimum, you're going to need a printer, scissors, glue, and paint.
I would recommend that you lose your own printer and print your model on a copy shop's three-foot-wide printer that prints from a roll of paper. It saves so much time during assembly, completely eliminating the "cut out the parts of the parts, then join the parts of the parts together" stage.
It may take multiple triees to get the correct size of print. To make this easier, I recommend finding a 3d model of a construction helmet and a human head, and putting them into your model. Measure how big your head is, create a ruler shape in the model that you can say, "This should be 15.5 inches long." Using Blender's native units support is helpful.
Once you have the model how you like it, figure out how to get it out of Blender. I used to use a script to export it from Blender as a papercraft SVG, but the linked wiki page is gone. You could try this github page for that tool or this unrelated tool?
After I exported the SVG from Blender, I opened it in Inkscape, and scaled the SVG so that the ruler would be the correct size when printed. Then I looked at all the tabs and rearranged and resized numbers so that they'd be legible once the model was printed. I then rearranged pieces for a more-compact print size, suited to my print shop's 36-inch paper reel. 36 inches wide, more than 15 feet long. Export the SVG as a PDF. Bring a rubber band to the print shop.
If you're printing on a home printer, there are tools that will make your job easier. Depending on your operating system, search the Internet for things like "how to print poster on Windows". This was my workflow on Linux in 2015 and 2016: split an image then print en masse.
Don't bother gluing the tabs of the papercraft work; use masking tape instead. You don't have to wait for glue to dry. Don't use medical tape; its sawtooth edges are impossible to hide.
Fill the weird gaps in the model where your tape ran awry with wood putty.
There is no need to paper-maiche on top of the printer paper. Buy a can of cheap windows-and-doors spray foam (not the very-expandy kind!) and fill up all the insides of your skull with that. Before filling with foam, add wire for rigidity and attachment points.
If you're not going to fill the innards with foam, then you'll need to paper-maiche or you'll need to glue the printer paper on top of posterboard before cutting it out. You can cut paper with scissors just fine, but posterboard deserves a sharp xacto knife.
Use a construction helmet as a base for your headpiece. Helmets are built to stay on the wearer's head despite strange impacts. Baseball caps are inadequate if you plan to bend over; they will not hold the skulll onto your head. Cut the crown off of the helmet with a hacksaw blade, drill some holes through the hatband, and zip-tie the helmet to the wire you placed in the skull before filling it up with foam. Trim the zip ties with wire cutters.
Does your paint emit fumes? It probably does. Find a way to do that outside, or find a way to ventilate the area where it'll be drying. If your bathroom has an exhaust fan, you can put newspaper on your bathroom floor, paint the mask outside, and then bring the skull into the bathroom to dry. This is particularly useful if it's too cold outside for the paint to cure properly. Look at the paint can; look at the thermometer. If the air is not at least 10 degress Fahrenheit above the paint's minimum temperature, you're going to have a verrrrry slow drying. Screen porches are handy things to have.
If your mask has more than one piece, figure out how to attach it to your head. For the lower jaw of a triceratops, I pinned the jawbone to a zentai, which wasn't the worst thing I've ever done. For the lower jaw of a much-better-planned deinonychus, I built a hinge from eyehooks. And then I put a rod on the jaw so that I could puppet the jaw. For this year's Maratus spp. head, I'm thinking some sort of Lego assembly will probably work best. Or copious quantities of elastic.
Polymer clay and air-dry clay are pretty much the same. What's your tolerance for fumes? That determines your tolerance for polymer clay, which must be baked. For air-dry clay, I molded the teeth around toothpicks. To attach the teeth to the model, I piked holes into the skull, filled the hole with hot glue, and then shoved the toothpick in until the tooth hit the bone.
For stretching gauze or tights or spandex across gaps, use pins to hold the fabric in place, but use Gorilla Glue to fix nylon in place, not hot glue or super glue. Spandex holds up under hot glue, but make sure that the hot glue is being bonded to a roughened surface on the skull side of the connection.
Do not use superglue on anything that is going to be near your eyes within 12 hours of the superglue application. Superglue offgasses straight chlorine gas, which stings exactly like pool water. Except more painfully.
Make something reusable. I've worn my 2015 Lewis skull to ... at least 5 venues that I can remember. The triceratops I wore twice before retiring it to a wall mount. The deinonychus I've worn at least 4 times.
Finally, do something that you'll have fun doing. Here's my thoughts on one con's worth of cosplay.
Miscellaneous other tutorials:
@rah-bop's Eye and Articulated Eyelid Tutorial
@nambroth has pretty feathers
2 notes
·
View notes