#musictutorial
Explore tagged Tumblr posts
Visit Tumblr Blog
Explore Tumblr blogs with no restrictions, modern design and the best experience.
Last Seen Tumblr Blogs


Fun Fact
Tumblr has a low social media market share in South America.
Text
Comprehensive Beginner’s Guide to Music Production in FL Studio: Step-by-Step Tutorial
Music production can feel intimidating for beginners, but with the right tools and guidance, it’s easier than you might think. FL Studio, one of the most popular digital audio workstations (DAWs), is a great platform to start producing your own music. This step-by-step tutorial will walk you through the basics of FL Studio, from setting up your project to exporting your first track.
Step 1: **Download and Install FL Studio**
Before you can start producing, you need to download and install FL Studio from the official **Image-Line website**. Choose the edition that suits your needs (the free trial version is fully functional but doesn’t allow you to reopen saved projects). Once installed, open the software, and you’ll see the main workspace where your creative journey begins.
Step 2: **Familiarize Yourself with the Interface**
The interface of FL Studio can be overwhelming at first, but understanding its key components will make navigation much easier. Here are the main areas:
- **Channel Rack**: Where you create your beats and patterns using instruments and samples.
- **Piano Roll**: Allows for detailed editing of notes and melodies.
- **Playlist**: The arrangement window where you place your patterns and audio clips to build your song.
- **Mixer**: Where you control the volume, panning, and effects of each track.
- **Toolbar**: Includes transport controls (play, stop, record) and various tools for editing.
Step 3: **Set Up Your Project**
Start by setting up your project:
1. **BPM (Beats Per Minute)**: Set the tempo of your track by adjusting the BPM at the top of the interface. Most pop songs are around 120 BPM, but you can adjust this based on your genre.
2. **Add Instruments**: In the **Channel Rack**, click the + button to add instruments (synths, drums, etc.). FL Studio includes a wide range of built-in instruments, such as **FL Keys**, **3xOsc**, and **Fruity DrumSynth Live**.
3. **Save Your Project**: Always remember to save your project regularly. Go to **File > Save As** and give your project a name.
Step 4: **Create Your First Beat**
Let’s start by creating a simple drum beat:
1. In the **Channel Rack**, select a drum sample (FL Studio provides a wide variety of samples in the **Browser** on the left).
2. Click on the individual steps in the **Step Sequencer** to create a rhythm (for example, place a kick drum on steps 1 and 9, and a snare on steps 5 and 13).
3. Press **Play** to listen to your beat.
You’ve just created your first drum pattern!
Step 5: **Add Melodies and Chords**
Next, let’s add some melodies and chords using the **Piano Roll**:
1. Select the instrument you want to use (for example, **FL Keys** for a piano sound).
2. Right-click on the instrument in the **Channel Rack**, then choose **Piano Roll**.
3. In the **Piano Roll**, click to add notes, adjusting their length and pitch by dragging them. Use the vertical axis for pitch (higher notes are higher up) and the horizontal axis for timing.
4. Experiment with different chords and melodies to complement your beat.
Step 6: **Arranging Your Song in the Playlist**
Now that you have a few patterns, it’s time to arrange them into a song:
1. Open the **Playlist** by clicking the **View Playlist** button (located in the toolbar).
2. Drag your patterns from the **Channel Rack** into the **Playlist**. You can copy and paste patterns, move them around, and create variations.
3. Organize your patterns into sections (e.g., intro, verse, chorus). This will give your track structure and flow.
Step 7: **Mixing Your Track**
Mixing is where you balance the levels of your different tracks and add effects to improve the overall sound.
1. Open the **Mixer** by clicking the **View Mixer** button (found in the toolbar).
2. Assign each of your instruments and samples to a separate **mixer track**. Do this by clicking on the instrument in the **Channel Rack** and adjusting the track number at the bottom.
3. In the **Mixer**, adjust the volume of each track so that nothing is too loud or too quiet. You want your track to sound balanced.
4. Add effects (reverb, compression, EQ, etc.) to each track by selecting the **FX slots** in the Mixer. FL Studio has a variety of built-in effects to experiment with.
Step 8: **Exporting Your Track**
Once you’re happy with your arrangement and mix, it’s time to export your song as an audio file.
1. Go to **File > Export**, and choose your preferred format (WAV or MP3).
2. Adjust the export settings (bit rate, quality, etc.) if needed, then click **Start** to export.
Congratulations! You’ve just created and exported your first track in FL Studio!
Step 9: **Continue Experimenting**
FL Studio is a powerful DAW with countless possibilities. Once you’re comfortable with the basics, start exploring more advanced features like automation, sound design, and complex arrangements. Don’t be afraid to experiment with new sounds and techniques to develop your own unique style.
Conclusion
Music production in FL Studio can be incredibly rewarding, especially once you get the hang of the workflow. By mastering the basics like creating beats, melodies, and mixing, you’ll be well on your way to producing professional-quality music. Keep practicing, experimenting, and learning new techniques, and you’ll quickly see progress in your production skills!
#MusicProduction#HomeStudio#AudioEngineering#LearnMusicProduction#FLStudio#MusicCreation#DigitalAudio#MusicTutorial
0 notes
Text
Another 5 common mistakes when mixing:
POOR PANNING DECISIONS
Making the mix feel lopsided or crowded.
IGNORING THE IMPORTANCE OF MIDRANGE
Where most of the audible content lies.
NEGLECTING THE LOW END
Leading to a weak or muddy mix.
OVERPOWERING HIGH FREQUENCIES
Causing listener fatigue.
NOT CONSIDERING THE SONGS EMOTION
Disconnect between the mix and the music's feel.
Search any of these online for futher information.
instagram
#singer#music#songwriter#songwriting#producer#singers#musicproducer#musician#musicians#songwriters#Tips#Music Tips#MusicTips#Tricks#MusicTricks#Music Tricks#Tutorial#MusicTutorial#Music Tutorial#MusicProduction#Music Production#OnlineMusicProduction#Online Music Production#Online Music Production Services#OnlineProducer#Online Producer#RecordingStudio#Recording Studio#Online Recording Studio#Instagram
1 note
·
View note
Text
youtube
Hey there, music enthusiasts! Welcome back to my channel, the place where we explore the limitless possibilities of music. In today's video, we're diving deep into the world of YouTube Music and discovering how it can be a game-changer in unlocking your musical potential. If you're ready to take your creativity to the next level, you're in the right place. Before we jump in, make sure to hit that subscribe button and ring the bell to stay updated with our musical journey. Now, let's get started! #musicinspiration #YouTubeMusicGuide #UnlockYourPotential #CreativePlaylist #musicaljourney #discovernewmusic #YTMusicTips #CollaborateInMusic #MusicalNetworking
#music discovery#YouTubeMusicGuide#UnlockYourPotential#CreativePlaylist#YouTubeMusicDiscovery#CreateWithYouTube#musictutorial#musicalcollaboration#PlaylistIdeas#YTMusicCommunity#musiclearning#InspirationalMusic#unlockcreativity#MusicCollaborators#BehindTheMusic#YTAlgorithm#MusicalInfluences#musiceducation#YTMusicJourney#CreativeProcess#playlistcuration#YTInnovation#MusicalConnections#YTMusicCreativity#DiscoverWithYouTube#yt#ytmusic#viral#viralvideo#vdjmondo
0 notes
Text
Check out the 90s House Tutorial on how to create a classic house Beat with Stock Plugins and the help of AI.
Only on: www.LoopLands.com
#90shousemusicproduction#houseproduction#aimusicproducer#musicproducerworkingwithai#innovatorsoundmatchi#jamahook#musictutorial#howtomakehousemusic#tinderformusic
0 notes
Video
youtube
Minor Scale Chords in Sa Re Ga Ma: A Complete Guide
#youtube#minorscale chords saregama minor musictheory chordprogressions learnmusic musictutorial indianclassicalmusic music musiceducation p
0 notes
Photo

#GoldenTouchMusicTV #MusicLovers #ArtistStories #MusicTutorials #YouTubeChannel The channel also serves as a platform to showcase emerging artists, giving fresh talent a chance to shine. With engaging music videos and live performances, Golden Touch Music TV introduces viewers to new and exciting sounds from various genres.
0 notes
Photo
Beauties of London #Electronicmusic #producers #musictutorial #music #London #ableton #abletonlive #academy #festivals #lessons #enfield #lifestyle #love #dance #fabric #party #ibiza #bits #hashtag #knowledge #pub #events #tutorials #free #musicproduction #musiclessons #festivals (at Kingston upon Thames) https://www.instagram.com/p/CU8MdjFMynX/?utm_medium=tumblr
#electronicmusic#producers#musictutorial#music#london#ableton#abletonlive#academy#festivals#lessons#enfield#lifestyle#love#dance#fabric#party#ibiza#bits#hashtag#knowledge#pub#events#tutorials#free#musicproduction#musiclessons
2 notes
·
View notes
Text
Playing the piano is so much more than just picking up notes on the keys.
Sound, look, and feel your best by following good piano posture that is just as vital.
Watch and pay attention as your teacher keyboardist Noel Prashanth from the Demoz School of Music demonstrates the right way and techniques. Get the posture right and you can play with expression and a vast dynamic range.
Subscribe to our YouTube channel www.youtube.com/c/zelusacademy and watch these curated training videos for free! Follow us for the latest updates on upcoming episodes.
#keyboardist#piano#pianotutorial#musicinstruments#musicinstrument#musicinstagram#keyboard#instrumentplaying#musictutorial
2 notes
·
View notes
Text
Step-by-Step Guide on Turning Simple Loops into Full Songs for Music Producers
As a music producer, starting with a simple loop is a common approach when building a new track. Loops provide the foundation for a song, but the real challenge is expanding that loop into a full composition. Whether it’s an inspiring melody, a catchy rhythm, or a hypnotic bassline, transforming your loop into a finished song requires structure and creativity. Here's a step-by-step guide to help you turn a simple loop into a fully developed track.
1. **Start with a Strong Loop**
Before diving into the full song, ensure your loop is solid and captivating. It should have a strong core element, such as a memorable melody, bassline, or drum pattern. The loop acts as the main theme or "hook" of your song.
**How to Build a Strong Loop:**
- **Layer different elements:** Start with a basic drum beat, then add a bassline, melody, chords, and other elements. Each layer should complement the others while standing out individually.
- **Balance frequencies:** Ensure your loop has a full-spectrum sound. For example, use sub-bass for the low end, mid-range instruments like guitars or synths, and higher-frequency elements like hi-hats or atmospheric effects.
- **Keep it interesting:** Even though loops are repetitive, they should be interesting enough to form the backbone of your song. Make sure it captures the listener's attention.
2. **Expand the Loop into a Song Structure**
Now that you have a strong loop, it’s time to stretch it out into a full song. The key is to develop a structure with various sections like verses, choruses, and bridges.
**Popular Song Structures:**
- **Verse-Chorus-Verse-Chorus-Bridge-Chorus**: One of the most common structures in modern music.
- **Intro-Verse-Chorus-Verse-Chorus-Breakdown-Chorus**: Ideal for electronic music or dance tracks.
- **Intro-Build-Drop-Build-Drop-Outro**: Typical for genres like EDM or trap.
**How to Expand the Loop:**
- **Divide your loop:** Use your loop as the basis for the main sections (verse or chorus). Then, create variations for other sections by adding or removing elements.
- **Use automation:** Automating filter sweeps, volume, or panning can add dynamics and keep the listener engaged throughout the track.
- **Introduce new elements:** Each section of the song should introduce subtle changes. For instance, adding a new instrument or effect in the chorus differentiates it from the verse.
3. **Build Tension and Release**
A song should have natural peaks and valleys, keeping listeners engaged by building tension and releasing it at key points. The contrast between sections, like a softer verse and a powerful chorus, creates excitement.
**How to Create Tension and Release:**
- **Breakdowns and drops:** In genres like electronic or dance music, a breakdown followed by a drop can be an effective way to release tension. Remove some layers during the breakdown, and reintroduce them (often with more energy) during the drop.
- **Volume and intensity shifts:** Gradually increase the intensity (like adding percussion or a louder synth) leading up to the chorus, then reduce it again during the next verse to keep the song dynamic.
- **Using effects:** Reverb, delay, and other effects can create atmospheric tension, especially when slowly building or cutting them back during transitions.
4. **Introduce Variations and Change-Ups**
A song can feel repetitive if the same loop is played throughout the entire track. Introduce subtle (or sometimes drastic) variations to keep the listener's attention.
**How to Add Variations:**
- **Melodic changes:** Alter the melody or harmony in different sections to keep the song fresh.
- **Rhythmic variations:** Change up the rhythm or drum pattern in the chorus or bridge to differentiate it from the verses.
- **Layering and subtracting elements:** Add new layers of sound for certain sections and remove them for others to create contrast. For example, remove the bass during a breakdown or introduce a new synth line in the chorus.
5. **Focus on Transitions**
Smooth transitions between sections are crucial in keeping the song flowing. Abrupt changes can disrupt the listening experience, so it’s important to use transition effects and techniques.
**How to Create Smooth Transitions:**
- **Use risers and impacts:** Sound effects like risers or impact sounds (like a crash) can signal a shift from one section to another, making transitions feel seamless.
- **Volume automation:** Gradually fading out one section while bringing in the next creates a natural flow.
- **Reverse effects:** Reversing sounds, such as cymbals or vocals, can build anticipation before transitioning to a new section.
6. **Fine-Tune the Arrangement**
Once the basic structure is in place, fine-tune the arrangement by paying attention to detail. Small adjustments can significantly improve the overall feel of the song.
**How to Fine-Tune the Arrangement:**
- **Balance the mix:** Ensure that each element is sitting properly in the mix. Vocals should be clear, bass should be punchy, and no element should overpower the others.
- **Use EQ and compression:** These tools can help tighten up individual elements and make the overall track sound cohesive.
- **Listen critically:** Play through the track multiple times and take notes on what feels too repetitive or too abrupt. Adjust accordingly.
7. **Add Ear Candy and Final Touches**
Ear candy refers to small, subtle elements that add flavor to your track. These can be unexpected sounds, melodic fills, or rhythmic accents that make the song more engaging.
**Ideas for Ear Candy:**
- **Vocal chops or samples:** Chop up vocal lines and place them as fills or accents throughout the track.
- **Percussive fills:** Add short percussive fills or stutter effects between sections to surprise the listener.
- **Ambience and texture:** Atmospheric pads, vinyl crackle, or distant reverb effects can add depth and richness to your track.
8. **Finalize the Song**
Once your track is fully arranged and polished, it’s time to finalize it. This involves the last round of mixing and preparing the track for mastering.
**Final Steps:**
- **Listen on different devices:** Play your song on headphones, speakers, and other systems to ensure it sounds great across all formats.
- **Bounce a rough mix:** Export a draft version and listen with fresh ears a day later. This will help you catch any mistakes or areas that need improvement.
- **Prepare for mastering:** After you’re satisfied with the mix, prepare it for mastering by ensuring there's no clipping and that the track has some headroom (-6dB is ideal).
Final Thoughts
Turning a simple loop into a full song is a process that requires both creativity and technical skill. By focusing on song structure, variations, transitions, and fine-tuning, you can expand your loop into a complete, professional track. With patience and attention to detail, your loops can evolve into engaging, dynamic songs that captivate listeners.
#MusicProduction#SongwritingTips#LoopToSong#MusicProducers#CreativeProcess#MusicComposition#SongStructure#ProducerLife#MusicTutorial#SoundDesign
0 notes
Link

The world of music revolves around the combination of a sequence of specific audio and vibrations. Music notes are made from different vibrations that are made by any specific kind of instruments Vocals, string, woodwinds, brass, percussion, and even nontraditional instruments like horn and pots, etc. But to organize these sounds and vibrations we arrange them in musical notes and name them accordingly. Which are known as music notes?
https://www.futurestarr.com/blog/music/musical-notes-what-are-musical-notes-what-is-an-octave
1 note
·
View note
Video
youtube
#HowToPlayOdeToJoyOnGlockenspiel
In this #GlockenspielTutorial, I play #OdeToJoy on 30 note Glockenspiel. You can play just as I do.
Thank you for your time. If you liked and want to support me, could you 👍LIKE👍 the video and 💕SHARE💕 it?
In order not to miss future videos from this channel, 💘SUBSCRIBE💘 to my channel as well.
If you want me to make a video of another song or if you have other things to share, please comment below... I will try to answer you.
A new video will air every Monday and Thursday 15:00 GMT. Stay tuned.🎶
twitter: https://twitter.com/ProjectMusica1 tumblr: https://projectmusica.tumblr.com blogger: https://projectmusicas.blogspot.com
Thank you for your interest and time. Stay with music 🎶 🤗
#percussion#ode to joy#beethoven#tutorial#musictutorial#bells#music lessons#glockenspiel#project musica#projectmusica
1 note
·
View note
Photo
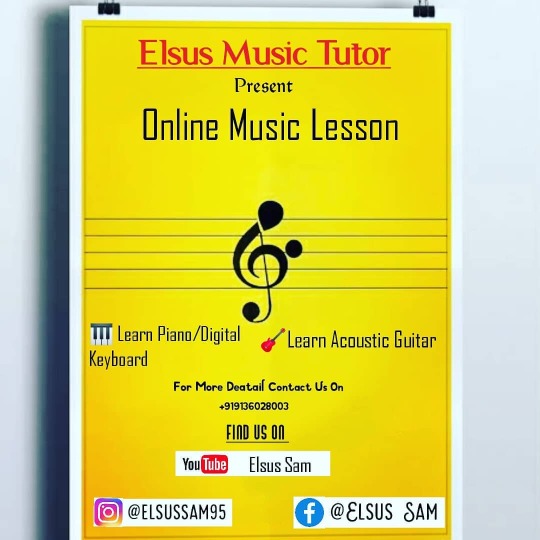
Itz Pleasure😍To Announce That We Are Starting Our Online Music Lessons, If Ur Eagerly Want To Learn Instrument Like Guitar And Piano In This Lockdown Period Then Join Us To Learn. DM Us For More Deatail. #musiconline #musiconlineclass #mumbaikar #musicinmumbai #mumbaimusic #musictutorial #musicinstructor #stayhomelearnmusic #stayhomeonlineclass #musicteachernearme #urbanpro #musicteachersofinstagram #musiclesson #mumbaiguitarclass #mahim #matunga #guitarteacher #pianoteachersofinstagram #musiclearning #musiclearner #musicinstrument #musicinstrumentlearning (at MAHIM - The Heart Of Mumbai) https://www.instagram.com/p/CCVmF81Jld1/?igshid=18xjcd5gxtldx
#musiconline#musiconlineclass#mumbaikar#musicinmumbai#mumbaimusic#musictutorial#musicinstructor#stayhomelearnmusic#stayhomeonlineclass#musicteachernearme#urbanpro#musicteachersofinstagram#musiclesson#mumbaiguitarclass#mahim#matunga#guitarteacher#pianoteachersofinstagram#musiclearning#musiclearner#musicinstrument#musicinstrumentlearning
1 note
·
View note
Video
youtube
Major Scale Chords in Sa Re Ga Ma: A Complete Guide
#youtube#majorscale chords saregama musictheory chordprogressions learnmusic musictutorial indianclassicalmusic music musiceducation piano
0 notes
Video
instagram
Quick Tutorial 1: hard Sync sequence . . . #music #producer #electronicmusic #analogsynth #musictutorial #synthtutorial #synthesizer #prophet08 #synthwave #sounddesign #keyboard #musicproducer #modularsynthesizer #cyberpunk #80s @sequential_llc (at Monterrey, Nuevo Leon, Mexico) https://www.instagram.com/p/B8mu3iZBBCX/?igshid=e4du1vu57rq8
#music#producer#electronicmusic#analogsynth#musictutorial#synthtutorial#synthesizer#prophet08#synthwave#sounddesign#keyboard#musicproducer#modularsynthesizer#cyberpunk#80s
1 note
·
View note
Text
Use of DAW Templates
The main idea of using templates for your DAW is to have a predefined configuration or setup of workspace to speedup your workflow and to remove repetitive tasks. A template is a starting point where your most commonly used items are already in place.
I don't use templates.
I'm usually not in a rush, and for me, setting up a project with all its little utilities and connections, is part of the creative process, part of the fun.
They say a template allows you to get into making music more quickly. But I'd say it depends on the approach to music; I choose different compressors, different reverbs, different EQs every time. This is building music as much as putting down notes or beats.
I could have placeholders for auxiliary sends and such, but it would inhibit experimentation and lead to an uninspired, streamlined signal path.
I don't know how many MIDI or audio channels I'll use beforehand. And if I need to erase empty channels or add more to scale regards to the project – that would beat the purpose with templates.
Well, all tasks in music production aren't fun, like high-passing every single channel or EQ notch muddiness and so on. But if you're not willing to work, it's almost like you could stop making music, and listen to already finished and published shit instead.
#musicproduction#makingmusic#songwriting#beatmaking#homerecording#sounddesign#bedroomproducer#bedroomstudio#audioproduction#homestudio#musictutorial#templates#daw#music production
12 notes
·
View notes
Photo

Electronic Music Courses starting soon!! Online and 121 lessons... Not previous experience is needed. #Electronicmusic #producers #musictutorial #music #London #ableton #abletonlive #academy #festivals #lessons #enfield #love #dance #fabric #party #ibiza #bits #hashtag #pub #events (at London, United Kingdom) https://www.instagram.com/p/CTftVn6MEFy/?utm_medium=tumblr
#electronicmusic#producers#musictutorial#music#london#ableton#abletonlive#academy#festivals#lessons#enfield#love#dance#fabric#party#ibiza#bits#hashtag#pub#events
3 notes
·
View notes