#nocode automation
Explore tagged Tumblr posts
Visit Tumblr Blog
Explore Tumblr blogs with no restrictions, modern design and the best experience.
Last Seen Tumblr Blogs


Fun Fact
Tumblr is available in 18 languages.
Text
Automate Your Workflow: Using Contact Form to Any API Plugin
In today's fast-paced digital world, automation isn't just a luxury—it's a necessity. Whether you're running a business, managing a nonprofit, or building a personal brand, streamlining your processes can save you time, reduce errors, and boost productivity. One of the most effective ways to automate your WordPress site is by integrating your contact forms with external APIs. That's where the Contact Form to Any API plugin comes in.

What Is a Contact Form to Any API?
Contact Form to Any API is a powerful WordPress plugin that extends the capabilities of the popular Contact Form 7. It allows you to send form submissions directly to any RESTful API endpoint, giving you full control over where your data goes. Whether you're pushing leads to a CRM, sending support tickets to a helpdesk, or syncing subscribers with your email marketing tool, this plugin makes it easy.
Why Automate With This Plugin?
Manual data entry is time-consuming and error-prone. With automation, you eliminate the need to copy and paste form submissions into other platforms. Here's why Contact Form to Any API stands out:
Universal Compatibility: Works with any API that accepts JSON or URL-encoded data.
Custom Triggers: Send data before or after email notifications.
Advanced JSON Support: Supports multi-level and custom JSON structures.
Authentication Options: Includes support for Basic and Bearer Token authentication.
Data Logging: Keep track of all submissions and API responses with detailed logs.
Real-World Use Cases
Let’s take a look at how this plugin can transform your daily operations:
1. Lead Generation & CRM Integration
Imagine a user fills out your contact form. Instead of checking your email and manually entering the details into your CRM (like Salesforce or HubSpot), the data is instantly transmitted through the API. Your sales team gets notified in real-time and can follow up faster.
2. Customer Support Automation
Using platforms like Zendesk or Freshdesk? This plugin can forward user inquiries directly to your support system. Automatically create support tickets, assign them to the right department, and kick off workflows based on tags or priorities.
3. Email Marketing Sync
Add form data directly into your email lists on Mailchimp, Sendinblue, or ActiveCampaign. No more exporting CSV files or dealing with import errors.
4. Custom Dashboards and Internal Tools
If you've built a custom dashboard or internal tool, you can feed data into it in real time. This is especially useful for custom ERPs, analytics dashboards, or membership systems.
Key Features at a Glance
Here's a breakdown of some of the plugin's most impactful features:
Unlimited API Connections: No cap on how many APIs you can connect to.
File Upload Support: Convert uploaded files into Base64 and send them with your API request.
Conditional Logic: Send data to different endpoints based on user selections.
Webhook Compatibility: Works flawlessly with platforms like Zapier, Integromat, and Make.
Security First: HTTPS support and robust authentication methods to ensure data security.
How to Set It Up
Install the Plugin: Search for "Contact Form to Any API" in the WordPress Plugin Directory and activate it.
Create Your Contact Form: Use Contact Form 7 to design your form.
Add API Settings: Navigate to the plugin settings, input your endpoint URL, headers (for authentication), and body structure (JSON or form data).
Test Your Integration: Submit a test form and review the API logs to verify data transmission.
Go Live: Once you're confident in the setup, publish the form on your site.
Pro Version Perks
While the free version is robust, the Pro version takes things to the next level:
Multi-API Support: Send data to multiple APIs at once.
Advanced Mapping: Handle complex data structures with nested fields.
Priority Support: Get help faster with dedicated customer support.
Tips for Optimization
Use Postman or Insomnia to test your API endpoints before connecting them.
Sanitize User Input to prevent malformed data from causing issues.
Monitor Logs regularly to catch any transmission errors or failures.
Document Your APIs for team use and future integrations.
Final Thoughts
Contact Form to Any API is more than just a plugin—it's a game changer for anyone looking to streamline their WordPress operations. By automating the flow of information between your site and external platforms, you can focus on what really matters: growing your business, engaging your audience, and delivering value.
If you're tired of manual processes and want a smarter, faster way to handle form data, give this plugin a try. The time and energy you save will speak for itself.
0 notes
Text
How to Start a Profitable AI Chatbot Business | No Coding Required | Wealth Brain
youtube
Want to begin a lucrative AI chatbot business without writing code? In this video, I will walk you through step-by-step how to develop and sell AI chatbots with no-code tools, acquire high-paying clients, and set prices for maximum profitability. Discover how companies leverage chatbots to automate customer support, boost sales, and drive leads—along with where to market your services and grow your business. Whether you're starting out or an entrepreneur looking for fresh opportunities, this guide will provide you with all you need to make AI chatbots a profitable online business. Let's get started!
#ai#chatbot#business#nocode#automation#digitalmarketing#startup#makemoneyonline#entrepreneur#chatbotmarketing#onlinemarketing#passiveincome#smallbusiness#leadgeneration#salesautomation#Youtube
0 notes
Text
youtube
🚀 Master PowerApps & Power Automate – Watch Our Demo Now! 🎥
Unlock seamless workflows and app creation. Start your journey today
Mode of Training: Online 💻🌐
📞Contact +91-9989971070
🌐Visit: https://www.visualpath.in/online-powerapps-training.html
📱WhatsApp: https://wa.me/c/917032290546
▶️Subscribe: youtube.com/c/visualpath🎥Watch demo video@ https://youtu.be/qnwmuB9Bjeg?si=nBQkrXnTiiBI9Zl4
#Visualpath#PowerApps#PowerAutomate#MicrosoftPowerPlatform#Automation#NoCode#LowCode#WorkflowAutomation#AppDevelopment#DigitalTransformation#BusinessAutomation#ProcessAutomation#Microsoft365#TechTraining#CareerGrowth#LearnPowerApps#Youtube
1 note
·
View note
Text
How I Bult a Passive Income System With Just 3 AI Tools (No Code Needed)
💡 How I Built a Passive Income System With Just 3 AI Tools (No Code Needed)
A year ago, I thought “passive income” was a myth.
Now? I wake up to emails like “You earned a commission” or “New subscriber joined” — and no, I’m not running shady dropshipping stores or mining crypto.
Here’s the simple 3-tool stack I used to build my passive income system — with $0 ad spend, no coding, and minimal effort.
1. 🧠 KoalaWriter – Blog Content on Autopilot
I picked a niche (AI + productivity), bought a $10 domain, and started publishing blog posts with KoalaWriter.
It uses ChatGPT + SEO data to generate articles that actually rank. I added affiliate links, and boom — traffic → clicks → money.
✅ Best for: Bloggers, affiliate marketers 👉 Generate SEO Blog Posts with KoalaWriter
2. ✨ Notion + Tally – Free Resources That Convert
Next, I created a Notion-based AI Tools Directory – just a list of tools I love, with ratings and links.
I embedded a Tally form at the top:
“Want more free tools like these? Drop your email.”
Tally sends new emails to my list automatically.
✅ Best for: Lead magnets, list-building, content creators 👉 Create a Free Tally Form
3. 🔁 Zapier – The Glue That Holds It All Together
Zapier handles the behind-the-scenes automation:
When someone submits a form → add to list
New blog post → auto-publish on Twitter
Link clicks → track in Google Sheets
I don’t touch a thing. Just review analytics on Sundays.
✅ Best for: Connecting everything, automating boring stuff 👉 Automate with Zapier
🔁 The Loop
KoalaWriter publishes content
Content links to my AI Tools directory
People submit their email for more tools
I send a weekly newsletter with tools + affiliate links
Zapier automates all of it
It took me 2 weekends to build. It’s been running for months with no maintenance.
🧠 Final Thought
The tools are out there. The strategy is simple. You just have to set it up once.
If you’re tired of chasing money, start building systems instead. And if you want my full stack, follow @HustleNest — I share it all.
#passiveincome#aiproductivity#nocode#digitaltools#automation#sidehustle#affiliatemarketing#remotework#hustlenest
0 notes
Text
Influencing Software Development and Key Innovations in Low Code, No Code Services for 2025
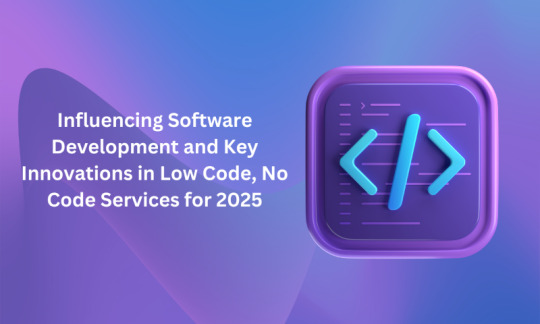
Building a software is a nightmare for many people as it generally involves coding. But nowadays, the reality is that anyone can build a software with low code and no code platforms.The main difference between these two are: low code requires minimal code which makes it suitable for developers who want to build complicated app faster, whereas no code requires no coding at all and is perfect for business users who want to create apps without having any technical expertise. As we are in 2025 now, these platforms are getting better and more helpful for various best application management and support companies.How Businesses Use Low Code and No Code PlatformsLet’s have a look at how different sectors and best application management and support companies are leveraging them:HealthcareHospitals use no code platforms to design patient management systems, which reduce administrative burden. AI integration helps in the processing of large datasets for medical research and diagnostics.RetailRetailers usually use low code tools to create customized e-commerce platforms and inventory management systems. Automated customer service chatbots also improve user experiences of best application management and support companies.EducationFor online learning and student monitoring, schools and universities are building applications. Administrative tasks like admissions and fee management are organised using automation.
#LowCode#NoCode#LowCodeDevelopment#NoCodeDevelopment#AppDevelopment#SoftwareDevelopment#DigitalTransformation#Automation#BusinessInnovation#TechSolutions
0 notes
Text
Drive Innovation with Low-Code Application Development Services.

Build apps quickly with low-code application development services. Using these, you can reduce coding efforts, organize workflows, and innovate faster with user-friendly, scalable, and efficient development solutions.
0 notes
Text
In 2025 project management continues to evolve, driven by technological advancements, the changing nature of work and the need for greater efficiency to achieve more with less. Organizations are increasingly adopting modern methodologies, AI-driven solutions, and flexible work structures to stay ahead in a competitive landscape. In this blog we explore the top 10 project management trends in 2025.
#ProjectManagement#AI#Automation#HybridWork#Agile#RemoteWork#DataDriven#Sustainability#Cybersecurity#Leadership#Blockchain#NoCode#LowCode#SoftSkills#GreenPM
0 notes
Text
How to Automatically Send Contact Form Data to Google Sheets (No-Code Solution!) 🚀
Still copy-pasting form submissions into Google Sheets? That’s a waste of time, not to mention the risk of losing data or making errors.
The smarter way? Automate the process so every contact form submission is logged in Google Sheets instantly—without lifting a finger. And guess what? No coding required! 🙌
Let’s go step by step and set it up in minutes so you can focus on what matters—your business.
📌 Want the full guide? Read this: How to Send Contact Form Data to Google Sheets for Free

Why Automate Contact Form Data to Google Sheets? 🤔
Manually entering data is frustrating and prone to mistakes. Here’s why Google Sheets contact form automation is a game-changer:
✔ No More Manual Entry – Every submission appears instantly in Google Sheets. ✔ Real-Time Updates – Stay on top of new leads and customer inquiries. ✔ Organized Data – Everything is in one place, neatly stored for easy access. ✔ Team Collaboration – Shared sheets allow your team to view and update leads effortlessly. ✔ Works with Any Form Builder – Whether it’s Google Forms, Typeform, WPForms, or a custom HTML form, this setup works seamlessly.
Step 1: Choose Your Contact Form Tool 📝
First, pick the right form builder for your website. Here are some popular choices:
Google Forms – Free and integrates with Google Sheets, but lacks customization.
Typeform / JotForm – More user-friendly, but requires external integration.
WPForms / Gravity Forms – Best for WordPress users.
Custom Website Forms – Needs an automation tool to sync with Google Sheets.
If your form doesn’t have a built-in option, don’t worry—you can easily integrate it with a no-code automation tool.
Step 2: Connect Your Form to Google Sheets 🔄
Here’s how you can send form data to Google Sheets automatically:
Option 1: Google Forms (Basic but Limited)
✔ If you’re using Google Forms, responses are automatically saved in Google Sheets. ✔ Good for simple surveys and event registrations, but not ideal for business workflows.
Option 2: Google Apps Script (For Techies)
✔ Lets you customize everything, but requires JavaScript knowledge. ✔ Not beginner-friendly and can be difficult to maintain.
If you’re looking for an easier way to sync your form submissions, a no-code Google Sheets integration is the best choice.
Option 3: Use an iPaaS for Seamless Automation (Best Option) 🚀
For a fully automated, no-code setup, an iPaaS like best iPaaS software is the simplest and most efficient way to send form submissions directly to Google Sheets.
Here’s why:
✅ No coding required – Set it up in just a few clicks. ✅ Instant syncing – No delays, all data updates in real time. ✅ Works with Any Contact Form – Whether it’s WordPress, Wix, Shopify, or a custom-built form, it integrates seamlessly. ✅ Custom Field Mapping – Choose exactly what data gets sent to Google Sheets.
📌 Example Workflow: ✔ A visitor fills out a contact form on your website → Their details appear in Google Sheets instantly → Your team gets notified via Slack or email.
🔗 See how best iPaaS software simplifies Google Sheets automation
Step 3: Test Your Automation ✅
Before you go live, make sure everything works perfectly:
✔ Submit a test form and check if the data appears in Google Sheets. ✔ Verify data fields to ensure everything is mapped correctly. ✔ Set up Slack or email notifications for instant alerts on new submissions.
Once everything is working, you're good to go! 🎉
Bonus: What Else Can You Automate? 🤖
If you’re already automating Google Sheets form integration, why stop there?
✔ Send Slack or Email Alerts for new form submissions. ✔ Push leads directly into your CRM (HubSpot, Salesforce, etc.). ✔ Trigger an automatic email response. ✔ Create a dynamic dashboard to track submissions in real-time.
With best iPaaS software, you can connect your form submissions with any tool—without writing a single line of code.
📌 Need a step-by-step guide? Read the full tutorial here.
Final Thoughts – Automate & Save Time! ⏳
Manually updating Google Sheets with form submissions is outdated and inefficient. By automating this process, you:
✔ Save hours of manual work. ✔ Reduce errors & keep data clean. ✔ Get real-time access to leads & customer inquiries.
Whether you need to auto-fill Google Sheets from website forms or set up a no-code workflow, automation makes everything easier.
🚀 Want an effortless setup? Best iPaaS software lets you automate everything in minutes.
📌 Read the Full Guide Here 👀: How to Send Contact Form Data to Google Sheets for Free
0 notes
Text
instagram
✨Everyone’s talking about AI agents—but what are they, really? 🤔
Unlike the AI tools we’ve been using—where we ask questions and get responses—AI agents don’t 𝗱𝗼 𝘁𝗵𝗶𝗻𝗴𝘀 𝗳𝗼𝗿 𝘂𝘀, they 𝗷𝘂𝘀𝘁 𝘁𝗮𝗹𝗸 𝘁𝗼 𝘂𝘀.
🚀That’s a big deal. Try now => https://t.ly/zeyneploops Because instead of spending hours manually tracking news, analysing data, or organising tasks—your AI agent can do it for you, every single day, exactly how you want it. Agents are going to be the next big thing, and we can already play with some early versions now.
You can use Magic Loops to track stock prices, get job updates, monitor news, or automate daily tasks, all sent directly to your phone or email.
#AI#FinTech#Accountants#Technology#Innovation#DataScience#JobSearch#Automation#CareerGrowth#TechJobs#JobAlerts#NoCode#Productivity#magicloops#nocodetools#aitools#api#lengua#literatura#correccion#ortografia#corrector#python#developer#generativeai#fyp#artificialintelligence#deeplearning#programmer#programming
0 notes
Text
Building Your First App with No-Code Platforms
In today's fast-paced digital landscape, anyone can become a creator with the help of no-code platforms. You no longer need to know how to code to bring your ideas to life. With these tools, anyone from a busy entrepreneur to a curious hobbyist can create useful applications that solve real problems. This guide will walk you through the process of building your first app step by step, without writing any code.
No-code platforms let you design applications visually by using pre-built components and workflows. This approach can improve your workflow efficiency and save money. Below, we outline the steps to help you start your app development journey.
Understanding No-Code Platforms
No-code platforms enable users to create applications through graphical interfaces instead of traditional coding. This means you can drag and drop elements, design the look, and set up the logic all without writing a line of code.
Some of the most popular no-code platforms include:
Bubble: Great for web apps, it allows for a high level of customization, with more than 8,000 templates available.
Adalo: Focused on mobile apps, making it notably easy for beginners to create functional applications.
Airtable: It combines spreadsheet simplicity with powerful database capabilities, streamlining project management tasks.
AppGyver: Ideal for building mobile apps quickly, offering a user-friendly interface backed by impressive functionalities.
The convenience of no-code platforms means you can create apps tailored to your needs without learning complex coding languages.
Step 1: Define Your Idea
The cornerstone of your app development is a clear idea. To formulate your concept, consider these questions:
What specific problem is your app addressing?
Who is your intended audience?
Which features are crucial for your idea to become a reality?
Spend time fleshing out your concept. Consider using a mind map or outline to visualize and organize your thoughts. For example, if you want to create a budgeting app for students, determine essential features like expense tracking and budgeting tips.
Step 2: Choose the Right No-Code Platform
With many no-code platforms to choose from, pick one that suits your project's goals. Here are some factors to keep in mind:
Ease of Use: Select a platform that feels comfortable to navigate, especially if you're new to app development.
Features and Flexibility: Ensure the platform offers the functionalities you envision for your app, such as user logins or payment processing.
Integration Capabilities: Check if the platform can connect with other tools you plan to use, like email marketing software.
For instance, if you're creating a task management app, you might find Airtable or Bubble to be particularly helpful due to their organization features.
Step 3: Sketch Your Wireframe
Before diving into the actual build, create a wireframe to outline your app’s layout. A wireframe provides a visual guide for the user experience and interface and doesn't need to be perfect—just an initial layout showing how everything fits together.
You can use tools like Figma or even sketch it on paper. Visualize the main screens of your app. If, for example, your app is a recipe sharing platform, you might sketch a homepage with featured recipes, a search bar, and links to user profiles.
Step 4: Design Your App
With your wireframe in place, it's time to flesh out your app’s visual design. Most no-code platforms feature customizable templates, which streamline the design process.
Here are principles to guide your design:
Consistency: Keep the color scheme and font style uniform throughout your app to create a cohesive look.
Simplicity: Avoid clutter. A clean design makes navigation intuitive.
Accessibility: Ensure that users with disabilities can adequately use your app. Implement features like alt text for images and proper contrast between text and background.
If you're designing an ecommerce app, for instance, make sure that product pages are clear and concise for a better shopping experience.
Step 5: Build Your App
Once your design is ready, it’s time to build your app using your chosen no-code platform. Begin by dragging and dropping your components.
Pay attention to these aspects:
User Authentication: If your app has user accounts, set up secure login systems to manage access.
UI Elements: Incorporate buttons, sliders, and forms to enhance user interaction.
Database Connection: Link your app to a database if it needs to store or retrieve user-generated content. Platforms like Airtable offer built-in database tools.
Utilize tutorials and community forums to troubleshoot any issues that arise.
Step 6: Iterate and Test
After building a prototype, it is vital to test your app and iterate based on user feedback. Get insights from friends, family, or potential users who can provide unbiased opinions.
Consider the following areas during your testing phase:
Functionality: Confirm that all features perform as intended.
User Experience: Gather feedback on the ease of navigation and clarity of information.
Performance: Measure how quickly your app responds. Statistically, a one-second delay can yield a 7% reduction in conversions.
Improving your app is an ongoing process, so be ready to adapt based on feedback.

Step 7: Launch Your App
When you're confident about your app's performance, it’s time to launch. Depending on your app's nature, this could involve publishing it on websites, app stores, or distributing it personally for beta testing.
To optimize your launch:
Create Buzz: Leverage social media, email promotions, and your website to build anticipation.
Gather Feedback: Encourage early users to leave reviews or suggestions after trying out your app.
Plan for Updates: Stay prepared for updates based on initial user feedback.
The hard work leads to this moment, and your launch is just the beginning of your app's journey.
Step 8: Maintain and Update Your App
After launching, prioritize maintaining and updating your app. Analyze user feedback and analytics to pinpoint areas needing attention. Regular updates will keep your app functional and relevant in the ever-changing tech landscape.
Consider maintaining:
New Features: As your user base grows, you may want to implement features that enhance usability.
Bug Fixes: Regular checks guarantee your app operates smoothly.
User Engagement: Keep users informed about updates to foster loyalty and interest.
Your dedication to ongoing improvement will drive your app’s long-term success.
The Journey Ahead
Creating your first app without writing code is a rewarding venture. With no-code platforms, your creativity can shine without technical limitations.
By following this guide—defining your idea, selecting the right platform, and iterating based on feedback—you can transform your concepts into functional applications. As the no-code movement grows, more individuals have the opportunity to step into the world of app development.
Start your journey today, and imagine the possibilities ahead as you watch your app positively impact its users.
#NoCode#AppDevelopment#Entrepreneurship#Startups#AI#Technology#Innovation#Business#Automation#DigitalTransformation#Productivity#SoftwareDevelopment#Bubble#Adalo#Airtable#LowCode#TechTrends#WebApps#MobileApps#FutureOfWork
0 notes
Text
Unlocking the Power of Low-Code and No-Code Tools
Unlocking the power of low-code and no-code tools empowers businesses to build applications quickly with minimal coding knowledge. These tools enable non-technical users to create, automate, and optimize workflows, enhancing productivity and accelerating digital transformation. Whether for process automation or app development, they are revolutionizing how businesses innovate and solve problems.

#LowCode#NoCode#DigitalTransformation#TechInnovation#AppDevelopment#Automation#BusinessEfficiency#NoCodeTools
0 notes
Text
Revolutionize Your Data Integration with FastN: The No-Code AI Platform

FastN is a no-code, AI-powered orchestration platform designed to help developers build, integrate, and manage APIs effortlessly. By leveraging AI agents and a visual drag-and-drop interface, FastN enables the creation of enterprise-grade API flows within minutes, supporting both synchronous and asynchronous applications.
Core Functionality:
FastN simplifies the integration and orchestration of multiple data sources into a single, unified API. Its AI agents facilitate seamless connections between disparate systems, streamlining the development process.
Key Features:
AI Agent for APIs & Integrations: Create APIs from human prompts, adding new integrations without coding.
Universal API Builder: Connect all application requirements with one Universal API, building, extending, and unifying integrations and authentication.
Instant API Composition: Compose high-performance, enterprise-ready APIs in minutes, with built-in observability and compliance.
Embed In Your App: Integrate your app in just a few clicks.
Infrastructure on Autopilot: Focus on growth, not infrastructure. Manage, monitor, and observe. Scale seamlessly.
Real-Time Data Orchestration: Instant data orchestration across all connected systems.
Benefits:
Enhanced Efficiency: Automate complex integrations, reducing development time and costs.
Scalability: Easily scale applications by integrating new data sources without significant overhead.
Flexibility: Support for both synchronous and asynchronous applications, accommodating diverse use cases.
Transform your data integration processes with FastN's no-code AI platform. Visit aiwikiweb.com/product/fastn
0 notes
Text
Drive Innovation with Low-Code Application Development Services.

Build apps quickly with low-code application development services. Using these, you can reduce coding efforts, organize workflows, and innovate faster with user-friendly, scalable, and efficient development solutions.
0 notes
Text

#Visualpath is the Top #mendix Training, offering expert-led Mendix Online Training Course with hands-on live projects and daily recorded sessions. Our #mendixtraining Online Certification Course is accessible across India, the USA, the UK, Canada, Dubai, and Australia. Gain in-depth knowledge from industry experts with real-time project experience. Flexible online classes ensure you master Mendix Online Training at your own pace. Call +91 7032290546 to enroll now!
visit: https://www.visualpath.in/online-mendix-training.html
WhatsApp: https://wa.me/c/917032290546
Visit our Blog: https://visualpathblogs.com/category/mendix/
#mendix#lowcode#nocode#mendixtraining#mendixdevelopment#mendixcommunity#mendixapps#ITCourses#ITSkills#automation#TechEducation#mendixexpert#mendixsolutions#lowcodeapps#MendixForBusiness#lowcodeplatforms
0 notes
Text
#🚀#NoCode ⚙️#AI 🌟#MachineLearning 💡 Revolutionizing the future of tech! 🌍 No coding? No problem! 🔥 Explore the power of#Automation#Innovation#and#TechSimplicity 🚀 Let AI & ML do the heavy lifting 🧠#TechForAll#AIWithoutCode 💻#FutureOfTech#DataScience 🛠️#MLForEveryone 🤖#TechTransformation#DigitalInnovation
0 notes
Text
Achieve More with Less - Boost Productivity Using Copilot in Power Apps

Microsoft Power Apps is transforming the landscape of app development, making it more accessible to a diverse range of users, from seasoned developers to business professionals with minimal coding experience. The introduction of Copilot, an AI-driven assistant, elevates Power Apps to a new level, streamlining app creation, automating repetitive tasks, and offering intelligent, context-sensitive suggestions — all powered by natural language commands.
What is Copilot in Power Apps? 🤖
Copilot is an AI assistant integrated into Power Apps that leverages Natural Language Processing (NLP) to help users design, develop, and refine their apps more efficiently. Whether you’re adding new features, integrating data sources, or troubleshooting issues, Copilot understands your intentions through plain language, making it easier to achieve your goals.
How Copilot Supercharges Productivity?
Streamlined App Development: Copilot offers step-by-step guidance through the app-building process. You simply describe what you need, and Copilot will help you implement it, reducing the learning curve and speeding up development.
Automated Routine Tasks: Tasks like connecting data sources or configuring app logic can be automated with Copilot, freeing up your time to focus on more complex aspects of your app.
Contextual Assistance: Stuck on a particular feature or function? Copilot provides instant, relevant suggestions or directs you to the right documentation, minimizing downtime and enhancing your workflow.
Enhanced Collaboration: Copilot bridges the gap between business users and developers by translating business requirements into technical actions. This fosters better collaboration and ensures that everyone on the team is aligned.
Getting Started with Copilot 🚀
To harness the power of Copilot, open the Power Apps editor and activate the Copilot feature. From here, you can start interacting with Copilot using natural language.
Whether you’re crafting a new app or refining an existing one, Copilot is your companion in every step of the development process.
How Memetic Solutions Can Elevate Your Copilot Experience ?🎯
At Memetic Solutions, we specialize in Power Apps development and are committed to helping you maximize the potential of Copilot. Our experts guide you through leveraging Copilot’s capabilities, customizing it to meet your specific needs, and optimizing your workflows for maximum efficiency.
Whether you’re tackling complex app builds or looking to streamline your processes, Memetic Solutions is here to support your journey.
#PowerApps#AIinDevelopment#ProductivityBoost#CopilotInPowerApps#AppDevelopment#MemeticSolutions#Automation#NoCode#LowCode#DigitalTransformation
0 notes