#openshift 4 installation
Text
Introduction to Openshift - Introduction to Openshift online cluster
Introduction to Openshift – Introduction to Openshift online cluster
OpenShift is a platform-as-a-service (PaaS) offering from Red Hat. It provides a cloud-like environment for deploying, managing, and scaling applications in a secure and efficient manner. OpenShift uses containers to package and deploy applications, and it provides built-in tools for continuous integration, continuous delivery,…
View On WordPress
#openshift openshift4 openshiftIntroduction openshifttutorial openshiftContainer introduction to openshift online cluster#introduction redhatopenshift containerization introduction to openshift#introduction to openshift#introduction to openshift container platform#introduction to openshift redhat#openshift 4#openshift 4 installation#openshift container platform#openshift online#Openshift overview#Overview of openshift#overview of openshift cluster#red hat introduction to openshift#red hat openshift#what is openshift#what is openshift online
0 notes
Text
Red Hat Training Categories: Empowering IT Professionals for the Future
Red Hat, a leading provider of enterprise open-source solutions, offers a comprehensive range of training programs designed to equip IT professionals with the knowledge and skills needed to excel in the rapidly evolving world of technology. Whether you're an aspiring system administrator, a seasoned DevOps engineer, or a cloud architect, Red Hat's training programs cover key technologies and tools that drive modern IT infrastructures. Let’s explore some of the key Red Hat training categories.
1. Red Hat Enterprise Linux (RHEL)
RHEL is the foundation of many enterprises, and Red Hat offers extensive training to help IT professionals master Linux system administration, automation, and security. Key courses in this category include:
Red Hat Certified System Administrator (RHCSA): An essential certification for beginners in Linux administration.
Red Hat Certified Engineer (RHCE): Advanced training in system administration, emphasizing automation using Ansible.
Security and Identity Management: Focuses on securing Linux environments and managing user identities.
2. Ansible Automation
Automation is at the heart of efficient IT operations, and Ansible is a powerful tool for automating tasks across diverse environments. Red Hat offers training on:
Ansible Basics: Ideal for beginners looking to understand how to automate workflows and deploy applications.
Advanced Ansible Automation: Focuses on optimizing playbooks, integrating Ansible Tower, and managing large-scale deployments.
3. OpenShift Container Platform
OpenShift is Red Hat’s Kubernetes-based platform for managing containerized applications. Red Hat training covers topics like:
OpenShift Administration: Learn how to install, configure, and manage OpenShift clusters.
OpenShift Developer: Build, deploy, and scale containerized applications on OpenShift.
4. Red Hat Cloud Technologies
With businesses rapidly adopting cloud technologies, Red Hat’s cloud training programs ensure that professionals are prepared for cloud-native development and infrastructure management. Key topics include:
Red Hat OpenStack: Learn how to deploy and manage private cloud environments.
Red Hat Virtualization: Master the deployment of virtual machines and manage large virtualized environments.
5. DevOps Training
Red Hat is committed to promoting DevOps practices, helping teams collaborate more efficiently. DevOps training includes:
Red Hat DevOps Pipelines and CI/CD: Learn how to streamline software development, testing, and deployment processes.
Container Development and Kubernetes Integration: Get hands-on experience with containerized applications and orchestrating them using Kubernetes.
6. Cloud-Native Development
As enterprises move towards microservices and cloud-native applications, Red Hat provides training on developing scalable and resilient applications:
Microservices Architecture: Learn to build and deploy microservices using Red Hat’s enterprise open-source tools.
Serverless Application Development: Focus on building lightweight applications that scale on demand.
7. Red Hat Satellite
Red Hat Satellite simplifies Linux system management at scale, and its training focuses on:
Satellite Server Administration: Learn how to automate system maintenance and streamline software updates across your RHEL environment.
8. Security and Compliance
In today's IT landscape, security is paramount. Red Hat offers specialized training on securing infrastructure and ensuring compliance:
Linux Security Essentials: Learn to safeguard Linux environments from vulnerabilities.
Advanced Security Features: Cover best practices for maintaining security across hybrid cloud environments.
Why Red Hat Training?
Red Hat certifications are globally recognized, validating your expertise in open-source technologies. They offer hands-on, practical training that helps professionals apply their knowledge directly to real-world challenges. By investing in Red Hat training, you are preparing yourself for future innovations and ensuring that your skills remain relevant in an ever-changing industry.
Conclusion
Red Hat training empowers IT professionals to build, manage, and secure the enterprise-grade systems that are shaping the future of technology. Whether you're looking to enhance your Linux skills, dive into automation with Ansible, or embrace cloud-native development, there’s a Red Hat training category tailored to your needs.
For more details click www.hawkstack.com
#redhatcourses#docker#information technology#kubernetes#containerorchestration#container#linux#dockerswarm#hawkstack#hawkstack technologies
0 notes
Text
OpenShift vs Kubernetes: A Detailed Comparison

When it comes to managing and organizing containerized applications there are two platforms that have emerged. Kubernetes and OpenShift. Both platforms share the goal of simplifying deployment, scaling and operational aspects of application containers. However there are differences between them. This article offers a comparison of OpenShift vs Kubernetes highlighting their features, variations and ideal use cases.
What is Kubernetes?
Kubernetes (often referred to as K8s) is an open source platform designed for orchestrating containers. It automates tasks such as deploying, scaling and managing containerized applications. Originally developed by Google and later donated to the Cloud Native Computing Foundation (CNCF) Kubernetes has now become the accepted industry standard for container management.
Key Features of Kubernetes
Pods: Within the Kubernetes ecosystem, pods serve as the units for deploying applications. They encapsulate one or multiple containers.
Service Discovery and Load Balancing: With Kubernetes containers can be exposed through DNS names or IP addresses. Additionally it has the capability to distribute network traffic across instances in case a container experiences traffic.
Storage Orchestration: The platform seamlessly integrates with storage systems such as on premises or public cloud providers based on user preferences.
Automated. Rollbacks: Kubernetes facilitates rolling updates while also providing a mechanism to revert back to versions when necessary.
What is OpenShift?
OpenShift, developed by Red Hat, is a container platform based on Kubernetes that provides an approach to creating, deploying and managing applications in a cloud environment. It enhances the capabilities of Kubernetes by incorporating features and tools that contribute to an integrated and user-friendly platform.
Key Features of OpenShift
Tools for Developers and Operations: OpenShift offers an array of tools that cater to the needs of both developers and system administrators.
Enterprise Level Security: It incorporates security features that make it suitable for industries with regulations.
Seamless Developer Experience: OpenShift includes a built in integration/ deployment (CI/CD) pipeline, source to image (S2I) functionality, as well as support for various development frameworks.
Service Mesh and Serverless Capabilities: It supports integration with Istio based service mesh. Offers Knative, for serverless application development.
Comparison; OpenShift, vs Kubernetes
1. Installation and Setup:
Kubernetes can be set up manually. Using tools such as kubeadm, Minikube or Kubespray.
OpenShift offers an installer that simplifies the setup process for complex enterprise environments.
2. User Interface:
Kubernetes primarily relies on the command line interface although it does provide a web based dashboard.
OpenShift features a comprehensive and user-friendly web console.
3. Security:
Kubernetes provides security features and relies on third party tools for advanced security requirements.
OpenShift offers enhanced security with built in features like Security Enhanced Linux (SELinux) and stricter default policies.
4. CI/CD Integration:
Kubernetes requires tools for CI/CD integration.
OpenShift has an integrated CI/CD pipeline making it more convenient for DevOps practices.
5. Pricing:
Kubernetes is open source. Requires investment in infrastructure and expertise.
OpenShift is a product with subscription based pricing.
6. Community and Support;
Kubernetes has a community, with support.
OpenShift is backed by Red Hat with enterprise level support.
7. Extensibility:
Kubernetes: It has an ecosystem of plugins and add ons making it highly adaptable.
OpenShift:It builds upon Kubernetes. Brings its own set of tools and features.
Use Cases
Kubernetes:
It is well suited for organizations seeking a container orchestration platform, with community support.
It works best for businesses that possess the technical know-how to effectively manage and scale Kubernetes clusters.
OpenShift:
It serves as a choice for enterprises that require a container solution accompanied by integrated developer tools and enhanced security measures.
Particularly favored by regulated industries like finance and healthcare where security and compliance are of utmost importance.
Conclusion
Both Kubernetes and OpenShift offer capabilities for container orchestration. While Kubernetes offers flexibility along with a community, OpenShift presents an integrated enterprise-ready solution. Upgrading Kubernetes from version 1.21 to 1.22 involves upgrading the control plane and worker nodes separately. By following the steps outlined in this guide, you can ensure a smooth and error-free upgrade process. The selection between the two depends on the requirements, expertise, and organizational context.
Example Code Snippet: Deploying an App on Kubernetes
apiVersion: v1
kind: Pod
metadata:
name: myapp-pod
labels:
app: myapp
spec:
containers:
- name: myapp-container
image: myapp:1.0
This YAML file is an example of deploying a simple application on Kubernetes. It defines a Pod with a single container running ‘myapp’.
In conclusion, both OpenShift vs Kubernetes offer robust solutions for container orchestration, each with its unique strengths and use cases. The choice between them should be based on organizational requirements, infrastructure, and the level of desired security and integration.
0 notes
Text
If you want to run a local Red Hat OpenShift on your Laptop then this guide is written just for you. This guide is not meant for Production setup or any use where actual customer traffic is anticipated. CRC is a tool created for deployment of minimal OpenShift Container Platform 4 cluster and Podman container runtime on a local computer. This is fit for development and testing purposes only. Local OpenShift is mainly targeted at running on developers’ desktops. For deployment of Production grade OpenShift Container Platform use cases, refer to official Red Hat documentation on using the full OpenShift installer.
We also have guide on running Red Hat OpenShift Container Platform in KVM virtualization;
How To Deploy OpenShift Container Platform on KVM
Here are the key points to note about Local Red Hat OpenShift Container platform using CRC:
The cluster is ephemeral
Both the control plane and worker node runs on a single node
The Cluster Monitoring Operator is disabled by default.
There is no supported upgrade path to newer OpenShift Container Platform versions
The cluster uses 2 DNS domain names, crc.testing and apps-crc.testing
crc.testing domain is for core OpenShift services and apps-crc.testing is for applications deployed on the cluster.
The cluster uses the 172 address range for internal cluster communication.
Requirements for running Local OpenShift Container Platform:
A computer with AMD64 and Intel 64 processor
Physical CPU cores: 4
Free memory: 9 GB
Disk space: 35 GB
1. Local Computer Preparation
We shall be performing this installation on a Red Hat Linux 9 system.
$ cat /etc/redhat-release
Red Hat Enterprise Linux release 9.0 (Plow)
OS specifications are as shared below:
[jkmutai@crc ~]$ free -h
total used free shared buff/cache available
Mem: 31Gi 238Mi 30Gi 8.0Mi 282Mi 30Gi
Swap: 9Gi 0B 9Gi
[jkmutai@crc ~]$ grep -c ^processor /proc/cpuinfo
8
[jkmutai@crc ~]$ ip ad
1: lo: mtu 65536 qdisc noqueue state UNKNOWN group default qlen 1000
link/loopback 00:00:00:00:00:00 brd 00:00:00:00:00:00
inet 127.0.0.1/8 scope host lo
valid_lft forever preferred_lft forever
inet6 ::1/128 scope host
valid_lft forever preferred_lft forever
2: ens18: mtu 1500 qdisc fq_codel state UP group default qlen 1000
link/ether b2:42:4e:64:fb:17 brd ff:ff:ff:ff:ff:ff
altname enp0s18
inet 192.168.207.2/24 brd 192.168.207.255 scope global noprefixroute ens18
valid_lft forever preferred_lft forever
inet6 fe80::b042:4eff:fe64:fb17/64 scope link noprefixroute
valid_lft forever preferred_lft forever
For RHEL register system
If you’re performing this setup on RHEL system, use the commands below to register the system.
$ sudo subscription-manager register --auto-attach
Registering to: subscription.rhsm.redhat.com:443/subscription
Username:
Password:
The registered system name is: crc.example.com
Installed Product Current Status:
Product Name: Red Hat Enterprise Linux for x86_64
Status: Subscribed
The command will automatically associate any available subscription matching the system. You can also provide username and password in one command line.
sudo subscription-manager register --username --password --auto-attach
If you would like to register system without immediate subscription attachment, then run:
sudo subscription-manager register
Once the system is registered, attach a subscription from a specific pool using the following command:
sudo subscription-manager attach --pool=
To find which pools are available in the system, run the commands:
sudo subscription-manager list --available
sudo subscription-manager list --available --all
Update your system and reboot
sudo dnf -y update
sudo reboot
Install required dependencies
You need to install libvirt and NetworkManager packages which are the dependencies for running local OpenShift cluster.
### Fedora / RHEL 8+ ###
sudo dnf -y install wget vim NetworkManager
### RHEL 7 / CentOS 7 ###
sudo yum -y install wget vim NetworkManager
### Debian / Ubuntu ###
sudo apt update
sudo apt install wget vim libvirt-daemon-system qemu-kvm libvirt-daemon network-manager
2. Download Red Hat OpenShift Local
Next we download CRC portable executable. Visit Red Hat OpenShift downloads page to pull local cluster installer program.
Under Cluster select “Local” as option to create your cluster. You’ll see Download link and Pull secret download link as well.
Here is the direct download link provided for reference purposes.
wget https://developers.redhat.com/content-gateway/rest/mirror/pub/openshift-v4/clients/crc/latest/crc-linux-amd64.tar.xz
Extract the package downloaded
tar xvf crc-linux-amd64.tar.xz
Move the binary file to location in your PATH:
sudo mv crc-linux-*-amd64/crc /usr/local/bin
sudo rm -rf crc-linux-*-amd64/
Confirm installation was successful by checking software version.
$ crc version
CRC version: 2.7.1+a8e9854
OpenShift version: 4.11.0
Podman version: 4.1.1
Data collection can be enabled or disabled with the following commands:
#Enable
crc config set consent-telemetry yes
#Disable
crc config set consent-telemetry no
3. Run Local OpenShift Cluster in Linux Computer
You’ll run the crc setup command to create a new Red Hat OpenShift Local Cluster. All the prerequisites for using CRC are handled automatically for you.
$ crc setup
CRC is constantly improving and we would like to know more about usage (more details at https://developers.redhat.com/article/tool-data-collection)
Your preference can be changed manually if desired using 'crc config set consent-telemetry '
Would you like to contribute anonymous usage statistics? [y/N]: y
Thanks for helping us! You can disable telemetry with the command 'crc config set consent-telemetry no'.
INFO Using bundle path /home/jkmutai/.crc/cache/crc_libvirt_4.11.0_amd64.crcbundle
INFO Checking if running as non-root
INFO Checking if running inside WSL2
INFO Checking if crc-admin-helper executable is cached
INFO Caching crc-admin-helper executable
INFO Using root access: Changing ownership of /home/jkmutai/.crc/bin/crc-admin-helper-linux
INFO Using root access: Setting suid for /home/jkmutai/.crc/bin/crc-admin-helper-linux
INFO Checking for obsolete admin-helper executable
INFO Checking if running on a supported CPU architecture
INFO Checking minimum RAM requirements
INFO Checking if crc executable symlink exists
INFO Creating symlink for crc executable
INFO Checking if Virtualization is enabled
INFO Checking if KVM is enabled
INFO Checking if libvirt is installed
INFO Installing libvirt service and dependencies
INFO Using root access: Installing virtualization packages
INFO Checking if user is part of libvirt group
INFO Adding user to libvirt group
INFO Using root access: Adding user to the libvirt group
INFO Checking if active user/process is currently part of the libvirt group
INFO Checking if libvirt daemon is running
WARN No active (running) libvirtd systemd unit could be found - make sure one of libvirt systemd units is enabled so that it's autostarted at boot time.
INFO Starting libvirt service
INFO Using root access: Executing systemctl daemon-reload command
INFO Using root access: Executing systemctl start libvirtd
INFO Checking if a supported libvirt version is installed
INFO Checking if crc-driver-libvirt is installed
INFO Installing crc-driver-libvirt
INFO Checking crc daemon systemd service
INFO Setting up crc daemon systemd service
INFO Checking crc daemon systemd socket units
INFO Setting up crc daemon systemd socket units
INFO Checking if systemd-networkd is running
INFO Checking if NetworkManager is installed
INFO Checking if NetworkManager service is running
INFO Checking if /etc/NetworkManager/conf.d/crc-nm-dnsmasq.conf exists
INFO Writing Network Manager config for crc
INFO Using root access: Writing NetworkManager configuration to /etc/NetworkManager/conf.
d/crc-nm-dnsmasq.conf
INFO Using root access: Changing permissions for /etc/NetworkManager/conf.d/crc-nm-dnsmasq.conf to 644
INFO Using root access: Executing systemctl daemon-reload command
INFO Using root access: Executing systemctl reload NetworkManager
INFO Checking if /etc/NetworkManager/dnsmasq.d/crc.conf exists
INFO Writing dnsmasq config for crc
INFO Using root access: Writing NetworkManager configuration to /etc/NetworkManager/dnsmasq.d/crc.conf
INFO Using root access: Changing permissions for /etc/NetworkManager/dnsmasq.d/crc.conf to 644
INFO Using root access: Executing systemctl daemon-reload command
INFO Using root access: Executing systemctl reload NetworkManager
INFO Checking if libvirt 'crc' network is available
INFO Setting up libvirt 'crc' network
INFO Checking if libvirt 'crc' network is active
INFO Starting libvirt 'crc' network
INFO Checking if CRC bundle is extracted in '$HOME/.crc'
INFO Checking if /home/jkmutai/.crc/cache/crc_libvirt_4.11.0_amd64.crcbundle exists
INFO Getting bundle for the CRC executable
INFO Downloading crc_libvirt_4.11.0_amd64.crcbundle
CRC bundle is downloaded locally within few seconds / minutes depending on your network connectivity speed.
INFO Downloading crc_libvirt_4.11.0_amd64.crcbundle
3.28 GiB / 3.28 GiB [----------------------------------------------------------------------------------------------------------------------------------------------------------] 100.00% 85.19 MiB p/s
INFO Uncompressing /home/jkmutai/.crc/cache/crc_libvirt_4.11.0_amd64.crcbundle
crc.qcow2: 12.48 GiB / 12.48 GiB [-----------------------------------------------------------------------------------------------------------------------------------------------------------] 100.00%
oc: 118.13 MiB / 118.13 MiB [----------------------------------------------------------------------------------------------------------------------------------------------------------------] 100.00%
Once the system is correctly setup for using CRC, start the new Red Hat OpenShift Local instance:
$ crc start
INFO Checking if running as non-root
INFO Checking if running inside WSL2
INFO Checking if crc-admin-helper executable is cached
INFO Checking for obsolete admin-helper executable
INFO Checking if running on a supported CPU architecture
INFO Checking minimum RAM requirements
INFO Checking if crc executable symlink exists
INFO Checking if Virtualization is enabled
INFO Checking if KVM is enabled
INFO Checking if libvirt is installed
INFO Checking if user is part of libvirt group
INFO Checking if active user/process is currently part of the libvirt group
INFO Checking if libvirt daemon is running
INFO Checking if a supported libvirt version is installed
INFO Checking if crc-driver-libvirt is installed
INFO Checking crc daemon systemd socket units
INFO Checking if systemd-networkd is running
INFO Checking if NetworkManager is installed
INFO Checking if NetworkManager service is running
INFO Checking if /etc/NetworkManager/conf.d/crc-nm-dnsmasq.conf exists
INFO Checking if /etc/NetworkManager/dnsmasq.d/crc.conf exists
INFO Checking if libvirt 'crc' network is available
INFO Checking if libvirt 'crc' network is active
INFO Loading bundle: crc_libvirt_4.11.0_amd64...
CRC requires a pull secret to download content from Red Hat.
You can copy it from the Pull Secret section of https://console.redhat.com/openshift/create/local.
Paste the contents of the Pull secret.
? Please enter the pull secret
This can be obtained from Red Hat OpenShift Portal.
Local OpenShift cluster creation process should continue.
INFO Creating CRC VM for openshift 4.11.0...
INFO Generating new SSH key pair...
INFO Generating new password for the kubeadmin user
INFO Starting CRC VM for openshift 4.11.0...
INFO CRC instance is running with IP 192.168.130.11
INFO CRC VM is running
INFO Updating authorized keys...
INFO Configuring shared directories
INFO Check internal and public DNS query...
INFO Check DNS query from host...
INFO Verifying validity of the kubelet certificates...
INFO Starting kubelet service
INFO Waiting for kube-apiserver availability... [takes around 2min]
INFO Adding user's pull secret to the cluster...
INFO Updating SSH key to machine config resource...
INFO Waiting for user's pull secret part of instance disk...
INFO Changing the password for the kubeadmin user
INFO Updating cluster ID...
INFO Updating root CA cert to admin-kubeconfig-client-ca configmap...
INFO Starting openshift instance... [waiting for the cluster to stabilize]
INFO 3 operators are progressing: image-registry, network, openshift-controller-manager
[INFO 3 operators are progressing: image-registry, network, openshift-controller-manager
INFO 2 operators are progressing: image-registry, openshift-controller-manager
INFO Operator openshift-controller-manager is progressing
INFO Operator authentication is not yet available
INFO Operator kube-apiserver is progressing
INFO All operators are available. Ensuring stability...
INFO Operators are stable (2/3)...
INFO Operators are stable (3/3)...
INFO Adding crc-admin and crc-developer contexts to kubeconfig...
If creation was successful you should get output like below in your console.
Started the OpenShift cluster.
The server is accessible via web console at:
https://console-openshift-console.apps-crc.testing
Log in as administrator:
Username: kubeadmin
Password: yHhxX-fqAjW-8Zzw5-Eg2jg
Log in as user:
Username: developer
Password: developer
Use the 'oc' command line interface:
$ eval $(crc oc-env)
$ oc login -u developer https://api.crc.testing:6443
Virtual Machine created can be checked with virsh command:
$ sudo virsh list
Id Name State
----------------------
1 crc running
4. Manage Local OpenShift Cluster using crc commands
Update number of vCPUs available to the instance:
crc config set cpus
Configure the memory available to the instance:
$ crc config set memory
Display status of the OpenShift cluster
## When running ###
$ crc status
CRC VM: Running
OpenShift: Running (v4.11.0)
Podman:
Disk Usage: 15.29GB of 32.74GB (Inside the CRC VM)
Cache Usage: 17.09GB
Cache Directory: /home/jkmutai/.crc/cache
## When Stopped ###
$ crc status
CRC VM: Stopped
OpenShift: Stopped (v4.11.0)
Podman:
Disk Usage: 0B of 0B (Inside the CRC VM)
Cache Usage: 17.09GB
Cache Directory: /home/jkmutai/.crc/cache
Get IP address of the running OpenShift cluster
$ crc ip
192.168.130.11
Open the OpenShift Web Console in the default browser
crc console
Accept SSL certificate warnings to access OpenShift dashboard.
Accept risk and continue
Authenticate with username and password given on screen after deployment of crc instance.
The following command can also be used to view the password for the developer and kubeadmin users:
crc console --credentials
To stop the instance run the commands:
crc stop
If you want to permanently delete the instance, use:
crc delete
5. Configure oc environment
Let’s add oc executable our system’s PATH:
$ crc oc-env
export PATH="/home/jkmutai/.crc/bin/oc:$PATH"
# Run this command to configure your shell:
# eval $(crc oc-env)
$ vim ~/.bashrc
export PATH="/home/$USER/.crc/bin/oc:$PATH"
eval $(crc oc-env)
Logout and back in to validate it works.
$ exit
Check oc binary path after getting in to the system.
$ which oc
~/.crc/bin/oc/oc
$ oc get nodes
NAME STATUS ROLES AGE VERSION
crc-9jm8r-master-0 Ready master,worker 21d v1.24.0+9546431
Confirm this works by checking installed cluster version
$ oc get clusterversion
NAME VERSION AVAILABLE PROGRESSING SINCE STATUS
version 4.11.0 True False 20d Cluster version is 4.11.0
To log in as the developer user:
crc console --credentials
oc login -u developer https://api.crc.testing:6443
To log in as the kubeadmin user and run the following command:
$ oc config use-context crc-admin
$ oc whoami
kubeadmin
To log in to the registry as that user with its token, run:
oc registry login --insecure=true
Listing available Cluster Operators.
$ oc get co
NAME VERSION AVAILABLE PROGRESSING DEGRADED SINCE MESSAGE
authentication 4.11.0 True False False 11m
config-operator 4.11.0 True False False 21d
console 4.11.0 True False False 13m
dns 4.11.0 True False False 19m
etcd 4.11.0 True False False 21d
image-registry 4.11.0 True False False 14m
ingress 4.11.0 True False False 21d
kube-apiserver 4.11.0 True False False 21d
kube-controller-manager 4.11.0 True False False 21d
kube-scheduler 4.11.0 True False False 21d
machine-api 4.11.0 True False False 21d
machine-approver 4.11.0 True False False 21d
machine-config 4.11.0 True False False 21d
marketplace 4.11.0 True False False 21d
network 4.11.0 True False False 21d
node-tuning 4.11.0 True False False 13m
openshift-apiserver 4.11.0 True False False 11m
openshift-controller-manager 4.11.0 True False False 14m
openshift-samples 4.11.0 True False False 21d
operator-lifecycle-manager 4.11.0 True False False 21d
operator-lifecycle-manager-catalog 4.11.0 True False False 21d
operator-lifecycle-manager-packageserver 4.11.0 True False False 19m
service-ca 4.11.0 True False False 21d
Display information about the release:
oc adm release info
Note that the OpenShift Local reserves IP subnets for its internal use and they should not collide with your host network. These IP subnets are:
10.217.0.0/22
10.217.4.0/23
192.168.126.0/24
If your local system is behind a proxy, then define proxy settings using environment variable. See examples below:
crc config set http-proxy http://proxy.example.com:
crc config set https-proxy http://proxy.example.com:
crc config set no-proxy
If Proxy server uses SSL, set CA certificate as below:
crc config set proxy-ca-file
6. Install and Connecting to remote OpenShift Local instance
If the deployment is on a remote server, install CRC and start the instance using process in steps 1-3. With the cluster up and running, install HAProxy package:
sudo dnf install haproxy /usr/sbin/semanage
Allow access to cluster in firewall:
sudo firewall-cmd --add-service=http,https,kube-apiserver --permanent
sudo firewall-cmd --reload
If you have SELinux enforcing, allow HAProxy to listen on TCP port 6443 for serving kube-apiserver on this port:
sudo semanage port -a -t http_port_t -p tcp 6443
Backup the current haproxy configuration file:
sudo cp /etc/haproxy/haproxy.cfg,.bak
Save the current IP address of CRC in variable:
export CRC_IP=$(crc ip)
Create a new configuration:
sudo tee /etc/haproxy/haproxy.cfg
0 notes
Text
ok I just want to take a moment to rant bc the bug fix I’d been chasing down since monday that I finally just resolved was resolved with. get this. A VERSION UPDATE. A LIBRARY VERSION UPDATE. *muffled screaming into the endless void*
so what was happening. was that the jblas library I was using for handling complex matrices in my java program was throwing a fucking hissy fit when I deployed it via openshift in a dockerized container. In some ways, I understand why it would throw a fit because docker containers only come with the barest minimum of software installed and you mostly have to do all the installing of what your program needs by yourself. so ok. no biggie. my program runs locally but doesn’t run in docker: this makes sense. the docker container is probably just missing the libgfortran3 library that was likely preinstalled on my local machine. which means I’ll just update the dockerfile (which tells docker how to build the docker image/container) with instructions on how to install libgfortran3. problem solved. right? WRONG.
lo and behold, the bane of my existence for the past 3 days. this was the error that made me realize I needed to manually install libgfortran3, so I was pretty confident installing the missing library would fix my issue. WELL. turns out. it in fact didn’t. so now I’m chasing down why.
some forums suggested specifying the tmp directory as a jvm option or making sure the libgfortran library is on the LD_LIBRARY_PATH but basically nothing I tried was working so now I’m sitting here thinking: it probably really is just the libgfortran version. I think I legitimately need version 3 and not versions 4 or 5. because that’s what 90% of the solutions I was seeing was suggesting.
BUT! fuck me I guess because the docker image OS is RHEL which means I have to use the yum repo to install software (I mean I guess I could have installed it with the legit no kidding .rpm package but that’s a whole nother saga I didn’t want to have to go down), and the yum repo had already expired libgfortran version 3. :/ It only had versions 4 and 5, and I was like, well that doesn’t help me!
anyways so now I’m talking with IT trying to get their help to find a version of libgfortran3 I can install when. I FIND THIS ELUSIVE LINK. and at the very very bottom is THIS LINK.
Turns out. 1.2.4 is in fact not the latest version of jblas according to the github project page (on the jblas website it claims that 1.2.4 is the current verison ugh). And according to the issue opened at the link above, version 1.2.5 should fix the libgfortran3 issue.
and I think it did?! because when I updated the library version in my project and redeployed it, the app was able to run without crashing on the libgfortran3 error.
sometimes the bug fix is as easy as updating a fucking version number. but it takes you 3 days to realize that’s the fix. or at least a fix. I was mentally preparing myself to go down the .rpm route but boy am I glad I don’t have to now.
anyways tl;dr: WEBSITES ARE STUPID AND LIKELY OUTDATED AND YOU SHOULD ALWAYS CHECK THE SOURCE CODE PAGE FOR THE LATEST MOST UP TO DATE INFORMATION.
#this is a loooooong post lmao#god i'm so mad BUT#at least the fix ended up being really easy#it just took me forever to _find_#ok end rant back to work lmao
4 notes
·
View notes
Text
Kubernetes is hot and everyone loses their minds
We all witnessed Pat Gelsinger invite Kubernetes to vSphere and all of a sudden every IT manager on the planet needs to have a Kubernetes strategy. There are many facets to understanding and embracing Kubernetes as the platform of the future coming from a traditional IT mindset. Are we ready?
Forgetting IaaS
With the recent announcement from SUSE to abandon OpenStack in favor of their container offerings, where are we going to run these containers? Kubernetes does not replace the need to effectively provision infrastructure resources. We need abstractions to provision servers, networks and storage to run the Kubernetes clusters on. The public cloud vendors obviously understands this but are we simply giving the hybrid cloud market to VMware? Is vSphere the only on-prem IaaS that will matter down the line? Two of the biggest cloud vendors rely on VMware for their hybrid offerings. Google Anthos and Amazon Outpost.
Rise Above
In the new brave world IT staff needs to start thinking drastically different on how they manage and consume resources. New tools need to be honed to make developers productive (and first and foremost, happy) and not have them run off with shadow IT. There’s an apparent risk that we’ll leapfrog from one paradigm to another without understanding the steps necessary in between to embrace Kubernetes.

Since my first KubeCon in 2016 I immediately understood that Kubernetes is going to become the defacto "operating system” for multi-node computing. There’s nothing you can’t do on Kubernetes you did yesterday with headless applications. It gives you way too much for free. Why would you be stuck in imperative patterns with toil overload when the declarative paradigm is readily available for your developers and operations team?
Start now Mr. IT Manager
Do not sit around and wait for Tanzu and Project Pacific to land in your lap. There are plenty of Kubernetes distributions with native integration with vSphere that allow your teams to exercise the patterns required to be successful at deploying and running K8s in a production setting.
Here’s a non-exhaustive list with direct links to the vSphere integration of each:
Google Anthos
Rancher
Red Hat OpenShift
Juju
Kops
The Go library for the VMware vSphere API has a good list of consumers too. So start today!
2 notes
·
View notes
Text
IBM C1000-150 Practice Test Questions
C1000-150 IBM Cloud Pak for Business Automation v21.0.3 Administration is the new exam replacement of the C1000-091 exam. PassQuestion has designed the C1000-150 Practice Test Questions to ensure your one attempt success in the IBM Cloud Pak for Business Automation v21.0.3 Administration Exam. You just need to learn all the IBM C1000-150 exam questions and answers carefully. You will get fully ready to attempt your IBM C1000-150 exam confidently. The best part is that the C1000-150 Practice Test Questions include the authentic and accurate answers that are necessary to learn for clearing the IBM C1000-150 exam.
IBM Cloud Pak for Business Automation v21.0.3 Administration (C1000-150)
The IBM Certified Administrator on IBM Cloud Pak for Business Automation v21.0.3 is an intermediate-level certification for an experienced system administrator who has extensive knowledge and experience of IBM Cloud Pak for Business Automation v21.0.3. This administrator can perform tasks related to Day 1 activities (installation and configuration). The administrator also handles Day 2 management and operation, security, performance, updates (including installation of fix packs and patches), customization, and/or problem determination. This exam does not cover installation of Red Hat OpenShift.
Recommended Skills
Basic concepts of Docker and Kubernetes
Ability to write scripts in YAML
Working knowledge of Linux
Working knowledge of OpenShift command-line interface, web GUI, and monitoring
Basic knowledge of Kafka, Elastic Search, Kibana, and HDFS
Working knowledge of relational databases and LDAP
Basic knowledge of event-driven architecture.
Exam Information
Exam Code: C1000-150
Number of questions: 60
Number of questions to pass: 39
Time allowed: 90 minutes
Languages: English
Certification: IBM Certified Administrator - IBM Cloud Pak for Business Automation v21.0.3
Exam Sections
Section 1: Planning and Install 26%
Section 2: Troubleshooting 27%
Section 3: Security 17%
Section 4: Resiliency 10%
Section 5: Management 20%
View Online IBM Cloud Pak for Business Automation v21.0.3 C1000-150 Free Questions
1. Which statement is true when installing Cloud Pak for Business Automation via the Operator Hub and Form view?
A. Ensure the Persistent Volume Claim (PVC) is defined in the namespace.
B. Use a login install ID that has at minimum Editor permission.
C. The cluster can only be set up using silent mode.
D. The secret key for admin.registrykey is automatically generated.
Answer: A
2. After installing a starter deployment of the Cloud Pak for Business Automation, which statement is true about using the LDAP user registry?
A. Only three users are predefined: cp4admin, user1, and user2, but others can be added manually.
B. Predefined users’ passwords can be modified by updating the icp4adeploy-openldap-customldif secret.
C. New users can be added by using the route to the openldap pod from an OpenLDAP browser.
D. New users can be added by the predefined cp4admin user through the admin console of ZenUI.
Answer: B
3. What might cause OpenShift to delete a pod and try to redeploy it again?
A. Liveness probe detects an unhealthy state.
B. Readiness probe returns a failed state.
C. Pod accessed in debug mode.
D. Unauthorized access attempted.
Answer: A
4. After the root CA is replaced, what is the first item that must be completed in order to reload services?
A. Delete the default token.
B. Replace helm certificates.
C. Delete old certificates.
D. Restart related services.
Answer: A
5. While not recommended, if other pods are deployed in the same namespace that is used for the Cloud Pak for Business Automation deployment, what default network policy is used?
A. deny-all
B. allow-all
C. allow-same-namespace
D. restricted
Answer: B
6. What feature of a Kubernetes deployment of CP4BA contributes to high availability?
A. Dynamic Clustering through WebSphere
B. WebSphere Network Deployment application clustering
C. Usage of EJB protocol
D. Crashed pod restart managed by Kubernetes kubelet
Answer: D
7. How are Business Automation Insights business events processed and stored for dashboards?
A. Kafka is responsible for aggregating and storing summary events.
B. Flink jobs write data to Elasticsearch.
C. Business Automation Insights uses a custom Cloudant database to store events.
D. The HDFS datalake serves this purpose.
Answer: B
0 notes
Photo

🇨🇦 Security Engineer 🍁 Toronto, Canada. Visa Sponsor . Skills: ✔️Java - 4 Year(s) ✔️Aws - 2 Year(s) ✔️ Cryptography - 2 Year(s) . Link: . https://vanhack.com/job/8135?invite=benlope . * Bachelor’s degree in Computer Science / Engineering or equivalent work experience * 3-5 years of development experience with strong knowledge in implementation (installation, configuration, integration) and enterprise application development * Working knowledge in Cryptography concepts such as PKI, HSM and Key Management * Proficiency in understanding concepts and technologies in DevOps, IT operations, security, cloud, microservices, containers, and scheduling platforms including cloud suite and services experience (i.e. Cloud Foundry, AWS, Azure, OpenStack, Kubernetes, OpenShift, Puppet, Chef and Terraform) * 3+ years of development experience in Java, NodeJS, JavaScript, Shell scripting, GO and GIT workflow. * Experience with infrastructure and application automation security implementation using SSO, SAML, IDM, OAUTH, Hashicorp * Excellent communication skills, both verbal and written. Able to work independently and manage multiple priorities * Quick learner with ability to pick up new technologies/skills and business knowledge * Highly motivated with the ability to work independently and effectively #trabajaencanada #trabajarencanada #estudiarencanada #latinosencanada🔥 #benlopezra #canada #canada🇨🇦 (at Toronto, Ontario) https://www.instagram.com/p/Cg1r6sSOMh7/?igshid=NGJjMDIxMWI=
0 notes
Text
IaaS, PaaS or SaaS — Which Cloud Offering is Right for Small Businesses?

IaaS, PaaS, and SaaS are the building blocks of modern cloud computing. Like the “aaS” part of the acronym in each of these terms implies, these are solutions offered “as a service” — on-demand to customers as and when they need to use them.
Related articles
What if we told you there are ways to minimize cloud service costs?
Success or failure on the cloud can depend on your Google Cloud Partner. Here are 4 criteria to help you choose right.
Taking away the need for businesses to manage their own infrastructure, platform or software, these cloud offerings give them the space to focus on the core of their business instead. The “as a service” model has become one of the defining characteristics of the cloud today.
IaaS, PaaS or SaaS: which cloud service offering should you select for your business? Let’s find out by taking a quick look at what IaaS, PaaS and SaaS actually mean.
IaaS — To Host
IaaS, or Infrastructure as a Service, refers to access to storage, networking, servers and other cloud computing resources, offered to a business by a vendor. In IaaS, users are provided with a ‘virtual server’ on which they can host their applications and data.
Amazon Web Services (AWS), Microsoft Azure and Google Compute Engine (GCE) are some of the most popular IaaS providers.
PaaS — To Build
PaaS is Platform as a Service, where access to a cloud-based environment is provided by a service provider, enabling application development and other cloud computing solutions. In PaaS, users receive a platform (runtime) and environment.
Users, in this case, are generally developers of applications. Popular PaaS providers include Google App Engine, SalesForce, IBM Bluemix, OpenShift, and Heroku.
SaaS — To Consume
SaaS is software as a service, where a software application developed by a service provider is made accessible on a subscription basis to individual users or companies via the internet. SaaS, in effect, is a business model through which a license for use of pre-developed software is made available to users.
The users here are typically end users of cloud solutions, and are not necessarily technical experts. Gmail, Facebook, Office 365 and Google Apps are all examples of SaaS.
Most small businesses and even some mid-size businesses often opt for SaaS solutions.
When to Choose SaaS
SaaS is the cloud offering that focuses on the consumption of services. It is, therefore, the model of choice for small-size businesses, as it requires no additional manpower or technical expertise to manage. It requires nothing more than an internet connection and a device in order to enable the consumption of the service.
With SaaS, there is no need to install any software locally, and no need to manage upgrades and updates, as they happen automatically when the device is connected to the cloud. Moreover, cloud computing services based on SaaS are accessible from almost any device connected to the internet, from anywhere in the world.
If you are looking for a cost-effective, simplified way to work on specific tasks without need for technical complications, then SaaS is your go-to model while choosing a cloud offering.
When Not to Choose SaaS
While SaaS is quick and easy to get started, you will be working with an off-the-shelf application which will likely not offer much by way of customization or control. Another challenge you may find with certain SaaS applications is that they may not integrate with or communicate effectively with other applications you may be using.
If you want a customized application for your business needs that will make you stand out from the rest of your industry, and if you have the resources to manage them, then you are probably better off giving SaaS a miss. Cloud now offers cloud migration services and cloud migration consulting services for their clients. IaaS, PaaS or SaaS: which cloud service offering should you opt for and with which cloud service provider(s)? Ask CloudNow today.
#Cloud migiration#cloud#cloud managed services#cloud computing#cloud companies#cloud advisory services#cloud advisory service#cloud advisory#cloud migration strategy#cloud migration service#top cloud migration service providers#cloud migration#leading cloud migration service providers#saas vs paas vs iaas#iaas#paas#application modernization#app development#app developing company#applicationdevelopment#apps#cloud service providers#cloud services
0 notes
Photo

10 Best API Management Tools
An App development Programming Interface (API) allows individual programs to communicate with each other directly and use each different function. An API is a window onto facts and capability within an app development company. It allows flutter developers to write app development that engage with backend web development systems.
10 best API management tools
1. Apigee
Apigee is one of the best API Management tools out there for partner app developers, cloud app development , consumer app developers, systems of record, and IoT. With app developers solutions, web designers, analyze, scale, and secure APIs.
Some of its features include:
It helps to deliver the solution in the form of proxy, hybrid, or agent.
It makes it easy for flutter developers to apply information and equipment to build new cloud-primarily based app development.
It has four pricing plans – Standard, Evaluation, Enterprise, and Enterprise Plus. The Evaluation plan is free. For opportunity, you need to contact the web development team.
2. Software AG
App development AG was recently categorized as a visionary in the Gartner Magic Quadrant for Industrial Internet of Things. This is due to the fact of its API infrastructure is properly-integrated and also exquisite for its innovation.
Some of its key features include:
Provides access to several open API standards.
Helps users to manage the entire API lifecycle.
Has an entirely customizable flutter developers portal.
3. Microsoft Azure
A user-friendly option for app development company of any size that enables enterprises to manage APIs with a self-provider approach.
Some of its key features include:
API management is tightly integrated with broader Azure cloud offerings, making it a smooth preference for web development companies that have already invested in Microsoft’s cloud app development technology.
Lifecycle APIs control includes version and intake track.
4. Red Hat 3Scale
Red Hat 3scale includes a wide range of API web designers tools that integrate into Red Hat’s 3scale broader flutter developers toolset, making this imparting an amazing desire for startups, small, medium, or big businesses.
Some of its key features include:
3scale is now connected to the wider world of containers and Kubernetes, Red Hat’s OpenShift app development platform, enabling API management and cloud-native workloads.
Monetization alternatives, as well as complete analytics for API app developers control, are a core element of the web development platform.
Users can installation 3scale components on-premises or within the cloud.
5. MuleSoft
MuleSoft is one of the best API management for connecting app developers. It also works well for coping and building APIs. Additionally, it offers solutions for flutter developers an app development web development from scratch.
This allows you to manage clients and examine the traffic you get. It also has guidelines in place that allow you to secure your API from cyberattacks.
Some of its key features include:
Has an integrated API app development platform.
Helps you create a community that you can use to nurture and collaborate with other flutter developers.
6. Axway
Axway is an excellent API web development tool that provides cloud-based data integration. Some of the solutions that it offers consist of B2B integration, app development, and API management.
Some of its features include:
Trend analysis and predictive evaluation of API.
Pre-built flutter development guidelines that make it easy for app developers to work.
7. Akana
Akana provides end-to-end API management tools for web designers, implementing, securing, and publishing the APIs. Well-suited for large various app development company and federated API app developers associate ecosystems, it may be deployed natively across on-premises and cloud, that enables clients to deploy securely in an integrated no-code portal, and provides detailed business analytics.
Some of its key features are:
Helps you to create, discover, and monitor the APIs.
It is highly secured and detects vulnerabilities in the API web development code.
8. Fiorano software
Fiorano app development is effective for integrating web development packages and app development services in an API. Available both as a cloud and on-premise flutter development platform. It also provides contextual evaluation and visibility into API initiatives and related to digital assets to assist drive app developers and user engagement.
Some of its key features include:
Monitoring all deployed APIs to detect errors and track performance.
Mediation app development services that support data formats such as HTTPS and JMS.
App Developers access to manage and deploy APIs through a web development console.
It has a drag-and-drop feature that makes it simple to create APIs.
9. IBM
A full flutter development and management app development platform for APIs that advanced insights to assist app development company to get the maximum out in their API usage, including revenue optimization. IBM’s app developers solution is an incredible desire for medium to large-sized software development company. It facilitates that the IBM cloud is so completely software developers an app development.
Some of its key features are:
App Developers integration in IBM’s app development platform enables app development company to connect to back-end data sources to flutter developers new APIs.
IBM’s app development platform can guide large scale deployments and is visible through many web development companies as being very convenient.
Available for deployment in every on-premises and as cloud SaaS app development models.
10. TIBCO cloud-Mashery
TIBCO Cloud Mashery is one of the best API management web development tools used for changing to SOAP and RESTful protocols. It affords a complete existence of API software developers solutions for public APIs, B2B, and SaaS app development.
0 notes
Text
How to deploy web application in openshift command line
To deploy a web application in OpenShift using the command-line interface (CLI), follow these steps:
Create a new project: Before deploying your application, you need to create a new project. You can do this using the oc new-project command. For example, to create a project named “myproject”, run the following command:javascriptCopy codeoc new-project myproject
Create an application: Use the oc…
View On WordPress
#openshift openshift4 redhatopenshift openshifttutorial openshiftonline#application deployment#deploy openshift web application using openshift cli command line red hat openshift#kubernetes#openshift#openshift container platform#openshift deploy spring boot jar#openshift installation#openshift login#openshift online#openshift openshift 4 red hat openshift#openshift openshift 4 red hat openshift container platform#openshift tutorial#Openshift webconsole#red hat#red hat openshift#redhat openshift online#web application openshift online
0 notes
Text
Deploying Your First Application on OpenShift
Deploying an application on OpenShift can be straightforward with the right guidance. In this tutorial, we'll walk through deploying a simple "Hello World" application on OpenShift. We'll cover creating an OpenShift project, deploying the application, and exposing it to the internet.
Prerequisites
OpenShift CLI (oc): Ensure you have the OpenShift CLI installed. You can download it from the OpenShift CLI Download page.
OpenShift Cluster: You need access to an OpenShift cluster. You can set up a local cluster using Minishift or use an online service like OpenShift Online.
Step 1: Log In to Your OpenShift Cluster
First, log in to your OpenShift cluster using the oc command.
oc login https://<your-cluster-url> --token=<your-token>
Replace <your-cluster-url> with the URL of your OpenShift cluster and <your-token> with your OpenShift token.
Step 2: Create a New Project
Create a new project to deploy your application.
oc new-project hello-world-project
Step 3: Create a Simple Hello World Application
For this tutorial, we'll use a simple Node.js application. Create a new directory for your project and initialize a new Node.js application.
mkdir hello-world-app cd hello-world-app npm init -y
Create a file named server.js and add the following content:
const express = require('express'); const app = express(); const port = 8080; app.get('/', (req, res) => res.send('Hello World from OpenShift!')); app.listen(port, () => { console.log(`Server running at http://localhost:${port}/`); });
Install the necessary dependencies.
npm install express
Step 4: Create a Dockerfile
Create a Dockerfile in the same directory with the following content:
FROM node:14 WORKDIR /app COPY package*.json ./ RUN npm install COPY . . EXPOSE 8080 CMD ["node", "server.js"]
Step 5: Build and Push the Docker Image
Log in to your Docker registry (e.g., Docker Hub) and push the Docker image.
docker login docker build -t <your-dockerhub-username>/hello-world-app . docker push <your-dockerhub-username>/hello-world-app
Replace <your-dockerhub-username> with your Docker Hub username.
Step 6: Deploy the Application on OpenShift
Create a new application in your OpenShift project using the Docker image.
oc new-app <your-dockerhub-username>/hello-world-app
OpenShift will automatically create the necessary deployment configuration, service, and pod for your application.
Step 7: Expose the Application
Expose your application to create a route, making it accessible from the internet.
oc expose svc/hello-world-app
Step 8: Access the Application
Get the route URL for your application.
oc get routes
Open the URL in your web browser. You should see the message "Hello World from OpenShift!".
Conclusion
Congratulations! You've successfully deployed a simple "Hello World" application on OpenShift. This tutorial covered the basic steps, from setting up your project and application to exposing it on the internet. OpenShift offers many more features for managing applications, so feel free to explore its documentation for more advanced topic
For more details click www.qcsdclabs.com
#redhatcourses#information technology#docker#container#linux#kubernetes#containersecurity#containerorchestration#dockerswarm#aws
0 notes
Text
In this guide we will be performing an installation of OKD / OpenShift 4.x Cluster on OpenStack Cloud Platform. OpenShift is a powerful, enterprise grade containerization software solution developed by Red Hat. The solution is built around Docker containers orchestrated and managed by Kubernetes on a foundation of Red Hat Enterprise Linux .
The OpenShift platform offers automated installation, upgrades, and lifecycle management throughout the container stack – from the operating system, Kubernetes and cluster services, to deployed applications. Operating system that will be used on both the Control plan and Worker machines is Fedora CoreOS (FCOS) for OKD deployment, and Red Hat CoreOS (RHCOS) for OpenShift deployment. This OS includes the kubelet, which is the Kubernetes node agent, and the CRI-O container runtime, which is optimized for Kubernetes.
Fedora CoreOS / Red Hat Enterprise Linux CoreOS also includes a critical first-boot provisioning tool called Ignition which enables the cluster to configure the machines. With all the machines in the cluster running on RHCOS/FCOS, the cluster will manage all aspects of its components and machines, including the operating system.
Below is a diagram showing subset of the installation targets and dependencies for OpenShift / OKD Cluster.
The latest release of OpenShift as of this article writing is version 4.10. Follow the steps outlined in this article to have a working installation of OpenShift / OKD Cluster on OpenStack. There is a requirement of having a running installation of OpenStack Cloud – on-premise, co-located infrastructure or Cloud IaaS setup.
Step 1: Download Installation Program / Client Tools
Download the installation program(openshift-install) and cluster management tools from:
OKD releases tools
For OpenShift Cluster Setup: OpenShift releases page
OKD 4.10 Installation program and Client tools
Install Libvirt to avoid error “./openshift-install: error while loading shared libraries: libvirt-lxc.so.0: cannot open shared object file: No such file or directory“
# CentOS / Fedora / RHEL / Rocky
sudo yum -y install libvirt
# Ubuntu / Debian
sudo apt update
sudo apt -y install libvirt-daemon-system libvirt-daemon
Downloading OKD 4.x installer:
mkdir -p ~/okd/tools
cd ~/okd/tools
# Linux
wget https://github.com/openshift/okd/releases/download/4.10.0-0.okd-2022-03-07-131213/openshift-install-linux-4.10.0-0.okd-2022-03-07-131213.tar.gz
# macOS
wget https://github.com/openshift/okd/releases/download/4.10.0-0.okd-2022-03-07-131213/openshift-install-mac-4.10.0-0.okd-2022-03-07-131213.tar.gz
Extract the file after downloading:
# Linux
tar xvf openshift-install-linux-4.10.0-0.okd-2022-03-07-131213.tar.gz
# macOS
tar xvf openshift-install-mac-4.10.0-0.okd-2022-03-07-131213.tar.gz
Move resulting binary file to /usr/local/bin directory:
sudo mv openshift-install /usr/local/bin
Download Client tools:
# Linux
wget https://github.com/openshift/okd/releases/download/4.10.0-0.okd-2022-03-07-131213/openshift-client-linux-4.10.0-0.okd-2022-03-07-131213.tar.gz
tar xvf openshift-client-linux-4.10.0-0.okd-2022-03-07-131213.tar.gz
sudo mv kubectl oc /usr/local/bin
# macOS
wget https://github.com/openshift/okd/releases/download/4.10.0-0.okd-2022-03-07-131213/openshift-client-mac-4.10.0-0.okd-2022-03-07-131213.tar.gz
tar xvf openshift-client-mac-4.10.0-0.okd-2022-03-07-131213.tar.gz
sudo mv kubectl oc /usr/local/bin
Check versions of both oc and openshift-install to confirm successful installation:
$ oc version
Client Version: 4.10.0-0.okd-2022-03-07-131213
$ openshift-install version
openshift-install 4.10.0-0.okd-2022-03-07-131213
built from commit 3b701903d96b6375f6c3852a02b4b70fea01d694
release image quay.io/openshift/okd@sha256:2eee0db9818e22deb4fa99737eb87d6e9afcf68b4e455f42bdc3424c0b0d0896
release architecture amd64
OpenShift 4.x Installation program and client tools (Only for RedHat OpenShift installation)
Before you install OpenShift Container Platform, download the installation file on a local computer.
Access the Infrastructure Provider page on the Red Hat OpenShift Cluster Manager site
Select your infrastructure provider – (Red Hat OpenStack)
Download the installation program for your operating system
# Linux
mkdir -p ~/ocp/tools
cd ~/ocp/tools
wget https://mirror.openshift.com/pub/openshift-v4/clients/ocp/stable/openshift-install-linux.tar.gz
tar xvf openshift-install-linux.tar.gz
sudo mv openshift-install /usr/local/bin/
# macOS
wget https://mirror.openshift.com/pub/openshift-v4/clients/ocp/stable/openshift-install-mac.tar.gz
tar xvf openshift-install-mac.tar.gz
sudo mv openshift-install /usr/local/bin/
Installation of Cluster Management tools:
# Linux
wget https://mirror.openshift.com/pub/openshift-v4/clients/ocp/stable/openshift-client-linux.tar.gz
tar xvf openshift-client-linux.tar.gz
sudo mv oc kubectl /usr/local/bin/
# macOS
wget https://mirror.openshift.com/pub/openshift-v4/clients/ocp/stable/openshift-client-mac.tar.gz
tar xvf openshift-client-mac.tar.gz
sudo mv oc kubectl /usr/local/bin/
Confirm installation:
$ openshift-install version
openshift-install 4.10.6
built from commit 17c2fe7527e96e250e442a15727f7558b2fb8899
release image quay.io/openshift-release-dev/ocp-release@sha256:88b394e633e09dc23aa1f1a61ededd8e52478edf34b51a7dbbb21d9abde2511a
release architecture amd64
$ kubectl version --client --short
Client Version: v0.23.0
$ oc version
Client Version: 4.10.6
Step 2: Configure OpenStack Clouds in clouds.yaml file
In OpenStack, clouds.yaml is a configuration file that contains everything needed to connect to one or more clouds. It may contain private information and is generally considered private to a user.
OpenStack Client will look for the clouds.yaml file in the following locations:
current working directory
~/.config/openstack
/etc/openstack
We will place our Clouds configuration file in the ~/.config/openstack directory:
mkdir -p ~/.config/openstack/
Create a new file:
vim ~/.config/openstack/clouds.yaml
Sample configuration contents for two clouds. Change accordinly:
clouds:
osp1:
auth:
auth_url: http://192.168.200.2:5000/v3
project_name: admin
username: admin
password: 'AdminPassword'
user_domain_name: Default
project_domain_name: Default
identity_api_version: 3
region_name: RegionOne
osp2:
auth:
auth_url: http://192.168.100.3:5000/v3
project_name: admin
username: admin
password: 'AdminPassword'
user_domain_name: Default
project_domain_name: Default
identity_api_version: 3
region_name: RegionOne
A cloud can be selected on the command line:
$ openstack --os-cloud osp1 network list --format json
[
"ID": "44b32734-4798-403c-85e3-fbed9f0d51f2",
"Name": "private",
"Subnets": [
"1d1f6a6d-9dd4-480e-b2e9-fb51766ded0b"
]
,
"ID": "70ea2e21-79fd-481b-a8c1-182b224168f6",
"Name": "public",
"Subnets": [
"8244731c-c119-4615-b134-cfad768a27d4"
]
]
Reference: OpenStack Clouds configuration guide
Step 3: Create Compute Flavors for OpenShift Cluster Nodes
A flavor with at least 16 GB memory, 4 vCPUs, and 25 GB storage space is required for cluster creation.
Let’s create the Compute flavor:
$ openstack flavor create --ram 16384 --vcpus 4 --disk 30 m1.openshift
+----------------------------+--------------------------------------+
| Field | Value |
+----------------------------+--------------------------------------+
| OS-FLV-DISABLED:disabled | False |
| OS-FLV-EXT-DATA:ephemeral | 0 |
| description | None |
| disk | 30 |
| id | 90234d29-e059-48ac-b02d-e72ce3f6d771 |
| name | m1.openshift |
| os-flavor-access:is_public | True |
| properties | |
| ram | 16384 |
| rxtx_factor | 1.0 |
| swap | |
| vcpus | 4 |
+----------------------------+--------------------------------------+
If you have more compute resources you can add more CPU, Memory and Storage to the flavor being created.
Step 4: Create Floating IP Addresses
You’ll two Floating IP addresses for:
A floating IP address to associate with the Ingress port
A floating IP Address to associate with the API load balancer.
Create API Load balancer floating IP Address:
$ openstack floating ip create --description "API ."
Create Ingress Floating IP:
$ openstack floating ip create --description "Ingress ."
You can list your networks using the command:
$ openstack network list
+--------------------------------------+---------------------+--------------------------------------+
| ID | Name | Subnets |
+--------------------------------------+---------------------+--------------------------------------+
| 155ef402-bf39-494c-b2f7-59509828fcc2 | public | 9d0e8119-c091-4a20-b03a-80922f7d43dd |
| af7b4f7c-9095-4643-a470-fefb47777ae4 | private | 90805451-e2cd-4203-b9ac-a95dc7d92957 |
+--------------------------------------+---------------------+--------------------------------------+
My Floating IP Addresses will be created from the public subnet. An external network should be configured in advance.
$ openstack floating ip create --description "API ocp.mycluster.com" public
+---------------------+--------------------------------------+
| Field | Value |
+---------------------+--------------------------------------+
| created_at | 2021-05-29T19:48:23Z |
| description | API ocp.mycluster.com |
| dns_domain | None |
| dns_name | None |
| fixed_ip_address | None |
| floating_ip_address | 172.21.200.20 |
| floating_network_id | 155ef402-bf39-494c-b2f7-59509828fcc2 |
| id | a0f41edb-c90b-417d-beff-9c03f180c71b |
| name | 172.21.200.20 |
| port_details | None |
| port_id | None |
| project_id | d0515ffa23c24e54a3b987b491f17acb |
| qos_policy_id | None |
| revision_number | 0 |
| router_id | None |
| status | DOWN |
| subnet_id | None |
| tags | [] |
| updated_at | 2021-05-29T19:48:23Z |
+---------------------+--------------------------------------+
$ openstack floating ip create --description "Ingress ocp.mycluster.com" public
+---------------------+--------------------------------------+
| Field | Value |
+---------------------+--------------------------------------+
| created_at | 2021-05-29T19:42:02Z |
| description | Ingress ocp.mycluster.com |
| dns_domain | None |
| dns_name | None |
| fixed_ip_address | None |
| floating_ip_address | 172.21.200.22 |
| floating_network_id | 155ef402-bf39-494c-b2f7-59509828fcc2 |
| id | 7035ff39-2903-464c-9ffc-c07a3245448d |
| name | 172.21.200.22 |
| port_details | None |
| port_id | None |
| project_id | d0515ffa23c24e54a3b987b491f17acb |
| qos_policy_id | None |
| revision_number | 0 |
| router_id | None |
| status | DOWN |
| subnet_id | None |
| tags | [] |
| updated_at | 2021-05-29T19:42:02Z |
+---------------------+--------------------------------------+
Step 5: Create required DNS Entries
Access your DNS server management portal or console and create required DNS entries:
api... IN A
*.apps... IN A
Where:
is the base domain – e.g computingpost.com
is the name that will be given to your cluster – e.g ocp
is the floating IP address created in Step 4 for API load balancer
is the floating IP address created in Step 4 for Ingress (Access to apps deployed)
Example of API DNS entry:
Example of Ingress DNS entry:
Step 6: Generate OpenShift install-config.yaml file
From the Pull Secret page on the Red Hat OpenShift Cluster Manager site, download your installation pull secret as a .txt file.
Run the following command to generate install-config.yaml file:
cd ~/
openshift-install create install-config --dir=
For , specify the directory name to store the files that the installation program creates. The installation directory specified must be empty.
Example:
$ openshift-install create install-config --dir=ocp
At the prompts, provide the configuration details for your cloud:
? Platform openstack # Select openstack as the platform to target.
? Cloud osp1 # Choose cloud configured in clouds.yml
? ExternalNetwork public # Specify OpenStack external network name to use for installing the cluster.
? APIFloatingIPAddress [Use arrows to move, enter to select, type to filter, ? for more help]
> 172.21.200.20 # Specify the floating IP address to use for external access to the OpenShift API
172.21.200.22
? FlavorName [Use arrows to move, enter to select, type to filter, ? for more help]
m1.large
m1.magnum
m1.medium
> m1.openshift # Specify a RHOSP flavor with at least 16 GB RAM to use for control plane and compute nodes.
m1.small
m1.tiny
m1.xlarge
? Base Domain [? for help] mycluster.com # Select the base domain to deploy the cluster to
? Cluster Name ocp # Enter a name for your cluster. The name must be 14 or fewer characters long.
? Pull Secret [? for help]
INFO Install-Config created in: ocp
File creation
$ ls ocp/
install-config.yaml
You can edit to customize further:
$ vim ocp/install-config.yaml
Confirm that Floating IPs are added to the install-config.yaml file as the values of the following parameters:
platform.openstack.ingressFloatingIP
platform.openstack.apiFloatingIP
Example:
...
platform:
openstack:
apiFloatingIP: 172.21.200.20
ingressFloatingIP: 172.21.200.22
apiVIP: 10.0.0.5
cloud: osp1
Also add ssh public key
$ vim ocp/install-config.yaml
...
sshKey: replace-me-with-ssh-pub-key-contents
If you do not have an SSH key that is configured for password-less authentication on your computer, create one:
$ ssh-keygen -t ed25519 -N '' -f /
Step 7: Deploy OKD / OpenShift Cluster on OpenStack
Change to the directory that contains the installation program and backup up the install-config.yaml file:
cp install-config.yaml install-config.yaml.bak
Initialize the cluster deployment:
$ openshift-install create cluster --dir=ocp --log-level=info
INFO Credentials loaded from file "/root/.config/openstack/clouds.yaml"
INFO Consuming Install Config from target directory
INFO Obtaining RHCOS image file from 'https://builds.coreos.fedoraproject.org/prod/streams/stable/builds/33.20210217.3.0/x86_64/fedora-coreos-33.20210217.3.0-openstack.x86_64.qcow2.xz?sha256=ae088d752a52859ad38c53c29090efd5930453229ef6d1204645916aab856fb1'
INFO The file was found in cache: /root/.cache/openshift-installer/image_cache/41b2fca6062b458e4d5157ca9e4666f2. Reusing...
INFO Creating infrastructure resources...
INFO Waiting up to 20m0s for the Kubernetes API at https://api.ocp.mycluster.com:6443...
INFO API v1.20.0-1073+df9c8387b2dc23-dirty up
INFO Waiting up to 30m0s for bootstrapping to complete...
INFO Destroying the bootstrap resources...
INFO Waiting up to 40m0s for the cluster at https://api.ocp.mycluster.com:6443 to initialize...
INFO Waiting up to 10m0s for the openshift-console route to be created...
INFO Install complete!
INFO To access the cluster as the system:admin user when using 'oc', run 'export KUBECONFIG=/root/okd/ocp/auth/kubeconfig'
INFO Access the OpenShift web-console here: https://console-openshift-console.apps.ocp.mycluster.com
INFO Login to the console with user: "kubeadmin", and password: "33yzG-Ogiup-huGI9"
INFO Time elapsed: 42m39s
Listing created servers on OpenStack:
$ openstack server list --column Name --column Networks --column Status
+--------------------------------------+--------+---------------------------------------+
| Name | Status | Networks |
+--------------------------------------+--------+---------------------------------------+
| ocp-nlrnw-worker-0-nz2ch | ACTIVE | ocp-nlrnw-openshift=10.0.1.197 |
| ocp-nlrnw-worker-0-kts42 | ACTIVE | ocp-nlrnw-openshift=10.0.0.201 |
| ocp-nlrnw-worker-0-92kvf | ACTIVE | ocp-nlrnw-openshift=10.0.2.197 |
| ocp-nlrnw-master-2 | ACTIVE | ocp-nlrnw-openshift=10.0.3.167 |
| ocp-nlrnw-master-1 | ACTIVE | ocp-nlrnw-openshift=10.0.1.83 |
| ocp-nlrnw-master-0 | ACTIVE | ocp-nlrnw-openshift=10.0.0.139 |
+--------------------------------------+--------+---------------------------------------+
Export the cluster access config file:
export KUBECONFIG=ocp/auth/kubeconfig
You can as well make it default kubeconfig:
cp ocp/auth/kubeconfig ~/.kube/config
List available nodes in the cluster
$ oc get nodes
NAME STATUS ROLES AGE VERSION
ocp-nlrnw-master-0 Ready master 3h48m v1.20.0+df9c838-1073
ocp-nlrnw-master-1 Ready master 3h48m v1.20.0+df9c838-1073
ocp-nlrnw-master-2 Ready master 3h48m v1.20.0+df9c838-1073
ocp-nlrnw-worker-0-92kvf Ready worker 3h33m v1.20.0+df9c838-1073
ocp-nlrnw-worker-0-kts42 Ready worker 3h33m v1.20.0+df9c838-1073
ocp-nlrnw-worker-0-nz2ch Ready worker 3h33m v1.20.0+df9c838-1073
View your cluster cluster’s version:
$ oc get clusterversion
NAME VERSION AVAILABLE PROGRESSING SINCE STATUS
version 4.10.0-0.okd-2022-03-07-131213 True False 3h16m Cluster version is 4.10.0-0.okd-2022-03-07-131213
Confirm that all cluster operators are available and none is degraded:
$ oc get clusteroperator
NAME VERSION AVAILABLE PROGRESSING DEGRADED SINCE
authentication 4.10.0-0.okd-2022-03-07-131213 True False False 3h24m
baremetal 4.10.0-0.okd-2022-03-07-131213 True False False 3h52m
cloud-credential 4.10.0-0.okd-2022-03-07-131213 True False False 3h57m
cluster-autoscaler 4.
10.0-0.okd-2022-03-07-131213 True False False 3h51m
config-operator 4.10.0-0.okd-2022-03-07-131213 True False False 3h52m
console 4.10.0-0.okd-2022-03-07-131213 True False False 3h31m
csi-snapshot-controller 4.10.0-0.okd-2022-03-07-131213 True False False 3h52m
dns 4.10.0-0.okd-2022-03-07-131213 True False False 3h51m
etcd 4.10.0-0.okd-2022-03-07-131213 True False False 3h51m
image-registry 4.10.0-0.okd-2022-03-07-131213 True False False 3h37m
ingress 4.10.0-0.okd-2022-03-07-131213 True False False 3h38m
insights 4.10.0-0.okd-2022-03-07-131213 True False False 3h45m
kube-apiserver 4.10.0-0.okd-2022-03-07-131213 True False False 3h49m
kube-controller-manager 4.10.0-0.okd-2022-03-07-131213 True False False 3h50m
kube-scheduler 4.10.0-0.okd-2022-03-07-131213 True False False 3h49m
kube-storage-version-migrator 4.10.0-0.okd-2022-03-07-131213 True False False 3h37m
machine-api 4.10.0-0.okd-2022-03-07-131213 True False False 3h46m
machine-approver 4.10.0-0.okd-2022-03-07-131213 True False False 3h51m
machine-config 4.10.0-0.okd-2022-03-07-131213 True False False 3h50m
marketplace 4.10.0-0.okd-2022-03-07-131213 True False False 3h50m
monitoring 4.10.0-0.okd-2022-03-07-131213 True False False 3h37m
network 4.10.0-0.okd-2022-03-07-131213 True False False 3h52m
node-tuning 4.10.0-0.okd-2022-03-07-131213 True False False 3h50m
openshift-apiserver 4.10.0-0.okd-2022-03-07-131213 True False False 3h45m
openshift-controller-manager 4.10.0-0.okd-2022-03-07-131213 True False False 3h44m
openshift-samples 4.10.0-0.okd-2022-03-07-131213 True False False 3h43m
operator-lifecycle-manager 4.10.0-0.okd-2022-03-07-131213 True False False 3h52m
operator-lifecycle-manager-catalog 4.10.0-0.okd-2022-03-07-131213 True False False 3h52m
operator-lifecycle-manager-packageserver 4.10.0-0.okd-2022-03-07-131213 True False False 3h46m
service-ca 4.10.0-0.okd-2022-03-07-131213 True False False 3h52m
storage 4.10.0-0.okd-2022-03-07-131213 True False False 3h50m
You can always print OpenShift Login Console using the command:
$ oc whoami --show-console
https://console-openshift-console.apps.ocp.mycluster.com
You can then login using URL printed out:
Step 8: Configure HTPasswd Identity Provider
By default you’ll login in as a temporary administrative user and you need to update the cluster OAuth configuration to allow others to log in. Refer to guide in the link below:
Manage OpenShift / OKD Users with HTPasswd Identity Provider
Uninstalling OKD / OpenShift Cluster
For you to destroy Cluster created on OpenStack you’ll need to have:
A copy of the installation program that you used to deploy the cluster.
Files that the installation program generated when you created your cluster.
A cluster can then be destroyed using the command below:
$ openshift-install destroy cluster --dir= --log-level=info
You can optionally delete the directory and the OpenShift Container Platform installation program.
0 notes
Text
IBM C1000-143 Practice Test Questions
Now you can pass C1000-143 IBM Cloud Pak for Watson AIOps v3.2 Administrator exam with ease. PassQuestion provides you a number of C1000-143 Practice Test Questions, exactly on the pattern of the actual exam. They are not only helpful for the exam candidates to evaluate their level of preparation but also provide them the opportunity to enhance their weaknesses well in time. The C1000-143 Practice Test Questions include the latest questions and answers which help you in clearing all of your doubts of the IBM C1000-143 exam. With the help of the C1000-143 practice test questions, you will be able to feel the real exam scenario and pass your exam successfully on your first attempt.
IBM Cloud Pak for Watson AIOps v3.2 Administrator
An IBM Certified Administrator on IBM Cloud Pak for Watson AIOps v3.2 is a system administrator who has extensive knowledge and experience on IBM Cloud Pak for Watson AIOps v3.2 including AI Manager, Event Manager and Metric Manager. This administrator can perform the intermediate tasks related to planning, sizing, installation, daily management and operation, security, performance, configuration of enhancements (including fix packs and patches), customization and/or problem determination.
Exam Information
Exam Code: C1000-143
Exam Name: IBM Cloud Pak for Watson AIOps v3.2 Administrator
Number of questions: 65
Number of questions to pass: 46
Time allowed: 90 minutes
Languages: English
Price: $200 USD
Certification: IBM Certified Administrator - Cloud Pak for Watson AIOps v3.2
Exam Sections
Section 1: IBM Cloud Pak for Watson AIOps Overview 11%
Section 2: Install the IBM Cloud Pak for Watson AIOps 17%
Section 3: Configuration 30%
Section 4: Operate the Platform 22%
Section 5: Manage User Access Control 8%
Section 6: Troubleshoot 12%
View Online IBM Cloud Pak for Watson AIOps v3.2 Administrator C1000-143 Free Questions
Which collection of key features describes Al Manager?
A.Al data tools and connections and Metric Manager
B.Al data tools and connections and infrastructure automation
C.Al models and Chat Ops
D.Network management and service and topology management
Answer: C
In Event Manager, which event groupings usually occur within a short time of each other?
A.Scope-based
B.Seasonal
C.Temporal
D.Topology
Answer: C
When a user logs on to any of the components on a Cloud Pak for Watson AlOps deployed cluster and it is too slow or times out, what can be done to resolve the issue?
A.Update the Idap-proxy-config ConfigMap and set the LDAP_RECURSIVE_SEARCH to "false".
B.Update the platform-auth-idp ConfigMap and set the LDAP_TIMEOUT to a higher value.
C.Update the Idap-proxy-config ConfigMap and set the LDAP_TiMEOUT to a higher value.
D.Update the platform-auth-idp ConfigMap and set the LDAP_RECURSIVE_SEARCH to "false"
Answer: A
When installing Al manager or Event Manager in an air-gapped environment, which registry must the OpenShift cluster be connected to in order to pull images?
A.Docker V2 compatible registry running behind
B.quay.io
C.Red Hat OpenShift internal registry
D.docker.io
Answer: C
For Al Manager, which type of ChatOps channel surfaces stories?
A.Reactive
B.Proactive
C.Public
D.Private
Answer: A
What are two valid Runbook types in Event Manager?
A.Partial
B.Semi-automated
C.Initial
D.Fully-automated
E.Locked-partial
Answer: C, D
0 notes
Video
Install Openshift on AWS Cloud, You need an account at RedHat.com and AWS. To Learn or Teach Linux visit www.theskillpedia.com, A Marketplace for Learners and Trainers. openshift installation on aws, openshift 4.6 installation on aws, openshift 4 installation on aws, openshift 4 installation
0 notes
Text
Kubernetes 1.16 released
Finally it’s the weekend. Peace and quiet to indulge yourself in a new Kubernetes release! Many others have beat me to it, great overviews are available from various sources.
The most exciting thing for me in Kubernetes 1.16 is the graduation of many alpha CSI features to beta. This is removes the friction of tinkering with the feature gates on either the kubelet or API server which is pet peeve of mine and makes me moan out loud when I found out something doesn't work because of it.
TL;DR
All these features have already been demonstrated with the HPE CSI Driver for Kubernetes, it starts about 7 minutes in, I’ve fast forwarded it for you.
At the Helm
Let’s showcase these graduated features with the newly released HPE CSI Driver for Kubernetes. Be warned, issues ahead. Helm is not quite there yet on Kubernetes 1.16, a fix to deploy Tiller on your cluster is available here. Next issue up is that the HPE CSI Driver Helm chart is not yet compatible with Kubernetes 1.16. I’m graciously and temporarily hosting a copy on my GitHub account.
Create a values.yaml file:
backend: 192.168.1.10 # This is your Nimble array username: admin password: admin servicePort: "8080" serviceName: nimble-csp-svc fsType: xfs accessProtocol: "iscsi" storageClass: create: false
Helm your way on your Kubernetes 1.16 cluster:
helm repo add hpe https://drajen.github.io/co-deployments-116 helm install --name hpe-csi hpe/hpe-csi-driver --namespace kube-system -f values.yaml
In my examples repo I’ve dumped a few declarations that I used to walk through these features. When I'm referencing a YAML file name, this is where to find it.
VolumePVCDataSource
This is a very useful capability when you’re interested in creating a clone of an existing PVC in the current state. I’m surprised to see this feature mature to beta before VolumeSnapshotDataSource which has been around for much longer.
Assuming you have an existing PVC named “my-pvc”:
apiVersion: v1 kind: PersistentVolumeClaim metadata: name: my-pvc-clone spec: accessModes: - ReadWriteOnce resources: requests: storage: 32Gi dataSource: kind: PersistentVolumeClaim name: my-pvc storageClassName: my-storageclass
Let’s cuddle:
$ kubectl create -f pvc.yaml persistentvolumeclaim/my-pvc created $ kubectl create -f pvc-clone.yaml persistentvolumeclaim/my-pvc-clone created $ kubectl get pvc NAME STATUS VOLUME CAPACITY STORAGECLASS AGE my-pvc Bound pvc-ae0075... 10Gi my-storageclass 34s my-pvc-clone Bound pvc-d5eb6f... 10Gi my-storageclass 14s
On the Nimble array, we can indeed observe we have a clone of the dataSource.
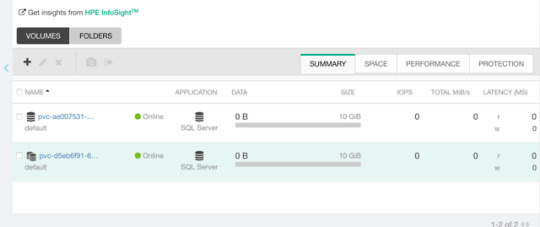
ExpandCSIVolumes and ExpandInUsePersistentVolumes
This is indeed a very welcome addition to be promoted. Among the top complaints from users. This is stupid easy to use. Simply edit or patch your existing PVC to expand your PV.
$ kubectl patch pvc/my-pvc-clone -p '{"spec": {"resources": {"requests": {"storage": "32Gi"}}}}' persistentvolumeclaim/my-pvc-clone patched $ kubectl get pv NAME CAPACITY CLAIM STORAGECLASS AGE pvc-d5eb6... 32Gi default/my-pvc-clone my-storageclass 9m25s
Yes, you can expand clones, no problem.
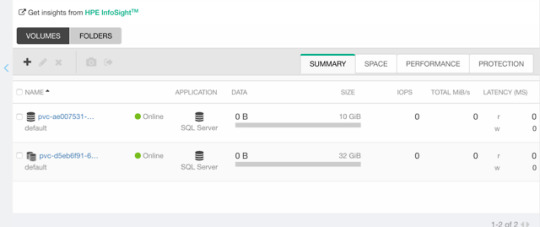
CSIInlineVolume
On of my favorite features of our legacy FlexVolume is the ability to create Inline Ephemeral Clones for CI/CD pipelines. Creating a point in time copy of a volume, do some work and/or tests on it and dispose of it. Leave no trace behind.
If this is something you’d like to walk through, there’s a few prerequisite steps here. The Helm chart does not create the CSIDriver custom resource definition (CRD). It need to be applied first:
apiVersion: storage.k8s.io/v1beta1 kind: CSIDriver metadata: name: csi.hpe.com spec: podInfoOnMount: true volumeLifecycleModes: - Persistent - Ephemeral
Next, the current behavior (subject to change) is that you need a secret for the CSI driver in the namespace you’re deploying to. This is a oneliner to copy from “kube-system” to your current namespace.
$ kubectl get -nkube-system secret/nimble-secret -o yaml | \ sed -e 's/namespace: kube-system//' | \ kubectl create -f-
Now, assuming we have deployed a MariaDB and have that running elsewhere. This example clones the actual Nimble volume. In essence, the volume may reside on a different Kubernetes cluster or hosted on a bare-metal server or virtual machine.
For clarity, the Deployment I’m cloning this volume from is using a secret, I’m using that same secret hosted in dep.yaml.
apiVersion: v1 kind: Pod metadata: name: mariadb-ephemeral spec: spec: containers: - image: mariadb:latest name: mariadb env: - name: MYSQL_ROOT_PASSWORD valueFrom: secretKeyRef: name: mariadb key: password ports: - containerPort: 3306 name: mariadb volumeMounts: - name: mariadb-persistent-storage mountPath: /var/lib/mysql volumes: - name: mariadb-persistent-storage csi: driver: csi.hpe.com nodePublishSecretRef: name: nimble-secret volumeAttributes: cloneOf: pvc-ae007531-e315-4b81-b708-99778fa1ba87
The magic sauce here is of course the .volumes.csi stanza where you specify the driver and your volumeAttributes. Any Nimble StorageClass parameter is supported in volumeAttributes.
Once, cuddled, you can observe the volume on the Nimble array.
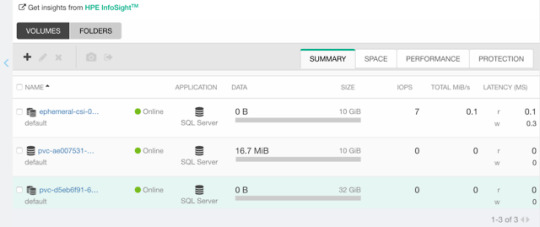
CSIBlockVolume
I’ve visited this feature before in my Frankenstein post where I cobbled together a corosync and pacemaker cluster running as a workload on Kubernetes backed by a ReadWriteMany block device.
A tad bit more mellow example is the same example we used for the OpenShift demos in the CSI driver beta video (fast forwarded).
Creating a block volume is very simple (if the driver supports it). By default volumes are created with the attribue volumeMode: Filesystem. Simply switch this to Block:
apiVersion: v1 kind: PersistentVolumeClaim metadata: name: my-pvc-block spec: accessModes: - ReadWriteOnce resources: requests: storage: 32Gi volumeMode: Block storageClassName: my-storageclass
Once cuddled, you may reference the PVC as any other PVC, but pay attention to the .spec.containers stanza:
apiVersion: v1 kind: Pod metadata: name: my-pod spec: containers: - name: ioping image: hpestorage/ioping command: [ "ioping" ] args: [ "/dev/xvda" ] volumeDevices: - name: data devicePath: /dev/xvda volumes: - name: data persistentVolumeClaim: claimName: my-pvc-block
Normally you would specify volumeMounts and mountPath for a PVC created with volumeMode: Filesystem.
Running this particular Pod using ioping would indeed indicate that we connected a block device:
kubectl logs my-pod -f 4 KiB <<< /dev/xvda (block device 32 GiB): request=1 time=3.71 ms (warmup) 4 KiB <<< /dev/xvda (block device 32 GiB): request=2 time=1.73 ms 4 KiB <<< /dev/xvda (block device 32 GiB): request=3 time=1.32 ms 4 KiB <<< /dev/xvda (block device 32 GiB): request=4 time=1.06 ms ^C
For competitors who landed on this blog in awe looking for Nimble weaknesses, the response time you see above is a Nimble Virtual Array running on my five year old laptop.
So, that was “it” for our graduated storage features! I'm looking forward to Kubernetes 1.17 already.
Release mascot!
I’m a sucker for logos and mascots. Congrats to the Kubernetes 1.16 release team.
0 notes
Last Seen Blogs


manncyclopedia
Mann Nayak

imright77
imright77

tesialo
:)

harrysgems
Spiegare cos'è il colore a chi vede bianco e nero