#or just send the same tutorial the website uses
Explore tagged Tumblr posts
Visit Tumblr Blog
Explore Tumblr blogs with no restrictions, modern design and the best experience.
Last Seen Tumblr Blogs


Fun Fact
Hackers stole 65M passwords from Tumblr in 2013.
Note
It suggested contacting Google but like, tf am I supposed to say? "hey this 3rd party wants my info and it's not working right, can you help me" like that is NOT their job
hi ggogle can u give me my inforamtion so i can get a cute little graphic pls ^-^
2 notes
·
View notes
Text
Luo Binghe Shimeji (Extended Version!)


a couple years ago, riladoo created an adorable binghe shime! he could be picked up and tossed around your computer screens, climb around on all your windows, multiply, and all the other cute things that come in the standard base shimeji set.
more recently, i reached out to riladoo with a commission request - more action sets for binghe! over the past couple months, riladoo has worked hard to make some adorable binghe art, and i've updated all the source code and config files to accommodate the new actions! 🎉
the extended action set includes: - a 'sit and eat' idle action - two 'head patting' actions when the mouse hovers over him - a 'fall and cry' action for when he falls from tall heights - a 'land nicely' action for when you place him down gently
the original binghe shime listing on riladoo's gumroad has been updated to have all these new actions, so go grab him now!! he's free / pay what you want! 🥰
i've put more details about the new action sets + general shimeji setup tips below the cut, but otherwise -- LET THE BINGHE COMPUTER INFECTION COMMENCE !!
**these extended actions only work on windows, not mac. sorry ;w; the original shime set has a mac version, though!
Extended Action Set Details
when you download the files from riladoo, you're looking for the .zip file labeled "Updated Shime code" !

sit and eat this is an idle action that will trigger randomly the same as any other idle action. if you want to trigger it manually, you can right click the shime -> 'set behavior' -> 'sit and eat'
head pats these are 'stay' actions that will trigger automatically when you hover your mouse over the shime. i recommend hovering your mouse over his head for maximum head-pat-effectiveness! unfortunately, this action won't play if the shime is actively climbing a wall/ceiling - maybe in the future this can be extended further, but for now there are only head patting actions for sitting and standing poses :>
falling variations (crying / default / land nicely) there are now a total of 3 'falling' actions. to see the 'fall and cry' action, allow binghe to fall from the top half of your monitor. to see the standard/original 'fall and trip' action, allow binghe to fall from the low-mid range portion of your monitor. to see the 'land nicely' action, gently place binghe down at the bottom of your monitor. this means you're rewarded for catching binghe when he falls off a window - if you catch him and set him down, he lands nicely, but if you let him fall normally, he'll start crying!! 🥰
Shimeji Installation Tips
if you've never had a shimeji before - don't worry, they're super easy to install! i recommend following this video tutorial created by the person who originally created the source code for shimeji. you can skip the parts about downloading the shimeji itself - you'll get that from riladoo's website :>
if you install everything but opening the shimeji executable does nothing, download jarfix to resolve this issue.
if you follow the tutorial and update the 'interactive windows' but the shime still doesn't stand/climb on the specified windows, restart your computer to resolve this issue. alternatively, make sure you don't have any 'unexpected' monitors plugged in - a friend of mine had their shime constantly falling down through their monitor onto their screen drawpad, which was confusing until it got figured out!
if you are on mac instead of windows.... i am so sorry i actually have no idea how to help 🙇♂️ the original/default binghe shimeji set DOES have a mac os folder in with the downloads, but i've never tested it (don't use mac), and even if it works, it won't include the extended actions (i didn't build an executable for mac with the new code).
More Questions???
feel free to hit me up! in the replies of this post / through DMs / send an ask - whatever is best for you. i'll tag any asks i get about the shime with #binghe shime chronicles so they get archived nicely. i got very familiar with all the source code / config files to get this lil guy set up with his extended actions, so hopefully i can answer any questions you have! 💪😤
that's all!! i am so happy w how the new actions turned out - the art riladoo did for them is SO cute! - and i hope y'all will be, too!
532 notes
·
View notes
Text
so. have you seen the pictures from Rafah of the blackened, charred infants? the toddler with no head?
i would like to ask a favour of everyone seeing this post, from one human to another. don't think about the things you can't do - because as it seems, nothing is enough, and nobody can do enough - there is no use to be paralyzed by these thoughts. instead focus on the things you are already doing and the things you can do. i will start by compile a small list of personal suggestions, and please add to it from your own resources! this list is not numbered, i will just add things that i can think of off the top of my head and if it is of any help to at least one person, thats good. take care of yourself - that includes taking care of others, and this world we live in.
this is obvious but keep listening to Palestinian voices. i am mostly active on twitter so i will give some examples from there: Hind_Gaza, HossamShabat, BayanPalestine (press). MuhammadSmiry, does community work with Care for Gaza. m7mdkurd. Everyone is saying mostly the same thing - keep talking, keep protesting, keep boycotting. so do it.
keep talking. humans are social animals and it's as simple as this: the ongoing genocide is dire, urgent and catastrophic - i dont think i need to tell you that. but when people, a lot of people, share posts with each other and reiterate this fact the urgency will be felt stronger by everyone, and reach people who would otherwise maybe not see the reports of the genocide on their screens. if people instead choose to stop sharing and stop talking because it's "been so long" or it's "too difficult", the suffering will become normalized and the only thing people will see on their feeds are mundane things - food, pets, fandoms, and it will send the message that oh, it's not that important after all.... sometimes, you SHOULD feel disturbed and uncomfortable. these feelings are not evil - they will be channelled into actions to better a situation and better the world. silence is violence.
search for protests near your town, sometimes they're hard to find but once you find your local organizations for the Palestinian movement, follow them and you will usually find them! this all depends on where you live of course - but most often there will be fundraisers and events and mailing campaigns etc, and the more people joining the better. and, most importantly i would say, share these events and pictures (no faces of strangers, ofc! from protests on your facebook, twitter etc - because that way people close to you will see them and that it's completely rational and normal to attend protests, and if they've been on the fence maybe they will reach out and join you.
donate if you are able and share links to the different organizations - some examples are Care for Gaza, Sulala animal rescue, the Gazan Municipality Life for Gaza project (https://gaza-city.ensany.com/campaign/6737), the PCRF.
individual gofundmes - here is the google doc with a lot of campaigns, but im sure there are lots of them that arent yet added: https://docs.google.com/spreadsheets/d/1-DDMFyn-ttboPXrz1bB3MFk7BlzCwfugh4259Wh7U1s/htmlview
donate e-sims, which will be sent by the Esims for Gaza team to people in Gaza, to help communicate with their families etc during blackouts. it's very quick and easy and on nomad you can get a referral code which gives someone else 25% off their first purchase, and there's also often different bonus codes. on the website there's tutorials for how to buy the different esims. https://gazaesims.com/
there's some different charity shops where you can buy Palestinian products and the proceeds help Palestinian artisans and people. here are some examples, please add more if you know any: https://handmadepalestine.com/ (based in Ramallah, Palestine), https://forpalestine.dk/ (based in Denmark), https://www.shoppalestine.org/ (based in the US)
boycott!! the BDS of course have their targeted brands (https://bdsmovement.net/) but there's also for example the witness website with lists of brands and the reasons for boycotting them (https://boycott.thewitness.news/) and some different apps that do the same thing, like the "no thanks" app. yes, the list of brands is very, very long. maybe all of it isn't feasible BUT i think a good start would be to go through them and decide which ones are unnecessary either way that you're better off without (mcdonalds, starbucks etc), and then which ones are part of your usual shopping routine, make a mental note of them and pick different options - see it as an opportunity to try new things, to support local brands and smaller businesses!
go do yourself a favour and give Palestinian-Canadian artist Nemahsis' new single "stick of gum" a listen, it's super good! <3 https://youtu.be/VsqYlmf3SAg?si=EK_TZjo0Ijny8hMT
please, add more tips and resources below or just share your own pictures or art or thoughts!
#palestine#gaza#resources#please add on with your own! <3#i just wanted to compile these links in one place and also bc i want to make a similar one for my facebook friends...
432 notes
·
View notes
Text
stop paying for shit you can pirate
this (OceanOfPDF) is a good website for pirating books thats a lot easier than looking for vk epubs, there are pdfs and epubs for a LOT of books and the site is the easiest to use and most comprehensive of the ones that I've found
the free kindle app (don't pay for amazon kindle) lets you send these files to all of you devices with the kindle app at the same time, you can use this site or find the email addresses for your devices in your amazon account (this is amazon tutorial for how to use the send to kindle email), the files are identical to ebooks that you buy for kindle, you can also upload any epub or pdf files from your device to google books and read them there exactly the same
this (12 Foot) is a good site for reading any articles that are behind a paywall for free, not sure it if works with academic journals and papers but it definitely works for stuff like the nyt
this (the Pirates Bay) is the classic and one of the best sites for pirating movies, tv shows, video games, books, and more, you will need to have a torrent installed to download and use these files, I use utorrent (free)
this (the internet archive) is a site that's good for a lot of stuff, its a nonproft free library type program, the book downloads do not work with the kindle app even if the file type is correct but the pdfs can be opened normally with any pdf reader
this is a cracked spotify apk, I think this one might be for android only and this is a link to spotiflyer which is an app that lets you pirate songs from spotify, youtube, and a few others to put on an mp3 player or flashdrive or cd or just to have them downloaded but separate from the spotify app, works on android, windows and mac
this is a very detailed step by step tutorial on getting ALL of the sims 4 dlc for free (it takes a LONG time to download the actual dlc, set aside at least 12 hours where you won't need to restart or turn off your computer but it works perfectly) you will need a torrent and file extractor but the tutorial links to reliable free apps for both
#might update as I think of more of the ones that I've used#i know i have one somewhere where i got minecraft for free on windows but it was saved on the phone that i broke#pirating#piracy#original content#december 2023
764 notes
·
View notes
Text

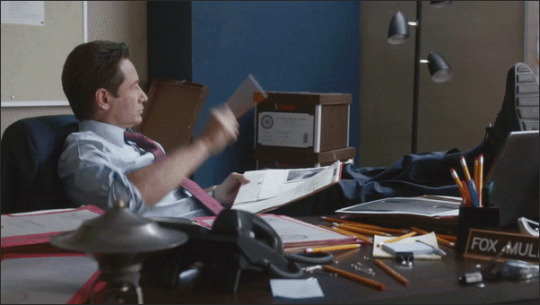
The silent art of gif making
The gif above has 32 layers plus 6 that aren't shown because this is part of a larger edit. I wanted to share it to give everyone a glimpse of the art of gif making and how long it usually takes for me to make something like this. This one took me about an hour and a half but only because I couldn't get the shade of blue right.
I use Adobe Photoshop 2021 and my computer doesn't have a large memory space (I don't know what to call it) so usually most of psds get deleted because I'm too lazy to get a hard drive. It doesn't really bother me that much because I like the art so when it's done, it's done. Off to somewhere else it goes.
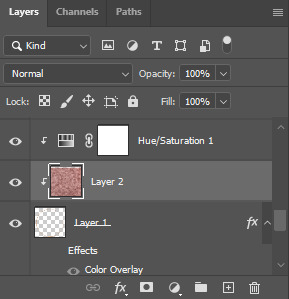
Here are the layers:

Everything is neat and organized in folders because I like it that way. I prefer to edit it in timeline but others edit each frame. There's a layer not shown (Layer 4 is not visible) and it's the vector art. Here it is:

Now it is visible. I don't plan to make this a tutorial, but if you're interested I'd love to share a few tricks about it. I'm pretty new to the colors in gifmaking but the rest is simple to understand. Here, I just want to show how much work it takes to make it.

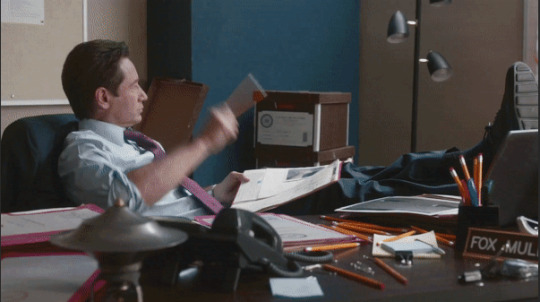
I opened Group 2 and here's the base gif. I already sharpened and sized it correctly but that's about it. Let's open the base coloring next.

Yay! Now it looks pretty! The edits are in Portuguese but it doesn't matter. There's a silent art of adding layers depending on how you want the gif to look but you get used to it. The order matters and you can add multiple layers of the same thing (for eg. multiple layers of levels or curves or exposure).

This was pretty much my first experiment with coloring so I don't know what I'm doing (this happens a lot with any art form but gifmaking exceeds in DIYing your way to the finished product) but I didn't want to mess up his hair, that's why the blue color is like that. Blue is easy to work with because there's little on the skin (different from red and yellow but that's color theory). I painted the layers like that and put it on screen, now let's correct how the rest looks.

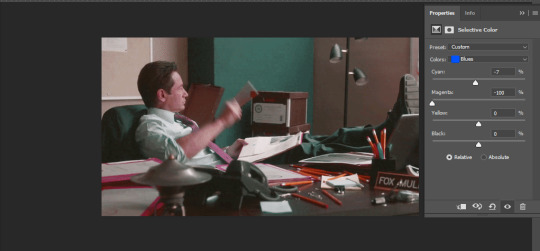
I was stuck trying to get the right teal shade of blue so yes, those are 10 layers of selective color mostly on cyan blue. We fixed his hair (yay!) we could've probably fixed the blue on his neck too but I was lazy. This is close to what I wanted so let's roll with that.

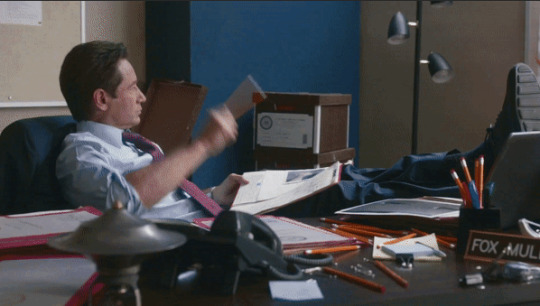
BUT I wanted his freckles to show, so let's edit a little bit more. Now his hair is more vibrant and his skin has red tones, which accentuates the blues and his eyes (exactly what I wanted!). That lost Layer 2 was me trying to fix some shadows in the background but in the end, it didn't make such a difference.

This was part of an edit, so let's add the graphics and also edit them so they're the right shade of blue and the correct size. A few gradient maps and a dozen font tests later, it appears to be done! Here it is:

Please reblog gifsets on tumblr. We gifmakers really enjoy doing what we do (otherwise we wouldn't be here) but it takes so long, you wouldn't imagine. Tumblr is the main website used for gif making and honestly, we have nowhere to go but share our art here. This was only to show how long it takes but if you're new and want to get into the art of gif making, there are a lot of really cool resource blogs in here. And my ask box is always open! Sending gifmakers all my love.
#gif making#gif tutorial#resources#completeresources#y'know what that post yesterday got me into this#i love creativity so i send all my love to gifmakers#this is HARD#my tutorials#tutorials
913 notes
·
View notes
Note
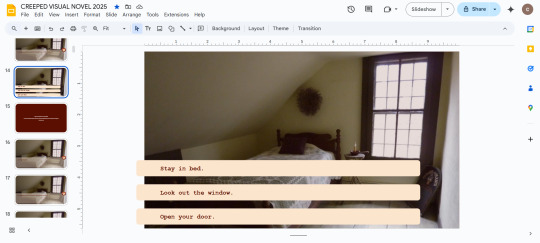
hey crushedsweets!!! i've been thinking about making my own vn in google slides like you did, do you have any tips/advice?? (like how you added different routes and how you put music in the bg)
hello hello!!!
okay so it's kind of hard to explain it all over text. if i get Enough requests i MIGHT do a tiktok video but as of right now, ill try it here. ALSO EVERYTHING IS PROBABLY ALREADY A TUTORIAL ON YOUTUBE BUT IM HELLA ANNOYING AND REFUSE TO WATCH TUTORIALS T_T I JUST STRUGGLE N FIGURE IT OUT
honestly this is such a shitty explanation so i might do the tiktok tutorial if i have free time next week (cuz im on spring break now LOL)...
also, if you guys want, i might make a copy of the slideshow and give yall full access to it so you can poke around to try and understand it cuz my "tutorial" is ASS
DIFFERENT ROUTES
okay so. i don't really do different routes, i just give 3 decisions that funnel into the same route so the game FEELS like a game...but its not rlly one.
i'll try to take it step by step:
make options. make sure you already have the following slides/routes created
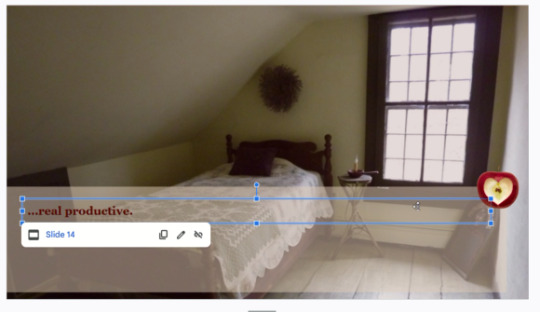
make the blue textbox cover the entire beige box. if you don't, then when players click, it'll direct them to the NEXT slide, not the route you want
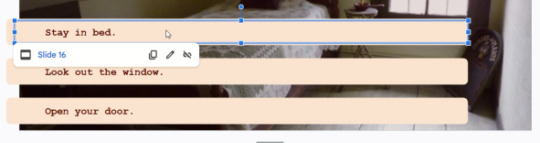
Click on the blue lines of the textbox and click CTRL+K. You should already have the route slide created, in which you just input the slide number. IF YOU WANT PLAYERS TO RETURN TO CERTAIN SLIDES W/O GIVING THEM THE OPTION SLIDE, HERES AN EXAMPLE..(?):
>the "stay in bed" option is on slide 14. >this options directs you to slide 16. >slide 16 is a joke option. because of this, i want the player to go BACK to slide 14 to make a serious decision. >to do this, i turned EVERY asset into a CTRL+K link that sends you back to slide 14. this includes the background, text box, beige text holder, the apple png >this way, no matter where the player clicks, it sends them back to slide 14 (so they can make a real decision) >this gives you full control of where the player goes, even if its going backwards
EXTRA TIPS:
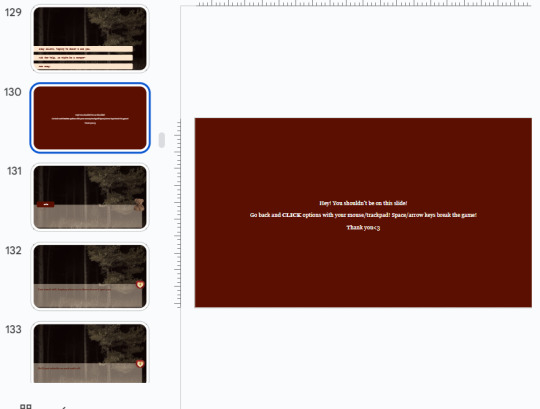
after every choice-slide, i created this warning slide. this makes sure that even if the player doesnt click correctly(i.e clicks the background, uses spacebar), they'll know there was a mistake and it'll send them back
I ALSO PUT THIS RED SLIDE BETWEEN EVERY "ROUTE CHUNK". what i mean by that is..
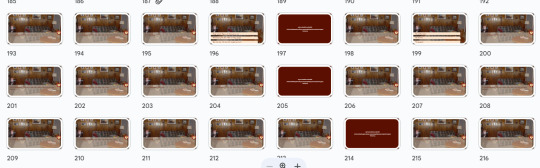
>as you can see, there is the decision on slide 196. >the first decision on slide 196 sends you to slide 198. >so slide 198-204 is a "route chunk". >when players finish that route chunk, i link(CTRL+F) ALL ASSETS on slide 204 to slide 215 >i do this because slide 215 is the end of the "route chunks" and leads you to the direct story. slide 204 AND 213 both link to 215 >this allows readers to progress smoothly regardless of what decision they made, since all decisions are meaningless in my VN (sorry)
>HOWEVER, this means you have to try and make sure all decisions leave no tangible impact on the story - i try to make them impact the player, not the MC (i.e leaving canine teeth in the drawers so the PLAYER will feel uneasy, but the MC never mentions it again)
i use these red slides to separate the slide chunks for two reasons:
makes it easier for me to keep track of route chunks when editing
if there is a mistake, players know to go back one slide so they can fix it. this way, they wont be progressing through random, unclear routes
okay. that was the best i got for the routes.
NOW FOR MUSIC
honestly? i dont even remember what website i used, but...
FIRST, you need to download a youtube video with whatever music you want. i think this website should work
SECOND, you now have an MP3 youtube video. GO ONTO GOOGLE DRIVE, click NEW, click UPLOAD FILE, then upload the MP3 file
THIRD, go into your slideshow. click INSERT, click AUDIO. now you should have the audio on your slideshow.
FOURTH, now its all up to preference. you should have a little audio icon pop up. click AUDIO ICON, click FORMAT OPTIONS, click LOOP AUDIO.
YOUR AUDIO SHOULD PLAY THROUGHOUT THE ENTIRE SLIDESHOW NOW!!! :3
extra:
i havent done it cuz i was getting busy and just wanted to finish it, but honestly, you could probably change the audio throughout your slideshow - upbeat music to scary music when the scenes change, etc. maybe even layer them? i dunno. thats for you to play around with, cuz I DUNNO cuz i didnt do it. but yahh
ok... thats all... im so ass at explaining but i might make that tiktok. but my laptop screen is cracked so im embarrassed recording pics of it HAHAHAHA
#asks#crped vn#omfg. this is so stupid im so bad at explaining#i hope this made evn an ounce of sense
37 notes
·
View notes
Text
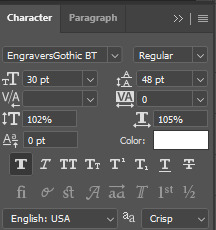
Fake Scenarios In My Head #35
Casey stood in the kitchen, staring at the shattered remains of Alex’s coffee mug on the counter. A sharp pang of guilt twisted in her chest. It wasn’t just any mug—it was the mug, the one Alex used every morning. White ceramic, with bold black lettering that read:
“Trust Me, I’m a Lawyer. What’s Your Excuse?”
Olivia had given it to Alex years ago as a gag gift, and Alex had laughed so hard the first time she read it that Casey assumed it was special. Over time, it had become a quiet centerpiece of their mornings together. Every morning, while Alex was still getting ready for the day, Casey would brew coffee and make a simple breakfast. By the time Alex walked into the kitchen, her mug was always waiting, steaming and ready. They’d sit together at the table or lean against the counter, stealing a few moments of calm before work pulled them in different directions. It wasn’t much, but it was theirs—a ritual that grounded them in the midst of busy lives.
And now, the mug was broken.
“Damn it,” Casey muttered, running a hand through her hair. She swept the jagged pieces into a bowl and stared at them helplessly. Maybe it can be fixed? She pulled out her phone, scrolling through DIY tutorials. But the more she watched, the more discouraged she became. The steps looked deceptively simple—clean the edges, apply glue, clamp it carefully—but Casey knew better. She wasn’t exactly the queen of precision. Determined to make it right, she searched online for a replacement. But her heart sank as she discovered the mug was discontinued. A few listings showed up on secondhand sites, but the prices were outrageous.
Casey chewed her lip. If she couldn’t find the exact one, maybe she could recreate it. She opened a custom mug design website and started playing with the text. At first, it seemed easy—just type out the words, pick a font, and voilà. But none of the fonts matched the original. One was too sleek, another too childish. After scrolling through a seemingly endless list, Casey rubbed her eyes and sighed. “This is hopeless,” she muttered.
Still, she wasn’t ready to give up. She tried again, painstakingly adjusting the font size and spacing until it looked close enough. She felt a flicker of hope—until she saw the estimated delivery time. “Two weeks?!” Casey groaned. “Seriously?”
Caught up in her spiraling thoughts, she didn’t hear Alex come in until arms wrapped around her waist from behind. Casey jumped, nearly dropping her phone. “Whoa, hey,” Alex said, laughing softly. She kissed Casey’s temple, the warmth of her lips sending a shiver down Casey’s spine. “Why so tense?” “Oh! Uh—nothing,” Casey stammered, fumbling to hide her phone screen as she turned to face Alex. Her cheeks burned under Alex’s curious gaze. Alex tilted her head, her brows knitting in concern. “Casey, what’s going on?”
Before Casey could stammer out another excuse, her phone betrayed her, blaring the chirpy voice of a DIY tutorial: “And with just a little patience and glue, your mug will look as good as new!”
Alex blinked. Casey froze.
Casey groaned, burying her face in her hands. “Okay, okay. Don’t laugh. I broke your mug this morning—your lawyer mug. I was trying to replace it, but I couldn’t find the same one, so… I thought I’d make one. But the fonts don’t match, and it’ll take forever to ship, and—” Alex cut her off with a soft laugh. “Casey, stop. It’s okay.” “No, it’s not! It’s your favorite mug,” Casey insisted, gesturing helplessly at the screen.
“Sweetheart,” Alex said, pulling Casey’s hands away from her face. “It’s just a mug. I only kept using it because you poured my coffee into it every morning. It wasn’t the mug I cared about—it was you. And the coffee. Together.” Casey blinked, momentarily stunned. “So… you’re not sad?” “Not even a little,” Alex assured her, her eyes sparkling with affection. She leaned in, pressing a soft kiss to Casey’s lips. “Although, watching you get this worked up over it? That’s pretty adorable.”
Casey chuckled. “You’re impossible.” “I’m also touched,” Alex said, smirking. “Though, if you’re designing a new one, I could use a sassier slogan. Maybe something like, ‘I object to mornings without coffee.’” Casey snorted. “Noted. I’ll put it on the list.”
47 notes
·
View notes
Text
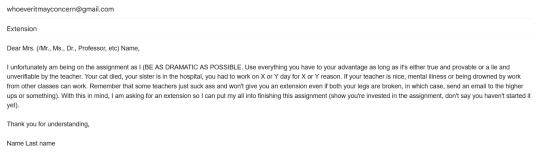
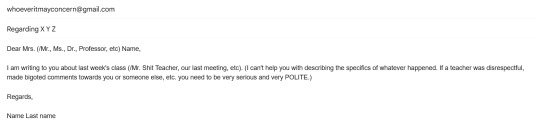
yeah so if you genuinely don't know how to write an email instead of using chatgpt and getting something that 1: has a chance to just fucking suck (and potentially be noticeably AI) and 2: uses stolen content, ruins the environment and indicates to the gen-AI companies that you want more gen-AI bullshit that will steal things and ruin the environment, you can look up how to write an email or look up email examples. here's a website, here's another, here's the wikihow page (it's a bit shit but it does its job), here's a good one for formal emails, and here's an email I sent today (more examples under the cut):
something that's really annoying right now is that most websites are desperately trying to sell you their cool funky AI friend that can write the email for you, and look at me: you have to tell it to go fuck itself (in your head, don't use it). this isn't about you being a moron for not being about to write an email, I struggled with it for a while too, I still do sometimes, writing emails notoriously sucks. gen-AI sucks more.
also, this might not be the case for everyone, but please at least try to learn how to write the email before using chatgpt, it will help you forever. if you have a question about emails or if you're not sure how to write one specific email, you can send an ask: I'm not all-knowing but I'll do my best to help.
I can mostly help for college/high school levels and I am studying in a French school, so the codes may not be exactly the same, but I am in fact being taught by English speakers, sometimes native ones.
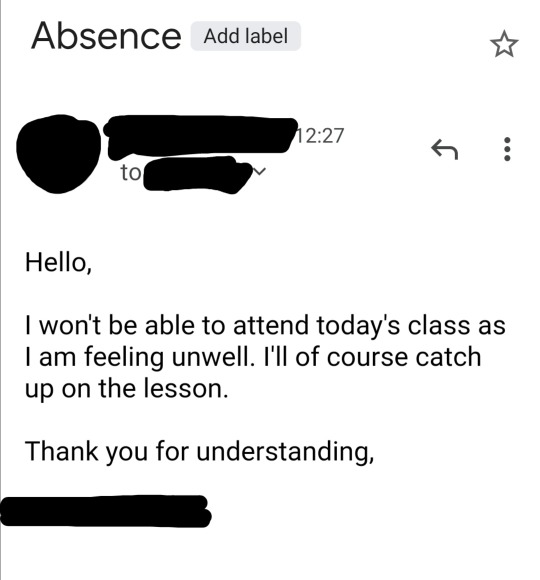
I'll give more general advice at the end, but here are a few examples of emails I would send.

If there's even a small chance of your teacher not recognizing you, write at the top something like "I am Name Last name, I am in your X-Y-Z class on Mondays from 8AM to 9AM". This isn't too useful in high school because your teachers likely know you, but in college your teachers might not. This will give them context.
Do your best to avoid typos or grammar errors. Reread your email, especially if the teacher is a language teacher.
Be polite, always, unless the teacher explicitly specified they don't care.
You do not need to beg for anything, don't debase yourself, and if a teacher makes you debase yourself, report them. You shouldn't have to beg for something that you ask for in an email. (so no more than one please per email, and avoid this one please if possible).
If it's possible and safe for you, prefer discussing important matters IRL.
Remember who you're talking to. Is the teacher strict or chill? Younger or older? Are they a white abled man or a Black disabled woman? Are they very into "respect the teacher!!" or do they put themselves at your level? Are you a 15 y/o high school student or a 20 something college student? Is this teacher familiar with you? Have they been understanding in the past? etc.
Generally, despite all my warnings above, a simple polite email will be fine with most teachers. If you're not sure how to identify the above possibilities or how to alter your emails depending on them, just write a formal, polite email (like seen above).
Some universities have online courses that teach you how to write emails. If there is a web-type course in your university and you can take it, take it.
Mine has one. I hate it. They defined a tweet as a "post on a blogging platform". I have to complete it or I don't pass. It still has a good tutorial for writing emails. You are lucky in the sense that emails are like the basic thing that even the boomer teachers know how to do (even if they don't like doing it), so there are a lot of resources for people who haven't written emails yet and need to learn.
If possible, ask your teacher at the start of the year what email to contact them with - if you're lucky, they'll say things about what kinds of emails they want.
If you're lucky still, someone else will send a shit email and the teacher will make a point during the class to remind how to write a proper email.
I put "Dear name" everywhere, but if it's not an extremely formal setting, some teachers will be fine with a "Hello". If you're not sure of the receiver's gender, use their title (Dr. etc).
For the extension: sometimes teachers aren't allowed to give you an extension or are assholes who don't want to give you an extension. In that case, don't bother writing another email (again: don't beg. + it will make them dislike you which you don't want).
This works more in work settings, but I read once that it's good to say "I will be taking a day off" rather than "May I take a day off/is it possible to take a day off". Just say that it's going to happen.
Know your rights. I can't know them for you. Figure out what the teacher can and cannot do through legal documents on your school's website or whatever. Know your rights depending on your state or country.
If you have a bad memory and don't want to have to look up how to write an email everytime, open your notes app or your blocknote or any preferred place to take notes and write down the important. I'd advise to note common greetings, subjects, opening and closing lines. Same for your teachers, if you need to remember which one is a bitch and which one is chill, write their name down with a description.
#people who know how to write emails. I'm calling you. post email examples lmao#like if you have time to make a guide or to compile examples. do it#mumblings//#emails#how to write an email#chatgpt#(if you're a tech bro and you see this: do not bother I will block you)
54 notes
·
View notes
Text
Treatment has been terrible.
My husband got restless leg syndrome. It’s something I am very familiar with because it’s a part of my neurological problems. The name sounds innocuous, but it’s actually awful. It’s a deep ache in your leg, kind of by the bone. It’s sort of a numbness. It isn’t pain, but it’s actually worse than pain. Only movement sort of helps, but it doesn’t really. You cannot sleep with it. My husband was up for hours pacing the room. I remember doing the same and viciously beating my leg, because the half-second pound was a half-second of sweet relief. Magnesium l-theroate is very helpful so I gave him some, but it’s not enough.
The pain in his lumbar continues to be an issue and the medication swap due to the study is less effective. It is really hard to see him like this. He is so weak. When he had treatment before, he was starting from a place of being healthy and strong. Now, he is starting from a place of being rundown. Not good at all.
My never ending dental struggles continue. The lab didn’t send a perfect crown so yesterday’s appointment was a waste, but also included some pain and was 1 1/4 hours. It means another appointment next week when we are already scheduled up the wazoo.
This is silly, but:
I know I’m going to be disappointed on Mother’s Day. I’m bummed about it. My husband isn’t in any condition to plan anything and that’s never been his strong suit. My kids are way less considerate than I was at their ages. I’m not sure if it’s because they are boys or if it’s because I had a single mom, so my sister and I realized that we had to be the ones doing stuff for her. I requested that my husband write me something in a card. I will treasure that if he manages to do it. I don’t really want much, just evidence of effort. I would like to be acknowledged for all that I do, especially considering how extraordinarily high-need everyone has been this year.
Years ago I wrote a Recipe for a Perfect Mother’s Day. I think this is what most mom’s want:
1. Something from the kids, made or written by them. Anything.
2. A gift that speaks to her as a person, not the roles she plays.
3. A planned event for her with the kids. Could be a meal. Could be a hike. Just plan something.
4. The rest of her day to be by herself, free from obligation.
5. Partner does all the menial tasks of parenting that day: feed kids, change diapers, sort out squabbles.
This could be really simple: like bring her flowers with a card the kids colored. Breakfast in bed and then leave her and take the kids to MIL’s for lunch. Whatever. Just make an effort and then leave us alone.
This year, I don’t think anything will be done for me. Boo hoo. Oh, I just remembered, one year I told my family to clean the house for me for Mother’s Day. Maybe I’ll do that if the kids don’t do anything. I usually like to go on a nature walk and then spend the rest of my day being solo and girlie. I just really, really need a break.
A break to work.
I’ve been trying to get some work done, but I require a stretch of regular days to do that. I am building a website from scratch for the first time and I need enough time to watch tutorials and remember what they said as I try to apply it. I can’t really accomplish anything in one hour here, one hour there. The week ahead has already been hacked up at the chop shop and all I might get is some spare parts.
Is this how it is always going to be? There are so many appointments and tasks until our trip, which I still haven’t planned and will have to pack for. My husband has treatment the day before, so we will be coming home and then going. We scheduled flights when he was on his other trial and was handling the drug better. I think my husband will be in an awful state at the beginning of the trip.
Our trip will be exhausting and hard for me since I need to tend to my introverted nature. After those 2 weeks, we will be back to cancer drama. Scans and either treatment or hospice. My husband’s needs are likely only going to increase. My son will hopefully start an internship and need to get there every day. I guess we will lend him a car?!? Scary and inconvenient. My other son will have nothing to do unless I plan events and take him places in the free time between my husband’s needs. So how is this going to work? How will I build a career and secure an income source when doing all the things for all the people? What I’m afraid of is that my younger son will be dropped and he will just play video games without complaint. But I don’t want that for him. I don’t want to do that to him.
Next chapter, please.
Please. Please. Please.
8 notes
·
View notes
Text
♡ ✧・゚: *✧・゚:*ᴀɴᴛɪ ᴘᴀʏᴡᴀʟʟ ᴄᴄ :・゚✧*:・゚✧ ♡
♡ Hello, I introduce myself ! First !♡
My name is Miinxpid ( formerly known as Cwunnie) in case you don't know me, I am a CC creator for the Sims 4. I want to tell you that in this publication I share with you all the websites and groups, such as Telegram, that share paywall CCs! If you have any questions or if you see that some cc is not there and I may have it, send me a message on discord: miinxpid that is! telling me who you are, for example: I'm clxdssims from tumblr!!
-
With this I want to tell you that I am a creator of personalized content but at the same time a simmer, a person who is a fan of the Sims saga who can spend days playing the video game 24 hours a day haha and buy game merch… I know there are people who creates cc for the video game and I love downloading and using his creations but what I can't tolerate is when certain people put custom content created for the game on paywalls and treat the sims as if it were their own creation
-
so…I welcome you to… this great post where I will share tips and pages where you can have paid CC because I am already tired of these people who treat the game as if it were theirs :D
-
♡ ✧・゚: *✧・゚:*important :・゚✧*:・゚✧ ♡:
IT IS UNDER YOUR OWN RESPONSIBILITY TO JOIN THE GROUPS! I AM SHARING THE LINKS WITH YOU BECAUSE I AM A PLAYER AND CREATOR TIRED OF ALWAYS HEARING THE FUCKING TOPIC OF PAYWALLS
-
♡ ✧・゚: *✧・゚:*Pages where you can find paid personalized content:・゚✧*:・゚✧ ♡
♡ Kemono Party
WARNING! : kemono party most of the posts are explicit content for adults on patreon about kemono party I want to tell you that they upload all the content on patreon you just have to search for the content creator you want and it will appear! (I don't know if all of them but the ones I look for are always there) I also advise you to use an ad blocker because all advertising is +18
♡ PAYSITES MUST BE DESTROYED
♡ TS4 REBELS
♡ ✧・゚: *✧・゚:*Telegram groups:・゚✧*:・゚✧ ♡:
♡ DOLLHOUSE MAFIA ( MAIN CHAT)
♡ ESCENERIOS BLENDER (NO LONGER EXISTS!)
♡ Purr_Sabbath
I recommend that you create a fake number for Telegram, you can always find tutorials on YouTube to do it
About dollhouse mafia I recommend you read the rules and ask about the booty channel
I recommend the blender escenarios if you usually render the sims for photos
♡ ✧・゚: *✧・゚:*VK groups:・゚✧*:・゚✧ ♡:
♡ Sims Galaxy
♡ Dark Phoenix
I also recommend creating a fake number one in vk
♡ ✧・゚: *✧・゚:*The End :・゚✧*:・゚✧ ♡:
I hope it has been useful to you and that you enjoy the paid cc! if you have any question! Don't forget to send me a message here or discord!
I will also update over time… if there is anything new....
Petition Change.org : Stop DMCA Abuse by CC Creators & Enforce EA's Terms of Use is by @farfallasims Link here: ♡ (clink in heart)
If I get deleted from Tumblr by these shitty paywall creators I want to thank you for all the support you have given me all these 2 years that I have been creating and please…can you share my recent cc and the old one (cwunnie) in simfileshare, google drive, mediafire WITHOUT ADS or take my username as miinxpid but add cc next to it that is: miinxpidcc
AND DON'T LET THESE PAYWALL CREATORS TAKE THE SIMS AS THEIR OWN GAME
Share so that it reaches more people <3
♡ I love you very much and see you soon!! ♡
ᴍɪɪɴxᴘɪᴅ <3
#sims4#ts4#thesims4#sims#los sims 4#the sims 4#thesims#ts4 cc#ts4 download#anti paywall#paywall#ts4 custom content#custom content creators#sims 4 custom content#sims 4 anti paywall#antipaysites
142 notes
·
View notes
Note
Hi Sarah, thank you for everything you have done to the Kalafina fandom until now, you're an angel.
Is there a tutorial for joining Finction Junction Station fan club? I want to apply for the next year's Yuki Kajiura live ticket lotteries an I want to be sure to have a ticket since I'll travel from a very far Country. Thank you!
Hello there lovely anon!

I currently have no dedicated tutorial for Yuki's official fan club, FictionJunction Station. However, many years ago, I made a very detailed post about Kalafina's fan club "Harmony". That post was meant to help people navigate the site and register as member. Even though "Harmony" no longer exists, the basic steps described in my tutorial still apply to both Wakana's fan club "Botanical Land" as well as Yuki's fan club "FictionJunction Station". All these websites are designed by the same company, SKIYAKI, so the basic structure is the same.
Here are some main requirements before you start〈(•ˇ‿ˇ•)-→
Credit Card: They do accept overseas credit cards as payment option so you'll be fine with that
Japanese Address: Find a forwarding/proxy service that will arrange everything for you. There’s tenso.com for example. You can get a Japanese address on this page which you can then use to buy things at various websites. That address can also be used to become a fan club member. They will not do transactions for you (as in, buy stuff for you, apply at ticket lotteries), they simply provide an address, store your stuff in case you buy anything and later send it to you. All your stuff will be sent to that address and then they will ship it to you (you can choose from various shipping methods). Payment for goods is also possible via credit card so you can have the merch sent to your TENSO address as well. Then there are sites like www.sosjapan.jp which will do pretty much everything for you (including payments). They will register for you under your name. They will apply for lotteries/pre-order/buy tickets or merch for you. This may actually be a better option for you but that's something you'll have to decide.
Step 1. Get your SC ID. An account will be issued by acquiring an SC ID (it’s free to do that!) which is required to use the service of this site. Simply click on the “new registration” button and enter your e-mail address and a password. A confirmation e-mail will be sent, by clicking the link in the mail, the first part of the registration process is completed. After logging in with your SC ID, you can access “My Page”.
Step 2: Confirm your e-mail address. After you have confirmed your e-mail address you’ll receive another mail stating that the registration of your SC ID was completed. You may log in now with your mail address and password. Be aware that your registration process is not done yet. Next up you should go to “My Page” to enter all your information.
Step 3: Go to “My Page” to enter all your information. Regarding the name, just enter your name in Roman letters first and then in katakana (Google Translate can help you get a katakana version of your name). As for the address, the Japanese address system is quite complex and can seem intimidating at first glance but Tenso provides a few tips on how to enter it properly so be sure to check them out.
Step 4. Confirm the information and continue to the payment method. It’s super simple. You have the option to pay with credit cards which is really the only option that is of interest to us. Simply choose your credit card and enter all the important data. On the right you’ll see the details for your payment (admission fee + annual fee, no extra fees). There's also an option to enable an automatic renewal of your membership. Only possible if you are paying with credit card. Once your year is almost over, the yearly fee will automatically be transferred from your credit card. I guess this comes in quite handy if you are prone to forget things like that easily. Lastly, there’s a button to confirm the transaction and then I think you’ll be asked one last time to confirm all your data and THEN it’s DONE. You are officially a member! You’ll be transferred to a page stating that the process is finished and listing some of the important data. You’ll also receive an e-mail welcoming you to the fan club and summarising all your information (=> member number, expiration date, payment details, payment method)
Please also keep in mind that often, a fan club membership will not be enough to get concert tickets. Most fan clubs will use one of Japan's common ticketing services for their lotteries. With FJS it's usually Lawson Ticket or e+. It can be very difficult to register for these site since they require verification via SMS/phone call (Japanese phone numbers only!!) The payment for tickets is also pretty much impossible for overseas fans. If you are uncertain about any of this and not willing to jump through many hoops, I recommend you look into proxy services like SOSJapan (as mentioned above).
Good luck on everything! Hope you'll be able to attend one of the lives next summer. It's gonna be Yuki's 60th birthday in August so maybe they'll do something a little more special for it.
#reply#yuki kajiura#kajiura yuki#fjs#tutorial#fictionjunction station#Tenso#SOSJapan#proxy service#ykl vol 21
14 notes
·
View notes
Note
hi, this edit is cool, would you please tell me how do you make the circle shape and text like that in the second gif?
https://mikelogan.tumblr.com/post/727834848573669376/forgiveness-is-warm-like-a-tear-on-a-cheek-think
hi!! i'm so sorry this took me so long to answer, but i've hardly been on my desktop for the last couple months and haven't been giffing. finally getting around to this and thank you for the kind words!

in this tutorial, i'll show you what i did as well as another way to achieve the same effect:
once you've made your gif and colored it the way you want, you can get the circle effect one of two ways. i'll show you how i did it first and then a more "normal" way lol
i actually had this circle texture laying around and for whatever reason, i decided to use that. so i popped that onto the canvas and used ctrl+T to center it both vertically and horizontally
then i used a glitter texture over the top of the circle layer and applied a clipping mask so that the glitter only shows up on the circle and not the entire gif. to do this, make sure your glitter (or whatever texture you decide to use) layer is ABOVE the circle and then right-click on the glitter layer and select "create clipping mask." you should see this lil arrow on the layer now:
as a quick note about textures/overlays: chances are that if you just google "glitter texture png" or something similar, you'll find tons, but the png portion is important because pngs have transparent backgrounds. this wouldn't work if the circle texture was a jpeg because its background is not transparent and the overlaying of the glitter texture would appear on every pixel, basically just taking the shape of the entire jpeg rather than just the circle.
i have a resources (basically anything downloadable, from overlays to actions to psds) tag on my gifmaking sideblog as well as one specifically for textures and overlays. i also utilize the websites freepik, pngegg, and pngwing for pngs (especially freepik).
to make the glitter layer the same pink/purple color i used, i ended up using a hue/saturation layer above it and also applied a clipping mask to that layer so it only affected the glitter layer. this step is totally optional depending on the coloring you're going for. you might be happy with the glitter texture exactly as it is. you could also skip the hue/saturation layer and instead apply a color overlay to the glitter layer, select the color you want, and set it to screen or another similar blending mode. to do this, double-click on the glitter layer, select color overlay from the menu, choose whatever color you want, make sure the opacity is set to 100%, and adjust the blend mode to whatever you think looks best.
the "normal" way to do the circle would just be to use the ellipse tool (right-click on the rectangle tool and choose ellipse) and input your desired dimensions. to get a perfect circle, the width and height have to be the same as one another. then you'd continue on with the rest of the process.
for the text, create your main text layer. these were my settings for a 540px canvas:
i also added a drop shadow to the layers with these settings (double-click the text layer to bring up this menu):

then i duplicated the text layer 6 times. select the first duplicated layer (the second line), use ctrl+T and your arrow keys (i only used the down arrow) to move the text down the desired amount of space. i made sure i moved each line down exactly 25 pixels, which is equal to 25 presses of the down arrow. i just think it looks nice when they're equally spaced. with each subsequent layer, i just dropped the opacity.
starting with the original text layer, i used: 100% -> 80% -> 60% -> 40% -> 20% -> 10% -> 5%, but this was just my personal preference.
anyway, that's pretty much it! but if you have any additional questions on this tutorial or any other set, just send me a message and i'll do my best to get to it much quicker than this one 💙
27 notes
·
View notes
Note
Hello! Not the previous anon, but have a very specific wig question. I'm a Mamizou and Wriggle cosplayer, and my wigs look pretty lousy. I'm trying to get something like your Yuuka, Nazrin, or Cirno, but trying to follow styling tutorials using a straight iron the best I'm getting right now is "rat-nest". Any tips for getting more fluff out of them? Willing to buy new wigs if you have any recommendations for those too!
Hello!! Thanks so much for your question! I will be honest: wigs are pretty much my weakest skill in terms of cosplay! I just typically pull a wig out of the bag and cut the bangs and wear it! Sometimes a very small amount of styling.
Some of my wigs, such as Cirno and Yuuka, just have fluffiness from being washed/brushed so many times. My Cirno wig is 14 years old, so I honestly think she's just that fluffy due to age. You may be able to get the same result with just teasing and brushing your wigs. I'm much better at maintaining shorter wigs than longer wigs (I hate detangling or doing any styling to long ones). But I've never crimped them or flat-ironed them to fluff them up. I'm always amazed and impressed with people that can style their wigs so amazingly with those methods! So sorry I'm not of any help in this department. : (
As for my Nazrin wig, I really lucked out since that one just came very full and fluffy! Sometimes I really luck out with wigs that way. (I link it later in the post here)
My wigs are sourced from a few different places. If I just need something simple, I will usually grab a cheap one online. If I want something specifically high quality/thicker/fancier, I will typically buy something from Arda Wigs. (This is the USA website, but they also have other locations.)
My Nazrin wig was actually an Amazon wig. My old one I had fell apart. I still have no idea how, and I needed one for a collab with a plush maker at the last minute. I do try to avoid shopping on Amazon too much, but in a pinch, it was a really lovely and super full and thick wig for the price.
Nazrin Wig Link (I'm Canadian, so this is Canadian Amazon, just a heads up!
Here are some other wig stores. Because I'm in Canada, I haven't ordered from them specifically, but I have friends in the Touhou community that have: Epic Cosplay Wigs Rock Star Wigs
Anyways I'm very sorry I wasn't super helpful with the styling tips! If you need help with anything else or have any questions feel free to send me a message!! In the meantime I'm going to see if I can source where I got my Yuuka and Cirno from (they are pretty old so I need to do some digging) If I find out I'll send it to you via a DM!! Thank you :D!
10 notes
·
View notes
Note
Hey! Im extremely sorry for asking this on tumblr but i don't know how to contact you via twitter, but could you please tell me how did you made the video you have on your twitter pinned post? or where did you find it? Thank you!
hi! no worries love, you can ask me whatever here, i don't mind twitter stuff here (as long is this kind of stuff - i don't want twitter discourse here for some time). i made my pinned video myself, i tried to find one similar but since i couldn't i decided to try to make it myself and i guess it worked!
gonna try to make a small tutorial for those who want this kind of videos:
you will need the following apps. (this tutorial is web, pc and mobile friendly!)
Canva
VN / CapCut
first of all, download the album cover and their respective vinyl on png format. here are the ones i used since hot girls don't gatekeep 💋
now, download the song you wanna use or screen-record it (you can use the "import audio from video" option to add the music to the video later). If you wanna screen-record it, remember that accounts that don't pay twitter premium or whatever the fuck is it called, only can upload videos less that 2:20 mins so i recommend record 2:19 seconds (even if its 2:20, twitter may say "too long" so to avoid that just make it 2:19).
open canva. select custom size and use 1920x656. add a background color or picture, i used white (#FFFFFF). add the album cover and the vinyl. place them wherever you want to (i want them in the middle, but if you place the album cover in the middle, the vinyl is gonna be a little bit more to the right so place the album cover a little bit to the left instead of the middle). tap the vinyl and use the "send to back" option to place it behind the album cover and add the "rotate" motion option. download the video (make it between 23s and 30s long - check that the vinyl make a complete turn on its axis) in the best quality or the want you wish.
open capcut or vn and add the video, crop it the way the vinyl starts in the exact same place it ends, duplicate it the amount of times you wish (depends on how long you want the video). you will notice that the vinyl does a smooth transition between videos, if not, that means its not cropped right. you can change the speed (canva doesn't let you unless you pay) so here you can make it slower or faste, i made it faster (x2). add the music and crop the audio to use your favourite part of the song. save the video (remember to make it 2:19 or less!) in the best quality you are able to since twitter will low the quality of the upload (if you want to upload it at the highest quality i recommend you to follow this tutorial).
open twitter and check that you are able to upload at a good quality (app settings) and post the video. you can add some emojis, symbols or you carrd/tumblr/youtube/etc - tip: erase the https:// from the url, it would look better and it will work perfectly). If you want to make your video downloadable to twitter premium users, leave the option turned on, if not, turn it off in the video (the same place where you can alt text and sensitive level). remember that people will still able to download your videos using some websites, so if you wanna put effort in you pinned vid remember to watermark it (you can add you @ on VN or CapCut and use the "transparency" option, i usually leave it at 15% or 20% but you can leave it 100% full if you want to).
im feel this is the most terrible tutorial i have ever done so please let me know if you need more help!
8 notes
·
View notes
Text
I’m on my “life is good try to be the change you want to see in the world” bullshit. And I’ve noticed a few shifts in tumblr’s online landscape that’s made the website less fun. So here’s my tutorial on using tumblr the fun way operating under the assumption people just don’t know this is fun yet. Number one of whatever.
Asks! I’ll try and add pictures to this guide later.
Asks are a super fun way to promote the cooperative blogging goal of tumblr’s set up, and I’ve noticed way less of these are being sent, responded to, or reblogged as of late. So here’s some info on them!
On mobile, you can send an ask to a blog by clicking the button in the top right shaped like a speech bubble with a plus sign in it. A blog can set a special message to label the ask button so the text will change on it sometimes. It is not the “send a message” option. You can also find the ask button right by the blog’s title and description with the same custom message as you’d see if you clicked the speech bubble button.
From there, you will be given an input box for your ask that looks much like the way you type a text post. You can type whatever you want here as the ask! But just because you can type whatever doesn’t mean you should. Here’s some askbox etiquette I like to stick to.
-don’t ask super invasive questions or ask for personal advice if the blog in question is not about that and do not offer personal advice or suggestions if those have not been invited
-keep in mind what the blog in question is actually about like if it’s an art blog, focus on asking or commenting on the blogger’s art
And you don’t need to super strictly adhere to the second rule imo. Sometimes I get sent funny stuff that’s funny to me, and I like it. Just have fun and try to approach others with good intentions.
Anyway back to the technical side of it. Once you have your ask written, you can send it. Here are a few options you may be given when sending asks that aren’t guaranteed. You can send an anonymous ask to blogs who allow that in their settings. This allows the ask to not directly link back to your main blog in the askbox unpublished and also published. If the receiver doesn’t allow anonymous asks, the ask will automatically link to your main blog. As far as I’m aware, you can’t send asks from side blogs. Side blogs can receive asks though. You may also be allowed to attach images to your ask, but again this is a setting some people will turn off for their blogs.
Once the blog receives the ask, the blogger can answer from their inbox. They’ll see the ask you typed your icon and username unless you’re anonymous. In which case they will instead see your ask and a default anonymous avatar and the username will just say “anonymous”. If they don’t respond to it or delete it, you won’t be notified. You’ll only be notified in your activity tab on your main blog when it is answered. Try not to sweat if people don’t answer yours asks. Sometimes people don’t feel like it or something. It’s not personal. Just have fun.
Hope this guide helps! Enjoy! (Note to self add images in a reblog later.)
11 notes
·
View notes
Text
Gif tutorial by Alinelovelace
Alright, I'll be doing 3 things here today:
1.) Sharing the programs and websites I use
2.) Showing y'all a tutorial on how I make my gifs (this is my first tutorial, so if anything doesn't make sense, don't hesitate to message me, send me an ask, or comment on this post!!!!!)
3.) Sharing some resources by insanely talented gif makers (because I learned how to make gifs by following tutorials)
It's probably important(?) to mention that I use a Windows laptop
A.) Programs and websites:
ezgif: to make my gifs and do light editing
You can make gifs with video clips or screen caps. I'm not advanced enough to use screen caps, though they're supposed to make gorgeous gifs. I use ezgif to make the actual gif and edit the timing (which I end up having to tweak on Photoshop but...)
I also like ezgif because no watermarks!! I will do anything in my power to get rid of watermarks from websites and editing programs because they bother the hell out of me!
Photoshop: for the rest of my editing
This is where I recolor and add text.
A great alternative to Photoshop is Photopea, which I've used before I "obtained" Photoshop. It's FREE and online, so you don't have to download anything! I highly recommend it if you really want to get into gif coloring !!!!
Currently, I get my videos from torrents (bc I have a wide selection for my family to watch on our tv). But I used to use the Xbox game bar on Windows to record the clips I wanted on online streaming sites (unfortunately there's not a whole lot up and running anymore), then cropped and cut them. If anyone's interested in that, I could probably post a separate tutorial for that another time :)
There's also screen cap websites out there and YouTube. And probably dozens of other ways to get videos that I don't know about!
Video cutter
If you use full length episode videos and don't know how to crop them on your laptop (like me)
★★★★★★★★★★★★★★★★★★★★★
B.) Tutorial:
I'll be remaking the first gifset I ever made since I've learned A LOT since then! It should be pretty simple since there's only one set of subtitles.
Another time, I could do an edit tutorial like my That 70s Show ones. It's just taking the same concepts as this tutorial though, and playing around with colors, fonts, and font placement.
1.) Find your video/screen caps:
Since I no longer have the video from my first gifset, I just googled "Mulder throwing pencils season 10" on YouTube. After finding the video, I copied the link and pasted it into a YouTube to MP4 site ((this site has never given me popups or tried to get me to download something that isn't my video file)).
2.) If your downloaded video clip is short enough, you can just stick it into ezgif. If not, you may have to cut it using a website or a computer program.
Ezgif.com -> video to gif -> browse -> select your file -> upload video
3.) After clicking upload video, you should find yourself on this page:
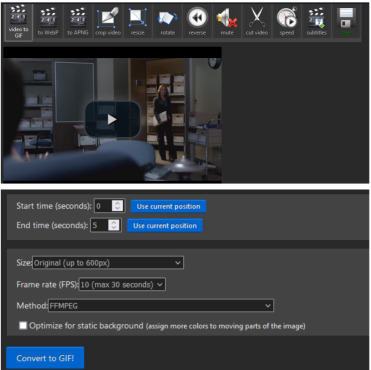
If you need to do any kind of video editing (cropping, rotating, resizing, etc) this is the place to do it! This is also where you make your gifs.
For the first gif, I don't need to change the start time, since I'm starting at the beginning of the video. 0 seconds is fine. But for the stop time, I'm going to play the video, pause where I want my first gif to end, then press "use current position" by end time.
I don't usually touch the settings for size, FPS, or method. If the gif doesn't have a lot of movement, I check "optimize for static background"
Then press convert to gif.
Here's the product I got. Since it's such a short clip, it moves a little fast for me.
I'm going to click "speed" which is below the gif. You're brought to this page:
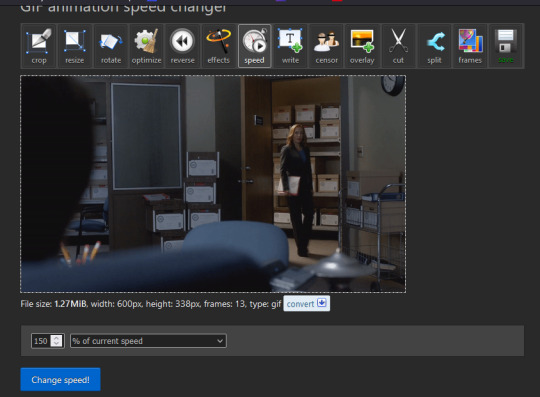
This is completely up to you for speed, but I find that between 60% and 85% end up looking good. If you don't like it, just change the number in the box and press "change speed". I ended up with mine at 65% of current speed.

A little better, right? The gifs that turn out best are 3 seconds to 10 seconds in my experience. This one is 1.5 seconds, so it's a little fast.
After that, rinse and repeat for every gif you need to make.
4.) Editing time! This is for Photoshop (if you use Photopea, I very much recommend this tutorial. It's very well explained!)
Go ahead and open all of your gifs once Photoshop is booted up. Then click window -> timeline
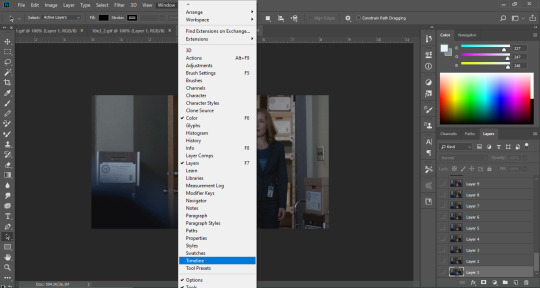
Now you have a handy dandy little timeline on the bottom.
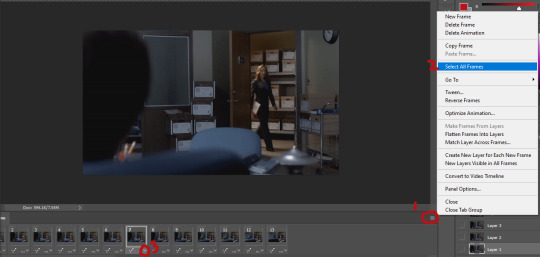
The first thing you're going to do click play and decide whether or not your gifs are running at the speed you want. If yes, move on to next step.
If not: click on the three lines -> select all frames -> little drop down arrow. You should have a variety of times available to choose. Usually, I click other, then put somewhere between 0.04 and 0.08 seconds. Click play again. If you don't like it, try this step again.
If you need to crop your gif, three lines -> select all frames. Press "c" on your keyboard and crop accordingly.
4a.) Color editing
This is where things get complicated. Just remember coloring is subjective and everyone does it differently. This is just an intro to the different tools most gif makers use to alter color.
You don't have to use all of these! I definitely pick and choose depending on how I want the coloring to look. When I'm making a gif set, my coloring isn't as adventurous as when I'm making an edit. It doesn't feel worth it to give away my settings for this gifset since it changes depending on the coloring and lighting of the scene.
All of these tools can be found under "create new filter adjustment layer"
• Brightness/Contrast
This one is the easiest in my opinion. It's pretty straightforward. The more you drag brightness the right, the brighter your gif gets. The more you drag contrast to the right, the higher the contrast is.

• Curves
This adjusts lighting with color values. It's another tool that's hard to explain. I just drag the little circles on the chart until it looks good

• Color Balance
Like every other setting, exactly what you do with this tool is up to you. Color Balance adjusts the overall tint of your gif. I recommend editing highlights, shadows, and midtones for the best results.
• Channel mixer
This one is one of the most complicated tools when making gifs in my opinion. It's best for getting rid of weird colored tints (think the blue coloring in Twilight). I'll just link a tutorial here for it. I don't make enough gifs to know how to explain it.
• Selective color
Hands down my favorite tool, though not only specifically for gif making. This tool allows you to select a color (reds, yellows, greens, cyans, blues, magentas, whites, neutrals, blacks) and edit each color group. For example: my skin in photos usually has a weird red tint. I can edit the reds in my photo using this tool to make it look less abrasive.
You just play around with the different colors and bars for each color until each color group looks good. I recommend hitting the highest value to see how the color changes/what parts of the gif are affected by the change.
In the instance below, I wanted to see how magenta affected the blue colors, so I dragged magenta to 100. Now, knowing what kind of color changes magenta will make to blue, I can adjust accordingly.
Messing around with the each color put me here:
• Vibrance
Another pretty self explanatory tool! Vibrance and saturation bars make the gif colors more colored and vibrant.
• Applying the filters to all frames
Shift click to select all the filters, and drag them above all the layers. They should now be applied to all the frames.
If not, select all frames with the three lines menu drop down like before -> click the little eye to turn off visibility, then click it again to turn it back on. You should be able to see everything now.
In order to carry the same colors from gif to gif, I take pictures of each setting and edit each filter adjustment layer accordingly. I side by side compare and make adjustments if the coloring doesn't match quite right. I'm sure there's a better way to do this, but I'm not experienced enough yet.


4b.) Subtitles
This part isn't too bad. For subtitle text, I use Calibri. Myriad pro bold italic and Arial are also really good options though!
• Text
Go to the sidebar and select text. Drag yourself out a box approximately where you want your subtitles. Type whatever you want. If you don't like where it is, click the move tool and drag it wherever you'd like.
Here are my text settings:

• Blending options
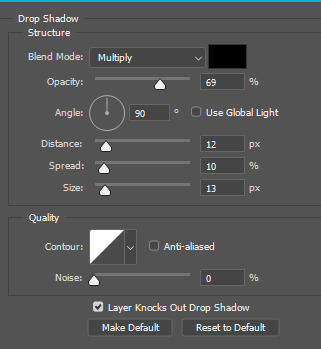
Right click your text layer and select "blending options" at the top. I edit stroke, which adds an outline. I also edit drop shadow, just because it adds a little depth to the text

• Applying to all frames
Drag the text layer to the top, just like you did with the adjustment filter layers when coloring. The same troubleshooting applies.
5.) Exporting
I know there's other ways to do this, but this is the way that makes the most sense to me.
Select all frames on the timeline -> file -> export -> save for web (legacy) -> save
With everything together, you go from:
To:

I had the subtitles in two parts because my first one had the subtitle in two parts (consistency).
Happy giffing!~~
★★★★★★★★★★★★★★★★★★★★★
C.) Resources:
This is a collection of resources both for Photopea and Photoshop
Photopea Resources:
Photopea giffing tutorial by @heroeddiemunson
Photopea gif coloring tutorial by @heroeddiemunson
Photopea removing yellow tint tutorial by @lacebird
Photopea gif making tutorial by @aragarna
Photopea gif making tutorial by @ashleyolsen
Photopea changing background color of gifs by @benoitblanc
Photoshop tutorials:
Giffing tutorial by @dqmeron
Subtitle tutorial by @itsphotoshop
Blurring gif backgrounds by @clubgif
Inverted colored text tutorial by @spaceslayer
Gradient text tutorial by @tawaifeddiediaz
Gif coloring tutorial by @logangarfield
Color consistency tutorial by @clubgif
Channel mixer tutorial by @zoyanazyalensky
11 notes
·
View notes