#plastic bottle craft ideas easy for school
Text
You may find plastic bottle crafts. They may be recycled to create lovely, useful crafts.
#5 plastic bottle craft ideas#plastic bottle craft ideas | easy for school]#plastic bottle craft ideas easy for school#Plastic bottle craft ideas for adults#plastic bottle craft ideas for home decoration#Plastic bottle craft ideas for preschoolers#small plastic bottle craft ideas
0 notes
Text
21+ Creative & Easy Plastic Bottle Craft Ideas For Kids

21+ Creative & Easy Plastic Bottle Craft Ideas For Kids
21+ Plastic Bottle Crafts For Kids
Plastic bottles arts and crafts ideas are known for their flexibility and durability. Create beautiful DIY artworks or crafts using them to decorate your home. Clean the bottle, remove the label by soaking it in warm water for a while, and get going with your children for some amazing family bonding and crafting time.
1. Glow bottle
Make these glow-in-the-dark bottles to put in your child’s bedroom at night. They can be used as a calming device when your crafts for kids children are on time-out.
You will need:
Plastic bottle
Hair gel
Glitter glue
Glow-in-the-dark paint
Superglue
Glow stars
How to make:
Put some glitter glue in the bottle.
Add some glow-in-the-dark paint into the bottle.
Mix the hair gel with some water and pour the mixture into the bottle.
Put in the glow stars.
Use super glue to stick the bottle’s cap to the bottle so that the mixture doesn’t spill out.
2. Soda bottle pencil case
This pencil case is the best way to make a statement at school. It is a functional piece of craft that is quite easy to make.
You will need:
Two soda bottles of the same size
Zipper
Hot glue
Felt
Scissors
Sandpaper
How to make:
Cut one soda bottle four inches from the bottom and the other at two and quarter inches from the bottom.
Sand the cut edges to make sure they are smooth.
Measure the zipper along the circumference of the bottles and cut off the excess.
Cut a small rectangle of felt and glue it to the end of the zipper. This prevents the zipper from opening completely.
Use hot glue to stick the zipper to the bottle. Make sure you leave enough space for the zipper to run freely.
Keep the felt end of the zipper unglued.
Apply hot glue on the other side (the inner upper side) of the zipper and glue it to the other bottle.
Make sure the felt piece fits perfectly. Cut it if necessary, and hot glue it to both bottles.
3. Plastic apple
An apple a day keeps the doctor away. This apple keeps the plastic away from polluting your environment.
You will need:
Two empty 1.25l plastic bottles
Red or green cellophane or tissue paper (you can also use thin cloth materials)
Green and brown felt
Ribbon or string
Needle and thread
Sandpaper
Scissors
Glue
How to make:
Cut around three inches from the bottom of each bottle.
Sand the edges to make sure there are no rough edges.
Heat the scissors and make a hole through the center of one of the bottom pieces.
Thread the ribbon or string through the hole and knot it on the inside.
Cut a stem and a couple of leaves from the felt.
Stitch them together.
Glue them to the ribbon or thread.
Scrunch up the cellophane, tissue paper, or fabric and place it inside the other cup.
Place one cup on top of the other and press down until they fit snugly.
You can use glue or tape to make sure the two cups won’t come apart.
4. Vertical garden
If you want to teach your children the concept of “best out of waste,” there is nothing better than this idea. Make a garden for new plants using plastic bottles.
You will need:
Plastic bottles
Scissors
Drill
Nails
Soil
Seeds
Rope
Sandpaper
How to make:
Drill holes in the wall where you want to set up the vertical garden and insert the nails into the holes. The distance between the holes will depend on the size of the bottle you are using.
Cut a rectangle from the midsection of a bottle.
Sand it to smoothen the edges.
Drill four holes in the bottle–two on opposite sides around an inch below the cap and two on opposite sides an inch above the bottom. You can use a pair of heated scissors to make the holes as well.
Also, make some holes on the opposite side of the rectangular opening.
Fold the rope and thread one end through the two holes at the top and the other end through the two holes at the bottom.
Tie the loose ends of the rope to the nails and secure them. Your bottle will be horizontal at this point, with the rectangular opening facing upwards.
Fill the bottle with soil and push in the seeds.
You can also try to plant terrarium-size cacti and succulents in plastic bottles with rocks and colored sand to add a contrasting and pretty look to your garden.
5. Apple container
These mini containers made from empty plastic bottles will ensure you are never out of containers again. They are great for gifting, and you can make them in any size you want.
You will need:
Two plastic bottles of the same size
Zipper
Spray paints in red and green colors
Hot glue
Painter’s tape
Scissors
Sandpaper
Green cardstocki
Cardboard
How to make:
Cut the two bottles around three inches from the bottom.
Sand the edges to make sure there are no rough edges.
Apply painter’s tape on the outside and spray paint on the inside of both pieces. Spray lightly and apply two or three coats of paint. Make sure the paint doesn’t pool at the bottom.
Remove the painter’s tape.
Measure the zipper along the circumference of the bottles and cut off the excess.
Apply hot glue to the end to seal the zipper. This prevents the zipper from running off the track.
Apply hot glue to the inner side of the zipper to attach one bottle piece to it, unzip it fully, and then attach the other. Make sure you leave space for the zipper to operate without snagging.
Cut a rectangular stem from cardboard and a leaf shape from the cardstock.
Hot glue them to the apple.
Point to consider
Fill the apple containers with mini cookies, candy, and dry fruits. Then, wrap it in colorful fabric and attach a bow. It would be a lovely and environment-friendly present for festivals or birthdays.
6. Bottle sprinkler
If you want a sprinkler for your outdoor plants, you can make one yourself with a plastic bottle. Use this for days when you have to go out of town yet want to keep your plants happy.
You will need:
2l plastic bottle
Garden hose spigoti
Garden hose
Duct tape (optional)
Scissors or pointed screwdriver or awli
How to make:
Attach the plastic bottle to one end and the garden hose to the other end of the spigot.
Make a few holes in the bottle.
Connect the other end of the garden hose to a water supply.
If there is any leakage in the joints, secure them with duct tape.
7. Plastic bottle butterflies
Make these pretty butterflies out of plastic bottles to adorn your walls. They are easy to make and can be made in various colors, patterns, and sizes.
You will need:
Plastic bottle
Permanent marker
Pipe cleaner
Beads
Sharpies
Hot glue
How to make:
Draw the shape of a butterfly on the bottle and cut it out.
Draw the patterns of the wings using permanent markers.
Color the patterns with Sharpies.
Fold the butterfly at the joint of each wing so that they crease and look realistic.
Bend the pipe cleaner in a V shape.
Thread some beads on one side of this shape.
Twist the V together and thread a big bead to make the butterfly’s head.
Curl the ends of the pipe cleaner to make antennae.
Place the bead in such a way that the wings are on both sides of the head.
Hot glue them in place.
8. Plastic bottle bird feeders
These bird feeders are extremely functional and will give your children an opportunity to observe birds closely.
You will need:
5l soda bottle
Craft knife
Small eye screw
Two chopsticks
Twinei
How to make:
Poke a hole through the lid of the bottle and insert the small eye screw through it.
Thread twine through the eye of the screw.
Make two sets of holes in the bottle–one set around the midway, and the other set near the bottom. Each set of holes should be directly opposite each other.
Insert the chopsticks through these holes.
Fill the bottle with birdseed.
Cut a hole, enough for the birds to gain access to the feed.
Close the cap.
Tie the other end of the twine to a branch.
9. Plastic chandelier
If you want to make an elegant and classy-looking decoration piece for your home, you can make this chandelier. It is made entirely out of plastic bottles, and apart from providing great lighting at the dining table, it will also serve as a conversation starter.
You will need:
Plenty of plastic bottles
White spray paint
Hot glue
Craft knife
Bulb and holder with wire
How to make:
Cut the bottles of different sizes around two inches from the bottom.
Spray them in white paint. You can use different colors after applying a white base coat.
Stick these bottle pieces together. They should come together in a dome-shaped pattern.
Insert the wire through the gap between two pieces.
Attach the holder to the inside end of the wire.
Put it up and screw in the bulb.
10. Plastic jellyfish
If your child is interested in sea creatures, make a jellyfish for them to put in a plastic bottle. They can observe their jellyfish and even consider it their pet.
You will need:
Transparent plastic bag
Plastic bottle
String
Blue food color
Scissors
How to make:
Cut a small square off the plastic bag.
Bring the ends together and make a small balloon. Tie it loosely with the string.
Cut the edges of the sheet so that they look like tentacles.
Fill the ballooned part of the sheet with water.
Put it inside the bottle. It will settle at the bottom.
Fill the bottle with water and add a few drops of blue food color to the water.
Screw the cap on.
Shake the bottle to make the jellyfish float.
11. Bottlecap mosaic
Brighten up a wall or any surface by making a beautiful mosaic using bottle caps. If you don’t have enough bottle caps, ask your friends and neighbors to save theirs.
You will need:
Plastic bottle caps in different colors and sizes
Glue
Pencil
How to make:
Select the surface on which you wish to make the mosaic. You may make it on a canvas board, a garden wall, or a fence.
Draw a design on the surface with a pencil.
Decide the color scheme of the design.
Apply glue to the top of each cap and attach them to the surface according to your design.
12. Plastic spoon lamp
This easy-to-make plastic lamp is made of plastic spoons and looks pretty when lit. You can put it up in your living room or dining room for a muted light effect.
You will need:
5l plastic bottle
Plastic spoons
Exacto knifei
Bulb
Holder
Wire
Scissors
How to make:
Cut one inch off the bottom of the bottle. Remove the lid.
Cut each spoon just below the flat portion.
Apply hot glue to the inner (concave) side of the spoon and stick it to the bottle from the bottom.
Once a layer is done, partially overlap the next layer on top of the first one.
Continue this process until the whole bottle is covered.
Attach the holder to one arts and crafts ideas side of the wire and pass the other end through the mouth of the bottle.
Screw in the bulb and put the light up wherever you want.
13. Plastic bottle piggy bank
This piggy bank made of plastic bottles is not only cute but also helps inculcate the habit of saving money in children. You can make a few of them for various purposes such as saving, spending, and donating.
You will need:
Plastic bottle
Googly eyes
Bottle caps
Hot glue and gun
Thick paper
Scissors
How to make:
Cut a rectangular hole of around 2x ½ inches. The long side of the rectangle should be along the length of the bottle.
Take the paper and cut out ear shapes and a circular shape for the snout.
Stick them to the bottle. The circular shape should come over the cap of the bottle.
Glue on the googly eyes.
Glue four bottle caps on the lower side of the bottle, below the slit. These will make the legs of the piggy.
14. Plastic bottle jewelry stand
This pretty jewelry stand can hold all your fashion accessories. Besides, it is easy to make.
You will need:
Four plastic bottles – two 2l bottles, one 1l bottle, and one 20 oz bottle
Exacto knife
Scissors
12-inch threaded rod
Nuts and washers
Drill
How to make:
Using the knife and scissors, cut the bottles from the bottom so that they look like flowers.
Drill holes through the center of each ‘flower.’
Put them through the rod and sandwich each of them on both sides with nuts and washers. The lowest ‘flower’ will be facing downwards to make the base of the stand. The others will be facing upwards.
Secure all the nuts firmly.
15. Bottle monsters
You can make these monsters out arts and crafts ideas of empty plastic bottles for Halloween.
You will need:
Plastic bottle
Marker
Exacto knife
Acrylic paints
Paintbrushes
How to make:
Take a clean, dry, and empty plastic bottle and draw your monster’s face on it with a marker.
Cut off the top of the bottle and the opening of the mouth using the knife.
Paint the monster in the colors of your choice.
Apply two or three coats if necessary.
Let the paint dry completely.
Put in candies and place the monster outside your front door for trick-or-treating.
16. Plastic bottle flower pots
Encourage your children to care for their plants by making these plastic flower pots with them. You can decorate them whichever way your children want for some extra incentive.
You will need:
Plastic bottles
Exacto knife
Acrylic paints
Paintbrushes
Scissors
Soil
Seeds
How to make:
Cut an empty plastic bottle in half.
Color the lower half in the colors of your choice.
Let the paint dry completely.
Heat the scissors and make holes at the bottom of the bottle. These holes help the excess water drain off.
Fill the bottle with soil and plant a few seeds.
17. Plastic crown
Make a crown for your child using empty plastic bottles. They will be eager to become the prince or princess of the recycle-land.
You will need:
2l plastic bottle
Glitter glue
Scissors
Marker
How to make:
Cut out the cylindrical portion of the bottle.
Trace the shape of arts and crafts ideas a crown on it using a marker. You can use a template from the Internet.
Use glitter glue to fill in the places of the gems in the crown.
Let the glue dry completely.
Secure the crown on your child’s head using bobby pins.
18. Plastic bottle bracelets
Make pretty bracelets for your children using plastic bottles. These fashionable accessories are easy to make and great to look at.
You will need:
Plastic bottle
Exacto knife
Ribbons
Masking tape
Glue
Decorative items (optional)
How to make:
Cut the bottom of the plastic bottle and cut a few sections from it. They can be of any width.
Place one end of a ribbon on the inside of the section and use masking tape to hold it in place.
Wrap it around the section until it is fully covered.
Glue the end of the ribbon securely.
You can use different colored ribbons and different styles of wrapping.
Use decorative items such as glitter, sequins, beads, buttons, etc., to decorate your bracelet.
You can also use wool or thread to wrap around the plastic strip.
18. Flower paint stamp
This is a great craft for young children. In this craft, you do not have to actually make something out of a plastic bottle. Instead, you can use the plastic bottle for a different purpose.
You will need:
Plastic bottles in different sizes
Paints
Paper plate
A4 sized paper
Pencil
How to make:
Draw and paint the stem of a flower or the trunk of a tree on a sheet of paper.
Pour the color of your choice on the paper plate.
Dip the lower portion of the bottle in the paint and stamp it on the sheet of paper to resemble flowers.
Use bottles of different sizes to make a garden of different colored flowers.
Use newspapers to place the bottles when not in use.
20. Plastic playhouse
Use old milk bottles to make some playhouses for your children’s dolls. They are extremely easy to make, and your children will spend hours playing with them.
You will need:
Empty milk bottle
Exacto knife
Hot glue
Construction paperi
Scissors
How to make:
Clean and dry the milk bottle thoroughly.
Cut a big opening on one broadside just below the handle so that it resembles a door.
Cut out rectangular shapes from the other sides for the windows.
Make shapes on the construction paper and hot glue them to the bottle for the windows.
Decorate the house in the way you want.
You can add some bits of furniture from the scrap bits of plastic.
21. Bottle firefly
Children love glowing things, fireflies being among them. So, engage your child in making a unique bottle firefly whenever they wish.
You will need:
20 oz green plastic bottle
Glow stick
Three pipe cleaners in green
One pipe cleaner in black
Pony beads
Cardstock
Glue
Scissors
Black acrylic paint
Clear tape
How to make:
Twist three green pipe cleaners around the middle of the bottle. Twist their ends together so that they resemble the legs. The bottle should be supported by these “legs” when placed on its side.
Cut the cardstock and wrap it around the bottle. Leave the legs free. Do not cover the top and the bottom of the bottle.
Glue the cardstock to the bottle.
Cut two wing-shaped pieces from another cardstock and stick them to the first cardstock on the bottle.
Put a glow stick inside the bottle. You can use tape to secure it near the top of the bottle.
Screw the cap on and stick the pony beads for the eyes.
Bend the black pipe cleaner in a V shape and then gently roll its ends to resemble antennae.
Stick it above the eyes.
Let the glue dry completely.
22. Water bottle penguin craft
Help your kids transform a plastic water bottle into an adorable penguin with paint and creative details.
You will need:
Empty plastic water bottle
Black and white craft paint
Paintbrushes
Craft foam or construction paper in black, white, orange, and yellow
Googly eyes
Glue
Scissors
Marker
How to make:
Paint a plastic water bottle black with a white belly.
Cut a white oval for the face and glue on googly eyes.
Create an orange beak and two webbed feet.
Attach the face above the belly and add the beak and feet.
Cut black wings and white markings for the belly.
Glue on the wings and markings, then draw additional details with a marker.
You may even use craft papers on the bottle and make cute penguins.
1. How can I make plastic bottle crafts safe and age-appropriate for children?
To make plastic bottle crafts safe for children, use age-appropriate techniques that are easy for younger children; you can increase the difficulty level and materials used for the crafts as they grow older. Also, use child-safe stationeries and other materials. Always monitor them and ensure that all sharp-edged materials, such as scissors, knives, and bottle cuts, are being used carefully.
2. Can I teach my children about recycling and sustainability through plastic bottle crafts?
Engaging your children in plastic bottle crafts is a great way to introduce them to the concept of reduce, reuse, recycle for kids. Tell them the importance of recycling and how it helps in environmental protection. You can show them a creative way to recycle by using materials such as old newspapers or magazines, straws, toys, used plastic bottles, old jars or utensils, and other recyclables around the home. These waste material crafts for kids can make recycling both fun and educational.
3. Can I use different types of plastic bottles for crafts, or are there specific types that work best?
You can use any type of plastic bottle depending on the type of craft and the size of bottle you want for the craft. But it’s important to note that not all plastics are easy to use in crafts.
4. What are some tips and tricks for making plastic bottle crafts with children both fun and educational?
To make plastic bottle crafts with children both fun and educational, offer a variety of materials, such as paints, markers, crayons, foam sheets, yarn, and stickers, to help them customize their crafts, thus fostering creativity. These crafts can be used to educate children about colors, shapes, and other educational concepts. You must also be mindful of your choice of paint as it impacts the outcome and the appeal of the craft for the child. According to Louise, a mother of three, who made plastic bottle Halloween lanterns with her kid, ”We painted our orange pumpkin lantern with poster paint and found lots of the paint flaked off so I would definitely advise using acrylic paint (i).”
5. Are there any plastic bottle crafts for children that can be done indoors or outdoors?
Plastic bottle crafts can be diy crafts made indoors or outdoors, depending on the type and size of the project. Bird feeders and planters are some plastic bottle crafts that can be made outdoors, while indoor activities may include making holders or home decor.
6. What are some tips for storing and organizing plastic bottle crafts for children?
To store and organize plastic bottle crafts, you can create a space in your living room or in your child’s bedroom to display their work; this will also help encourage your child’s creativity.
7. How can I encourage my child’s creativity and imagination through plastic bottle crafts?
You can use plastic bottle crafts to foster creativity and imagination in your children by instructing them to make something unique from the given supplies. You can also give them a topic or theme and let them use their imagination to create a plastic bottle craft that will suit the theme.diy crafts
Plastic items do not get degraded easily and contribute to environmental pollution. There is an urgent need to reduce and recycle plastic waste to help our planet recover. These plastic bottle crafts for kids can encourage your children to learn more about recycling plastic in fun and useful ways. Instead of discarding plastic bottles, children could acquire an interest in making new items such as a planter, bird feeder, or pencil case. This allows a child’s creativity to blossom while also teaching them to be ecologically mindful. The craft ideas on this list also make great Earth Day activities for kids.
Infographic: Games And Activities Your Children Will Love
Educational games are one of the best teaching methods for children of all ages as they incorporate the fun of playing games with learning. They even make the subject interesting and practical for them to understand. So, let’s check out the infographic below for some educational games and activities you may try.
Key Pointers
Recycle the house plastic bottles with fun crafts such as “Soda Bottle Pencil Case” or “Plastic Chandelier.crafts for kids”
Repurpose them into “Vertical Garden” or “Birdfeeder.”
Summertime can be a lot more enjoyable when old plastic is transformed into sprinklers.
0 notes
Text
I'm feeling like yapping because I slept very poorly last night, so: Here's the story of that human Ratchet cosplay and why I'm lowkey convinced it's cursed
Start planning cosplay months in advance for a school event
See the perfect belt for it while in Rhodes with my family. It's the only one left, and I later find that the type of belt is referred to as a ratchet belt. This is a sign.
Need to locate white heavy-duty trousers and a white padded parka jacket
Finding them at thrift stores takes a little longer than expected, no biggie. End up with a white parka that I removed 2 pockets from and someone's old slalom trousers
Both articles of clothing end up being synthetic fabric, which means they need a specific kind of fabric paint
Crafts store is specifically out of red synthetic fabric paint, unsure when they'll get the next shipment
In the meantime I buy my wig. I have no previous experience styling wigs
I end up having to cut large parts of the wig away, and hairspray doesn't stick as well to synthetic hair as I hoped
Attempt to stick the bangs (the wig had bangs) back with a hairdryer
This would have been a great idea if it wasn't for the fact that this was my mom's old hairdryer from the early 2000s or earlier that doesn't have the heat listed anywhere
Turns out this thing lets out air hot enough to literally burn the bangs off. Oops
Color in the ginger streaks with an alcohol marker: a surprisingly effective method
Attempt to find crepe hair for the facial hair, end up having to order it from Denmark because the only finnish store that sells that stuff only sells it in 10cm pieces
Attempt to follow a tutorial I found online for reusable crepe hair facial hair. The hair doesn't stick to the tull, result looks like a merkin. End up deciding to just glue the hair straight to my face
Shoes: I have old winter boots that were worn through the bottom to the point that they can't be used as proper winter shoes anymore. They're black in color which would actually have fit into the design nicely
But the human design I made had white and red boots with steel toes. Attempt to recreate that.
The fabric is very hard (kuoma boots) so my first attempt is spray paint. Believe it or not, spray paint doesn't take well to fabric
Start applying acrylic paint to shoes. The paint job takes several layers but actually turns out really beautiful
Make prop blade with two cardboard pieces glued together and a shit-tonne of duct tape on top. Thing ends up weighing about 2 kilos by my estimate
Paint job is decent for a first time prop-maker
Back to the clothes: I locate red synthetic fabric paint at an online store. At this point the even is less than a month away
Buy two large bottles
Wait for them to arrive
Package says "primary red"
The paint is pink
Like the most hot neon magenta pink color you've ever seen. Nothing like the photos. I say out loud "he slays but not that much"
Send one bottle back, order big bottle of orange and small bottle of brown to hopefully mix the perfect red
By the time it arrives time is running out
In the meantime I have embroidered a small Autobots logo on the breast of the jacket. This went without a hitch and was completed in one 5 hour sitting
2 days left. Finally get to paint the jacket. Think to myself "Why don't more cosplayers use fabric paint?"
The answer is because fabric paint is of the devil
Start painting the clothes in my parents' shower room. I've placed trashbags on the floor to protect it.
One thing about fabric paint is that it dries very slow. So slow in fact, that moving the jacket around caused stains on the plastic bags, which then stained parts of the jacket that were meant to stay white. Jacket that was supposed to be 40% white ends up with just the front breast remaining white
You'd think that the slow drying would make it easy to get wet paint stains out. You'd be incorrect.
Spend OVER 7 HOURS in one sitting painting the jacket and pants
Cry. but get the job done. Leave the clothes to dry at my parents house.
Return next day. Paint that was evenly colored the previous evening has dried splotchy
Well, nothing I can do about that. If nothing else it makes the jacket look suitably weathered, and some of the darker stains look like dried blood
Iron the clothes thoroughly, take them home to sew on the reflective strips.
By now it is the night before the event. I need to wake up at 6.30
Get home at around 7-8 pm. Immediately start cutting out the pieces
Hand sewing is a lot harder than I remembered, especially when sewing onto a premade garment. I have to sew blind at a few points because I can't see very far down the pant leg
These were also garments with linings and padding. This is very bad for sewing shit onto something that you can't take apart
My hands start getting shaky, I'm sleepier than I can ever remember being. Have to push through. I keep pricking my fingers
At some point I scribble down a poem: "In the lamplight I see the needle's halo / Set against the reflective fabric / Like all things holy it requires a sacrifice / I prick my fingers once more"
At 3.30 am I stop looking at the clock. I have to downsize the amount of reflective strips I'm going to sew on. Only the most important ones remain. My stitches are sloppy
I've accidentally ended up method-acting the character: I am suddenly struck by the thought "I spent so much effort and time on this, but no-one else will see that. They'll only see the terrible result"
Shove that aside. I've been waiting for this day since I was 7. I will not let my perfectionism ruin it for me. I will have fun or I will cry and have fun
Finally get to sleep
Wake up to my alarm, somehow feeling totally refreshed
Eat breakfast, start applying make-up. I have not had any time to practice the make-up or putting on crepe hair
It, surprisingly, goes without a hitch
I put on my outfit and surprisingly, it looks great if you don't look at the messy stitches!
Head to school. It's february and very slippery outside, so I put on my normal winter shoes for the way. I have to leave the prop sword at home (school doesn't want even pretend weapons on site, I get that) I take my rainbow flag with me instead
Get to school. Try to switch on my cosplay shoes, find out that the paint cracks and leaves a tiny mark on the floor. I quickly switch back to my normal shoes
Get my bag of candy, participate in school events, get ready to get on top of a lorry truck
It's -20C (-4F) outside. Mom makes me swear I'll put on extra layers under my outfit before I head outside.
Go to bathroom, put on an extra layer of wool clothing between my pre-existing 3 layers of clothing. Knitted socks on top of my normal socks in my shoes, mittens on my hands on top of my gloves, hat between my wig cap and wig.
45-60 minute lorry ride goes well, by the end of it my face and feet are frozen. My face is as red as my outfit
Afterwards one other student recognizes my character. Nearly jump out of excitement. The student's friend gives me a candy
Go to meet my friend at a cafe, but while removing the hat I notice something peculiar
My wig cap is gone. Like fully gone. Not in the hat, not in my clothes. It's gone.
Spend some wonderful time with my friend at the cafe, but after a few hours I start nodding off. Friend recommends I go home.
So, that was the first time I wore the cosplay. Some of it was pure bad luck, but most parts were a result of me biting off way more than I could chew. I don't know how i pulled it off. The second time, however:
Enroll in a small local cosplay contest.
Start fixing the cosplay so it's presentable. I end up having to take off all the reflective strips to re-sew them better. In the process I find that one of the leg strips' stitches have snapped and that I accidentally sewed two parts of the lining on the back together
No idea how that didn't rip
New stitches end up really nice, sew them on over several days in 2-3 hour sittings
Wig is kind of a mess, try to spike it with glue.
Practice the make-up several times
Contest day comes: make-up takes way longer than the first time. Almost run out of time with the crepe hair. The eyebrows don't end up great, but the make-up is the best it's ever been
Start walking towards the bus stop, it takes me some time to orient myself to where the stop is, but I realize it's closer than I thought. I'm a fast walker, I'll have time to stop by the store
Go in, buy two chocolate bars. I already had one soda (BRIGHT green in color). I have not eaten breakfast.
Forget my fucking credit card number. Already stressed. I have enough coins to pay, thankfully
Apologize to the cashier, say "Nothing has been going according to plan today" she laughs, which is nice. I imagine a 50yo looking man with the fashion sense of a Pokemon gym leader and the voice of an afab teenager ( a particularly bright and high-pitched voice at that) is not something you see every day.
Remember my credit card number the fucking second I step out of the store
Cashier said she hoped my card didn't get locked. Get a juice from a different store. Card thankfully works. Drink the juice while waiting for the bus.
The bus I'm waiting for isn't on the timetable, but it shows up online. Oh shit.
Double check that the stop name is correct, start panicking.
Oh wait! The name is correct, the number isn't. There's another bus stop 20 meters away. Thank goodness.
My friend from the cafe was supposed to come with me, but fell ill. It's my second con, and I'm alone. Determined to make the best of it regardless.
Realize that I've once again method-acted. I am suitably pissed about the obstacles I dealt with
It's august, I'm wearing winter clothes. You see the problem.
Get to the contest, have more free-time than I expected. Don't really have anything to do except wait. Run into a friend later that day, catch up
Go to the store to buy a soda that isn't room-temperature. Eat one of the chocolate bars, too nervous to eat anything else.
Go to meet the judges, it goes pretty okay. I didn't say nearly as much as I should have, though, but that's neither here nor there
Wait for the contest. Walk on stage and make the most of it. Even if I don't place, this is my moment to shine
Don't place in the contest, and neither does mine and my friend's entry for the photoshoot contest. Hey, that means we can enroll it in different contests!
Hang around a little bit longer: All I really wanted was for someone to recognise my costume. Give up after a while, start heading to bus stop
Younger kid (11-13?) runs up to me, asks if they can take a picture with me. I say "of course!" I'm happy as a clam because someone recognized my cosplay or at least liked it enough to want a picture.
Find bus stop. Random person asks me what series I'm cosplaying from, in case they recognize the character. I say Transformers Prime. I, for some reason, don't say which character I'm cosplaying. They don't seem to recognize me
Different person shows up, asks if I'm wearing a Transformers jacket. I tell them I'm wearing a whole transformers cosplay. I, once again, don't say which character I'm cosplaying. Also tell the person I competed in the contest. They ask me where I got my wig, I say I styled it myself, show before and after pics. They seem impressed
We lament the lack of a transformers fandom presence in finnish cons together
They get on a different bus
Had made plans to meet up a friend in the city, but they can't make it after all
I go to the city centre. My sister is having her birthday party at the apartment where I live, so I'll go to my parents. Want to get some food first. Stop by the local game store on the way just to check if they have transformers stuff, not this time
Go to the counter with some candy. Cashier asks me if I'm coming from the con. I say yes. They pull up their sleeve to show that they have a huge autobots logo tattoo. I'm awestruck, compliment the tattoo, they compliment my cosplay
I once again forget to specify my character
Want taco bell fries, it's now over 6pm and I have eaten a total of: small juice box, one chocolate bar, and about 0.6 liters of soda.
Find out taco bell doesn't offer "just fries". Decide to just go home in hopes my parents will have something I can eat
Hop on the bus. The trip takes a little less than an hour. 7pm.
Get home. Parents immediately want me to change and shower. I say I can't take my makeup off yet because I don't have my spirit gum remover with me. They insist.
I try to peel my facial hair off as gently as I can. I lose 20% of my eyebrows, the one part of my face that I like the most. I feel like Snorkmaiden when her beautiful golden hair got singed by lightning
My parents say you can barely tell. You can definitely tell.
Dad takes me to get pizza
Finally eat an actual meal.
Thankfully notice that most of my eyebrow hairs that look "gone" are actually snapped near the bottom, not completely pulled out
Finally get pictures of the cosplay taken by my dad. Find out my wig looked fucking atrocious from the back
Thankfully it was a cheap wig, so replacing it and re-styling it won't be too expensive, this wig can be my stunt-wig now
Notice that the paint has started coming off the sword
This I was very sad about, I really like that prop blade. I will try to find a way to save it.
Like the second time just feels like pure bad luck through and through. I have plans to enter at least one more contest with this cosplay after I've updated the wig, so we'll see how that goes
1 note
·
View note
Text
Getting stARTed
These are some tips I had put together for another purpose for people thinking about trying something creative, but thought I'd share.
Watch some artistic and creative videos on YouTube to see what appeals to you.
Check local art and craft supply sellers, art schools, and galleries to see what classes and workshops might be available.
Check local and online art and craft supply sellers for on sale items so you don't spend more than you need to before you find out what you like doing.
Watercolours can be wonderfully unpredictable. Learn to embrace that.
Check your home to see what supplies you might already have.
Most importantly, don't worry about the end result or the quality of the end result. This is for personal enjoyment and exploring a process. Don't be afraid to make mistakes. Many artists will tell you that mistakes are sometimes the best part. Talent is not important. Enjoyment is. Besides, talent is more of an acquired skill than you might think.
Here's some simple processes to keep in mind.
Colouring
While colouring may seem simplistic, if you're stuck for ideas it can be a good place to start. You can colour the images in different methods using different materials, like crayons, coloured pencils, and markers.
Materials are easy to acquire and economical.
Doodling
Creating patterns and randomness can spur other creative ideas.
Materials are easy to acquire and economical.
There are informal and formal methods of getting started. Zentangling is popular, but is not the only way of enjoying patterning.
Tracing
Using pre-existing images, such as photographs, to trace images that you can colour to learn those techniques, or create collage with.
Hand-lettering
This process can be used to create inspirational or quote art for your walls, to enhance scrapbooks or journals, or to enhance framed photographs.
Notes
Get a notebook and/or sketchbook to keep track of ideas, projects, progress, lists of supplies you need, lists of supplies you bought, inspirations, for doodling, and other sketching.
Keep a swatch book of the supplies you buy, so that you can see how the colours look on paper, how different supplies react to different surfaces, to keep track of lightfastness and pigment information - if you care to. It's not required.
Patterning and doodling with no set plan can open up your creativity.
Non-traditional and non-obvious materials can include masking tape, sponges, spray bottle, toothbrushes, plastic sheets, rubbing alcohol, stencils, and salt.
Make sure to do some investigating on which products are the best quality and suitability for your needs.
While cheap is convenient, cheaper products don't always produce the best results. If you can afford better products, acquire them. That said, if you can't afford the better stuff, you should absolutely use what you can acquire. Making is the point, no matter with what.
Don't acquire too much at first before you have a better idea of whether or not you're going to enjoy the work you're doing or the materials you're using.
Consider the space you have for the work before you acquiring anything. If, for example, you only have a small space then large-format painting may not be the best choice. Or, if where you need to work is not well-ventilated, then oil painting is probably not the best option.
0 notes
Text
Brightest Blue (series)
PART TEN
Pairing: Josh x reader
Warnings: THIS CHAPTER IS 18+ ONLY! sexual content (finally), pot use, alcohol use
Summary: Things are changing. New state. New school. New roommate. You just pray things are going to click into place.
Notes: Okay, guys. If you missed it, this chapter is NSFW. This was the best to write, seriously. Love you all, don't be afraid to tell me what you think of it!
taglist: @valleyd0ll @satingrass-maidensfair @guitarfingers @thebohemianpenguin @peaceisouranthem @oblvions @hansonobsessed @myownparadise96 @lara-gvf @anditsmywholeheart @kill-fear-the-power-of-lies @bigblack-catattack
MASTERPOST
Two weeks before the Saturday of the play, the forecast had called for a blizzard. “Polar vortex” they had called it on the tv at school, flashing graphics of a polar bear wearing a scarf.
After classes on Friday, you had asked Kate if she wanted to go for coffee. You had been working like a dog on the play - sewing and painting to the point where your fingers perpetually hurt and the only thing you could see when you closed your eyes was the shade of green that every foliage prop was painted.
You ordered a caramel macchiato and genuinely tried to enjoy it, propping your legs up on the chair next to her.
“So,” she started, eyeing you like she had a bone to pick. She still looked so pretty when she was coming for your life. “We’ve been so busy with Josh, we haven’t had any alone time to talk about Trevor.”
You sucked in a deep breath and relaxed your stiff neck muscles, achy from behind hunched over while sewing. “Yeah. I kind of forgot about it, to be honest.”
“I have not, however. So dish,” she requested, reaching into her purse and pulling out a tube of lipstick. She applied it carefully in her phone camera as you spoke.
“Josh did it,” you admitted, making her eyes flick over to you momentarily. “I mean, I still slapped him, but Josh was the one that gave him a black eye.”
“And how do you feel about that?” she asked carefully.
You shrugged, wrapping your fingers tightly around your cup, half to leech the heat, and half because you were anxious. “I don’t know. I was kind of upset, but only because he could have gotten kicked out of school for that.”
She just nodded for you to continue as she cleaned up the lines around her lips with a paper napkin.
“I mean, and for what? He could have been arrested. Just for revenge. I feel like the best revenge would be just be keeping your head high.” You rolled your eyes at the beginning of your statement, just for emphasis.
She stared at you blankly as she picked up her mug. “Aren’t you flattered? I wish a guy would punch one of my hookups.”
“I mean, it’s cute, but I feel like he did it more for himself - for his own pride, you know?”
Her expression changed then to something a little heavier, her features sharpening in accusation. “Are you for real? Like, for real, for real?”
You frowned at her, feeling like you were being scolded. “What are you talking about?”
She let out a long breath, looking dumbstruck. “I haven’t really pressed it because I guess I just thought it was something that everyone knew but wasn’t talking about but-” She paused, putting her hand over yours on the table just to really drive the point home.
“That boy has it bad for you.”
You knew your expression was ridiculous by the way she looked at you with pity. “What the hell are you talking about? Josh? Are we talking about Josh?”
She closed her eyes, pursed her lips, and nodded.
“Kiszka?” you tried again, still refusing to let her statement sink in.
“Yes,” she said through a laugh. “Yes, your roommate Josh. Curly hair, hippy bullshit - that guy. I swear to God I thought you knew. I mean, there were times when I was like ‘does she actually know?’ but then I thought ‘there’s no way she lives with him and doesn’t know that’. You’re telling me I was wrong?”
You were struck silent for a few long moments. “Are you sure?”
Thankfully, she was looking at you like you were a puppy with its head stuck in a peanut butter jar. “Look at me. He punched a guy in the face for you.”
You closed your eyes and tried to suppress a smile. “I don’t know.”
“Okay. There’s supposed to be a huge snowstorm this weekend. Now that you’ve heard me say it, return to me on Monday - after spending all weekend in the same place as him - and tell me you don’t see it then,” she said simply.
“Okay, I will,” you challenged.
“Okay, you do that,” she quipped with a smirk, leaning back in her seat and crossing her arms over her chest confidently.
+++
In preparation, you had gone grocery shopping together, picking out everything you’d need to be stuck in the apartment together. He had even made you take him to a thrift store, just so he could see if there was anything fun. In the end, he had come out with a card game in a box, still wrapped.
Saturday morning the snow started falling, this time in huge, fluffy flakes, and it wasn’t supposed to stop until Monday evening.
While Josh was in the shower, you decided to get everything ready for the evening’s festivities that you had planned together. You had gone to find a good cheese board at the market until you found out they were too pricey for your (nearly nonexistent) budget, so you ended up laying out different crackers and cheeses onto a circular pizza pan.
By the time he got out of the shower, you had grapes, pickles, olives, and chocolates laid out on the coffee table, and he caught you just as you were pouring each of you a glass of wine.
The charcuterie was his idea - actually, the first thing he suggested when you said you wanted to have a fun night in on Saturday. The three different kinds of alcohol had been your idea.
“Okay, it’s all yours,” he informed as he trotted out from his bedroom, dressed in a fresh set of clothes.
The shower was still warmed up, the mirror still steamy. You got a towel out and stepped in under the spray.
You took the time to enjoy washing and conditioning your hair - your mom had been sweet enough to send you some of the expensive kind you love. Once you had hinted over the phone that you were homesick and the smell of it reminded you of home, she was already googling it.
Once you felt sufficiently clean, you stepped out and dried off. The clothes you had taken into the bathroom weren’t anything special - you had chosen comfort over aesthetic - but they were warm, which is what you really needed as the snow fell outside.
When you joined him back in the living room, Josh was waiting patiently on the couch.
“Ready?” he asked, handing you your glass of wine.
“You didn’t have to wait for me.” You gestured down at the untouched food.
He smiled at you. “I know.”
You sipped at your drink as he gestured to the tv.
“Movie for background noise?”
You hummed in thought. “Maybe music?”
He nodded in agreement. “What are you in the mood for?”
“Whatever you pick will be perfect.”
By the time he had made a selection, you had nearly finished your glass of wine. “So, the costumes are coming along well. I got the cutest lace for the trimmings of Alice’s dress. I’m not sure you’ll even be able to see it from the audience, but she’ll look adorable in pre and post-performance pictures.”
He shot you a beaming smile. “That’s some master craft. Your attention to detail is unrivaled.”
You knew that he was just playing, but it still made your stomach flip.
“Should we play our card game?” he suggested, padding over to the kitchen and snatching the bottle of wine off the counter.
You watched his movements as he poured your glass full again. “Thank you. Yeah, we can. Or did you want to be drunker first?”
He hummed. “One shot each?”
“Of vodka?” you inquired as you picked yourself off of the couch. “Where are the shot glasses?”
“I don’t think I own any,” he admitted as he watched you rifle through the cupboards.
You shot him a shocked look. “You’re a college kid; why would you not own a shot glass?”
“Well, we haven’t needed it thus far. I don’t throw a lot of parties if you haven’t noticed.” He gestured around the empty room. “We’ll each just take a pull from the bottle?”
“Okay, you first,” you agreed, thrusting the bottle at his chest. He took it from your grasp with a smirk and then pressed his lips to the rim. He drank until the count of three before swallowing hard and passing it along.
You followed suit, except with more difficulty. He had made it look so easy, you had almost forgotten how vodka tasted. You swiped your thumb across your lips, wiping them dry in the process.
You took your seats back on the couch next to each other as the music played through the room.
“Charcuterie?” you offered, gesturing to the coffee table full of food.
“Yes, of course.”
As you watched him make a cracker sandwich, you spoke. “So, should we crack this game open?”
After he nodded excitedly, you ripped into the plastic wrap.
“Okay, it looks like it’s essentially just a questions game. We just draw one at a time and the other person answers them,” you explained after skimming the inside of the box. “And you have to finish your drink if you can’t answer it.”
He laughed. “Okay, ladies first. I’m ready.”
You pushed the stack of cards over at him. “No way, you ask me first,” you stated with a cheeky smile.
He raised his eyebrows at you but relented. As he plucked a card from the deck, he took a sip of wine.
“What is your favorite color?” he asked, leaning in and squinting like the information you were about to provide was essential to his existence.
You snorted. “Really?” He nodded, prompting you to continue. You hummed as you thought about it. “It’s blue.”
“What kind of blue? Like navy or sky?”
You shook your head. “No, more like that blue that’s so blue it hurts your eyes. The one that was a new pigment discovered not that long ago - so bright it hurts.”
He gave you a sincere smile. “That’s a good pick.”
“What’s yours?”
“That’s not how this game works,” he said through a breathy laugh.
You frowned at him. “Yeah, well. Then I’m asking you as a friend. Josh, what is your favorite color?”
He pursed his lips as he considered his answer. “It’s hard for me to pick, but maybe either red or orange.”
You nodded in agreement as you reached for the deck. “I could see that. Okay, your turn.”
You stared at the card in your hand that read, WHO WAS THE LAST PERSON YOU SLEPT WITH?
“Are you alright?”
You snapped your eyes up to him, quickly nodding as you realized that he had been waiting patiently for you to read it.
“Okay,” he agreed cautiously. “That’s good. What’s the question?”
You couldn’t suppress an awkward smile as a heat rose to your face.
“It says, ‘who is the last person you slept with?’,” you informed in a humored tone. You even held it up for him to see.
He stared at the card like it just accused him of a heinous act. “You really got to answer the color question and I have to answer this?”
His intensity made you snort a laugh, though you were trying to hold yourself together so you didn’t spill your wine. “Okay, okay. I’ll answer it too. Maybe we can play the game where we both just answer it.”
“Do you just want to hear me talk about sex?” he prompted with a shit-eating grin.
You gave him a disbelieving look. “Are you- You’re the one that picked this game out!”
Your overreaction was clearly exactly what he had been looking for. You were anticipating his ribbing to continue, but it didn’t.
“The last person I had sex with,” he started, pressing his lips against the rim of his glass as he took a swig. “Was from my music theory class.”
“When?” you quickly asked, shocking even yourself.
“Is that part of the question?” he teased smugly, picking a kalamata olive off of the tray and piercing it with his finger before popping it in his mouth.
You licked your lips nervously. “No, it isn’t,” you admitted. “You don’t have to answer that, I was just curious.”
“You wanna get high?”
He was staring directly into your eyes when you looked up at him again.
“I feel like it’ll make it easier to answer these.”
You nodded at him, biting your bottom lip. “Yes. Yes, I do want to.”
“My room?” he asked, picking up both of your glasses as he stood.
“Your room,” you confirmed, following suit.
Through the slats in his blinds, you could see that the ground was completely covered in a white blanket of snow. You spent some time watching it fall from his bed as he packed a bowl.
“Here,” he said gently to get your attention. “You take the first hit. I’m going to light it and you’re going to suck in and hold it in.”
You nodded in understanding.
“Not too much though,” he warned.
The glass was cool in your hands as you took it from him. When he held the flame to it, you did as you were told before exhaling with care. He was looking at you with a proud expression when you met his eyes.
You handed it back over to him, waiting until he was in the process of taking a hit before you spoke.
“Tell me when you slept with her,” you demanded calmly, biting back a smirk at the way his breathing faltered.
It had turned into a game of chicken as you held each other’s gazes silently.
“You haven’t even answered the required question yet and you want me to do the extra credit?” he quipped.
“The last person I fucked was a guy from tinder back home, and it happened a couple of months before I left,” you informed him confidently. “I’ve only ever had one boyfriend, and he was a prick, so when we broke up, I went on a tinder bender just to feel something.”
A small smile spread across his pink lips as he listened.
“Now you.”
“She was my girlfriend last year. We broke up in April and I had a hard time saying no to late-night texts until the end of June.” His tone was sincere as far as you could tell, as were his eyes.
You were starting to feel the hit you’d taken by then, and you took a pause from the conversation to lean over the side of his bed and grab the bag of suckers you knew was waiting there for this very occasion.
The high washed over you in a gentle, pleasant manner, leaving you feeling a little dreamy.
“Sucker?” you asked, holding the bag open for him. He breathed a laugh - probably at you offering him his own candy - and then plucked one from the bag.
After he had it unwrapped, he held the bowl out to you again. “Want another? Or am I going to have to smoke the rest of this myself?”
“Yes, I’m sure that would be very rough on you, poor baby,” you teased.
He huffed a laugh, sitting up a bit straighter in his position. “You want another one or not?”
You stared at him wordlessly for longer than was socially acceptable, but when you finally spoke, it was with conviction. “I’ll have another baby hit.” You pulled the cards from the pocket of your pajama pants. “But then we’re playing another card, right?.”
He glanced down at the bowl and then back up to you. “When you say ‘baby hit’-”
“I mean I want you to blow it into my mouth with your mouth,” you explained cheekily, making him huff a laugh.
“You liked that, huh?” he asked, risking a dark glance up at you through his long lashes as his fingers played along the glass piece.
You knew exactly what you wanted to say - could hear it in your head, but your body felt tight with nerves at the thought of actually saying it. “Not as much as you did, I’m guessing.”
Oh, damn, you said it.
A smirk played across his mouth, his eyes half hooded. If you hadn’t been paying attention, you would have thought he was completely unaffected by your teasing, but you had been listening to his breathing, so you were perfectly aware when it changed slightly. It was just the smallest difference in sound like he was pulling in air through tighter lungs.
“Be careful with what you’re accusing people of.” A warning, definitely, but almost more of a challenge. In the months that you’d spent with him, you’d never seen him like that, but you suppose you wouldn’t have unless- Unless you were about to make him do something truly reckless.
You bit your bottom lip out of an anxious, excited energy. “Oh, my mistake then.”
The ball was in his court, and you could tell that he was expecting him to continue pressing him. A look of slight disappointment flashed behind his eyes, but you weren’t done yet.
You nodded toward the bowl, prompting him to glance down at it like he had forgotten what he was doing in the game he was playing with you. He kept eye contact with you as he brought it to his mouth and lit it. You watched the white smoke circle the inside of the globe before he sucked it into his lungs.
You tilted your chin up in invitation and tried to relax your muscles as he leaned in, his throat looking tight.
You felt his nose brush yours first before you realized you had closed your eyes in anticipation. The smoky smell hit you first when you realized you were supposed to be taking it from him. You opened your eyes and tried to breathe it all in, but most of it was lost to the room.
He had a tiny smirk playing on his features until you reached out and wrapped your hand around the back of his neck, pressing his forehead against yours in an abrupt motion. You could tell he had his teeth clenched by how tight his jaw looked.
You couldn’t stop yourself from playing your fingers along the sharp line of it.
“Do you want me?” you whispered, voice barely there at all.
Through a labored breath, he responded with a smoky sounding, “What would give you that impression?”
You couldn’t help the laugh that escaped you, but unsurprisingly, it came out sounding raw. Your fingers brushed across the short hair on the nape of his neck, the pleasant feeling causing his eyelids to flutter.
You leaned forward until you pressed your cheekbone against his, lips right by his ear, and pointedly asked, “Do. You. Want. Me?”
“Fucking of course, I do,” he spat through clenched teeth, sounding distressed as his hands wrapped around your waist, thumbs pressed into your hipbones on either side.
“Should we?” you asked, pulling back so you could see his face.
“Probably not.” His words were humored, a melodic laugh accompanying them, but still somehow managed to not sound any less strained.
You considered what he was saying for a moment, relishing in the idea that this was the last moment before the point of no return. “Just one hookup,” you reasoned.
He smirked at you, looking all too smug and disbelieving. “Okay,” he agreed.
Patiently, you waited for him to make the first move, your heartbeat bouncing around like a basketball in your chest. When you felt his hands move from your hips, your body tensed, trying to predict where they’d end up next.
As he cupped your jaw with both hands, you melted a little, muscles noticeably relaxing.
The kiss was tentative at first - just a brushing of his lips on yours like he was testing the waters. He held your face like he was afraid that you were going to vanish into thin air - like your presence was the key to his existence.
You could hear his shallow breaths as he opened his mouth, pressing it against yours. His tongue tasted like the orange sucker he’d abandoned on its wrapper on top of the dresser next to his bed. You lapped at it, body rising as you shifted to crawl into his lap. With the way he was sitting, cross-legged on his bed straddling him was a bit of a strain on your inner thighs, but the feeling was oddly pleasing - like a warm-up for the workout you were about to endure.
He let go of your face to place his hands back on your hips, pulling your body as close to his as it physically could be. Before he could situate you too firmly, you started to unbutton your pajama shirt, and bless his heart, he couldn’t help but watch your fingers work.
“Is this really happening, or this just a super high fever dream?” he asked, shaking his head as he frowned like he wasn’t sure he could trust his eyes.
You wanted to laugh at him, but you could hardly blame his disbelief. If someone had told you even earlier that week that you’d be in this position, you would have rolled your eyes at them. You hadn’t realized how much you wanted this until it was about to happen.
The last button undone, you let the garment fall, the pink and white striped fabric slipping off the bed and to the hardwood.
The cool air was shocking on your bare skin at first, causing it to tighten - well, that and you could practically feel his eyes raking over your chest.
“It’s happening,” you assured, leaning in until you were speaking against his parted lips.
The feeling of him brushing the pads of his fingers over your nipple made your breathing shudder. When you tipped your head back, he ducked in and pressed his mouth to your throat, dragging a stripe across your skin with the flat of his tongue. Every part of your whole body felt hot, but none more than between your legs. You tried to grind yourself down on him, but couldn’t seem to get a good angle - luckily, he seemed to notice, and halted your movements with his hands on your hips, stretching his legs out straight.
He pulled back just far enough to see your face when he ground you down onto him, the outline of his cock slipping against your core. Even with all the layers between you, the feeling still made you crumble against him, a whine escaping your lips of its own volition. It was clear that he felt it too as he bit his lip, his eyes fluttering.
You seized the opportunity to get your fingers under his shirt, lifting it over his head as he held his arms up for you. Before he could prepare for it, you pressed closer, pressing a kiss to his temple and then nipping at his earlobe. The cool metal of his earring was pleasing against your tongue, and you reveled in the moment as he sucked in a sharp, shocked breath.
His hands snaked around your sides, palms wide as he cupped your ass and used the leverage to pull you against him again. Burying his nose in the crook of your neck, he let a shaky breath escape him.
You could feel his thumbs hook under the elastic band of your pajama bottoms as he started to slip them down the cleft of your ass. Once it was bare, he ran his fingers over it, movement stalling as he looked at you with an eyebrow raised.
“Are you not wearing panties?”
You scoffed. “Not to bed, obviously. Are you implying that you wear something under those loose pants?”
The corners of his lips tilted up in a wicked smirk. “I encourage you to find out.”
You giggled at his confidence, sweetly nudging your forehead against his, so he didn’t expect the swift movement of your hand as you tugged the tie of his sweats down. The answer to your previous question was “no” - he hissed as you grabbed his erection, swiping your thumb across the head, glossy from the dim light through the blinds. It was just a tease though, because a split second later, you let go of it in favor of wrapping your arms around his neck and pressing your mouth against his again.
As you pressed him back, he tried to hold you, but once he realized you weren’t just leaning on him for support, he relented. You laid him back on his bed, pulling back as you slipped your bottoms off the rest of the way.
“Jesus,” he breathed as his eyes took in the whole of your naked body above him. “Hang on.”
He reached to the bedside table and grabbed the bowl and lighter. After he sucked in another hit and set the piece back down, he tugged you in roughly, depositing the smoke directly into your mouth. You tried to hold it in like he had taught you, but you were much more interested in getting your tongue into his mouth.
Still, you were plenty high, so much so that looking down on his bare form had tears threatening your eyes. He looked so soft and sweet despite the position he was in, his eyes half-lidded and one hand behind his head, one on your bare hip.
You shifted until you could grind your core against the length of him, the wetness letting it slip through easily.
“Fuck.” You had thought it was an exclamation of pleasure until you opened your eyes and saw a scowl painted across his face. “I definitely don’t have a condom.”
You hummed through a smile. “I don’t blame you, I definitely didn’t expect this.”
He frowned up at you. “We can just try something else if you want,” he offered.
“Well, I’m on birth control, and given the length of time between our last sexual encounters, I’m guessing we’re both clean - I know I am.”
He stared at you for a long moment before really realizing what you were implying, but once he did, he licked his lips in consideration.
“Come here.” You weren’t sure what he was requesting until he grabbed onto your thighs and guided you up until you were straddling his face.
The thought of it made you blush, and surely your cheeks were hot to the touch.
He started with broad strokes of his tongue, just dragging it through. You briefly wished he had a headboard for you to brace yourself on, but your thoughts quickly became completely incoherent. You decided you were going to lean back instead, placing your palms flat on his bent knees. When you were completely comfortable and situated, he started pointedly flicking his tongue against your clit directly, first very soft and teasing, but building to something rougher and more deliberate.
You thought you were actually going to shake apart when he sucked your clit right into his mouth, rolling the bead of it around on the flat surface. When you could feel yourself getting close to the edge, you threaded your fingers through his curls, keeping him close.
The moment you lost it, everything in the room melted away from you - just a black expanse with flicks of color littered throughout it.
You took a moment to catch your breath, trying to bring yourself, at least partly, back to reality. When you pulled away from him, you were met with the sight of him - the entire bottom half of his face slick with your come.
He only let you watch in fascination as it dripped from his chin for a second before he was pushing you back, your head laid at the foot of the bed. He slipped his sweats off the rest of the way before crawling over you.
There was no way you could have blamed him as he pushed in, seemingly not having any time for a slow entrance - you did make him sit there, untouched, for god knows how long. You certainly couldn’t name even a rough estimate for the amount of time passed.
The spark of pleasure that shot through you made you throw your head back, your spine arching as you let out a whine.
“I’m sorry, are you okay?” he breathed, through tight teeth.
“Yes,” you hissed as you ground yourself down onto him. “Keep going.”
Your eyes were closed, but you were sure he was wearing an awed expression. You grabbed the back of his neck, pulling him in until your foreheads were pressed together. When he started to move his hips, you let out a long, pleased hum, pressing your nails into the skin on his shoulders.
Your whole lower half was still incredibly sensitive, so every time he brushed you, it made you writhe a bit beneath him. “Mm, fuck,” you growled as he intentionally reached down and pressed his thumb into your clit, the feeling resting somewhere between “just perfect” and “way too much”.
He was biting his lip as he watched your reaction intently. You felt his hand snake down your outer thigh, gripping it from the bottom. He lifted it up, near-forcing you to wrap it around his hip.
The new angle was a different kind of feeling - something hot deeper in your gut like someone placed a smoldering ember in your belly. You weren’t paying attention to anything but your own impending orgasm, so you didn’t expect it when he sucked your nipple into his mouth. He raked his teeth over the bud, causing your hips to jerk against him.
When you opened your eyes and met his, you took a moment to absorb his expression - like he was seeing another dimension through your face.
You could tell he was close when his lips fell open, but that was perfect because he was taking you with him. You hitched your legs around his hips and squeezed, letting your head tip back.
When you came a second time, it was with his open mouth pressed to your throat, his hot breath hitting your damp skin. You let out a low whine, fingers tangled in his hair, probably a little too tight.
You suspected it was probably your muscles clenching in orgasm around him that set him off, a string of expletives falling from his kiss-swollen lips. His hips shuddered as he fucked you through it.
The other side of your collective climax was warm and fuzzy, like watching home videos from the ‘60s. When he was able to hold himself all the way up, you ran your fingers through his damp curls affectionately.
He was clearly trying to get his bearings, his breath flowing in and out of him like a tide.
“Are you okay?” he whispered, sounding like he might not be able to speak any louder than he currently was if he wanted to.
You hummed through a smile. “So good, Maybe never better.”
He rubbed his nose against yours, the smallest hint of an upward tilt to his lips. “I’m high as hell, so I’m not sure what’s acceptable for our situation right now, but can I kiss you?”
“We probably shouldn’t,” you admitted, making his expression fall slightly.
He nodded at you in reluctant agreement. “You’re right.”
You bit your bottom lip. “Ah, fuck it, we’ll start going back to normal tomorrow.”
#josh kiszka smut#josh kiszka#Greta Van Fleet#greta van fleet fan fiction#greta van fleet fic#brightest blue fic#gvf#gvf fic
272 notes
·
View notes
Text
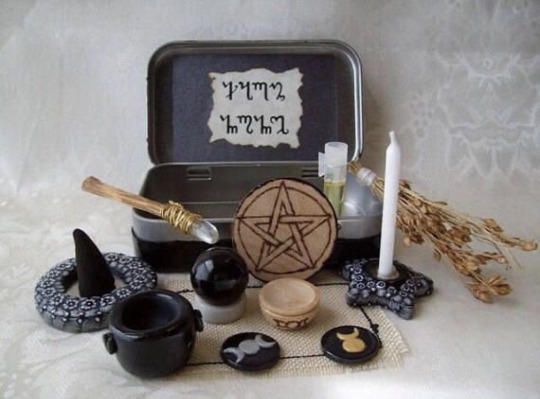
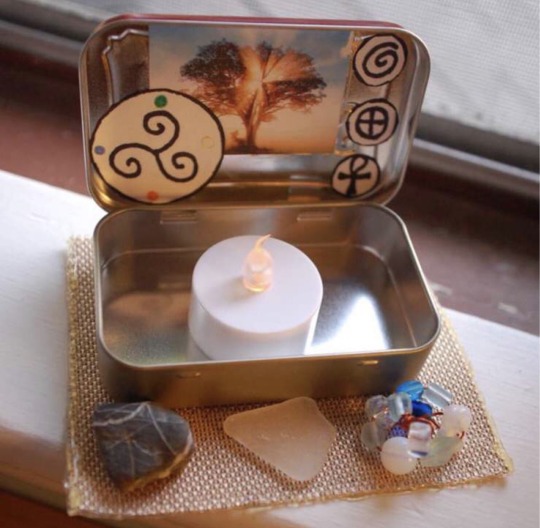
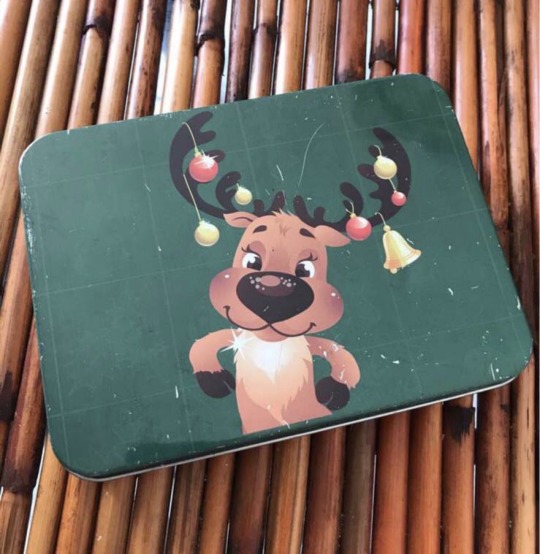
Pocket Altars
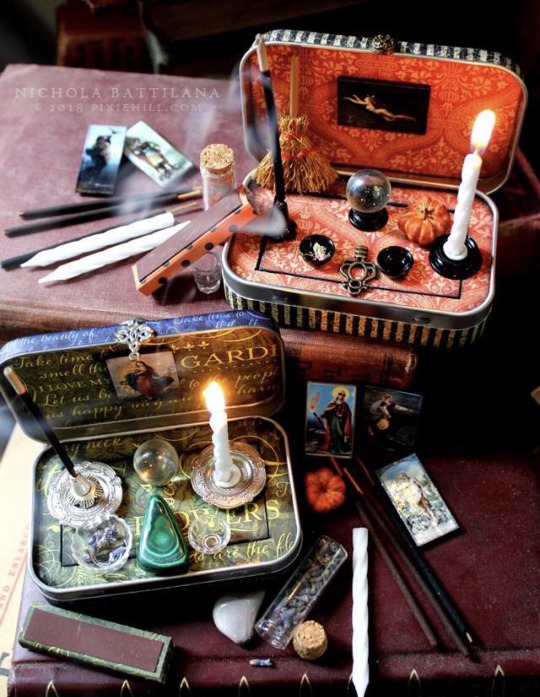
Pocket/Travel Altars
Okay imagine this scenario... You are leaving your home for the day and not thinking about doing any witchcraft until after you get your mundane tasks completed. You go shopping, pay bills, go to work/school etc...but you get a Desire to do something “witchy” right then but don’t have anything with you.
Yes I feel it is true that one doesn’t “need” any supplies to do magickal work -and yes I BELIEVE this. However what if you do if you want a little something with you? You make a travel/pocket Altar to keep with you. They are very easy and I personally love them!
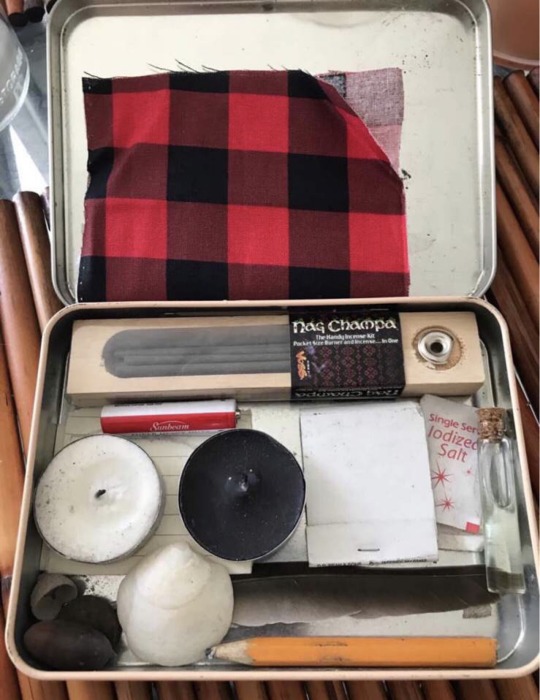
Supply Ideas
🌟 A container that fits in one hand (easy to pack & take everywhere)
🌟 A candle or multiple ones (tea light & or birthday candles) think of multi purpose colors white and black
🌟 a small mini flameless tea light candle (dollar stores carry these)
🌟 Container of salt (use the free single use packages that companies have for To Go foods)
🌟 A small charm or drawing of a pentacle
🌟 Package of single use matches
🌟 Small container of plain water (be sure it doesn’t leak) I keep florida water in mine
🌟 A toothpick or small twig (little wand)
🌟 Incense cone or a piece of the stick type
🌟 Piece of fabric/felt (for your altar cloth)
🌟 mini pencil (use the free lottery ones from a gas station)
🌟 a sheet of paper or very small notepad
🌟 feather, shell, bone
🌟 few bay leaves
🌟 some twine or embroidery floss
🌟 Small crystal chips or stones
🌟 Eggshell powder (cascarilla powder)
🌟 pendulum
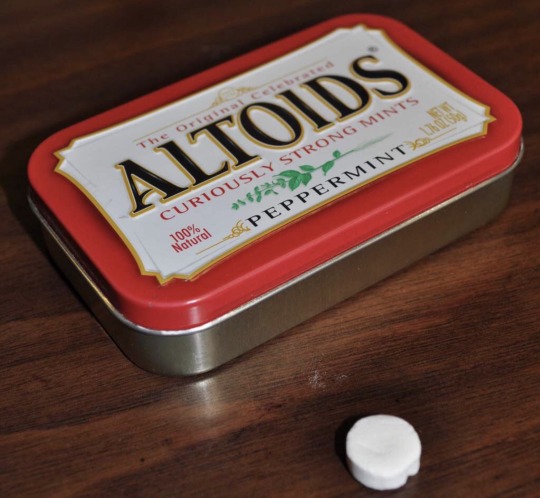
Okay I know what you may be thinking.... What container do I use? I love metal mint tins, metal card containers, kitchen match boxes (the larger matches), a small wooden box (craft stores sell these for $1.00-$2.00), metal gum containers, small plastic food containers ( the mini square or round ones).
🧙🏻♀️🧐
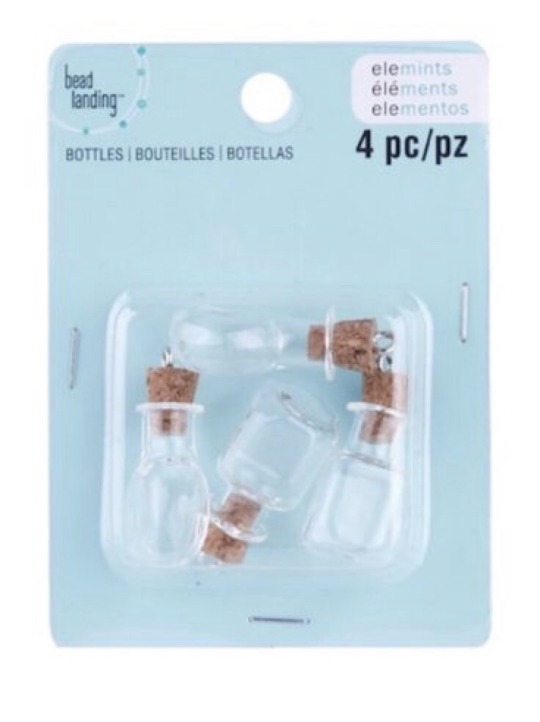
But what about the containers to put water, salt, etc... in? Many craft stores carry mini glass and plastic jars in their jewelry sections. Some of the jars & bottles have screw lids while others have cork lids.
🧙🏻♀️👍🏼
My advice to setting this up: use some paint, or magazine pictures to jazz it up on the exterior and or interior of your container. Gather up your supplies and think on the small scale- lay them out in front of your container. Remember about How You Practice your magick; if you don’t want to include items relating to the Elements don’t put them in there. This is for you to actually use when the mood or desire happens.
❤️🧙🏻♀️
#Altar
#pocket
Here are some examples and some ideas where to purchase a few things and two pics of my first one that I still use:
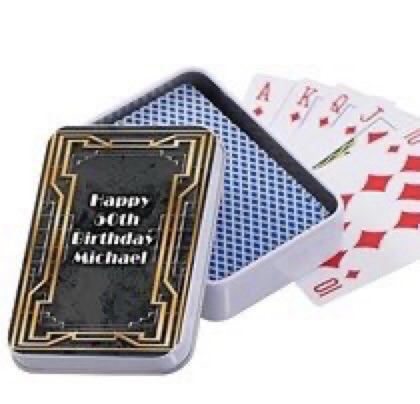
Candy Tin Ouija Mystifying Mints 1.5 oz https://www.amazon.com/dp/B005VG89QU/ref=cm_sw_r_cp_api_i_vA.uEbDVH9MAG
https://www.specialtybottle.com/metal-tin-containers/hinged/thn2
https://images.app.goo.gl/1quGiHkdsMwffah27
https://www.michaels.com/elemints-mini-glass-bottles-by-bead-landing/10473706.html
https://i.pinimg.com/originals/4c/e5/ab/4ce5ab55a880541df343892ad6284e1b.jpg
104 notes
·
View notes
Photo


This topic is brought to you thanks to my amazing Patreon Supporters!

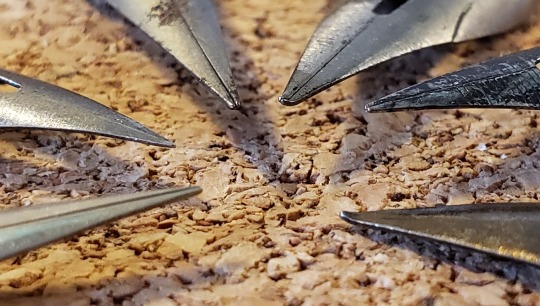
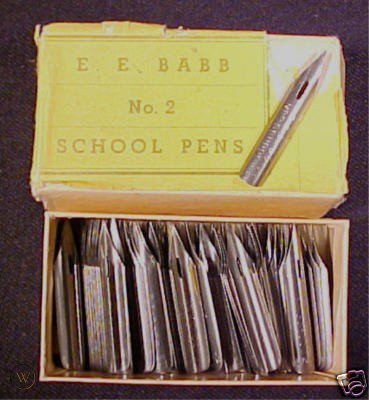
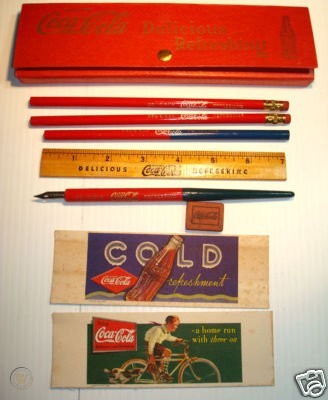
Dip Pens
So I wanted to know what sort of writing tools Steve and Bucky would have been familiar with, and was really surprised to discover that they would have almost certainly learnt penmanship primarily with dip pens!
Dip pens are a writing technology that came after quills and before fountain pens. They are a reasonably straight-forward tool, but they changed access to literacy in America.
Elements and Accessories of Dip Pens
At the basic level, a dip pen consists of three main elements:
The Pen — While most of us will know of the writing point as a “nib,” it is actually called the “pen.” These metal point, commonly made from steel, are easily slid into the shaft, making them easy to change and replace at will.
The Shaft — The shaft is the handle the user holds when writing, and can be made of a vast array of materials (ebony, mother of pearl, silver, gold, etc), but usually wood (or later plastic).
The Ink — Alongside these is ink, usually in an open-top bottle or another temporary container.
Other accessories that would often accompany dip pens:
Blotter Paper — This is paper used to absorb excess ink to prevent smudges. Commonly it would be attached to a holder so it could be rolled over the paper smoothly.
Inkwell and Inkstand — Inkwells are containers that hold ink for use when writing. They can vary in quality and expense as needed. A step up from this is the inkstand, a luxurious desk accessory that would consist of inkwells, containers for spare pen tips, spaces for shafts to rest, and a place for ink blotters.
Writing Pad — This is a leather writing pad that would allow for the smoother glide of the pen tip over the paper and protect the desktop. Again, this was a luxury item.
Cleaning Cloth — A cloth or scrap of rag used to clean pens after use.
Very Fine Sandpaper — Used to smooth the tip of new pens.
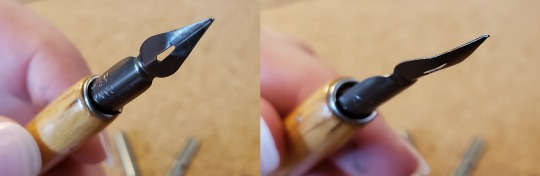
Using Dip Pens
To use a dip pen, the pen (”nib”) of choice is inserted into the shaft. The pen point is then dipped directly into the ink to a point above the “vent hole” (cut-out section). A certain amount of the ink will be retained by the pen to feed the strokes. Depending on the pen shape and ink type, a single dip can last anywhere from a couple of words to several lines of text.
Some maintenance and cleaning is required to get the pens into a useable state and to keep them in working order. New pens are often coated in a fine film of oil that will prevent it from collecting ink for use. To remove this, the pen can easily be cleaned with alcohol or the oil burnt off by passing it through a flame several times. Once cleaned, the tip will sometimes need to be smoothed with very fine sandpaper, as they can be razor-sharp and tear paper while writing otherwise. After use, pens will also need to be cleaned of residue ink, as letting it dry will affect its function. For this, some water and a cloth/rag will do the job to wipe it down before putting pens away. If not cleaned correctly, they can become corroded.
Pen Styles and Functions
As these pens were used in all areas of society, the diversity of shapes and designs is vast. Here are some of the key elements to a pen and what it brings to its user:
Tip shape — The width of the tip determines the thickness and shape of the line. The most common being “pointed” and “broad-edge” (also “stub” or “italic”).
“Pointed” tips have two tines that come to a single sharp point, and with the application of pressure, can spread and give variation in the line thickness.
A “broad-edge” tip has a wide, flat point and will produce a stroke that varies in width from thin to thick, depending on the direction it is moved.
Tip angle — Aside from the shape of the tip mentioned above, they can also come “pointed” or “ball-pointed” (or “turned-up”). As the name suggests, a “pointed” tipped pen comes to a point completely in line with the rest of the pen. Alternatively, a “ball-pointed” pen has an up-turned tip. The difference between the two is the ease at which they moved over the paper. A “pointed” pen moves best when pulled in the direction of the user but can snag on the paper stock when pushed away from them. The rounded tip of the “ball-pointed” pen moves more smoothly across the paper, has more flexibility of movement in any direction, and is less prone to snagging on the paper. It was the predecessor to the modern ballpoint pen. As for the uses, a “pointed” pen will produce a finer line than a “ball-pointed” shaped one.
For reference, Image-1 shows them side-by-side, Image-3 shows a “ball-pointed” tip and Images-4 and -5 show “pointed” tips.
Flexibility — The flexibility of the two tines of the pen will affect how wide apart they spread. The further apart they spread, the broader the variation in line thickness when pressure is applied. A stiffer pen will offer less variation in line thickness; while more flexible tines will allow the user a greater variation between fine and broad lines with the application of pressure while writing. Additional slots and notches can also improve elasticity in the tines. Think along the lines of touch sensitivity when using a digital drawing tablet.
Pen Shape — This is the most visually obvious element of a pen. The overall shape of the pen can vary greatly, and this element is both practical (impacts the way the pen works) and decorative. This element includes the “shoulder” (the base of the tines that flares out to varying degrees) and the “vent hole” (the cut-out at the base of the slit between the tines).
The full list of types is too much to post here, but Wikipedia has a great visual list of them, and The Steel Pen has great, detailed information about dip pens. For now, I will just focus on the types I think our boys would have been most acquainted with:
Straight — Very simple, straight body that angles smoothly into the point. Similar to the Straight are the Beaked and the Bank which have longer tines. (See Image-4 and the 1st, 4th, and 6th pens in Image-9)
Stub — A straight body that then angles sharply inward with short tines.
Leaf / Flat Leaf / Spoon / Crown — These all have similar rounded shapes. The “shank” is straight until about halfway, then the shoulders flair out in a rounded shape. The result is a pen that looks similar to a spade from a suit of cards. (See Image-3 and the 3rd and 5th pens in Image-9)
Tip Size — The size of the tip will, as you might expect, impact the base thickness of the line.
To get an idea is the sheer variety these pens can come in, have a gander through Wikipedia’s gallery of dip pens!
Identifying Pens
Manufacturers will identify their pens by including their brand name along with the style name and/or number on the pen's “shank” (the section that slides into the shaft). As such, it is very easy to identify pen styles and their makers. In addition, manufacturers would put different design flair into the shape of the pen, resulting in some pretty interesting looking pens from higher-end manufacturers.
Purchasing Pens
Pens could be purchased easily in boxes containing anywhere from 12-100 pens. These boxes could either contain multiples of just one type by that manufactures, or a selection of their styles for different uses (a Straight, a Falcon, a Leaf, etc). While some brands were sold in tins, most I have seen have been cardboard boxes, often with a draw design (similar to modern matchboxes) sealed before sale with adhesive labels over the ends.
Cost
Dip pens were relatively cost-effective, which is why they were used in schools over fountain pens and continued to be in use for decades after the invention for the ballpoint pen. Based on newspaper ads from the 1920s and 1930s, a fountain pen could put you back $1.00 - $10.00 (though I did see one ad with sale ones listed at 75c), while a box of 12 “steel pens point” would only cost you 5c. A dozen basic lead pencils look to have been around 10c, and a 2oz. bottle of ink around 10c as well. Similarly, a simple soft-cover 48 leaves book would be around 5c.
Do note that these prices do come from ads for large department stores, so cheaper items could likely be found at smaller local stockists.
I personally have a decent collection of pen “nibs”. The ones photographed here are some I recently picked up for Patreon perks and a shaft I kept with my modern pens and markers (it’s too long to fit in the box with the rest of my nibs etc). But after spending an afternoon searching, I can’t seem to find the box I keep the rest of my collection in. When I do I’ll be sure to post some photos on more shapes they can come in!
If you want more in the topic, my full research notes on all topics are available for all $3+ Patreon patrons!
Image Sources
Close-Up of Pen Tips | D.’s Personal Collection
Close-Up of Shaft End | D.’s Personal Collection
Government of Canada No. 50 Close-Up (Flat Leaf) | D.’s Personal Collection
Government of Canada No. 40 Close-Up (Beaked) | D.’s Personal Collection
Eagle Pencil Co. E11 Close-Up (Falcon) | D.’s Personal Collection
Wooden School Case w/ pens | Source
Box of No. 2 School Pens, c. 1920s | Source
Coca-Cola School Set, c1930s | Source
Shaft w/ Pens | D.’s Personal Collection
This post comes to you thanks to Patreon supporters at the ‘Ephemera Club’ level. Those subscribed in July 2020 received their very own vintage dip pen nib, along with a sweet postcard showing an element of Brooklyn in the 1920-1940s! If you would also like to receive neat, period-appropriate items in the mail each month, you can join the ‘Ephemera Club’ for just $15!
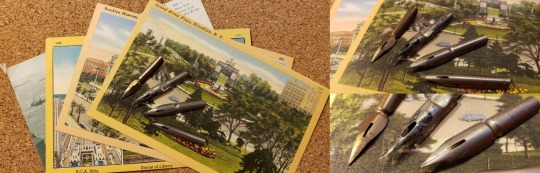
If you join before the end of July 2020, you too will receive these items!
[ Support SRNY through Patreon and Ko-Fi ] And join us on Discord for fun conversation! I also have an Etsy with upcycled nerdy crafts
#Steve Rogers#Bucky Barnes#Dip Pens#Steve's Childhood#1920s#1920s History#1920s School#1920s Childhood#1930s#1930s History#1930s School#1940s#1940s History#captain america#New York#Brooklyn#Brooklyn Daily Eagle#Penmanship#School History#Captain America: The First Avenger#captain america tfa#CAPTAIN AMERICA REFERENCE#fanfiction#fanfic#fanfic writing#Fanfic references#fanfic research#writing#writing resources#writing reference
38 notes
·
View notes
Text
All throughout high school I participated in an event called Festival of Life. It was a Nazarene competition that spanned over several things, one of which was craft. For my final year, I made a physical representation of Ayiesha Woods’ song, Big Enough. It was honestly a simple craft that I didn’t think would go very far. It was a clear plastic display case with a plastic cross bottle (one that you were supposed to fill with colored sand) glued inside. The walls of the case were messily painted black with nail polish, with words clipped from magazine headlines plastered on randomly. The words were all scary sounding stuff- “The Benghazi Attack,” “before it’s too late,” “in a state of war,” “suicide,” “bipolar disorder,” “war games,” etc. In other words, big problems. When on display, I would put a glow stick in the middle of the cross and the light would try to shine out where it could. Despite the sloppiness of the work and the fact that I hadn’t put as much effort into it as crafts of previous years, this object that served no practical purpose placed first.
Interesting story, I know. And the more I think about it, the weirder it seems. The first year I put together a plastic canvas tissue box that looked like a house. Every window had a verse about a house and every door had a picture of Jesus knocking at the door. It served not only as a reminder of Jesus being the Lord of my house, but also was a decorative cover for certain tissue boxes. The second craft I made for the competition was a clay horse and chariot, painted to look they were made of fire. In the chariot was a candle holder with a fake candle. Essentially, an elaborate candle holder inspired by the flaming chariots from the Bible.
This box? Was just a physical representation of boxing in Christ. It had no other purpose. And I’m not bringing this up to brag about just how amazing I am- in fact, I’ll back to this later. But the song and what the box represents I feel have a message that is often heard and often overlooked by Christians of my generation. And I see it a lot on Tumblr.
Most of us already understand that God is bigger than anything we can think of. And so I think that we normally apply that to “really big” things. Or maybe we think too small and think about the passing storms of life that God can help with. Like the possibility of losing a job, going through a rough patch with the family, a loved one in the hospital. But sometimes I feel like it doesn’t occur to us that God’s bigger than ourselves.
I’m sure you’re thinking, “But I know God’s bigger than me!” I’m sure you do, in some cases. But all to often I see these helpful dissertations or quips reblogged by Christians here and while there’s help to be found in them, it almost seems like Christians take those things like gospel truth. I know I’m going to hit some nerves here, but I’m talking about things like self care, and dealing with mental roadblocks, and cutting out toxic people. Sure, there’s a grain of truth in posts like these, I’m not going to deny that, but like, they’re all things to help ourselves.
We use these things as excuses to God as to why we can’t do something. We call ourselves limited by pointing out all the mental or emotional trouble we have, or we claim we need “me time” or self care, or we claim that these toxic people in our lives are really hindering us. And you know what, the world’s going to do what the world’s going to do. I’m talking about Christians. When we say that kind of stuff, what are we telling God?
I’m sure you’re probably thinking, “But Secret, these are actually big issues. You don’t understand how debilitating some of these things are.” You’re right, I can’t relate on every level. But I’ve also seen my mom, with seasonal depression, press on to follow God. She’s an absolute introvert who’d rather sit in her room reading books and whatnot than to get up on Thursdays to spend an almost entire day in the community our church is located. I’ve seen my grandmother, with bipolar disorder and problems that come with age, be the closest person I know to God. If God tells her to do something, she’ll do it. She doesn’t really take the time to stop and say, “But God, I’m just not mentally fit right now.” And for me personally, the older I get, the risk of my chance of getting my grandmother’s bipolar disorder increases. I already have an “I can’t” mentality that I’ve let way too many times get in the way of what I’m supposed to do and I have to make a choice that, if I were diagnosed in future with it, I would have to continue on. And for me, it would be all too easy to use bipolar disorder as an excuse to not do something. So no. I’m not going to pretend to know what it’s like to go through certain things. But I do know I’ve seen God work bigger things than what we imagine ourselves capable of.
When we use the problems in our lives to give a “valid reason” as to why we can’t do something, we attempt to box God in. Now I’m not saying that we should all be at the point my grandmother’s at. It’s a growth process. But we can’t grow if we keep ourselves limited. And then use those limitations to limit what God can do with us.
“I have xyz, or I’m abc, so I can’t do everything that the Bible and God expects of me.” God already knows what you struggle with. But He’s bigger than that. There are many examples of God working through people who by themselves wouldn’t have been able to achieve what they did. And that’s the point. They couldn’t do it by themselves. God could do it. You’re not supposed to do it by yourself- you’re supposed to surrender it and yourself to God so He can use you in ways that you didn’t think possible. Don’t box God in with mental, emotional, or personality limitations.
“I have to have self care and time to myself." What are you doing with that self care time? How important is it to you? If God asked for it, would you give it to Him, or continue to insist that you’ll need it or you won’t be of any use? Do you trust that God knows when you need time alone with Him? Or will you continue to insist that you need to think of yourself first? I’m not saying that we have to constantly think of others first. I’m saying we have to constantly think of God first. We also have to consider just how much of our self care routines are that important. Remember that God provides rest to weary. He isn’t looking to run you ragged. But if our idea of “self care” is constantly thinking of our needs and limitations especially where God might ask us to move outside the comfort zone, we’re not going to find that rest. We’re going to find our own rest, and it will never be as satisfying. Don’t box God in with the things that you think you need.
“I need to cut these people out of my life because they’re toxic.” Toxic? Toxic how? Because they might grate with you? Because they annoy you? Because spending time with them is draining? Have you ever considered that you might someone else’s toxic person? Have you ever considered what life might be like if God cut out everyone who was toxic in His life? You are supposed to be salt and light to the world, but it’s hard for some people to see that if you cut them out of your life. Even if they’re Christians, consider that the Bible says, “As iron sharpens iron, so must one sharpen another.” (Paraphrasing, I know.) I’ve seen and heard of God doing big things with relationships that were “toxic.” I’m not trying to encourage unhealthy relationships or harmful behaviors. But rather than you being in charge of your relationships, why not surrender them to God? Do we think that no good can come of the “toxic people”? Don’t box God in with people you think are toxic.
Now I don’t have guidelines for how your life should look. Each life is different, each case is different, each problem is different. What I’m trying to say is that so often we put ourselves and our problems before God. We’ll give Him some things, as I said earlier. But we seem to have this idea that there are some things that not even God could fix. We come up with excuses as to why something won’t work. When you come across advice like this, are you looking for advice to help, or are you gaining another excuse to present to God as to why you can’t follow everything He tells you to do? Are you gaining another excuse to live comfortably? Are you gaining another excuse to box in what God can do?
Back to the little box. As I said before, I didn’t put a lot of effort into it and it certainly wasn’t as neat as it could’ve been. But I had been given inspiration I know now must have been the Spirit and I made a little box that I was certain was going to be overlooked at the competition. But it was God’s. And I know God did bigger things than just a gold medal. Had I gone a different direction, had I instead decided to do something grander, or made a craft with more “useful” purpose, I doubt it would have the same impact.
Part of the journey of a maturing Christian is to get rid of excuses of why we can’t. To get rid of the excuses that box in the wonders that God can do. Wonders aren’t just miraculous healings. Wonders can be taking you beyond what you thought you could do. Take it from someone who still struggles with the “I can’t” factor. I constantly sabotage myself by convincing myself I can’t do anything. But when I finally let God do what He’s been asking me to let Him do, man, blows my mind.
But first, we have to acknowledge the excuses. We have to acknowledge the things that we use to box God in. God’s been doing big things since the beginning of the world. Our everyday struggles are small. Not insignificant small. But nothing that’s going to overwhelm Him.
What are you using to box God in?
6 notes
·
View notes
Text
Top Environmental Benefits of Paper Bags
Paper bags have been part of trade and commerce for more than centuries. Traditionally cloth and jute bags were used to pack goods in larger quantities during its transfer from manufacturer or farms to retailers and shopkeepers then used the paper bags to distribute smaller quantity goods to end customers. In fact, paper bags are still used by small food retailers like – sweetshop owners, street food vendors, bakers and by small vegetable sellers.
On the other hand, a paper bag’s structural firmness and surface feature made it ideal to print high-quality images, logo, designs better as compared to a plastic bag, and that made paper bags a hit for fashion, luxury and premium gift packaging industry.
However, the contribution of a paper bag in business and commerce gradually remained restricted due to the industrialization and betterment of plastic packaging options that had higher endurance, strength, and capability to protect products, especially food item from the external environment –increasing the product’s shelf life. In fact, plastic ruled the global packaging industry for the last 5 to 6 decades. During these times, the world witnessed the ill effects of non-biodegradable waste of plastic packaging on the global environment. Plastic bottles and food packages congested the oceans to maintains, marine and land animal spices started to die with plastic deposits in their digestive systems, land fertility degraded due to plastic deposits in the soil.
Till 90’s these problems were spoken and written primarily in the circle of newspapers, scientific studies and in world summits. Then in the past few years, the effects of pollution started to hit the city people and day to day life of the common man. People now are falling sick due to polluted air, normal people (especially in Indian metropolitan cities) are now appreciating organizations, government bodies and individuals who are taking environmental responsibility steps.
In such a scenario adopting paper bags adds to brand appreciation. Either due to government ban or proactive steps to win customer appreciation, organizations gradually adopting biodegradable packaging solutions and using paper bags.
Nowadays the paper bag is a new trend. One can witness people carrying paper bags from almost from every place. People carry them to schools, offices and retail stores. Thus, it is very important to go for a creative solution as well. So that it can benefit both the business and most importantly the environment.
This trend has gained popularity owing to the people and businesses becoming more aware of the ecological surroundings. Also, several individuals want to use paper bags because they are easy to carry, clean and can hold items for a good duration of time.
You surely know how to wrap a gift, but sometimes, using a gift bag is just better. Maybe the gift is oddly shaped, or maybe you want to include multiple items in one present. Maybe you're just tired of wrapping paper. Whatever the reason, there's no shame in using a gift bag—but that doesn't mean you have to settle for a basic store-bought gift bag. These gift bag ideas prove that even the plainest paper bag can become something beautiful, and as an added bonus, making DIY gift bags are a fun, practical addition to the list of Christmas crafts you have planned to fill the open hours of this holiday season.
Picking Christmas gifts for everyone on your list is its own challenge, but any savvy gift-giver knows that presentation is a huge part of the total gifting package. Putting time and effort into wrapping or bagging your gifts makes the gift exchange even more of an experience, and using bags instead of gift wrap is one way to help your presents stand out. (Unlike wrapping paper, gift bags are also reusable year after year if they're taken care of, so your DIY gift bags can be a sustainability effort, too.)
Whether you're planning white elephant gifts or figuring out how to differentiate the gifts for your kids, creative gift bag ideas can help. Here, you'll see smart ideas for dressing up basic paper gift bags, plus DIY guides with the supplies and steps you need to make your bags shine. Read on for eight creative gift bag ideas—even if you haven't finished your holiday shopping, you can get your gift bags ready to go.
Corrugated boxes are a recyclable, recyclable green packaging product that is an essential tool for packaging. Corrugated boxes are used as transport packaging products, which play a very important role in the protective properties of the packaged goods. Corrugated boxes in the flow application, impact, vibration, static pressure, dynamic pressure, climatic conditions, etc., have become an important factor in the damage to the carton, so the physical properties of corrugated boxes determine whether the package can be intact the arrival of the land in the hands of consumers has become a major factor affecting the consumer experience. One of the most fundamental items in testing the physical properties of corrugated boxes is compressive strength, which is an important indicator for measuring the compressive strength of corrugated boxes. In this paper, several factors such as environmental humidity, structural size and structure are selected for research. Corrugated boxes with different humidity, different sizes and different structures were studied, and their compressive strength was gained, and the variation law was studied. By comparing the effects, the environmental humidity of the corrugated box and the influence of the structural size on the compressive properties are gained, and a more effective finite element model is gained. The results of this study have important guiding significance for the structural design of corrugated boxes in different geographical environments.
How to Choose a Jewelry Box
When most people think about jewelry boxes, they are thinking about something lovely and delicate that is perfectly suited to their bedroom décor. However, if you choose a jewelry box based solely on looks, this could mean that your precious items will get terribly tangled and even damaged.
Choose Wood
There are some gorgeous enamel and metal jewelry boxes out there, but when you want something that will keep your items safe and sound, consider wood.
Well-treated wood prevents moisture buildup, and it also provides a small amount of insulation for your jewelry.
In addition, wood has a lovely natural finish that provides deep and rich color all on its own.
Choose a lovely red oak, a pale poplar or pine or even a gorgeously decadent ebony jewelry box for your collection.
Consider Your Jewelry Collection
How many pieces of jewelry do you own? This is a great time to look at your jewelry and take quick inventory.
How many necklaces, rings and bracelets do you have, and how should they be stored? For example, if you mostly own rings, you will find that you should choose a jewelry box that has slots where you can put them.
If you mostly have small bracelets, consider a jewelry box that has lots of room in its drawers.
If you have more necklaces than anything else, you may need a type of jewelry box known as an armoire, which has an upright design and plenty of places to hang necklaces.
Touch the Lining of the Box
If you are buying a jewelry box from a brick-and-mortar store, you will be able to handle it beforehand.
Open the box and touch the lining. It should be completely lint-free and soft to the touch. An abrasive lining will scratch your jewelry, making it look old before its time.
If the jewelry box’s lining feels harsh to the touch, pass it by.
On the other hand, if you are in love with everything but the lining, you can choose to store your more delicate gemstones, such as pearls and opals, in jewelry bags before putting them into the box.
To Lock or Not to Lock?
If you are truly concerned about the safety of your jewelry, you should place the box in a temperature-controlled safe in your home, in a locked room, or in a safe deposit box at the bank.
In the event of a home invasion, a jewelry box can be easily picked up and removed from the premises. However, if your primary concern is young children, a simple lock on the box is typically all you need.
There are excellent jewelry boxes with childproof locks, which can keep your jewelry safe from meddling hands.
Box Design
Make sure that the jewelry box you choose matches your home design and décor.
For example, if you favor a very traditional Victorian design, choose a box with plenty of gorgeous details and scrolling decorations.
If you prefer something that is a great deal more modern, choose a very sleek box that is on the plainer side.
If you are someone who adores their jewelry, make sure that you have a fantastic place to keep it. A good jewelry box will make sure that your jewelry is safe for a lifetime.
What are Cosmetic Boxes?
Most of the time, we are not aware of the importance of the custom cosmetic packaging. But we know that it is important for us to choose a good and strong packaging to present our cosmetic products. After all, this is one of the first things the consumer will see when they come in contact with our cosmetic boxes.
Good Cosmetic Boxes, Packaging can be one of your most effective marketing tools and help you stand out from your competitors. More importantly, it can also be used to communicate your brand’s values, message and style. What are some ways to package your custom beauty boxes? Cosmetic packaging is the use of cardboard material to paper-wrap and/or box and contain various cosmetics (solid, fluid and semi-solid), makeup products. Such cosmetic products include: face creams, lipstick, hair colorants, tanning lotions, nail varnish’s or perfumes.
Cosmetic packaging is especially designed and developed to protect cosmetics from physical, chemical, biological and atmospheric factors. The cardboard structure encases the product in a way that it will not be exposed to its surroundings. UV inhibitors within the cardboard can also help prevent discoloration or degradation of contents. Not only does the paper-based exterior case provide support for fragile glass containers but it acts as protection against bumps and other external damages that could damage the content while still in transit. For example: for hair dyes, hair mascara & hair styling items — cardboard cosmetic packaging reduces color bleed and prevents harmful ingredients from coming into contact with user’s skin or scalp (to reduce risk of allergic reaction).
Make Your Own Customized Cosmetic Boxes!
Many people have the same problem: they can’t find the perfect cosmetic box packaging that matches their sense of style and expresses their personality. That’s where this website comes in. Here, at Blue Box Packaging you can print your own customized boxes to match your needs. Print custom-made boxes with your favorite designs and patterns, or customize them with your monogram or initials for a personalized touch.
Importance of Packaging for Your Cosmetic Product
Makeup is one of the most important beauty staples. It helps us feel beautiful and confident. We use it to highlight our best features and to hide less flattering ones. However, when we store our makeup in old shoe boxes or cluttered closets, it becomes impossible to find what we need. The result? A very frustrated and ugly you.
Thankfully, there are now custom made personalized cosmetic boxes that can help solve this problem. These organizers come in a variety of styles and sizes so it’s sure to work for your needs.
1 note
·
View note
Text
Make your own juice packs
<p>A proper school lunch looks something like this to a kid: chip bag, colorful treat, and something good to drink. There is nary the thought of needed protein, nutrients, and fiber when it comes to children choosing their school lunch preferences. Most wouldn’t even think to consider the unwieldy sugar content, high fructose corn syrup, and unnatural preservatives that can be found in most store bought snacks and drinks. </p> <p><img src="https://ift.tt/3lpNoDp" alt="Girl drinking homemade juice" /></p> <h2>Kid-friendly beverages</h2> <p>That’s why it’s so good that there are moms. It’s a mom’s job to worry about the stuff most children don’t even know about. Mom’s have the wherewithal to read labels, shop smart, and choose the best options for their beloved little ones. And, moms get to do all that while trying to find the most colorful, kid-friendly lunch snacks and beverages possible.</p> <p>With a health conscious First Lady in the White House, and a plethora of organic companies cropping up across the nation, it’s getting easier to find low-sugar, organic lunch box options.</p> <p>There are an applause worthy number of products that help moms make smart food choices for their families. However, when purchased for daily school lunches, prepackaged drinks and juices create a lot of waste. They are one of the more expensive additions to daily brown bag fare, yet a lot of kids aren’t content with just toting “a reuseable water bottle” to school. They see other kids pull out their shiny, cartoon decorated juice packets with tiny little straws, and somewhere in their little kid minds, they figure they’re missing out on the true lunchtime fun. Really, you can’t blame them; juice boxes are awfully cool. Those little straws do seem to make school a better place. So, what’s a mom to do?</p> <h2>DIY Juice box alternatives</h2> <p>A great alternative to packing expensive, sugary, environmentally unfriendly juice boxes is to make your own flavored juice packets at home, then send them as an accompaniment to your kids’ reuseable water bottles. The process is simple, the ingredients easy to find. And, the result is delicious, nutritious, and earth conscious. Go, Mom!</p> <p>The following recipe for flavored waters can be mixed directly into a single water bottle before school. Its quick, easy to make, and tastes great!</p> <p>To give your kids a sense of store-bought fun, mix together their favorite Kool-Aid flavor with a couple packets of Stevia, then pour them into an extra-small, plastic zip top bag. (These bags may be purchased in bulk, you’ll likely be able to find a package of 100 bags for less that $3 at your local craft store, in the bead aisle.)</p> <h2>Kool Homemade Juice Packets</h2> <p>One serving</p> <h4>Ingredients</h4> <ul> <li>Kool-Aid</li> <li>Stevia powder</li> <li>Water bottle</li> </ul> <h4>Directions</h4> <ol> <li>Mix together a pinch or two of any flavor Kool-Aid and 1 to 2 packets of Stevia powder.</li> <li>Add to one water bottle.</li> <li>Shake and enjoy.</li> </ol> <h2>More healthy school lunch ideas</h2> <ul> <li>Healthy lunches for toddlers</li> <li>Keeping your kids on healthy diets at school</li> <li>Creating cool school lunches</li> <li>Five new ways to serve PB&J for lunch</li> </ul>
source https://familycuisine.net/make-your-own-juice-box/
0 notes
Video
youtube
See it, Plan it, Build it, and Use it
Hello friends my name is Hassam. I hope you all are find and good this awesome video teach you DIY/How to Recycling plastic bottles
Our Requirements Material is
• Old plastic bottles
• Seize/ Pen knife
• Electrical Iron
Hope you enjoy is video don’t forget to subscribe for more new interesting videos
Please support your channel
Please click subscribe Button😇😇
#Make Easy#Lyari#DIY#ice cream cup#school kids project#Bottle Life Hacks#Do It Yourself#craft#ART#Hassam#idea#science projects#recycling of plastic bottles#interesting#how to make plastic bowls
1 note
·
View note
Text
Best Arts And Crafts For Kids

Best Arts And Crafts For Kids 2021
Tap into your child’s creativity and artistic side by using exciting Do It Yourself crafts kits. Arts and crafts for kids are essential for the development of children and as a means to express themselves. Also, an excellent way to keep busy and engaged in a healthy activity is the Best Arts And Crafts For Kids. It helps in brain development and inculcates concentration in your child, which will make him ready for school and quick learning!
The Best Arts And Crafts Products For Kids
FunzBo Arts and Crafts Supplies for Kids
FunzBo has a wide variety of arts and crafts supplies. It has a large bucket containing any and everything that you can possibly imagine when it comes to art supplies. Glitter, beads, yarn, sticks, buttons, pompoms, and much more!
Kid Made Modern Arts and Crafts Library Kit
This product is priced at $40 and contains over 1000 pieces, ideal for arts and crafts for kids. This crafts box is especially for jewelry making, tag making, crafting, scrapbooking, and even school projects!
Arts and Supplies for Kids- Blue Squid Store
This art box has 1500+ pieces; includes many items such as feathers, pompoms, sequins, googly eyes, and many more. Blue Squid Arts Supply store has items for both boys and girls aging 4 to 9 years old. It can be used for many exciting homes and school projects!
Hide & Seek Rock Painting Kit
This exciting rock painting kit comes in different styles ranging from original to glow-in-the-dark and holiday-themed. The kit contains 10 rocks and 8 waterproof paints and is recommended for ages 6 to 96. Priced at $13, this is a catch!
ZMLM Scratch Paper Art Set
This cool activity is interesting and fun at the same time. The ZMLM Scratch paper set contains scratch paper with black matte, which when scratched with a wooden stylus reveals colorful images or simply rainbow colors for your own creativity!
Let them Craft
Kids love crafting so why not get them some kid's craft kits. This will do two things – keep them busy and let their inner artist come alive. For fun craft ideas, get them some all-in-one craft kits. A window art kit can work well with kids of both genders. It contains sun stickers with paints, sturdy suction cups, non-toxic paints, and additional glitter!
Building Bird Houses
Kids love painting and constructing small new things up. Several kid's craft ideas will help you in letting the go innovative with paints and color. Get some oriental cherry DIY birdhouse kits for your kits to satisfy their craving for construction and painting (and keep them busy doing it). The oriental cherry DIY kits have 2 un-assembled birdhouses with 12 paints, 3 brushes, 2 strings, and glue. In a nutshell, all that the kids will need is to build their birdhouse!
Play with Sand
We are suggesting something better with an artistic touch over here. Get your kids some sand kits that will let them play and express themselves through colors. This one over here can be a good choice. It contains 4 sand bottles, 2 pendant bottles, 8 colors of sand, 1 satin cord, 1 plastic funnel, and 1 design tool. Craft easy things like sand shapes in different colors so this kit can be a great choice for kids!
Let’s create Wind Chimes
Kids love that too. What’s better is getting them to make their wind chimes and bring the inner artist out. If you’re planning to buy a DIY wind chime kit for your kids then consider purchasing it from here. This kit contains two terra cotta pots, chime rods, a paint strip, and a cord. Kids will have fun assembling a wind chime and will enjoy the final result!
Finally, When creating an arts and crafts project, children are able to develop their fine motor skills. Art also allows your child to expand their essential vocabulary. They’ll learn the names of different shapes, colors, and materials!
youtube
#Best Arts And Crafts For Kids#Best Arts And Crafts For Kids 2021#Arts And Crafts For Kids#Best Arts and Crafts Ideas for Kids#Arts and Crafts#CraftyThinking#Youtube
0 notes
Text
Interesting Back to School DIY Crafts Ideas

A new term at school calls for new supplies!
Personalize your supplies to suit your style and add a touch of fun. Doing it yourself also makes for a great pastime by letting your creative juices flow. What's best is at the end of dedicating those few hours, you have bits of stationery that speak you!
Buying art supplies was never as easy as it is with Art Cove. Art Cove is a premier online craft store carrying over 8000 products, including craft mirrors, beads, dolls, bells, hoops, paints, colors, canvases and many more.
If you're planning to make any of the vibrant school crafts listed below, order your materials now and get going.
Craft Sticks Pencil Holder

It's a universal truth that regardless of how many pencils you get at the start of the term, somehow all end up vanishing pretty soon!
The perfect solution to disappearing pencils is having a pencil holder at your study desk.
To DIY a colorful pencil holder for yourself:
1. Reuse any old plastic cup lying around the house or cut up your own from a big-sized plastic bottle.
2. Using the Gem-Tac Permanent Adhesive, stick the colorful craft sticks in the sequence of the rainbow colors (VIBGYOR)
3. Allow it to dry for a few hours.
Your bright and colorful pencil holder is sure to brighten up those study sessions.
Gold Accent Notebooks

What's better than buying the perfect notebook? Making one!
Starting from a blank canvas, there's a lot that can be done to beautify and create a personalized notebook.
Just follow these steps:
1. Grab a notebook with a plain cover. Go classic with a simple white, or select any solid color of your liking.
2. Using the DecoArt Dazzling Metallics Splendid Acrylic Paints and a paintbrush, make some accents of your desired shape. You could paint hearts, brush strokes, polka dots, diamonds, or any other.
3. Pick any acrylic paint from Art Cove's online art supplies, or get the whole acrylic paint sets to have endless choices.
4. Allow it to dry for a few hours.
Carry your DIY notebooks around campus and flaunt them!
Glitter Paper Clips

A little glitter never did any harm!
Black paper binder clips, although very useful, tend to look extremely bland.
Here's how you can amp them up:
· Spread a thin, even coat of Gem-Tac Permanent Adhesive over an ordinary binder clip. Use a paintbrush if it helps spread it thinly.
· Be very quick and keep a lid filled with a container ready for the binder clip to be dipped into.
· Dip it evenly and ensure the whole of it is covered with glitter and no spots are left.
· Allow it to dry.
Your glam binder clips are ready to jazz up your notes.

Order your art supplies online at Art Cove and get ready for the new term at school!
Whether you're into crochet, macramé, jewelry, beads, or resin creations, they have it all!
Visit their website or contact them for more details.
0 notes
Text
Week 3 - History of Design

This Ikea photo frame hanging in my bedroom has a minimalistic aesthetic to it, as it is completely white and rectangular. It has a thin frame with a thick paper border on the inside to frame the photo within the frame itself. Its simple look gives the consumer creative control over where to place it, as it can match with most furniture. For example, in my room I have it placed near a white bookshelf and above a wooden dresser with white drawers. Its rectangular shape gives me more freedom to be able to place photos and paintings around it that frame it nicely. The aesthetic intended with this frame juxtaposes the criticized “more is more” aesthetic from the 19th century with its simplicity.
https://www.ikea.com/us/en/p/ribba-frame-white-90378427/

This bookshelf from Ikea has similar properties, though it is much larger than the photo frame. The bookshelf is not from the same collection that the photo frame is from, but that doesn’t stop these items from looking good together. The white surface combined with the rectangular shape and sharp edges makes these items look like they belong together. That is part of the appeal when it comes to minimalistic furniture. Even if the consumers aesthetic isn’t quite minimalistic, these items can be used in so many different ways. The plain style of the bookshelf also allows the buyer to use each shelf however they may want to. I personally utilize this space mostly for books, but I also have items that won’t fit anywhere else in my room that fit well here. There are also some items placed here that really don’t have a place anywhere in my room but I was too lazy to put away.
https://www.ikea.com/us/en/p/billy-bookcase-white-50263838/


This deck of cards, while also minimalistic compared to other card decks, could not be mass produced and sold without the original inventions of movable type, the printing press, or the steam press in the mid 1700’s. The emergence of mass production in industrial revolution made objects cheaper and more available to the public. This specific deck of cards is a collectable item, so it may not be as cheap or widely produced as other decks of cards, but even with this information it is still produced enough to be able to be sold to many people for collection. Many modern collector’s items today would not be able to be, at least somewhat, mass produced without Johann Gutenberg, the development of type, and the Industrial Revolution.

These cards are also offered in many different styles, which encourages buyers to collect them all. The top images are of cards that are gold and shiny, and some of the faces contain golden details that match the back color. These ones are pink with faces that contain both light blue and black text and suits.

The box has a unique design as well, that mimics a crate. The brand of “Peelers” Playing Cards expands into other types of playing cards as well, for example “Squeezers” that feature images of grapefruits, and “Carvers” that feature watermelons. This shows a well-conceived marketplace, where the producers are able to continue makings brand that are tied together but still different enough for people to want to purchase them. I just went on their website myself and I think I’m about to make another purchase!
https://www.riffleshuffle.com/collections/playing-cards/products/peelers-v3


This is a mug I received from the 3D art teacher at my high school. Although it was a gift, he still sold his work for both himself and to raise money for the art program. During the Industrial Revolution, when items were being mass produced and sold, artists began to notice a lack of craftsmanship. This was the beginning of the Arts and Crafts Movement. A man named William Morris started a company, Morris & Co, to sell homeowner goods. This mug reflects my art teacher’s work through its visible imperfections, just as Morris would reflect craftsmanship through hammer marks and exposed joints. This mug also sticks out from other mugs that are mass produced through its curvy form and dripped glaze, as manufactured mugs are often all shaped as perfect cylinders with a logo or image printed onto the side. I personally prefer the mug from my teacher, as I enjoy the abstracted look and visual craftsmanship marks.


The opposite of that mug would be this lamp I purchased last year for my dorm room. The design of this lamp is very simple and it is built from cheap material. This is an item that is extremely mass produced and cheap for college kids to purchase for their college housing. It is also easy to take apart, as it can be compressed into multiple small pieces, making it convenient for transport to new locations. Although it is cheaply manufactured, I’ve grown to like it. It’s been very reliable and I prefer it to my ceiling light since it isn’t as harsh.
https://www.kmart.com/simple-designs-1-light-stick-torchiere-floor-lamp/p-02482538000P

This is a TV stand I got from my brother. It has a utilitarian look to it, with the sleek vinyl design, the combination of round and sharp edges, and the balance of the stand itself. This is a good example of the definition of design, as this TV stand solves the problem of where to place things like DVD players or gaming stations, as well as the issue of hiding all of the messy wiring that comes with these electronics. The clear table as well as the base of the tv stand serve as perfect surfaces for electronics and the gaps in the neck of the stand are placed so the user can weave the cords through them and hide them behind the stand. The neck of the stand goes back about half a foot behind the TV, but nothing else is behind it to keep it standing. The structure itself looks like it should tip over any second, but everything that reaches forward from the TV creates a balance that stops that from happening.
https://www.walmart.com/ip/Ameriwood-Home-Galaxy-TV-Stand-with-Mount-for-TVs-up-to-50-Black/20564653

My Yeti Rambler is a good example of an idea that meets consumers wants and needs, as well as how design has become more incorporated into today’s everyday products. Water bottles like Yetis and Hydroflasks are advertised as bottles that are both durable and will maintain the temperature of the liquid placed in it for hours on end, and they follow through. They also both have sleek designs that are pleasing to the eye. They come in multiple colors, sizes, and styles based on what the buyer intends to use them for. The companies found new ways to design the water bottle, and this attracts customers from everywhere. These water bottles have increased in popularity, creating a competitive water bottle market. Other companies have started creating insulated water bottles as well, rather than cheap plastic ones.
https://www.yeti.com/en_US/drinkware/rambler-36-oz-bottle-with-chug-cap/21071070029.html#pos=18
https://www.hydroflask.com/
0 notes
Text
Agilenano - News: Best 21 Shower Caddy Totes
Small Utility Shower Caddy Tote – WhiteSmall Utility Shower Caddy Tote – White - Can be used for household items, office supplies, crayons, crafts, etc. Measures approx 10″ l x 85″ w x 45” d. White utility shower caddy tote. Can also be used as a shower caddy (small drainage holes in each section). 3 sections 1 small, 1 medium, and 1 large.
Da Jia Folding Quick Dry Shower Caddy Tote Bag with Mesh Bottom Waterproof Oxford Bath Organizer Perfect for Dorm, Gym, Camping, Beach, SpaDa Jia Folding Quick Dry Shower Caddy Tote Bag with Mesh Bottom Waterproof Oxford Bath Organizer Perfect for Dorm, Gym, Camping, Beach, Spa - Perfect shower caddy tote for college dorms, bathrooms, gym, shower, swimming pool, and travel. 1023″l x 669″w x 826″ h interior provides storage for shower accessories like shampoo and brushes. Easy to clean and maintain, can be placed on the shower handle. Folding, convenient when not in use, travel is convenient to carry. Waterproof oxford cloth and bottom breathable mesh allow shower caddies water to drain easily so it dries quickly and resists mold.
mDesign Bathroom Shower Caddy Tote for Shampoo, Soap, Lotion, Razors – Medium, Light GraymDesign Bathroom Shower Caddy Tote for Shampoo, Soap, Lotion, Razors – Medium, Light Gray - Drains easily features drainage holes to allow water to easily pass through, built-in center handle makes for easy carrying. Divided storage bathroom shower caddy tote with 6 storage compartments of varying sizes. Stores and organizes bath essentials organizes shampoo, conditioner, razors, shaving cream, cosmetics, soap, loofahs, lotions and more. Made of durable, bpa-free plastic hand wash with mild soap and water only do not clean in dishwasher. Dimensions 12″ x 625″ x 6″.
Small Utility Shower Caddy Tote – Mint BlueSmall Utility Shower Caddy Tote – Mint Blue - Can be used for household items, office supplies, crayons, crafts, etc. 3 sections 1 small, 1 medium, and 1 large. Can also be used as a shower caddy (small drainage holes in each section). Mint blue utility shower caddy tote. Measures approx 10″ l x 875″ w x “8 t.
InterDesign Una Bathroom Shower Caddy Tote for Shampoo, Conditioner, Soap, Mesh, BlackInterDesign Una Bathroom Shower Caddy Tote for Shampoo, Conditioner, Soap, Mesh, Black - Waterproof take it in the shower with you great for use in shared bathrooms, at the office, in the craft room or at the gym. Nine durable mesh pockets let you see what you’ve stored large center compartment, 8 outer pockets, and built in handle for toting. Quick drying breathable mesh wipe with a damp cloth or wash by hand folds away when not in use. Measures 6″ x 6″ x 75″ high. Made of 100% pvc.
DearyHome Mesh Shower Caddy Tote 8 Pockets Quick Dry Hanging Toiletry Bath Organizer for Dorm,Gym,Camp Travel Tote Bag, BlackDearyHome Mesh Shower Caddy Tote 8 Pockets Quick Dry Hanging Toiletry Bath Organizer for Dorm,Gym,Camp Travel Tote Bag, Black - Roomy 9 inch large main storage with 8 side pockets enable you to organize all your shower accessories and toiletries like shampoo,conditioner,comb,toothbrush,soaps,etc. Reinforced structure the top of the handle and all the seams have reinforcement, providing strength to carry and hang heavy items the handle is strong and comfortable to carry. User-friendly the shower tote can caddy can be hang over the door, shower head or put on shower stand by the corner perfect design for dorm, gym,college, travel, camping and beach swimming. Portable the shower caddy made from pvc and oxford and easy to fold to fit into your pocket for carry anywhere. Quick dry breathable mesh allow shower caddies water to drain easily so it dries quickly and resists mold.
Small Utility Shower Caddy Tote – BlueSmall Utility Shower Caddy Tote – Blue - Measures approx 10″ l x 85″ w x 45” d. 3 sections 1 small, 1 medium, and 1 large. Can be used for household items, office supplies, crayons, crafts, etc. Can also be used as a shower caddy (small drainage holes in each section). Blue utility shower caddy tote.
DII Mesh Portable Quick Dry Lightweight, 7 Compertment Bathroom, Shower Caddy Tote For Shampoo, Conditioner, Soap, Toiletries Perfect for Dorm, Travel, Gym, Spa – WhiteDII Mesh Portable Quick Dry Lightweight, 7 Compertment Bathroom, Shower Caddy Tote For Shampoo, Conditioner, Soap, Toiletries Perfect for Dorm, Travel, Gym, Spa – White - Easy to carry evereywhere compact, stylish and the easy carry handle makes carrying the caddy anywhere easy perfect for the college, dorm, gym, camping, travel, quick overnight and more. Light weight, durable and last-long material the bag is made of pvc mesh in body and polyester on handle and trims, provide a longer usage time. Classic design with plenty of storage space portable shower caddy size 8″x6″x8″, with 7 compartment pockets to hold all your bathroom accessories towels, lotions, gels, shampoo, shavers, makeup, sunglassesand more. More options to view more of our products visit amazoncom/dii. Quick dry and mold ressitant sturdy pvc mesh allow maximum air circulation for quick and easy drying to reduce odor/moisture, no more mildew or mold.
Mesh Shower Caddy – Quick Dry 8 Pockets Mesh Portable Shower Tote Bag with Handle for College, Dorms, School, Sport, Gym, Camp, BlackMesh Shower Caddy – Quick Dry 8 Pockets Mesh Portable Shower Tote Bag with Handle for College, Dorms, School, Sport, Gym, Camp, Black - Quickly dry, water-resistant breathable mesh ensures quick dry-time and mold resistance perfect shower caddy tote for college dorms, bathrooms, gym, shower, swimming pool, and travel. 8 pockets, 1 large main pocket with 7 ample side pockets to hold all your bathroom accessories and it is enough for all the essentials and keeps them organized and in shipshape. Top quality, made of tough and versatile mesh, breathable travel-sized shower caddy with carry handle the handle has been reinforced for durability. Versatile, features a spacious center compartment and 7 side pockets, plus a carry handle, which is roomy enough for all the essentials and keeps them organized. Portable design, this shower tote bag is compact, Â lightweight, durable, stylish and easy to fold idea gift ideas for women or men.
Mesh Shower Caddy Tote plus PVC Zipper Bag – Toiletry Bag for Travel Camp College Dorm, Blue-BlackMesh Shower Caddy Tote plus PVC Zipper Bag – Toiletry Bag for Travel Camp College Dorm, Blue-Black - You’re guaranteed to be satisfied with our stylish, yet durable design shower caddy or you’ll get your money back. A free splash proof pvc zipper pouch included our shower caddy is made out of premium quality polyester mesh materials that are waterproof, mildew resistant and rustproof. Perfect for college dorm, gym, swimming, beach, camping and travel idea gift ideas for women or men. Reinforced crossing stitching on handles and covered seams makes the shower bag resistant to ripping. Quick dry and portable shower tote has one main pocket with eight small side pockets to hold your bathroom accessories.
Titan Mall Shower Tote Quick Dry Hanging Toiletry and Bath Organizer with Wide Breathable Mesh Fabric Shower Caddy for College, Dorms, School, Sport, Gym, Camp & Travel Hot PinkTitan Mall Shower Tote Quick Dry Hanging Toiletry and Bath Organizer with Wide Breathable Mesh Fabric Shower Caddy for College, Dorms, School, Sport, Gym, Camp & Travel Hot Pink - Wide mesh design this titan mall shower tote has a wide weave so water drains and dries quickly, air can flow through easily this weave helps to control mildew growth due to the mesh material, this shower tote is easy to clean as well. Gift- wrap the titan mall shower caddy packaging design is of simplicity and fresh, which is optimum gift for college students, fitness enthusiasts and campers, etc. Multiple compartments 8 pockets to keep all your supplies organized makes access to what you need in the shower and locker room easy large main area inside for towel, shower cap, shower sandals or flops easy to organize your toiletries wash up time made pleasant. Reinforced structure as you can see this shower organizer, the top of the handle and all the seams have reinforcement, providing strength to carry and hang heavy items although strong, the handles are soft, making it comfortable to carry. Multi-purpose versatile design is perfectly suited for using in college dorms, communal bathrooms, campground showers, deployment, bedroom, gyms, schools, camping, swimming pools, travelling, garden, beach, plugs and cords, kitchen stuff, spas, military, pet supplies, staying overnight, etc.
7 Pocket Shower Caddy Tote, Blue – Keep your shower essentials within easy reach. Shower caddies are perfect for college dorms, gym, shower, swimming and travel. Mesh allows water to drain easily.7 Pocket Shower Caddy Tote, Blue – Keep your shower essentials within easy reach. Shower caddies are perfect for college dorms, gym, shower, swimming and travel. Mesh allows water to drain easily. - Seven extra-large storage compartments can handle large shampoo bottles, soaps, and more. Perfect shower caddy tote for college dorms, bathrooms, gym, shower, swimming pool, and travel. Breathable mesh allow shower caddies water to drain easily so it dries quickly and resists mold. Canvas handles make this attractive blue caddy ready for transport and to hang on the showerhead. 6″ deep interior middle section provides storage for shower accessories like shampoo and brushes.
Mesh Shower Caddy Tote, Dorm Bathroom Caddy Organizer with Key Hook and 2 Durable Handles, Quick Hold, 8 Basket PocketsMesh Shower Caddy Tote, Dorm Bathroom Caddy Organizer with Key Hook and 2 Durable Handles, Quick Hold, 8 Basket Pockets - Within a shower bag, no need complaining communal showers or accidentally leaving items in the bathroom easy carrying items and keep shower tidy. A large mesh shower caddy equipped with an attached key hook to safely store your keys, unique design with the shower basket caddy for dorm. Large main storage compartment with 7 roomy outer pockets to organize all your shower accessories to make them easy to find, carry and use. Portable bathroom tote organizer hang the shower tote caddy over the door, showerhead or put it on a shower stand in the corner perfect dorm shower caddy tote, used for gym, college, travel, camping, swimming. Strong and sturdy polyester mesh shower tote rubbery breathable mesh dry quickly, double reinforced handles hanging heavy items without tearing.
Evelots 8 Pocket Shower Caddy Tote Bag, Cleaning Supplies, Bathroom OrganizerEvelots 8 Pocket Shower Caddy Tote Bag, Cleaning Supplies, Bathroom Organizer - A great functional design that allows you to have all of your essentials in one bag within your reach no more fumbling through random bags wasting time looking for your accessories at home or while traveling approximate dimensions 95″ diameter by 85″ height. Keep all your toiletries organized with this convenient mesh travel shower caddy toiletry bag. It features 7 outer pockets to hold your accessories and a large center storage area its made out of high-quality polyester fabric that holds up well and drys quickly, no smell, mold, or rust. Evelots has more than 500 products to offer please don’t forget to visit our amazon store. Perfect for the gym, school, dorm, college, beach, bathroom, kitchen, travel, camping and more also great for organizing your cleaning supplies and keeping them in one place.
Shower Caddy Case Organizer Tote to Hang in the Shower plus Free Toiletries Bag – by The Fine Living Co USAShower Caddy Case Organizer Tote to Hang in the Shower plus Free Toiletries Bag – by The Fine Living Co USA - 100% customer satisfaction and lifetime guarantee. Holds everything you need, holds three to four regular bottles, secure pocket for razors, washcloths, toiletry organizer for toothbrush, moisturizer, deodorants etc. Take it with you into the shower, quick draining and waterproof often dries within an hour and resists mold and mildew for a healthier and more hygienic caddy. Included free gift, splash proof toiletry organizer, for razors, toothbrush, moisturizer’s, clippers, sprays etc. Features, fully zip secured | hanging up hook | carry handle | soft design that keeps shape when hanging.
mDesign Bathroom Shower Caddy Tote for Shampoo, Soap, Razors – Large, Light GraymDesign Bathroom Shower Caddy Tote for Shampoo, Soap, Razors – Large, Light Gray - Made of durable, bpa-free plastic hand wash with mild soap and water only do not clean in dishwasher. Organizes shampoo, conditioner, soap, loofahs, razors, shaving cream, cosmetics and more. 145″ x 7″ x 575″. Bathroom shower tote with 11 storage compartments. Features drainage holes and built-in handle for portability.
Small Utility Shower Caddy Tote – Corsair BlueSmall Utility Shower Caddy Tote – Corsair Blue - Can also be used as a shower caddy (small drainage holes in each section). 3 sections 1 small, 1 medium, and 1 large. Corsair blue utility shower caddy tote. Can be used for household items, office supplies, crayons, crafts, etc. Measures approx 10″ l x 85″ w x 45” d.
InterDesign Bathroom Shower Caddy Tote for Shampoo, Conditioner, Soap, Razors – Large, Navy BlueInterDesign Bathroom Shower Caddy Tote for Shampoo, Conditioner, Soap, Razors – Large, Navy Blue - Features drainage holes and built-in handle for portability. Bathroom shower tote with 11 storage compartments so you can keep your shower gear organized and mobile-ready. 7″ inches x 1462″ inches x 575″. Made of durable plastic. Organizes shampoo, conditioner, soap, loofahs, razors, shaving cream, cosmetics and more.
Small Utility Shower Caddy Tote (Black)Small Utility Shower Caddy Tote (Black) - Can be used for household items, office supplies, crayons, crafts, etc. 3 sections 1 small, 1 medium, and 1 large. Utility shower caddy tote. Can also be used as a shower caddy (small drainage holes in each section). Measures approx 10″ l x 875″ w x “8 t.
Small Utility Shower Caddy Tote – Teal BlueSmall Utility Shower Caddy Tote – Teal Blue - 3 sections 1 small, 1 medium, and 1 large. Teal blue utility shower caddy tote. Can be used for household items, office supplies, crayons, crafts, etc. Measures approx 10″ l x 85″ w x 45” d. Can also be used as a shower caddy (small drainage holes in each section).
Fancii Portable Mesh Shower Caddy Tote with 7 Large Pockets and Key Hook – Quick Dry Hanging Bath & Toiletry Storage Organizer Bag for College Dorm, Travel, Gym, Beach & CampingFancii Portable Mesh Shower Caddy Tote with 7 Large Pockets and Key Hook – Quick Dry Hanging Bath & Toiletry Storage Organizer Bag for College Dorm, Travel, Gym, Beach & Camping - Water-resistant breathable mesh ensures quick dry-time and mold resistance. 7 extra large compartments allow you to neatly store and organize all your beauty and bathing essentials. Portable design with two sturdy reinforced handles, providing strength to carry and hang heavy items. Key hook feature provides a convenient place to safely store your keys, perfect for college dorm, gym, camping and travel. Strong and durable polyester construction for quality that endures continuous day-to-day wear and tear and water contact. #Storage

Agilenano - News
from Agilenano from shopsnetwork (4 sites) https://agilenano.com/blogs/news/best-21-shower-caddy-totes-1
0 notes
Last Seen Blogs

musicforthehorsehospital
roman candle

mushroommako-art
Art side blog

pangpangxiya1-blog
胖胖西❤️

allaboutthecurry
Untitled