#rubber fender washers
Text

This is my setup so far!
Things might change in the future but so far, I’m pretty happy with it!
Before anyone says anything I know a lot of the items I got were a bit extra and that cheaper alternatives are available but, this is one “big” tax splurge/birthday present!
I'm going to do my best to keep this up to date as things develop!
Cage/Perches
C&C Outdoor Large Cat Cage Enclosure - 4/5
So far I love this cage! With the set up pictured above, I actually ended up with extra panels to expand further in the future.
This cage offers a lot of versatility and would be great for odd shaped spaces or tight spaces that might require a little bit more creativity!
As far as durability goes, I would say that is pretty average for a C&C cage. With that being said... USE THE ZIP TIES! Or invest in additional wire cage supports or else the first time you move it... it will fall apart!
Pros
Weight - Light weight, easy to move and and tare down!
Price Point - Affordable and way cheaper than traditional bird cages of the same size!
Versatility/Customization - This is a build your own cage set! You can go wild and pretty much do whatever you want!
Add-ons - Because this is a C&C cage there are a lot of options for expansions and a lot of add-ons (ramps, doors, patios, etc) that can be bough!
Cons
Durability - So long as your using extra supports the durability isn't an issues. Without the supports... this is going to fall apart the first time you move it!
Bar Spacing - The bar spacing on this is large! 1.65" (4.1 cm). Because of the bar spacing your going to need to get a 2" Fender Washer in order to attach most standard bird accessories. An easy fix but something to be aware of!
Cleaning - Because this cages relies on joints there are plastic pieces that jut into the cage and run the risk of being pooped on. If they are pooped on... You will have to take apart a large chunk of the cage and remove the joint to clean it... It's a pain in the ass.
Corrugated Plastic Cage Liner Base 3/5
This works just as intended! It keeps what it needs to in and what it needs to out! It can be laid flat, and folded for storage if need be.
Pros
It works! Keeps poop and seed inside!
Cleaning - Easy to wipe down and poop doesn't seem to stick to the surface! Water and weatherproof is also a plus!
Cons
Price Point - I, admittedly, did not do my research before purchasing this base! This could have easily been made for about half the price from a local hardware or craft store with a sheet of Corrugated Plastic and either some hot glue or, if I wanted to get fancy, some Plastic Chicago Screws.
Cleaning - While the outside is easy enough to clean, corrugated plastic is hallow-ish on the insides and is IMPOSSIBLE to clean! To avoid dust build up you can use a length Rubber Edge Trim along the top! Make sure you check the with of your Corrugated Plastic before buying any trim.
Perch 4/5
It's a perch, it do what it do. Nothing super exciting.
Pros
It works as intended!
Cons
The shorter perch was NOT pink, lol. Not important to most people but it is important to notes that its defiantly more orange.
Lining/Hammock - 5/5 (I'm bias because I made them, lol!
The lining is simply two pieces of Anti-Pill Plush Fleece sewn to size! Anit-pill fleece is stain resistant, easy to clean and soft to the touch!
Pros
Price Point - Much cheaper then pre-made linings!
Reusable - Simply wash and reuse! No reoccurring monthly expense for something like puppy pads!
Customizable - Make them any color or all the colors!
Easy to Make - For real! Sewing a full bottom lining takes me about 30 mins from start to finish! If sewing isn't your think you could do it tie blanket style or simply cut a piece of fabric to size and call it good!
Food/Water
3 in 1 Cat Bowl - 5/5
I love this this feeder! Not only is it super cute but, it allows you to lock the bowls in place, preventing them form moving. The angled sides of the bowl also really help to keep seed where it should be! This is super easy to clean and the fact that it has two bowls and a gravity feed water dispenser makes it perfect for pigeons!
Pros
One stop shop - because of the two bowls and the separate water dish this works great for offering see, grit and water all separate!
Bowl Position - This feeder has a star shaped grid in the bottom that allows you to change the position of the bowls. This allows you to turn the bowl so the raised edge is facing the water dish preventing water from getting into your grit and feed!
Cons
Seeds under bowl - Because the bottom of the bowl holder is open if there are seeds under it the bowl becomes difficult to lock into place. Not a big deal but it can be annoying to deal with!
Water riser - The water dish has a white, circle riser that is open in the center. It's not a huge deal, Mango got use to it after his second attempt, and it's totally removable!
Toys/Enrichment
I'll make this part short and sweet, lol!
Mango doesn't care at all about anything but his Brick. Bitches love bricks.
10 PC Cat Toy set
Mirror
Doughnut Dog Toy
Cake Foraging Toy
Snuffle Mat
Brick
Nesting Pink Bed
Crinkle Paper
Paper Straws
Hay Feeder
9 notes
·
View notes
Text
D.I.Y.
"I've nothing much to offer
There's nothing much to take
I'm an absolute beginner
And I'm absolutely sane"
#TGS #D11
Saved my self a few bob, I did. A couple o’ quid left in me pocket.
Got an appraisal a week or so back. 500 plus they wanted.
And, being them a body shop — it was a fair price. But…
500 bens for a bent-up truck’s fender?
It’s just the bloody holes of the rubber fender bit had stretched out passed where the bolts could hold to the frame o’ the beast.
So…
A few bucks for a small packet of washers,…

View On WordPress
0 notes
Text
LIUGONG WHEEL LOADER SPARE PARTS 109

31B0501 RELAY
SP182242 BEARING ASSEMBLY
SP182248 DOOR-LH
67C1929 HOSE AS
07C9377 HOSE AS
07C9435 HOSE AS
67C1818 HOSE AS
67C1819 HOSE AS
63A1171 MIDDLE SHAFT
08D0534 TUBE AS
08D0688 TUBE AS
38Y0531X0 HAY FORK
48C5602X0 ENGINE HOOD
07C9504 HOSE AS
08D0535 TUBE AS
08D0646 TUBE AS
12C7465 CONTROL VALVE
67C2066 HOSE AS
67C2073 HOSE AS
07C9487 HOSE AS
67C2065 HOSE AS
08D0643 TUBE AS
52C0423 COUPLING
70C1843 HARNESS
30D3677 FRONT FRAME
49C6220 CONTROL BOX
18A8187 BLOCK
32A3948 WATER HOSE
67C0590 FUEL HOSE
67C0589 FUEL HOSE
32A4003 INTAKE PIPE
05C9225 HOSE AS
67C1834 HOSE AS
32A4272 WATER HOSE
32A4273 WATER HOSE
32A4275 WATER HOSE
07C9479 HOSE AS
41A0887X0 SUN GEAR SHAFT
SP182336 GASKET
18D5175 BRACKET-RH
18D5174 BRACKET-LH
01C1627 OIL PIPE
01C1628 OIL PIPE
70C1873 HARNESS
70C1864 HARNESS
70C1656 CAB HARNESS
SP165542 RECTANGULAR RING
SP165543 SCREW HEX FLANGE HEAD CAP
SP165544 HEATER INTAKE AIR
SP165545 SCREW STUDDED FLANGE CAP
SP165546 WASHER DINSULATING
40D1615 REAR FENDER-RH
14D0884 PISTON ROD
SP173002 SEAL KIT
18A8135 CUTTING EDGE
18A8136 CUTTING EDGE
01Y0580X0 FRONT AXLE AS
01Y0581X0 REAR AXLE AS
22D1898 BUCKET
30D3344 FRONT FRAME
SP164888 CONNECTOR
07C8984 HOSE AS
09D9910 TUBE AS
09D9909 TUBE AS
07C9076 HOSE AS
12C7090 CONTROL VALVE
12C7127 RELIEF VALVE
SP171888 O-RING
SP171889 PARALLEL PIN
SP171890 SPRING-TYPE STRAIGHT PIN
SP171891 SPRING-TYPE STRAIGHT PIN SLOTTED HEAVY
SP171893 SPRING-TYPE STRAIGHT PIN SLOTTED HEAVY
SP171894 CIRCLIP FOR SHAFT
SP171895 INNER HEXAGON SOCKET HEAD CAP SCREW
SP171896 INNER HEXAGON SOCKET HEAD CAP SCREW
SP171897 INNER HEXAGON SOCKET HEAD CAP SCREW
SP171898 INNER HEXAGON SOCKET HEAD CAP SCREW
SP171899 INNER HEXAGON SOCKET HEAD CAP SCREW
SP171900 DOUBLE END STUD
SP171901 HEXAGON FLANGE BOLT
SP171903 HEXAGON FLANGE BOLT
SP171904 HEXAGON FLANGE BOLT
SP171905 HEXAGON FLANGE BOLT
SP171906 SPRING WASHER
SP171907 HEXAGON HEAD BOLT
SP171908 HEXAGON HEAD BOLT
SP171910 HEXAGON FLANGE BOLT
SP171911 INNER HEXAGON SOCKET HEAD CAP SCREW
SP171912 HEXAGON FLANGE BOLT
SP171913 HEXAGON FLANGE BOLT
SP171914 THERMOSTAT
SP171915 EXHAUST VALVE SEAT
SP171916 COMMON RAIL BRACKET
SP171917 HARNESS BRACKET
SP171918 SEALER
SP171919 STUDS
SP171920 PIPE CLAMP ASSEMBLY
SP171921 BOWL PLUG
SP171922 CYLINDER HEAD SUBASSEMBLY
SP171923 CYLINDER HEAD
SP171924 BRACKET
SP171925 EXHAUST MANIFOLD
SP171926 DOUBLE END STUD
SP171927 HEXAGON HEAD BOLT
SP171928 BRACKET
SP171929 HEXAGON LOCK NUT
SP171930 AIR PIPE CONNECTOR
SP171931 PIPE JOINT
SP171932 FRONT COVER SHIELD
SP171933 FRONT COVER SHIELD
SP171934 BAFFLE BOARD
SP171936 IDLER GEAR SHAFT
SP171937 BOLT
SP171940 INTAKE CONNECTING PIPE
SP171941 CYLINDER HEAD BOLT
SP171943 SILENCER BRACKET
09D9616 TUBE AS
96A5342 EDGE-RH
04A4279 FLANGE
04A4280 FLANGE
07C9083 HOSE AS
67C1108 HOSE AS
25C1801 HINGE
48C5343X0 ENGINE HOOD
38Y0467X0 BUCKET
72A3126 SLEEVE
00A8549 CONNECTOR
SP167897 SLIDE BUSHING
42C0983T2 REVERSE PLANET CARRIER AS
SP172558 SEAL KIT
SP172559 SEAL KIT
SP172560 SEAL KIT
24C3223 ROPE
48C5497 TOP COVER
70C1696 HARNESS
14D0903 PISTON ROD
50A1200 PISTON
32A4152 INTAKE PIPE
SP169872 PLUG THREADED
SP168727 SEAL KIT
SP130338 FORK
67C0543 FUEL HOSE
32A3972 WATER HOSE
32A3973 WATER HOSE
67A0198 PIPE
67A0199 PIPE
20C3012 AIR COOLER
20C3011 WATER RADIATOR
10C4531 STEERING CYLINDER
82A3686 SOUND INSULATION PLATE
82A3687 SOUND INSULATION PLATE
70C1064 HARNESS
09D9618 TUBE AS
09D9620 TUBE AS
09D9619 TUBE AS
11D0290X9 PIN
09D9796 TUBE AS
05C8319 HOSE AS
20C3079 WATER RADIATOR
67C1112 HOSE AS
48C5610X0 ENGINE HOOD
47C4088 STEERING COLUMN
11C2904 SECONDARY STEERING PUMP
45C0969 BRAKE
03A1475 CONNECTOR
50A1219 PISTON
34C8090 LOCKNUT
10C4779 SIDE DUMP CYLINDER
67C2292 HOSE AS
37A4214 SOCKET
07C9437 HOSE AS
07C9208 HOSE AS
58A4836 PLATE
84A4931 RUBBER PLATE
84A4933 RUBBER PLATE
84A4975 CLAMP
05C9196 HOSE AS
05C9318 HOSE AS
05C9214 HOSE AS
05C9222 HOSE AS
05C9223 HOSE AS
SP182407 BRACKET
SP182408 FOOT PEDALCONNECTOR
SP182409 FMV
SP182410 SENSOR SEAT
SP182411 CLAMP
SP182412 CLAMP
SP182416 GAS PIPE
SP182417 CONVERSION ADAPTER
SP182418 WATER PIPE
SP182419 WATER PIPE
SP182420 BALANCE TUBE
SP182421 PIPE JOINT
SP182422 SIGNAL GENERATOR
SP182424 OIL PAN ASSEMBLY
SP182425 MAGNETIC SCREW PLUG ASSEMBLY
SP182426 HEXAGON SCREW PLUG
SP182427 AIR COMPRESSOR WATER PIPE
SP182428 HEXAGON FLANGE BOLT
SP182430 EXHAUST MANIFOLD
SP182431 DOUBLE END STUD
SP182432 HEXAGON FLANGE BOLT
SP182433 TURBOCHARGER OIL PIPE
SP182434 TURBOCHARGER HEAT SHIELD
SP182435 INTAKE MANIFOLD ASSEMBLY
SP182436 HOSES CLAMP
SP182437 TURBOCHARGER WASHER
SP182438 FAN
SP182439 PRESSURE AND TEMPERATURE SENSOR
SP182441 CONVERSION ADAPTER
SP182442 BOLT
SP182443 PIPE JOINT
SP182445 EXHAUST VALVE
SP182447 WATER-OUTLET PIPE
SP182448 CYLINDER HEAD SUBASSEMBLY
SP182449 LOCK BLOCK
SP173161 SPRING KIT MF5
SP173163 SIGNWARNING
SP173164 SPOOL FR
SP173165 SOLENOID VALVE
SP173166 SEAL KIT
SP173167 SEAL KIT COVER
SP173168 SEQUENCE VALVE A264
SP173170 LS/PRI CHECK VALVE
SP173171 HOSE FLOAT POSITION
SP173172 SEAL KIT INTERSECTION
SP173173 CAP KIT A-SIDE
SP173174 CAP KIT B-SIDE
SP173175 FLOAT POSITION SPRING PACK
SP173177 PRESSURE RELIEF VALVE PAY 300/20
SP173178 SPRING PACKAGE
SP173179 SPRING PACKAGE
SP173180 CHECK VALVE N2
SP173181 COVER
SP173182 COUNTER PRESSURE VALVE 5 BAR
SP173183 SEQUENCE FUNCTION SPOOL KIT
SP173185 SEAL KIT
SP173186 HANDLES BALL
SP173187 HANDLEBAR
SP173188 HANDLEBAR
SP173189 DUST COVER
SP173190 SEAL KIT
SP173191 O-RING SEAL GB3452.1 42.5×2.65
SP173192 HALLITE RING SEAT
SP165616 ARREST LOCATION BULB
70C1285 CAB HARNESS
70C1286 HARNESS
70C2292 CAB HARNESS
49C6812 FUSE BOX AS
39Y0034X0 GRAPPLE
38Y0303X0 BUCKET AS
01C1618 TUBE AS
58A4805 PLATE
33D1425 LOWER HINGE PLATE
01C1626 TUBE AS
01C1625 TUBE AS
01C1619 TUBE AS
12C7320 CHECK VALVE
92A5984 PLATE
05C9018 HOSE
SP182162 SEAL KIT
SP182450 EXHAUST VALVE SEAT
SP182451 INTAKE VALVE SEAT
SP182452 VALVE STEM SEAL
SP182453 EXHAUST VALVE SPRING BOTTOM RETAINER
SP182454 PRESSURE DIFFERENCE SENSOR
SP182455 PAD
SP182456 PAD
SP182458 CONVERSION ADAPTER
SP182460 AIR FILTER
SP182461 WATER PIPE CONNECTOR
SP182462 CLAMP
SP182463 MIXER CORE
SP182464 MIXER BODY
SP182465 ELECTRONIC THROTTLE
SP182466 GASKET
SP182467 MIXER INTAKE PIPE
SP182475 FRONT EXHAUST MANIFOLD
SP182478 OIL PAN SET
53A3248 DUST COVER
53A3249 DUST COVER
SP169765 PISTON AND SHOE ASSEMBLY
SP169766 CAM
SP169767 O-RING
SP169768 O-RING
SP169769 SOCKET HEAD CAP SCREW
SP169770 RETAINING RING
SP169771 SEAL RETAINER
SP169772 PORT PLATE PIN
SP169773 CAM BEARING
SP169775 BIAS PISTON
SP169776 CONTROL GUIDE
SP169777 CONTROL PISTON
SP169778 BARREL HOLD DOWN WASHER
SP169779 BARREL HOLD DOWN SPRING
SP169781 RETAINER PLATE
SP169782 PORT PLATE
SP169783 BARREL
SP169784 SHAFT
SP169786 COMPENSATOR ASSY
SP169787 O-RING
SP169788 O-RING
60C1051X0 FUEL TANK AS
85A6282X9 REAR FENDER-LH
85A6284X9 REAR FENDER-RH
SP174986 OIL PUMP PAD
SP174988 TAKE POWER SHAFT
SP174989 PUMP DRIVE SHAFT
SP174990 TAKE POWER GEAR
SP174992 PISTON
SP174993 WEAR PAD
SP174994 STOP PIECE
SP174996 WASHER
SP174997 REVERSE PLANETARY SHAFT
SP174998 OUTPUT FLANGE
SP174999 OUTPUT GEAR
SP175000 COLLAR
SP175002 SEAL SEAT
SP175003 BUSHINGS
SP175004 OUTPUT SHAFT
SP175005 ADJUSTING WASHER
SP175006 ADJUSTING WASHER
07A4337 MOUNTING PLATE
86A3644 PLATFORM
16B0227 TYRE
70C1323 HARNESS
70C1358 HARNESS
70C1293 HARNESS
41D1737 STEP
07C8069 HOSE AS
07C8068 HOSE AS
40C7881 SCREW
70C2204 CAB HARNESS
07C9391 HOSE AS
70C1934 CAB HARNESS
31C1444 ELBOW
11C2574 HAND PUMP
09D9352 TUBE AS
07C8855 HOSE AS
09D9422 WATER HOSE
07C8856 HOSE AS
07C8858 HOSE AS
07C8857 HOSE AS
07C8872 HOSE AS
07C8873 HOSE AS
07C8874 HOSE AS
09D9368 TUBE AS
09D9367 TUBE AS
09D9366 TUBE AS
09D9365 TUBE AS
70A1183T0 HUB
72A2650T0 PLANETARY CARRIER
67C0544 HOSE AS
67C0545 HOSE AS
67C0542 HOSE AS
32A3980 WATER HOSE
70C1290 HARNESS
70C1236 HARNESS
70C1237 CAB HARNESS
SP167493 O-RING SEAL
40D1636X0 REAR FENDER-LH
40D1635X0 REAR FENDER-LH
13D2175X1 CYLINDER BODY
SP172037 BRACKET
SP172038 FUEL FILTER BRACKET
SP172039 BOLT
SP172040 CLIP
SP172041 HEXAGON NUT
SP172043 HARNESS BRACKET
SP172044 AIR CONNECTING RUBBER PIPE
SP172045 FLYWHEEL HOUSING COUPLING RING
SP172048 BACK-UP BLOCK
SP172049 SILENCER
SP172050 FUEL-INLET PIPE ASSEMBLY
SP172053 WATER-OUTLET PIPE SET
SP172054 AIR COMPRESSOR AIR-INLET PIPE
SP172055 BACK-UP BLOCK
SP172056 AIR FILTER BRACKET
SP172058 FUEL FILTER BRACKET
SP172059 FUEL-INLET PIPE ASSEMBLY
SP161891 DUST COVER
SP161894 JAMMING SPRING
SP161896 AXES FURCA
SP161897 SLIDE FURCA
SP161898 LUG FURCA
SP161901 SEAL KIT
SP161902 ARM280×65
60C0745 DIESEL ENGINE
SP161904 GUIDE BUSHING60×60
SP161906 RIGHT INSTALLING PLATE200×230
SP161907 BODY WEIGHT ADJUSTMENT HAND GRIP 120×30
SP161908 SKATE330×66
SP161909 HAND GRIP60×60
SP161911 COIL SPRING70×70
SP138796 THREADED ELBOW
38Y0491X0 BUCKET
11C2728 GEAR PUMP
SP178159 NUT-IDLER SHAFT
SP178188 NUT-BEARING ADJUSTING
SP178145 BEARING CAP GASKET
SP179223 LIQUID FILTRATION MODULE
07C8871 HOSE AS
45D2658 PROTECTION SHIELD
81A0496 LINER
SP171217 DIFFERENTIAL PINION
SP171194 PLATE
SP171181 COMPRESSION SPRING
SP172075 HEXAGON FLANGE BOLT
SP172078 STARTER MOTOR
SP172084 CLAMP
SP172090 FAN BELT
SP172094 PUSH ROD BUSH
SP172099 PIPE JOINT
SP172140 CLIP
SP172143 PIPE CLAMP ASSEMBLY
SP172144 WATER CUP ASSEMBLY
SP172145 PULLING RIVET
SP172101 AIR COMPRESSOR OUTLET PIPE
SP172102 ECU SUPPORTING PLATE Ⅱ
SP172103 ECU SUPPORTING PLATE Ⅰ
SP172104 WIRING HARNESS FASTENER Ⅳ
SP172105 TRANSITION JOINT
SP172063 HEXAGON FLANGE BOLT
SP172067 HEXAGON HEAD BOLT
SP172106 GASKET
SP172107 HOOP 30
SP172108 PIN 6×12
SP172109 CYLINDRICAL PIN 5×16
SP172110 BOLT M8X35
SP172111 PARTITION
SP172112 PARTITION
SP172114 TURBOCHARGER
SP172115 BOLT
SP172116 PRE-HEATING PART
SP172117 ADDITIONAL PULLEY
SP172119 INJECTION PUMP GEAR COVER PLATE GASKET
SP172120 THERMOSTAT SEAT
SP172122 INTAKE MANIFOLD GASKET
SP172123 CAMSHAFT SIGNAL PANEL
SP172124 BACK CYLINDER HEAD COVER
SP172125 REAR HANGER
SP172126 FRONT HANGER
SP172127 GEAR CHAMBER COVER PLATE GASKET
SP172128 PREFILTER HOLDER
SP172130 WATER RETURN PLASTIC PIPE
SP172131 COVER PLATE SUBASSEMBLY
SP172132 THREADED SLEEVE
Read the full article
0 notes
Text
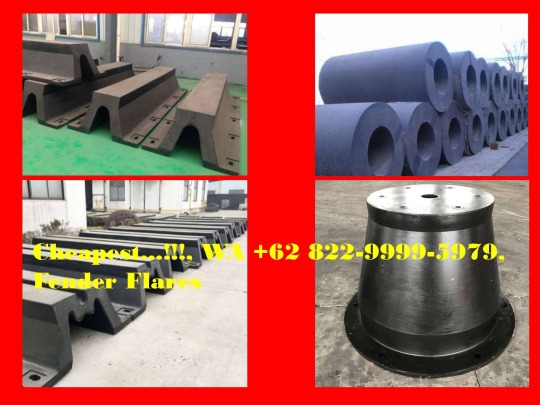
Chat +62 822-9999-5979, Supplier 3 Rubber Fender Extension Australia Niri Rubber
Chat WA +62 822-9999-5979, Rubber Fender Supplier In Philippines, Rubber Fender Supplier In UAE, Rubber Fender Supplier In Singapore, Rubber Fender Supplier In Malaysia, Rubber Fender Supplier In Cebu
Indonesian Marine Supplier
Ready for Cylindrical Fender, V Fender (SVF), A-Fender (SAF), M-Fender (SMF), Super Cone Fender (SSCF), Super Cell Fender (SCF), Lambda Fender (LMD), D-Fender
Komplek Jaladha Pura ( AURI )
Jln. Cendrawasih III No. 34
Kel. Margahayu
Bekasi Timur
Bekasi 17113
Klik here => https://wa.me/+6282299995979
Klik here => https://wa.me/+6282299995979
Klik here => https://wa.me/+6282299995979
#rubber fender flares#rubber fender washers#rubber fender trim#rubber fender extension#rubber fender flares for trucks#rubber fender flare trim#rubber fender welting#rubber fender liner#rubber fender adalah#rubber fender australia#rubber fender energy absorption#rubber fender flare arch#d fender rubber australia#rubber feet for fender amp#arch rubber fender#fender apron rubber#the rubber fender#price of a rubber fender#how to make a rubber fender#rubber fender bumper
1 note
·
View note
Text
Critter Nation Cage Mod How-To
I’ve seen too many good web pages disappear so I’m reposting this cage mod how-to description from AcroRATics here. You can follow this link to see the main picture post.
by AcroRATics Mar 26, 2015

The most difficult part of the project by far is getting the PVC section to fit into these flanges.
These toilet flanges are tapered on the inside and are designed to wedge at the end of PVC pipe but never let it slip all the way through. If you can find a more suitable flange that would be great but we have not found one. These need to be sanded extensively on the inside or the pipe will not fit. This is serious work, and my friend recommends either an oscillating sander or a lathe for this task. But don't sand too much or the pipe will not fit tightly enough. The flanges are available in both white and black plastic, and we found that the white flanges were made of a material which was easier to sand, so I will recommend you go with those if you can find them. It will also take a good bit of muscle to force the flange down the pipe, and a rubber mallet will be useful.
You'll need a small piece of regular straight 4" schedule 40 PVC pipe. I got a two foot section from the hardware store, which was sufficient. The piece shown is exactly 8 inches long. It is difficult to make a clean, straight cut with a hacksaw, so a band saw or circular saw is recommended.
Once you're convinced that you can make the flanges fit, place the section of pipe next to the cage at the height you would like the mod to go, and mark the bars which will need to be cut. We cut exactly nine horizontal bars on each cage. A square shaped hole will be created. My friend used a Dremel tool with a cut-off wheel attachment rated for metal to make the cuts.
The two flanges are tightened together with 5/16" hex bolts (1.5" long) and nuts and washers. When the attachment is complete, there should be small sections of pipe sticking out evenly on each side.

The tube construction is comparatively simple. This is where I purchased the clear tubing.
http://www.usplastic.com/catalog/item.aspx?itemid=32528&catid=440
The 4.5" OD size fits perfectly into the hubs of 4-inch PVC fittings, but it was the most expensive component of the project. The minimum order is 6 feet and that cost me $81, including shipping. Wrap the cut site of the tubing with painter's or masking tape to help prevent shattering. Cut the tubing to length with a band saw or circular saw, preferably one with a higher speed and a blade with teeth that are closer together. Glue PVC couplings to each end of the finished tubing with PVC cement.

The entrances were created the same way as with the cages, but instead of cutting cage bars, you will need to cut the plastic. The hole for the PVC pipe section was cut using a hole cutter Dremel attachment. The PVC section used was only 6 inches long because none of it sticks out past the flange on the inside of the tote. The pilot holes for the bolts were cut with a power drill and a 5/16" spade bit. The tote has a slight taper to its sides, and this was offset by adding a couple washers on the outside of the box on the bottom two bolts (as pictured) and mirrored on the inside of the tote for the top two bolts.

Here, Brodie demonstrates the the load bearing 5/16" all-thread going through the tote. The all-thread is held in place with 5/16" fender washers and nuts which are secured permanently to each side of the tote with gorilla glue to spread the load.

The digging box is suspended by chain and attached to ceiling studs with eye hooks and quick links. We made sure all suspension components could bear at least 50 pounds for good measure (a system with 4 chains rated for 50 pounds each should be able to hold up to 150 pounds). The all-thread can be slipped through one of the chain links to bring the box to the appropriate height.

To provide better ventilation, the lid to the tote was cut open with a Dremel tool using a cut-off wheel rated for plastics. Half-inch hardware cloth was cut to size and secured to the lid with nuts, bolts, and washers on each side. A spade bit was used to make the pilot holes for the bolts.
Since I posted the album of my rat cage setup here http://imgur.com/a/Veliu I've had a number of people ask how they can recreate it. Although this is not a complete step-by-step guide, this album hopefully provides a few additional details on its construction.
Disclaimer: We have only created this setup once, and I cannot guarantee your success, your mileage may vary, etc. Some steps are difficult and you will need power tools and probably access to a work shop. Questions can be PM'ed to Reddit user AcroRATics.
29 notes
·
View notes
Text
Get Great Car Fix Suggestions On this page Just before The Next Vehicle Concern!
Failing to make the proper choices about automobile fixes can make you in a realm of damage. The next occasion you experience judgements with regards to your vehicle, you should be certain you know what you're doing. Please read on to stay well-informed regarding your car restoration choices once they take place.
Read your owner's handbook thoroughly in order to save cash on auto repair. In this particular handbook, you can find a lot of suggestions that could get your car back into gear and help save you a visit to the mechanic. Mending https://www.lndauto.com/ on your own may help you within both a practical and economic sensation.
You don't usually must take your automobile for the retail outlet when there is a challenge. Quite a few automotive problems can be done yourself. You could use the web and try to analyze the situation and inform yourself for the alternatives. If the maintenance isn't too hard, you could possibly cut costs by performing it on your own.
When you are worried about a car system store puffing up the level of work which needs to be completed, go and obtain totally free diagnostics from in other places. Since there is no promise you will definately get job carried out by them, they may have no reason to assert there is a lot more required than needed.
Talk with your tech to ascertain if they have worked tirelessly on your car just before. In case they have prior to, then they are probably going so as to also fix your car or truck easily ample.
Will not make the oversight of having someone correct your automobile simply because the total amount it will cost cost less than all the others. Often the low prices compensate for the shortage in high quality work. Performing analysis on the repair center under consideration will assist you to assess if that is the situation in this article.
Don't be scared to question as many concerns as you need. It is your car or truck, and you must know why it is important to correct a certain object straight away. When you are experiencing intimated, or maybe you are not receiving straight replies, obtain a secondly viewpoint before you sign away on the function.
Keep a basic fix package within your auto trunk always. An easy package made up of wrenches, jumper cabling, screws, as well as a jack might be a life saver should your vehicle reduces on the highway. This will enable you to make small maintenance immediately, saving you the fee for a pricey tow truck.
A damage or scuff within a plastic-type material fender is very an easy task to resolve. Begin by cutting the portions that adhere outside the damage until the sides are clean. You may then work with a filler to make the dent disappear altogether. Beach sand within the region and paint to conceal the restoration.
Trust your gut experiencing when confronted with a auto technician. In the event the person you are speaking to is not going to actually solution to your questions or is apparently vague on objective, you need to always keep searching. A great technician need to put you relaxed and give you a lot of information on the task which needs to be done.
If you have been getting minimal car troubles, you have to have them looked at. In many cases, dismissing modest troubles guide right to more severe ones.
Probably the most important component of your automobile is the braking system. With out them, you are not going to have the capacity to generate. If they are destroyed, this can be really harmful to suit your needs. Consequently, when you practical experience braking system troubles, immediately see a auto technician to get them replaced. To get this done on your own, you should use rubber footwear to get rid of the mounting bolts and loosen the brake padding. Then, set up new braking system. Nonetheless, if you are not comfortable achieving this, it is best to visit a mechanic. You do not desire to get odds in relation to brakes.
Be sure your car or truck is ready for wintertime. The cool can be extremely difficult on the vehicle's method therefore you need to properly preserve it. A lot of things you should do are look into the tires, look at the antifreeze, change older wipers, and check out windshield washer substance. Driving is hard adequate in the winter, so make issues less difficult if you make sure your car or truck can handle the harsher varying weather conditions.
Best mechanics advise that you search for a technician who displays a sincere attitude. They are saying that, in addition to excellent Better business bureau ratings and suitable licensing and recognition, a good technician is just "up-front". Aspects who steer clear of eye contact, don't give directly answers and overlook your worries ought to be averted.
If you don't have standard knowledge about the automobile, you can't identify if one thing is going improper. If you believe your knowledge is incredibly constrained, vehicle fix classes can be a beneficial endeavor. Being familiar with the performing of your own motor vehicle and how to conduct diverse fixes will help you help save a great deal down the road, whilst the school is surely an initial expense. That way, you will discover issues before they get too awful, and that will help with the lifespan of your respective automobile.
Severe and potentially hazardous concerns with a brand new automobile should be taken to the attention of your company There can be a remember issued for the motor vehicle or maybe the company will look at issuing a remember should you be not really the only person that complains. Your company may even deal with the repairs.
When evaluating a reputable car fix facility, only look at accredited fix retailers. Qualifications, for example the seal off for Auto Services Brilliance, are an indication that the shop has exhibited a fundamental level of proficiency in the area of car repair. While such accreditations are never ever a total promise of excellent assistance, chances are better if the place is licensed.
Should you get in an crash, you need to get the speak to and insurance plan information in the others concerned. This may cause obtaining your car set much easier. Supply this information to the repair shop if they must communicate with the insurance of the liable celebration.
Make sure that you keep all of your service data. When you ought to get anything in your automobile set, you ought to deliver a record of all of the function you may have had done in your car. This data may be helpful to the professional that is allotted to fix your car.
How do you sense reading this post about dealing with your vehicle maintenance? Imagine encouraging this new self-confidence and continuous to grow it with new knowledge. Will no longer should you really truly feel inferior in relation to producing decisions regarding your car improvements. Take the bull through the horns!
1 note
·
View note
Video
youtube
Special for flanges and valves High temperature resistant seal ptfe gasket Chinese factory
Langfang Jiuwang Sealing Material Co., Ltd.
https://mifengcailiaodaquan.cn/
Whatsapp/WeChat: +86-18830639308
---------------------
Special for flanges and valves High temperature resistant seal ptfe gasket Chinese factory
rubber mat for quad bike
where can i buy nylon rod
copper washer and dryer
gland packings
https://mifengcailiaodaquan.cn/9654.html
high density graphite
b&q outdoor rubber mats
lip seal with spring
rubber mat for dog bowls
golf 7 rubber mats
ptfe bearing pad
r/home gym rubber mat
what are lip seals used for
copper v band gaskets
nylon rod amazon
https://mifengcailiaodaquan.cn/9657.html
rubber mat 1/4 inch thick
flax storage
o-ring boss thread tap
honda hr-v rubber mats
cross-linked polymer examples
gland packing cutter
are drain rods flexible
who is gland packing
5mm copper washers
gland packing material for pump
o nylon e um polímero uma poliamida
gland packing material for pump,
copper gasket where to buy
nylon pad manufacturer in pune
6' wide rubber mat
https://mifengcailiaodaquan.cn/9730.html
can you plaster over asbestos board
teflon coated ironing board cover
o ring without lubricant
nylon rod 3
5 rubber casters
3/4 rubber mat canada
resin pad vs metal pad
teflon ptfe
1/2 nylon threaded rod
Spiral Wound Semi-Metallic Gasket
does aluminum washer insulate thermal energy
genuine vauxhall astra j rubber mats
t shaped rubber gasket material
rubber mat flooring,
graphite thermal interface pad
graphite ring for sale
https://mifengcailiaodaquan.cn/9751.html
graphite pdms
packing ring definition
graphite packing rope installation
go packing meaning
does fiberboard contain asbestos
will fiberglass resin stick to packing tape
asbestos board panel
9 teflon frying pan
dart board with rubber darts
rubber mat transition
graphite packing sheet
copper gluconate aluminum washer experiment
rubber board que significa
thick copper washer
nylon rod 25mm
is asbestos construction material
Ptfe Spiral Wound Gasket Ptfe Gasket Sheet Price - Buy Ptfe Round Shee,Ptfe Filler Gasket,Ptfe Gasket Product
rubber mat target
https://mifengcailiaodaquan.cn/9740.html
is graphite reactive
api ring joint gasket
rubber board field officer
ddr metal pad australia
should teflon be capitalized
tariff code for ring joint gasket
rubber mat to hide cords
ring joint gasket uses
ptfe paste
rubber board peon psc,
o-ring kit for hydraulic
asbestos gasket sheet specification
was asbestos used in particle board
graphite packing rings
copper brake line washer 7/16
the rubber board login
cast nylon rods
nylon rod 300mm
rubber mat homebase
metal pad ido price
rubber outside floor mat
molded rubber parts
https://mifengcailiaodaquan.cn/9782.html
packing ring die
o-ring tool installation
nylon rod knife block,
packing ptfe alchem 6375
o-ring handbook
billet aluminum fender washer
Metallic graphite composite gasket | Metal, Graphite, Custom
nylon pad isolator
how to cut rubber mats,
aptf paris 17
is an aluminum washer insulate thermal energy
rubber mat vs foam mat
aramid fiber gland packing
rubber mat about
metal parking pad
https://mifengcailiaodaquan.cn/9786.html
gland packing vs mechanical seal,
flexible graphite o rings
is asbestos bad for you
3/4 lip seal
o-ring 6mm x 2mm
which materials contain asbestos
packing ring set
is asbestos wood
gland packing set
rubber mat by the foot tractor supply
2 graphite road wilro park roodepoort
grafoil sheet gasket
pure graphite packing ring
wurth copper washers
aluminum washer fluid tank
nylon rod home depot
rubber board tura,
1/8 inch nylon rod
https://mifengcailiaodaquan.cn/9797.html
o-ring oval
teflon coated rubber gasket
aramid glass packing
metal pan kitchen
lip seal vs o ring,
graphite o rings
lip seal 13mm
red steel box
rubber toilet mat u shaped
gland packing graphite
rubber mat raised edge,
copper washers jewelry
1/2 bsp copper washers
o-ring tool
asbestos rubber sheet india
o-ring 2x1 nbr 90,
asbestos rope suppliers in chennai
rubber board return filing online,
rubber mat 4x8,
rubber mat mitre 10
o-ring lubricant
Graphite/PTFE Compression Packing with Silicone Core
gland packing tap
rubber mat is code
https://mifengcailiaodaquan.cn/9797.html
was asbestos ever considered safe
1 fiberglass rope
teflon cutting board material
6 fiberglass tape
o-ring not sealing
o-ring hardness,
ring packing stuffing box
3/8 id copper washers
neoprene gasket supplier
replacing o ring on outside tap
rubber mat odor,
rubber mat voor kabels
100% Virgin Ptfe Turned Board 1000*1200*15mm Ptfe Skived Sheet - Buy Natural Color Ptfe Teflon Sheet Ptfe Skived Sheet,Original Sheet Expansion Ptfe Sheet Natural Color Ptfe Sheet,Non-stick Virgin Ptfe Sheet Product
ptfe packing for valves
high carbon footprint
lip seal metric
why gland packing used in centrifugal pump
rubber mat costco
can you reuse copper crush washers
graphite ring manufacturers
o-ring
0 notes
Link
0 notes
Text
LIUGONG WHEEL LOADER SPARE PARTS 118
48C5667X0 TOP COVER
48C5186X0 TOP COVER
48C4672X0 TOP COVER
48C3751X0 TOP COVER
48C4573X0 TOP COVER
48C3250X0 TOP COVER
48C4405X0 TOP COVER
SP184407 BOLT
SP184424 AIR CONNECTING RUBBER PIPE
21D2479T2 BOOM
12C8153 SHIFT CONTROL VALVE
SP157948 TUBE INJECTOR FUEL SUPPLY
08D2147 TUBE AS
75A1748 STEEL WIRE PROTECTION RING
SP187111 HOSE PIPE
SP187112 HOSE PIPE
SP187113 HOSE PIPE
SP187119 SEAL KIT
18D8874 PROTECTION SHIELD
45D3000 WINDOW
35B0678 INSTRUMENT
70C2722 CAB HARNESS
48D1690 PLATE
24C3559X2 BOOM
24C3560X2 LINKAGE
33A6824 TUBE
04A4578 INPUT FLANGE
70C3156 HARNESS
98A7615 PLATE
98A7616 PLATE
33D1492 LOWER HINGE PLATE
00G0004 COVER
49C7977 FAN
30D3912 FRONT FRAME
30D3913 FRONT FRAME
30D3915 FRONT FRAME
30D3918 FRONT FRAME
30D3926 FRONT FRAME
30D3927 FRONT FRAME
30D3928 FRONT FRAME
30D3929 FRONT FRAME
30D3930 FRONT FRAME
67C3862 HOSE AS
67C3861 HOSE AS
67C3879 HOSE AS
67C3863 HOSE AS
70C3365 GRID HEATER HARNESS
33D1508 UPPER HINGE PLATE
08D2401 TUBE AS
24C3398 BOOM
24C3399 LEVER
27A4552 DOOR
98A5811 PLATE
98A5813 PLATE
18D6950 BRACKET
18D7095 BRACKET
18D6948 BRACKET
70C2441 HARNESS
98A5939 PLATE
98A5940 PLATE
98A5821 MOUNTING PLATE
18D7072 BRACKET
02C3215 TUBE AS
70C2553 HARNESS
18D8307 HINGE SEAT
18D8320 BRACKET
60C2115 DEF TANK
40C6468 NUT
48A7849 PLATE
18C0381 HOSE AS
18C0382 HOSE AS
58A6570 PLATE
49C8192 HOSE
SP186172 SEAL KIT
38Y0613X0 BUCKET AS
11D2074X0 PIN
38Y0648X0 BUCKET AS
67C3729 HOSE AS
49C7993 HOSE
18D9641 BRACKET
67C3269 HOSE AS
70C2724 A/C HARNESS
12C7676 CONTROL VALVE
11D2011X0 PIN
38Y0555X0 BUCKET AS
38Y0597X0 BUCKET
38Y0529X0 BUCKET
SP172085 FERRULE
SP186597 MEASURING UNIT OF OIL QUANTITY
SP186600 SET MAIN BEARING
SP186602 FUEL FILTER ELEMENT
SP186606 SEAL KIT
SP186498 SEAL KIT
SP186499 SEAL KIT
SP186500 OVERLOAD VALVE
69A0843 PLATE
18D9483 BRACKET
86A4291 HOUSING
18D9239 BRACKET
30D4262 REAR FRAME
98A7648 PLATE
80A1888 SUPPORT RING
SP192401 OUTPUT FLANGE
SP192402 PLATE
SP192403 PISTON SEALS
SP192404 WASHER
SP192405 PARKING BRAKE
18D8933 PLATE
33D1497 UPPER HINGE PLATE
01C1728 TUBE AS
01C1729 TUBE AS
49C8013 HOSE GP
30A8003 HOSE
91A9567 LOCK PLATE
18D8381 BRACKET
67C3252 HOSE AS
18A8970 CUTTING EDGE
33D1486 LOWER HINGE PLATE
00G0320 PLATE
47C4648 DOOR-RH
47C4647 DOOR-LH
30D4325 FRONT FRAME
49C8284 HOSE
35D2006 PLATE AS
49C8287 HOSE
SP186449 SEAL KIT
05C9851 HOSE AS
18D7755 COVER
60C2108 DEF TANK
98A8255 PLATE
59A1760 PLATE
45D3070 HOOD
45D3071 SHROUD
70C3378 HARNESS
67C3722 HOSE AS
24C3576 LEVER
59A1023 MOUNTING PLATE
70C3212 WORK LIGHT HARNESS
69A0716 PLATE
67C3807 HOSE AS
67C3814 HOSE AS
70C2643 CABLE
48C6373 SIDE HOOD
48C6374 SIDE HOOD
18D9513 BRACKET
18D9512 BRACKET
05C3269 DEF PIPE
SP187032 HANDLE
SP187033 DUST COVER
SP187036 SEAL KIT
SP187037 UNIVERSAL JOINT ASSEMBLY(WARTUNGSFREI)
SP187038 UNIVERSAL JOINT ASSEMBLY(WARTUNGSFREI EN
SP187039 OUTER HEXAGON BOLT GB/T5782-2000 M14×35
SP187040 THE PILLOW BALL BEARING 60×110×28
SP187041 SLIDE FORKS
70A1725 HUB
40D1780 FRONT FENDER-LH
18D8872 BRACKET
08D2105 TUBE AS
34B1956 WORK LIGHT SWITCH
40D1781 FRONT FENDER-RH
41D1935 STEP
49C7904 CONDENSER
20C3435 OIL COOLER
98A7767 PLATE
25C2043 HINGE
48C6237 COVER
67C3525 HOSE AS
67C3526 HOSE AS
30D3908 FRONT FRAME
SP188558 AIR VALVE
32A4778 WATER HOSE
18C0372 HOSE AS
14D0995 PISTON ROD
50A1256 PISTON
60C2067 AIR FILTER
05C9811 DEF PIPE
05C9812 DEF PIPE
30D4229 REAR FRAME
30D4228 REAR FRAME
SP194467 PRESSURE REDUCING VALVE
SP194469 HYDRAULIC MOTOR
SP194486 INNER HEXAGON
SP194488 INNER HEXAGON
SP194489 BRUSH CYTOLOGY
SP194494 OVERLOAD VALVE
SP194495 SEAL KIT
SP194496 SEAL KIT
SP194497 SAFETY VALVE
SP194498 SAFETY VALVE
64A2801 LINKAGE
64A2802 LINKAGE
69A0844 PLATE
48C6375 ENGINE HOOD
48C6377 COVER AS
48C6376 COVER
16B0269 TYRE
43D3063 SHIELD
43D3062 SHIELD
34C8553 DOOR LOCK
32B0841 REAR COMBINATION LIGHT
53A3338 BRACKET
60C2257 FAN
SP192093 LOGIC VALVE
SP192094 LOGIC VALVE
SP192095 ORIFICE
SP192096 ORIFICE
SP192097 SEAL KIT
67C3107 HOSE AS
07C5132 HOSE AS
07C5131 HOSE AS
32D2959 TELESCOPIC BOOM
67C3236 HOSE AS
32D2960 BOOM
21C1338X9 HYDRAULIC OIL TANK
60C1166X9 FUEL TANK AS
SP187311 CONNECTION WATER INLET
18D8641 LOWER HINGE PLATE
98A7841 PLATE
18C0239 HOSE AS
10C5106X0 BOOM CYLINDER
SP192266 SEPARATOR ELEMENT
05C1509 HOSE AS
05C1566 HOSE AS
67C3703 HOSE AS
34B1959 HEATING SYSTEM SW
98A7758 COVER
98A7757 COVER
70C3148 A/C HARNESS
46D3606 COVER
SP101474 OIL COOLER
18D9446 MOUNTING SUPPORT
07A8060 PLATE
34C8777 LOCK
44D0956 DOOR
30D4304 FRONT FRAME
18D9490 BRACKET
18D9238 BRACKET
42D3322 PLATE
18D9489 BRACKET
18D8008 OUTRIGGER
18D7750 BRACKET
SP188720 SEAL KIT BUCKET CYLINDER
SP188721 PRESSURE REDUCING VALVE
70C2813 CAB HARNESS
62A1037 HALF SHAFT
70C2805 HARNESS
30B1437 FUEL LEVEL SENSOR
18D7898 BRACKET
32A4550 INTAKE PIPE
18D7896 COMPRESSOR BRACKET
07C9961 HOSE AS
05C9885 HOSE AS
18D7922 MOUNTING PLATE
05C9879 HOSE AS
67C3282 HOSE AS
17D1400 MOUNTING PLATE
45C1033 BRAKE VALVE AS
45D3003 DUCT PLATE
22D2132 BUCKET
32A4503 INTAKE PIPE
48C5959 BRACKET
07C1654 HOSE AS
25D0799 LOWER FORK
12C7880 CONTROL VALVE
38Y0590X0 BUCKET AS
52C0396T2 OVERRUN CLUTCH
43D3125 BRACKET
70C3171 HARNESS
70C3217 HARNESS
70C3225 HARNESS
70C3224 HARNESS
70C3216 HARNESS
70C3157 HARNESS
37B3117 CONTROLLER
24C3575 LINKAGE
40D1783 FRONT FENDER-RH
40D1782 FRONT FENDER-LH
24C3574 BOOM AS
59A1520 PLATE
33D1501 LOWER HINGE PLATE
67C3645 HOSE AS
67C3721 HOSE AS
49C8011 EVAPORATOR AS
70C3218 A/C HARNESS
05C1854 HOSE AS
53A3387 BEARING COVER
55A9715 BUSHING
55A9776 BUSHING
SP186996 PLUG
SP186997 SEAL KIT
SP186999 CAP
SP187000 PISTON
SP187005 BULB
12C7935 PILOT OIL SUPPLY VALVE
30D3924X0 FRONT FRAME
30D3940X0 FRONT FRAME
67C3732 HOSE AS
05C1823 HOSE AS
18D8934 PLATE
05C9878 HOSE AS
67C3283 HOSE AS
18D9481 BRACKET
92A7474 MOUNTING PLATE
67C3877 HOSE AS
45D3069 SHROUD
51C0867 FRONT DRIVE SHAFT&BRG AS
51C0866 MIDDLE DRIVE SHAFT
18C0378 HOSE AS
18D7947 BRACKET
08D2535 BELLOWS
18A8971 PLATE
18A8972 PLATE
18A8973 PLATE
30D4322 REAR FRAME
18D9646 BRACKET
28A4996 EXHAUST PIPE
48D1807 GUARD
87A1598 GLASS
06B1077 LOCK WASHER
48D1754 WINDOW
49C7684 HEATER
18D8961X0 SUBSIDIARY FRAME
09C2728 CLAMP
18C0240 HOSE AS
08D2125 TUBE AS
07A7421 PLATE
07A7420 PLATE
11C3077 GEAR PUMP
11D1166X0 PIN
SP186769 COVER
11C2917 PUMP
07C1924 HOSE AS
30D4082 REAR FRAME
38Y0273X0 BUCKET
12C8158 CHECK VALVE
27C1402X0 COUNTERWEIGHT
SP192269 HANDLE KIT
69A0559 PLATE
38Y0646X0 BUCKET AS
24C2185X0 LINKAGE
18D9106 MOUNTING SUPPORT
69A0785 PLATE
67C3749 HOSE AS
67C3725 HOSE AS
30D3870 FRONT FRAME
11C3088 GEAR PUMP
18C0269 HOSE AS
49C6238 CONTROL BOX
34C7999 HANDRAIL GP-LH
Read the full article
0 notes
Text
Chat +62 822-9999-5979, Manufacturer Arch Rubber Fender Canada Niri Rubber
Chat WA +62 822-9999-5979, Rubber Fender Manufacturer In China, Marine Rubber Fender Supplier In Singapore, Rubber Fender Suppliers In India, Rubber Fender Manufacturer In India, D Rubber Fender Manufacturer In Mumbai
Indonesian Marine Supplier
Ready for Cylindrical Fender, V Fender (SVF), A-Fender (SAF), M-Fender (SMF), Super Cone Fender (SSCF), Super Cell Fender (SCF), Lambda Fender (LMD), D-Fender
Komplek Jaladha Pura ( AURI )
Jln. Cendrawasih III No. 34
Kel. Margahayu
Bekasi Timur
Bekasi 17113
Klik here => https://wa.me/+6282299995979
Klik here => https://wa.me/+6282299995979
Klik here => https://wa.me/+6282299995979

#rubber fender barrier#rubber fender boat#rubber fender blocks#rubber fender body#rubber fender bib#rubber backed fender washers#rubber b fender#b section rubber fender#rubber fender covers#rubber fender catalogue#rubber fender compression test#rubber fender customs tariff code#rubber fender cones#rubber cylindrical fender#rubber coated fender washers#rubber cylinder fender#rubber fender d type#rubber fender design#rubber fender d section#rubber dock fender
0 notes
Link
D Fender Rubber - Real top is one of the leading manufacture that manufacture the best quality of D Fender Rubber, D type rubber fender supplier in china.
0 notes
Text
C2 Corvette Gets a Complete Cooling System Overhaul
The cooling system in a C2 Corvette has plenty of faults, even in the original configuration, and when you start modifying the engine the problems only get worse. The constant struggle to stay cool has created anxiety in thousands of Corvette owners, as one eye is always glued on the temperature gauge. The subject in this cooling system overhaul is a small-block car backed by a manual transmission and 4.11 gears. The healthy small-block and low rearend gears made for big fun, but anything over 55 mph for more than a few minutes resulted in overheating issues. A five-speed transmission helped matters tremendously by bringing the cruising rpm down, but it didn’t completely reduce the temperature anxiety. A generic aluminum radiator and electric fan also seemed to help, but it didn’t fit the car well enough to be considered a permanent solution.
The car’s previous cooling system eliminated the original expansion tank system. While the universal aluminum radiator was simple and effective, it was a little too tall for the car, making the hood clearance too close for comfort. The radiator hose placement also wasn’t ideal and it just didn’t have the right look. In an effort to cool this low-geared hot rod Corvette, we decided to start from scratch with a new radiator from DeWitts, a new fiberglass fan shroud from J&D Corvette and a box full of cooling system goodies from Zip Corvette.
Going from cobbled together universal parts to a selection of direct-fit parts made for an easy install. It was more work to undo the universal components than it was to install the new pieces. Everything fit as advertised and the assembly process was simply a matter of bolting factory-type pieces together, a task that we handled over the course of a few evenings in the shop. The improved stock-look aluminum radiator and flex fan is certainly capable of cooling this modified small-block, as we have been pleased to see the temperature gauge staying at 180 degrees. In addition to the improved cooling capabilities, the new components cleaned up the engine bay nicely. Take a look at our cooling system overhaul and use the tips and tricks to keep your C2 cool, whether it’s on the highway, sitting in traffic or blasting down your favorite backroad. Vette
1. When our 1964 Corvette coupe rolled into the garage it had a functional cooling system, but the generic aluminum radiator didn’t offer proper fitment. It was physically too tall for the car and the hose outlets were not quite right.
2. The original fan shroud was in pretty bad shape before the universal-fit radiator was installed, but you can see where modifications were necessary to accommodate the radiator hose outlets.
3. After draining the fluids and undoing the less-than-desirable cooling system repairs, we were ready to remove the generic radiator, electric fan and hacked-up shroud.
4. Since our new DeWitts radiator is a direct-fit piece, we whipped out the Zip Corvette catalog for some standard replacement parts. First up was a pair of new radiator cushions (PN WS-333) that fit into the original lower radiator mounts.
5. The radiator is DeWitts’ HP Series (PN 1249063M), which features all-aluminum construction and two rows of 1.25-inch tubes and offers 25 percent more cooling capacity than stock replacement radiators. We ordered ours in the “Black Ice” coating for an original look. The original-style dowels fit nicely into the new rubber cushions.
6. We grabbed a new radiator and shroud center bracket (PN M-259) from Zip, along with a new upper cushion (PN WS-436). We slid the cushion over the original-style tab on the radiator and then loosely installed the two bolts to hold the radiator upright.
7. It would seem natural to install the fan shroud next, but we found that installing the lower radiator hose is much easier without the shroud in the way. The radiator hoses came from RockAuto.com, but you can get them at many Corvette parts suppliers.
8. Now we can lower the J&D Corvette fiberglass fan shroud into place. Before installation, we sanded it and applied two coats of semi-gloss black paint to match the rest of the engine bay.
9. After getting it dropped into place, we installed bolts and nuts in the factory positions. Make note that the original steel shroud had built-in nuts, while our J&D Corvette replacement does not, meaning that it requires pass-through bolts and attaches with nuts and washers.
10. We tightened the side mounting bolts and then tightened the radiator and shroud center bracket bolts. That allowed us to accurately drill the hole for the only remaining fastener. After it is drilled, we install the bolt, nut and washers.
11. Final adjustments can be made to align the center bracket and then the bolts can be tightened.
12. Our six-blade flex fan can be re-installed using the existing hardware. We removed the electric fan, as the new cooling system is more than adequate for this modified Corvette.
13. Any time the cooling system is taken apart it’s a good time to replace the thermostat. It’s cheap and easy to install since you’ve already drained the coolant. We went with a 180-degree thermostat.
14. Our upper radiator hose was a little long so we trimmed it with tin snips until the fitment was perfect.
15. With the upper radiator hose installed—and the dust and our fingerprints wiped off—the new DeWitts radiator and J&D Corvette fan shroud look like factory fresh pieces.
16. Now it’s time to move onto the expansion tank. Since our previous radiator did not use an expansion tank we had removed the mounting straps and bracket. We got a new bracket (PN M-235A) from Zip Corvette and attached it to the inner fender using new bolts.
17. Next are the expansion tank straps (PN M-235). The straps are not pre-bent so we did some trial and error fitment to get an idea of the correct shape. After getting them dialed in, we attached the lower portion of the straps to the bracket.
18. The new DeWitts expansion tank (PN 421) is an exact reproduction of the original Harrison tank. We still had to do some final tweaking on the straps, and then installed the new strap bolts from Zip.
19. Another cheap and easy step for a cooling system overhaul is installing new heater hoses. You can buy the hose in bulk at the local parts store or you can buy the correct stamped hoses from any Corvette parts supplier. We opted for the parts store hoses and installed them with new clamps.
20. Another piece from the Zip Corvette catalog is this heater hose T-fitting (PN M-207). It connects the upper heater core hose to the expansion tank and allows free coolant flow from the water pump.
21. One last trip to the parts store yielded us some new heater hose fittings for the water pump and the intake manifold. We coated the threads with pipe sealant before threading them into place.
22. Although it is rather bulky, this 90-degree fitting is a much better piece than some of the chrome-plated aftermarket versions. We removed the valve cover to give us a little more room to tighten the fitting.
23. We spun the fitting until it was facing the front of the car and then trimmed the heater hose for a nice fit. Next, we trimmed and installed the lower heater hose.
24. Finally, we installed 3/8-inch hose from the expansion tank to the radiator, as well as a 3/8-inch overflow hose.
25. With a combination of parts from DeWitts, J&D Corvette and Zip Corvette, we completely overhauled this Corvette’s cooling system and gave it a super clean look. The final step was pouring a fresh mixture of coolant and water into the expansion tank and taking it for a spin … and 180 degrees never looked so good!
Sources
DeWitts
(517) 548-0600
www.dewitts.com
J&D Corvette
(800) 838-8353
www.jdcorvette.com
Zip Corvette
(800) 962-9632
www.zip-corvette.com
The post C2 Corvette Gets a Complete Cooling System Overhaul appeared first on Hot Rod Network.
from Hot Rod Network https://www.hotrod.com/articles/c2-corvette-gets-complete-cooling-system-overhaul/
via IFTTT
2 notes
·
View notes
Link
Best Bumper Installation Service and Cost in Austin TX |Mobile Auto Truck Repair Austin
more information is at : https://mobileautotruckrepairaustintx.com/bumper-installation-near-me/
Bumper Installation Service near Austin TX: Are you looking for the Best Bumper Installation Service near Austin TX ? Mobile Auto Truck Repair Austin, A vehicle’s bumper is a protective part of the automobile that is mounted to both the front and rear ends of the car. Cost? Free estimates! Send us a message or call us today. Best Bumper Installation Service around Austin TX. We serve Austin TX and other areas. Get a Free Quote Now!
BEST BUMPER INSTALLATION SERVICE IN AUSTIN TX
AUSTIN BUMPER INSTALLATION
How to install your bumper system
Bumper Installation Service near Austin TX: If you've recently become the new owner of a rear bumper system, you may not know how all of the different pieces fit together to mount to your chassis. Whether it's KG, they all typically have similar pieces. OTK is essentially the same process, but will differ slightly with their parts.
● You'll begin by installing the two mounting posts to your chassis . The key to securing the two mounting posts to your chassis starts with installation outside of the chassis. In your hands, drop your smaller washer into what will become the outside of the mounting post, drop the larger washer into what will become the inside. Now drop your 10mm bolt through the two washers and mounting post beforehand tightening the rubber (with threading on the inside) to your bolt. You should have one sold piece now that you''ll mount to your chassis.
● To finish installing your mounting posts to your chassis, grab a 17mm wrench or socket on an impact and tighten the piece to your chassis tube .Nice and tight will do, you don't have to set any world records for strength. You'll do this for both sides, left and right, before we head into the next segment.
● The next piece to install is what you'll eventually mount your rear bumper to, it's the rear bumper support . Supplied typically with a short 8mm bolt, washer, and nut, you'll fasten your support to your post solidly. After successfully mounting both your right and left supports solidly to your posts, we'll move on to the next segment, mounting the bumper.
● You'll notice on the bumper a pair of elongated mounting holes. Line those holes up with your support holes and press the bumper to your supports. Now it's time to grab your hardware, which should typically be an 8mm bolt with washer and nut, and tighten your bumper to your supports . Again, you don't need to show off your strength, but make sure it's nice and solid; you don't want the bumper to move side to side. Your entire system should be nice and tight at this point. However, it is common to see the support loose on the post. You can loosen the support by taking a couple of turns out, but still keeping the bolt within the nylon of the nut so that it doesn't vibrate out while on track. This will free up the rear end and allow it to flex more in certain conditions.
What is a Bumper?
Bumper Installation Service near Austin TX: A vehicle’s bumper is a protective part of the automobile that is mounted to both the front and rear ends of the car. Typically crafted from aluminum, plastic, rubber, or steel, the bumper acts as a shock absorber during low-speed collisions. It also aids in reducing more significant damages made to your vehicle. While some types of bumpers are made from foam that acts as a kind of cushion, others have energy absorbers or brackets that serve the same purpose.
Do Bumper Guards Really Work?
● Collisions happen even if you’re a careful driver. If your car is rear-ended or damaged in a parking lot, the other person can drive away without much risk. To prevent damages that may not be covered by car insurance, many people use bumper guards to protect their vehicles.
● Bumper guards are vertical bars or foam pads that can be placed on either the back or front of your car. They’re usually easy to install and remove, but are they worth it? Let’s look at the pros and cons of utilizing a bumper guard.
They protect your vehicle
Bumper Installation Service near Austin TX: If you have to park in a crowded street or in a cramped garage, there’s always the possibility that someone may hit the back of your car. You could also end up damaging your vehicle yourself if you don’t have enough room to back out of a parking space. A foam guard will give you a little cushion to absorb damage. It can also protect the front end of your vehicle by minor damage caused by fender benders.
3 Benefits of Installing a Heavy-Duty Bumper on Your Vehicle
If you need to select a bumper for your commercial truck or pickup, you may want to consider the benefits of a heavy-duty model. Heavy-duty bumpers outperform lightweight models in several categories including collision protection, longevity, and durability. To learn more about the benefits of a weightier model, look over this convenient guide.
Why Choose a Bumper?
1. Collision Protection
You will find large, robust bumpers on vehicles like ambulances, fire trucks, and commercial vehicles for a reason. A bumper’s most important duty lies in collision protection. Thus, bigger, more resilient ones will always offer greater performance in this arena. Heavy-duty bumpers absorb impact better than thinner models, thereby keeping the truck and individuals inside safe from harm.
2. Longevity
heavy-duty bumper Heavy-duty bumpers are often constructed from high-quality steel, which is built to endure for decades. While less robust models may suffer wear and tear over the years and eventually need replacement, a heavy-duty bumper will continue to serve your needs. Off-roaders who demand rugged features that will hold up in the face of mud, rocks, and debris will also greatly benefit from a sturdier bumper. If you want a lasting investment, opt for the durability heavy-duty models offer.
3. Economic Savings
While heavy-duty bumpers may cost more initially, they offer significant economic savings over lightweight models in the long run. Since heavy-duty bumpers very rarely need replacement, you won’t have to worry about additional expenditures as the years pass. Furthermore, these bumpers protect against serious and costly vehicular damage.
TIPS
Bumper Installation Service near Austin TX: This is one of the less complex mechanical jobs that you can perform on your car, and it can be attempted by even those with the most basic of technical knowledge. All you need to complete this task is a spanner set, a socket and ratchet set, some wire clippers, a Phillips and a flat-head screwdriver and two wheel ramps to help you elevate your vehicle and you’re ready to go.
● Locate and Unscrew the Bumper Cover
There are two parts to the front bumper. The first is the painted cover that matches your car’s color scheme. This is sometimes referred to as the bumper, but is actually concealing the real bumper underneath. To replace the bumper you will need to remove this first. Open the car bonnet and remove the screws that hold the cover in place. These can be found above the grill.
● Unclip the Bumper Cover
It’s now time to unclip the bumper cover from its position. Look underneath the front side of the part and locate the plastic clips that hold it in place. Carefully use the flat head screwdriver to pry these out of position. This should leave a clip exposed. This clip attaches the bumper to the body work, and needs to be cut with your clippers. Finally pull the bumper cover away from the car and place it on a blanket or towel to prevent it from getting scratched or damaged.
● Bumper Removal
After driving the car up the wheel ramps so that the front of the car is elevated, use a body board to go under the front of the car and find the bolts along the upper edge of the bumper. Use your spanner set to remove the bolts, and use the socket and ratchet set to remove the tensioning rods that sit on either side of the bumper. Make sure you store all the bolts in a safe place for reattachment, and then take the old bumper away from the car.
● Replace the Bumper
Place the bumper on the frame of the car and thread the bolts through the holes in the part to hold it in place against the frame. Then simply reattach the nuts to the bolts and tighten so the bumper is flush against the bodywork before finally reattaching the tensioning rods. You’re now ready to drive the car down the ramp and get to work on replacing the bumper cover.
● Reattach the Bumper Cover
Retrieve the bumper cover from its safe storage space. You will need to replace the clips that you destroyed in step 2 with new clips or the bumper cover will flap in the wind. Simply put the cover in place and lock it in position before reattaching all the necessary clips. When this is completed and the part is firmly held against the bumper simply reattach the screws under the grille and your car is good to go.
COST
How much does it cost to install a bumper?
Bumper Installation Service near Austin TX: In the worst scenario, because of high damage, a replacement will be made. A replacement of a bumper will cost you around $300 – $700. If sensors, lights, cameras or any other component are damaged, then you can expect an increase in overall cost. Even a low-speed collision of a new car could cost up to $1,000.
If you find yourself in a fender bender and need to have your bumper replaced, you may be wondering about bumper repair costs. Usually, a bumper will cost between $880 and $1,390 to replace, depending on the type of vehicle you own and the amount of labor time the repair takes. Front bumper repair costs tend to be different than rear bumper repair costs. Additionally, different auto manufacturers will charge different amounts for bumper parts.
Why is Bumper Replacement and Bumper Repair Costs So Pricey?
Many folks get caught off-guard when they find out how much bumper repairs cost. This is because bumpers are an integral part of your vehicle for both aesthetic and practical purposes. They are vital components of a vehicle and this is why the price to repair or replace them are so high.
Labor Costs for Bumper installation Costs
Repairing or replacing a bumper isn’t just a simple matter of unscrewing a couple of bolts. Since modern front and end bumpers are integrated parts of the vehicle, auto technicians will need to disconnect and reconnect all of the parts. Some of these parts include:
● Air Intakes: Although this is not a common occurrence, some cars are made this way and have their cold-air intakes mounted to the front bumper.
● Airbag Sensors: These parts can sometimes be connected to the bumper. In order to remove the bumper, you will need to remove the airbag sensors first.
● Lights: A lot of your vehicle’s lights, including the headlights and turn signals, may be wired to the front bumper. They all need to be disconnected before you replace or repair the bumper.
● Trim: There can be numerous trim parts that are connected to the bumper. To replace or repair the bumper, they will need to be removed.
● Warning Signals: Car warning sensors such as weather sensors, parking sensors, backup sensors, vehicle lane changing warning sensors, collision warning sensors, as well as car cameras will probably be interconnected to your bumper.
Removing all of these parts one by one will take two hours or more to complete. If the car accident is severe, some of these parts will have to be replaced. These additional charges can quickly add up and significantly increase the costs of the overall replacement or repair process.
FREQUENTLY ASKED QUESTIONS
What is a Bumper?
A vehicle’s bumper is a protective part of the automobile that is mounted to both the front and rear ends of the car. Typically crafted from aluminum, plastic, rubber, or steel, the bumper acts as a shock absorber during low-speed collisions. It also aids in reducing more significant damages made to your vehicle. While some types of bumpers are made from foam that acts as a kind of cushion, others have energy absorbers or brackets that serve the same purpose.
How do I install my Bumper Guard products?
Please reference our section on Installation Instructions
How long does it take to install the Bumper Guard products?
Installation takes only a few minutes. Please make sure to follow the installation instructions when applying our bumper guards.
Will the Bumper Guards chip, fade, or discolor?
Since the color of our bumper guards run through the product you will not experience any cracks, chips or fading like you would get from a painted bumper guard.
Can the Bumper Guards be installed on a repainted bumper?
We do not recommend installing bumper guards on a repainted bumper. Oftentimes when a bumper is repainted at a body shop the quality of the paint job is second rate. It is possible that the 3M adhesive can damage a repainted bumper if removed improperly.
If I trim or cut the edges of my bumper guard will the color be different on the cut edges?
No, since the color runs through the bumper guard; the color of the actual bumper guard will be the color on the exposed cut edge,
Can you paint the bumper guards to match a color that you do not carry?
You probably could get them professional painted at a bumper shop but we DO NOT recommend it. The paint will more than likely crack, chip or peel off with time/from the elements/or if damaged.
How do I know what size to order?
If you are unsure what size to order please measure your vehicle's bumper. The sizes we have available are standard sizes. We can customize a particular size if you require. Please contact us with any requests.
I can't tell what color to order?
Oftentimes we carry many shades of a particular color. If you are unsure which color to choose, we recommend ordering a color sample. Color samples are the simplest way to ensure a close color match. All color samples are shipped USPS and are labeled accordingly.
Is it possible to trim/cut color bumper guards, rear bumper guards, and/or front bumper guards?
Yes, however we recommend purchasing our professional grade clippers. They work really well in cutting/trimming your bumper guard. Please note our bumper guard edge comes straight cut. If you want to trim the ends of your bumper guards on an angle we recommend ordering the clippers. Also please note that standard scissors/players do not work so well when attempting to cut or trim the guards.
CALL FOR US:
● Bumper Installation Service Near Austin TX
● Bumper Installation
● Front Bumper Installation
● Bumper Installation Cost
● Car Bumper Installation
● Bumper Installation Labor Cost
● Car Bumper Clip Lock
● Bumper Guard Installation Near Austin TX
● How To Install Bumper Clips
● Bumper Repair Cost
● Front Bumper Repair Cost
● Front Bumper Replacement Cost Estimate
● Small Crack In Bumper Repair Cost
● Loose Bumper Repair Cost
● How Much To Replace A Rear Bumper
● Car Bumper Repair
● How Much Does It Cost To Replace A Plastic Bumper Near Austin TX
BEST BUMPER INSTALLATION SERVICE IN AUSTIN TX
MOBILE AUTO TRUCK REPAIR AUSTIN
REQUEST MORE INFORMATION. CONTACT US NOW!
Contact Details
Mobile Auto Truck Repair Austin
Best Mobile Mechanic & Mobile Auto Truck Repair in Austin Texas
Call US: (512) 649-5322
Location: Texas, Austin
Monday-Sunday 24 Hours
www.mobileautotruckrepairaustintx.com
Zip Codes in Austin, Texas:
76527 (Florence) 76530 (Granger) 76537 (Jarrell) 76573 (Schwertner) 76574 (Taylor) 76578 (Thrall)
78602 (Bastrop) 78610 (Buda) 78612 (Cedar Creek) 78613 (Cedar Park) 78615 (Coupland) 78616 (Dale)
78617 (Del Valle) 78619 (Driftwood) 78620 (Dripping Springs) 78621 (Elgin) 78622 (Fentress) 78626
(Georgetown) 78628 (Georgetown) 78633 (Georgetown) 78634 (Hutto) 78640 (Kyle) 78641 (Leander)
78642 (Liberty Hill) 78644 (Lockhart) 78645 (Lago Vista) 78648 (Luling) 78650 (Mc Dade) 78652
(Manchaca) 78653 (Manor) 78655 (Martindale) 78656 (Maxwell) 78659 (Paige) 78660 (Pflugerville)
78661 (Prairie Lea) 78662 (Red Rock) 78664 (Round Rock) 78665 (Round Rock) 78666 (San Marcos)
78669 (Spicewood) 78676 (Wimberley) 78681 (Round Rock) 78701 | 78702 | 78703 | 78704 | 78705 |
78712 | 78717 | 78719 | 78721 | 78722 | 78723 | 78724 | 78725 (Hornsby Bend) 78726 | 78727 |
78728 (Wells Branch) 78729 (Jollyville) 78730 | 78731 | 78732 | 78733 | 78734 (Lakeway) 78735 |
78736 | 78737 | 78738 (Bee Cave) 78739 | 78741 | 78742 | 78744 | 78745 | 78746 | 78747 | 78748 |
78749 | 78750 | 78751 | 78752 | 78753 | 78754 | 78756 | 78757 | 78758 | 78759 | 78953 (Rosanky)
78957 (Smithville)
#Roadsideassistance. #Emergencyroadsideassistance #CommercialTowing
#Carlockouts #HeavyTransportation #Flatbedtowservice
0 notes
Link
Best Bumper Installation Service and Cost in Albuquerque NM |Mobile Mechanics of Albuquerque
More information is at:
http://mobilemechanicalbuquerque.org/bumper-installation-near-me/
Are you looking for the BestBumper Installation Service near Albuquerque NM ? Mobile Mechanics of Albuquerque,A vehicle’s bumper is a protective part of the automobile that is mounted to both the front and rear ends of the car. Cost? Free estimates! Send us a message or call us today. Best Bumper Installation Service around Albuquerque NM. We serve Albuquerque NMand other areas. Get a Free Quote Now!
BEST BUMPER INSTALLATION SERVICE IN ALBUQUERQUE NM
ALBUQUERQUEBUMPER INSTALLATION
How to install your bumper system
Bumper Installation Service near Albuquerque NM: If you've recently become the new owner of a rear bumper system, you may not know how all of the different pieces fit together to mount to your chassis. Whether it's KG, they all typically have similar pieces. OTK is essentially the same process, but will differ slightly with their parts.
● You'll begin by installing the two mounting posts to your chassis . The key to securing the two mounting posts to your chassis starts with installation outside of the chassis. In your hands, drop your smaller washer into what will become the outside of the mounting post, drop the larger washer into what will become the inside. Now drop your 10mm bolt through the two washers and mounting post beforehand tightening the rubber (with threading on the inside) to your bolt. You should have one sold piece now that you''ll mount to your chassis.
● To finish installing your mounting posts to your chassis, grab a 17mm wrench or socket on an impact and tighten the piece to your chassis tube .Nice and tight will do, you don't have to set any world records for strength. You'll do this for both sides, left and right, before we head into the next segment.
● The next piece to install is what you'll eventually mount your rear bumper to, it's the rear bumper support . Supplied typically with a short 8mm bolt, washer, and nut, you'll fasten your support to your post solidly. After successfully mounting both your right and left supports solidly to your posts, we'll move on to the next segment, mounting the bumper.
● You'll notice on the bumper a pair of elongated mounting holes. Line those holes up with your support holes and press the bumper to your supports. Now it's time to grab your hardware, which should typically be an 8mm bolt with washer and nut, and tighten your bumper to your supports . Again, you don't need to show off your strength, but make sure it's nice and solid; you don't want the bumper to move side to side. Your entire system should be nice and tight at this point. However, it is common to see the support loose on the post. You can loosen the support by taking a couple of turns out, but still keeping the bolt within the nylon of the nut so that it doesn't vibrate out while on track. This will free up the rear end and allow it to flex more in certain conditions.
What is a Bumper?
Bumper Installation Service near Albuquerque NM: A vehicle’s bumper is a protective part of the automobile that is mounted to both the front and rear ends of the car. Typically crafted from aluminum, plastic, rubber, or steel, the bumper acts as a shock absorber during low-speed collisions. It also aids in reducing more significant damages made to your vehicle. While some types of bumpers are made from foam that acts as a kind of cushion, others have energy absorbers or brackets that serve the same purpose.
Do Bumper Guards Really Work?
● Collisions happen even if you’re a careful driver. If your car is rear-ended or damaged in a parking lot, the other person can drive away without much risk. To prevent damages that may not be covered by car insurance, many people use bumper guards to protect their vehicles.
● Bumper guards are vertical bars or foam pads that can be placed on either the back or front of your car. They’re usually easy to install and remove, but are they worth it? Let’s look at the pros and cons of utilizing a bumper guard.
They protect your vehicle
Bumper Installation Service near Albuquerque NM: If you have to park in a crowded street or in a cramped garage, there’s always the possibility that someone may hit the back of your car. You could also end up damaging your vehicle yourself if you don’t have enough room to back out of a parking space. A foam guard will give you a little cushion to absorb damage. It can also protect the front end of your vehicle by minor damage caused by fender benders.
3 Benefits of Installing a Heavy-Duty Bumper on Your Vehicle
If you need to select a bumper for your commercial truck or pickup, you may want to consider the benefits of a heavy-duty model. Heavy-duty bumpers outperform lightweight models in several categories including collision protection, longevity, and durability. To learn more about the benefits of a weightier model, look over this convenient guide.
Why Choose a Bumper?
1. Collision Protection
You will find large, robust bumpers on vehicles like ambulances, fire trucks, and commercial vehicles for a reason. A bumper’s most important duty lies in collision protection. Thus, bigger, more resilient ones will always offer greater performance in this arena. Heavy-duty bumpers absorb impact better than thinner models, thereby keeping the truck and individuals inside safe from harm.
2. Longevity
heavy-duty bumperHeavy-duty bumpers are often constructed from high-quality steel, which is built to endure for decades. While less robust models may suffer wear and tear over the years and eventually need replacement, a heavy-duty bumper will continue to serve your needs. Off-roaders who demand rugged features that will hold up in the face of mud, rocks, and debris will also greatly benefit from a sturdier bumper. If you want a lasting investment, opt for the durability heavy-duty models offer.
3. Economic Savings
While heavy-duty bumpers may cost more initially, they offer significant economic savings over lightweight models in the long run. Since heavy-duty bumpers very rarely need replacement, you won’t have to worry about additional expenditures as the years pass. Furthermore, these bumpers protect against serious and costly vehicular damage.
TIPS
Bumper Installation Service near Albuquerque NM: This is one of the less complex mechanical jobs that you can perform on your car, and it can be attempted by even those with the most basic of technical knowledge. All you need to complete this task is a spanner set, a socket and ratchet set, some wire clippers, a Phillips and a flat-head screwdriver and two wheel ramps to help you elevate your vehicle and you’re ready to go.
● Locate and Unscrew the Bumper Cover
There are two parts to the front bumper. The first is the painted cover that matches your car’s color scheme. This is sometimes referred to as the bumper, but is actually concealing the real bumper underneath. To replace the bumper you will need to remove this first. Open the car bonnet and remove the screws that hold the cover in place. These can be found above the grill.
● Unclip the Bumper Cover
It’s now time to unclip the bumper cover from its position. Look underneath the front side of the part and locate the plastic clips that hold it in place. Carefully use the flat head screwdriver to pry these out of position. This should leave a clip exposed. This clip attaches the bumper to the body work, and needs to be cut with your clippers. Finally pull the bumper cover away from the car and place it on a blanket or towel to prevent it from getting scratched or damaged.
● Bumper Removal
After driving the car up the wheel ramps so that the front of the car is elevated, use a body board to go under the front of the car and find the bolts along the upper edge of the bumper. Use your spanner set to remove the bolts, and use the socket and ratchet set to remove the tensioning rods that sit on either side of the bumper. Make sure you store all the bolts in a safe place for reattachment, and then take the old bumper away from the car.
● Replace the Bumper
Place the bumper on the frame of the car and thread the bolts through the holes in the part to hold it in place against the frame. Then simply reattach the nuts to the bolts and tighten so the bumper is flush against the bodywork before finally reattaching the tensioning rods. You’re now ready to drive the car down the ramp and get to work on replacing the bumper cover.
● Reattach the Bumper Cover
Retrieve the bumper cover from its safe storage space. You will need to replace the clips that you destroyed in step 2 with new clips or the bumper cover will flap in the wind. Simply put the cover in place and lock it in position before reattaching all the necessary clips. When this is completed and the part is firmly held against the bumper simply reattach the screws under the grille and your car is good to go.
COST
How much does it cost to install a bumper?
Bumper Installation Service near Albuquerque NM: In the worst scenario, because of high damage, a replacement will be made. A replacement of a bumper will cost you around $300 – $700. If sensors, lights, cameras or any other component are damaged, then you can expect an increase in overall cost. Even a low-speed collision of a new car could cost up to $1,000.
If you find yourself in a fender bender and need to have your bumper replaced, you may be wondering about bumper repair costs. Usually, a bumper will cost between $880 and $1,390 to replace, depending on the type of vehicle you own and the amount of labor time the repair takes. Front bumper repair costs tend to be different than rear bumper repair costs. Additionally, different auto manufacturers will charge different amounts for bumper parts.
Why is Bumper Replacement and Bumper Repair Costs So Pricey?
Many folks get caught off-guard when they find out how much bumper repairs cost. This is because bumpers are an integral part of your vehicle for both aesthetic and practical purposes. They are vital components of a vehicle and this is why the price to repair or replace them are so high.
Labor Costs for Bumper installation Costs
Repairing or replacing a bumper isn’t just a simple matter of unscrewing a couple of bolts. Since modern front and end bumpers are integrated parts of the vehicle, auto technicians will need to disconnect and reconnect all of the parts. Some of these parts include:
● Air Intakes: Although this is not a common occurrence, some cars are made this way and have their cold-air intakes mounted to the front bumper.
● Airbag Sensors: These parts can sometimes be connected to the bumper. In order to remove the bumper, you will need to remove the airbag sensors first.
● Lights: A lot of your vehicle’s lights, including the headlights and turn signals, may be wired to the front bumper. They all need to be disconnected before you replace or repair the bumper.
● Trim: There can be numerous trim parts that are connected to the bumper. To replace or repair the bumper, they will need to be removed.
● Warning Signals: Car warning sensors such as weather sensors, parking sensors, backup sensors, vehicle lane changing warning sensors, collision warning sensors, as well as car cameras will probably be interconnected to your bumper.
Removing all of these parts one by one will take two hours or more to complete. If the car accident is severe, some of these parts will have to be replaced. These additional charges can quickly add up and significantly increase the costs of the overall replacement or repair process.
FREQUENTLY ASKED QUESTIONS
What is a Bumper?
A vehicle’s bumper is a protective part of the automobile that is mounted to both the front and rear ends of the car. Typically crafted from aluminum, plastic, rubber, or steel, the bumper acts as a shock absorber during low-speed collisions. It also aids in reducing more significant damages made to your vehicle. While some types of bumpers are made from foam that acts as a kind of cushion, others have energy absorbers or brackets that serve the same purpose.
How do I install my Bumper Guard products?
Please reference our section on Installation Instructions
How long does it take to install the Bumper Guard products?
Installation takes only a few minutes. Please make sure to follow the installation instructions when applying our bumper guards.
Will the Bumper Guards chip, fade, or discolor?
Since the color of our bumper guards run through the product you will not experience any cracks, chips or fading like you would get from a painted bumper guard.
Can the Bumper Guards be installed on a repainted bumper?
We do not recommend installing bumper guards on a repainted bumper. Oftentimes when a bumper is repainted at a body shop the quality of the paint job is second rate. It is possible that the 3M adhesive can damage a repainted bumper if removed improperly.
If I trim or cut the edges of my bumper guard will the color be different on the cut edges?
No, since the color runs through the bumper guard; the color of the actual bumper guard will be the color on the exposed cut edge,
Can you paint the bumper guards to match a color that you do not carry?
You probably could get them professional painted at a bumper shop but we DO NOT recommend it. The paint will more than likely crack, chip or peel off with time/from the elements/or if damaged.
How do I know what size to order?
If you are unsure what size to order please measure your vehicle's bumper. The sizes we have available are standard sizes. We can customize a particular size if you require. Please contact us with any requests.
I can't tell what color to order?
Oftentimes we carry many shades of a particular color. If you are unsure which color to choose, we recommend ordering a color sample. Color samples are the simplest way to ensure a close color match. All color samples are shipped USPS and are labeled accordingly.
Is it possible to trim/cut color bumper guards, rear bumper guards, and/or front bumper guards?
Yes, however we recommend purchasing our professional grade clippers. They work really well in cutting/trimming your bumper guard. Please note our bumper guard edge comes straight cut. If you want to trim the ends of your bumper guards on an angle we recommend ordering the clippers. Also please note that standard scissors/players do not work so well when attempting to cut or trim the guards.
CALL FOR US:
● Bumper Installation Service Near Albuquerque NM
● Bumper Installation
● Front Bumper Installation
● Bumper Installation Cost
● Car Bumper Installation
● Bumper Installation Labor Cost
● Car Bumper Clip Lock
● Bumper Guard Installation Near Albuquerque NM
● How To Install Bumper Clips
● Bumper Repair Cost
● Front Bumper Repair Cost
● Front Bumper Replacement Cost Estimate
● Small Crack In Bumper Repair Cost
● Loose Bumper Repair Cost
● How Much To Replace A Rear Bumper
● Car Bumper Repair
● How Much Does It Cost To Replace A Plastic Bumper Near Albuquerque NM
BEST BUMPER INSTALLATION SERVICE IN ALBUQUERQUE NM
MOBILE MECHANICS OF ALBUQUERQUE
REQUEST MORE INFORMATION. CONTACT US NOW!
0 notes
Text
LIUGONG WHEEL LOADER SPARE PARTS 121

18C0404 HOSE AS
67C4069 HOSE AS
60C2488 OIL-WATER SEPARATOR
08D2456 TUBE AS
SP191815 CROSS SHAFT
SP191816 BOLT
SP191817 BOLT
SP191818 STEEL BALL
SP191819 BEARINGS
SP191820 FLAT MAT (HIGH STRENGTH)
18D8845 BRACKET
09C1798D0 CLAMP
27C1254X0 COUNTERWEIGHT
01Y0640X0 FRONT AXLE AS
08D2399 TUBE AS
08D2241 PIPE
58A6371 PLATE
43A0292 HALF SHAFT GEAR
70C3268 HARNESS
70C3273 HARNESS
70C3274 HARNESS
70C3275 HARNESS
70C3265 HARNESS
70C3266 HARNESS
70C3269 HARNESS
12C8193 CONTROL VALVE
24C3594 LINKAGE
24C3593 LEVER
24C3592 BOOM
49C8082 HOSE
90A9881 PLATE
42D3227 SIDE HOOD
42D3228 SIDE HOOD
98A7210 PLATE
32A4651 WATER HOSE
38Y0655X0 BUCKET
SP193651 SEAL KIT
23D5706 PLATE
23D5707 PLATE
18C0336 HOSE AS
18C0337 HOSE AS
34C8746 FIRE EXTINGUISHER
46D3485 PLATE
08D2151 TUBE AS
08D2150 TUBE AS
18C0270 HOSE AS
69A0485 PLATE
18C0234 HOSE AS
18C0235 HOSE AS
45D3057 HOOD
04A4717 FLANGE
44D0943 COVER
48C6255 SIDE HOOD
48C6256 SIDE HOOD
11C3073 GEAR PUMP
51C0861 FRONT DRIVE SHAFT&BRG AS
48C6253 COVER
05C9888 HOSE AS
98A7917 COVER
48C6254 TOP COVER
58A6372 PLATE
32A4741 HOSE
32A4738 HOSE
24C3587 BOOM AS
24C3586 LEVER
01C1736 TUBE AS
18D7799 BRACKET
42D3369 PLATE
43D3211 DUCT PLATE
43D3212 COVER
30D4367 REAR FRAME
43D3213 COVER
67C3888 HOSE AS
67C3889 HOSE AS
18C0392 HOSE AS
18C0391 HOSE AS
98A8586 PLATE
41D1891 PROTECTIVE BARRIER
18D8494 BRACKET
30D4203 REAR FRAME
96A6973 CUTTING EDGE-LH
96A6972 CUTTING EDGE-RH
98A7452 PLATE
98A7451 PLATE
SP179580 HEXAGON FLANGE HEAD CAP SCREW
41D1948 STEP
41D1947 STEP
67C3783 HOSE AS
30D4312 REAR FRAME
41D1954 PEDAL-RH
18D8385 SUPPORT
SP189699 WASHER
SP196592 RING GEAR
48C4436X0 SIDE HOOD
48C6087 ACCUMULATOR BOX
81A0517 RUBBER PLATE
SP188806 CIRCLIP FOR HOLE GB/T893.1-1986-A ¢48
98A7010 PLATE
98A8813 PLATE
80A1902 SUPPORT RING
80A1903 SUPPORT RING
82A4522 SPONGE
SP190304 DEFAULT
18D9169 BRACKET
18C0358 HOSE AS
70C3234 HARNESS
70C3286 HARNESS
SP191254 SEAL KIT
SP191255 SPRING
SP191256 SOCKET-HEAD SCREW
SP191257 SWASHPLATE
SP191258 PUMP HOUSING
SP191260 TURBOCHARGER COOLANT SUPPLY TUBE
SP191262 PLAIN HOSE
11C3144 GEAR PUMP
52C0467 COUPLING
38Y0682X0 BUCKET AS
67C4121 HOSE AS
45D3118 PROTECTION SHIELD
11D2137 PIN
SP177492 VENTING MOUTH
SP188550 BLOCK
43D3141 MOUNTING SUPPORT
24C3621 BOOM
05C9935 HOSE AS
05C9936 HOSE AS
92A6878 PLATE
52A3509 DISK
SP186967 HANDLE BAR
SP186968 ELECTROMAGNET
SP186969 HANDLE
62A1066 HALF SHAFT
69A0334 PLATE
SP195426 SEAL KIT
87A1559 GLASS
49C7748 HOSE
49C7746 HOSE
18C0026 HOSE AS
18C0025 HOSE AS
18C0009 HOSE AS
18C0008 HOSE AS
67C3375 HOSE AS
67C3376 HOSE AS
67C3327 HOSE AS
18D8150 BRACKET
49C7730 HOSE
49C7731 HOSE
49C7745 HOSE
18D8182 BRACKET
40D1764 REAR FENDER-LH
86A4185 DECORATION
86A4186 DECORATION
86A4187 DECORATION
86A4188 CUP HOLDER
86A4192 COVER
32A4654 INTAKE PIPE
27A4776 DOOR
44D0928 SUPPORT
04C1586 BELLOWS
30C3721 CONNECTOR
30A8577 LOW TEMPERATURE WATER HOSE
30A8578 LOW TEMPERATURE WATER HOSE
SP186965 SEAL KIT
SP186966 RUBBER COVER
70C2631 GRID HEATER HARNESS
44D0913 SUPPORT
30D4020 REAR FRAME
35B0676 INSTRUMENT
58A6812 PLATE
34C8851 DOOR LOCK
34C8867 DOOR LOCK
09C2755 CLAMP
30D4230 FRONT FRAME
30D4354 REAR FRAME
33D1546 LOWER HINGE PLATE
30D4317 REAR FRAME
33D1526 LOWER HINGE PLATE
60A6681 LOCK BUCKLE
60C2078 AIR FILTER
12C8142 SAFETY VALVE
05C9993 HOSE AS
67C3588 HOSE AS
05C9994 HOSE AS
38C0767 DOOR LOCK
34C8539 DOOR LOCK
07C6077 HOSE AS
84A5256 RUBBER PLUG
SP189692 HEXAGON HEAD BOLT
SP189693 HEXAGON FLANGE BOLT
SP189695 EXHAUST MANIFOLD BOLT
SP189696 STUDS
SP189697 HEXAGON LOCK NUT
SP189698 WASHER
SP189700 AIR FILTER BRACKET
SP189701 CONVERSION ADAPTER
SP189702 CYLINDER HEAD COVER GASKET
SP189703 OIL FILLING TUBE ASSEMBLY
SP189705 TIMING GEAR CHAMBER
SP189706 OIL FILTER
SP189707 FUEL COARSE FILTER
SP189708 FUEL FILTER
67C3388 HOSE AS
67C3389 HOSE AS
22D2096 BUCKET
08D2355 TUBE
18C0359 HOSE AS
18C0327 HOSE AS
08D2398 TUBE AS
18C0365 HOSE AS
43D3106 DUCT PLATE
67C3246 HOSE AS
67C3421 HOSE AS
SP191307 CAP
SP191311 HOSE
SP191314 HOSE
SP191333 WIRE RETAINING CLIP
24C3547 LINKAGE
24C3546 LEVER
24C3545 BOOM
30D4366 REAR FRAME
58A6043 PLATE
58A6042 PLATE
02C3230 TUBE AS
08D1687 TUBE AS
70C2385 HARNESS
79A1560 DECAL
49C6963 MOUNTING PLATE GP
67C3590 HOSE AS
05C9998 HOSE AS
70C3071 WORK LIGHT HARNESS
18D8622 MOUNTING PLATE
18D8642 MOUNTING PLATE
18D8658 BRACKET
18D8603 BRACKET
67C3596 HOSE AS
67C3592 HOSE AS
67C3593 HOSE AS
67C3594 HOSE AS
67C3601 HOSE AS
67C3603 HOSE AS
67C3602 HOSE AS
05C9995 HOSE AS
67C3589 HOSE AS
67C3510 HOSE AS
18C0139 HOSE AS
18C0140 HOSE AS
18C0109 HOSE AS
18C0101 HOSE AS
67C3512 HOSE AS
08D1993 TUBE AS
18C0039 HOSE AS
18C0090 HOSE AS
18C0091 HOSE AS
12C8038 CONTROL VALVE
12C8057 CONTROL VALVE
12C8059 CONTROL VALVE
49C7888 HOSE
49C7919 HOSE
18D8660 BRACKET
69A1002 PLATE
08D2455 TUBE AS
67C4068 HOSE AS
08D2693 TUBE AS
08D2690 TUBE AS
48D1844 WINDOW
18C0494 HOSE AS
46D3732 PLATE
08D2600 TUBE AS
08D2599 TUBE AS
08D2598 TUBE AS
32A4858 BELLOWS
32A4855 HOSE
32A4854 HOSE
32A4851 HOSE
67A2275 PIPE
48C6484 TOP COVER
04C1098 HOSE AS
49C8516 HOSE
07A8461 PLATE
48C5236X0 COVER
70C3373 HARNESS
37B3178 CONTROLLER
38Y0667X0 BUCKET AS
30D4034 REAR FRAME
69A0226 PLATE
38Y0619X0 BUCKET AS
96A6998 PLATE
12C8055 CONTROL VALVE
SP187340 BOLT
SP187341 BOLT
SP187343 REDUCTION BUSHING
SP187345 DIFFERENTIAL PINION
SP187346 DIFFERENTIAL SIDE GEAR
SP187347 CLUTCH DISC
SP187348 SHIM KIT
SP187349 SEAL
SP187351 INTERMEDIATE COVER
SP187352 INTERMEDIATE COVER
SP187353 HOUSING
96A7510 CUTTING EDGE-LH
96A7512 CUTTING EDGE-RH
67C3906 HOSE AS
67C3907 HOSE AS
79A5220 DECAL
38Y0661X0 BUCKET AS
SP196563 SEAL KIT
96A7023 PLATE
18D9928 BRACKET
32A4766 WATER HOSE
18D9609 BRACKET
48C6393 TOP COVER
30A8255 INTAKE PIPE
96A7294 EDGE-RH
96A7293 EDGE-LH
20C3499 AIR COOLER
32A4864 INTAKE PIPE
43D3243 BRACKET
32A4852 HOSE
45D3119 SHROUD AS
19D0003 BRACKET
70C3580 STEERING HARNESS
60C2581X0 RADIATOR MOUNTING
48C6471X0 TOP COVER
38Y0670X0 BUCKET AS
67A2274 PIPE
24C3116D0 BOOM
SP186790 JUMP RING
SP186793 JOINT
70C2533 HARNESS
Read the full article
0 notes
Photo

I meant to get this done when I first got the van. A little degreaser, brush and the power washer to prep the rear fender blackout. This can protect a little bit more from rock chips but it’s a purely aesthetic thing. We use 3M rubberized undercarriage paint. Taped off all the parts we wanted to keep clean. And there you go. Simple #DIY. #Mercedes #Benz #sprintervan #sprntr #vanlifesprinter #sprntrco #van #vangram #vanstagram #vanspotting #vanlife #adventuremobile #4x4 #4x4van #sprintervan4x4 #907sprinter #DIYvan #diyvanconversion #diyvanbuild #diyvanlife #diyproject (at San Francisco, California) https://www.instagram.com/p/CLo79YtB9aA/?igshid=19yimlvejlo0m
#diy#mercedes#benz#sprintervan#sprntr#vanlifesprinter#sprntrco#van#vangram#vanstagram#vanspotting#vanlife#adventuremobile#4x4#4x4van#sprintervan4x4#907sprinter#diyvan#diyvanconversion#diyvanbuild#diyvanlife#diyproject
0 notes
Last Seen Blogs