#sharing before i. add javascript
Explore tagged Tumblr posts
Visit Tumblr Blog
Explore Tumblr blogs with no restrictions, modern design and the best experience.
Last Seen Tumblr Blogs


Fun Fact
Average visit duration of Tumblr.com is 10 mins and 25 secs.
Text
go look at my website boy
#sharing before i. add javascript#inescapable.#looks better on desktop but should be functional on mobile#mar's midnight rambles
9 notes
·
View notes
Text
Convert HTML to Image: A Step-by-Step Guide ✨

Do you want to turn some HTML code you've made that's on your website and have a way to convert it into an image for you to save?
Well, look no further! I too wanted to do the same thing but funny enough, there weren't any straightforward tutorials out there that could show you how! After hours of searching, I finally discovered the solution~!
This is an old tutorial I made 🐼

💛 Set your environment
Before we dive into the conversion process, I'll assume you already have your HTML code ready. What you want to learn is how to turn it into an image file. You should have a good grasp of HTML and JavaScript. For this tutorial, we'll use the following HTML code example:

We won't include the CSS code, as it doesn't affect this tutorial. The JavaScript file (script.js) at the bottom of the body element is where we'll add the functionality for the conversion.
Your page should resemble the following:

As you can see, the "Click me" button will handle the conversion. We aim to convert everything within the div.info-div into an image.
💛 Using the html2canvas JavaScript Library
The html2canvas library allows you to take screenshots of webpages and target specific elements on a screen. Here are the steps to include the library in your project:
The steps to put the library in your project:
Visit the html2canvas website for more information.
Copy the CDN link from here

and include it in a script tag in your project's head tag in the HTML file:

That's it for including the library on the HTML side. Now, let's move on to the JavaScript code.
💛 JavaScript Functionality
Here's the JavaScript code to handle the conversion:

In this code, I want to turn the whole div.info-div into an image, I put it into a variable in const div = document.querySelector(".info-div");.
I also put the button into a variable in const button = document.querySelector("button");
I added a click event listener to the button so when the user clicks the button, it will follow the code inside of the event listener!
You can find similar code like this in the documentation of the html2canvas library:

What is happening here is:
We add the div (or what the element we want to take an image of) into the html2canvas([element]).then((canvas)
Added the image file type url to a variable = const imageDataURL = canvas.toDataURL("image/png"); - You can replace the png to other image file types such as jpg, jpeg etc
Created an anchor/link tag, added the href attribute to imageDataURL
The download attribute is where we will give the default name to the image file, I added "dog.png"
Perform the click() function to the anchor tag so it starts to download the image we created
And that's it!
💛 The End
And that's it! You've successfully learned how to turn your HTML into an image. It's a great way to save and share your web content in a unique format.

If you have any questions or need further clarification, please comfortable to ask. Enjoy converting your HTML into images! 💖🐼
#my resources#coding#codeblr#programming#progblr#studying#studyblr#programmer#html#html css#javascript#neocities#coding tips#html5 tutorial#html tutorial
155 notes
·
View notes
Note
hi there! sorry if you've gotten a similar ask before. do you write wayfarer directly into twine or do you keep it in a separate doc? do you just have really clearly labeled sections in a word doc or something or is there a specific program you use to keep track of every story path? basically, with something as expansive and w/ as many routes as wayfarer, how do you keep all your writing organized?
I have answered this before, but I can't seem to find my posts on the subject (you may want to peruse my coding in twine tag, the masterpost has a bunch of different resources for this kind of thing!).
But in short, no, I do not write Wayfarer directly into Twine. This could functionally work for a very small game, but I would still advise against it as Twine doesn't really work as a word processor. You can't proof-read in it.
My process has three main steps:
Outlining
Writing
Coding
Compiling
Outside of my big beat chart (which spans the whole game), I break each episode down into their own outlines, and then break the routes of each episode down into their own outlines. Sometimes specific sections end up with their own outlines too. My system probably doesn't make much sense to anyone other than me, but as long as I know what the divisions are, then it's all good.
I write in MS Word. Each episode has its own folder (sometimes with subfolders) and every section of the game gets its own document.

Here's the main folders, each episode goes into its own thing.
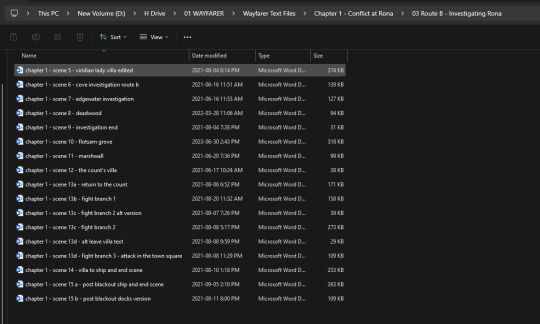
This is an subfolder for Episode 1, specifically Route B.
Within my word documents themselves, I use a colour-coding system for separating out branches and sections. This is extremely useful for writing dialogue loops, like this:

I also add in any coding notes (variables, true/false states, stat checks) while I am writing so I know what I need to do when I sit down to code 4+ months later. I usually throw a X or XX on choices after I have written them as a note to myself that I have finished it (this is just personal shorthand - X means I've done the pass version of a check, XX means I've done the pass and fail states).
I use about 8-10 colours in my documents; I have a set of MS Word macros set up so I can easily switch between them.
I share my word documents with my editor via OneDrive, which makes it easy for her to got through and proofread.
I use MS Word because I've been using it to write since the 2000s and it's what I prefer to use. I have also been writing professionally for over a decade now, so I have systems and strategies in place that work for me that I've developed for myself over time. But if you're new to writing and you're looking for a word processor that can also help you with outlining and keeping your story straight, something like Scrivener may be helpful.
One the text is ready to be coded, it's a lot of copy/pasting from Word into Twine. When I'm coding I will typically be running multiple programs at once:
MS Word
MS Excel (for my variable sheets)
Twine
Notepad++ (which has some regularly used code stored in it; I also use it to edit CSS and Javascript, as well as any really code-heavy sections since it's easier to do that in Notepad++ than it is in the Twine editor)
Notepad (just the regular version - I use it for writing notes to myself while I'm coding)
a web browser to launch tests in as I code
Once I am done coding and I have tested things, it's time to compile. The Twine editor can only handle so many passages and text in one file (around 500-700 passages before you hit massive lag), so I break Wayfarer into multiple story files. Having multiple story files also makes it really easy for me to cross-reference events (if I need to grab a passage title to reference it later) because I don't have to look through one big file. If I know the event happens in Episode 2's first scene, then I know I need to open Chapter_2.1.
My Twine library looks like this at the moment:
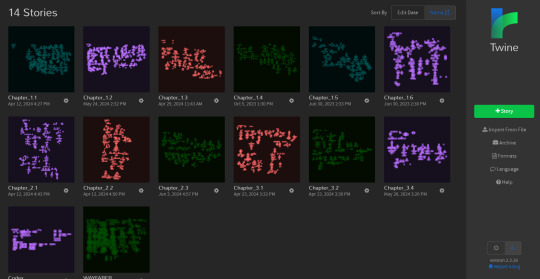
I am using an old version of the editor (with an up-to-date version of SugarCube) since I didn't like the new one. I don't necessarily recommend using the Twine editor when you can easily make your game with Twee extensions in Visual Studio Code and have better support and functionality, but this is what I like and it really comes down to personal preference.
But because everything is in separate files, I have to merge them altogether. I have Tweego installed on my PC; it's run through the command prompt and outputs multiple story files into one HTML file. I've talked about this process here and here.
And that's basically it! I don't think there's a one-size-fits-all solution to keeping track of your IF. You need to figure out what works for you, based on your writing and outlining habits, how big your story is, and how much you intend to keep track of.
Hope this helps!
#wayfarer#wayfarer if#coding in twine#twine#twine game#interactive fiction#interactive novel#answered
46 notes
·
View notes
Text
"Lore, where have you been?"
In hell, probably. I remade M0R1BUND.com.
“For the love of god, why?”
Short answer: to save time and money.
Long answer: Sharing art was getting burdensome. Neocities hosts static websites built with html, css, and javascript—which is awesome for its mission, to encourage people to create future-proof websites. But this also means that every page is created and maintained by hand. I handle every little link and file and bit of code, and if I want to do site-wide changes, I have to push those by hand, too. This takes time, and so does writing image descriptions and cross-posting art to other websites. It became normal for sharing art to eat up an entire day.
I later created Basedt.net in WordPress, so that I didn’t have to worry about managing link hierarchies, which was a big timewaster on my old webcomic. I liked working in WordPress well enough, and I knew I would benefit from being able to use PHP to manage the sheer amount of stuff that’s on M0R1BUND.com. I was also paying double for webhosting through two different services, when I really didn’t need to…. So… I knew it was inevitable that I would consolidate the two at some point. It was time.
I do really love Neocities and I’m sorry to let it go. I encourage anyone who wants to learn web design and create their own website to start there.
Anyway, that’s how I ended up in hell for 6 months.
“What’s changed?”
Most things. I’m most excited about the quality-of-life stuff, like being able to sort art by character/location/world, or being able to move between individual pieces instead of having to return to the gallery landing page. There are lots of things I want to add, but my soft deadline for this was the new year, so I focused on recreating M0R1BUND.com as it existed before… well… this.
I’ve also edited most of my writing. This site is old, and the art is even older, it felt good to give it some TLC.
There are still a few things missing from the new site:
The Woods and RANSOM. They aren’t really representative of Basedt or Mercasor anymore, and I was not a competent writer in 2018. If I re-share them, it will be in the distant future.
Some of my Those Who Went Missing stuff. I haven’t been playing TWWM publicly, so this is lower priority right now. It will happen when it happens.
Some twines. They haven’t adjusted to the new filepath format yet. Killswitch is here, though :)
If you need them urgently for some reason, I can share them with you? but that seems doubtful haha.
Links to pages on the old M0R1BUND.com are broken and will remain broken until I set up redirections to the new M0R1BUND.com. I have no idea how long that will take! … Hopefully not long, given the new semester is here.
And of course... If you see anything weird, tell me! I test as much as I can, but I only have access to so many devices. Break this website within an inch of its miserable life so that I can fix it.
“How’s Basedt going?”
It’s going. Recreating my website took precedence for the above reasons, but I’ve been working concurrently on it in my spare time. We move like a glacier into the new year. ETA: ???
37 notes
·
View notes
Text
Frequently Asked Questions About The Infatica SDK FAQ Guide
If you've recently come across the term "infatica-sdk" and you're wondering what it's all about, you're not alone. Many developers and software enthusiasts are curious about how this tool works, how to use it properly, and what to look out for. To make things easier, we’ve gathered some of the most common questions people ask about the Infatica SDK and answered them in a simple, easy-to-understand way.
What is the Infatica SDK, exactly? The Infatica SDK is a software development kit that helps developers include proxy network features into their apps or services. In plain terms, it gives developers a set of tools so that applications can send internet traffic through a network of different IP addresses. This kind of setup can be useful for many things, like running software tests, managing multiple accounts, or collecting data online more safely.
Is it safe to use the SDK? Yes, when used correctly and responsibly, the SDK is safe. But like with any tool, how safe it is depends on how you use it. Always make sure your work follows rules and guidelines, especially if you’re collecting information or sending data.
Do I need to be a programming expert to use it? Not at all. While some basic knowledge of programming is helpful, the SDK comes with documentation and examples to help beginners get started. You can also find helpful communities online where other users share advice and answer questions.
What programming languages can I use it with? The SDK supports popular languages like Python and JavaScript, which makes it easier for developers with different backgrounds to get started. Check the official documentation for the full list.
Can I try it before committing to a full project? Yes, many people test the SDK in smaller setups before using it in bigger applications. Starting this way helps you learn how it behaves and whether it fits what you’re trying to build.
Who do I contact if I need help? There’s usually a support team you can reach out to, but there are also forums and user communities where experienced users can help answer your questions. Sometimes reading through those community posts can solve your problem even faster.
Overall, the Infatica SDK can be a very useful tool if you need to add proxy features to your software. Just take your time to learn the basics, ask questions if you get stuck, and explore step by step.
0 notes
Text
The 10 Code Snippets That Save Me Time in Every Project.
Let’s be real—coding can sometimes feel like a never-ending marathon of the same boring tasks. You write, debug, tweak, repeat. But what if I told you there’s a secret stash of tiny code snippets that could literally cut your work in half and make your life 10x easier?
Over the years, I’ve built up my personal toolkit of code snippets that I pull out every single time I start a new project. They’re simple, they’re powerful, and best of all—they save me tons of time and headaches.
Here’s the deal: I’m sharing my top 10 snippets that are like little magic shortcuts in your code. Bookmark this, share it, and thank me later.

Debounce: The “Stop Spamming Me!” Button for Events Ever noticed how when you type or resize a window, your function fires off like crazy? Debounce lets you tell your code, “Chill, wait a sec before running that again.”
javascript Copy Edit function debounce(func, wait) { let timeout; return function(…args) { clearTimeout(timeout); timeout = setTimeout(() => func.apply(this, args), wait); }; } Say goodbye to sluggish UIs!
Deep Clone: Copy Stuff Without Messing It Up Want a clone of your object that won’t break if you change it? This snippet is the magic wand for that.
javascript Copy Edit const deepClone = obj => JSON.parse(JSON.stringify(obj)); No more accidental mutations ruining your day.
Fetch with Timeout: Because Nobody Likes Waiting Forever Network requests can hang forever if the server’s slow. This snippet makes sure you bail after a timeout and handle the error gracefully.
javascript Copy Edit function fetchWithTimeout(url, timeout = 5000) { return Promise.race([ fetch(url), new Promise((_, reject) => setTimeout(() => reject(new Error('Timeout')), timeout)) ]); } Stay in control of your app’s speed!
Capitalize First Letter: Make Text Look Nice in One Line Quick and dirty text beautifier.
javascript Copy Edit const capitalize = str => str.charAt(0).toUpperCase() + str.slice(1); Perfect for UI polish.
Unique Array Elements: Bye-Bye Duplicates Got a messy array? Clean it up instantly.
javascript Copy Edit const unique = arr => […new Set(arr)]; Trust me, this one’s a life saver.
Format Date to YYYY-MM-DD: Keep Dates Consistent AF Don’t mess with date formatting ever again.
javascript Copy Edit const formatDate = date => date.toISOString().split('T')[0]; Dates made simple.
Throttle: Like Debounce’s Cool Older Sibling Throttle makes sure your function runs at most every X milliseconds. Great for scroll events and such.
javascript Copy Edit function throttle(func, limit) { let lastFunc; let lastRan; return function(…args) { if (!lastRan) { func.apply(this, args); lastRan = Date.now(); } else { clearTimeout(lastFunc); lastFunc = setTimeout(() => { if ((Date.now() - lastRan) >= limit) { func.apply(this, args); lastRan = Date.now(); } }, limit - (Date.now() - lastRan)); } }; } Keep it smooth and snappy.
Check if Object is Empty: Quick Validation Hack Sometimes you just need to know if an object’s empty or not. Simple and neat.
javascript Copy Edit const isEmptyObject = obj => Object.keys(obj).length === 0;
Get Query Parameters from URL: Parse Like a Pro Grab query params effortlessly.
javascript Copy Edit const getQueryParams = url => { const params = {}; new URL(url).searchParams.forEach((value, key) => { params[key] = value; }); return params; }; Perfect for any web app.
Random Integer in Range: Because Random Is Fun Generate random numbers like a boss.
javascript Copy Edit const randomInt = (min, max) => Math.floor(Math.random() * (max - min + 1)) + min; Use it for games, animations, or fun experiments.
Why These Snippets Will Change Your Life If you’re like me, every saved second adds up to more time for creativity, coffee breaks, or learning something new. These snippets aren’t just code — they’re your trusty sidekicks that cut down on repetitive work and help you ship better projects faster.
Try them out. Customize them. Share them with your team.
And if you found this helpful, do me a favour: share this post with your dev buddies. Because sharing is caring, and everyone deserves to code smarter, not harder.
0 notes
Note
Browser extensions georg, what are your extensions
i'm using firefox esr. i cannot attest to the functionality of these extensions in any other browser.
here are the extensions that i think are worth sharing:
ublock origin: and ublock origin specifically. a powerful security suite that prevents your browser from loading data from a wide variety of dishonest and unsafe domains.
no-one should use a browser without this or an equally good extension. vital for security, a better first line of defense than your antivirus.
as a delightful bonus, you can also use it to permanently block specific elements as needed.
noscript: javascript blocker with per-domain whitelisting. most people are not willing to maintain whitelists, but this is still very helpful in blacklist mode. i use it in whitelist mode, and store few permanent exceptions.
greasemonkey: allows you to inject javascript into any page, and thus allows you to write your own browser extensions, or install userscripts written by others. if i count each userscript separately, this counts as about fifteen extensions.
stylus: injects css into any page, and thus also allows you to write your own browser extensions, albeit with one specific purpose.
if i visit any website with any amount of regularity, i have probably written one or more userstyles for it. if i count each userstyle separately, this counts as about forty extensions.
i'll stop here and say that if you're serious about security, or if your safety would be harmed by a third-party gaining hold of your browsing data, you should really think twice before installing anything below this line. i cannot promise they are completely secure.
i have a second browser with only those above four bare-minimum extensions for sensitive browsing. you may want to do the same.
cleanlinks: removes tracking, nesting, and obfuscation from most links in most cases. it isn't perfect. cleanurls is a popular alternative. i've tried and failed to create a userscript to replace this.
user-agent switcher: does what it says on the tin. its use as a privacy tool is dubious, but it is useful for getting a site to display a specific version of itself according to your needs, and that is why i have it.
some websites insist they only work in one browser or another (usually, but not always, chrome). this is almost never true. they typically work in all browsers, provided they see the user-agent they're looking for.
i use this most often to get around sites incorrectly telling me my browser is out of date. it isn't, they just check user-agents incorrectly.
if they're looking for chrome specifically, there's a good chance they want to get up to some absolute bullshit that firefox correctly does not allow. the alternative is that the frontend dev likes the small number of chrome-specific css rules which, i'll be honest, simply do not matter.
webdeveloper: a variety of tools that are purportedly for webdevs, but which are honestly very useful for the end-user, too. i rarely need this, but when i do, i am very glad to have it.
buster: a bot that solves captchas for you. i cannot even tell you why, but i really struggle with captchas, especially google's. i will go around and around in a dozen attempts and never pass. i have no idea which disability is to blame, but these things are disgustingly inaccessible. without buster, i would not be able to view anything that is gated behind a captcha.
we have reached a point where a script can solve a captcha in approximately two seconds, and some humans cannot even given an infinite number of attempts.
emoji to english: as-is, exists to provide text transcriptions of emoji characters. i use it as a tool to wrap all emoji characters in an identifiable element which i can then set not to display via a simple userstyle. frankly, it would be convenient if that were an option in the extension, but i can deal with this workaround.
image block x: adds a toolbar button to prevent or enable image loading on demand. my bandwidth is terrible, and i sometimes need this to be able to use the web at all.
recipe filter: renders recipe websites usable.
session manager, which i cannot link to because it apparently no longer exists. it allows me to save discrete browsing sessions with their own tabs, and switch to them or add them to my existing session as needed. very useful for research, webdev, and browser games. there is no agreed-upon alternative, but in searching i did discover those users who jumped to quantum miss it.
reddit enhancement suite: still functional, despite its claims. pair with old reddit redirect for best results.
new xkit, which despite its claims, is still mostly-functional. i use its blacklist heavily.
i used to have many other extensions, but over the years firefox has added their functionality to the basic browser experience. canvasblocker, for example, can now be replaced with resistfingerprinting:TRUE. context-menu interference, for another example, can be resolved by holding shift.
0 notes
Photo

White jeans are a classic wardrobe staple for spring and summer—but let’s be real…they’re also one of the trickiest pieces to get just right. You want to avoid anything too sheer, too tight, or just plain unflattering. After looking and failing too many times, it can really start to feel like an impossible task. So that is exactly why I’ve done the hard work for you! I’m breaking down three of the best white jeans right now and sharing style tips on how to choose the pair that flatters your body shape. Keep on scrolling for all the tips you need to find the perfect white jeans for YOU! Turn on your JavaScript to view content Once you’ve found the perfect white jeans, check out this post on my favorite shoes for spring and summer! are white jeans flattering? Short answer here…YES! While it is true that white and lighter colors can add volume to your body, styling them and finding the right fit for your body shape really does make all the difference. Here’s some style and fit tips to keep in mind before you hit that “add to cart” button. Check the InseamThe process of finding that perfect pair of white jeans is already frustrating enough, don’t add tailoring to the mix. Always double-check (and then triple check) the inseam length, especially if you’re petite or tall. You want a streamlined and elevated look, and the right length is a key component to achieving that. Fabric MattersLook for white jeans with a blend of cotton and just the right amount of stretch (usually 1–2% elastane or spandex). This ensures they’ll hug your curves without losing their shape. A higher cotton content, thicker fabric will help you feel more supported and confident that your jeans are not see through. If you’re in between sizes, I suggest sizing up—too small of a fit will accentuate any lumps and bumps that you’d rather not highlight. Know Your Best FitBootcut, skinny, straight-leg, or flare? The best silhouette depends on your body shape and personal style. Not sure? Bootcut and straight-leg are universally flattering, while a high-rise flared leg can work wonders for elongating the legs for any shape, especially balancing out curvier hips and thighs. ✨Pro Tip: Make sure that you wear skin-toned undergarments. White or dark undies will show through, while matching your skin tone will remain perfectly hidden. Here’s my favorites to avoid the notorious VPL. Turn on your JavaScript to view content top white jeans #1. Mother The Hustler High Rise Ankle Fray This pair is my all-time favorite for a reason. The Hustler’s high-rise fit and ankle-length cut make them super versatile—dress it up with heels or keep it casual with sandals. The frayed hem adds an effortless, cool vibe, and the inseam is 27.5”. This is perfect for me at 5’4”, and since they’re a raw hem, you can easily cut them to be shorter if they’re too long. The fabric offers the perfect amount of stretch without stretching out. I’ve worn this pair for years now and go back to it again and again, year after year. They run true to size, and yes—they are the perfect white jeans (for petites)! Best for: Rectangle or athletic figures and petites, but can work for ALL body shapes! Why you’ll love them: Soft, stretchy fabric that retains its shape and a cool-girl silhouette that works year-round. Turn on your JavaScript to view content #2. DL1961 Bridget Instasculpt Bootcut These jeans sculpt in all the right places, thanks to DL1961’s Instasculpt technology. They smooth, sculpt, and flatter your body in just the right way. The ankle bootcut silhouette gives a flattering little flare at the bottom, balancing out curves and is the perfect length for petites (27” inseam). The raw hem adds a modern, edgy touch. This pair is also available in a 31.5” inseam right here AND a 33″ inseam here for all my taller ladies! Best for: Petite hourglass or triangle body shapes wanting to hide a tummy. Why you’ll love them: Supportive fabric, clean white finish, on-trend silhouette and multiple lengths available. Turn on your JavaScript to view content #3. Joe’s Jeans Molly High Rise Flare The Molly High Rise Flare from Joe’s Jeans is the go-to pair when you want the look of “legs-for-days” which, yes, is possible even with white jeans! The high rise makes everything feel held and supported, while the flared leg balances hips and creates a long, lean line. Dress up with wedges or down with some chic sneakers. This pair of white jeans is ultra-slimming and the best part for me… they have a 31″ inseam which means I can pair them with a low heel or even a platform sneaker! (Tall ladies, do not despair, keep scrolling to find your perfect pair with an extra long inseam.) These flattering white jeans are one of my favorites that I know you’re going to love! Best for: ALL body shapes, but especially good for hourglass and triangle body shapes (the flare balances curvy hips, butt and thighs beautifully) and with 31-inch inseam these are great for petites too. Why you’ll love them: Sleek high-rise fit, elongating flare, and a soft fabric with just the right amount of stretch but they retain their shape. You can wear these time and time again without washing and they still keep their shape (I’ve tested it out! 😉 Turn on your JavaScript to view content Taller and looking for the perfect white jeans? Check out the Skinny Flare by Veronica Beard that is just what you need (34″ inseam)! wear your white jeans with confidence Wearing white jeans can feel intimidating, but the truth is, the right pair will make you feel incredible. To make sure yours look their best, stick to skin-colored, seamless underwear to avoid any unwanted lines. Pay attention to proportions—if you’re wearing a skinny or slim fit, pair it with a flowy or billowy top, while a bootcut or flare jean looks fantastic with something more fitted on top. Most importantly, wear your white jeans with confidence. Style them your way, have fun experimenting with different looks, and remember that when you feel great in your clothes, it always shows. Source link
0 notes
Photo

Easter Sunday is kind of the unofficial kickoff to spring beauty looks, in my opinion. I know spring was official on March 20th, but Easter time is my benchmark because my own mother always told me to WAIT to plant any new flowers until Easter Sunday arrived. This was because she said the potential for frost would be over here in Georgia. Which signals to me that spring is TRULY here on Easter! So today I am sharing wearble and easy makeup trends for Easter Sunday Makeup. This means that pastels, bright florals, and sunshine are the best reasons to dress up a little more than usual. Whether you’re heading to brunch, church, or just a reason for a special family gathering, it’s the perfect holiday to lean into a spirited makeup look that complements the season. Easter Sunday Makeup Trends For 2025, the beauty trends are all about glow, softness, and wearable color. And don’t worry, we’re leaving the glittery TikTok looks to Gen Z. This year’s trends are surprisingly age-inclusive with a few fun curveballs that us over-40+ gals can confidently rock. For my Easter look, I took a nod from the 1960’s mod makeup looks of Diahann Carroll and am showing you how to make it your own. Think the retro powder blue eye with stark graphic liner a la Twiggy, BUT, now with a softer approach like these inspo pics of Diahann. I think she looks so chic. Easter Sunday Makeup Trend: Bold Color I also took inspiration from the print in my floral print Amazon dress, $40, as I like to do when choosing my makeup looks and trying to tie in the makeup with the wardrobe! (wearing a size small btw.) Before we get into this look tutorial, there’s still time for everyone to take advantage of the Sephora Sales Event that ends on 4/14. So be sure to check out all of my recommendations on last week’s post, of what you should take advantage of during this sale that happens only twice a year! Turn on your JavaScript to view content 1. Skin Is In: Glazed But Grown-Up The Easter Sunday Makeup Trend: “Glazed skin” continues to dominate 2025—but it’s less about looking dewy and more about looking healthy. Think softly luminous, plumped-up skin that reflects light without looking greasy. How to Wear It: Start with hydrating skincare helpers. I chose to start with the iconic product from Peach & Lily, their Glass Skin Veil mist, $31, that I sprayed a generous amount over my moisturizer before I applied foundation. It acts like a pre-setting spray/primer plus glow getter! Highly recommend this K beauty product. Add in a light-reflecting skin tint or light foundation with a satin finish. I chose my Make Up For Ever HD Skin Hydra Glow foundation, in shade 2N22, $47. This 86% skincare based foundation is inspired by skincare sheet masks and delivers 24-hour hydration. It is ideal for dry, mature, and sensitive skin (not really for the oily skinned gals, sorry!). The featherlight texture melts into skin and looks beautiful. 2. Color on the Eyes—But Softer The Easter Sunday Makeup Trend: Watercolor lids are huge this spring, with soft washes of lavender, baby blue, mint green, or peach making a comeback. This is the fun part! How to Wear It: Skip shimmer-heavy shadows and opt for sheer satin formulas or matte shadows that blend easily. Try this powder blue eyeshadow look paired with navy eyeliner for a modern, spring-ready look that brightens the eyes. I’m using a pale blue-green-gray shade from an old palette, but a similar shade can be found here from Colourpop and I am using the Pixi Beauty silky eye pencil in “blue black,” $12. The key was to use just a dusting of the powder blue in the center of the eye, then add any neutral taupe brown/grey shade of shadow along your crease to ground it. I then tightlined just underneath the upper lash line, then added a small outer flick on upper lash line with the navy and smudged. Lots of lashes + bright waterline to finish it off. With any colorful eyeshadow such as this, I’d make sure to add this moonstone nude eyeliner, $9, into the lower waterline to make sure the eyes stay super bright! Leave the lower lash line bare of color of eyeshadow but be sure to coat your lashes in mascara with the Maybelline Sky HIgh mascara, $9 which is becoming a favorite of mine. Turn on your JavaScript to view content 3. Blush Draping for a Youthful Glow The Easter Sunday Makeup Trend: “Blush draping” is the technique of sweeping blush up toward the temples to lift and sculpt the face. 2025 is all about monochromatic blush looks—think blush that matches your lip color for a pulled-together vibe. How to Wear It: Choose a true pink – like the iconic Dior Rosy Glow blush, in 001 Pink, $40, that I’m using here. It’s the happiest shade of pink that has a subtle hint of luminosity. Take this blush up high to the sky for a facelift. Bonus tip: A touch of blush on the bridge of the nose gives that sun-kissed, happy look, like you’ve just come back from a springtime stroll. 4. Lips: Soft Statement The Easter Sunday Makeup Trend: A glossy lip balm is the perfect match to the mod eye look. No fuss of heavy lipstick or lip liner needed. This keeps everything balanced and not overdone. How to Wear It: Choose a hydrating lip gloss that gives a sheer tint of color while nourishing lips. If you haven’t picked up a L’Oreal Glow Paradise Gloss in Balm yet, $11, go get one! I chose shade “sublime magenta” to pair with my Dior pink cheeks. Easy breezy coordinating cheeks and lips! Turn on your JavaScript to view content 5. Radiant Skin: Glow and Blur Have you tried the miracle body coverage perfector by Westmore Beauty, $49?? I’m OBSESSED. I struggle with varicose veins on my legs and a little bit of age spots on my chest, and this stuff is truly like rubbing a blurring filter onto your skin. And it does not rub off on clothes! I added a little to my exposed chest here, and you won’t believe your eyes when you try this product – I’m wearing shade “natural radiance.” I applied mine with my Anisa Beauty body brush, $50. The Rest of My Easter Sunday Outfit Details Similar Kendra Scott drop earrings here, $80 in the dichroic glass shade that goes with everything! // My Amazon tie shoulder maxi dress, $40, in the green shade is just the cutest – very silky and comfy to the max. // Wearing those clear Target sandals again, $25, because they just go with everything and are mad comfortable because of the memory foam! The Unexpected: Makeup-as-Accessories Want to stand out a little this Easter? Then try this soft mod eye look. You don’t have to overhaul your entire beauty routine to feel fresh and festive this Easter. A touch of pastel, a healthy glow, and the confidence of knowing you’ve found your own way to wear makeup trends? That’s timeless beauty. Here are 3 other eyeliner + lip combos to try this Easter – get to practicing! About The Author Jennifer Duvall Jennifer is our beauty & makeup contributor. She posts a weekly column on Saturdays She also runs her own website & YouTube channel, which you can find by clicking below. Source link
0 notes
Text
How to Build a Custom Shopify Page Using AI: A Beginner's Guide to Code-Assisted Development
Ever wanted to create a personalized product page where customers can upload their own images, choose sizes, and preview their creations - all without touching a single line of code? I recently built exactly that using Shopify and AI tools, and I'm here to show you how you can do it too.
Why Use AI for Shopify Development?
Before we dive in, let me share something exciting: AI has revolutionized how we approach web development. Instead of spending months learning to code or hiring expensive developers, you can now use AI as your personal web development assistant. It's like having a senior developer on speed dial, ready to help 24/7.
Understanding Shopify's Theme Editor and Its Limitations
Let's be completely honest about what you can and can't do in Shopify's Theme Editor:
What the Theme Editor Actually Does:
Log into your Shopify account
Click on "Online Store" → "Themes" → "Customize"
Here you can:
Rearrange existing blocks and sections
Change colors and fonts
Adjust spacing and layouts
Add pre-built sections
Modify basic settings
But here's the important part: The Theme Editor alone won't let you build custom features like image uploaders or preview generators. Think of it like decorating a pre-built house - you can change the paint and move the furniture, but you can't add new rooms without some construction work.
The Real Path to Custom Features
To create truly custom features, we need to work with code. Don't panic! Here's how we'll approach this:
Access the Code Editor:
In your theme, click "Actions" → "Edit code"
This is where the real customization happens
You'll see folders and files with different extensions (.liquid, .js, .css)
How to Have a Productive Conversation with AI About Custom Shopify Development
Starting with the Basics
First, let's understand how to break down our conversations with AI into logical steps. Here's the sequence I used to build my custom image upload feature:
Understanding the Tools (First Chat Session)
Act as a Shopify development teacher for complete beginners. I want to create a page where users can upload images and preview them. What tools and access do I need before starting? Please explain each tool's purpose in simple terms.
This will help you understand:
Which Shopify plan you need
Required developer tools
Any third-party services needed
Basic setup requirements
Understanding the Process (New Chat Session)
Act as a Shopify project manager. I want to create an image upload feature. Can you break down this project into small, manageable steps? Please explain what each step accomplishes.
This helps you:
See the big picture
Understand the workflow
Know what to learn first
Plan your development path
Learning About File Structure (New Chat Session)
Act as a Shopify file structure expert. I'm starting from zero. Where in my Shopify theme should I add custom features? Please explain:1. Which folders matter for custom features2. What each important file does3. Where to safely add new code4. What files I should never modify
Getting into Development
Starting the Code (New Chat Session)
Act as a Shopify developer who's great at explaining basics. I need to create an image upload feature. Please help me with:
1. The exact files I need to create 2. Where to put them in my them. 3. Basic structure of each file 4. How these files work together
Building the Upload Feature (New Chat Session)
Act as a Shopify code expert. I'm ready to build the image upload feature. Please provide: 1. The HTML code for the upload button 2. Any required JavaScript 3. Explanation of each code block 4. Where exactly to paste each piece
Creating the Preview Feature (New Chat Session)
Act as a front-end developer. I have the upload feature working. Now I need to: 1. Show a preview of the uploaded image 2. Let users select sizes 3. Display the final previewPlease provide the code and explain how it works.
Important Tips for AI Communication
Be Specific About Your Knowledge Level
Bad example: "How do I add code to Shopify?"
Good example: "I'm new to Shopify and have never modified code before. Please explain how to safely add custom code to my theme, assuming I don't know any technical terms yet."
Ask for Explanations, Not Just Solutions
Bad example: "Give me the code for image upload."
Good example: "Please provide the code for image upload and explain:
What each part does
Why each line is necessary
How to test if it's working
Common mistakes to avoid"
Request Context for Technical Terms
Bad example: "How do I use liquid tags?"
Good example: "I've heard about 'liquid tags' but don't know what they are. Can you:
Explain what liquid tags are in simple terms
Show basic examples
Explain when and why to use them"
Break Down Complex Features When building the image upload feature, ask about each component separately:
First chat: File input creation
New chat: Image preview
New chat: Size selection
New chat: Final preview generation
Real Example of Progressive Questions
Here's how I built my feature, step by step:
First Session:
Act as a Shopify expert for beginners. What exactly happens when a user uploads an image on a Shopify store? Please explain the process in non-technical terms.
Next Session:
Act as a Shopify code teacher. Now that I understand the upload process, how do I create a basic file upload button? Please provide the simplest working example.
Following Session:
Act as a JavaScript expert who's good with beginners. I have a working upload button. How do I show a preview of the uploaded image? Please explain like I'm five.
Testing and Troubleshooting
Always end your AI conversations with:What should I test to make sure this works properly? Please provide: 1. Specific things to check 2. Common problems to watch for 3. How to fix basic issues 4. When to seek more help
Remember: AI is your patient teacher, but you need to ask the right questions. Start with understanding, then move to implementation, and always ask for explanations rather than just code.
Success Stories
When I first started, I didn't know anything about Shopify or coding. Using these exact steps, I created a custom page where customers can:
Upload their pictures
Choose sticker sizes
Select quantities
See exactly how their final product will look
#integrate ai tools#ai tools#ai#llm#shopify#smallbusiness#shopify development company#shopify ecommerce development#technology
1 note
·
View note
Text
How to Build a Web Application in 2024
Introduction to Web Application Development in 2024
Welcome to the exciting world of web application development in 2024! As technology continues to advance at a rapid pace, building a web app has become more accessible and rewarding than ever before. Whether you're an aspiring developer or a business owner looking to enhance your online presence, understanding the ins and outs of web application development is crucial.
In this blog post, we will explore the key elements that go into creating a successful web app in 2024. From mastering the basics of HTML, CSS, and JavaScript to choosing the right framework for your project, we'll guide you through each step of the process.
But it's not just about code. User experience design plays a vital role in captivating your audience and keeping them engaged with your web app. We'll delve into why UX design is essential and offer tips on how to create intuitive interfaces that leave users wanting more.
Of course, no web app can function without proper backend development. In this article, we'll compare two popular options – Node.js and PHP – so you can make an informed decision based on your specific needs.
Additionally, integrating APIs and third-party services can take your web app to new heights by adding functionality and enhancing user experiences. We'll discuss best practices for incorporating these external resources seamlessly into your project.
Testing and debugging are critical steps in ensuring a smooth launch for any web application. We'll provide advice on how to thoroughly test every aspect of your app before making it available to users.
Once you've successfully built your dream web app, launching it into the digital realm requires careful planning and maintenance strategies. We'll share insights on effective deployment techniques as well as ongoing maintenance tasks that will keep your site running smoothly long after its initial launch.
Looking towards future trends in website development company is also essential if you want to stay ahead of the curve. We'll explore emerging technologies such as AI integration, voice search optimization capabilities, Progressive Web Apps (PWAs), and more.
So, whether you're a seasoned developer or just starting your
Understanding the Basics: HTML, CSS, and JavaScript
When it comes to web application development in 2024, having a solid understanding of the basics is crucial. And at the core of every web app are three fundamental technologies: HTML, CSS, and JavaScript.
HTML (Hypertext Markup Language) provides the structure and content for your web pages. It's like the backbone that holds everything together. With HTML, you can define headings, paragraphs, images, links – basically all the elements that make up a webpage.
CSS (Cascading Style Sheets), on the other hand, takes care of how your web pages look. It adds style and visual appeal by controlling fonts, colors, layouts – essentially everything related to design. CSS allows you to create stunning interfaces that captivate users and enhance their overall experience.
And finally, we have JavaScript – a powerful scripting language that brings interactivity to your web applications. With JavaScript's functionality and versatility, you can create dynamic elements such as form validation or interactive maps. It enables you to add logic and behavior to your website so that it goes beyond being static content.
In today's world of web development in 2024 though there are many frameworks available which simplify these tasks making it easier than ever before!
From this brief introduction into these foundational technologies -HTML,CSS ,JavaScript- I hope you understand how critical they are when building a successful web application!
Choosing the Right Framework: React vs Angular
Choosing the right framework for your web application is a crucial decision that can significantly impact its success. In 2024, two popular options are React and Angular. Both frameworks have their strengths and weaknesses, so it's important to consider your specific project requirements before making a choice.
React is known for its simplicity and flexibility. It allows developers to create reusable components, making it easier to maintain and update the codebase. Additionally, React offers excellent performance due to its virtual DOM implementation. This makes it ideal for building large-scale applications where speed is essential.
On the other hand, Angular provides a comprehensive solution that includes everything you need to build complex web applications. Its extensive features make it great for enterprise-level projects with multiple teams working together. Angular also has built-in support for TypeScript, which offers static typing and improved tooling.
The decision between React and Angular will depend on factors such as project complexity, team expertise, scalability requirements, and personal preference. It may be helpful to consult with experienced developers or conduct some prototyping before committing to a framework.
Remember that both React and Angular have active communities with plenty of resources available online. So whichever framework you choose, you'll likely find ample support along the way.
In conclusion (not actually concluding), choosing between React and Angular requires careful consideration of your project needs and goals in 2024!
The Importance of User Experience Design
User experience design, often referred to as UX design, plays a crucial role in the success of any web application. It involves creating an intuitive and seamless experience for users, ensuring they can navigate through your website effortlessly and achieve their goals.
One key aspect of user experience design is usability. This focuses on making sure that every element on your website is easy to use and understand. From clear navigation menus to well-organized content layouts, usability ensures that visitors can quickly find what they need without getting frustrated or confused.
Another important consideration in UX design is visual appeal. Aesthetically pleasing designs not only catch the eye but also create a positive impression about your brand or business. By using visually appealing colors, fonts, and graphics, you can engage users and make them more likely to stay on your site longer.
Additionally, user experience design takes into account the responsiveness of a web application across different devices. With the increasing popularity of mobile browsing, it's essential that your website adapts seamlessly to various screen sizes and resolutions.
Moreover, understanding user behavior patterns and preferences is vital in designing effective web applications. Through research methods like surveys or analytics tools, you can gain insights into how users interact with your site and tailor their experiences accordingly.
In conclusion? User experience design should never be overlooked when building a web application in 2024 (and beyond!). By focusing on usability, visual appeal, responsiveness across devices, and user behavior analysis -- among other factors -- you'll create an enjoyable online journey for visitors while achieving your business goals at the same time!
Backend Development: Using Node.js or PHP?
When it comes to backend development for web applications, developers often face the dilemma of choosing between Node.js and PHP. Both have their own strengths and weaknesses, so it's important to consider your specific project requirements before making a decision.
Node.js is a JavaScript runtime built on Chrome's V8 engine. It allows developers to write server-side code using JavaScript, which can be advantageous if you're already familiar with the language. Additionally, Node.js has a non-blocking I/O model that makes it highly efficient for handling concurrent connections.
On the other hand, PHP is a widely-used open-source scripting language specifically designed for web development. It has been around for many years and has a large community of developers who contribute to its ecosystem. PHP is known for its simplicity and ease of use, making it an excellent choice for beginners.
The decision between Node.js and PHP depends on various factors such as scalability requirements, performance considerations, available resources or team expertise. Some prefer the flexibility of Node.js while others appreciate the stability of PHP.
To make an informed decision about which technology stack suits your needs best consult with experienced professionals or reach out to a website development company that specializes in both technologies. They will help guide you based on your specific project requirements.
In conclusion (This paragraph should only be included in this section):
Choosing between Node.js and PHP for backend development requires careful consideration of various factors such as project requirements and team expertise. Both technologies have their own advantages and disadvantages - what matters most is finding the right fit for your specific needs!
Integrating APIs and Third-Party Services into Your Web App
One of the key factors in building a successful web application in 2024 is the ability to integrate APIs and third-party services. These integrations can greatly enhance the functionality and user experience of your web app, allowing you to leverage existing tools and resources.
When it comes to integrating APIs, there are countless options available. From social media platforms like Facebook and Twitter to payment gateways like Stripe or PayPal, these services provide ready-made solutions that can save you time and effort in developing specific functionalities from scratch.
By utilizing APIs, you can add features such as social sharing buttons, login with Google or Facebook options, real-time chat capabilities, maps integration for location-based services, or even machine learning algorithms for personalized recommendations - all without having to reinvent the wheel.
However, it's important to carefully choose which APIs and services you want to integrate into your web app. Consider factors such as reliability, security measures provided by the service provider, documentation availability for easy implementation process etc.
Furthermore,integrating third-party services gives you access to an extensive range of specialized tools that can enhance different aspects of your web app. For example,email marketing providers like MailChimp or SendGrid enable powerful email automation campaigns while analytics platforms like Google Analytics help track user behavior on your site.
In conclusion,the ability to seamlessly integrate APIs and third-party services into your web app is crucial in today's fast-paced digital landscape.
It allows you take advantage of existing resources,differentiate yourself from competitors,and ultimately deliver a more robust,user-friendly experience for your target audience.
So don't hesitate! Explore the vast array of available API integrations out there,and give your web app that extra boost it needs!
Testing and Debugging Your Web Application
Testing and debugging your web application is a crucial step in the development process. It ensures that your application functions as intended and provides a smooth user experience. Here are some key points to consider when testing and debugging your web app.
It's essential to conduct thorough testing across different browsers and devices to ensure compatibility. This will help identify any browser-specific issues or responsive design problems. You can use tools like Selenium or BrowserStack for automated cross-browser testing.
Next, you should test various scenarios and edge cases to uncover any potential bugs or errors. This includes checking form validations, handling invalid inputs, verifying data integrity, and validating user authentication processes.
Additionally, performance testing is vital to optimize load times and ensure efficient processing of requests. Tools like Google PageSpeed Insights or Lighthouse can provide insights on areas for improvement such as image optimization, code minification, caching strategies, and server response time.
Furthermore, implementing proper error handling mechanisms will assist in identifying issues during runtime. Logging error messages with relevant information can aid in diagnosing problems quickly.
Continuous integration (CI) practices should be adopted to automate the testing process whenever changes are made to the codebase. CI tools like Jenkins or Travis CI can help run tests automatically upon each deployment or commit.
Launching and Maintaining Your Web App in 2024
Launching and maintaining a web app in 2024 requires careful planning and attention to detail. Once your web app is developed, it's time to take the crucial step of launching it into the digital world. This involves choosing the right hosting provider that can handle the traffic your app will generate and ensure its smooth performance.
Before launching, thorough testing should be conducted to identify any bugs or glitches that may hinder user experience. It's important to ensure compatibility across different devices and browsers, as users will access your web app from various platforms.
Once launched, regular maintenance is essential for keeping your web app running smoothly. This includes monitoring server performance, updating software versions, and addressing any security vulnerabilities promptly. Regular backups are also vital in case data loss occurs.
User feedback plays a significant role in improving your web app post-launch. Actively seek feedback from users through surveys or reviews to understand their needs better and make necessary improvements accordingly.
In addition to maintenance tasks, regularly update content on your web app to keep it relevant and engaging for users. Incorporate new features or functionality based on user demands or market trends.
Staying up-to-date with technology advancements is crucial for long-term success. Keep an eye on emerging trends such as Artificial Intelligence (AI) integration or Voice User Interface (VUI) development, which could enhance the functionality of your web app.
Remember that launching a successful web application isn't just about technical aspects but also requires effective marketing strategies. Promote your web app through various channels like social media platforms or partnering with influencers who align with your target audience.
By carefully managing both technical aspects and marketing efforts after launch, you can ensure sustained growth and success for your web application in 2024.
Future Trends in Web Application Development
As we step into 2024, the world of web application development is evolving at a rapid pace. Technology continues to advance, and new trends are emerging that will shape the future of this industry. Here are some key trends to watch out for:
1. Progressive Web Applications (PWAs): PWAs combine the best features of websites and mobile apps, providing users with an app-like experience directly from their browsers. With offline functionality, push notifications, and quick loading times, PWAs are set to revolutionize user engagement.
2. Voice User Interface (VUI): The rise of smart speakers and virtual assistants has given birth to voice-controlled applications. Integrating VUI into web apps allows users to interact naturally using voice commands, making tasks more convenient and efficient.
3. Artificial Intelligence (AI) Integration: AI-powered chatbots have already made their mark on customer service, but in 2024 we can expect deeper integration of AI technologies into web applications. From personalized recommendations based on user behavior to predictive analytics for better decision-making - the possibilities are endless.
4. Augmented Reality (AR) and Virtual Reality (VR): AR/VR technology is not just limited to gaming; it has immense potential in various industries such as education, healthcare, e-commerce, and more. Integrating AR/VR experiences into web applications can provide immersive interactions like never before.
5. Cybersecurity: With increasing cyber threats lurking around every corner of the internet, robust security measures become even more crucial for web applications in 2024. Developers will need to focus on implementing strong encryption protocols and regularly updating security patches to protect sensitive user data.
6.Data Privacy Compliance: As privacy concerns continue to grow among users worldwide due to frequent data breaches scandals,enforcing stringent data protection regulations such as GDPR or CCPA becomes essential.
Developers must prioritize privacy by design principles when building web applications,to ensure compliance with such regulations and earn users' trust.
Conclusion
As we look ahead to the year 2024, web application development continues to evolve and present exciting opportunities for businesses and developers alike. With the right tools, frameworks, and a focus on user experience design, building a successful web app has become more accessible than ever before.
HTML, CSS, and JavaScript remain the foundation of web development, providing the essential building blocks for creating dynamic and interactive websites. When it comes to choosing a framework, React and Angular are two popular options that offer different advantages depending on your project requirements.
User experience design plays a crucial role in ensuring that your web app is intuitive and engaging for users. Taking into consideration factors such as usability, accessibility, and visual appeal will greatly enhance the overall success of your application.
When it comes to backend development, both Node.js and PHP provide robust solutions. The choice between them depends on factors like scalability needs or existing expertise within your team.
Integrating APIs and third-party services can greatly enhance the functionality of your web app. Leveraging these resources allows you to add features such as payment gateways or social media integration seamlessly.
Testing and debugging are essential steps in ensuring that your web app performs flawlessly across various devices and browsers. Regularly conducting tests throughout the development process will help identify any issues early on before they impact user experience negatively.
Launching your web app is just the beginning; ongoing maintenance is critical for its long-term success. Stay updated with security patches, performance improvements, bug fixes while listening closely to feedback from users to continuously improve their experience.
Looking forward into 2024's future trends in web application development promises even more exciting possibilities. Technologies like Artificial Intelligence (AI), Internet of Things (IoT), Progressive Web Apps (PWAs), Voice User Interface (VUI) are steadily gaining traction – offering new avenues for innovation in this field.
0 notes
Text
Javascript's not very optional "optional semicolons"
It's something we all hear about: Javascript's semicolons are optional except when they aren't. But it's actually kinda surprising how many people haven't encountered what this is referring to. So I thought I would share a real example encountered by Jr. Dev at work (well an example snippet version of what they encountered, NDAs gotta be followed and all that).
So for various reasons they needed to set up an anonymous async function and use a then to attach an async callback. They ended up with something like this:
console.log("I am a line of code that works") (async () => { console.log("I'm doing some async things") await new Promise(resolve => setTimeout(resolve, 1000)); })().then(() => { console.log("Done!") })
It's a clever little construction actually. But what's weird is that there's now an error on the first line (Firefox):
Uncaught TypeError: console.log(...) is not a function
Why is the line before borked? Like it'd make sense if the weird async bit had an error, but no, it's the entirely normal console.log call.
Well it's because Javascript doesn't always treat whitespace the same. When something is in brackets Javascript gives 0 hoots about the whitespace between it and the previous token. So what the interpreter is actually seeing is this:
console.log(...)(...).then(...)
It thinks you are trying to call the result of console.log and attach an async callback to the result of that. console.log 'returns' undefined. undefined is not a function. Hence the error "console.log(...) is not a function".
The way to solve this is to add the good ol' "optional" semicolon back into the code like this:
console.log("I am a line of code that works"); (async () => { ...
Now the interpreter knows that the first line is a complete statement, and it will no longer think you are trying to call it as a function.
Don't forget your semicolons, people!
#javascript#software development#software engineeering#optional semicolons#this is why everyone hates javascript#just rewrite it in rust
0 notes
Text
How To Automatically Add Discount Codes to Shopify Checkout With Pure Javascript
New Post has been published on https://henryreith.co/automatically-add-discount-codes-to-shopify-checkout/?utm_source=TR&utm_medium=HR+-+Tumblr&utm_campaign=SNAP%2Bfrom%2BHenry+Reith
How To Automatically Add Discount Codes to Shopify Checkout With Pure Javascript

Discount codes are a key part of most eCom & Shopify businesses’ marketing strategies. Whether you use them for Black Friday sales, to drive conversions for first-time sales, to increase retention or as part of an affiliate offer, they get a lot of use. So in this article, I’ll go through how to add discount codes to your Shopify checkout automatically for customers.
Shopify is an awesome eCom platform, but the discount code experience for customers can be a bit clunky. On mobile, the discount code box can be hidden so some customers miss it and on desktop customers have to type it and we know the more fiction there is the less likely it is someone will convert. Also when you give discount’s to customers or share them with affiliates, i always think it looks best if the URL is as short and relevant as possible. So i like to create url’s such as yourstore.com/discountname or yourstore.com/partnername, that then redirects to a full URL with UTM tracking and the discount information included.
So below, we’ll go through a neat JavaScript trick I created to automatically apply discount codes to a Shopify cart using URL query strings for my store Oh Crap. Essentially, when a user clicks a link or visits your store with a specific URL, the discount code embedded in that URL is automatically applied to their cart. No manual input needed! Now, let’s dive into how this works.
Automatically Add Discount Codes to Shopify Checkout Using Shopify’s Built-In Functionality
Before I share how you can automatically add discount codes to the Shopify cart from a query string parameter I want to point out Shopify does have a built-in function to add discount codes.
If you go to yourstore.com/discount/[discountcode]/ Shopify will automatically redirect you to the homepage and the discount code will be automatically added at checkout. So if a customer goes to yourstore.com/discount/Henry10/ the discount code Henry10 will be added at checkout & the customer will land on the homepage of your website.
And if you want to redirect customers to go to a particular page on your site, you can include a redirect parameter such as yourstore.com/discount/Save10?redirect=%2Fcollections%2Fall, which will mean customers land on your yourstore.com/collections/all URL.
You can read the full Shopify Docs on this functionality here.
There are also apps that add discount codes to Shopify checkout automatically, but that means that more JS files are added to your site. And slower loading times which are not good for SEO and usability.
However, that just doesn’t look good for customers and adds complications when it comes to adding UTM’s or any other parameters easily. It’s a lot easier to include the discount code in the direct score URL query string. So let’s go through a method to do this below.
Automatically Add Discount Codes to Shopify Checkout With Pure Javascript
Here is the full JS code to automatically add discounts to your Shopify checkout:
This will take the parameter from the discount= query string and add it automatically at checkout. So if your URL is yourstore.com/?discount=Save10 the discount code Save10 will automatically be added at checkout.
You can either add this to the bottom of your theme.liquid file wrapped in <script> tags, or i’ve added to my custom.js theme file.
Now let’s break the code down so you can see what’s going on:
Extracting the Discount Code
The first step in this process is to extract the discount code from the URL. This code could be a part of the URL in a format like https://yourstore.com/?discount=code. Here discount is a URL parameter, and code is the actual discount code.
var urlParams = new URLSearchParams(window.location.search); var discountCode = urlParams.get('discount');
In the code snippet above, we’re utilising the URLSearchParams API to parse the query string of the current URL (window.location.search). Then, using the get method, we fetch the value of the discount parameter, which is our discount code.
If there is a discount parameter in the URL, the rest of the code is executed.
Storing the Discount Code
The next step is to store this discount code for later use. We do this by saving it in a cookie.
document.cookie = `discount_code=$discountCode; path=/`;
We’re setting a cookie named discount_code with the value of our discount code. The path=/ option ensures the cookie is available across the entire website, so you can use it for elements such as notification bars.
Applying the Discount Code
The final step is to apply this discount code to the user’s cart. We achieve this by sending a GET request to the /discount/discountCode endpoint on our server.
fetch(`/discount/$discountCode`);
Here, fetch is a modern, promise-based API for making HTTP requests from the browser. This basically simulates the website visitor visiting Shopify’s automatic discount URL outlined above. This means we get to use all of Shopify’s built-in functionality to add the discount to the checkout automatically.
Conclusion
In this article, we’ve explored how to enhance the shopping experience on your Shopify store by automatically applying discount codes from URL query strings. We’ve broken down the process into three simple steps – extracting the discount code from the URL, storing it in a cookie, and applying it to the user’s cart.
With this knowledge, you can now create promotional links containing discount codes that are automatically applied when clicked by a user.
Have you tried implementing this feature in your Shopify store? Do you have any other unique ways you’re improving your customer’s shopping experience and conversion rates?
0 notes
Photo

Easter Sunday is kind of the unofficial kickoff to spring beauty looks, in my opinion. I know spring was official on March 20th, but Easter time is my benchmark because my own mother always told me to WAIT to plant any new flowers until Easter Sunday arrived. This was because she said the potential for frost would be over here in Georgia. Which signals to me that spring is TRULY here on Easter! So today I am sharing wearble and easy makeup trends for Easter Sunday Makeup. This means that pastels, bright florals, and sunshine are the best reasons to dress up a little more than usual. Whether you’re heading to brunch, church, or just a reason for a special family gathering, it’s the perfect holiday to lean into a spirited makeup look that complements the season. Easter Sunday Makeup Trends For 2025, the beauty trends are all about glow, softness, and wearable color. And don’t worry, we’re leaving the glittery TikTok looks to Gen Z. This year’s trends are surprisingly age-inclusive with a few fun curveballs that us over-40+ gals can confidently rock. For my Easter look, I took a nod from the 1960’s mod makeup looks of Diahann Carroll and am showing you how to make it your own. Think the retro powder blue eye with stark graphic liner a la Twiggy, BUT, now with a softer approach like these inspo pics of Diahann. I think she looks so chic. Easter Sunday Makeup Trend: Bold Color I also took inspiration from the print in my floral print Amazon dress, $40, as I like to do when choosing my makeup looks and trying to tie in the makeup with the wardrobe! (wearing a size small btw.) Before we get into this look tutorial, there’s still time for everyone to take advantage of the Sephora Sales Event that ends on 4/14. So be sure to check out all of my recommendations on last week’s post, of what you should take advantage of during this sale that happens only twice a year! Turn on your JavaScript to view content 1. Skin Is In: Glazed But Grown-Up The Easter Sunday Makeup Trend: “Glazed skin” continues to dominate 2025—but it’s less about looking dewy and more about looking healthy. Think softly luminous, plumped-up skin that reflects light without looking greasy. How to Wear It: Start with hydrating skincare helpers. I chose to start with the iconic product from Peach & Lily, their Glass Skin Veil mist, $31, that I sprayed a generous amount over my moisturizer before I applied foundation. It acts like a pre-setting spray/primer plus glow getter! Highly recommend this K beauty product. Add in a light-reflecting skin tint or light foundation with a satin finish. I chose my Make Up For Ever HD Skin Hydra Glow foundation, in shade 2N22, $47. This 86% skincare based foundation is inspired by skincare sheet masks and delivers 24-hour hydration. It is ideal for dry, mature, and sensitive skin (not really for the oily skinned gals, sorry!). The featherlight texture melts into skin and looks beautiful. 2. Color on the Eyes—But Softer The Easter Sunday Makeup Trend: Watercolor lids are huge this spring, with soft washes of lavender, baby blue, mint green, or peach making a comeback. This is the fun part! How to Wear It: Skip shimmer-heavy shadows and opt for sheer satin formulas or matte shadows that blend easily. Try this powder blue eyeshadow look paired with navy eyeliner for a modern, spring-ready look that brightens the eyes. I’m using a pale blue-green-gray shade from an old palette, but a similar shade can be found here from Colourpop and I am using the Pixi Beauty silky eye pencil in “blue black,” $12. The key was to use just a dusting of the powder blue in the center of the eye, then add any neutral taupe brown/grey shade of shadow along your crease to ground it. I then tightlined just underneath the upper lash line, then added a small outer flick on upper lash line with the navy and smudged. Lots of lashes + bright waterline to finish it off. With any colorful eyeshadow such as this, I’d make sure to add this moonstone nude eyeliner, $9, into the lower waterline to make sure the eyes stay super bright! Leave the lower lash line bare of color of eyeshadow but be sure to coat your lashes in mascara with the Maybelline Sky HIgh mascara, $9 which is becoming a favorite of mine. Turn on your JavaScript to view content 3. Blush Draping for a Youthful Glow The Easter Sunday Makeup Trend: “Blush draping” is the technique of sweeping blush up toward the temples to lift and sculpt the face. 2025 is all about monochromatic blush looks—think blush that matches your lip color for a pulled-together vibe. How to Wear It: Choose a true pink – like the iconic Dior Rosy Glow blush, in 001 Pink, $40, that I’m using here. It’s the happiest shade of pink that has a subtle hint of luminosity. Take this blush up high to the sky for a facelift. Bonus tip: A touch of blush on the bridge of the nose gives that sun-kissed, happy look, like you’ve just come back from a springtime stroll. 4. Lips: Soft Statement The Easter Sunday Makeup Trend: A glossy lip balm is the perfect match to the mod eye look. No fuss of heavy lipstick or lip liner needed. This keeps everything balanced and not overdone. How to Wear It: Choose a hydrating lip gloss that gives a sheer tint of color while nourishing lips. If you haven’t picked up a L’Oreal Glow Paradise Gloss in Balm yet, $11, go get one! I chose shade “sublime magenta” to pair with my Dior pink cheeks. Easy breezy coordinating cheeks and lips! Turn on your JavaScript to view content 5. Radiant Skin: Glow and Blur Have you tried the miracle body coverage perfector by Westmore Beauty, $49?? I’m OBSESSED. I struggle with varicose veins on my legs and a little bit of age spots on my chest, and this stuff is truly like rubbing a blurring filter onto your skin. And it does not rub off on clothes! I added a little to my exposed chest here, and you won’t believe your eyes when you try this product – I’m wearing shade “natural radiance.” I applied mine with my Anisa Beauty body brush, $50. The Rest of My Easter Sunday Outfit Details Similar Kendra Scott drop earrings here, $80 in the dichroic glass shade that goes with everything! // My Amazon tie shoulder maxi dress, $40, in the green shade is just the cutest – very silky and comfy to the max. // Wearing those clear Target sandals again, $25, because they just go with everything and are mad comfortable because of the memory foam! The Unexpected: Makeup-as-Accessories Want to stand out a little this Easter? Then try this soft mod eye look. You don’t have to overhaul your entire beauty routine to feel fresh and festive this Easter. A touch of pastel, a healthy glow, and the confidence of knowing you’ve found your own way to wear makeup trends? That’s timeless beauty. Here are 3 other eyeliner + lip combos to try this Easter – get to practicing! About The Author Jennifer Duvall Jennifer is our beauty & makeup contributor. She posts a weekly column on Saturdays She also runs her own website & YouTube channel, which you can find by clicking below. Source link
0 notes