#tutorials please
Explore tagged Tumblr posts
Visit Tumblr Blog
Explore Tumblr blogs with no restrictions, modern design and the best experience.
Last Seen Tumblr Blogs


Fun Fact
25% of US internet users with an annual income of $80-100K use Tumblr.
Text
Anyone know anything about CSS? Not in the show me how (although resources, links, etc. are appreciated). But this is a weird one.
Okay you know those things you see with PowerPoint tips and tricks, like morphs and transitions, can they be done with CSS?
Every so often I see those 30 sec "here's a tutorial on punching up your presentation" and they're super cool, but I want to employ them on a website, not as a presentation.
Specifically, I want to set up some... I'm assuming containers, to create some cool ways of showcasing information for my world building. I'm willing to learn how to do it myself, but if someone knows where I can find decent walkthroughs, that would be an immense help to get started.
#css help#tutorials please#this doesnt have a time limit or anything#i just want to putter and poke at stuff#but unless I know what im looking at I just get discouraged
1 note
·
View note
Text
On this day
A Savior was Born
#I’m very pleased with the results#there’s just one little detail I’d wanted to add that didn’t turn out but otherwise he’s perfect#expect the full tutorial in the next week I need to make sure I explain every fuck up along the way lmao#homestuck#karkat#Christmas#karkat Vantas
5K notes
·
View notes
Text
Archery: expectations vs reality vs reality again! REJECT THE BORING VERSION OF REALITY AND SUBSTITUTE THE FUN ONE!
You can find the College of Arrows here join us and be an Archery Bard! Or something
#please do ridiculous things responsibly. there's a reason one of the courses on my site is entirely on safety.#archer#archery#nerd#fantasy#history#trick shot#tutorial
5K notes
·
View notes
Note
Hi! Absolutely adore your work 💗 I’m not sure if you’ve gotten a question like this before, so feel free to ignore, but do you have any tips for capturing likeness of characters you draw? You manage to stylize characters, especially live action characters, just right!


Thank you <3
#anon ask#ask box#to be deleted later#personal#my art#please don't repost#tutorial#reference#art resources#artists on tumblr#i tried very hard to explain how i do it but im not a good teacher and it shows#don't listen a word i say#gosh i suck at this#thank you for your lovely words#sarah michelle gellar#christopher plummer#lionel astier#daniel davis#robert downey jr
556 notes
·
View notes
Text

I love that whenever the gang went camping or smth, these two would end up sleeping like this or smth
#httyd#art#how to tell how big toothless is compared to hiccup tutorial please#it’s hard 😞#rtte#hiccup horrendous haddock lll#hiccup haddock#toothless#httyd toothless#toothless httyd#hiccup and toothless#hiccup rtte#race to the edge#doodles#school doodles
789 notes
·
View notes
Text
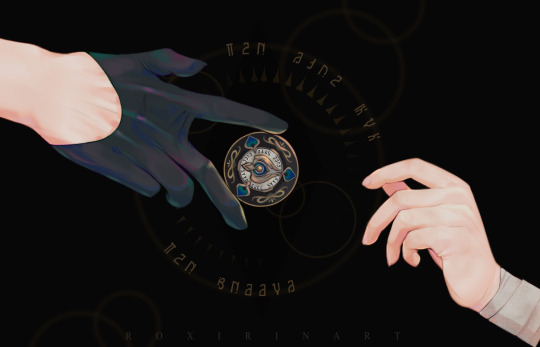
even what you don’t want
#honestly I just wanted to do rendering practice and the tutorial I was looking at used hands as an example#so I drew some hands#and then when I looked away and looked back again I’d made it into a painting by mistake#happens sometimes 🤷♂️#please imagine there’s a cool reason why he’s not wearing his jewellery and not just because I didn’t want to draw it#roxirinart#roxirinhsr#hsr#honkai star rail#aventurine#hsr aventurine#aventurine honkai star rail#aventurine fanart#honkai star rail fanart#hsr fanart#kakavasha
253 notes
·
View notes
Text

i would like to share this VERY handy tutorial on drawing cars by the ever-immaculate EtheringtonBrothers (twitter, instagram)
#tutorial#cars#etheringtonbrothers#knight rider#transformers#resources#tagging the two fandoms i can think of who might need this the most lmfao#thank you EB i would never be able to draw kitt without you o7 coupled with my gmod references of a kitt car model too of course#please check out their accounts they have so so so many good tutorials. absolutely phenomenal tutorials. on like Everything ever#i know cars are THE biggest pain in the ass to draw ever so here's where i learned it 👉👉#you still gotta do a bit of thinking but its amazing how much even just this one trick can do for you. it carries HARD
868 notes
·
View notes
Text

is this anything
#hi rtc fandom please accept me as one of your own#someone has probably done this before but oh well#i've been teaching myself how to use capcut by editing the rtc slime tutorial#and come to the conclusion that i will never use capcut again#ride the cyclone#rtc#ocean o'connell rosenberg#noel gruber#bagel thoughts
1K notes
·
View notes
Text


Hi *flashbangs you with Flatland fanart*
#flatland#flatland fanart#feel free to draw my designs :0#if someone reads this please send me a image ID tutorial I have no idea how they work and I´d hate to mess it up :^]c#my art
739 notes
·
View notes
Text
throws this at high speeds
#wreck it ralph#wir turbo#turbotastic#turbotime#turbo#flash animation#not a replication I mean actual flash . please do not ask me for a tutorial#because your only answer will be “just download the program”#I despise this creature#miss construction#I procrastinated so hard on this#shakes treat bag#wir
252 notes
·
View notes
Text
bill dead hallariel gone cathilda gone and hell if we're counting gilear then he's gone too. the closest thing fabian has to a parental figure right now is honestly probably his motorcycle. if we had to pick. and that's his dog
#[hangman voice] Sire. Sire. If you open YouTube you can find a washing machine tutorial. Sire please#dimension 20#fantasy high junior year#fabian aramais seacaster#scal txt
2K notes
·
View notes
Text
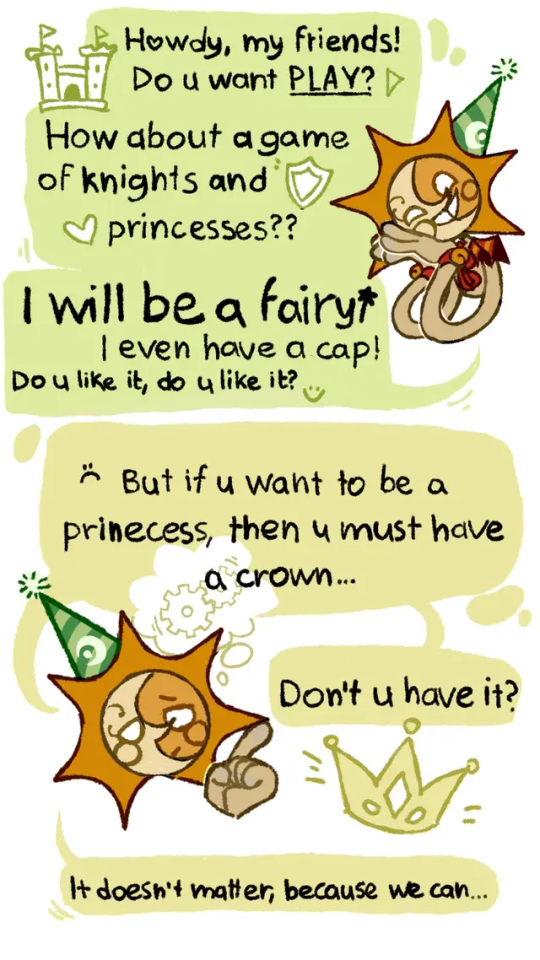
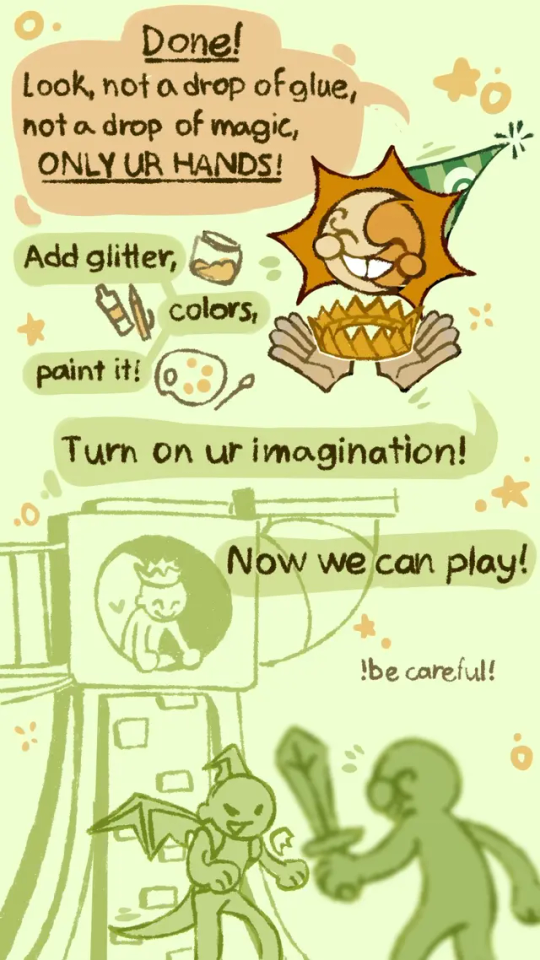
Some old childish shit (I love that and I love Sun so much, someone please treat me like this)
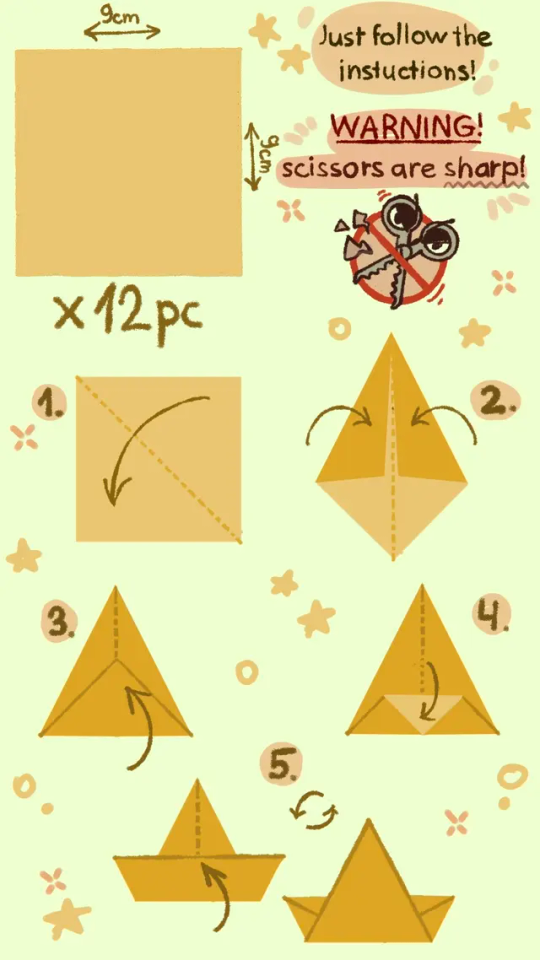
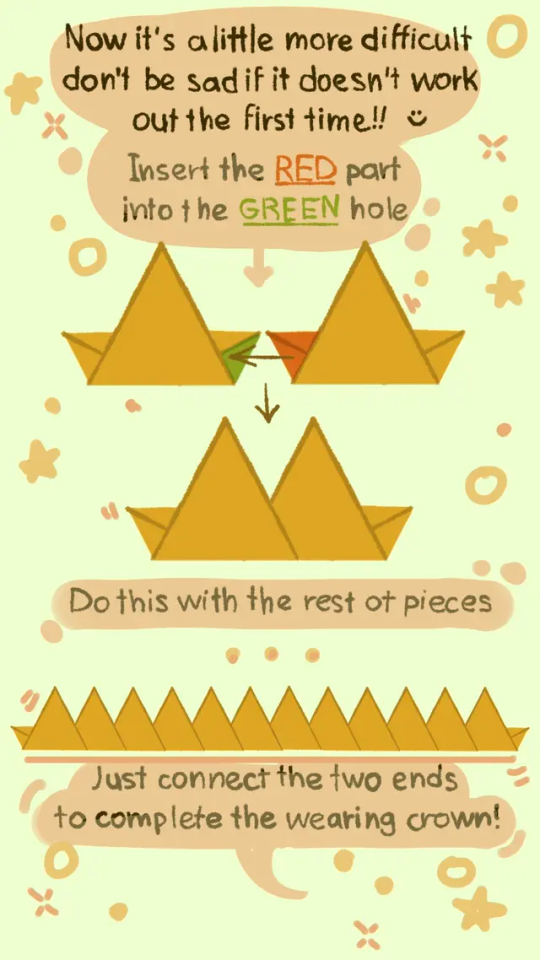
Paper crown tutorial 👑:P
#please treat me like this I'm begging u#hur hur hur hur hur#sundrop#sun#fnaf 9#fnaf 9 security breach#sun fnaf#sun fanart#fanart#tutorial#origami#origami tutorial#crown#paper craft#paper crown#so much tags
2K notes
·
View notes
Text
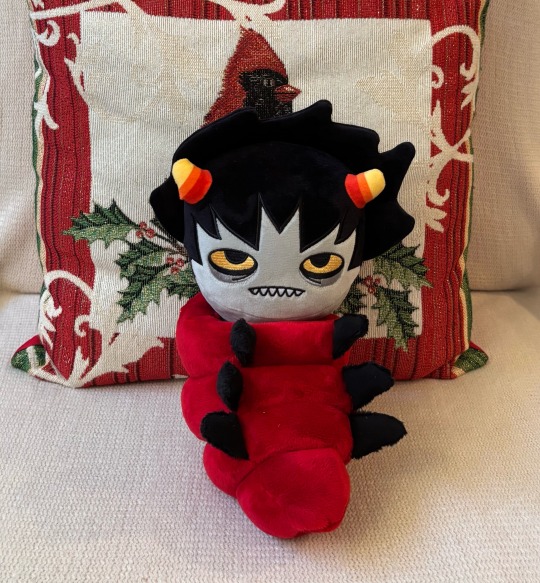
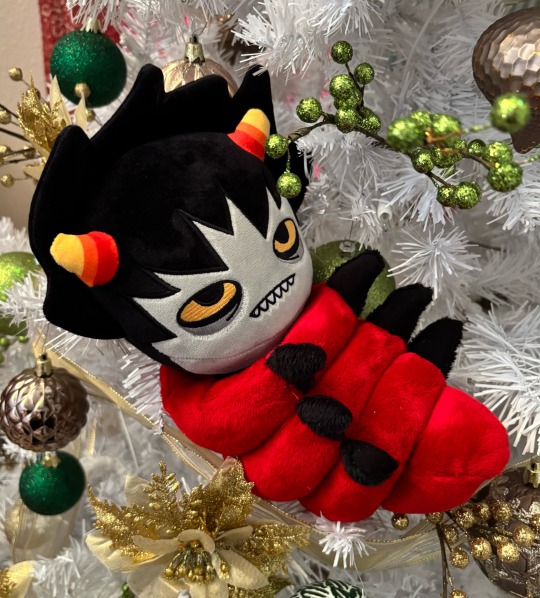
how to grub your karkat
or you can use this for any other plush or if you wanna make a whole new plush entirely or whatever

disclaimer im not a professional in any sense of the word and theres anything technical im doing wrong or you think you can do it better by all means dont hold back
Things you’ll need
sewing machine unless youre really dedicated but doing it by hand is gonna be an agonizing feat i promise. I just used a straight stitch for everything
Fabrics: for the main body i suggest a minky or something soft, for the inner lining something in the same color as the main body and ideally with some stretch, and anything black for the legs. Less than a yard of each will do
if youre using minky or anything furry get a lint roller. Trust me
stuffing, i used polyfil
threads that match your fabrics
good fabric scissors
sewing needle for hand sewing/fixes
karkat plush (optional)

Heres the pattern i came up with! They are numbered for your convenience and pieces with the same numbers are going to be part of the same row of segments. cut everything out on the black lines (Make sure when you’re printing to fit the image to the page size.) on the left we have the belly pieces, the right is the main body, and we have the foot in between
Im using a relatively thin minky fabric, im sure you can use whatever but something with some fluffiness kinda helps to mask any imperfections in the sewing. When drawing out your patterns keep in mind what direction your fibers settle in and try to keep it consistent
On the wrong side of the fabric measure out at least a half inch seam allowance around each piece of the pattern, i used a centimeter and that worked but had me sweatin a bit.

For the main body pieces fold your fabric in half before you cut so you can have 2 of each segment that are mirrored to each other, i also extended all of the #1 pieces an additional centimeter/half inch at the top so we can fold them over at the very end. I highly suggest numbering the insides of all the cut pieces, especially in a way where you will remember what direction they are each meant to sit

After you’ve numbered all your pieces, set them aside and start making your feet!
Each of the 6 legs is made of two pieces, but i because i only had a swatch of the black minky i made up for the rest with some random black scrap fabric from an old project. Try to keep your fabric consistent if you can lol
I didnt give these pieces any more seam allowance on the fabric but i recommend adding a centimeter or half inch to the base of it to extend the length and have some more wiggle room

like so
Instead of cutting out 12 individual pieces and struggling to stitch them all together i started with 6, then pinning each piece real tight with the right/furry side down onto my secondary fabric, and slowly stitching around the shape real close to the edges- DO NOT CLOSE THE FLAT SIDE as we are going to stuff the feet through here

Now cut the shape out of the fabric and repeat till you have 6 feet

Now flip those bad boys inside out, stuff up, and if you wanna you can match them to their best pairs

now grab a pair of feeties and your #1 pieces and line them up, in this picture my belly #1 piece is shorter bc i forgot to add the extra centimeter and i recut that once i realized. Line those sides up with the right/furry parts touching and with the feet in between, flip it around to make sure everything's sitting the way you want it

Note. i didnt realize until later but i sewed my feet in upside down. save yourself the time it takes to fix it and dont make the same mistake
Straight stitch these layers together and repeat with the next two segments our good friends #2 & #3

Repeat this for the #2 and #3 sections but NOT THE #4, that part doesnt need feet! just line those edges up right/furry sides together and sew


the secret to the squish of the suit is making this inner lining from another fabric and stuffing it! I used what i had leftover from a stretchy red fabric for a kanaya skirt. For this we need to make a new pattern for each section, making sure it follows the curve of the round edge but the piece itself is shorter, almost like youre removing the seam allowance you added. Mine is a centimeter shorter on the top and on the bottom and reaches to the middle

Make one of these for each numbered segment,you only need to make half the pattern and you can fold your fabric in half on a crease and you end up with one symmetrical piece (bars)

Now you need to pin these pieces right on top of the wrong side of your numbered furry sections and line up the straight edges like so (disclaimer for LOTS OF SCARY NEEDLES !!)

Admittedly i didnt estimate how long these pieces needed to be very accurately and overshot it a bit, if you start pinning it from the middle and continue outwards on either side thatll ensure its not too lose and you can cut off any excess after
The only exception is piece #1, if you recall we gave this #1 section extra seam allowance. This is so we can sew down that excess at the neck later and hide any of the inside that might show once its all put together. Do not connect the top edge to the inner lining! Since i added an extra centimeter earlier im gonna leave that hanging and pin + sew down the inner lining a centimeter lower than the top edge. LEAVE THE CURVED EDGES OPEN! DONT SEW THEM TOGETHER! those stay open to stuff

Straight stitch the lined up edges together

Now you have all these skinned pieces of little freak and we need to connect all these segments together making sure to sew UNDER the existing stitches so we dont see those on the outside when its all put together


Inside looks like a bit of a mess but thats fine bc its not the part that matters
Now stuff it! you might need a stick or pencil or something long and thin to get stuffing into the middle bits

Now thats its stuffed you can finally close those curved edges. Try not to sew over a thick mound of stuffing, push it in a little further to give yourself some space and you can fluff it back out after everythings closed. I cut off that excess lining fabric after sewing

Ough… they filleted my boy…
Finally, match up all the edges and lines and HAND SEW them right sides together. You will destroy your machine trying to work around that stuffing i promise. You also have an excuse to get up from your work desk and sew on a couch or smth. I used a standard backstitch for a tight finish and again, make sure you sew under any existing stitches so they arent visible on the outside!

Speaking of the outside, once you stitch everything together you can very gently flip this sucker inside out

This is @hatamonu’s cat Cocaina, aka Coco. Her perfectly square figure made it into my grub files somehow so shes essential to the tutorial

Check the fit and all thats left to do is roughly baste stitch down that excess neck fabric onto the stuffed lining and youre set! I gave the thread slight tugs as i went to tighten the opening a bit put dont tighten it too much

tadaaaaa

It fits pretty snug but starts to slip a bit with motion. Heres a bounce test

If you do shake your baby make sure to safety pin the plush to the suit so he doesnt prematurely shed his exosekeleton
Now spread that baby fever and show your baby to the world


pics from the ALA 2025 homestuck meetup and supplied by para.dox.cos
Tysm for coming along this ride with me especially if you followed the prototype journey on twitter, much thanks to my more sewing savvy friend for the solution to my grub dilemma and for helping me design and build my dolorosa cosplay <3 much love and hopefully many more homestuck cosplays and meetups to come in the future!
#homestuck#homestuck cosplay#karkat plush#karkat#karkat vantas#cosplay#tutorial#homestuck grub plush#plush pattern#long post#ALA 2025#anime los angeles#dolorosa#the dolorosa#apologies if this is hard to follow or utterly incomprehensible please note i am making shit up as i go and results may vary#feel free to ask any clarifying questions and ill do my best to answer#no i will not be selling these#technically i have more minky left than i know what to do with but the cost would have to justify the pain in the ass it all was to complet#and i dont think anyone will pay that price#send me suggestions of red characters to make plushes out of
424 notes
·
View notes
Text
Drawing Likeness: with Tem!
okaay since a few people actually showed interest in me sharing a bit of what I've been doing to figure out how to really capture likeness, specifically Temuera Morrison, I figured id do my best to write it out
I am also going to entice you with some of my recent clone art! (oooh some of it is unreleaaasedd)


I am putting the whole thing under the cut because I have a feeling its going to be long:
Read more!!!
a couple disclaimers before we start
-This is not some definite post about how everyone should be drawing clones, nor is it in any way claiming that this is the right way. This is just my musings as I stare at a mans face for way too long and try to replicate it
-I am inexperienced. As kind as you all are to me, drawing real people is relatively new to me, capturing a persons identity through their features is difficult for anybody, and I am no different. I have watched many a video on likeness and had my share of classes, but If im being honest, i rarely put it into practice successfully. So there'll probably be errors in this post or things i will come back to in a few months and wish I had said/done differently
ANYWAYs you guys get my vibe im just here to ramble and today we are rambling about mr copy paste. I am doing this for Law, my clone boy, because I plan on delving further into oc fanart and I want to put effort into representing him correctly!
SO LETS BEGIN
Before even deciding what specific pose of a person I want to draw, I tend to grab a bunch of references and compile them like so

(all of these can be found on my pinterest)
Why so many? Well, we are about to delve into facial features, so when we are dealing with photos we have to take into account that there are an abundance of circumstances that will influence how a persons face will appear, some of these include:
focal length: All of these are taken on different devices, and focal length can play a big part in distorting faces
age will play a part, your face changes a bunch throughout your life!
lighting, while not as major, can muddy the waters and make it difficult to interpret facial planes and features
SO, to make sure we get a proper grasp of what's really going on, I like to make sure we have lots of options to compare and contrast with.
Next up! What I like to do is block out the main facial features with colour on different layers, the features I block out usually are the general face shape, eyebrows, eyes, nose and lips. But what you are looking for is the defining features of a person, so that could include other things! Maybe a scar, or some particularly prominent cheekbones.

I dont have any rhyme or reason when it comes to picking my colours, all that matters is you can see all the shapes clearly.
Now I may be biased, because Ive been staring at these for 4 hours, but notice how it still looks like Tem? :D
Anyways, now we can break these parts down, and you'll see what I mean about compare and contrast:

We'll start with isolating the facial shape, putting all these next to eachother you'll notice they arent exactly the same (partly because of my shoddy work) But the distinguishing features run through each shape! Namely the very soft rectangular shape I sketched out in the bottom right there. Along with his soft, wide jaw structure.
I did the same for the rest of his features!


You'll notice I highlight the prominent shapes and ratios,
When drawing anything, it is important to start from the very base shapes and build up.
When drawing something you want to look like someone, those shapes relative to other shapes is what makes it look like them.

I didnt use the same technique with his eyes and lips, but I wrote out some helpful info for them! More importantly for his eyes.
When drawing eyes, I find the most important part is where exactly I draw the creases, (along with the overall shape of the eye itself) it is important to understand where those will present themselves with hooded eyes.
NOW, with an understanding of his facial features in place, lets take a detour to colours:
before I start, a couple things to note:
-Temuera morrison versus the clone troopers in the animated shows:
While I love the animated shows they don't exactly stay close to their source material. Im going to link here to an excellent post discussing whitewashing specifically in relation to the clones.
Temuera is Māori, of Te Arawa (Ngāti Whakaue) and Tainui (Ngāti Maniapoto, Ngāti Rarua) whakapapa, and also has Scottish and Irish ancestry.
The Māori people are the indigenous Polynesian people of mainland New Zealand (Aotearoa). Māori originated with settlers from East Polynesia. Māori people often vary in skin tone, Skin colour doesn't determine ethnicity. There's often a correlation but it's not a requirement.
But that is a tangent! What we are aiming for is to stay true to Temuera.

Bringing back my reference photos from before, Ive colour picked a buncha values and theyre all over the place. Why doesnt this work?
Similarly to earlier, you have to take into account the photos themselves. Many things like lighting, colour grading (when it comes to filmography) and makeup, can alter how a skin colour presents in photo.

You can attempt to get true to life by swatching from certain places on the face. Here I've tried to pick some photos with good lighting, and I've also tried to avoid overly lit/shaded areas.
Tem has a very warm, tan skin tone, Instead of colour picking I tend to try and replicate it myself, but I do often bring in references to make sure Im staying true to the source!

a brief intermission to talk about colour theory, something I myself struggle with alot. Often, when putting in flat colours without a background, I will forget to make sure the colours i intend to use will work with the skin tone i have picked! (something that is apparent in older works of mine, not just in relation to clones, but in general, the colours I end up with stray largely from their original sources and it is something I am doing my best to keep in mind and improve in! Although I don't think i am nearly experienced enough in the topic to say I have succeeded yet lol.)
anyways back to Tem :))

Now we can put all of that into practice! Things to keep in mind when drawing out a piece next to a reference like this:
the distance between the eyebrows? how far down his face does his nose go? Basically just, in relation to eachother, where do all those shapes we found earlier, sit?
The screenshot above is from before I did it myself, but instead of directly tracing from the reference, a handy trick I use it to complete your sketch first, and then overlay a traced version to see where your inconsistencies are! Alternatively, you could move your sketch over the image, but I didnt do it that way so!! uh!! im sure it works exactly the same!!!!
When it comes to a final illustration, or any sketch that isnt a direct study, of course you can push and pull and stylise! You'll see below that I'm not exactly 1:1 to my reference photo either.
The important thing with stylisation, or at least my own personal understanding of stylisation is that you need to thoroughly understand the thing you are stylizing! "You need to know the rules to break them" and all that. While shapes, lines and rendering can change, when it comes to drawing someone, and making it look like them, you have to make sure to keep their core features true to source. Caricature can capture a persons vibe whilst drastically exaggerating features, but it will only look like them if you KEEP THOSE FEATURES!!!! SHAPES!!! AHHH!!
But that is just my perspective on the discussion of style versus realism, please dont take is as Law, I dont know what Im on about half the time!!
anyways, after fixing your sketch, add local colours!

I rexified him because why tf not! But this is where you can go crazy with that clone personalization!

And then here is a very very barely rendered version (if you guys want me to explain how i RENDER that would need to be a completely different post, and I havent had anyone ask about it yet so who knows! maybe one day) But I digress, hopefully you learnt something new through my ramblings! It has certainly helped me organize my thoughts and I have also found some areas I would like to focus more on in the future to improve my own art!
TLDR: In order to understand an object, be it a face or a building or literally anything, you have to break it down to its simplest forms, understanding LARGER shapes will help you immensely in the long run
If you guys like this sorta content do let me know! I'd be down to do similar things for armor/anything really, I am very anti gatekeep so really anything at all you want to know! Send me an ask :))
also if you see a spelling mistake.. i don’t know how that got there
#can you tell im nervous#i’ve never done anything like this BEFORE SPARE ME PLEASE#star wars#star wars fanart#digital art#my art <3#digital aritst#the clone wars#clone trooper#temuera morrison#tutorial#soulars yaps#soulars tutorial
502 notes
·
View notes
Text
I think it's really amazing how the game designers, artists, and writers of Hypergryph who all have an immense love for the world of Terra will come together and dedicate their time and energy working collaboratively to build an extensive, richly detailed event minigame that completely fucking sucks
#arknights#i spent like an hour on this engraving minigame. Please learn how to write tutorials i beg of you
201 notes
·
View notes
Text
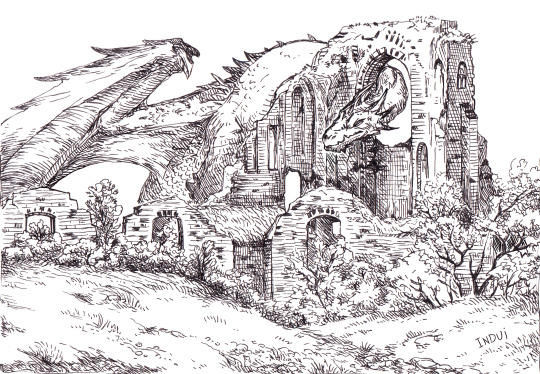
I've been asked a few times now, if these kinds of illustrations are traditional or digital. it's both <: The inks are traditional, made with 03 or 05 micron pen.
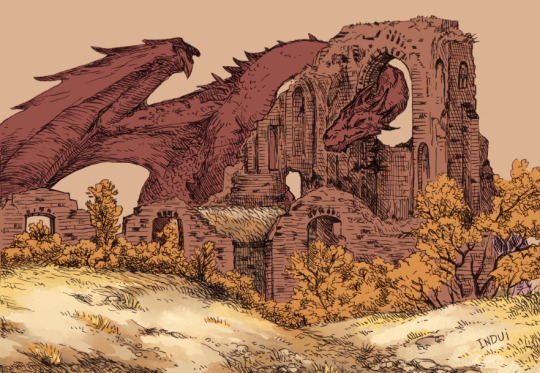
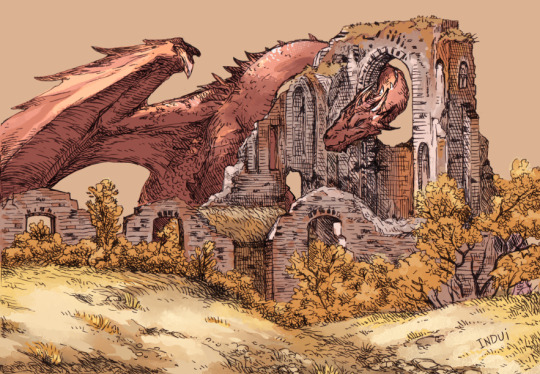
Then I take it to Clip Studio. Paint-bucket and basic brushes are used for big blocks of color and some preliminary details.
Brushes: Dense Watercolor, Transparent Watercolor, India Ink Darker Bleed, Bit Husky, G-pen, Milli Pen, Cross hatching texture brush. Blend: Running Color On Fiber
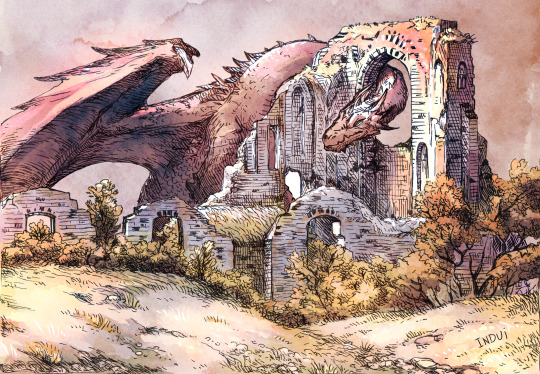
Somewhere in there, I'll pick up a free-to-use watercolor texture and set it on overlay, to see how it meshes with the values I already sketched in. I'll finish up the rest of the smaller details/values with the same above brushes. And voila.
Hope that's helpful <:
#art#art tutorial#dragon#I really enjoy this method because I find inking traditionally more fun than doing it digitally#And meanwhile#I find coloring digitally very fun and fast#Getting a pleasing result very efficiently has been super rewarding to me with this style#it's why I've been doing it so much lately#step-by-step#dragons#dragon art
1K notes
·
View notes