#underglaze transfers
Text
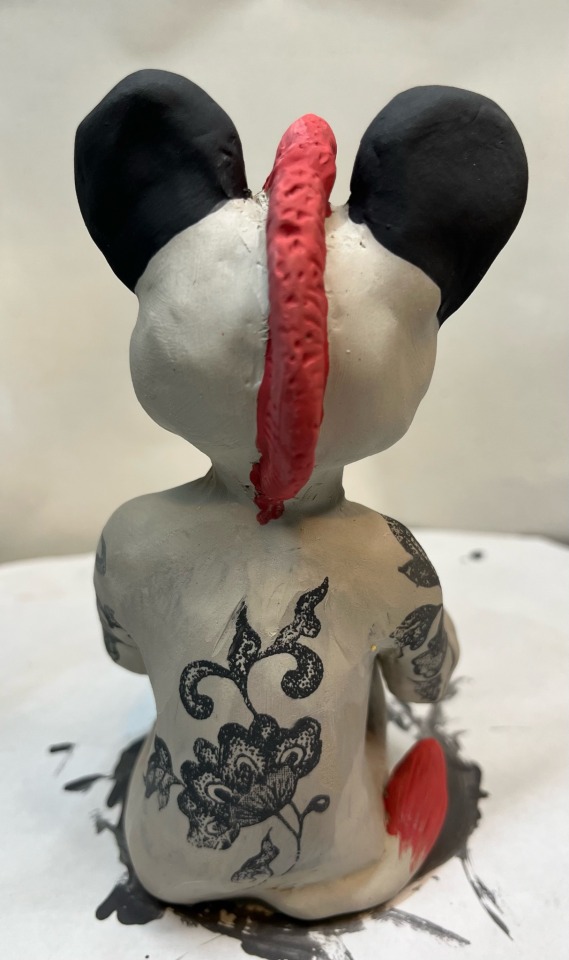
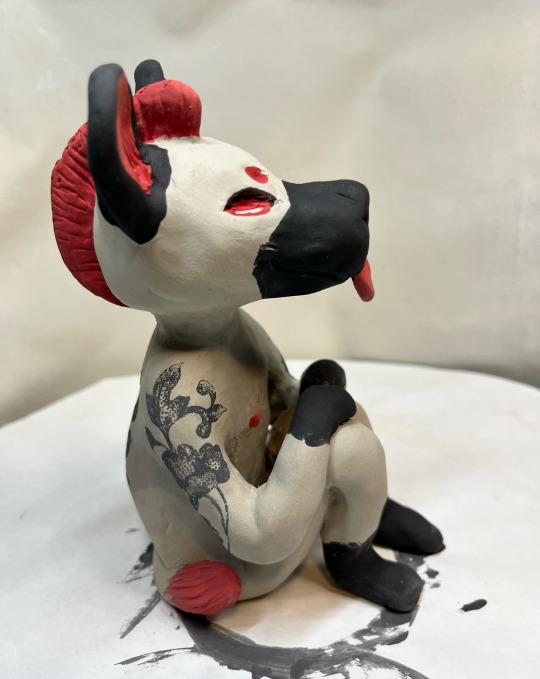
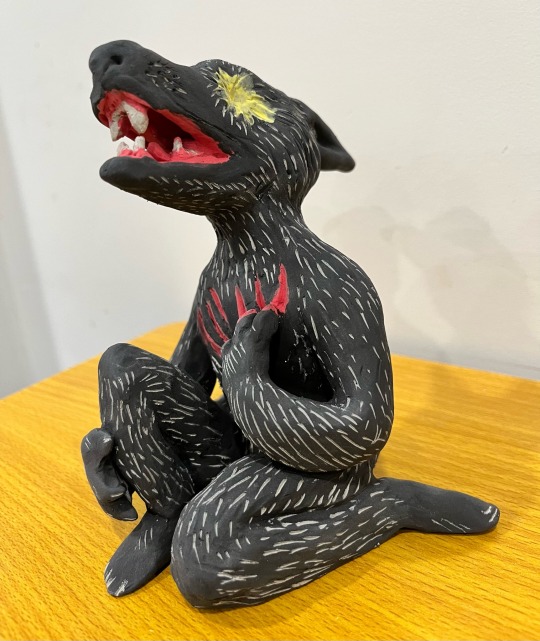
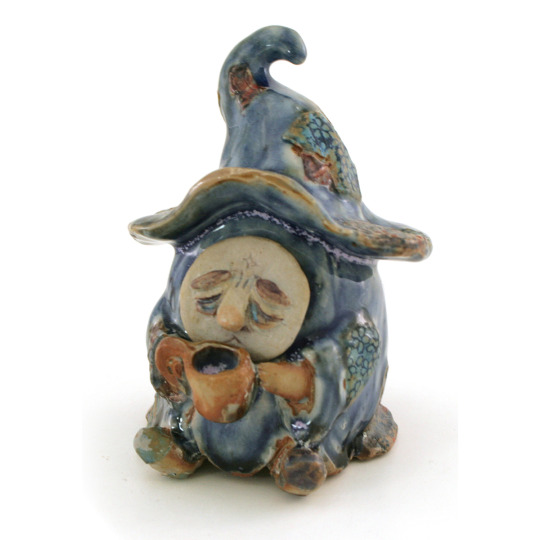
I have spent wayyyy too much time on pottery today. my neck hurts. but it’s worth it for…
my hyena!
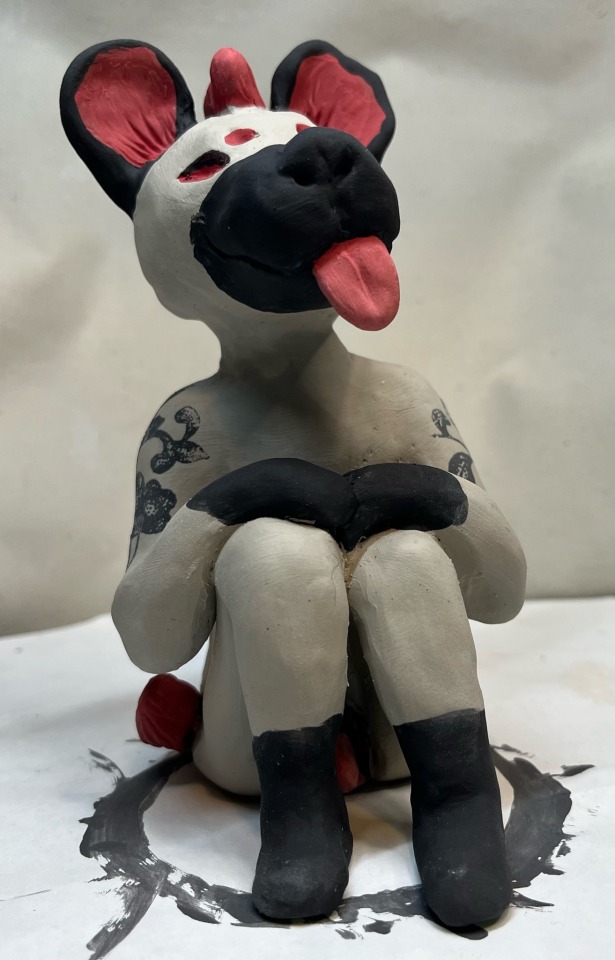
I might play up the different expressions more later but I’m so tired. I love the first pic lol, you can just kinda see her dick
do you guys think she needs spots?
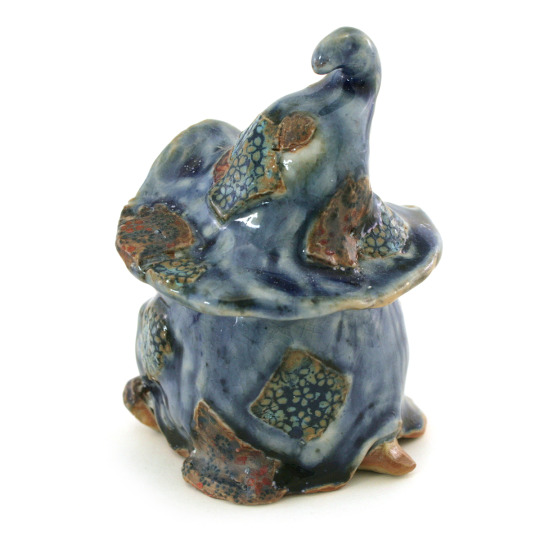
and my bunny boy, who turned out way hornier than intended lmfao

look at this smug little shit lmao. I think the pose I picked is to blame, yep
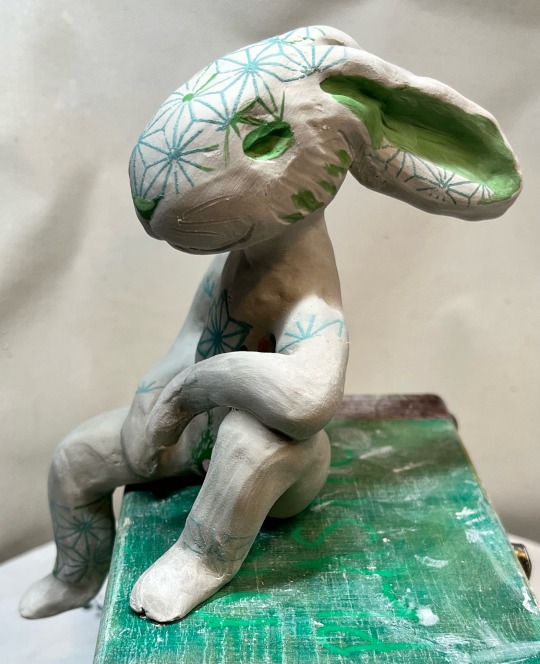

smirky
#the hyena is still available once fired#pottery#ceramics#underglaze painting#little dudes#clay sculpture#sculptural#hyena art#yeen art#bunny boy#hyena girl#trans art#trans#transfem#transmasc#queer art#queer#artistic nude#nude art#underglaze transfers#tattoos
257 notes
·
View notes
Text
new murder mystery mug!!

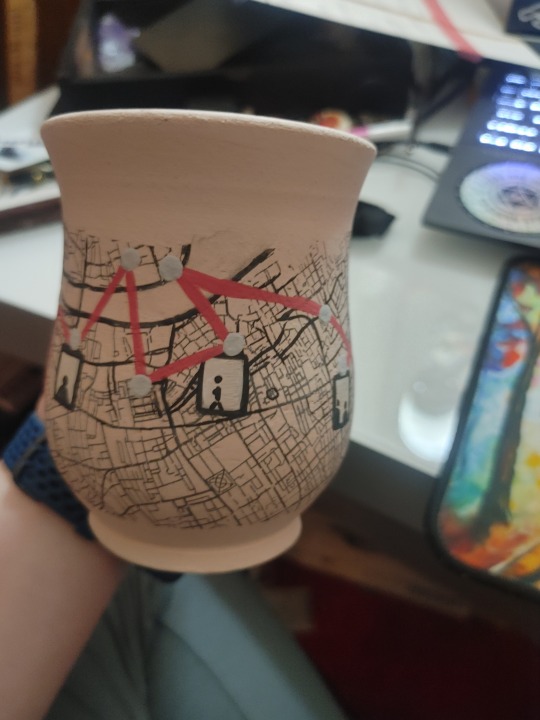
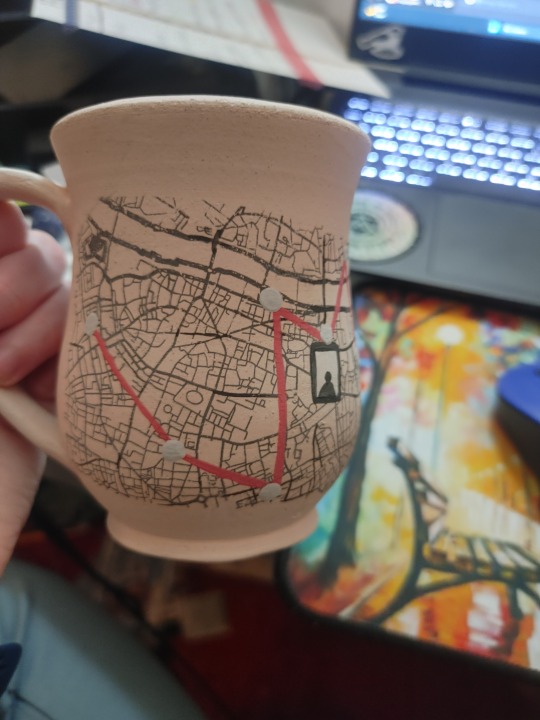
#pottery#Ceramics#Maps#Red string#Red string theory#Mystery#Murder mystery#Mystery genre#Murder#coffee#underglaze transfer#underglaze
4 notes
·
View notes
Text
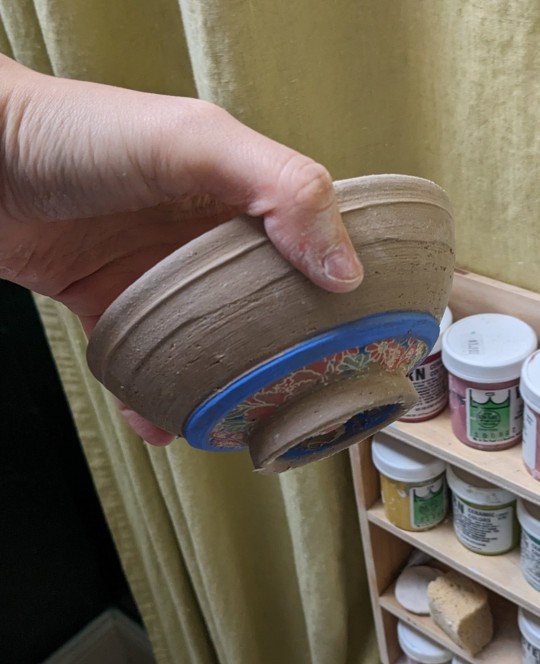


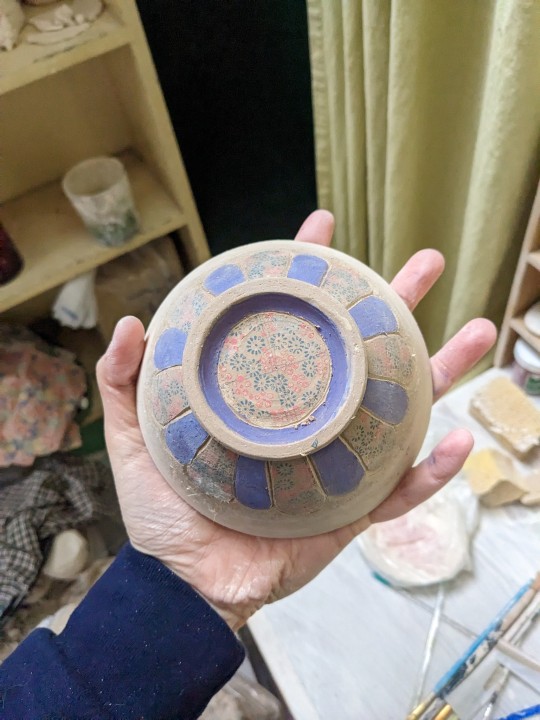
took these bowls home from wheel class to apply underglaze transfer paper, paint them, and most importantly, grasp them threateningly
834 notes
·
View notes
Text
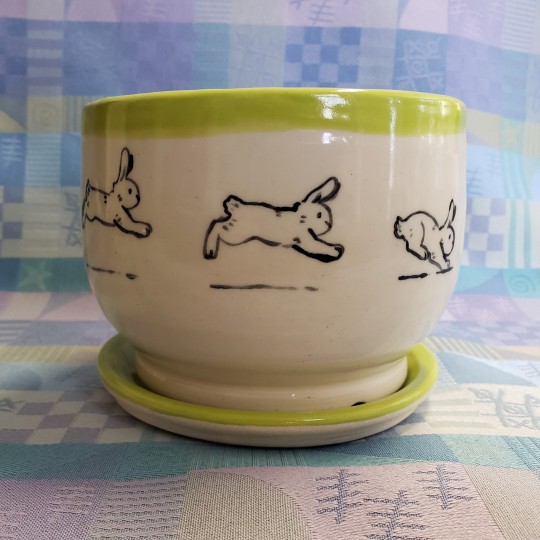

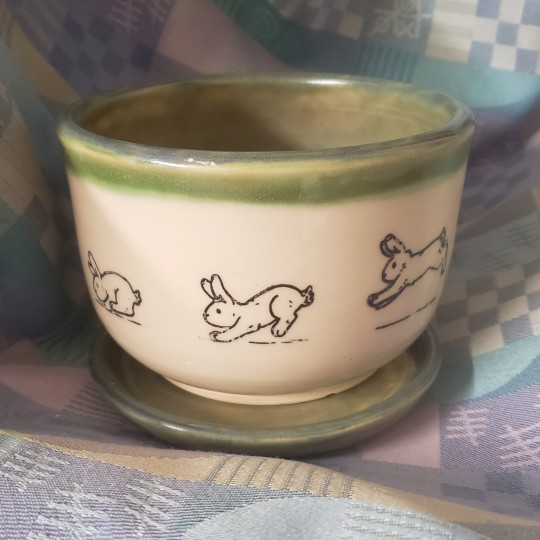
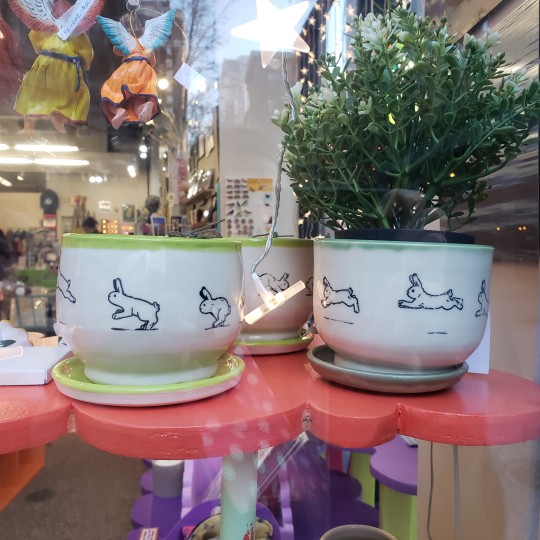
A couple of still images of some of my Animated Bunny Planters ^_^
At first I was screen printing the designs onto rice paper and then transferring them onto the pots but I realized that process wasn't any easier than tracing the drawings onto leather hard clay to make an indent and then painting underglaze over that. Next I'm going to try using a projector to trace directly with the underglaze. :) That last image is them in the Craftland store in Providence! <3
#pottery#ceramic art#stoneware#bunny#rabbit#art#planters#clay#glaze#craftland#myartanddoodles#my art
14 notes
·
View notes
Text
Andd printed! Or well in the process of making my underglaze transfers.


17 notes
·
View notes
Photo


taylor rae, two of swords, fall 2022. clay, underglaze, glaze.
as i might have mentioned previously, the ceramics class i took this semester was printmaking-based. i had a wonderful professor i learned a lot about transfers (hand painted and screen printed) and relief printing/stamping onto clay from, and these bowls were done by hand-building the vessels and screen printing my design onto a thin paper, using slip to transfer it to the clay body.
this piece touches on morality and feeling caught between being two different people at the same time.
#ceramics#ceramic sculpture#sculpture#clay sculpture#art student#art major#Artists of Tumblr#student artist#student art#queer artist#tarot#two of swords#snake#swan#ceramic bowl#ceramic bowls#tarot art#taylor rae works
20 notes
·
View notes
Text
My Totoro mug is finally done! Just in time for Christmas.
The big Totoros were b&w underglaze transfers, which I painted gray. The little blue and white Totoros are all me, baby! (H/T to some guy named Miyazaki or something…) @wellthats-interesting
2 notes
·
View notes
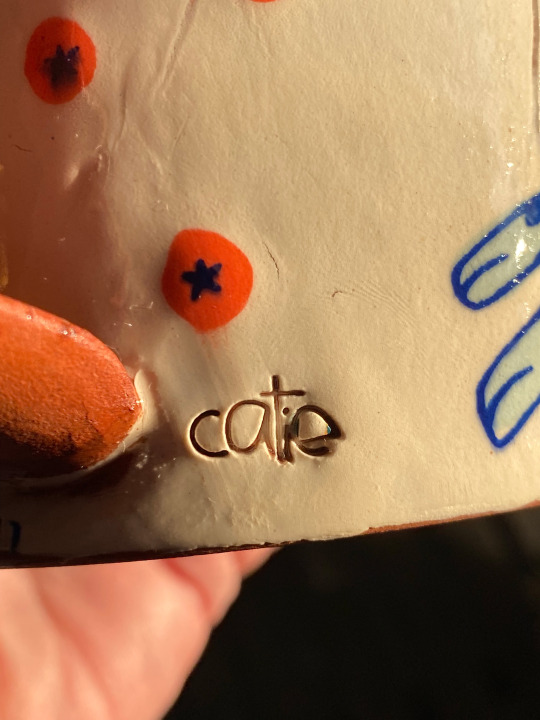
Text
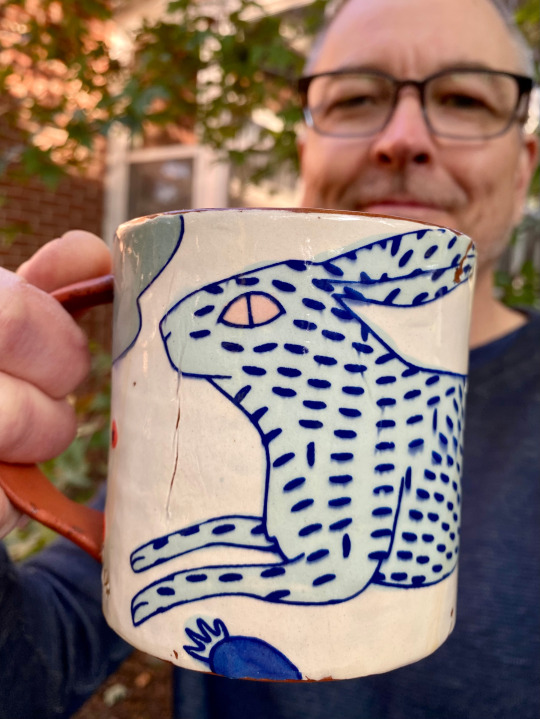
Mugshot Monday - "Big Blue Rabbit" coffee mug by Catie Miller Ceramics with Morning Glory Signature Blend by Peace Coffee
Last weekend, my buddy Adam and I headed north to Harris, MN for Matthew Krousey's Annual Fall Pottery Sale. It was a gorgeous fall day for an outdoor sale.
While browsing all the amazing pots, I got to meet Fargo, North Dakota potter Catie Miller (@catiemillerceramics) for the first time. Her work is amazing--I love her illustrations and her unique handles.
This big blue rabbit mug instantly caught my attention.
Adam was telling me on the drive up to the sale that he was inspired back in 2019 by one of Catie's slip transfer process videos on Instagram and incorporated it into his own work.
Catie said she uses screen-printing to build the layers of the transfer which kind of blew my mind.


I couldn't visualize the process so I asked her to explain:
"I start by making flexible screens from my drawings. Then I use thick underglaze and screen-print my drawings as outlines onto newsprint. The designs are filled in with colored slips working from foreground to background. The newsprint is then pressed and transferred to the clay surface, resulting in a one-time unique print, also called a monoprint."
Catie summed it up by saying it's like applying a temporary tattoo on the pot! So cool.
I really enjoyed talking to Catie about her work and I appreciated all the bits of information shared. I agree with Adam--it's so inspiring. I can't wait to try doing some monoprints on my own mugs.
Cheers, y'all.✌🏻 🐇 ☕️
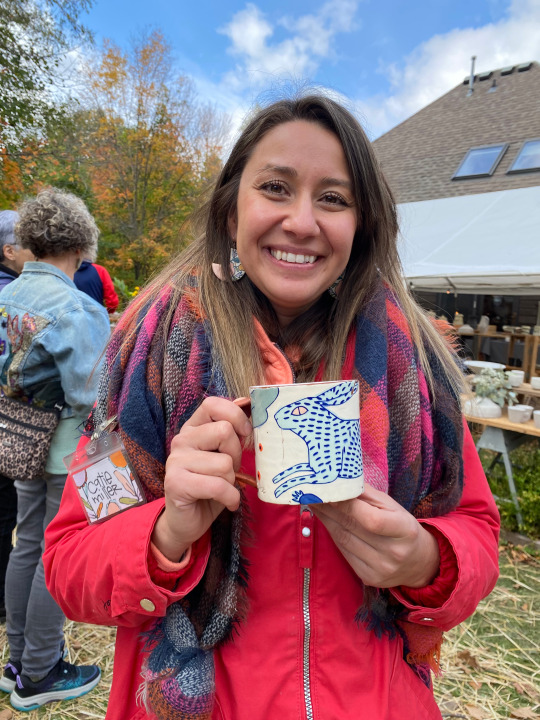
See also my 700+ photos from the Mugshot Monday project here: www.MugshotMonday.com – Every Mug Has A Story
4 notes
·
View notes
Note
Do you have any tips to get into ceramics? I've been thinking of trying it but I have no idea where to start and some guides are so overwhelming :( Like what clay & paint do you use? Do you need a special surface or other materials for it? (If it's alright to ask! No presh to answer btw)
Your works are so lovely, I'm always looking forward to what you make next! 💗
hi beloved. my first advice usually is to find a pottery studio where you can take classes... a teacher’s guidance + every material you need available to you will make things way easier for you in the beginning. but assuming that you’re trying to learn by yourself at home because you can’t take classes right now for your own reasons... i’ll try to give you the most basic guide on ceramics here, hopefully it will clear a few questions you might have? btw i feel the need to point out that i only started making ceramics less than a year ago, so there’s still a looooot that i don’t know yet. technicalities like firing & glazes i’m a bit ignorant of, so i won’t be covering much of that :s again, this is very basic! i’m simplifying it just to help you feel less overwhelmed c: <3
1. ok first thing first, you asked about the surface. at home i placed a sheet of unvarnished wood over my table & that’s where i do all my pottery work. of course there are many other options, you can read more about this topic here
2. there’s a few different options for clay, differents colors & types that you might like more. it’s explained perfectly on this video :^) i personally use white stoneware.
3. you need to wedge your clay!!! this is crucial. do it on the surface you picked from #1. here’s a very good tutorial.
4. ok now you can build whatever you want!
• you take your clay (you can use a wire to cut it from the big block of clay), wedge it, & start your work. i always have a small bucket of water & a small sponge with me when i’m working. use a humid sponge to smooth the clay if needed.
• i usually leave it at a shelf to dry a bit for a day or two, then it’s a bit more hard & you can’t make many changes (as in, adding new stuff to it) but it’s a good moment to carve it a bit more if necessary & smooth it out with the humid sponge. sculpt the little details etc. i recommend buying a tool set like this, it’ll make your job easier for this part
5. firing. like a said before i’m still not very familiar with the technicalities since i don’t own a kiln & my teachers are the ones handling that part :p but what you need to know is that your piece will need to be fired twice in order to become actual ceramic. your clay needs to be dry to go into the kiln. the first firing is called bisque. after that, you need to glaze your piece & then fire it a second time. the glaze will basically turn you work glass-like & food safe. here’s a very informative guide on firing <-
6. there’s are many (many!!) different colors & types of glaze. you can go to the amaco website & look at their charts just so you can have an idea. you can use either colored glazes or a transparent one. underglazes are used to ‘draw’ on & decorate you work. i personally use underglaze to paint before bisque firing bc i feel like the colors looks less faded that way. after bisque, i simply retouch little areas if necessary before applying the transparent glaze over it. you can use the underglaze only after bisque as well. there’s also a bunch of underglaze transfer sheets on etsy that looks super cool & fun to try! one thing you’ll notice about both glazes & underglazes is that the colors do not look nearly the same before & after firing. the colors look rather dull & opaque, but they’ll be vibrant after firing. it’s my favorite surprise heh
ok i think that’s it! this is obviously super SUPER basic, there’s so much little details that you’ll eventually learn but i just wanted to help you situate yourself a bit because i understand how overwhelming it can be when you’re learning something from scratch & alone. my tip is: join facebook groups for pottery, there are SO many & people are always happy to help if you have any questions. i also recommend that you go buy your materials in person if possible instead of online, surely the worker helping you will be able to guide you better on the many products that are out there & answer the questions you might have about it. & about the kiln, most pottery studios offer their kiln for people that aren’t students. the one i go to price it based on the total weight of the pieces i bring.
hopefully that was helpful! 🥰🙏
37 notes
·
View notes
Text


Hanging shelf. ~6" h x 4"w x 2"d
Sea-mix body. Black satin cone 6 glaze.
The back was used to test out custom underglaze transfer techniques.
4 notes
·
View notes
Text
new dude just got his tattoos!

I’m loving my soft trans sculptural dudes, but I’m going to call the ones that aren’t kiln gods guardians from now on (thanks for the suggestion @tranzdragonz )
a kiln god is a sculptural dude of any size or shape that watches over a kiln. the thing that makes them kiln gods, to me, was the intention I had when I made them
my guardian dudes are similar in style to my kiln gods, but they aren’t guarding kilns. they’re guarding their people instead ❤️
here are some kiln gods


and here are some guardians


#pottery#ceramics#kiln god#kiln god adjacent#clay guardian#clay sculpture#little dudes#sculpture#ceramic#ceramic art#underglaze painting#underglaze transfers#nude art#artistic nude#trans art#greenware
184 notes
·
View notes
Text


Only photos I got of this beauty before it sold
#Pottery#Handmade#Big mug#Silkscreen transfer#underglaze transfer#floral art#floral aesthetic#blue mug#blue flowers#Mayco midnight rain#Revivify_inn
0 notes
Text


I really like how a lot of underglaze transfers look like textiles and even feel like textiles before you transfer them from their big sheets of paper to the clay. Here are some patchwork sculptures about it
251 notes
·
View notes
Text
The Girls
I was commissioned to make a plate festooned with a picture of The Girls by the same guys I made these hats for. The Girls, in case you couldn’t tell, are guinea pigs.
I made drawings in Procreate from some pictures the boys sent me and transferred them to the plates.
I’m working on terracotta with slips and underglazes.
The pigs in outline.
I was really getting into it before I remembered…

View On WordPress
2 notes
·
View notes
Note
Hi! I really like your strawberry plate and mug! I was curious about whether you used underglaze and if so what kind?
I did! I used an underglaze transfer sheet from Elan Transfers for the strawberry designs, and the red inside the cup I used Amaco Lead Free Velvet Underglazes in Coral.
2 notes
·
View notes
Text

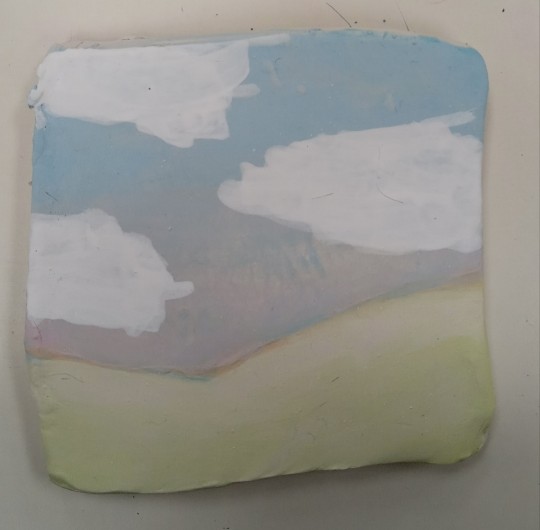

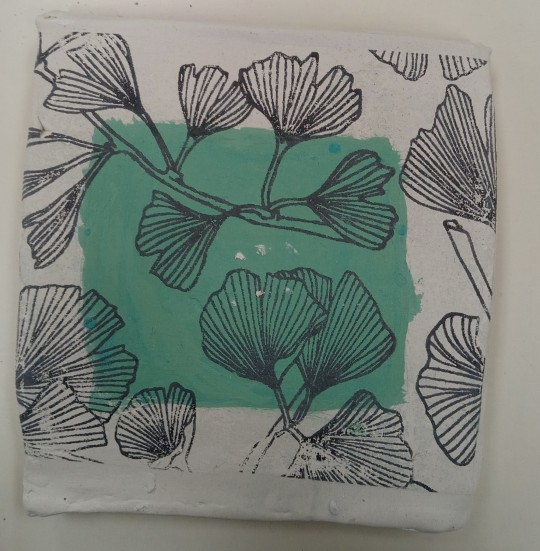
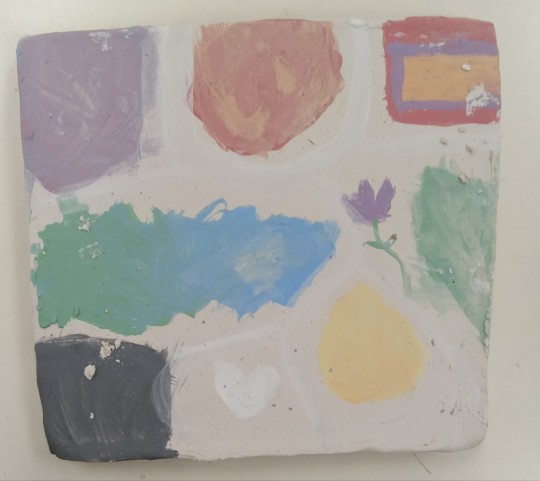


Clay tiles I decorated in art class. This was basically just practice on different underglaze techniques. They haven't been put in the kiln yet, so they still look a little weird.
Underglaze pencil (top left), wax resist (top middle), watercolor underglaze (top right), paper transfer (middle right), underglaze paint (bottom left), sgraffito (bottom middle), and relief (bottom right).
The one on the middle left was one we were allowed to experiment with.
I'll post again once they've gone through the kiln 👍
1 note
·
View note
Last Seen Blogs


