#vCenter Server Deployment
Explore tagged Tumblr posts
Visit Tumblr Blog
Explore Tumblr blogs with no restrictions, modern design and the best experience.
Last Seen Tumblr Blogs


Fun Fact
In 2020, Tumblr had 29.4 million users in the US.
Text
Top VMware Home Lab Configurations in 2023
Top VMware Home Lab Configurations in 2023 @vexpert #vmwarecommunities #100daysofhomelab #VMwareHomeLabSetup #VMwareWorkstationHomeLab #ESXiHostConfiguration #NestedVirtualizationVMware #vSANClusterConfiguration #BestVMwareHomeLabConfigurations2023
In 2023, many great options exist for delving into a home lab. Many get into running a home server to learn more skills for their day job, or they like to tinker and play around with technology as a hobby. For many, it is a mix of both. VMware vSphere is the market leader hypervisor in the enterprise. It arguably provides the most features and capabilities of any hypervisor on the market. This…
View On WordPress
#Best VMware Home Lab Configurations 2023.#ESXi Host Configuration#Nested Virtualization VMware#vCenter Server Deployment#VMUG Advantage for Home Labs#VMware Home Lab Setup#VMware vs Open Source Hypervisors#VMware vSAN Explanation#VMware Workstation Home Lab#vSAN Cluster Configuration
0 notes
Text
Ransomware Attacks Target VMware ESXi Infrastructure Following Interesting Pattern

Cybersecurity firm Sygnia has shed light on a concerning trend where ransomware attacks targeting VMware ESXi infrastructure follow a well-established pattern, regardless of the specific file-encrypting malware deployed. According to the Israeli company's incident response efforts involving various ransomware families, these attacks adhere to a similar sequence of actions.
The Attack Sequence
- Initial access is obtained through phishing attacks, malicious file downloads, or exploitation of known vulnerabilities in internet-facing assets. - Attackers escalate their privileges to obtain credentials for ESXi hosts or vCenter using brute-force attacks or other methods. - Access to the virtualization infrastructure is validated, and the ransomware is deployed. - Backup systems are deleted, encrypted, or passwords are changed to complicate recovery efforts. - Data is exfiltrated to external locations such as Mega.io, Dropbox, or attacker-controlled hosting services. - The ransomware initiates execution and encrypts the "/vmfs/volumes" folder of the ESXi filesystem. - The ransomware propagates to non-virtualized servers and workstations, widening the scope of the attack.

Mitigation Strategies
To mitigate the risks posed by such threats, organizations are advised to implement the following measures: - Ensure adequate monitoring and logging are in place - Create robust backup mechanisms - Enforce strong authentication measures - Harden the environment - Implement network restrictions to prevent lateral movement
Malvertising Campaign Distributing Trojanized Installers
In a related development, cybersecurity company Rapid7 has warned of an ongoing campaign since early March 2024 that employs malicious ads on commonly used search engines to distribute infected installers for WinSCP and PuTTY via typosquatted domains. These counterfeit installers act as a conduit to drop the Sliver post-exploitation toolkit, which is then used to deliver more payloads, including a Cobalt Strike Beacon leveraged for ransomware deployment. This activity shares tactical overlaps with prior BlackCat ransomware attacks that have used malvertising as an initial access vector, disproportionately affecting members of IT teams who are most likely to download the infected files.
New Ransomware Families and Global Trends
The cybersecurity landscape has witnessed the emergence of new ransomware families like Beast, MorLock, Synapse, and Trinity. The MorLock group has extensively targeted Russian companies, encrypting files without first exfiltrating them and demanding substantial ransoms. According to NCC Group's data, global ransomware attacks in April 2024 registered a 15% decline from the previous month, with LockBit's reign as the top threat actor ending in the aftermath of a sweeping law enforcement takedown earlier this year. The turbulence in the ransomware scene has been complemented by cyber criminals advertising hidden Virtual Network Computing (hVNC) and remote access services like Pandora and TMChecker, which could be utilized for data exfiltration, deploying additional malware, and facilitating ransomware attacks. Read the full article
4 notes
·
View notes
Text
Dell VxRail Deploy Exam (D-VXR-DY-01) Prep Guide & Practice Exam
The D-VXR-DY-01 Dell VxRail Deploy Version 2 exam is a qualifying exam for the Dell VxRail Deploy v2 Certification, designed to assess your knowledge of implementing and managing a VxRail cluster. This exam covers various topics, from solution planning to hardware and software installation, and troubleshooting, making it essential for IT professionals working with VxRail solutions.
In this blog post, we’ll dive into the key aspects of the exam, explore its structure, and share the best tips for preparing, including how to make use of the D-VXR-DY-01 practice exam from Cert007 for optimal study results.
Dell VxRail Deploy Version 2 Exam Overview
The Dell VxRail Deploy v2 Certification exam tests your ability to implement a basic VxRail cluster, including hardware installation, environment validation, software implementation, and post-deployment tasks. The exam is split into two parts:
Part 1: 90 minutes
Part 2: 30 minutes
To pass the exam, you need to meet the passing score requirements for both parts.
Understand Key Exam Topics
The following topics are essential for the D-VXR-DY-01 Dell VxRail Deploy Version 2 exam:
1. VxRail Physical Components (4%)
Understanding VxRail cluster architecture
Knowing rack requirements for VxRail clusters
2. VxRail Deployment Planning (12%)
vCenter server and its role in deployment
Networking components and vSphere Distributed Switches
DNS options, node discovery, and vSAN settings
3. Using VxRail Configuration Tools (4%)
Creating and reviewing VxRail projects and configurations
4. VxRail Hardware Installation and Initialization (8%)
Procedures for installing and cabling VxRail hardware
Configuring VxRail node iDRAC and system time settings
5. VxRail Network Environment Requirements and Initialization (8%)
Configuring and validating VxRail network settings manually
6. Deploying the VxRail Cluster (24%)
Initializing VxRail clusters with VxRail or customer-managed vCenter Server
vSAN ESA (vSAN Express Storage Architecture) setup
7. VxRail Post-Deployment Procedures (18%)
Performing post-installation validation
Configuring vSAN settings and native backups
8. VxRail Cluster Upgrade and Expansion (10%)
Understanding upgrade requirements and scale-out processes
9. VxRail Troubleshooting (6%)
Collecting logs and troubleshooting using VxRail and vSAN tools
10. VxRail REST API (6%)
Using VxRail REST APIs to automate tasks and troubleshoot issues
Study Tips for D-VXR-DY-01 Dell VxRail Deploy Exam
Preparing for the D-VXR-DY-01 exam requires a solid understanding of the VxRail system, hardware installation, networking, and troubleshooting. To maximize your chances of success, follow these steps:
Understand the Core Topics: Focus on the key areas of the exam, including deployment planning, hardware installation, and post-deployment procedures. Review Dell’s official documentation and guides related to VxRail clusters.
Hands-On Experience: Practical experience with VxRail components, vCenter Server, and networking setups is crucial. Try to work on a live or simulated VxRail environment to get familiar with the installation and configuration processes.
Use VxRail Tools: Gain proficiency with tools like the VxRail Configuration Portal and REST API. Understanding how to troubleshoot common issues using logs and vSAN tools will be particularly useful for the troubleshooting section.
Practice Exams: One of the best ways to prepare for the exam is by using D-VXR-DY-01 practice exams from Cert007. These practice exams closely simulate the real exam experience, helping you assess your readiness and pinpoint areas that need more study.
Review Study Materials: Cert007 offers comprehensive and up-to-date study materials specifically designed for the Dell VxRail Deploy v2 exam. These materials cover every exam topic in detail and provide insights into common issues and troubleshooting strategies.
Final Thoughts
The D-VXR-DY-01 Dell VxRail Deploy Version 2 Certification is an essential step for professionals looking to demonstrate their expertise in deploying and managing Dell VxRail clusters. By focusing on key exam topics, gaining hands-on experience, and leveraging practice exams from Cert007, you can confidently prepare for and pass the exam.
Invest in quality study materials and practice exams to ensure you're well-prepared for this important certification. Good luck on your journey to becoming Dell VxRail Deploy certified!
0 notes
Text
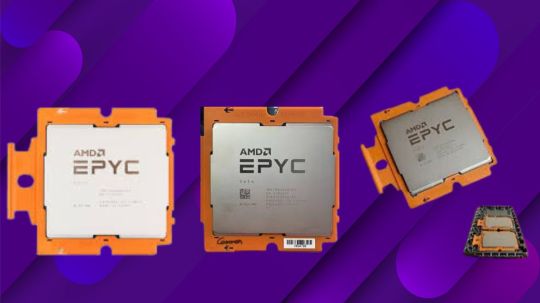
VMware VMmark Wins, Powered By AMD EPYC Virtual Tasks
VMmark User Guide
After their introduction in 2017, AMD EPYC processors have become the preferred option for both public and private cloud deployments. High core counts, the fastest x86 memory bandwidth in the market, and cutting-edge security features make 4th generation AMD EPYC processors ideal for demanding private cloud workloads. AMD EPYC processors offer a strong platform for building private cloud infrastructures, as do VMware by Broadcom products including VMware Cloud Foundation (VCF) and VMware vSphere Foundation (VVF), which comprise programmes like vSphere, vCenter, vSAN, and NSX. The strategic partnership between AMD and VMware By Broadcom helps organisations install and manage virtualized environments that meet their performance and scalability needs while optimising energy efficiency and TCO.
Two typical deployment scenarios for VCF/VVF exist:
Conventional VVF infrastructure typically comprises discrete networking, storage, and computation gear. Running this model requires managing each part independently, which frequently calls for specialised knowledge and equipment, but it produces the best results. The computational component is virtualized using software like VMware vSphere, which is controlled by a virtual infrastructure administrator. This configuration’s storage component depends on specialised Storage Area Network (SAN) or Network Attached Storage (NAS) devices under the control of a Storage Administrator. A contemporary method of managing data centres is called hyper-converged infrastructure (HCI), which integrates networking, storage, and processing into a single, cohesive system. Typically, HCI systems pool storage resources throughout the entire infrastructure for simple scaling and management by a Virtual Infrastructure Administrator. This is made possible by Software Defined Storage (SDS), which is made possible by products like vSAN. Compared to conventional VCF/VVF installations, this simplified method can maximise savings while enhancing agility and scalability. VMmark Benchmark
By offering thorough performance measurements that mimic real-world workloads to evaluate CPU, memory, storage, and networking performance, the VMmark benchmark helps enterprises to evaluate the effectiveness and scalability of their virtualized systems. Businesses may decide on hardware configurations, resource allocation, and workload management methods with knowledge thanks to this comprehensive picture of system capabilities under various workload scenarios.
By applying the smallest unit, or “tile,” of load, VMmark3 employs a weighted scoring system to assess a server’s performance. Nineteen virtual machines are included of each tile, which represents a typical enterprise virtualization scenario by executing a wide collection of tasks both concurrently and collaboratively. Each tile’s static nature allows for the size and scalability of the amount of work for every distinct VMmark3 cluster.
With a growth in hosts, sockets, and cores, there are usually more tiles. Each tile also serves as a representation of the maximum theoretical score and a Quality of Service (QoS) metric, which are used to appropriately scale each publication: an excessive number of tiles exceeds the benchmark latency requirements, while an insufficient number of tiles limits the maximum score.
While application performance accounts for a piece of the total score, the quantity of tiles is essential to comprehending the potential of a VCF deployment. Many of the capabilities that are exclusive to VCF, like XvMotion, Storage vMotion, vMotion, and the Distributed Resource Scheduler (DRS), are also utilised by standard virtualized deployments. By utilising these capabilities, VMmark workloads offer a more comprehensive view of what can be accomplished with the entire system as opposed to just one server. Depending on the underlying technology, these infrastructure processes can vary in scope and duration, accounting for 20% of the total score.
Benefits of Generational Performance AMD is committed to innovation and keeps delivering notable gains in efficiency and performance for important applications. As can be seen in Figure 1, AMD EPYC processors have significantly improved in performance with each iteration when used in VCF scenarios. These assessments include single- and dual-processor installations in both normal settings and vSAN configurations. The consistent dedication of AMD towards meeting the dynamic and ever-increasing demands of contemporary virtualized infrastructures is demonstrated by the notable performance improvements attained with every new generation of AMD EPYC CPUs.
Performance of Throughput
Thanks to continued AMD processor technology advances and collaborative VMware By Broadcom optimisations, the preceding section of this blog revealed constant performance increases across successive AMD EPYC processor generations. The performance domination of AMD EPYC processors over several processing generations is demonstrated in Figure 2, which highlights their unwavering commitment. In VMmark3 performance tests conducted on clusters comprising two dual-socket servers for a total of four processor sockets, the 4th generation AMD EPYC 9654 CPU outperforms even the most recent 5th generation Intel Xeon Platinum 8592+ processor.
Per-Core Efficiency
When it comes to power, space, and server count optimisation, per-server throughput is a crucial measure. Additionally, because per-core performance is frequently a major issue in software licencing models based on core count, it is especially important for workloads that are SLA-critical.
The performance improvements of 32-core AMD EPYC 9374F processors over 32-core Intel Xeon Gold 6548Y+ processors and 64-core AMD EPYC 9554 processors over 64-core 5th Gen Intel Xeon 8592+ processors are shown in Figure 3.
Power Effectiveness
In order to minimise cooling requirements, maximise utility costs, and support sustainability goals, modern data centres must have efficient power consumption. In comparison to both 4th and 5th Gen Intel Xeon processors, Figure 4 illustrates how 4th Gen AMD EPYC 9654 CPUs provide higher power efficiency.
Space for a Data Centre VMmark Scores Data centres have tremendous incentives to optimise space, electricity, and cooling for sustainability and TCO. Less servers that may offer more virtual machine consolidation without sacrificing the speed required for corporate operations can be used to achieve these goals. Suppose AMD workloads need to achieve business objectives with resources and quality of service equal to a total VMmark3 score of 500. This aggregate score can be attained with just 26 servers running 4th Gen AMD EPYC 9654 processors, as shown in Figure 5.
AMD will require 38 servers if they choose to employ servers with 5th generation Intel Xeon 8592+ processors. It may take up to 112 servers for customers with 2nd Gen Intel Xeon 8280 processor-based servers to get the same aggregate score! That’s more than 4 times the amount of AMD EPYC 9654 processor-based servers required to meet the same workload in business! This comparison emphasises the significance of not only power efficiency but also making the best use of server rack space in datacenters.
VMmark Benchmark Results This article demonstrated how VMmark victories and the next generation of AMD EPYC processors can drive consistent performance leadership, giving organisations optimal hardware consolidation and unparalleled x86 workload performance that may help reduce total cost of ownership. Businesses can safely depend on AMD EPYC processors to satisfy their changing virtualized infrastructure demands while maximising available power and capacity. Together, AMD and VMware by Broadcom are still dedicated to promoting innovation that continuously yields record-breaking virtualized environment performance and efficiency. Businesses can achieve new levels of agility, scalability, security, and reliability in their IT infrastructures by utilising Broadcom’s combination of experience in AMD and VMware.
Read more on Govindhtech.com
0 notes
Text
Bryan Strauch is an Information Technology specialist in Morrisville, NC
Resume: Bryan Strauch
[email protected] 919.820.0552(cell)
Skills Summary
VMWare: vCenter/vSphere, ESXi, Site Recovery Manager (disaster recovery), Update Manager (patching), vRealize, vCenter Operations Manager, auto deploy, security hardening, install, configure, operate, monitor, optimize multiple enterprise virtualization environments
Compute: Cisco UCS and other major bladecenter brands - design, rack, configure, operate, upgrade, patch, secure multiple enterprise compute environments.
Storage: EMC, Dell, Hitachi, NetApp, and other major brands - connect, zone, configure, present, monitor, optimize, patch, secure, migrate multiple enterprise storage environments.
Windows/Linux: Windows Server 2003-2016, templates, install, configure, maintain, optimize, troubleshoot, security harden, monitor, all varieties of Windows Server related issues in large enterprise environments. RedHat Enterprise Linux and Ubuntu Operating Systems including heavy command line administration and scripting.
Networking: Layer 2/3 support (routing/switching), installation/maintenance of new network and SAN switches, including zoning SAN, VLAN, copper/fiber work, and other related tasks around core data center networking
Scripting/Programming: SQL, Powershell, PowerCLI, Perl, Bash/Korne shell scripting
Training/Documentation: Technical documentation, Visio diagramming, cut/punch sheets, implementation documentations, training documentations, and on site customer training of new deployments
Security: Alienvault, SIEM, penetration testing, reporting, auditing, mitigation, deployments
Disaster Recovery: Hot/warm/cold DR sites, SAN/NAS/vmware replication, recovery, testing
Other: Best practice health checks, future proofing, performance analysis/optimizations
Professional Work History
Senior Systems/Network Engineer; Security Engineer
September 2017 - Present
d-wise technologies
Morrisville, NC
Sole security engineer - designed, deployed, maintained, operated security SIEM and penetration testing, auditing, and mitigation reports, Alienvault, etc
responsibility for all the systems that comprise the organizations infrastructure and hosted environments
main point of contact for all high level technical requests for both corporate and hosted environments
Implement/maintain disaster recovery (DR) & business continuity plans
Management of network backbone including router, firewall, switch configuration, etc
Managing virtual environments (hosted servers, virtual machines and resources)
Internal and external storage management (cloud, iSCSI, NAS)
Create and support policies and procedures in line with best practices
Server/Network security management
Senior Storage and Virtualization Engineer; Datacenter Implementations Engineer; Data Analyst; Software Solutions Developer
October 2014 - September 2017
OSCEdge / Open SAN Consulting (Contractor)
US Army, US Navy, US Air Force installations across the United States (Multiple Locations)
Contract - Hurlburt Field, US Air Force:
Designed, racked, implemented, and configured new Cisco UCS blade center solution
Connected and zoned new NetApp storage solution to blades through old and new fabric switches
Implemented new network and SAN fabric switches
Network: Nexus C5672 switches
SAN Fabric: MDS9148S
Decommissioned old blade center environment, decommissioned old network and storage switches, decommissioned old SAN solution
Integrated new blades into VMWare environment and migrated entire virtual environment
Assessed and mitigated best practice concerns across entire environment
Upgraded entire environment (firmware and software versions)
Security hardened entire environment to Department of Defense STIG standards and security reporting
Created Visio diagrams and documentation for existing and new infrastructure pieces
Trained on site operational staff on new/existing equipment
Cable management and labeling of all new and existing solutions
Implemented VMWare auto deploy for rapid deployment of new VMWare hosts
Contract - NavAir, US Navy:
Upgraded and expanded an existing Cisco UCS environment
Cable management and labeling of all new and existing solutions
Created Visio diagrams and documentation for existing and new infrastructure pieces
Full health check of entire environment (blades, VMWare, storage, network)
Upgraded entire environment (firmware and software versions)
Assessed and mitigated best practice concerns across entire environment
Trained on site operational staff on new/existing equipment
Contract - Fort Bragg NEC, US Army:
Designed and implemented a virtualization solution for the US ARMY.
This technology refresh is designed to support the US ARMY's data center consolidation effort, by virtualizing and migrating hundreds of servers.
Designed, racked, implemented, and configured new Cisco UCS blade center solution
Implemented SAN fabric switches
SAN Fabric: Brocade Fabric Switches
Connected and zoned new EMC storage solution to blades
Specific technologies chosen for this solution include: VMware vSphere 5 for all server virtualization, Cisco UCS as the compute platform and EMC VNX for storage.
Decommissioned old SAN solution (HP)
Integrated new blades into VMWare environment and migrated entire environment
Physical to Virtual (P2V) conversions and migrations
Migration from legacy server hardware into virtual environment
Disaster Recovery solution implemented as a remote hot site.
VMware SRM and EMC Recoverpoint have been deployed to support this effort.
The enterprise backup solution is EMC Data Domain and Symantec NetBackup
Assessed and mitigated best practice concerns across entire environment
Upgraded entire environment (firmware and software versions)
Security hardened entire environment to Department of Defense STIG standards and security reporting
Created Visio diagrams and documentation for existing and new infrastructure pieces
Trained on site operational staff on new equipment
Cable management and labeling of all new solutions
Contract - 7th Signal Command, US Army:
Visited 71 different army bases collecting and analyzing compute, network, storage, metadata.
The data collected, analyzed, and reported will assist the US Army in determining the best solutions for data archiving and right sizing hardware for the primary and backup data centers.
Dynamically respond to business needs by developing and executing software solutions to solve mission reportable requirements on several business intelligence fronts
Design, architect, author, implement in house, patch, maintain, document, and support complex dynamic data analytics engine (T-SQL) to input, parse, and deliver reportable metrics from data collected as defined by mission requirements
From scratch in house BI engine development, 5000+ SQL lines (T-SQL)
Design, architect, author, implement to field, patch, maintain, document, and support large scale software tools for environmental data extraction to meet mission requirements
Large focus of data extraction tool creation in PowerShell (Windows, Active Directory) and PowerCLI (VMWare)
From scratch in house BI extraction tool development, 2000+ PowerShell/PowerCLI lines
Custom software development to extract data from other systems including storage systems (SANs), as required
Perl, awk, sed, and other languages/OSs, as required by operational environment
Amazon AWS Cloud (GovCloud), IBM SoftLayer Cloud, VMWare services, MS SQL engines
Full range of Microsoft Business Intelligence Tools used: SQL Server Analytics, Reporting, and Integration Services (SSAS, SSRS, SSIS)
Visual Studio operation, integration, and software design for functional reporting to SSRS frontend
Contract - US Army Reserves, US Army:
Operated and maintained Hitachi storage environment, to include:
Hitachi Universal Storage (HUS-VM enterprise)
Hitachi AMS 2xxx (modular)
Hitachi storage virtualization
Hitachi tuning manager, dynamic tiering manager, dynamic pool manager, storage navigator, storage navigator modular, command suite
EMC Data Domains
Storage and Virtualization Engineer, Engineering Team
February 2012 – October 2014
Network Enterprise Center, Fort Bragg, NC
NCI Information Systems, Inc. (Contractor)
Systems Engineer directly responsible for the design, engineering, maintenance, optimization, and automation of multiple VMWare virtual system infrastructures on Cisco/HP blades and EMC storage products.
Provide support, integration, operation, and maintenance of various system management products, services and capabilities on both the unclassified and classified network
Coordinate with major commands, vendors, and consultants for critical support required at installation level to include trouble tickets, conference calls, request for information, etc
Ensure compliance with Army Regulations, Policies and Best Business Practices (BBP) and industry standards / best practices
Technical documentation and Visio diagramming
Products Supported:
EMC VNX 7500, VNX 5500, and VNXe 3000 Series
EMC FAST VP technology in Unisphere
Cisco 51xx Blade Servers
Cisco 6120 Fabric Interconnects
EMC RecoverPoint
VMWare 5.x enterprise
VMWare Site Recovery Manager 5.x
VMWare Update Manager 5.x
VMWare vMA, vCops, and PowerCLI scripting/automation
HP Bladesystem c7000 Series
Windows Server 2003, 2008, 2012
Red Hat Enterprise and Ubuntu Server
Harnett County Schools, Lillington, NC
Sr. Network/Systems Administrator, August 2008 – June 2011
Systems Administrator, September 2005 – August 2008
Top tier technical contact for a 20,000 student, 2,500 staff, 12,000 device environment District / network / datacenter level design, implementation, and maintenance of physical and virtual servers, routers, switches, and network appliances
Administered around 50 physical and virtual servers, including Netware 5.x/6.x, Netware OES, Windows Server 2000, 2003, 2008, Ubuntu/Linux, SUSE, and Apple OSX 10.4-10.6
Installed, configured, maintained, and monitored around 175 HP Procurve switches/routers Maintained web and database/SQL servers (Apache, Tomcat, IIS and MSSQL, MySQL) Monitored all network resources (servers, switches, routers, key workstations) using various monitoring applications (Solarwinds, Nagios, Cacti) to ensure 100% availability/efficiency Administered workstation group policies and user accounts via directory services
Deployed and managed applications at the network/server level
Authored and implemented scripting (batch, Unix) to perform needed tasks
Monitored server and network logs for anomalies and corrected as needed
Daily proactive maintenance and reactive assignments based on educational needs and priorities Administered district level Firewall/IPS/VPN, packet shapers, spam filters, and antivirus systems Administered district email server and accounts
Consulted with heads of all major departments (finance, payroll, testing, HR, child nutrition, transportation, maintenance, and the rest of the central staff) to address emergent and upcoming needs within their departments and resolve any critical issues in a timely and smooth manner Ensure data integrity and security throughout servers, network, and desktops
Monitored and corrected all data backup procedures/equipment for district and school level data
Project based work through all phases from design/concept through maintenance
Consulted with outside contractors, consultants, and vendors to integrate and maintain various information technologies in an educational environment, including bid contracts
Designed and implemented an in-house cloud computing infrastructure utilizing a HP Lefthand SAN solution, VMWare’s ESXi, and the existing Dell server infrastructure to take full advantage of existing technologies and to stretch the budget as well as provide redundancies
End user desktop and peripherals support, training, and consultation
Supported Superintendents, Directors, all central office staff/departments, school administration offices (Principals and staff) and classroom teachers and supplementary staff
Addressed escalations from other technical staff on complex and/or critical issues
Utilized work order tracking and reporting systems to track issues and problem trends
Attend technical conferences, including NCET, to further my exposure to new technologies
Worked in a highly independent environment and prioritized district needs and workload daily Coordinated with other network admin, our director, and technical staff to ensure smooth operations, implement long term goals and projects, and address critical needs
Performed various other tasks as assigned by the Director of Media and Technology and
Superintendents
Products Supported
Microsoft XP/Vista/7 and Server 2000/2003/2008, OSX Server 10.x, Unix/Linux
Sonicwall NSA E8500 Firewall/Content filter/GatewayAV/VPN/UTM Packeteer 7500 packet shaping / traffic management / network prioritization
180 HP Procurve L2/L3 switches and HP Procurve Management Software
Netware 6.x, Netware OES, SUSE Linux, eDirectory, Zenworks 7, Zenworks 10/11
HP Lefthand SAN, VMWare Server / ESXi / VSphere datacenter virtualization
Solarwinds Engineer Toolset 9/10 for Proactive/Reactive network flow monitoring
Barracuda archiving/SPAM filter/backup appliance, Groupwise 7/8 email server
Education
Bachelor of Science, Computer Science
Minor: Mathematics
UNC School System, Fayetteville State University, May 2004
GPA: 3
High Level Topics (300+):
Data Communication and Computer Networks
Software Tools
Programming Languages
Theory of Computation
Compiler Design Theory
Artificial Intelligence
Computer Architecture and Parallel Processing I
Computer Architecture and Parallel Processing II
Principles of Operating Systems
Principles of Database Design
Computer Graphics I
Computer Graphics II
Social, Ethical, and Professional Issues in Computer Science
Certifications/Licenses:
VMWare VCP 5 (Datacenter)
Windows Server 2008/2012
Windows 7/8
Security+, CompTIA
ITILv3, EXIN
Certified Novell Administrator, Novell
Apple Certified Systems Administrator, Apple
Network+ and A+ Certified Professional, CompTIA
Emergency Medical Technician, NC (P514819)
Training:
Hitachi HUS VM
Hitachi HCP
IBM SoftLayer
VMWare VCP (datacenter)
VMWare VCAP (datacenter)
EMC VNX in VMWare
VMWare VDI (virtual desktops)
Amazon Web Services (AWS)
Emergency Medical Technician - Basic, 2019
EMT - Paramedic (pending)
1 note
·
View note
Text
In this article we will be looking at how you can enable file service in a vSAN Storage cluster configured in a VMware environment. The vSAN File Service allows a vSphere admin to provision a file share from their vSAN cluster. The file share created can be accessed using NFS protocol. Before you start the configuration you need few items already configured: Setup Pre-requisites A Working VMware vSphere implementation: Setup ESXi hosts and deploying vCenter Server Appliance. Configured and working DNS resolution for all ESXi hosts and vCenter Appliance Static IP address, subnet masks and gateway for file servers DNS name for each IP address or allow the system to do a reverse DNS lookup. The design implementation of the File Service is as captured in the diagram below. Enable NFS File Service in a VMware vSAN Storage Cluster The vSAN File services is supported on DVS version 6.6.0 or higher. You need to create a dedicated port group for vSAN File Service in the DVS. Click on the Cluster name you created in vCenter. The go to Configure > vSAN > Services. Click “ENABLE” under the File Service section. Review requirements in the Introduction page and hit Next if the checklist is satisfied. In the File service agent page there are two options to choose from for downloading the OVF files. Automatic approach: This is the default option which lets the system search and download the OVF. Manual approach: This option allows you to browse and select an OVF that is already available on your local system. Using Manual approach If you don’t have internet connectivity from your VMware Infrastructure you’ll need to have the following files for deployment: VMware-vSAN-File-Services-Appliance-x.x.x.x-x_OVF10.mf VMware-vSAN-File-Services-Appliance-x.x.x.x-x-x_OVF10.cert VMware-vSAN-File-Services-Appliance-x.x.x.x-x-x-system.vmdk VMware-vSAN-File-Services-Appliance-x.x.x.x-x-cloud-components.vmdk VMware-vSAN-File-Services-Appliance-x.x.x.x-x-log.vmdk VMware-vSAN-File-Services-Appliance-x.x.x.x-x_OVF10.ovf Here is the list of the files I downloaded and I’ll be using Manual approach. For my installation I’ll choose Manual approach deployment method. Select all the files and hit Open. Confirm all the files were selected for use during deployment. Set File service domain name. DNS Servers and DNS suffixes. Select network to be used by file service, subnet mask and the network’s gateway. Provide IP addresses which should match the number of hosts in the cluster for best operation. Make sure the DNS names are configured in your DNS server. Confirm configuration details then click “Finish“. If the installation is successful the file service should show as enabled. In our next article we will look at how you can use vSAN NFS file service. Stay connected for updates.
0 notes
Text
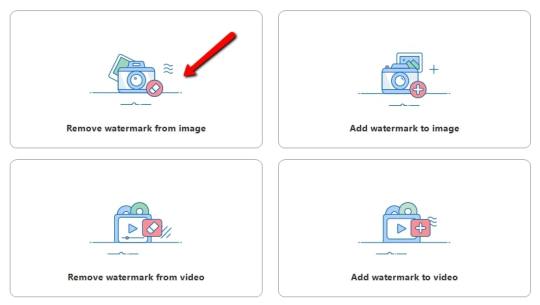
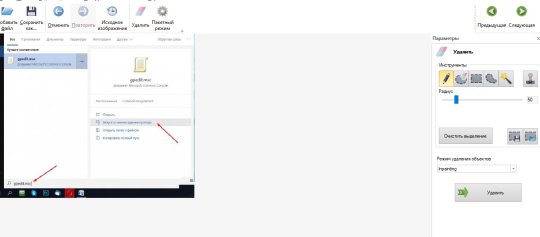
Photo stamp remover 8.3 key


You can now deploy Horizon Connection Servers and Horizon Agents in different data centers across WAN, as long as the Horizon Agents are located within 120ms of the Connection Servers.
HTML Access is now supported in an IPv6 environment.
You can now connect to the event database using SSL.
See Using the Legacy Microsoft CryptoAPI Standard. If you have a use case requiring use of the legacy CryptoAPI standard, you can still do so.
By default Horizon now uses the Microsoft Cryptography API: Next Generation (CNG) standard.
Cross-Origin Resource Sharing (CORS) is now enabled by default.
See Add vCenter Server Instances to VMware Horizon. Deployment type allows you to specify whether your vCenter is in a private data center or in a specific public cloud data center.
When adding a vCenter Server instance, you can now select a deployment type.
Manage Machine Maintenance - used for toggling machines manually to and from maintenance state.
Manage Machine Alias and User Assignment - used for machine user assignment and machine alias assignment.
Both new privileges are children of the Manage Machine privilege: See Privileges for Managing Machines and Object-Specific Privileges.
Role creation and edit now offer two new privileges applicable to access groups.
You can now use smart card caching emulation for non-Microsoft Windows client connections.
Users belonging to untrusted domains can use SAML authentication, True SSO, and smart card authentication.
See Using VMware Horizon Desktop Recording.
You can record desktop sessions for troubleshooting and auditing sessions.
See VMware Configuration Maximums for detailed scalability metrics.
Horizon supports 20,000 desktops and sessions per Pod.
See Estimating Memory Requirements for Virtual Machine Desktops.
5K and 8K client display resolutions are now supported (Blast only).
See Choosing ClonePrep or Sysprep for Customizing Your Virtual Desktops.
Microsoft Sysprep is now supported for customizing instant clone virtual machines.
See Worksheet for Creating an Instant-Clone Desktop Pool.
When creating or editing a desktop pool with session type Application and Desktop or Application, you can select the Bypass Session Timeout setting to allow application sessions to run forever.
See Worksheet for Creating an Automated Instant-Clone Farm in Horizon.
The Bypass Session Timeout setting allows application sessions to run forever.
The actual release date can vary based on business needs and engineering schedule changes to address critical customer requirements. This information is grouped by installable component.īeginning with this release, version numbering is based on the planned year and the month of the release. VMware Horizon version 2106 provides the following new features and enhancements.
Nonoperational Features in This Release.
No Longer Supported Features in This Release.
It always gives me accurate results.These release notes include the following topics: I’ve used it for a really long time and never once had a problem. This one does a great job removing photo background online as well as replacing. With its user-friendly and ad-free interface, a first-time user can create the most stunning photo with the fancy background templates it offers. It’s so much better than any other tools I’ve used before. This is exactly what I’ve been looking for. I successfully changed the background of my passport photo to white with this amazing tool. It not only erases my photo backgrounds but also provides multiple templates. This online background eraser does what it promises and does it very well. The AI technology helps me remove image background online with a single click. One of the best online photo background erasers by far.
0 notes
Text
Vmware 7

Vmware 76719
Vmware 7.0.2
VMware Skyline Health Diagnostics for vSphere - FAQ Note: VMware withdrew ESXi602-BG, ESXi602-BG, and ESXi501-BG due to instability issues reported by Intel. For more information, see Intel Sightings in ESXi Bundled Microcode Patches for VMSA-2018-0004.
VMware vSphere 7.0 and TLS Protocol. In vSphere 7.0, TLS 1.2 is enabled by default. TLS 1.0 and TLS 1.1 are disabled by default. If you upgrade vCenter Server to 7.0 and that vCenter Server instance connects to ESXi hosts, other vCenter Server instances, or other services, you might encounter communication problems.
Vmware 76719
Jul 16, 2020 The new vCenter can simplify management and operations with new VMware features. Now vCenter 7 cannot be installed on a Windows machine. VMware vCenter 7 can be deployed only as a virtual appliance (VCSA – vCenter Server Appliance) based on a Photon OS (a Linux-based operating system maintained by VMware).
Register to download your 60 day trial
Explore vSphere for free for 60 Days.
Don't have an account yet? Register to start your free 60-day trial. Already have an account? Log in to start your free 60-day trial.
Installation and Configuration
vSphere delivers an efficient and secure hybrid cloud platform to help you get the best performance, availability and efficiency out of your infrastructure and applications from day one.
- A base hypervisor, vSphere ESXi, that is installed on every physical server for hosting virtual machines.
- One instance of a management server, vCenter Server, enables centralized management of multiple vSphere hosts.
Start your VMware vSphere evaluation with the following steps:
Resources
vSphere Documentation Product Information vSphere Central vSphere 7 Technical Blogs
Troubleshooting & Support
Learn basic tips and tricks for troubleshooting various components of VMware vSphere.
Other Resources
Buying VMware vSphere.
The rich capabilities of vSphere are packaged into multiple editions to fit the needs of any organization. VMware vSphere is available in English, German, Simplified Chinese, and Japanese.
Find out which product is best suited to your business needs:

One instance of VMware vCenter Server, sold separately, is required for VMware vSphere deployments
Buy Online
Purchase VMware vSphere from our online store.
Find a Reseller
Leverage the VMware Partner Network to help you purchase the vSphere products that fit your needs.
Contact VMware Sales
Contact us today and speak to a sales expert to discuss your business needs.
Please login or create an account to access VMware vSphere downloads
Connect Support
View the top articles related to troubleshooting and support for this product. Add keywords to narrow your search.
Relevant Keywords: Intro maker.
vSphere 7
The new generation of vSphere for existing enterprise apps. Available in two editions.
VMware vSphere 7, the new generation of vSphere, is now generally available. This major new release brings a massive improvement in the work experience of vSphere administrators, folks who are responsible for the security, performance, and resiliency of the infrastructure and applications that provide all the key services to their organizations.
Watch the vSphere 7 digital launch event for the executive view, a technical overview, and a customer perspective with the hosts of siliconANGLE’s theCUBE.
To deep dive into the new features in vSphere 7, please visit the vSphere Academyand the YouTube playlist for vSphere 7.
Major Release
The purpose of this major release from vSphere is two-fold. The first is to embed containers and Kubernetes into vSphere, unifying them with virtual machines as first class citizens. This enables all vSphere administrators to become Kubernetes administrators and easily deliver new services to their developers. More on this in part two of this blog post, when vSphere 7 with Kubernetes becomes available as part of VMware Cloud Foundation 4. If you’re interested in vSphere 7 with Kubernetes, please visit the VMware Cloud Foundation blog site to learn more.
The second purpose of this major release is to deliver an essential building block of the cloud operating model to vSphere admins for running existing enterprise applications with vSphere 7. vSphere 7 addresses key challenges faced by our vSphere admins in areas of lifecycle management, security, and performance and resiliency needed by business-critical applications, AI/ML applications and latency sensitive applications.
Lifecycle Management
vSphere admins spend a significant amount of time on the lifecycle management of infrastructure. Lifecycle management includes ensuring that their systems are up-to-date and that the latest firmware for the underlying compute, storage and networking are installed and working. It also includes installing patches provided by VMware and other industry vendors, as updates are released in response to security vulnerabilities and as enhancements are deployed. Upgrading to the latest vSphere software version often takes a dedicated amount of time too, since each host needs to be updated, and the current process involves manual steps to validate. A typical vCenter Server upgrade would include migrating external PSCs and the vCenter Server from Windows OS to a vCenter Server appliance. Upgrading vSphere clearly involved many different activities and tools that required significant planning.
vSphere 7 offers a much simpler software architecture with a single upgrade workflow. With vSphere 7, the only requirement is to upgrade vCenter Server; there is no need to upgrade other external components such as the external PSC (Platform Services Controller) or load balancers. This results in a more efficient upgrade process given the fewer nodes that need to be managed.
Also, vSphere 7 enables the upgrades of entire ESXi clusters (versus a single ESXi host at a time) using a desired state model with cluster image management. The desired state model of the upgrade validates each host’s configuration until it matches the desired state. This simplifies and automates the host upgrade significantly for the entire ESXi cluster, once customers have upgraded to vSphere 7. Note that customers would have to upgrade to vSphere 7 to take advantage of the desired state model for future upgrades.
Security
vSphere admins are frequently and deeply involved in security operations related to infrastructure. Implementing data privacy and security policies and performing periodic compliance validation becomes a joint responsibility of IT and security organizations. The problem is that there are many ways in the industry to implement security policies, including implementing multi-factor authentication (MFA). Life for vSphere admins is even more complicated because many customers already have MFA in their corporate identity management systems.
vSphere 7 solves this problem using Identity Federation, which means vCenter Server can integrate with an enterprise identity provider without involving the vAdmins and vCenter Server. This simplifies the vSphere Admin’s job and helps reduce compliance audit scope.
vSphere 7 also enables vSphere admins to protect the integrity of your virtual infrastructure with remote attestation by a trusted computing base. This capability is delivered by vSphere Trust Authority. With vSphere Trust Authority, vSphere admins conduct security checks on a few strongly trusted hosts, validating the operating system, firmware, credentials, etc. These trusted systems are then compared to other running systems, with any differences being identified, so they can be evaluated for security vulnerabilities.
Performance and Resiliency
Whether customers are running database applications that demand a large VM such as SAP HANA or Oracle back ends, or AI/ML applications using GPU resources, or latency sensitive applications that require granular access to timing information, the needs for large and high performing applications continues to grow.
vSphere 7 delivers massive improvements to Distributed Resource Scheduler (DRS), vMotion, and Assignable Hardware to meet the needs of enterprise applications.
Vmware 7.0.2
Improved DRS – Now using a workload centric approach for efficient resource allocation and live migration of workloads, the improved DRS concentrates less on the ESXi host utilization and prioritizes the VM condition – think of it as how “happy” your virtual machine is. The VM DRS score is calculated every minute, allowing vSphere to provide a much more granular optimization of resources.
Large application vMotion – vSphere admins can extend vSphere’s vMotion capability to large workloads such as SAP HANA and Oracle back ends. Previously, these workloads necessitated a longer stun-time during the switchover phase. With vSphere 7 and the greatly improved vMotion logic to transfer only those pages that are desired by the workload, stun time is reduced drastically for large workloads.
Assignable Hardware – With vSphere 7, vSphere admins can provision efficient pools of accelerated hardware for AI/ML applications with supported GPUs. Assignable Hardware will now interact with DRS when that VM is powered on (initial placement) to find an ESXi host that has such a device available, claim that device, and register the VM to that host. If there is a host failure and vSphere HA kicks in, Assignable Hardware also allows for that VM to be restarted on a suitable host with the required hardware available.
Precision Time Protocol (PTP) – vSphere 7 delivers software timestamp based PTP support for applications that need millisecond-level time accuracy.
Next Steps
Now is the time to start planning your upgrade.
To learn about the upgrade process, pricing and packaging for vSphere 7 and upgrading your vSphere license keys, please visit the vSphere Upgrade Center. If you have questions, you can visit Resources in the Upgrade Center or contact VMware Support.
To learn more about the vSphere 7 release, please visit the key product resources onvSphere Central, vSphere 7 blog or vSphere Academy.
Also, remember that End of General Support (EOGS) for vSphere 6.0 occurred on March 12, 2020. Please read the 6.0 EOGS blog for more details and upgrade to vSphere 7 as soon as possible to take advantage of the new capabilities.
Thank you for helping us improve vSphere 7 by giving us feedback, and being open about the challenges you face in your operating environments. Please continue to provide feedback through all channels, including our user groups and the VMware Technology Network . You can learn also more about vSphere 7 through our VMUG webcast series and through the resources below. Thank you for your continued confidence in vSphere!
Key vSphere 7 upgrade resources:
Visit the vSphere 7 Upgrade Center
Visit the vSphere Central
Watch thevSphere 7 launch event to hear executive, technical, and customer perspectives on vSphere 7
Additional Information:
We are excited about vSphere 7 and what it means for our customers and the future. Watch the vSphere 7 Launch Event replay, an event designed for vSphere Admins, hosted by theCUBE. We will continue posting new technical and product information about vSphere 7 and vSphere with Kubernetes Monday through Thursdays into May 2020. Join us by following the blog directly using the RSS feed, on Facebook, and on Twitter. Thank you, and please stay safe.
0 notes
Text
Vmware Vcenter Server 6.0

Vmware Vcenter Server 6.0 Crack
Vmware Vcenter Server 6.0 Windows 10
Vmware Vcenter Server 6.0 Download Free Trial
In previous post of this series, we’ve learnt about vCenter Server Architecture, such as its components, services, and Platform Services Controller (PSC). If you’ve missed previous posts of this series, you can find them here.
In this post, we’ll learn installing vCenter Server step-by-step in windows environment. When vCenter Server is installed, following services are also installed with it.
For complete guidance regarding vCenter Server installation and configuration, you can follow VMware vSphere 6.0 Part 2 – vCenter, Alarms and Templates course. In next post, we’ll see how vSphere Web Client works and used for managing and controlling vCenter Server. VMware's vCenter server appliance 6.0 has the same scalability numbers as the windows installable server. It seems that there is no reason to avoid the installation of vCenter appliance again. Buy one Microsoft windows server license less next time.I will not go through an installation guide since there are plenty of these published on the. Click Finish to complete the installation. Installing the VMWARE vCenter Server Appliance 6.0. Double Click the index.html file in the root of the DVD. Ensure pop up blockers to no block the Client Integration Plugin. Select Allow, so the VMware Client Integration Plug-In can access the operating system.
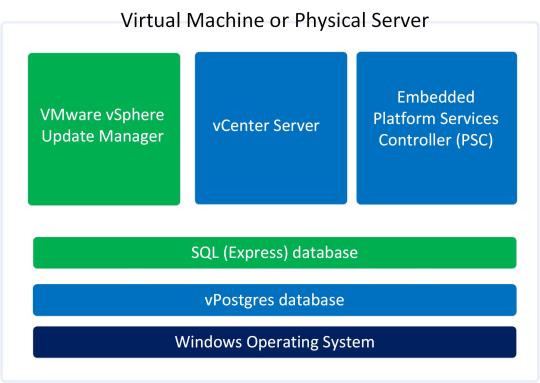
vCenter Server
vSphere Web Client (enables to connect to vCenter Server instance using web browser)
VMware Inventory Service (stores vCenter Server application and inventory data)
vSphere Auto Deploy (support tool that can provision many physical hosts with ESXi software)
vSphere ESXi Dump Collector (configure ESXi to dump the VMkernel memory to a network server, rather than to a disk)
vSphere Syslog Collector (support tool that provides a unified architecture for system and network logging)
vSphere Web Client directly communicates with vCenter Server, and vSphere Client is used to directly communicate with ESXi hosts. vCenter Server provides access to the ESXi hosts via an agent called vpxa.
Minimum Hardware Requirements for vCenter Server
Before installing and configuring vCenter Server, we should consider minimum hardware requirements. Following are the minimum hardware requirements. We’re installing vCenter Server in home-lab environment, so we’ll install it as embedded PSC with 2CPUs and 4GB RAM.
Let’s start the process:
Step 1: Download the vCenter Server ISO from VMware site. After downloading, mount it on CD/DVD drive
Step 2: Open the mounted path and double click the Autorun.exe to start the process.
Step 3: Select vCenter Server for Windows and click Install to begin the installation.
Vmware Vcenter Server 6.0 Crack
Step 4: Windows Installer preparing to install in process, click Next to install vCenter Server 6.0.0
Step 5: Accept the License Agreement and click Next
Step 6: Select Embedded Deployment and click Next
Vmware Vcenter Server 6.0 Windows 10
Step 7: Enter the System Name as FQDN and click Next
Step 8: Select Create New vCenter Single Sign-On domain, enter vCenter Single Sign-On password, Confirm password, Site name, and click Next
Step 9: Select Use Windows Local System Account and click Next
Vmware Vcenter Server 6.0 Download Free Trial
Step 10: Select Use an embedded database (vPostgres) and click Next
Step 11: Verify Configure Ports and click Next
Step 12: Leave Destination Dictionary default and click Next
Step 13: Review your settings and click Install
Step 14: vCenter Server installation process will start now, and will take some time to install.
Step 15: Installation process is completed, click Finish or Launch vSphere Web Client
vCenter Server installation is completed when you click Finish button. When you’ll click on Launch vSphere Web Client, it will launch vSphere Web Client. For complete guidance regarding vCenter Server installation and configuration, you can follow VMware vSphere 6.0 Part 2 – vCenter, Alarms and Templates course. In next post, we’ll see how vSphere Web Client works and used for managing and controlling vCenter Server.
I hope you’ve enjoyed reading this post, if you have any query or suggestion, please feel free to write in comments. Thanks a lot.
Author: Nisar Ahmad
Systems Engineer, double VCP6 (DCV & NV), 5 x vExpert 2017-21, and the owner of My Virtual Journey, with experience in managing a Datacenter environment using VMware and Microsoft Technologies. This blog mainly covers virtualization and cloud technologies but also covers some other technologies such as Cyber Security, Quantum Computing, etc.
VMware vCenter Converter Standalone 6.0 | 14 May 2015 | Build 2716716
Check periodically for additions and updates to these release notes.
What's in the Release Notes
These release notes cover the following topics:
Introduction to Converter Standalone
VMware vCenter Converter Standalone provides an easy-to-use solution to automate the process of creating VMware virtual machines from physical machines (running Windows and Linux), other virtual machine formats, and third-party image formats. Through an intuitive wizard-driven interface and a centralized management console, Converter Standalone can quickly and reliably convert multiple local and remote physical machines without any disruptions or downtime.
Benefits
Convert physical machines running Windows or Linux operating systems to VMware virtual machines quickly and without any disruption or downtime.
Convert third-party image or virtual machine formats such as Parallels Desktop, Symantec Backup Exec System Recovery, Norton Ghost, Acronis, StorageCraft, Microsoft Virtual Server or Virtual PC, and Microsoft Hyper-V Server virtual machines to VMware virtual machines.
Enable centralized management of remote conversions of multiple physical servers or virtual machines simultaneously.
Ensure conversion reliability through quiesced snapshots of the guest operating system on the source machine before data migration.
Enable non-disruptive conversions through hot cloning, with no source server downtime or reboot.
What's New
The VMware vCenter Converter Standalone 6.0 provides:
Support for virtual machine hardware version 11.
Compatibility with vSphere 6.0 and Workstation 11.
Support for additional guest operating systems: Red Hat Enterprise Linux 7, Ubuntu 14, CentOS 6-7, Windows Server 2012 R2, Windows 8.1.
Support of pure IPv6 environments.
Proxy mode.
File-level cloning for volumes with ReFS file system.
Support for XFS file system.
Support for predictable network interface names.
VMware vCenter Converter Standalone 6.0 Support Notice
VMware vCenter Converter Standalone 6.0 is the last release of the product to support third-party backup images and virtual machines as sources for conversion. This capability will be discontinued in the next release. If you use this capability, you should start planning your transition. For the full list of the third-party backup images and virtual machines see Interoperability.
Installation Notes
You can download, install, and run VMware vCenter Converter Standalone in English only.
Users with limited rights cannot install Converter Standalone on Windows. You must log in as an administrator to install Converter Standalone.
Platforms
You can install VMware Converter Standalone 6.0 on the following platforms:
Windows Server 2003 R2 SP2 (32-bit and 64-bit)
Windows Vista SP2(32-bit and 64-bit)
Windows Server 2008 SP2 (32-bit and 64-bit)
Windows Server 2008 R2 (64-bit)
Windows 7 (32-bit and 64-bit)
Windows 8 (32-bit and 64-bit)
Windows 8.1 (32-bit and 64-bit)
Windows Server 2012 (64-bit)
Windows Server 2012 R2 (64-bit)
Interoperability
Converter Standalone 6.0 supports the following sources.
Physical machine running an operating system noted in Supported Guest Operating Systems
VMware Desktop products
Workstation 10.x and 11.0
Fusion 6.x and 7.0
Player 6.x and 7.0
VMware vCenter virtual machines
vSphere 6.0
vSphere 5.5
vSphere 5.1
vSphere 5.0
vSphere 4.1
vSphere 4.0
Third-party backup images and virtual machines - to be discontinued. See Support notice.
Acronis True Image Echo 9.1 and 9.5, and Acronis True Image Home 10 and 11 (.tib)
Symantec Backup Exec System Recovery (formerly LiveState Recovery) 6.5, 7.0, 8.0, and 8.5, and LiveState Recovery 3.0 and 6.0 (.sv2i format only)
Norton Ghost version 10.0, 12.0, and 14.0 (.sv2i format only)
Parallels Desktop 2.5, 3.0, and 4.0 (.pvs and .hdd). Compressed disks are not supported
Parallels Workstation 2.x (.pvs). Compressed disks are not supported. Parallels Virtuozzo Containers are not supported.
StorageCraft ShadowProtect Desktop, ShadowProtect Server, ShadowProtect Small Business Server (SBS), ShadowProtect IT Edition, versions 2.0, 2.5, 3.0, 3.1, and 3.2 (.spf)
The Microsoft VHD format for the following sources:
Microsoft Virtual PC 2004 and Microsoft Virtual PC 2007 (.vmc)
Microsoft Virtual Server 2005 and 2005 R2 (.vmc)
For conditions and limitations about converting Backup Exec System Recovery, ShadowProtect, and Consolidated Backup images, see the VMware vCenter Converter Standalone User's Guide.
Depending on the selected source, you can convert it to the following destinations.
VMware vCenter virtual machines
ESX 4.0 and 4.1
ESXi 4.0, 4.1, 5.0, 5.1, 5.5 and 6.0
vCenter Server 4.0, 4.1, 5.0, 5.1, 5.5 and 6.0
VMware Desktop virtual machines
VMware Workstation 10.x and 11.0
VMware Player 6.x and 7.0
VMware Fusion 6.x and 7.0
Earlier releases of Converter Standalone (versions 3.x, 4.x and 5.x) might not be compatible with VMware vSphere 6.x.
Supported Guest Operating Systems
Converter Standalone 6.0 supports the following guest operating systems:
Windows Server 2003 R2 SP2 (32-bit and 64-bit)
Windows Vista SP2 (32-bit and 64-bit)
Windows Server 2008 SP2 (32-bit and 64-bit)
Windows Server 2008 R2 (64-bit)
Windows 7 (32-bit and 64-bit)
Windows 8 (32-bit and 64-bit)
Windows 8.1 (32-bit and 64-bit)
Windows Server 2012 (64-bit)
Windows Server 2012 R2 (64-bit)
CentOS 6.x (32-bit and 64-bit)
CentOS 7.0 (64-bit)
Red Hat Enterprise Linux 4.x (32-bit and 64-bit)
Red Hat Enterprise Linux 5.x (32-bit and 64-bit)
Red Hat Enterprise Linux 6.x (32-bit and 64-bit)
Red Hat Enterprise Linux 7.x (64-bit)
SUSE Linux Enterprise Server 9.x (32-bit and 64-bit)
SUSE Linux Enterprise Server 10.x (32-bit and 64-bit)
SUSE Linux Enterprise Server 11.x (32-bit and 64-bit)
Ubuntu 12.04 (32-bit and 64-bit)
Ubuntu 14.x (32-bit and 64-bit)
CAUTION: During cloning of powered on Linux machines, Converter Standalone 6.0 preserves the following source file systems on the destination: ext2, ext3, ext4, reiserfs, vfat, and xfs. All other source file systems are converted into ext3 or ext4 file systems on the destination virtual machine.
For more information about the operating systems supported by Converter Standalone and other system requirements, see the VMware vCenter Converter Standalone User's Guide.
Prior Releases of Converter Standalone
Features from prior releases of Converter Standalone are described in the release notes for each release. To view release notes for prior releases of Converter Standalone, click one of the following links:
Known Issues
The Converter Standalone 6.0 release contains the following known issues:
Installation
If the name of the Converter Standalone installation directory contains non-ASCII characters, you might experience conversion and configuration problems If the name of the Converter Standalone installation directory contains non-ASCII characters, the following issues might occur:
Conversion and configuration of Windows virtual machines might fail with an error message Unable to reconfigure destination virtual machine. In the vmware-converter-worker.log, this error generates a message similar to Error 3 (error restoring key: Unknown error 3 (0x3) (3)) restoring registry key C:ã—ã™ãŸã•ã‹ãn°...dataSKUNKWORKS_FILLER into... .
If you try to convert a Linux physical machine, you might receive an error message in the Convert Machine wizard Unable to obtain hardware information.
You must restart machines that run 64-bit Windows Vista or later before re-installing Converter Standalone If you uninstall Converter Standalone from a 64-bit Windows Vista, Windows Server 2008, or Windows 7 machine and do not restart it, a subsequent Converter Standalone installation might fail with the following error message: Error 29144. Could not install service Vstor2 MntApi 1.0 Driver (shared). Please reboot and try to install again. Workaround: Restart the Windows Vista, Windows Server 2008, or Windows 7 machine and try installing Converter Standalone again.
Converter Standalone installer removes Workstation 6.5.x remote agents without notification When you use Workstation 6.5.x to hot-clone a Windows source machine, Workstation deploys a remote Workstation agent on the source. If you choose to leave the remote agent on that source and then install Converter Standalone on the same machine, the Converter Standalone installer uninstalls that agent without any warning messages.
Users with limited rights cannot install Converter Standalone on Windows If you are logged in to Windows as a non-administrator user, the following error message is displayed while the InstallShield is extracting files for Converter Standalone installation: Unable to save file: C:WINDOWSInstaller The system cannot find the path specified. The error is displayed because limited users do not have the required write permissions. Workaround: Select the %TEMP% directory to extract the installation files:
Click OK in the error message. A Save As dialog box appears.
Browse to the Temp folder of the current user (for example, C:Documents and Settings'username'Local SettingsTemp) and click OK.
NOTE: You still need to log in as an administrator to install Converter Standalone.
You cannot install vCenter Converter 4.2.1 on the same machine where you have already installed Converter Standalone 6.0 If you install Converter Standalone 6.0 and then install vCenter Converter 4.2.1 server on the same machine, downloading the vCenter Converter 4.2.1 plug-in from vSphere Client fails. Workaround: First install vCenter Converter 4.2.1 and then install Converter Standalone 6.0.
General
Disk-based cloning of a powered off machine image to a virtual datastore destination might fail You might not be able to perform a disk-based cloning of a powered off machine image to a virtual datastore destination. The conversion might fail at 1% with a message Operation expirienced network error if the size of the source disk is not a number that is a multiple of a MB. Workaround: Use volume-based cloning, if the option is available.
Converter Standalone might display an incorrect version of the Windows operating system Converter Standalone might display incorrect operating system information for running machines or virtual machines with Windows 8.1 and Windows Server 2012 R2 and later.
If the operating system is Windows 8.1, Windows 8 is displayed.
If the operating system is Windows Server 2012 R2, Windows Server 2012 is displayed.
Workaround: None. Windows 8.1 and Windows Server 2012 R2 work as expected despite the incorrect operating system displayed.
Creation of virtual machine with thick destination disk type of certain size fails on VSAN datastore even if it seems to have enough space If you try to perform disk-based conversion with thick destination disk type of certain size on VSAN datastore, the creation of virtual machine might fail with the following error 'converter.fault.InsufficientManagedDiskSpace', even if it seems to have enough space. Workaround: Change the destination disk type to thin.
If you try to convert a source physical or virtual machine to a managed destination by using thick provisioned disks with large empty spaces on them, the conversion task might fail If you try to perform a disk-based cloning of a physical or virtual machine to a managed destination by using thick provisioned disks with large empty spaces on them, the conversion task might fail with an error message Unable to clone disk source_disk on the virtual machine virtual_machine_name. The following messages appear in the log file:
(03200 warning 'Default') (,0) (NFC ERROR) NfcNetTcpRead: bRead: -1 (03200 warning 'Default') (,0) (NFC ERROR) NfcNet_Recv: requested 264, recevied only 0 bytes (03200 warning 'Default') (,0) (NFC ERROR) NfcFile_Stream: Failed to get message from source (03200 warning 'Default') (,0) (NFC ERROR) NFC_NETWORK_ERROR
The destination ESX server must return an acknowledgement after each processed NFC write request. If the source sends a large block of zeroes that must be written it might take a long time for the ESX to return the acknowledgement. Thus, the Converter assumes that the operation has timed out and closes the connection, no matter that the ESX server is still writing to the target disk.
Workaround: Change the destination disk type to thin.
When converting hosted virtual machines with unpartitioned disks, you might not be able to obtain hardware information about the source When converting hosted virtual machines with unpartitioned disks, you might not be able to obtain hardware information about the source. In such case, the following error messages might appear in the worker log:
(01628 warning 'Default') Partition:Invalid sector magic number.
(01628 warning 'Default') ERROR: Failure during open: Reading disk signature
(01628 error 'Default') (BaseDiskSetComputer::DoOpen) OpenDisks failed, mntapi error: 32.
Workaround: Remove the unpartitioned disks from the conversion job.
A running P2V conversion job fails if you create a new conversion job for the same Windows source machine and use a different port to deploy the Converter Standalone agent If, while running a P2V conversion job, you start creating another conversion job for the same powered on Windows source machine, and specify a port for the connection, Converter Standalone deploys the Converter Standalone agent using the port you specified. If the connection port is different from the one that is being used for the already running conversion job, both jobs fail. The following error message appears in the Job summary tab for the first conversion job: FAILED: A general system error occurred: No connection could be made because the target machine actively refused it. The following error message appears in the Job summary tab for the second conversion job: FAILED: Unable to create a VSS snapshot of the source volume(s). Error code: 2147754774 (0x80042316).
You cannot copy running conversion or configuration jobs If you open the Copy As New wizard for a running configuration or conversion job when the source is a virtual machine or a backup image and you click Next, the wizard displays the error message Unable to obtain hardware information for the selected machine. Workaround: Wait for the job to complete before selecting Copy as New in its pop-up menu.
Linked Cloning of source images greater than 2GB to a network share that does not support large files fails Creating linked clones from source images that are larger than 2GB to a network share that does not support large files (for example, to a Linux SMB share) fails. Converter Standalone does not split the source files into smaller chunks. If the source is larger than the supported file size on the destination, the conversion tasks fails.
Creating a conversion job to convert a standalone VMware source with a VMDK file greater than 2GB from a network share that does not support large files, fails If you select a standalone virtual machine source with VMDK file greater than 2GB residing on a remote network location that does not support large files (for example, Linux SMB share), the following error message appears in the Converter wizard on clicking Next or View source details: Unable to obtain hardware information for the selected machine. Workaround: Map the network shared folder to the machine where Converter Standalone runs, and select the source from there.
Converter Standalone cannot detect the power state of VMware Workstation or other VMware hosted source virtual machines if they are located on a read-only network share If the source machine is a Workstation or another VMware hosted source and is located on a network share with read-only permissions, Converter Standalone cannot detect if the source is powered on or suspended. This might lead to data inconsistency on the destination machine if changes are made to the powered on source virtual machine during conversion. Workarounds:
Verify that the source virtual machine is powered off prior to conversion.
Provide write privileges to the network share where the source virtual machine resides.
Conversion jobs from and to ESX hosts that are not connected to vCenter Servers fail if the number of disks on the source machine is more than nine When converting a source machine that has more than nine disks, conversion fails with the following error in the log file: Error on logout (ignored): Operation timed out SSLStreamImpl::BIORead (3BBA4E8) timed out. The error is due to the limited number of NFC connections that can be established to ESX hosts that are not connected to vCenter Server instances. Workaround: Connect to the destination ESX host through a vCenter Server. In this case, the number of source disks is limited to 27 for ESX and to 23 for ESXi hosts.
Converting source volumes with unrecognized file systems might prevent the destination virtual machines from starting While you are setting up a volume-based cloning task in one of the Converter Standalone wizards, the volume name might be missing in some rows of the Source Volumes tab. This means that Converter Standalone does not recognize the file system on those volumes. The destination virtual machine that is created as a result of such a conversion task might fail to start up. Nevertheless, Converter Standalone copies the source volume data to the destination using block-level copying. Workaround: configure the destination virtual machine after the conversion.
Converting standalone VMware sources with a VMDK file greater than 2GB to a hosted destination that resides on a network share that does not support large files, fails If you select a standalone virtual machine source with VMDK file greater than 2GB and try to convert it to hosted destination residing on a remote network location that does not support large files (for example, Linux SMB or NFS share), the conversion job might fail with one of following error messages:
Unable to connect to the virtual disk
Remote server closed connection after 0 response bytes read
An error occurred during an operation on a virtual disk
If conversion is successful, the following error message related to the VMDK file might appear when you power on the destination virtual machine: Internal Inconsistency errors Workaround:
In the main application window of Converter Standalone, right-click the failed job and select Copy As New...
Go to the Options page and select Data to Copy.
In the Data to Copy pane, select the volumes to copy and click Advanced.
On the Destination layout tab, select Split not pre-allocated or Split pre-allocated as the destination disk type.
Click Next to view a summary of the conversion job.
On the Ready to Complete page, click Finish to resubmit the job.
Converter Standalone is unable to detect the system volume if it resides on a SCSI disk and IDE disks are present in the source machine On source machines with SCSI and IDE disks, Converter is unable to detect the system volume if the system volume resides on a SCSI disk. Converter only checks the first IDE disk in such configurations.
If the hardware configuration of the source machine is modified while the Conversion wizard is open, you need to restart the conversion wizard if you want to view correct source details Source machine details are retrieved per wizard session, as this is a time-consuming process. If some changes occur on the source machine (such as adding memory or hard drives) after this information is retrieved, the Conversion wizard does not show information about the changes. Workaround: Restart the conversion wizard.
Cloning a source that contains file system errors might result in a damaged virtual machine See Cloning a source that contains file system errors may result in a damaged copy (KB 1006689).
Timeout on SSL handshake when converting over a WAN link Converter Standalone does not support conversion over a WAN. When trying to perform a conversion over a WAN link, you might experience an SSL timeout because the timeout for SSL handshakes is two minutes. Workaround:
To avoid the two-minute handshake, perform a conversion to a hosted destination machine (for example, Workstation) in the same LAN.
Copy the temporary virtual machine and send it over the WAN to the remote site. If the intended destination is a Workstation virtual machine, this completes the process.
If the intended destination is ESX, import the Workstation virtual machine to the ESX server.
User Account Control (UAC) prevents installing Converter Standalone agent if you are not using the default Administrator account to connect to a powered on source machine If you are setting up a task to convert a powered on source machine that runs Windows Server 2008, Windows Vista, Windows 7, Windows Server 2012, or Windows 8 and you use a non-default Administrator account to log in to the source machine, the following error message might appear when you try to install Converter Standalone agent on the source machine: Insufficient permissions to connect to xxxxxxx. Here xxxxxxx is the IP address of the source machine. This is because Converter Standalone server cannot install Converter Standalone agent when UAC is enabled and you are logged in to the source as non-default Administrator user. Workaround: Disable the UAC on the source machine before you start the Conversion wizard. You can search the Microsoft Web site for procedures on disabling the UAC depending on the source operating system. For Windows Server 2012 and Windows 8, in addition to disabling UAC, you must perform the following steps:
In the Windows Start menu, type gpedit.msc. The Local Group Policy Editor opens.
Navigate to Computer Configuration > Windows Settings > Security Settings > Local Policies > Security Options.
Disable the Run all administrators in Admin Approval Mode setting.
Restart.
The Reconfigure Virtual Machine wizard does not display correctly the vDS port group name When you reconfigure a virtual machine that uses dvSwitch and you navigate to the Network interface settings pane, the Network name text box does not display the name of the dvSwitch after the port group name. Only port group is displayed instead.
The reported network transfer rate might not be correct The reported network transfer rate might be higher than the actual one because of the inherent compression used by the network protocol. This does not affect the network throttling.
Adding a virtual machine to a domain might fail if you specify a fully qualified user name When configuring a virtual machine, you might not be able to add the virtual machine to a domain if you use a fully qualified user name (DOMAIN_NAMEUSER_NAME). Workaround: Specify the user name without including the domain name.
Conversion of a physical machine running Microsoft Windows XP or Windows Server 2003 with a BCD manager (Boot Manager for Windows Vista) and later might fail If you try to convert a physical machine with a BCD manager, the P2V conversion might fail in the following cases:
Microsoft Windows Vista or later is installed on the source physical machine, which is a dual-boot machine currently running Microsoft Windows XP or Windows Server 2003.
Microsoft Windows Vista or later is installed as a second operating system on the source physical machine and later is removed, but the BCD manager is left on the source machine.
Workaround 1: In case of a dual-boot machine conversion :
Boot the later version of Windows (Windows Vista, Windows Server 2008, or Windows 7).
Perform a physical source conversion.
On the newly created virtual machine, boot a repair CD for the earlier version of Windows (Windows XP or Windows Server 2003).
Remove the BCD manager and revert the operating system to its compatible boot process.
Shut down the virtual machine and reconfigure it by using the Converter Standalone configuration wizard. Now you can boot the machine.
Workaround 2: In case of converting a source machine running Windows XP or Windows Server 2003 with a BCD manager:
On the source machine, boot a repair CD of the corresponding operating system.
Remove the BCD manager and revert the operating system to its compatible boot process.
For more information on how to repair BCD, see the Microsoft knowledge base article Windows no longer starts after you install an earlier version of the Windows operating system in a dual-boot configuration. Submitting a job might fail with The specified parameter was not correct:'info.owner'message If Converter Standalone is installed in a client-server mode and you have connected by using a username, which is the same as the computer name, submitting a job might fail with The specified parameter was not correct:'info.owner' message. Workaround: Connect by using a different user account with administrative rights. You might not be able to convert more than nine disks at once On ESX 3.5 and 4.0, conversion might fail if you try to convert more than nine disks. Workaround: Perform conversion in multiple steps to convert the disks in portions of up to nine. Then, attach all the disks to the target machine.
Windows Sources
If you convert a source machine with Windows 2008 and above operating system, some disk(s) may be offline or read-only If you convert a source machine with Windows 2008 and above operating system, some disk(s) in the destination VM may be offline or read-only. Workaround:
If the disk is offline, in the Disk Management console diskmgmt.msc, right-click the disk and select Online.
If the disk is read-only, run diskpart.exe with administrator's rights, and then run the following commands:
DISKPART> list disk Lists all disks and their status: online/offline.
DISKPART> select disk # Where '#' is the number of disk in offline state.
DISKPART> attribute disk clear readonly
DISKPART> online disk
Repeat steps 2-4 for every offline disk.
DISKPART> exit
Configuration of Windows virtual machines with multiple active partitions might not complete For Windows virtual machines with multiple active partitions, Converter Standalone might not recognize the boot partition and might not be able to complete the reconfiguration of the destination virtual machine. In such cases, after the conversion job is 96-98% complete, the conversion job status changes to Failed and an error message appears. For example: FAILED: Unable to find the system volume, reconfiguration is not possible. In the Worker/Agent log this issue is identified by the following statement: (#### warning 'Default') ERROR: (Mntapi_GetFirstBootDisk) more that *one* active volume found. Current active disk #0, another active disk #1. Workaround 1: Mark all non-boot active partitions on the destination machine as inactive and run configuration on the destination machine.
Boot into Windows Recovery Console on the destination machine.
Run diskpart.exe. The diskpart command prompt appears.
(Optional) To list the available disks, enter list disk.
Enter select disk <disk_number>.
(Optional) To list the partitions on the selected disk, enter list partition.
Enter select partition <partition_number>.
Enter inactive.
Repeat steps 4-7 to mark another partition as inactive.
Power off the destination machine.
Run Converter Standalone and configure the destination machine.
Workaround 2: Mark all non-boot active partitions on the source machine as inactive and attempt to run the conversion again.
On the source machine, run diskpart.exe. The diskpart command prompt appears.
(Optional) To list the available disks, enter list disk.
Enter select disk <disk_number>.
(Optional) To list the partitions on the selected disk, enter list partition.
Enter select partition <partition_number>.
Enter inactive.
Repeat steps 2-6 to mark another partition as inactive.
Run Converter Standalone and start the conversion again.
Conversion of a local powered on source machine fails at 1% If you select This local machine as a conversion source and a Converter Standalone agent from a previous Converter Standalone version is installed on the source machine, the conversion task fails at 1%. The following error message appears in the Status line of the Task progress tab: FAILED: Unable to create a VSS snapshot of the source volume(s). Error code: 127 (0x0000007F). This is because the Converter Standalone installer cannot upgrade previous versions of Converter Standalone agents. Workaround: Manually uninstall Converter Standalone agent from the source machine and create a new conversion task.
Converter Standalone worker process stops responding if you try to copy a configuration job during guest operating system customization If you right-click a running configuration job and select Copy As New while the destination machine is being customized, Converter Standalone worker process stops responding. Workaround: Wait for the configuration job to complete before you copy it.
Subsequent P2V conversions of remote source machines that run 64-bit Windows Vista or later might fail after a successful conversion If you convert successfully a remote source machine that runs 64-bit Windows Vista, Windows Server 2008, or Windows 7 operating system and then try converting it again, the conversion fails with the error message Converter Standalone Agent installation failed on x.x.x.x Error code: 1603, where x.x.x.x is the IP address of the source machine. This error message might occur if automatic uninstall of remote Converter Standalone agent has been enabled during the first successful conversion. Workaround: Restart the remote source machine and try running the conversion task again.
Converter Standalone does not preserve disabled network adapters during conversion of physical machine sources that run on Windows During P2V conversion of Windows source machines, Converter Standalone does not detect disabled network adapters on the source and does not preserve them on the destination virtual machine. Workaround: On the Options page of the Converter Standalone wizard, click Networks to add network adapters to the destination virtual machine.
Microsoft Windows Vista reboots repeatedly after customization Providing wrong customization information might cause the destination virtual machine to reboot repeatedly if the source operating system is Microsoft Windows Vista. During conversion or configuration, if you choose to customize Microsoft Windows Vista and provide wrong customization information, for example an invalid serial key, the customized destination reboots repeatedly. This is a known issue with Microsoft Windows Vista. Workaround: Make sure that the provided customization information is valid.
Converter Standalone does not support cloning powered on Windows Server 2008 sources with FAT/FAT32 volume file system VSS under Windows Server 2008 does not support FAT/FAT32. Trying to convert a FAT/FAT32 volume causes the conversion task to fail. Workaround: Deselect all FAT/FAT32 volumes on the Options page of the Conversion wizard.
Converter Standalone remote agent does not notify the user about Converter 3.0.x or 4.0.x remote agents that have been installed on the source system during remote hot cloning process If Converter Standalone is converting a remote machine source that already has a remote agent from Converter version 3.0.x or 4.0.x, it uninstalls the old remote agent without issuing a notification or warning message. This prevents older Converter versions from converting this source machine later.
Previous Converter versions cannot convert source machines that have Converter Standalone 6.0 agent installed on them Converter Standalone 6.0 agent is deployed on the source machine during conversion. If Converter Standalone 6.0 agent is not uninstalled after the conversion, older Converter versions cannot deploy their agents on top of the newer Converter Standalone agent version. Therefore, you cannot use previous Converter versions to convert sources that have already been converted with Converter Standalone 6.0. Workaround: Uninstall Converter Standalone 6.0 agent before trying to convert the source with an older Converter version.
Stopping Converter Standalone processes during file-level cloning might cause the machine that runs the Converter Standalone server service to restart During file-level cloning of source systems that run Windows XP or Windows Server 2003, if any of the following Converter Standalone process is forcibly stopped, the machine on which the stopped process was running might automatically reboot.
VMware Converter Standalone Integrated Worker
VMware Converter Standalone Integrated Agent
This behavior is not consistent and depends on the Windows version and patch level.
Workaround: Do not stop any Converter Standalone services on the source machine during file-level cloning. For more information and hot fix, check the Microsoft site Error message when a Delayed Write Failure event is reported in Windows Server 2003: 'Stop 0x00000019 - BAD_POOL_HEADER' or 'Stop 0xCD PAGE_FAULT_BEYOND_END_OF_ALLOCATION'.
Converter Standalone does not change PIC HAL to APIC HAL during conversion of Windows source machines If the source to convert is running a Programmable Interrupt Controller (PIC) HAL, Converter Standalone does not change the PIC HAL to an Advanced Programmable Interrupt Controller (APIC) HAL in the destination virtual machine. As a result, the destination virtual machine might not boot or might fail to perform as expected. To find out which HAL is running, go to Windows Device Manager and select Computer in the list of devices. If it displays Standard PC or Advanced Configuration and Power Interface (ACPI) PC, you are running a PIC HAL. Workaround: VMware virtual machines are APIC computers. If your source computer is a PIC computer that runs a PIC HAL, you must update the HAL in the destination virtual machine to APIC HAL after the conversion. For more information on configuring the correct HAL, check the Microsoft Web site HAL options after Windows XP or Windows Server 2003 Setup. Note: Microsoft does not support running a PIC HAL on an APIC computer. If your source is an APIC computer running a PIC HAL, you must configure the correct HAL on the source machine before starting the conversion.
Owner name and organization are not displayed properly after customizing the guest operating system After customizing the guest operating system, Unicode characters used for owner name and organization on the Computer Information page do not appear the way they were set in the Conversion or the Configuration wizard. For all Windows operating systems except Windows Vista, customization parameters such as user name and organization must use characters only from the local encoding of the default user profile of the guest. For example, you can use Japanese characters for the user name only on a guest whose default user profile's local encoding is set to Japanese. These restrictions do not apply to Windows Vista guests because Windows Vista uses a UTF-8 encoded XML file to store the Microsoft sysprep parameters. Earlier versions of Windows use the sysprep.inf file, and the Microsoft Windows mini-setup process reads that file in the local encoding only. Workaround: Either avoid Unicode characters when assigning owner name and organization name for the destination virtual machine, or use the workaround described at: http://support.microsoft.com/kb/310441/.
Converter can convert FAT/FAT32 volumes during hot cloning only if the source machine has at least one NTFS volume For source machines running under Windows versions earlier than Windows Server 2008, VSS can take snapshots of FAT/FAT32 volumes only if the source machine has at least one NTFS volume. For all operating systems that support volume-based cloning, you need at least one NTFS volume for VSS to work.
Converter Standalone agent does not start automatically after reboot If the source machine starts up too slowly, Converter Standalone agent might not start automatically after the source machine is restarted. Workaround: Start the Converter Standalone agent manually:
Right-click My Computer and select Manage.
In the Computer Management window, select Services and Applications >Services on the left.
In the list on the right, double-click VMware Converter Standalone Agent.
Click Start to start the process.
Click Apply followed by OK.
The source virtual machine does not have the appropriate drivers The following error message appears in the log file when reconfiguration fails because the appropriate drivers are missing from the source operating system: Unable to find symmpi.sys in the specified CAB files This is usually observed in Windows Server 2003 SP1. Workaround:
Back up the virtual machine created during the failed conversion.
Attach the VMDK file containing the system folder to another Windows Server 2003 virtual machine.
Replace the WINDOWSDriver Cachei386driver.cab file in the destination virtual machine with a version of the driver.cab file that includes the missing driver from the helper virtual machine.
Detach the VMDK file from the helper virtual machine and run the Configure Machine wizard on the destination virtual machine.
Sysprep deletes drive letter mappings during customization If you choose customization options and the destination virtual machine fails at a Please Wait screen after the second sysprep reboot, you need to rerun the conversion task without customization. This issue occurs because of a problem with Microsoft sysprep, which deletes the drive letter mappings, preventing access to certain files.
You cannot import a Windows source with 'signature()' in the boot.ini file You cannot import a Window source with 'signature()' in the boot.ini file. If you import a Windows live source with 'signature()' in the boot.ini file, and try to reconfigure and convert it, the reconfiguration fails and this results in a conversion error. If you try to convert the source without reconfiguration, the conversion succeeds but the destination cannot boot. For more information on 'signature()' go to http://support.microsoft.com/kb/227704.
Linux Sources
Converted SUSE Linux Enterprise Server 10 machine might not have network connectivity If you convert a SUSE Linux Enterprise Server 10 machine, the converted virtual machine might not have network connectivity.
Workaround:
In the /etc/udev/rules.d/30-net_persistent_names.rules.d/30-net_persistent_names.rules file, comment out the lines that start with SUBSYSTEM and contain the old MAC addresses.
Check the /etc/sysconfig/network directory. If there is no ifcfg-eth0 file and there is a file of the form ifcfg-if-mac_address, rename it to ifcfg-eth0.
Restart the network service.
Converted powered on Linux machines cannot start up If you convert a powered on Linux machine that has a non-standard LVM filter saved in the /etc/lvm.conf file, the converted virtual machine might fail to start up. The following error message appears in the virtual machine console: Unable to access resume device (dev//) Workaround: Before the conversion, edit the filter in the lvm.conf file on the source Linux machine to allow all devices. For Red Hat Linux, the default value of the filter is ( 'a/.*/' ).
Linux P2V conversion fails in the beginning with the following error message: 'A general system error occured: <source_server_dns_name>: Connection closed by remote host' If the source machine sshd is configured to allow less than 3 unauthenticated connections, it may sever the converter connection. Workaround: Check MaxStartups in /etc/ssh/sshd_config and ensure it is either commented out or its first number is 3 or higher.
P2V conversions of SLES 9 sources cannot complete, if the root directory is located on an LVM disk When you select to convert a physical SLES 9 source, Converter Standalone cannot complete the conversion if the root directory is located on an LVM disk. After the conversion job is 99% complete, the job status changes to Failed and the following entry is added to the log: FAILED: An error occurred during the conversion: 'Failed to restore original lvm in initrd image: /usr/lib/vmware-converter/restoreLvmInInitrd.sh failed with return code: 1, and message: * Unpacking initrd image /mnt/p2v-src-root//boot/initrd cpio: unsupported cpio format, use newc or crc ERROR: Unable to unpack initrd image /mnt/p2v-src-root//boot/initrd ' Workaround: Convert the LVM disk to a basic disk.
On the Options page of the Conversion wizard, click Data to copy in the options list.
Click Advanced and select the Destination layout tab.
Select the volume that contains the root directory and click To basic.
Virtual machines cloned from SLES 11 SP1 sources to ESX/ESXi managed destinations boot in console mode After the conversion, the destination virtual machine cannot load the GNOME Display Manager and boots in console mode. The following warning message appears: GdmLocalIDisplayFactory: maximum number of X display failures reached: check X server log for errors. Workaround: Recreate the xorg.conf file.
X Server might fail to start in destination virtual machines converted from sources that run Linux When the destination virtual machine starts, X server might fail to start with an error Fatal X server Error. This is due to incompatibility issues between the display driver used in the Linux source and the display adapter of the destination VMware virtual machine. Workarounds:
Install VMware Tools on the destination virtual machine.
configure the X server on the destination virtual machine to change the refresh rate and the display resolution.
Linked cloning of standalone VMware sources to Linux SMB shared destination fails Linked cloning tasks of VMware standalone sources to SMB shared destinations that run on Linux fail with the following error: converter.fault.FileIOFault.
The number of LVM logical volumes per volume group is limited to 12 for powered on Linux sources During the conversion of powered on Linux machines, Converter Standalone converts LVM volume groups into new disks on the destination virtual machine. The number of LVM logical volumes on a source LVM volume group cannot exceed 12. Workaround: Move volumes out of the new disk to other destination disks:
On the Options page of the Conversion wizard, click Data to copy.
From the Data copy type drop-down menu, select Select Volumes to copy and click Advanced.
On the Destination layout tab, select a volume to move and click Move Up or Move Down until it is moved to the destination disk. You can move volumes between disks only if they are not Active /boot or System / volumes.
(Optional) To create a new destination disk, click Add Disk.
By default, the Linux P2V helper virtual machine is powered off when the conversion job finishes Workaround: Manually disable this option in the converter-worker.xml file.
On the machine where Converter Standalone server runs, browse to the converter-worker.xml file in the following location %ALLUSERSPROFILE%Application DataVMwareVMware Converter Standalone.
Open the converter-worker.xml file in a text editor and change the powerOffHelperVm flag from true to false.
To restart Converter Standalone worker: Reboot the system or open the Services section in the Microsoft Management Console, find the VMware Converter Worker service and restart it.
Note: Care should be taken when this option is enabled and the helper VM network is configured to use a static IP address. After the conversion, the helper VM retains the statically configured IP because it is still running. Thus any subsequent Linux P2V jobs cannot use the same static IP until this helper VM is powered off, or at least has its network interface disabled. Disabling the powerOffHelperVm flag is useful when the useSourcePasswordInHelperVm Converter Standalone worker flag is enabled. This allows users to log in to the helper virtual machine after conversion.
Source volumes on top of volume managers other than LVM are not recognized during conversion of powered on Linux machines Converter Standalone recognizes only managed source volumes that run on the LVM volume manager. Other volume managers, including but not limited to Veritas Volume Manager (VxVM), are not recognized.
Converter Standalone does not recognize source volumes that reside on Linux Software RAID configurations During cloning of powered on Linux machines, Converter Standalone does not recognize source volumes that are part of a Software RAID configuration (also referred to as multiple disk, or MD, configurations).
By default, Converter Standalone has a 20 minute timeout when waiting for the helper virtual machine to start up during Linux P2V conversion This might cause a Linux P2V conversion task to fail due to connection timeout. Workaround: Extend the timeout period (in milliseconds) by modifying the linuxP2VBootTimeout flag in the converter-worker.xml file.
On the machine where Converter Standalone server runs, browse to the converter-worker.xml file in the following location %ALLUSERSPROFILE%Application DataVMwareVMware Converter Standalone.
Open the converter-worker.xml file in a text editor and replace the default value for linuxP2VBootTimeout with the necessary timeout value in milliseconds. Note: The timeout value is measured in milliseconds. To specify the timeout in minutes, multiply the number of minutes by 60000 and use that value.
To restart Converter Standalone worker: Reboot the system or open the Services section in the Microsoft Management Console, find the VMware Converter Worker service and restart it.
Sparse files are not preserved during conversion of powered on source machines that run Linux By default, Converter Standalone does not preserve sparse files on the source machine during Linux P2V conversion. If you have large sparse files on the source, they are created as non-sparse on the destination virtual machine. This renders the used space on the destination file system larger than that on the source machine. This might also cause the conversion task to fail with a timeout error. Workaround: Manually enable preserving sparse files during Linux conversions by modifying the keepsake flag in the converter-worker.xml file.
On the machine where Converter Standalone server runs, browse to the converter-worker.xml file in the following location %ALLUSERSPROFILE%Application DataVMwareVMware Converter Standalone.
Open the converter-worker.xml file in a text editor and change the keepsake flag from false to true.
To restart Converter Standalone worker: Reboot the system or open the Services section in the Microsoft Management Console, find the VMware Converter Worker service and restart it.
Destination virtual machine might not boot if you change the disk controller type while converting a Linux virtual machine In Linux virtual machines, the root device can be defined using the block device name (such as /dev/sda1) in /boot/grub/grub.conf, /boot/grub/menu.lst, or /etc/fstab. If you change the disk controller type while converting the virtual machine, the destination virtual machine might not boot. This is because the root device now has a different name (for example, it might have been changed to /dev/hda1). Workaround: Configure the destination virtual machine manually. At the minimum, change the root device name to reflect its new name in the destination virtual machine. To make your system more robust, use the volume label or UUID instead of the block device name.
During conversion of powered on Linux machines, Converter Standalone does not recognize Linux source volumes if they are mapped directly on a hard disk Workaround: Linux source volumes that are not managed by LVM must be located in a partition so that Converter Standalone can recognize them during cloning of powered on Linux sources.
Linux P2V jobs on ESX 5.0 target hosts fail if the name of the virtual machine is not in ASCII symbols or in the Windows current system locale If the target host is ESX 5.0, the name of the virtual machine must be in ASCII or in the Windows current system locale, otherwise the helper machine cannot be connected and the Linux P2V conversion fails. Workaround: Before the conversion, enter the name of the virtual machine by using ASCII symbols. After the conversion is complete, you can rename the virtual machine.
Third-Party Formats
Virtual machines created from Acronis images that have dynamic volumes do not start up after the conversion Some Acronis True Image images of Windows Vista, Windows Server 2008, or Windows 7 are not correctly configured and do not start up after the conversion. The problem occurs when the system or the active disk is located on a dynamic volume in the source. Workaround:
Create a new virtual machine using the vSphere Client.
Use the Acronis True Image software to restore the image inside the new virtual machine.
Limitations when converting third-party images You can use Converter Standalone to convert third-party virtual machines, system images, and backup images with the following limitations:
Backups of systems with dynamic disks are not supported (ShadowProtect and Backup Exec System Recovery).
All images for the backup of a machine must be in a single folder that contains no other images (ShadowProtect and Backup Exec System Recovery).
For incremental images, up to 16 incremental backups are supported (ShadowProtect and Backup Exec System Recovery).
Images of systems with logical volumes are not supported if the logical drive is also a system or active volume (only for ShadowProtect sources).
For volume-based cloning of Acronis and StorageCraft, all volumes in the disk before the active and system volumes must be backed up. For example, if a disk has 4 partitions, 1-4, with partition 2 as the active volume and partition 3 as the system volume, the backup must include volumes 1 through 3 (ShadowProtect and Backup Exec System Recovery).
Virtual machines from Macintosh versions of Virtual PC are not supported.
Older versions of VMware products have limited support of newer operating systems. For example, ESX 3.5 does not support Windows 7. The converted source operating system must be supported for the destination VMware platform. For a list of supported systems, see the Guest Operating System Installation Guide.
Separate backup images should be stored in separate folders Storing more than one third-party backup in a single folder results in a failed migration. Workaround: Place each backup in its own folder before using Converter Standalone to convert an image.
SDK Release Notes
Converter Standalone SDK 6.0
The VMware vCenter Converter Standalone API provides language-neutral interfaces to the Converter Standalone server management framework. The Converter Standalone SDK is a ZIP file that contains the following items.
Sample code demonstrating common use cases for programmatically managing Converter Standalone server. The sample code includes Java and C# source code files. See the respective Readme files (readme_java.htm and readme_dotnet.htm ) for information about building and using the samples.
The WSDL that defines the API available on Converter server.
Batch files and shell scripts to automate the process of generating client-side stubs, and for rebuilding the sample applications. For C# developers, the Microsoft Visual Studio project files (.sln) have been included.
Reference documentation, the VMware vCenter Converter Standalone API Reference Guide, which provides language-neutral descriptive information (object type definitions, properties, and method signatures, for example) for the VMware vCenter Converter Standalone API 6.0.
Obtaining the Software
You can obtain the Converter Standalone SDK 6.0 from here.
Supported Platforms
The Converter Standalone 6.0 SDK is tested only on the supported Windows platforms. See Platforms.
0 notes
Text
vCloud Availability for Cloud-to-Cloud DR 1.5 Reference Architecture
Overview
The vCloud Availability Cloud-to-Cloud DR solution provides replication and failover capabilities for vCloud Director workloads at both VM and vApp level.

VMware vCloud Availability for Cloud-to-Cloud DR Reference Architecture (PDF format here)
This blog demonstrates the reference architecture of vCloud Availability for Cloud-to-Cloud Disaster Recovery 1.5, VMware vCloud Availability for Cloud-to-Cloud DR 1.5 allows tenant and service provider users to protect vApps between different virtual data centers within a vCloud Director environment and across different vCloud Director based clouds.
The architecture diagram illustrates the needed solution components between cloud provider’s two data centers which are backed by different vCloud Director cloud management platform, it also shows the network flow directions and port number required for communication among components in the vCloud Availability for Cloud-to-Cloud DR solution. Architecture supports symmetrical replication operations between cloud environments.
The service operates through a VMware Cloud Provider Program, and each installation provides recovery for multiple cloud environments. The vCloud Availability for Cloud-to-Cloud DR provides: Self-service protection and failover workflows per virtual machine (VM). Single installation package as a Photon-based virtual appliance. The capability of each deployment to serve as both source and recovery vCloud Director instance (site). There are no dedicated source and destination sites. Symmetrical replication flow that can be started from either the source or the recovery vCloud Director site. Replication and recovery of vApps and VMs between vCloud Director sites. Using a single-site vCloud Availability for Cloud-to-Cloud DR installation, you can migrate vApps and VMs between Virtual Data Centers that belong to a single vCloud Director Organization. Secure Tunneling through a TCP proxy. Integration with existing vSphere environments. Multi-tenant support. Built-in encryption or encryption and compression of replication traffic. Support for multiple vCenter Server and ESXi versions.
Architecture Explained When you implement this solution from the ova file in your production environment, make sure you are not choosing the “Combined” configuration type, instead you need to choose the “Manager node with vCloud Director Support’ configuration (icon # 6 in the RA), you’ll see the configuration description showing “The H4 Management Node. Deploy one of these if you need to configure replications to/from vCD”, H4 represents the vCloud Availability Replicator or Manager (C4 is for vCloud Availability vApp Replication Service or Manager), by selecting this configuration type, the ova will install three vCAV components all together in a single appliance:
1. vCloud Availability Cloud-to-Cloud DR Portal (icon # 5 in the RA) 2. vCloud Availability vAPP Replication Manager (icon # 4 in the RA) 3. vCloud Availability Replication Manager (icon # 3 in the RA)
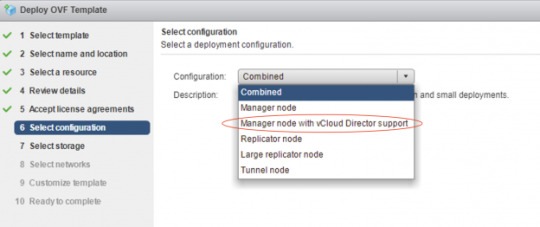

The above three components are located in a white-colored rectangle box (icon # 6) in the reference architecture diagram, all the communications between those three components are happened internally and will never route through outside this appliance, for example, vCloud Availability vAPP Replication Manager will use REST API calls to vCloud Availability Replication Manager in order to perform required replication tasks.
vCloud DirectorWith the vCloud Director, cloud provider can build secure, multi-tenant private clouds by pooling infrastructure resources into virtual data centers and exposing them to users through Web- based portals and programmatic interfaces as fully automated, catalog-based services.
vCloud Availability Replicator Appliance For production deployments, You deploy and configure dedicated vCloud Availability Replicator appliance or appliances, it exposes the low-level HBR primitives as REST APIs.
vCloud Availability Replicator ManagerA management service operating on the vCenter Server level. It understands the vCenter Server level concepts for starting the replication workflow for the virtual machines. It must have TCP access to the Lookup Service and all the vCloud Availability Replicator appliances in both local, and remote sites.
vCloud Availability vApp Replication ManagerProvides the main interface for the Cloud-to-Cloud replication operations. It understands the vCloud Director level concepts and works with vApps and virtual machines using vCD API calls.
vCloud Availability C2C DR PortalIt provides tenants and service providers with a graphic user interface to facilitate the management of the vCloud Availability for Cloud-to-Cloud DR solution. It also provides overall system and workload information.
Manager node with vCloud Director Support Single appliance that contains the following services:vCloud Availability Cloud-to-Cloud DR Portal vCloud Availability vAPP Replication Manager vCloud Availability Replication Manager
vCenter Server with Platform Services ControllerThe PSC provides common infrastructure services to the vSphere environment. Services include licensing, certificate management, and authentication with VMware vCenter Single Sign-On.
vCloud Availability Tunnel ApplianceThis solution requires that each component on a local site has bidirectional TCP connectivity to each component on the remote site, If bidirectional connections between sites are a problem, you configure Cloud-to-Cloud Tunneling, you must provide connectivity between the vCloud Availability Tunnel appliances on each site. It simplifies provider networking setup by channeling all incoming and outgoing traffic for a site through a single point.
Network Address TranslationYou must set an IP and port in the local site that is reachable for remote sites and forward it to the private address of the vCloud Availability Tunnel appliance, port 8048, for example, by using destination network address translation (DNAT).
Coexistence
Based on the product release nodes, vCloud Availability for Cloud-to-Cloud DR 1.5 and vCloud Availability for vCloud Director 2.X can be installed and can operate together in the same vCloud Director environment. You can protect virtual machines either by using vCloud Availability for Cloud-to-Cloud DR 1.5 or vCloud Availability for vCloud Director 2.X.
vCloud Availability for Cloud-to-Cloud DR 1.5 and vCloud Director Extender 1.1.X can be installed and can operate together in the same vCloud Director environment. You can migrate virtual machines either by using vCloud Availability for Cloud-to-Cloud DR 1.5 or vCloud Director Extender 1.1.X.
Interoperability
vSphere Hypervisor (ESXi) – 5.5 and above
vCenter Server – 6.0, 6.5 and 6.7
vCloud Director for Service Providers – 8.20, 9.0, 9.1 and 9.5
* Please visit VMware Product Interoperability Matrices website to check the latest support products version.
Notes
There’s a comprehensive vCloud Availability Cloud-to-Cloud DR Design and Deploy Guide available here, which was published by my colleague, Avnish Tripathi, you can find detail design guidelines for this solution.
VMware official vCloud Availability for Cloud-to-Cloud DR Documentation is here.
0 notes
Text
DES-6322 Exam Questions - Specialist – Implementation Engineer, VxRail Exam
Are you worried about how to pass your DES-6322 Specialist – Implementation Engineer, VxRail Exam? PassQuestion provides detailed DELL EMC DES-6322 Exam Questions that will help you prepare for the real exam.It is highly recommended to go through detailed DES-6322 Exam Questions so you can clear your concepts before taking Specialist - Implementation Engineer,VxRail exam. It is the right way to proceed so you can easily manage things in an efficient way. Make sure that you are using up to date DES-6322 Exam Questions so you can easily clear the DELL EMC DES-6322 exam on the first shot.
DES-6322 Specialist – Implementation Engineer, VxRail Exam
DES-6322 exam is a qualifying exam for the Specialist – Implementation Engineer,VxRail (DCS-IE) track. This exam focuses on the overall product, hardware, and software requirements to implement a VxRail cluster. This includes an introduction to VxRail, hardware installation, pre-deployment tasks, environment validation, software implementation, post-deployment procedures, product scale-out options, REST API functionality, and common issues and troubleshooting of events. There are two parts in this DES-6322 exam,you need to pass both parts to get your certification.
Part 1: Duration: 90 Minutes Number of Questions: 54 Questions Pass Score: 63%
Part 2: Duration: 30 Minutes Number of Questions: 6 Simulations Pass Score: 67%
Exam Topics
Introduction to VxRail (8%)
VxRail Pre-deployment Tasks and Hardware Installation (12%)
VxRail Network Environment Requirements and Initialization (10%)
VxRail System Initialization (17%)
VxRail Post-deployment Procedures (20%)
VxRail Cluster Expansion and Stretched Clusters (13%)
VxRail Troubleshooting (13%)
VxRail Appliance REST API (7%)
View Online Specialist-Implementation Engineer, VxRail Exam DES-6322 Free Questions
What is validated by running the Proactive Network Performance test in vCenter on a VxRail cluster? A. Network performance for virtual machines B. Latency and bandwidth measurement to the witness host C. Latency measurement between DCs for Stretched Clusters D. Network configuration and performance for vSAN Answer: B
Which vCenter object is created automatically when deploying VxRail with an external vCenter Server? A. Datacenter B. Cluster C. VxRail Management user account D. Resource Pool Answer: B
What is a characteristic of the VxRail S Series node? A. Large form factor drives B. Dense Flash disks C. Form factor of 2U4N D. Form factor of 1U1N Answer: D
What Is a supported method for racking nodes for a new VxRail deployment? A. With server exhaust facing the cold aisle B. With PDUs connected to 120v single phase 5-amp electrical circuits C. Starting with node 1 at the top of the rack D. In the rack hosting the network equipment used to manage the iDRAC Answer: D
0 notes
Text
VMware Warns of Critical Vulnerability Impacting All vCenter Server Deployments
VMware Warns of Critical Vulnerability Impacting All vCenter Server Deployments
VMware, Inc., an American cloud computing and virtualization technology company, is advising its vCenter users to immediately update vCenter Server versions 6.5, 6.7, and 7.0 following the discovery of a serious remote code execution (RCE) flaw in the Virtual SAN Health Check plug-in. The most urgent is CVE-2021-21985, which is connected to a remote code execution flaw in a vSAN plugin authorized…

View On WordPress
0 notes
Photo

VMware vSphere 4.x/5.x to 5.5 Upgrade & New Tech Accredited Training-Adams Academy
The VMware vSphere 4.x/5.x to 5.5 Upgrade & New Tech Accredited Training course includes all the necessary information about the VMware vSphere 4.x/5.x to vSphere 5.5 Upgrade and New Technology Ultimate Bootcamp. Throughout the course, you will learn about vSphere 5.1 & 5.5, upgrading or migrating to vSphere 5.5, virtual machine enhancements, managing vSphere 5.x administration, networking, storage, availability, and security enhancements. The course provides a detailed overview of VMware concepts and vSphere 5.1 & 5.5 including the licensing procedures. The course covers the procedures of migration and upgradation of vSphare 5.1 and 5.5. You will also learn about the Virtual Machine Enhancements including templates and clones, and VMware converter 5.5. Apart from these, the course teaches you about the host profiles, host deployment options, ESXi 5.5 management, vCenter Server Appliance (vCSA), vSphere Web Client, new update manager features, and vCenter Server 5.x management.
See more: https://www.adamsacademy.com/course/vmware-vsphere-4-x-5-x-to-5-5-upgrade-new-tech-accredited-training/
#vmware_vsphere_6#vmware_vsphere_training_online#vmware_vsphere_5_5_online_training#vmware_vsphere_5_1_online_training#what_is_vmware_vsphere
2 notes
·
View notes
Text
Step up Innovation with Dell EMC PowerEdge and VMware

Breaking new ground is one of the most difficult tasks an IT team can do. It requires knowledge, solid partnership, and trust into the new path forward. Organizations like yours might be looking at hybrid cloud as that next route ahead.
Your company’s IT landscape needs to provide efficiency, flexibility, and scalability along with ease of deployment and management so that you can avoid growing pains. At the same time, you need to help your team comply with key security features while managing the headcount in your organization. We’ve got your back! By using our solutions, customers like Trintech have increased operational efficiency, expanded globally, and achieved more IOPS without the need to expand their IT team.
With a solid partnership that extends over two decades, Dell Technologies and VMware consistently clear the path towards the new objectives your company needs to reach.
Solid partnership working for you
Dell EMC PowerEdge servers with VMware software combine industry leading x86 servers¹ with software in joint solutions that allow you to pick and choose optimal configurations that adapt to your needs. PowerEdge servers provide a secure infrastructure and foundation that’s flexible and scalable. Our partnership provides a unified solution that helps you flexibly architect and scale, automate and empower — regardless of workload. Learn more in our PowerEdge and VMware portfolio brochure.
Trust the Path Forward
Put your business on a solid path to success when you chose the optimal hardware and software partners in your integrated software stack. VMware brings virtualization with VMware vSphere®, and prepares your infrastructure for modern apps when you use vSphere with Tanzu on modern, agile Dell EMC PowerEdge servers. That’s why more businesses are choosing VMware vSphere with Tanzu™ and Dell EMC PowerEdge servers — to take business to the next level with greater ease, speed and confidence.
When it comes to modernizing and simplifying storage, you can boost efficiency with VMware vSAN™ 7 Update 2 on Dell EMC PowerEdge servers with improvements that supports several new vSAN use cases, whether you’re using them for core storage, stretched clusters, modern apps or remote/branch office (ROBO) deployments.
To complete your hybrid cloud, you can deploy VMware Cloud Foundation™ on premises as a private cloud, run it as a service within a public cloud, or take the hybrid cloud approach. At the end of the day improved performance + familiar deployment = a winning solution that makes everything more efficient and creates less headaches for your IT staff.
When it comes to workloads, we provide an easy path for your upgrades. PowerEdge and VMware can help organizations with a large SQL Server database upgrade to the latest SQL 2019 easily and achieve performance improvements of 53% on newer hardware and software. Take a look at the report here. Newer hardware and software solutions from Dell Technologies and VMware can help IT teams run more VMs in the same rack space and more easily manage large SQL Server deployments in a virtualized environment, all while providing a layered approach to high availability. With simplified OEM licensing and support options, PowerEdge and VMware together can help IT teams architect, validate, and build solutions that meet specific business needs.
Easier and faster lifecycle management
Managing your software and hardware lifecycle is something to important in your path; but don’t worry we got your back on this topic as well! Our sophisticated, unified lifecycle management solution across virtualized and non-virtualized environments between OpenManage Integration with VMware vCenter (OMIVV) and vSphere Lifecycle Manager (vLCM) saves administrators valuable time. For example, you can check hardware compatibility on a single node with 87% less hands‑on time and 85% fewer steps.²
Certainly, Dell Technologies and VMware clients have a lot to celebrate – in addition to new solutions to discover during Dell Technologies World 2021. We invite you to join our session at Dell Technologies World: 4 Ways to Make Hybrid Clouds More Agile, Intelligent and Secure with PowerEdge and VMware. Let us guide you into your new path!
¹ IDC, WW Quarterly x86 Server Tracker, 4Q2020 Unit Shipments, March 11, 2021.
² Principled Technologies report commissioned by Dell Technologies, “New VMware vSphere 7.0 features reduced the time and complexity of routine update and hardware compliance tasks,” August 2020.
0 notes
Text
Deep Dive Architecture Comparison of DaaS & VDI, Part 2
In part 1 of this blog series, I discussed the Horizon 7 architecture and a typical single-tenant deployment using Pods and Blocks. In this post I will discuss the Horizon DaaS platform architecture and how this offers massive scale for multiple tenants in a service provider environment.
Horizon DaaS Architecture
The fundamental difference with the Horizon DaaS platform is multi-tenancy architecture. There are no Connection or Security servers, but there are some commonalities. I mentioned Access Point previously, this was originally developed for Horizon Air, and is now a key component for both Horizon 7 and DaaS for remote access.

If you take a look at the diagram above you’ll see these key differences. Let’s start with the management appliances. There are five virtual appliances (OVA) used for Horizon DaaS; Service Provider, Tenant, Desktop Manager, Resource Manager and Access Point. When these appliances are deployed, they are always provisioned as an HA pair (master/slave), except for Access Point which is active/active across multiple appliances. No load-balancer is required, only for multiple Access Point appliances. The remaining virtual appliances use a virtual IP in the master/slave configuration. There is only a single OVA (template), and upon initial installation, the bootstrap process uses this template as a base for each of the virtual appliance types.
I’ve already introduced Access Point with the Horizon 7 architecture previously, but it’s worth mentioning that this is a recent addition. Previously with the original Desktone product and subsequent versions of Horizon DaaS platform, remote access was provided using dtRAM (Desktone Remote Access Manager). The dtRAM is also a virtual appliance (based on FreeBSD and pfSense) and still available, but I would now recommend using Access Point for the latest features.
Service Provider
The service provider has two different types of virtual appliance (HA pair); the Service Provider and Resource Manager.
The Service Provider appliance provides the Service Center portal where the provider can perform a number of activities including Desktop Model management, Tenant management, monitoring and discovery of infrastructure resources. This appliance also contains a Resource Manager service which targets and deploys other management virtual appliances. For example, when a Tenant Appliance pair is created, it’s name, networks, IP address, and so on, are stored in the FDB (Fabric Database). The Service Provider appliance then instructs the resource manager service to clone a tenant appliance.
Resource Manager
The Resource Manager virtual appliance communicates with the infrastructure (vCenter) to carry out desktop provisioning, and provides management of all desktops for tenants. Unlike Horizon 7 that can provision View Composer linked clones, Instant Clones or full clones, only full clones are currently supported with Horizon DaaS. Resources are assigned to tenants so they can consume compute, storage and network for virtual desktops.
It’s important to note that Resource Manager appliances are tied to the service provider, and not the tenant.
Tenant
The tenant also has two different types of virtual appliance (HA pair); Tenant and Desktop Manager virtual appliance.
The Tenant appliance provides a web-based UI (Enterprise Center) for both the tenant end-user and IT administrator. End-users can manage their own virtual desktops, and the administrator functions allow for creation and management of the tenant desktops.
Other tenant operations provided by Enterprise Center, include:
Domain registration
Gold pattern conversion
Desktop pool creation
AD user and group assignment to virtual desktops
The Tenant virtual appliance also contains a Desktop Manager component which brokers connections to tenant virtual desktops. Each Desktop Manager supports up to 5,000 virtual desktops. If more are required then a HA-pair of Desktop Manager virtual appliances can be deployed.
Desktop Manager
The Desktop Manager virtual appliance is the same as the Tenant appliance, but does not include the brokering or Enterprise Center portal. You can deploy Desktop Manager appliances to scale beyond the 5,000 virtual desktop limit.
Resources are assigned to the Desktop Manager for consumption by the tenant. In some cases you may have a vSphere cluster dedicated for 3D workloads with vDGA pass-through. These 3D specific resources would be dedicated to a Desktop Manager virtual appliance pair.
Each virtual desktop is installed with the DaaS Agent which sends heartbeats to the Desktop Manager in order to keep track of it’s state.
Networking
As shown in the above diagram, there are three networks associated with Horizon DaaS; Backbone Link Local network, Service Provider network, and tenant networks.
The Backbone Link Local network is a private network that is dedicated for all virtual appliances. Although the Tenant virtual appliances are connected to this network, there is no access from the tenant network.
The Service Provider management network provides access for service provider administration of the Service Provider appliances, and vSphere infrastructure.
The Tenant network (per tenant) is dedicated for virtual desktops. This also has IP connectivity to the tenants supporting infrastructure such as Active Directory, DNS, NTP, and file servers.
Horizon DaaS Terminology
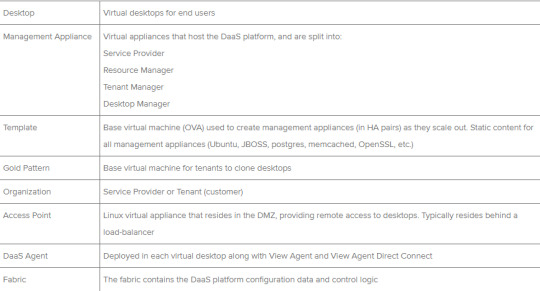
Conclusion
VMware Horizon® is a family of desktop and application virtualization solutions that has matured significantly over the past few years. vCloud Air Network service providers can provide customers with either a managed Horizon 7 platform, or Desktop as a Service with Horizon DaaS.
Both Horizon 7 and Horizon DaaS offer virtual desktops and applications, and used in combination with App Volumes, applications can be delivered in near real-time to end-users.
Access Point provides remote access to both Horizon 7 and Horizon DaaS which provide many advantages to the service provider. With their active/active scalable deployment, and hardened Linux platform, service providers and customers can benefit from multiple authentication and access methods from any device and any location.
For both Horizon solutions, RDSH continues to be an attractive choice for delivering desktop or application sessions. These can either be presented to the user with the Horizon Client, or with integration with Workspace ONE and Identity Manager.
Finally, the vCloud Air Network is a global ecosystem of service providers that are uniquely positioned to supply modern enterprises with the ideal VMware-based solutions they need to grow their businesses. Built on the foundation of existing VMware technology, vCloud Air Network Service Providers deliver a seamless entry into the cloud. You can learn more about the vCloud Air Network, or search for a vCAN service provider here: http://vcloudproviders.vmware.com
0 notes
Text
Palo Alto Networks PSE StrataDC Exam Questions
If you are going to take your Palo Alto Networks System Engineer Professional - Strata Data Center exam, PassQuestion provides 100% Valid PSE StrataDC Exam Questions which can help you to pass your certification exam in first attempt.With the help of PSE StrataDC Exam Questions, you can prepare for your Palo Alto Networks PSE - Strata Data Center Professional Exam on your own in a short time. The questions and answers from all the topics of the PSE StrataDC exam is available in PassQuestion PSE StrataDC Exam Questions.
Professional Services for Strata
To provide confidence in your firewall-as-a-platform implementation, Palo Alto Networks provides Design, QuickStart, Optimization, and Operations Professional Service offerings. The services are matched with your technology capabilities to provide right-sized solutions to meet your business needs. The outcomes of the services are a well-planned and accelerated deployment of Strata technology, adhering to best practices, with operational efficiencies to Secure the Enterprise.
View Online Palo Alto Networks System Engineer Professional - Strata Data Center PSE StrataDC Free Questions
A customer wants to completely segment their internal networks They have Cisco switches and extensively use 10Gbps interfaces. They are running VMware ESXi and are considering implementing NSX. Which three Palo Alto Networks firewall models will support this deployment? (Choose three.) A.PA-3050 B.VM-100 C.VM-300 D.PA-3250 E.PA-7050 Answer : A, D, E
Which three components are relevant for installing a VM-Series firewall in an OpenStack environment? (Choose three ) A.bootstrap files including init-cfg.txt. bootstrap.xml, and VM-Series auth codes B.a valid VM-Series gcow2 image C.Hypervisor: ESX D.a valid OpenStack heat template in json format E.a valid vmseries vhd image F.a valid OpenStack heat template in yaml format Answer : A, B, D
Describe the Automated Deployment of the NSX VM-Series firewall for NSX Solution'? A.When a new ESXi host is added to a cluster, a new VM-Series firewall is automatically deployed, provisioned and available for immediate policy enforcement without any little manual intervention B.When a new ESXi host is added to a cluster, a new VM-Series firewall is automatically deployed, provisioned and available for immediate policy enforcement without any manual intervention C.When a new ESXi host is added to a cluster, a new VM-Series firewall is automatically deployed provisioned and after manually retrieving licenses available for immediate policy enforcement. D.When a new ESXi host is added to a cluster, a new VM-Series firewall is automatically deployed and after manually adding licenses available for policy enforcement Answer : B
Which three criteria are required to deploy VM-Series firewalls in High Availability? (Choose three) A.deployed on same type of hypervisor B.allocate identical CPU cores and network interfaces C.assigned identical licenses and subscriptions D.deployed on a different host E.configured asymmetric routing Answer : A, B, C
Which feature removes the limitation of requiring the first interface to be management? A.Management interface swap B.Utilize a separate Load Balancer VM C.Utilize a separate NAT VM. D.Dataport interface switch Answer : B
What are two ways to size a VM-Series firewall deployment to secure a VMware ESXi environment? (Choose two ) A.one per virtual network B.one per vCenter server C.one per SaaS application in use D.one per ESXi host Answer : A, C
0 notes