#vue pass data from one component to another
Explore tagged Tumblr posts
Visit Tumblr Blog
Explore Tumblr blogs with no restrictions, modern design and the best experience.
Last Seen Tumblr Blogs


Fun Fact
Tumblr was named as a finalist in Lead411’s New York City Hot 125 in Aug 2010.
Text
How to pass value to child component in Vue.js
How to pass value to child component in Vue.js
Hello buddy, in this blog we will see how we can pass value to the child component in vue.js and we will also learn the use of props. Sharing data across components is one of the core functionalities of VueJS. It allows you to design a more modular project, control data scopes, and create a natural flow of data across your app. Think you are using the Vue tab component where you have put 5oo…

View On WordPress
#pass data to component vue#vue dynamic component#vue emit#vue get data from child component#vue pass data between sibling components#vue pass data from one component to another#vue pass data from parent to child#vue pass data to component onclick
0 notes
Text
A Font-Like SVG Icon System for Vue
Managing a custom collection of icons in a Vue app can be challenging at times. An icon font is easy to use, but for customization, you have to rely on third-party font generators, and merge conflicts can be painful to resolve since fonts are binary files.
Using SVG files instead can eliminate those pain points, but how can we ensure they’re just as easy to use while also making it easy to add or remove icons?
Here is what my ideal icon system looks like:
To add icons, you just drop them into a designated icons folder. If you no longer need an icon, you simply delete it.
To use the rocket.svg icon in a template, the syntax is as simple as <svg-icon icon="rocket" />.
The icons can be scaled and colored using the CSS font-size and color properties (just like an icon font).
If multiple instances of the same icon appear on the page, the SVG code is not duplicated each time.
No webpack config editing is required.
This is what we will build by writing two small, single-file components. There are a few specific requirements for this implementation, though I’m sure many of you wizards out there could rework this system for other frameworks and build tools:
webpack: If you used the Vue CLI to scaffold your app, then you’re already using webpack.
svg-inline-loader: This allows us to load all of our SVG code and clean up portions we do not want. Go ahead and run npm install svg-inline-loader --save-dev from the terminal to get started.
The SVG sprite component
To meet our requirement of not repeating SVG code for each instance of an icon on the page, we need to build an SVG “sprite.” If you haven’t heard of an SVG sprite before, think of it as a hidden SVG that houses other SVGs. Anywhere we need to display an icon, we can copy it out of the sprite by referencing the id of the icon inside a <use> tag like this:
<svg><use xlink:href="#rocket" /></svg>
That little bit of code is essentially how our <SvgIcon> component will work, but let’s go ahead create the <SvgSprite> component first. Here is the entire SvgSprite.vue file; some of it may seem daunting at first, but I will break it all down.
<!-- SvgSprite.vue --> <template> <svg width="0" height="0" style="display: none;" v-html="$options.svgSprite" /> </template> <script> const svgContext = require.context( '!svg-inline-loader?' + 'removeTags=true' + // remove title tags, etc. '&removeSVGTagAttrs=true' + // enable removing attributes '&removingTagAttrs=fill' + // remove fill attributes '!@/assets/icons', // search this directory true, // search subdirectories /\w+\.svg$/i // only include SVG files ) const symbols = svgContext.keys().map(path => { // get SVG file content const content = svgContext(path) // extract icon id from filename const id = path.replace(/^\.\/(.*)\.\w+$/, '$1') // replace svg tags with symbol tags and id attribute return content.replace('<svg', `<symbol id="${id}"`).replace('svg>', 'symbol>') }) export default { name: 'SvgSprite', svgSprite: symbols.join('\n'), // concatenate all symbols into $options.svgSprite } </script>
In the template, our lone <svg> element has its content bound to $options.svgSprite. In case you’re unfamiliar with $options it contains properties that are directly attached to our Vue component. We could have attached svgSprite to our component’s data, but we don’t really need Vue to set up reactivity for this since our SVG loader is only going to run when our app builds.
In our script, we use require.context to retrieve all of our SVG files and clean them up while we’re at it. We invoke svg-inline-loader and pass it several parameters using syntax that is very similar to query string parameters. I’ve broken these up into multiple lines to make them easier to understand.
const svgContext = require.context( '!svg-inline-loader?' + 'removeTags=true' + // remove title tags, etc. '&removeSVGTagAttrs=true' + // enable removing attributes '&removingTagAttrs=fill' + // remove fill attributes '!@/assets/icons', // search this directory true, // search subdirectories /\w+\.svg$/i // only include SVG files )
What we’re basically doing here is cleaning up the SVG files that live in a specific directory (/assets/icons) so that they’re in good shape to use anywhere we need them.
The removeTags parameter strips out tags that we do not need for our icons, such as title and style. We especially want to remove title tags since those can cause unwanted tooltips. If you would like to preserve any hard-coded styling in your icons, then add removingTags=title as an additional parameter so that only title tags are removed.
We also tell our loader to remove fill attributes, so that we can set our own fill colors with CSS later. It’s possible you will want to retain your fill colors. If that’s the case, then simply remove the removeSVGTagAttrs and removingTagAttrs parameters.
The last loader parameter is the path to our SVG icon folder. We then provide require.context with two more parameters so that it searches subdirectories and only loads SVG files.
In order to nest all of our SVG elements inside our SVG sprite, we have to convert them from <svg> elements into SVG <symbol> elements. This is as simple as changing the tag and giving each one a unique id, which we extract from the filename.
const symbols = svgContext.keys().map(path => { // extract icon id from filename const id = path.replace(/^\.\/(.*)\.\w+$/, '$1') // get SVG file content const content = svgContext(path) // replace svg tags with symbol tags and id attribute return content.replace('<svg', `<symbol id="${id}"`).replace('svg>', 'symbol>') })
What do we do with this <SvgSprite> component? We place it on our page before any icons that depend on it. I recommend adding it to the top of the App.vue file.
<!-- App.vue --> <template> <div id="app"> <svg-sprite /> <!-- ... -->
The icon component
Now let’s build the SvgIcon.vue component.
<!-- SvgIcon.vue --> <template> <svg class="icon" :class="{ 'icon-spin': spin }"> <use :xlink:href="`#${icon}`" /> </svg> </template> <script> export default { name: 'SvgIcon', props: { icon: { type: String, required: true, }, spin: { type: Boolean, default: false, }, }, } </script> <style> svg.icon { fill: currentColor; height: 1em; margin-bottom: 0.125em; vertical-align: middle; width: 1em; } svg.icon-spin { animation: icon-spin 2s infinite linear; } @keyframes icon-spin { from { transform: rotate(0deg); } to { transform: rotate(359deg); } } </style>
This component is much simpler. As previously mentioned, we leverage the <use> tag to reference an id inside our sprite. That id comes from our component’s icon prop.
I’ve added a spin prop in there that toggles an .icon-spin class as an optional bit of animation, should we ever need. This could, for example, be useful for a loading spinner icon.
<svg-icon v-if="isLoading" icon="spinner" spin />
Depending on your needs, you may want to add additional props, such as rotate or flip. You could simply add the classes directly to the component without using props if you’d like.
Most of our component’s content is CSS. Other than the spinning animation, most of this is used to make our SVG icon act more like an icon font¹. To align the icons to the text baseline, I’ve found that applying vertical-align: middle, along with a bottom margin of 0.125em, works for most cases. We also set the fill attribute value to currentColor, which allows us to color the icon just like text.
<p style="font-size: 2em; color: red;"> <svg-icon icon="exclamation-circle" /><!-- This icon will be 2em and red. --> Error! </p>
That’s it! If you want to use the icon component anywhere in your app without having to import it into every component that needs it, be sure to register the component in your main.js file:
// main.js import Vue from 'vue' import SvgIcon from '@/components/SvgIcon.vue' Vue.component('svg-icon', SvgIcon) // ...
Final thoughts
Here are a few ideas for improvements, which I intentionally left out to keep this solution approachable:
Scale icons that have non-square dimensions to maintain their proportions
Inject the SVG sprite into the page without needing an additional component.
Make it work with vite, which is a new, fast (and webpack-free) build tool from Vue creator Evan You.
Leverage the Vue 3 Composition API.
If you want to quickly take these components for a spin, I’ve created a demo app based on the default vue-cli template. I hope this helps you develop an implementation that fits your app’s needs!
¹ If you’re wondering why we’re using SVG when we want it to behave like an icon font, then check out the classic post that pits the two against one another.
The post A Font-Like SVG Icon System for Vue appeared first on CSS-Tricks.
You can support CSS-Tricks by being an MVP Supporter.
A Font-Like SVG Icon System for Vue published first on https://deskbysnafu.tumblr.com/
2 notes
·
View notes
Text
Building the Future: Exploring the World of Web Development
Web development has evolved drastically over the years, from simple HTML pages to complex web applications. With the rise of new technologies and advancements in the field, every web development company considers it an exciting area to explore. In this blog post, we will explore the world of web development and how it is shaping the future of the internet.
What is web development?
Firstly, let's define what web development is by a web development company. Web development refers to the process of building websites and web applications. It involves a combination of programming languages, design principles, and technologies to create functional and visually appealing websites. The goal of web development is to provide a seamless user experience for visitors to a website, while also ensuring that the site is accessible, secure, and optimized for search engines.
One of the most exciting aspects of web development is the constant innovation and evolution of technologies. With each passing year, new tools and techniques are introduced that make web development easier, faster, and more efficient. Some of the most popular web development technologies today include HTML, CSS, JavaScript, React, Angular, Vue, Node.js, and MongoDB, among others.
Technology behind web development
HTML (HyperText Markup Language) is the backbone of every website. It is a markup language that is used to create the structure and content of web pages. CSS (Cascading Style Sheets) is used to style and format web pages, while JavaScript is used to add interactivity and dynamic functionality to websites.
Every Logo design company React, Angular, and Vue use JavaScript frameworks that simplify the development of complex web applications. These frameworks provide developers with pre-built components and libraries that can be easily integrated into their projects, reducing development time and costs.
Node.js is a popular JavaScript runtime that allows developers to build server-side applications using JavaScript. It provides an event-driven architecture that is highly scalable and efficient. MongoDB is a NoSQL database that is used to store and manage data in web applications.
In addition to these technologies, there are many other tools and frameworks that are used in web development today. These include Bootstrap, jQuery, SASS, LESS, Grunt, Gulp, and many others. The use of these tools and frameworks has revolutionized the way web development is done, making it easier and more efficient than ever before.
Development trends for Web and Mobile
Another exciting aspect of web development is the rise of mobile devices and mobile web browsing. With more and more people accessing the internet through their smartphones and tablets, it has become crucial for websites to be optimized for mobile devices. This has led to the development of responsive web design, which allows websites to adapt to different screen sizes and resolutions.
Responsive web design involves using flexible layouts, fluid images, and media queries to ensure that websites look good and function properly on any device. Every web development company considers it a critical aspect of web development today, as mobile devices continue to dominate the internet landscape.
Security & Reliability
One of the biggest challenges in web development today is ensuring that websites are secure and protected from cyber threats. With the rise of cybercrime and data breaches, it has become more important than ever to secure websites and web applications. This involves using encryption technologies such as SSL/TLS, implementing strong authentication mechanisms, and regularly updating and patching software to address vulnerabilities.
In addition to security, accessibility is another important aspect of web development. Websites must be designed in a way that is accessible to all users, including those with disabilities. This involves adhering to accessibility guidelines and standards such as the Web Content Accessibility Guidelines (WCAG), which provide a framework for creating accessible websites.
The future of web development
As we look to the future of web development, there are many exciting possibilities on the horizon. Every Logo design company considers one of the most promising areas of development is the Internet of Things (IoT). IoT refers to the network of connected devices, appliances, and systems that are connected to the internet.
The world of web development is constantly evolving, with new technologies and trends emerging all the time. Here are some of the top trends that are currently trending in the world of web development:
Progressive Web Apps (PWA)
Progressive Web Apps (PWA) are web applications that provide users with an app-like experience on their mobile devices. A web development company uses PWAs that are fast, reliable, and can work offline, which makes them ideal for users with poor internet connections or limited data plans. They also use push notifications to keep users engaged and can be installed on the user's home screen, just like a native app.
Artificial Intelligence (AI) and Machine Learning (ML)
AI and ML are revolutionizing web development by providing developers with powerful tools to create intelligent and interactive applications. AI-powered chatbots, voice assistants, and recommendation engines are just a few examples of how AI is being used in web development today.
Voice Search Optimization
With the rise of voice assistants like Siri, Alexa, and Google Assistant, optimizing websites for voice search has become increasingly important. Web developers are now designing websites that are optimized for voice search, using techniques such as natural language processing and schema markup.
Motion UI
Motion UI is a design trend that uses animation and transitions to create a more engaging and interactive user experience. It involves using subtle animations to guide users through the website and highlight important information.
Single Page Applications (SPA)
Single Page Applications (SPA) are web applications that load a single HTML page and dynamically update the content as the user interacts with the site. Every web development company uses SPAs to provide a seamless user experience and can be faster than traditional multi-page applications.
Cybersecurity
Cybersecurity has become a top priority in web development due to the rise of cyber threats and data breaches. Web developers are now implementing security measures such as SSL/TLS encryption, two-factor authentication, and regular software updates to protect websites and web applications from cyber attacks.
Headless CMS
Headless CMS is a content management system that separates the content from the presentation layer. This allows developers to use the CMS as a backend for multiple websites or applications, without being limited by the front-end design. Headless CMS provides developers with more flexibility and control over their content, allowing them to create custom experiences for users.
Web Assembly (WASM)
Web Assembly (WASM) is a new technology that allows developers to run high-performance applications in the browser. It is a low-level assembly language that can be used to create complex applications, such as games and simulations, that run at near-native speed in the browser.
These are just a few of the top trends that are currently trending in the world of web development in every Logo design company. As the field continues to evolve, new technologies and trends are sure to emerge, making web development an exciting and dynamic field to be a part of.
1 note
·
View note
Text
How Angular Web Development Can Benefit Your Project?

Angular is a web application framework that is used to build web applications. The framework was developed by Google and it has been around for several years now. It is one of the most popular frameworks today, with developers preferring it over other frameworks such as ReactJS and VueJS.
There are several reasons why you should consider using Angular Web Development for your next project rather than choosing another framework such as React or VueJS:
Web Development with Angular
Angular is a front-end web development framework that was originally developed in 2009 by Google. It was initially created as an internal tool for developing web apps at Google and later released as an open-source project.
Why choose Angular for your Web Development project?
Angular is built using NodeJS, which allows you to use JavaScript.
Angular is a structural framework that implements the MVC pattern. In this case, Angular uses JavaScript code to create HTML views and interact with them (Controller).
The Controller acts as an intermediary between View and Model; it handles DOM events such as clicks or key presses and passes data back to the model on which it operates (View).
The Model contains data storage methods while View represents what we see on screen with HTML elements like form labels/fields or buttons etc…
Angular also allows developers to use the MVVM pattern instead of the MVC pattern when developing their projects since it’s highly flexible when it comes down to choosing between these two patterns!
Angular is Highly Flexible
Angular is a highly flexible framework, which means you can use it for a wide variety of projects. Angular is indeed best suited to building large-scale applications and websites, but that doesn’t mean it’s not suitable for smaller projects.
Angular web development is flexible and allows developers to build applications of any size. The fact that the framework doesn’t require you to use large frameworks like React or Vue makes it ideal for smaller apps as well as larger ones.
Angular Allows Automatic Updates
Angular is a framework that allows you to update your website automatically without having to do any coding.
You can update your website with Angular and it is easy to use. It is a great way to keep your website up to date and it will be easier for developers when working on the project.
Angular Makes it Easier for New Developers to Join the Team
The most significant advantage of Angular Web Development is that it allows new developers to quickly learn and understand its component-based structure. Developers can focus on their components, not the entire framework, which helps them concentrate on what they need to do. This means less time spent researching and more time spent developing your product.
Another benefit of this is that it makes it easier for you to onboard new members of your team as they no longer need to learn everything about Angular before they can start contributing. They just need to know enough about their chosen component or two to get started building out functionality confidently!
Angular is a Highly Compatible Framework
It can be used with any language, database, web server and browser, operating system, framework, or library.
Initially developed by Google in 2009 Angular was released as open-source software in 2010. Since its release, it has been improved continuously and now there are many versions available that offer different features for developers to choose from.
The latest version is Angular 7 which was released in March 2019 with some new features like more CLI commands and an improved compiler among others…
Angular Saves you Money and Time
Angular saves you money and time in many ways:
It is a popular framework, so your developers need not learn a new language or technology.
It’s an easy-to-learn angular web development framework. Your team will be up and running quickly.
It’s easy to use, so you don’t have to worry about training your employees or consultants on how to work with Angular. This will save you time and money because they won’t make mistakes like forgetting what the code does or not understanding how all the different pieces of Angular fit together.
Angular is also great for maintenance because it’s built from scratch by Google engineers who know how the software works at its core level—and they’re constantly updating their frameworks based on feedback from developers using them every day!
When Looking at Web Development Frameworks, Consider Using Angular.
If you’re an experienced developer who has been working with JavaScript and HTML for years, then it may be time to expand your horizons by learning a new framework. While this isn’t the only option, it’s one of the best and most widely used frameworks in the industry today.
Let’s take a look at some of the benefits of Angular for Web Development:
Faster development time and lower maintenance costs over time (due to its ease of use)
More readable code that is easy on developers’ eyes (the syntax is simple and concise)
Conclusion
So, why Angular web development? In a nutshell, it is more secure and faster than other frameworks. It’s also easier to use, which means you can get your project completed sooner. If you have any questions about this post or would like more information on our services, please contact us today!
#Angular Web Development#Benefits of Angular for Web Development#Why Choose Angular for Your Web Development Project
0 notes
Link
A form will pop-up what feels for you to fill out and when you hit enter the app creates that timer for you. When you decide to delete a timer if you click the delete button, the timer will remove itself from the page that is pretty much what you would call a dynamic user interface.
React was created because the facebook develop team wanted a better way to structure JavaScript applications.
So, why use React.Js ?
Number one is for reusable components
Components are a huge part of what makes react so understanding them is crucial when programming with react components let you split your code into separate independent reusable pieces.
You can think of components as functions that can take inputs to call props and return elements describing what should appear on the screen. You also take those already created functions and reuse than in other parts of your app without any problems.
So, react components are like individual Legos that can build something great and then connect it together and they’re also reusable.
Also Read:
React Is The New jQuery! (Or Is It Vue)
Number two is for the virtual Dom
Even though, javascript is fast enough to handle complex web applications. Dom manipulations are still not too fast.
Updating the Dom is usually the problem when it comes to achieving optimal web performance that’s where the virtual Dom comes in how the virtual Dom works are.
It keeps a copy of the real Dom in storage and whenever a change is made the update first goes to the virtual Dom.
The virtual Dom then compares its Dom with the real Dom and applies the changes to the real Dom in the most efficient way possible.
The number three is for props and skates
So let’s start off with props short for properties by the wedding preps are used to let components talk with each other.
That’s pretty much it, props let you pass data to other components for them to use it and another thing to know about props is that you cannot change props.
And you may be thinking then what can I use for values that change over time what do I need for values that do that change frequently. That’s where the state comes in.
So props shouldn’t change but we need inputs that can change its value. The purpose of states is so that components can keep track of information between any renders.
It does when you change a part of the state it updates the objects and then every renders the component. It’s also important to note that you should have this little state as possible reason being is.
Let’s say that you have a car, a car has many moving parts and eventually things break.
And the same thing could happen if you have too much state in your react, that location and for components that don’t need any state.
We have two types of components stateful and stateless components
Also Read:
Learn Reactjs: Become The Highest Paid Front-End Software Developer Today
stateful components | stateless components
stateful components are components using state which means they have values that can change stateless components, on the other hand, are components that don’t use state, which means they don’t have values that change.
1 note
·
View note
Text
Significant React Native Libraries for Mobile App Development in 2021

React Native happens to be one of the most sought-after app development frameworks across the globe as it comes with a host of advantages like a cost-effective developmental cycle, faster time-to-market, high performance, modular and intuitive architecture, and many more.
One of the unique benefits of this framework is the availability of countless third-party libraries that expedite the development and prove highly convenient for every React Native App Development Company. However, owing to the presence of thousands of React Native libraries, selecting the apt ones becomes a herculean task. As a consequence, development teams often have to spare a great deal of time and effort for picking the right tool or library that would prove fruitful.
For easing out this task, I have penned down the most significant tools and libraries that complement the React Native framework. A quick read will help you to find the perfect match that suits your requirement.
Tools and Libraries for Various React Native App Development Categories

Category: User Interface
React Native Elements
This UI library, built using JavaScript, has earned 20.5k stars and 4.2k forks on GitHub.
This library comes with cross-platform compatibility and supports Expo.
It is easy to use, customizable, and community-driven.
Lottie-react-native
This library created by Airbnb enables adding attractive animations to React Native applications.
React Native developers can either select from the free animations available or design and add their animations employing “Adobe After Effects.”
Functioning: The animation data is exported in JSON format with Bodymovin and rendered natively on mobile.
Styled Components
This library enables developers to write CSS code for styling components
It removes the mapping between styles and components, thereby easing out the usage of components as a low-level styling construct.
The styles can be reused several times resulting in lesser coding
React Native Vector icons
React Native Vector icons is a library that offers numerous icons of various types, designed for the React Native Apps.
Each element can be fully customized
Category: Forms
Formik
It’s a small library that helps to build forms in React
Formik enables to validate the form values, display error messages and helps to submit the form.
Redux-form
Redux-form enables proper state management in Redux
It helps in tracking the commonest form states like fields contained in the form, focussed field, field values, fields which the users have interacted with, etc.
Category: Testing
Jest
This is a popular testing framework, designed and maintained by Facebook, and is used for testing JavaScript code. This versatile testing tool is compatible with any JavaScript framework or library, including React, Angular, VueJS, etc. Uber, Airbnb, and Intuit are some of the top brands that have leveraged this tool. Its offerings are:
High-speed performance
Standard syntax with report guide
Mocks functions, with the inclusion of third-party node_module libraries
Conducts parallelization, snapshot, and async method tests
Enables managing tests with bigger objects, by using live snapshots
Mocha
Mocha is a JavaScript test framework, used for testing React and React Native apps. It provides the Developers full control over what plugins and tools they choose to use while testing applications. Its major highlights are:
Runs on Node.js
Provides support for asynchronous front-end and backend testing, test coverage reports, and the usage of any claims library
Helps to track errors
Excels in mocking tests
Enzyme
Enzyme is another testing tool developed by Airbnb.
It comes with API wrappers, to ease out developers’ tasks like manipulating, asserting, and traversing the React DOM.
It supports full and shallow DOM and also supports static rendering
Besides, it is compatible with several other testing frameworks and libraries like Mocha and Jest.
Chai
It’s an assertion testing library meant for browser and node
Chai employs behavior-driven and test-driven development principles
Compatible with various testing tools and can be paired with any JS testing framework
Its functionality can be extended by using several custom plugins
Moreover, it enables the developers to create their plugins and share them in the community
Category: Navigation
React Navigation
This component supports navigational patterns like tabs, stacks, and drawers
It is based on JavaScript and is simple to use
It enables developers to effortlessly set up app screens
Can be completely customized as well as extended
React Router
This is a library of navigational components which composes declaratively with the app.
It allows one to specify named components, create various types of layouts, and pass layout components.
Category: App’s State Management
Redux
Redux, a free-standing library, and a predictable state container is predominantly used along with the UI library components of React. Besides the React ecosystem, one can also use Redux with other frameworks like Vue, Angular, Vanilla JS, Ember, etc. Its principal offerings are:
Can be used with back-end as well as front-end libraries
Enables the developers to write consistent codes
Allows editing the live code
Functions well in various environments – Server-side, client-side, and native
Connects the pieces of state to the React components by minimizing the need for props or callbacks.
Category: Linting and checking Types
ESLint
It’s a JavaScript-based, open-source linter tool
ESLint is configurable and pluggable
It improves the code consistency and makes it bug-free
It helps in evaluating patterns in the code and eliminates errors by automatically fixing the code, to enhance the overall code quality.
It helps detect creases in the JavaScript code that don’t comply with the standard guidelines
It helps react native developers to create their own linting rules
Flow
Developed by Facebook, Flow is a static type checker JavaScript library
It easily identifies problems during coding
It proves beneficial in crafting large applications, as it prevents bad rebases when several persons are working on a single program.
The main objective of Flow is to make the code more precise and enhance the speed of the coding process
Category: Networking
Networking tools are used to establish a networking flow in React Native projects. Let us have a look at a few of them.
react-native –firebase is a lightweight layer on the top of Firebase libraries. It creates a JavaScript bridge connecting to the native JavaScript SDKs to ease out using Firebase in React Native Application Development projects.
Apollo Client is quite compatible and adaptable. It is required when the developers need to use GraphQL. It assists in creating a User Interface that pulls data with GraphQL.
Axios, a lightweight HTTP JavaScript client was built to send asynchronous HTTP requests to REST endpoints. Besides, it performs CRUD operations.
react-native-ble-manager is a plugin that helps in connecting and transmitting data between a mobile handset and BLE peripherals.
Category: Utils
The below-mentioned ready-made tools simplify and speed up working with Utils while developing React Native apps.
Ramda is a library that eases out creating functional pipelines without user-data mutation.
The JavaScript functions’ toolkit Lodash offers clean and effective methodologies to your development team for working with collections and objects.
Reselect builds memorized selectors that are needed for avoiding unnecessary recalculation and redrawing of data. This library also quickens the speed of your app.
Moment works with various data formats and is capable of parsing, manipulating as well as validating times and dates in JavaScript.
Validate.js, designed by Wrap, offers the app developers a declarative way to validate JS objects
Category: Analytics
The following libraries act as mediators enabling one to implement the trending analytical tools into their React Native Mobile App Development projects.
react-native-mixpanel is a kind of wrapper for the library named Mixpanel and helps the developers to reap all the benefits of the Mixpanel library.
react-native-google-analytics-bridge acts as a bridge for establishing compatibility between Google Analytics tools and React Native projects.
Category: Localization
react-native-i18n helps in localizing or internationalizing applications. It integrates the i18n-js library in JavaScript for React Native applications.
Category: In-app Purchases
react-native-in-app-utils is a small library used to implement the in-app billing procedure for iOS apps. It can be effortlessly installed and is simple to work with.
react-native-billing is used for adding in-app billing to applications meant for the Android platform. It possesses a simple UI and wraps anjlab’s InApp Billing library to function as a bridge.
Category: AR and VR
ViroReact is used to speedily develop native cross-platform VR/AR apps in React Native. Its key functionalities are:
It has an easy learning curve
It comes with a high-performing native 3D rendering engine as well as a custom extension of React for creating VR and AR solutions.
It provides support for all kinds of platforms in VR including Samsung Gear VR, Google Cardboard, Google Daydream, etc. for Android and iOS; and AR including Android ARCore and iOS ARKit platforms.
Needs React-Viro-CLI and React-Native-CLI for writing cross-platform native codes
Final Verdict:
I hope the aforesaid information was helpful and has given you a clear idea of which library/libraries would be most suitable for your next project.
To know more about our other core technologies, refer to links below:
Angular App Development Company
Ionic App Development Company
Blockchain app developers
0 notes
Text
Getting started with C# and Blazor
In this new post, I want to summarize what I understood for getting started with C# and Blazor, the new technology from Microsoft. I briefly spoke about Blazor in some other posts but here I want to introduce it properly.
We live in exciting times, as .NET developer’s life has never been better. We can create apps for any operating system be it Windows, Linux, iOS, Android or macOS. Of course, we can also build amazing web-based applications with ASP.NET. MVC, Razor Pages, and WebAPI have allowed us to create robust scalable and reliable systems for years, but there has long been a missing piece to the puzzle.
One thing all of ASP.NETs web solutions have in common is that they are server based. We’ve never been able to leverage the power of C# and .NET to write client-side applications, this has always been the domain of JavaScript.
So, I’m going to introduce you to a revolutionary client-side framework: Blazor. Built on web standards, Blazor allows us to write rich, engaging user interfaces using C# and .NET. We’ll explore how Blazor can make your development process more efficient and raise your productivity levels, especially if you’re using .NET on the server as well. We’ll cover hosting models, an important concept to understand when starting out with Blazor. We’ll look at both production supported models and the benefits and tradeoffs of each. Next, we’ll introduction components and the benefits of using them to build UIs. Finally, we’ll discuss the reasons why you should consider Blazor for your next project.
Table of contents
Why choose Blazor for new applications?
Pros
Components, a better way to build UI.
What is a component?
The benefits of a component-based UI
Components
Anatomy of a Blazor component
Understanding the code
Blazor, a platform for building modern UI with C#
No installation required
Mobile applications
Understanding hosting models
Blazor Electron
Code example
Mobile Blazor Bindings
Blazor WebAssembly
Process begin
DOM manipulation
blazor.boot.json
dotnet.wasm
Calculating UI Updates
Process explained
Benefits
Tradeoffs
Blazor WebAssembly summarize
Blazor Server
Process begins
Process static files
Calculating UI updates
Process explained
SignalR
DOM
Performance
The test
Testing
Benefits
Tradeoffs
Blazor Server summarize
Why choose Blazor for new applications?
Arguably, the hardest part of starting a new project in recent times has been choosing the tech stack, there is just so much choice available. This is especially true in the front-end world. Pick a framework (Angular, React, Vue), pick a language (TypeScript, CoffeeScript, Dart), pick a build tool (Webpack, Parcel, Browserify). If a team is new to this eco-system, it can seem an almost impossible task to try and work out which combination of technologies will help make the project a success; it’s even hard for teams with experience!
So, first in this getting started with C# and Blazor, let’s cover some of the top reasons for choosing Blazor for your next project and how it can help avoid some of the issues I’ve just mentioned.
Pros
C#, a modern and feature rich language – It’s powerful, easy to learn, and versatile
Great tooling – The .NET community has been fortunate to have some amazing tooling. Visual Studio is an extremely powerful, feature rich and extensible IDE. It’s also 100% free for individuals or non-enterprise teams of 5 or less. If you prefer something more lightweight, then there is Visual Studio Code – one of the most popular code editors today. Both Visual Studio and VS Code are both cross platform:
Visual Studio for Windows and Mac
Visual Studio Code for Windows, Mac and Linux.
.NET Ecosystem – While many new frameworks need to wait for an ecosystem to build up around them, Blazor can tap into the existing .NET ecosystem. Blazor applications target .NET Standard 2.1 and can in theory use any .NET Standard NuGet package.
Unopinionated – There are no preferred patterns or practices for Blazor development, you can write applications using the ones you’re familiar and comfortable with.
Shallow learning curve – If you’re an existing .NET developer then the learning curve for Blazor is quite shallow. Razor, C#, dependency injection, project structure will all look familiar to you. This means you can focus on writing features quicker, rather than learning the framework.
Code sharing – If you’re using C# on the server then Blazor makes an excellent paring. One of the most frustrating problems with different client and server languages is the inability to reuse code. With Blazor, everything is C#. Any shared code can be placed in a common .NET Standard class library and shared easily between server and client.
Open source – As with many projects at Microsoft, Blazor is fully open source and the code is freely available on GitHub for you to browse, download, or fork your own copy.
Components, a better way to build UI.
Blazor, as with many modern front-end frameworks, uses the concept of components to build the UI. Everything is a component, pages, parts of a page, layouts, they’re all components. There are various types of component in Blazor as well as multiple ways to write them all of which will be explored in future chapters. But learning to think in terms of components is essential for writing Blazor applications.
What is a component?
You can think of a component as a building block. You put these building blocks together to form your application. These building blocks can be as big or as small as you decide, however, building an entire UI as a single component wouldn’t be a good idea. Components really show their benefit when you think of them as a way to divide up logical areas of a UI. Let’s look at an example of a user interface structured as components.

Example of a layout divided into components
Each area of the interface is a component and each one has a certain responsibility. You may also notice that there is a hierarchy forming. The layout component sits at the top of the tree, the menu, header, home page and footer are all child components of the layout component. These child components could, and probably would have child components of their own. For example, the header component could contain a logo component and a search component.

Example of nesting components to form a component tree
The benefits of a component-based UI
Many UIs have repeating elements in them, a great advantage to using components is that you can define an element in a component and then reuse the component wherever the element repeats. This can drastically cut down on the amount of repeated code in an application. It also makes the maintainability of the application much better as if the design of that element changes you only need to update it in a single place.
To cater for more advanced scenarios, components can define their own APIs allowing data and events to be passed in and out. Imagine a line of business application, it’s probably safe to assume that within that app there would be lots of places data would be displayed in table format. One approach would be to create each table as its own component, however, this would mean we would end up with a lot of components which displayed data in a table.
A better approach would be to define a single component which took in a dataset as a parameter and then displayed it in a table. Now we have a single component for displaying data in a table that we can reuse all over the application. We could also add features to this component, things such as sorting or paging. As we do, this functionality is automatically available to all the tables in the application as they are all reusing the same component.
Components
Components help speed up the development process. Due to the reusable nature of components, using them often leads to shorter development times. They can be composed together.
While usually self-contained, it’s also possible to have components work together to create more complex UI. For example, let’s take the data table scenario we just talked about, that could be a single component but that could potentially be quite large.
Another approach would be to divide it up into several smaller components, each performing a certain job. We could have a table header component, a table body component even a table cell component. Each of these components are performing a specific job but they are still part of the overall table component.
Anatomy of a Blazor component
Now, in this post getting started with C# and Blazor, we have a better idea of what components are in a general sense, let’s look at an example of a component in Blazor. For this we’re going to grab a component from the Blazor project template.
In figure 1.3 we can see an example of a component from Blazors standard project template, Counter.razor.

The sections of a component in Blazor
This particular component is known as a routable component, as it has a page directive declared at the top. Routable components are essentially a page in the application. When the user navigates to the /counter route in the application, this component will be loaded by Blazor router. It displays a simple counter with a button and when the user clicks on the button the count is incremented by one and the new value displayed to the user.
Understanding the code
While understanding the code isn’t important at this point, we can understand the structure of the component. Figure 1.3 is divided up into three sections each has a certain responsibility.
Section 1 is used to define directives, add using statements, inject dependencies, or other general configuration which applies to the whole component.
Section 2 defines the markup of the component; this is written using the Razor language, a mix of C# and HTML. Here we define the visual elements which make up the component.
Section 3 is the code block. This is used to define the logic of the component. It is possible to write any valid C# code into this section. You can define fields, properties, even entire classes if you wish.
Blazor, a platform for building modern UI with C#
Blazor is a fully featured framework for building modern client-side applications using the power of C# and .NET. Allowing developers to build engaging applications which work across nearly any platform – including web, mobile and desktop.
Blazor is an alternative to JavaScript frameworks and libraries such as Angular, Vue and React. If you’ve had experience working with any of these then you’ll probably start spotting familiar concepts. The most notable influence is the idea of building UIs with components, a concept all these technologies share and something we’ll explore in more detail later in this chapter.
No installation required
Because Blazor is built on top of web standards; it doesn’t require the end user to have .NET installed on their machines or any kind of browser plugin or extension. In fact, with Blazor WebAssembly applications we don’t even need .NET running on the server, this flavor of Blazor can be hosted as simple static files.
Being built on .NET means we have access to the vibrant ecosystem of packages available on NuGet. We also have best in class tooling with Visual Studio and Visual Studio Code, and of course, with .NET being cross platform, we can develop our Blazor applications on whatever our preferred platform is, be that Windows, Mac or Linux.
Mobile applications
Therefore, I want to highlight that Blazors programming model can also be used to build cross-platform native mobile applications via an experimental project called Mobile Blazor Bindings. This is a collaboration between the ASP.NET Core team and the Xamarin team to investigate the potential and demand for using Blazor to build non-web UIs. Microsoft has also announced the future evolution of Xamarin Forms, the Multi-platform App UI framework known as .NET MAUI. This framework will allow developers to build native apps which run on Windows, macOS, iOS and Android. According to the roadmap, Blazors programming model will be offered as an option for building these new .NET MAUI apps. This really makes Blazor a compelling technology to learn as once understood, could allow developers to build UIs for almost any platform or device.
Hopefully, you can already see Blazor is an exciting technology with a lot of potential. But there is a key concept which is important to understand before we go any further, that of hosting models. Let’s tackle that next.
Understanding hosting models
When first getting started with Blazor you will immediately come across the concept of hosting models. Essentially, hosting models are where a Blazor application is run. Currently, Blazor has two production supported hosting models called Blazor WebAssembly and Blazor Server. Regardless of which of these models you choose for your application, the component model is the same meaning components are written the same way and can be interchanged between either hosting model.

Blazor has a separation between hosting models and its app/component model. Meaning components written for one hosting model can be used with another.
The above image shows an abstract representation of Blazors architecture, with the separation between the app and component model and the various hosting models. One of the interesting aspects of Blazor is the potential of other hosting models being made available over time to allow Blazor to run in more places and be used to create more types of UI.
Outside of the two production hosting models we will cover below, there are also two other experimental models Microsoft have been testing, Blazor Electron and Mobile Blazor Bindings.
Blazor Electron
Blazor Electron is the oldest of the two experiments and allows Blazor components to be hosted in an Electron application (https://www.electronjs.org/). Developers write components for this model using HTML and C# in the exact same way as they would for Blazor WebAssembly or Blazor Server.
Code example
An example of a component which can be used by all three of hosting models is shown in the following code.
<div> <p>Current count: @currentCount</p> <button @onclick="IncrementCount">Click me</button> </div> @code { private int currentCount = 0; private void IncrementCount() { currentCount++; } }
Mobile Blazor Bindings
The newer experiment is Mobile Blazor Bindings. This model allows developers to write native mobile applications using Blazors programming model. However, this hosting model can’t use components written using web technologies, components for this hosting model must be written using native controls. The following code contains the same component as the code abode but rewritten for the Mobile Blazor Bindings hosting model.
<StackLayout> <Label> Current count: @currentCount </Label> <Button OnClick="@IncrementCount">Click me</Button> </StackLayout> @code { private int currentCount = 0; private void IncrementCount() { currentCount++; } }
As you can see the programming model is the same between the two code samples. The logic in the code block is unchanged, it’s just C# after all. The only difference is in the markup where web technologies have been swapped for native mobile controls. This does mean that we can’t swap component around between web-based hosting models and native hosting models. However, once we’ve mastered Blazors programming model we can easily use that knowledge to create other types of UI.
Now we’ve talked a little about hosting models in general we’re going to focus in on the two production supported options available in Blazor today, Blazor WebAssembly and Blazor Server.
Blazor WebAssembly
Blazor WebAssembly is the principal hosting model for Blazor applications. Choosing this option will mean your application will run entirely inside the client’s browser making it a direct alternative to JavaScript SPA (Single Page Application) frameworks. To understand how this hosting model works we’re going to walk through the process of initializing a Blazor WebAssembly application shown in following image.
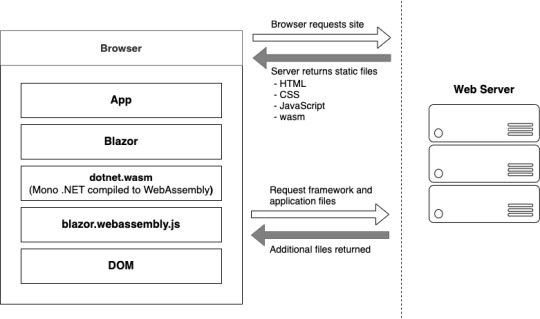
Bootup of a Blazor WebAssembly application showing the interactions between the client’s browser and the web server
Process begin
The process begins when a browser makes a request to the webserver. The web server will return a set of files needed to load the application, these include the host page for the application, usually called index.html, any static assets required by the application such as images, CSS and JavaScript. As well as a special JavaScript file called blazor.webassembly.js.
At this point, you may be wondering why we have a JavaScript file, one of the big selling points of Blazor is the ability to write UI logic using C# instead of JavaScript, right? Yes, that’s true.
But as of right now WebAssembly has a fairly large limitation, it can’t alter the DOM or call Web APIs directly.
DOM manipulation
In order to manage this current limitation, part of the Blazor framework resides in JavaScript called blazor.webassembly.js file. This part of the framework does three main things:
Loads and initializes the Blazor application in the browser.
Provides direct DOM manipulation so Blazor can perform UI updates.
Provides APIs for JavaScript interop scenarios, which we’ll discuss in detail in later chapters.
It’s possible that in the future this file will no longer be required, this will depend on how fast features are added to WebAssembly and adopted by browsers. But for now, it’s an essential part of the framework.
Now, we’ve cleared that up let’s get back to our booting Blazor app. I want to point out that the server returns all static files. They haven’t required any server-side compilation or manipulation. This means that they can be hosted on any service which offers static hosting, there is no requirement for a .NET runtime to be present on the server. For the first time this opens up free hosting options such as GitHub pages to .NET developers (applies to standalone Blazor WebAssembly applications only).
blazor.boot.json
Once the browser has received all the initial files from the web server it can process them and construct the Document Object Model (DOM). Next, blazor.webassembly.js is executed. This performs many actions but in the context of starting a Blazor WebAssembly app it downloads the blazor.boot.json file. This file essentially contains an inventory of all of the framework and application files which are required to run the app.
Most of these files are normal .NET assemblies, there is nothing special about them and they could be run on any compatible .NET runtime. But there’s also another type of file which is downloaded called dotnet.wasm.
dotnet.wasm
The dotnet.wasm file is in fact a complete .NET runtime, the mono .NET runtime to be exact, which has been compiled to WebAssembly.
At this point in time, only the .NET runtime is compiled to WebAssembly, the framework and application are standard .NET assemblies. In the future a feature called AOT (Ahead Of Time) compiling will be introduced which will allow developers to compile parts of their applications into WebAssembly.
The benefit of this will be performance, any code compiled to WebAssembly will be many times more performant than the interpreted approach used today. However, there’s a tradeoff, and that’s size. AOT compiled code will be bigger than the standard assemblies meaning a larger overall download size for the application.
Once the blazor.boot.json file has been downloaded and the files listed in it have been downloaded, it’s time for the application to be run. The WebAssembly .NET runtime is initialized which in turn loads the Blazor framework and finally the application itself. At this point we have a running Blazor application which exists entirely inside the client’s browser. Aside from requesting additional data (if applicable), there’s no further reliance on the server.
Calculating UI Updates
We now understand how a Blazor WebAssembly application boots up. But how do UI updates get calculated? Just as we did for the initialization process, we’re going to follow a scenario to understand how this happens and what Blazor does.
The process of client-side navigation in Blazor WebAssembly from clicking a link to the application of UI updates
For our scenario we have a Blazor WebAssembly application with two pages, home and counter. Neither of these pages have anything on them except a heading saying either “Home” or “Counter”, respectively. The user is on the home page of the application and is going to click on a link to the go to the counter page. We’ll follow the process Blazor goes through to update the UI from that of the home page to the counter page.
Process explained
When the user clicks on the counter link, the navigation event is intercepted by Blazor on the JavaScript side. This event is then passed over to Blazor on the WebAssembly side and is processed by Blazors router component.
The router checks its routing table for any routable components which match the link the user has attempted to navigate to. In our case, it will find a match with the Counter component and a new instance of that component will be created and the relevant lifecycle methods will be executed.
Once complete Blazor will work out the minimum amount of changes that are required to update the DOM to match that of the Counter component. When this is complete, those changes will be passed back down to the Blazor JavaScript runtime and that will in-turn, apply those changes to the physical DOM. At this point the UI will update the user will be on the Counter page.
All of this has happened client-side in the user browser. There was no need for a server during any point in this process. It’s fair to say that in a real world application, you would probably make a call out to a server to some point in this process. This usually happens during the execution of the lifecycle methods of the component being navigated to in order to load some initial data for the component. But this would depend on the individual application.
Benefits
Now we know a bit more about how the Blazor WebAssembly hosting model works, let talk about the benefits and tradeoffs of choosing this model. Let’s start with the benefits.
Applications run on the client. This means that there is much less load on the server, you can offload much of the work to the client. This could lead to significant cost saving on server infrastructure and improve the scalability of an application.
Can work in offline scenarios. As the app runs entirely inside the browser there’s no need for a persistent connection to the server, making applications more tolerant to unstable network connections. It’s also trivial is enable Progressive Web Application (PWA) functionality. In fact, Blazor WebAssembly has this as an option you can select when creating your application.
Deployed as static files. As Blazor WebAssembly apps are just static files, they can be deployed anywhere static hosting is available. This opens up some options which have never been available to .NET developers historically. Services such as GitHub pages, Netlify, Azure Blob Storage, AWS S3 Buckets, Azure Static Web Sites, are all options for hosting standalone Blazor WebAssembly applications.
Code Sharing. Potentially one of the greatest benefits with Blazor WebAssembly is if you’re using C# on the server. You can now use the same C# objects on your client as you use on the server. The days of keeping TypeScript models in sync with their C# equivalent and vice versa, are over.
Tradeoffs
Of course, nothing is a silver bullet so let’s understand some tradeoffs of this model.
Payload. The initial download size for a Blazor WebAssembly app can be considered quite large. The project template weighs in at around 1.8mb when published. This is largely down to the fact Blazor needs to ship an entire .NET runtime to the client which comes in at around 600kb. However, this is a one-time cost as the runtime and many of the framework assemblies are cached on the first load. Meaning subsequent loads can be a small as a few kb.
Load time. A knock-on effect of the payload size can be load time. If the user’s on a poor internet connection the amount of time required to download the initial files will be higher, which will delay the start of the application, leaving the user with a loading message of some kind. This can be offset slightly by using server-side prerendering, however, while this will give the user something more interesting to look at initially, the app still won’t be interactive until all files have been downloaded and initialized. Server-side prerendering for Blazor WebAssembly apps also requires a ASP.NET Core element on the server, which negates any free hosting options.
Restricted runtime. This is arguably not a tradeoff as such, but for existing .NET developers who are used to having a relatively free rein over the machine their apps run on, it’s something to be aware of. WebAssembly applications run in the same browser sandbox as JavaScript applications. This means, for example, that you will not be allowed to reach out to the users’ machine and do things such access the local file system.
Blazor WebAssembly summarize
To summarize, Blazor WebAssembly is the hosting model to choose if you’re looking for a direct replacement for a JavaScript SPA framework such as Angular, React or Vue. While there are a few tradeoffs to consider, there are some substantial benefits to choosing this model.
Blazor Server
Now we’ve seen how Blazor WebAssembly works, let’s turn our attention to the Server hosting model and see how it differs. Blazor Server was the first production supported hosting model for Blazor, being released around 8 months before the WebAssembly version. As we did with the previous model, we’ll walk through initializing a Blazor Server application to help us understand how things work.
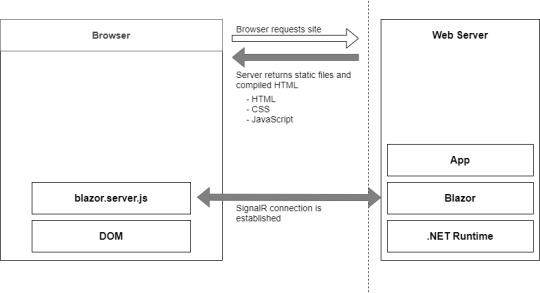
Bootup process of a Blazor Server application
Process begins
The process begins with a request to load the site from the browser. When this request hits the webserver two things could happen, the app is started up, or if the app is already running, a new session is established. Why would the app already be running? Blazor WebAssembly follows the traditional SPA model and runs entirely in the browser, essentially making it like a desktop application. Each user has their own instance of the app which runs locally on their machine. Blazor Server is different, only one instance of the application runs on the server, but it can support many clients. Therefore, the app could already be running, and the new request would just establish a new session.
Process static files
The request is then processed by the application and the initial payload is sent back to the browser. This includes static assets such as CSS and JavaScript files, and images. There is also the initial HTML, but this is compiled rather than static HTML we saw in Blazor WebAssembly. The reason for this is that the hosting page for a Blazor Server application is a Razor Page rather than a static HTML page in the WebAssembly model. The advantage of this is it allows Blazor Server applications to use server-side prerendering out of the box. In fact, this feature is enabled by default when you create this type of Blazor application.
Once the initial payload is returned to the browser the files are processed and the DOM is created – then a file called blazor.server.js is executed. The job of this runtime is to establish a SignalR connection back to the Blazor application running on the server. At this point the application is ready for user interaction.
Calculating UI updates
What happens when a user interacts with the application? We saw earlier that in Blazor WebAssembly the events are processed right there in the browser along with calculating any UI updates and applying them to the DOM. But that can’t happen here as the application is running on the server.
We’ll follow the same scenario as we did with Blazor WebAssembly, we have a Blazor Server application with two pages, home and counter. Neither of these pages have anything on them except a heading saying either “Home” or “Counter”, respectively. The user is on the home page of the application and is going to click on a link to the go to the counter page. We’ll follow the process Blazor goes through to update the UI from that of the home page to the counter page.

Process of updating the UI in Blazor Server
Process explained
The user clicks on the link in the menu and the click event is intercepted by Blazor’s runtime on the client. The runtime then processes the event to understand what has happened. In this case there are two things, a mouse click event and a navigation event, due to it being a hyperlink that was clicked. These two events are then bundled up and sent back to the server over the SignalR connection that was established when the application started.
So, the client sent a the message to the server and the server unpacks and process the message. The Blazor framework then calls any application code necessary. In this case it would instantiate an instance of the counter page component and execute the relevant lifecycle methods.
SignalR
Once complete, Blazor will work out what the minimum amount of changes needed to make the current page transform to the counter page and then send these back to the client via the SignalR connection. Just to be clear, Blazor will not send back an entirely new page to the client. It will only send back the minimum number of instructions needed to update the current DOM to match the Counter page. In our case, the only difference is the heading. Blazor will send back a single instruction to change the text in the heading from “Home” to “Counter”.
DOM
Once back on the client, the client unpacks the changes, and the required changes are applied to the physical DOM. From the user’s perspective, they appear to have navigated to a new page in the application, the counter page. But they are still on the same physical page, it just has a different header.
You may have spotted this already, but the overall process isn’t any different to how Blazor WebAssembly worked, it’s just been stretched out a bit over that SignalR connection. Blazor Server is just as much a SPA as Angular, Vue or Blazor WebAssembly. It just happens to run its logic and calculate UI updates on the server instead of the client. In fact, I would go as far as saying if you were presented with two identical applications, one written in Blazor Server and one in Blazor WebAssembly, you wouldn’t be able to tell the difference between them, as a user.
Performance
Before we talk about benefits and tradeoffs for this model, I want quickly mention performance. With all the network chatter which goes on in this hosting model I’m sure it may have crossed your mind that this might not scale particularly well.
The test
In 2019, the ASP.NET Core team did some testing to establish the performance levels of Blazor Server apps. They setup an application in Azure and tested it on different powered virtual machines, checking the number of active users the application could support. Here are the results.
Standard D1 v2 Instance (1vCPU & 3.5GB Memory). Over 5000 concurrent users
Standard D3 v2 Instance (4vCPU & 14GB Memory). Over 20,000 concurrent users
As you can see, Blazor Server is no slouch when it comes to performance. The main factor they found which effects the number of clients that can be supported is memory. This makes sense as the server needs to keep track of all the clients which are connected to it, the more there are the more information needs to be stored in memory.
Testing
The other major finding from testing was how network latency effected the application. As all interaction are sent back to the server for processing, latency can have a large impact on usability.
If the server is located 250ms away from the client, then each interaction is going to take at least 500ms to be processed as it has to travel to the server (250ms), then be processed, then travel back again (250ms).
Testing found that when the latency went above 200ms then the UI began to feel sluggish and less responsive. As a rough rule you would always want your users to be on the same continent as the server. If you want to have a globally available Blazor Server application, then you need to have your app evenly distributed across the world aiming to keep all clients within 200ms of a server.
Benefits
As we did before, let’s look at the benefits and tradeoffs of choosing a Blazor Server application.
Small payload. As the application is running on the server as opposed to the client, the initial download is significantly smaller. Depending on static assets such as CSS and images a Blazor Server application can be as small as a 100-200kb.
Fast load time. With a much smaller payload the application loads much faster. The server-side prerendering also helps as the user never sees a loading message.
Access to the full runtime. The application code is executing on the server on top of the full .NET runtime. This means that you can do things such as access the servers file system if you require without hitting any security restrictions.
Code security. If you have code which is proprietary, and you don’t want people being able to download and interrogate it then Blazor Server is a good choice. The application code is all executed on the server and only the UI updates are sent to the client. This means your code is never exposed to the client in anyway.
Tradeoffs
Heavy server load. Where Blazor WebAssembly allows us to utilize the power of the client Blazor Server does the complete opposite. Almost all of the work is now being performed by the server. Meaning you might need a larger investment in your infrastructure to support Blazor Server apps.
Doesn’t work offline. Where Blazor WebAssembly takes offline working in its stride Blazor Server does not. The SignalR connection is the lifeline of the application and without it the client can’t function at all. By default, this results in an overlay with a message saying the client is attempting to reestablish the connection. If this fails, the user has to refresh the browser to restart the application.
Latency. Due to its design Blazor Server apps are sensitive to latency issues. Every interaction the user has with the application must be sent back to the server for processing and await any updates that need to be applied. If there is a high latency in the connection between client and server a noticeable lag manifests in the UI and actions quickly feel sluggish. In real numbers a latency above 200ms is going to start causing these issues.
Requires a stable connection. Following on from the need for low latency and tying in with the inability to work offline. Blazor Server apps need to have a stable internet connection. If the connection is intermittent in any way, the user will continually see the reconnecting overlay in their application which quickly becomes very disruptive. An obvious scenario where this could occur is when a user is on a mobile device which has intermittent connection.
Blazor Server summarize
In summary, if you’re looking for a fast loading application and you have users with a fast and stable network connection, then Blazor Server is a great choice.
The post Getting started with C# and Blazor appeared first on PureSourceCode.
from WordPress https://www.puresourcecode.com/dotnet/net-core/getting-started-with-c-and-blazor/
0 notes
Link
In 2020, we are blessed with a number of frameworks and libraries to help us with web development. But there wasn't always so much variety. Back in 2005, a new scripting language called Mocha was created by a guy named Brendan Eich. Months after being renamed to LiveScript, the name was changed again to JavaScript. Since then, JavaScript has come a long way.
In 2010, we saw the introduction of Backbone and Angular as the first JavaScript frameworks and, by 2016, 92 per cent of all websites used JavaScript. In this article, we are going to have a look at three of the main JavaScript frameworks (Angular, React and Vue) and their status heading into the next decade.
For some brilliant resources, check out our list of top web design tools, and this list of excellent user testing software, too.
01. Angular
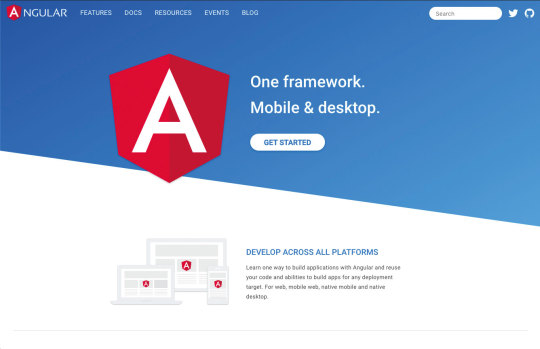
AngularJS was released in 2010 but by 2016 it was completely rewritten and released as Angular 2. Angular is a full- blown web framework developed by Google, which is used by Wix, Upwork, The Guardian, HBO and more.
Pros:
Exceptional support for TypeScript
MVVM enables developers to separate work on the same app section using the same set of data
Excellent documentation
Cons:
Has a bit of a learning curve
Migrating from an old version can be difficult.
Updates are introduced quite regularly meaning developers need to adapt to them
What's next?
In Angular 9, Ivy is the default compiler. It's been put in place to solve a lot of the issues around performance and file size. It should make applications smaller, faster and simpler.
When you compare previous versions of Angular to React and Vue, the final bundle sizes were a lot a bigger when using Angular. Ivy also makes Progressive Hydration possible, which is something the Angular team showed off at I/O 2019. Progressive Hydration uses Ivy to load progressively on the server and the client. For example, once a user begins to interact with a page, components' code along with any runtime is fetched piece by piece.
Ivy seems like the big focus going forward for Angular and the hope is to make it available for all apps. There will be an opt-out option in version 9, all the way through to Angular 10.
02. React
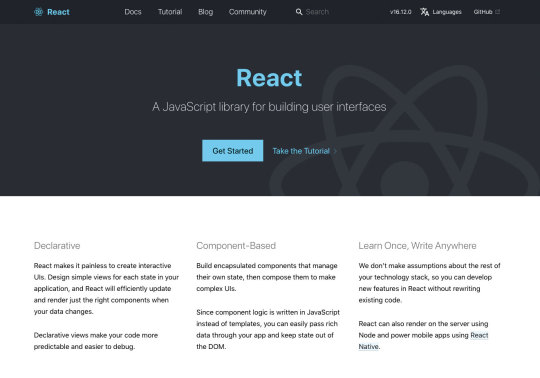
React was initially released in 2013 by Facebook and is used for building interactive web interfaces. It is used by Netflix, Dropbox, PayPal and Uber to name a few.
Pros:
React uses the virtual DOM, which has a positive impact on performance
JSX is easy to write
Updates don't compromise stability
Cons:
One of the main setbacks is needing third-party libraries to create more complex apps
Developers are left in the dark on the best way to develop
What's next?
At React Conf 2019, the React team touched on a number of things they have been working on. The first is Selective Hydration, which is where React will pause whatever it's working on in order to prioritise the components that the user is interacting with. As the user goes to interact with a particular section, that area will be hydrated. The team has also been working on Suspense, which is React's system for orchestrating the loading of code, data and images. This enables components to wait for something before they render.
Both Selective Hydration and Suspense are made possible by Concurrent Mode, which enables apps to be more responsive by giving React the ability to enter large blocks of lower priority work in order to focus on something that's a higher priority, like responding to user input. The team also mentioned accessibility as another area they have been looking at, by focusing on two particular topics – managing focus and input interfaces.
03. Vue
Vue was developed in 2014 by Evan You, an ex-Google employee. It is used by Xiaomi, Alibaba and GitLab. Vue managed to gain popularity and support from developers in a short space of time and without the backing of a major brand.
Pros:
Very light in size
Beginner friendly – easy to learn
Great community
Cons:
Not backed by a huge company, like React with Facebook and Angular with Google
No real structure
What's next?
Vue has set itself the target of being faster, smaller, more maintainable and making it easier for developers to target native. The next release (3.0) is due in Q1 2020, which includes a virtual DOM rewrite for better performance along with improved TypeScript Support. There is also the addition of the Composition API, which provides developers with a new way to create components and organise them by feature instead of operation.
Those developing Vue have also been busy working on Suspense, which suspends your component rendering and renders a fallback component until a condition is met.
One of the great things with Vue's updates is they sustain backward compatibility. They don't want you to break your old Vue projects. We saw this in the migration from 1.0 to 2.0 where 90 per cent of the API was the same.
How does the syntax of frameworks compare?
All three frameworks have undergone changes since their releases but one thing that's critical to understand is the syntax and how it differs. Let's have a look at how the syntax compares when it comes to simple event binding:
Vue: The v-on directive is used to attach event listeners that invoke methods on Vue instances. Directives are prefixed with v- in order to indicate that they are special attributes provided by Vue and apply special reactive behaviour to the rendered DOM. Event handlers can be provided either inline or as the name of the method.
React: React puts mark up and logic in JS and JSX, a syntax extension to JavaScript. With JSX, the function is passed as the event handler. Handling events with React elements is very similar to handling events on DOM elements. But there are some syntactic differences; for instance, React events are named using camelCase rather than lowercase.
Angular: Event binding syntax consists of a target event name within parentheses on the left of an equal sign and a quoted template statement on the right. Alternatively, you can use the on- prefix, known as the canonical form.
Popularity and market
Let's begin by looking at an overall picture of the three frameworks in regards to the rest of the web by examining stats from W3Techs. Angular is currently used by 0.4 per cent of all websites, with a JavaScript library market share of 0.5 per cent. React is used by 0.3 per cent of all websites and a 0.4 per cent JavaScript library market share and Vue has 0.3 per cent for both. This seems quite even and you would expect to see the numbers rise.
Google trends: Over the past 12 months, React is the most popular in search terms, closely followed by Angular. Vue.js is quite a way behind; however, one thing to remember is that Vue is still young compared to the other two.
Job searches: At the time of writing, React and Angular are quite closely matched in terms of job listings on Indeed with Vue a long way behind. On LinkedIn, however, there seems to be more demand for Vue developers.
Stack Overflow: If you look at the Stack Overflow Developer Survey results for 2019, React and Vue.js are both the most loved and wanted web frameworks. Angular sits down in ninth position for most loved but third most wanted.
GitHub: Vue has the most number of stars with 153k but it has the least number of contributors (283). React on the other hand has 140k stars and 1,341 contributors. Angular only has 59.6k stars but has the highest number of contributors out of the three with 1,579.
NPM Trends: The image above shows stats for the past 12 months, where you can see React has a higher number of downloads per month compared to Angular and Vue.
Mobile app development
One main focus for the big three is mobile deployment. React has React Native, which has become a popular choice for building iOS and Android apps not just for React users but also for the wider app development community. Angular developers can use NativeScript for native apps or Ionic for hybrid mobile apps, whereas Vue developers have a choice of NativeScript or Vue Native. Because of the popularity of mobile applications, this remains a key area of investment.
Other frameworks to look out for in 2020
If you want to try something new in 2020, check out these JavaScript frameworks.
Ember: An open-source framework for building web applications that works based on the MVVM pattern. It is used by several big companies like Microsoft, Netflix and LinkedIn.
Meteor: A full-stack JavaScript platform for developing modern web and mobile applications. It's easy to learn and has a very supportive community.
Conclusion
All three frameworks are continually improving, which is an encouraging sign. Everyone has their own perspective and preferred solution about which one they should use but it really comes down to the size of the project and which makes you feel more comfortable.
The most important aspect is the continued support of their communities, so if you are planning to start a new project and have never used any of the three before, then I believe you are in safe hands with all of them. If you haven't had a chance to learn any of the three frameworks yet, then I suggest making it your New Year's resolution to start learning. The future will revolve around these three.
0 notes
Text
Alpine.js: The JavaScript Framework That’s Used Like jQuery, Written Like Vue, and Inspired by TailwindCSS
We have big JavaScript frameworks that tons of people already use and like, including React, Vue, Angular, and Svelte. Do we need another JavaScript library? Let’s take a look at Alpine.js and you can decide for yourself. Alpine.js is for developers who aren’t looking to build a single page application (SPA). It’s lightweight (~7kB gzipped) and designed to write markup-driven client-side JavaScript.
The syntax is borrowed from Vue and Angular directive. That means it will feel familiar if you’ve worked with those before. But, again, Alpine.js is not designed to build SPAs, but rather enhance your templates with a little bit of JavaScript.
For example, here’s an Alpine.js demo of an interactive “alert” component.
CodePen Embed Fallback
The alert message is two-way bound to the input using x-model="msg". The “level” of the alert message is set using a reactive level property. The alert displays when when both msg and level have a value.
It’s like a replacement for jQuery and JavaScript, but with declarative rendering
Alpine.js is a Vue template-flavored replacement for jQuery and vanilla JavaScript rather than a React/Vue/Svelte/WhateverFramework competitor.
Since Alpine.js is less than a year old, it can make assumptions about DOM APIs that jQuery cannot. Let’s briefly draw a comparison between the two.
Querying vs. binding
The bulk of jQuery’s size and features comes in the shape of a cross-browser compatibility layer over imperative DOM APIs — this is usually referred to as jQuery Core and sports features that can query the DOM and manipulate it.
The Alpine.js answer to jQuery core is a declarative way to bind data to the DOM using the x-bind attribute binding directive. It can be used to bind any attribute to reactive data on the Alpine.js component. Alpine.js, like its declarative view library contemporaries (React, Vue), provides x-ref as an escape hatch to directly access DOM elements from JavaScript component code when binding is not sufficient (eg. when integrating a third-party library that needs to be passed a DOM Node).
Handling events
jQuery also provides a way to handle, create and trigger events. Alpine.js provides the x-on directive and the $event magic value which allows JavaScript functions to handle events. To trigger (custom) events, Alpine.js provides the $dispatch magic property which is a thin wrapper over the browser’s Event and Dispatch Event APIs.
Effects
One of jQuery’s key features is its effects, or rather, it’s ability to write easy animations. Where we might use slideUp, slideDown, fadeIn, fadeOut properties in jQuery to create effects, Alpine.js provides a set of x-transition directives, which add and remove classes throughout the element’s transition. That’s largely inspired by the Vue Transition API.
Also, jQuery’s Ajax client has no prescriptive solution in Alpine.js, thanks to the Fetch API or taking advantage of a third party HTTP library (e.g. axios, ky, superagent).
Plugins
It’s also worth calling out jQuery plugins. There is no comparison to that (yet) in the Alpine.js ecosystem. Sharing Alpine.js components is relatively simple, usually requiring a simple case of copy and paste. The JavaScript in Alpine.js components are “just functions” and tend not to access Alpine.js itself, making them relatively straightforward to share by including them on different pages with a script tag. Any magic properties are added when Alpine initializes or is passed into bindings, like $event in x-on bindings.
There are currently no examples of Alpine.js extensions, although there are a few issues and pull requests to add “core” events that hook into Alpine.js from other libraries. There are also discussions happening about the ability to add custom directives. The stance from Alpine.js creator Caleb Porzio, seems to be basing API decisions on the Vue APIs, so I would expect that any future extension point would be inspired on what Vue.js provides.
Size
Alpine.js is lighter weight than jQuery, coming in at 21.9kB minified — 7.1kB gzipped — compared to jQuery at 87.6kB minified — 30.4kB minified and gzipped. Only 23% the size!
Most of that is likely due to the way Alpine.js focuses on providing a declarative API for the DOM (e.g. attribute binding, event listeners and transitions).

Bundlephobia breaks down the two
For the sake of comparison, Vue comes in at 63.5kB minified (22.8kB gzipped). How can Alpine.js come in lighter despite it’s API being equivalent Vue? Alpine.js does not implement a Virtual DOM. Instead, it directly mutates the DOM while exposing the same declarative API as Vue.
Let’s look at an example
Alpine is compact because since application code is declarative in nature, and is declared via templates. For example, here’s a Pokemon search page using Alpine.js:
CodePen Embed Fallback
This example shows how a component is set up using x-data and a function that returns the initial component data, methods, and x-init to run that function on load.
Bindings and event listeners in Alpine.js with a syntax that’s strikingly similar to Vue templates.
Alpine: x-bind:attribute="express" and x-on:eventName="expression", shorthand is :attribute="expression" and @eventName="expression" respectively
Vue: v-bind:attribute="express" and v-on:eventName="expression", shorthand is :attribute="expression" and @eventName="expression" respectively
Rendering lists is achieved with x-for on a template element and conditional rendering with x-if on a template element.
Notice that Alpine.js doesn’t provide a full templating language, so there’s no interpolation syntax (e.g. in Vue.js, Handlebars and AngularJS). Instead, binding dynamic content is done with the x-text and x-html directives (which map directly to underlying calls to Node.innerText and Node.innerHTML).
An equivalent example using jQuery is an exercise you’re welcome to take on, but the classic style includes several steps:
Imperatively bind to the button click using $('button').click(/* callback */).
Within this “click callback” get the input value from the DOM, then use it to call the API.
Once the call has completed, the DOM is updated with new nodes generated from the API response.
If you’re interested in a side by side comparison of the same code in jQuery and Alpine.js, Alex Justesen created the same character counter in jQuery and in Alpine.js.
Back in vogue: HTML-centric tools
Alpine.js takes inspiration from TailwindCSS. The Alpine.js introduction on the repository is as “Tailwind for JavaScript.”
Why is that important?
One of Tailwind’s selling points is that it “provides low-level utility classes that let you build completely custom designs without ever leaving your HTML.” That’s exactly what Alpine does. It works inside HTML so there is no need to work inside of JavaScript templates the way we would in Vue or React Many of the Alpine examples cited in the community don’t even use script tags at all!
Let’s look at one more example to drive the difference home. Here’s is an accessible navigation menu in Alpine.js that uses no script tags whatsoever.
CodePen Embed Fallback
This example leverages aria-labelledby and aria-controls outside of Alpine.js (with id references). Alpine.js makes sure the “toggle” element (which is a button), has an aria-expanded attribute that’s true when the navigation is expanded, and false when it’s collapsed. This aria-expanded binding is also applied to the menu itself and we show/hide the list of links in it by binding to hidden.
Being markup-centric means that Alpine.js and TailwindCSS examples are easy to share. All it takes is a copy-paste into HTML that is also running Alpine.js/TailwindCSS. No crazy directories full of templates that compile and render into HTML!
Since HTML is a fundamental building block of the web, it means that Alpine.js is ideal for augmenting server-rendered (Laravel, Rails, Django) or static sites (Hugo, Hexo, Jekyll). Integrating data with this sort of tooling can be a simple as outputting some JSON into the x-data="{}" binding. The affordance of passing some JSON from your backend/static site template straight into the Alpine.js component avoids building “yet another API endpoint” that simply serves a snippet of data required by a JavaScript widget.
Client-side without the build step
Alpine.js is designed to be used as a direct script include from a public CDN. Its developer experience is tailored for that. That’s why it makes for a great jQuery comparison and replacement: it’s dropped in and eliminates a build step.
While it’s not traditionally used this way, the bundled version of Vue can be linked up directly. Sarah Drasner has an excellent write-up showing examples of jQuery substituted with Vue. However, if you use Vue without a build step, you’re actively opting out of:
the Vue CLI
single file components
smaller/more optimized bundles
a strict CSP (Content Security Policy) since Vue inline templates evaluate expressions client-side
So, yes, while Vue boasts a buildless implementation, its developer experience is really depedent on the Vue CLI. That could be said about Create React App for React, and the Angular CLI. Going build-less strips those frameworks of their best qualities.
There you have it! Alpine.js is a modern, CDN-first library that brings declarative rendering for a small payload — all without the build step and templates that other frameworks require. The result is an HTML-centric approach that not only resembles a modern-day jQuery but is a great substitute for it as well.
If you’re looking for a jQuery replacement that’s not going to force you into a SPAs architecture, then give Alpine.js a go! Interested? You can find out more on Alpine.js Weekly, a free weekly roundup of Alpine.js news and articles.
The post Alpine.js: The JavaScript Framework That’s Used Like jQuery, Written Like Vue, and Inspired by TailwindCSS appeared first on CSS-Tricks.
via CSS-Tricks https://ift.tt/3aMMDvq
0 notes
Text
Alpine.js: The JavaScript Framework That’s Used Like jQuery, Written Like Vue, and Inspired by TailwindCSS
We have big JavaScript frameworks that tons of people already use and like, including React, Vue, Angular, and Svelte. Do we need another JavaScript library? Let’s take a look at Alpine.js and you can decide for yourself. Alpine.js is for developers who aren’t looking to build a single page application (SPA). It’s lightweight (~7kB gzipped) and designed to write markup-driven client-side JavaScript.
The syntax is borrowed from Vue and Angular directive. That means it will feel familiar if you’ve worked with those before. But, again, Alpine.js is not designed to build SPAs, but rather enhance your templates with a little bit of JavaScript.
For example, here’s an Alpine.js demo of an interactive “alert” component.
CodePen Embed Fallback
The alert message is two-way bound to the input using x-model="msg". The “level” of the alert message is set using a reactive level property. The alert displays when when both msg and level have a value.
It’s like a replacement for jQuery and JavaScript, but with declarative rendering
Alpine.js is a Vue template-flavored replacement for jQuery and vanilla JavaScript rather than a React/Vue/Svelte/WhateverFramework competitor.
Since Alpine.js is less than a year old, it can make assumptions about DOM APIs that jQuery cannot. Let’s briefly draw a comparison between the two.
Querying vs. binding
The bulk of jQuery’s size and features comes in the shape of a cross-browser compatibility layer over imperative DOM APIs — this is usually referred to as jQuery Core and sports features that can query the DOM and manipulate it.
The Alpine.js answer to jQuery core is a declarative way to bind data to the DOM using the x-bind attribute binding directive. It can be used to bind any attribute to reactive data on the Alpine.js component. Alpine.js, like its declarative view library contemporaries (React, Vue), provides x-ref as an escape hatch to directly access DOM elements from JavaScript component code when binding is not sufficient (eg. when integrating a third-party library that needs to be passed a DOM Node).
Handling events
jQuery also provides a way to handle, create and trigger events. Alpine.js provides the x-on directive and the $event magic value which allows JavaScript functions to handle events. To trigger (custom) events, Alpine.js provides the $dispatch magic property which is a thin wrapper over the browser’s Event and Dispatch Event APIs.
Effects
One of jQuery’s key features is its effects, or rather, it’s ability to write easy animations. Where we might use slideUp, slideDown, fadeIn, fadeOut properties in jQuery to create effects, Alpine.js provides a set of x-transition directives, which add and remove classes throughout the element’s transition. That’s largely inspired by the Vue Transition API.
Also, jQuery’s Ajax client has no prescriptive solution in Alpine.js, thanks to the Fetch API or taking advantage of a third party HTTP library (e.g. axios, ky, superagent).
Plugins
It’s also worth calling out jQuery plugins. There is no comparison to that (yet) in the Alpine.js ecosystem. Sharing Alpine.js components is relatively simple, usually requiring a simple case of copy and paste. The JavaScript in Alpine.js components are “just functions” and tend not to access Alpine.js itself, making them relatively straightforward to share by including them on different pages with a script tag. Any magic properties are added when Alpine initializes or is passed into bindings, like $event in x-on bindings.
There are currently no examples of Alpine.js extensions, although there are a few issues and pull requests to add “core” events that hook into Alpine.js from other libraries. There are also discussions happening about the ability to add custom directives. The stance from Alpine.js creator Caleb Porzio, seems to be basing API decisions on the Vue APIs, so I would expect that any future extension point would be inspired on what Vue.js provides.
Size
Alpine.js is lighter weight than jQuery, coming in at 21.9kB minified — 7.1kB gzipped — compared to jQuery at 87.6kB minified — 30.4kB minified and gzipped. Only 23% the size!
Most of that is likely due to the way Alpine.js focuses on providing a declarative API for the DOM (e.g. attribute binding, event listeners and transitions).
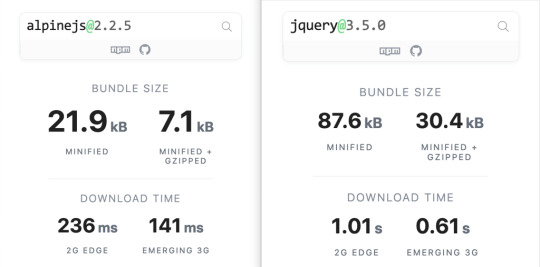
Bundlephobia breaks down the two
For the sake of comparison, Vue comes in at 63.5kB minified (22.8kB gzipped). How can Alpine.js come in lighter despite it’s API being equivalent Vue? Alpine.js does not implement a Virtual DOM. Instead, it directly mutates the DOM while exposing the same declarative API as Vue.
Let’s look at an example
Alpine is compact because since application code is declarative in nature, and is declared via templates. For example, here’s a Pokemon search page using Alpine.js:
CodePen Embed Fallback
This example shows how a component is set up using x-data and a function that returns the initial component data, methods, and x-init to run that function on load.
Bindings and event listeners in Alpine.js with a syntax that’s strikingly similar to Vue templates.
Alpine: x-bind:attribute="express" and x-on:eventName="expression", shorthand is :attribute="expression" and @eventName="expression" respectively
Vue: v-bind:attribute="express" and v-on:eventName="expression", shorthand is :attribute="expression" and @eventName="expression" respectively
Rendering lists is achieved with x-for on a template element and conditional rendering with x-if on a template element.
Notice that Alpine.js doesn’t provide a full templating language, so there’s no interpolation syntax (e.g. in Vue.js, Handlebars and AngularJS). Instead, binding dynamic content is done with the x-text and x-html directives (which map directly to underlying calls to Node.innerText and Node.innerHTML).
An equivalent example using jQuery is an exercise you’re welcome to take on, but the classic style includes several steps:
Imperatively bind to the button click using $('button').click(/* callback */).
Within this “click callback” get the input value from the DOM, then use it to call the API.
Once the call has completed, the DOM is updated with new nodes generated from the API response.
If you’re interested in a side by side comparison of the same code in jQuery and Alpine.js, Alex Justesen created the same character counter in jQuery and in Alpine.js.
Back in vogue: HTML-centric tools
Alpine.js takes inspiration from TailwindCSS. The Alpine.js introduction on the repository is as “Tailwind for JavaScript.”
Why is that important?
One of Tailwind’s selling points is that it “provides low-level utility classes that let you build completely custom designs without ever leaving your HTML.” That’s exactly what Alpine does. It works inside HTML so there is no need to work inside of JavaScript templates the way we would in Vue or React Many of the Alpine examples cited in the community don’t even use script tags at all!
Let’s look at one more example to drive the difference home. Here’s is an accessible navigation menu in Alpine.js that uses no script tags whatsoever.
CodePen Embed Fallback
This example leverages aria-labelledby and aria-controls outside of Alpine.js (with id references). Alpine.js makes sure the “toggle” element (which is a button), has an aria-expanded attribute that’s true when the navigation is expanded, and false when it’s collapsed. This aria-expanded binding is also applied to the menu itself and we show/hide the list of links in it by binding to hidden.
Being markup-centric means that Alpine.js and TailwindCSS examples are easy to share. All it takes is a copy-paste into HTML that is also running Alpine.js/TailwindCSS. No crazy directories full of templates that compile and render into HTML!
Since HTML is a fundamental building block of the web, it means that Alpine.js is ideal for augmenting server-rendered (Laravel, Rails, Django) or static sites (Hugo, Hexo, Jekyll). Integrating data with this sort of tooling can be a simple as outputting some JSON into the x-data="{}" binding. The affordance of passing some JSON from your backend/static site template straight into the Alpine.js component avoids building “yet another API endpoint” that simply serves a snippet of data required by a JavaScript widget.
Client-side without the build step
Alpine.js is designed to be used as a direct script include from a public CDN. Its developer experience is tailored for that. That’s why it makes for a great jQuery comparison and replacement: it’s dropped in and eliminates a build step.
While it’s not traditionally used this way, the bundled version of Vue can be linked up directly. Sarah Drasner has an excellent write-up showing examples of jQuery substituted with Vue. However, if you use Vue without a build step, you’re actively opting out of:
the Vue CLI
single file components
smaller/more optimized bundles
a strict CSP (Content Security Policy) since Vue inline templates evaluate expressions client-side
So, yes, while Vue boasts a buildless implementation, its developer experience is really depedent on the Vue CLI. That could be said about Create React App for React, and the Angular CLI. Going build-less strips those frameworks of their best qualities.
There you have it! Alpine.js is a modern, CDN-first library that brings declarative rendering for a small payload — all without the build step and templates that other frameworks require. The result is an HTML-centric approach that not only resembles a modern-day jQuery but is a great substitute for it as well.
If you’re looking for a jQuery replacement that’s not going to force you into a SPAs architecture, then give Alpine.js a go! Interested? You can find out more on Alpine.js Weekly, a free weekly roundup of Alpine.js news and articles.
The post Alpine.js: The JavaScript Framework That’s Used Like jQuery, Written Like Vue, and Inspired by TailwindCSS appeared first on CSS-Tricks.
source https://css-tricks.com/alpine-js-the-javascript-framework-thats-used-like-jquery-written-like-vue-and-inspired-by-tailwindcss/
from WordPress https://ift.tt/2We2Ap8 via IFTTT
0 notes
Text
Introducing Alpine.js: A Tiny JavaScript Framework | ArkssTech

Introducing Alpine.js: A Tiny JavaScript Framework Like most developers, I have a bad tendency to over-complicate my workflow, especially if there’s some new hotness on the horizon. Why use CSS when you can use CSS-in-JS? Why use Grunt when you can use Gulp? Why use Gulp when you can use Webpack? Why use a traditional CMS when you can go headless? Every so often though, the new-hotness makes life simpler. Recently, the rise of utility based tools like Tailwind CSS have done this for CSS, and now Alpine.js promises something similar for JavaScript. In this article, we’re going to take a closer look at Alpine.js and how it can replace JQuery or larger JavaScript libraries to build interactive websites. If you regularly build sites that require a sprinkling on Javascript to alter the UI based on some user interaction, then this article is for you. Throughout the article, I refer to Vue.js, but don’t worry if you have no experience of Vue — that is not required. In fact, part of what makes Alpine.js great is that you barely need to know any JavaScript at all. Now, let’s get started. What Is Alpine.js? According to project author Caleb Porzio: “Alpine.js offers you the reactive and declarative nature of big frameworks like Vue or React at a much lower cost. You get to keep your DOM, and sprinkle in behavior as you see fit.” Let’s unpack that a bit. Let’s consider a basic UI pattern like Tabs. Our ultimate goal is that when a user clicks on a tab, the tab contents displays. If we come from a PHP background, we could easily achieve this server side. But the page refresh on every tab click isn’t very ‘reactive’. To create a better experience over the years, developers have reached for jQuery and/or Bootstrap. In that situation, we create an event listener on the tab, and when a user clicks, the event fires and we tell the browser what to do. See the Pen Showing / hiding with jQuery by Phil on CodePen. See the Pen Showing / hiding with jQuery by Phil on CodePen. That works. But this style of coding where we tell the browser exactly what to do (imperative coding) quickly gets us in a mess. Imagine if we wanted to disable the button after it has been clicked, or wanted to change the background color of the page. We’d quickly get into some serious spaghetti code. Developers have solved this issue by reaching for frameworks like Vue, Angular and React. These frameworks allow us to write cleaner code by utilizing the virtual DOM: a kind of mirror of the UI stored in the browser memory. The result is that when you ‘hide’ a DOM element (like a tab) in one of these frameworks; it doesn’t add a display:none; style attribute, but instead it literally disappears from the ‘real’ DOM. This allows us to write more declarative code that is cleaner and easier to read. But this is at a cost. Typically, the bundle size of these frameworks is large and for those coming from a jQuery background, the learning curve feels incredibly steep. Especially when all you want to do is toggle tabs! And that is where Alpine.js steps in. WANT TO BUILD YOUR BUSINESS APP IN LARAVEL FRAMEWORK? ARKSSTECH, AGILE SOFTWARE DEVELOPMENT COMPANY OFFERS EXPERIENCED LARAVEL APP DEVELOPERS & TO HIRE LARAVEL DEVELOPERS FOR STARTUPS AND SMES. RENT A CODER TODAY!! Like Vue and React, Alpine.js allows us to write declarative code but it uses the “real” DOM; amending the contents and attributes of the same nodes that you and I might edit when we crack open a text editor or dev-tools. As a result, you can lose the filesize, wizardry and cognitive-load of larger framework but retain the declarative programming methodology. And you get this with no bundler, no build process and no script tag. Just load 6kb of Alpine.js and you’re away! Alpine.js JQuery Vue.js React + React DOM Coding style Declarative Imperative Declarative Declarative Requires bundler No No No Yes Filesize (GZipped, minified) 6.4kb 30kb 32kb 5kb + 36kb Dev-Tools No No Yes Yes WANT TO BUILD YOUR BUSINESS APP IN LARAVEL FRAMEWORK? ARKSSTECH, AGILE SOFTWARE DEVELOPMENT COMPANY OFFERS EXPERIENCED LARAVEL APP DEVELOPERS & TO HIRE LARAVEL DEVELOPERS FOR STARTUPS AND SMES. RENT A CODER TODAY!! When Should I Reach For Alpine? For me, Alpine’s strength is in the ease of DOM manipulation. Think of those things you used out of the box with Bootstrap, Alpine.js is great for them. Examples would be: Showing and hiding DOM nodes under certain conditions, Binding user input, Listening for events and altering the UI accordingly, Appending classes. You can also use Alpine.js for templating if your data is available in JSON, but let’s save that for another day. When Should I Look Elsewhere? If you’re fetching data, or need to carry out additional functions like validation or storing data, you should probably look elsewhere. Larger frameworks also come with dev-tools which can be invaluable when building larger UIs. From jQuery To Vue To Alpine Two years ago, Sarah Drasner posted an article on Smashing Magazine, “Replacing jQuery With Vue.js: No Build Step Necessary,” about how Vue could replace jQuery for many projects. That article started me on a journey which led me to use Vue almost every time I build a user interface. Today, we are going to recreate some of her examples with Alpine, which should illustrate its advantages over both jQuery and Vue in certain use cases. Alpine’s syntax is almost entirely lifted from Vue.js. In total, there are 13 directives. We’ll cover most of them in the following examples. Getting Started Like Vue and jQuery, no build process is required. Unlike Vue, Alpine it initializes itself, so there’s no need to create a new instance. Just load Alpine and you’re good to go. The scope of any given component is declared using the x-data directive. This kicks things off and sets some default values if required: ... Capturing User Inputs x-model allow us to keep any input element in sync with the values set using x-data. In the following example, we set the name value to an empty string (within the form tag). Using x-model, we bind this value to the input field. By using x-text, we inject the value into the innerText of the paragraph element. This highlights the key differences with Alpine.js and both jQuery and Vue.js. Updating the paragraph tag in jQuery would require us to listen for specific events (keyup?), explicitly identify the node we wish to update and the changes we wish to make. Alpine’s syntax on the other hand, just specifies what should happen. This is what is meant by declarative programming. Updating the paragraph in Vue while simple, would require a new script tag: new Vue({ el: '#app', data: { name: '' } }); While this might not seem like the end of the world, it highlights the first major gain with Alpine. There is no context-switching. Everything is done right there in the HTML — no need for any additional JavaScript. Click Events, Boolean Attributes And Toggling Classes Like with Vue, : serves as a shorthand for x-bind (which binds attributes) and @ is shorthand for x-on (which indicates that Alpine should listen for events). In the following example, we instantiate a new component using x-data, and set the default value of show to be false. When the button is clicked, we toggle the value of show. When this value is true, we instruct Alpine to append the aria-expanded attribute. x-bind works differently for classes: we pass in object where the key is the class-name (active in our case) and the value is a boolean expression (show). WANT TO BUILD YOUR BUSINESS APP IN LARAVEL FRAMEWORK? ARKSSTECH, AGILE SOFTWARE DEVELOPMENT COMPANY OFFERS EXPERIENCED LARAVEL APP DEVELOPERS & TO HIRE LARAVEL DEVELOPERS FOR STARTUPS AND SMES. RENT A CODER TODAY!! Hiding And Showing The syntax showing and hiding is almost identical to Vue. This will set a given DOM node to display:none. If you need to remove a DOM element completely, x-if can be used. However, because Alpine.js doesn’t use the Virtual DOM, x-if can only be used on a (tag that wraps the element you wish to hide). Magic Properties In addition to the above directives, three Magic Properties provide some additional functionality. All of these will be familiar to anyone working in Vue.js. $el fetches the root component (the thing with the x-data attribute); $refs allows you to grab a DOM element; $nextTick ensures expressions are only executed once Alpine has done its thing; $event can be used to capture a nature browser event. Let’s Build Something Useful It’s time to build something for the real world. In the interests of brevity I’m going to use Bootstrap for styles, but use Alpine.js for all the JavaScript. The page we’re building is a simple landing page with a contact form displayed inside a modal that submits to some form handler and displays a nice success message. Just the sort of thing a client might ask for and expect pronto!

Initial view (Large preview)
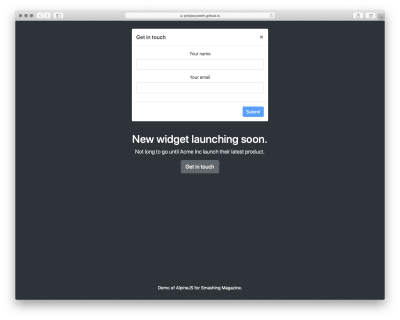
Modal open (Large preview)
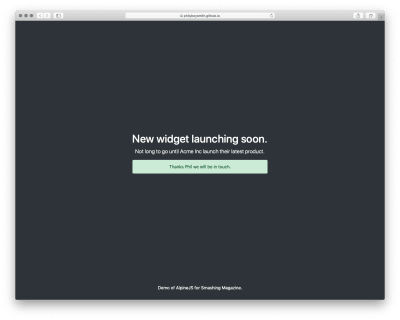
Success message (Large preview) Note: You can view the original markup here. WANT TO BUILD YOUR BUSINESS APP IN LARAVEL FRAMEWORK? ARKSSTECH, AGILE SOFTWARE DEVELOPMENT COMPANY OFFERS EXPERIENCED LARAVEL APP DEVELOPERS & TO HIRE LARAVEL DEVELOPERS FOR STARTUPS AND SMES. RENT A CODER TODAY!! To make this work, we could add jQuery and Bootstrap.js, but that is quite a bit of overhead for not a lot of functionality. We could probably write it in Vanilla JS, but who wants to do that? Let’s make it work with Alpine.js instead. First, let’s set a scope and some initial values: Now, let’s make our button set the showModal value to true: Get in touch When showModal is true, we need to display the modal and add some classes: Let’s bind the input values to Alpine: And disable the ‘Submit’ button, until those values are set: Submit Finally, let’s send data to some kind of asynchronous function, and hide the modal when we’re done: Submit And that’s about it! Just Enough JavaScript When building websites, I’m increasingly trying to ask myself what would be “just enough JavaScript”? When building a sophisticated web application, that might well be React. But when building a marketing site, or something similar, Alpine.js feels like enough. (And even if it’s not, given the similar syntax, switching to Vue.js takes no time at all). It’s incredibly easy to use (especially if you’ve never used VueJS). It’s tiny ( There are more advanced features that aren’t included in this article and Caleb is constantly adding new features. If you want to find out more, take a look at the official docs on Github. WANT TO BUILD YOUR BUSINESS APP IN LARAVEL FRAMEWORK? ARKSSTECH, AGILE SOFTWARE DEVELOPMENT COMPANY OFFERS EXPERIENCED LARAVEL APP DEVELOPERS & TO HIRE LARAVEL DEVELOPERS FOR STARTUPS AND SMES. RENT A CODER TODAY!! Read the full article
#bestbrowsersforwebdesign#designsystems#webdesignbrowsers#webdesigncomponents#webdesigntools#webdesignworkflow
0 notes
Text
Watch Directv
AT&T‘s Internet-streaming live TV service will soon be specific to the Chrome browser, assuming you favour to circulation for your computer or computing device. Users are reporting seeing a message when trying to move on PC that advises them to download and install Google Chrome, pronouncing its miles vital with the intention to get the ‘best streaming revel in.’ You have till the give up of this month to make the transition.
If you subscribe to DirecTV NOW and also you log into your account on a PC's browser, you’ll be greeted with a message that asserts, in component, ‘DirecTV NOW will stay solely on Google Chrome while accessed through your laptop.’ The word goes on to give an explanation for that the provider will drop its support for Internet Explorer and Safari ‘after June.’
This trade simplest impacts folks that try and watch the carrier from a computing device browser; the service is viewable thru a devoted app while watching from a cellphone or pill. Presumably, as soon as the aid is dropped, folks that try and get admission to the provider the usage of Explorer or Safari could be directed to download Chrome before getting access to the video content material.
The organization has no longer revealed why it's far making this modification — except to say that Chrome will in a few ways offer the excellent viewing enjoy — and it hasn’t but updated any of its assist pages to indicate the upcoming change, which is a chunk ordinary. Regardless, you've got approximately 3 weeks left to make the transition…either to Chrome or to an extraordinary OTT video carrier. Competing products consist of PlayStation Vue, Sling TV, and Hulu Live TV.
WHAT IS DIRECTV APP FOR PC
Directv is a premium subscription-based satellite tv carrier issuer which becomes began in 1994. The company has been successfully completed its 23 years. At Directv, you could subscribe tv and audio offerings. It makes use of satellite transmission to offer their offerings to their customers. Its audio and tv services are confined to the United States, Latin America, and the Caribbean. It doesn’t provide their offerings international.
OTHER PRODUCTS OFFERED BY DIRECTV
Direct broadcast satellite tv for pc
Pay Television
Pay-in line with-view
Internet Television
Owner AT&T
Read Kinemaster for PC
SUBSCRIPTION OFFERED BY THE DIRECTV
Local tv stations
broadcast television networks
Subscription-based total tv offerings
Satellite radio services
private video services
HOW TO WATCH DIRECTV ON PC
If you're one that loves looking movies and TV suggests so that you must strive the Directv which help you get right of entry to movies and indicates anytime & anywhere if you have a working internet connection.
Below we're sharing how you may start taking part in the content of Directv on a Home windows PC (Computer)
Visit here DIRECTV entertainment website
Log in along with your subscription keys
Now faucet “watch online”
It will carry you the listing of films, simply select one
Enjoy
Features of Directv APK
Watch Favorite shows and films
It gives its customers the element to watch their boundless fav serials and films which customers can see Live or On-Demand. Another extra element is to get the Data Free TV which allows viewing DIRECTV on the gadgets, without utilising the patron’s net facts. Besides, customers should purchase into the top-notch channels which permit viewing the maximum latest content.
Recording
Directv gives a highlight of recording the fav serials and movies from anyplace in order that viewers don’t pass over out on their favourite content material and can view it every time as consistent with their requirements.
Read MainStage 3 for PC Download Free
Total Control
This component permits its customers to use their devices to pause, play, and rewind the serials and films which can be streaming on their TV. At the point when somebody wishes to search for a show, the subscriber can actually communicate out and voice seek highlight can help discover exactly what clients are trying to find. At that point, they can even arrange it to reveal consequences on the TeleVision. Most importantly, Users can set parental controls and respect large serenity over what their children are viewing.
Easy Interface
It is having an exceedingly easy to make use of interface which makes your work excessively truthful. The on-hand channels incorporate every one of the channels immediately from the child’s quarter to adults.
More info Clicks Helpsforpc.com
0 notes
Photo

Great weekend watching with the Vue.js documentary
#477 — February 28, 2020
Unsubscribe : Read on the Web
JavaScript Weekly
▶ Vue.js: The Documentary — A well produced 30 minute documentary (from the creators of the previously popular Ember.js documentary) focused on Evan You, the development of Vue.js, its position in our ecosystem, and the userbase.
Honeypot
Rome: A New Experimental JavaScript Toolchain from Facebook — Includes a compiler, linter, formatter, bundler, and testing framework (these are all new and not existing tools) and aims to be a comprehensive tool for anything related to the processing of JavaScript code. It comes from Sebastian McKenzie, one of the creators of both Babel and Yarn.
Facebook Experimental
Master State Management with Redux & Typescript at ForwardJS — Join us for a full day in-depth React workshop at ForwardJS Ottawa. Further talks touch on TypeScript, containers, design systems, static sites, scaling teams and monorepos.
ForwardJS sponsor
How Autotracking Works — This is really interesting! It’s a truly deep dive into Ember’s new reactivity system but is applicable to your thinking as a JavaScript developer generally. Autotracking, at its core, is about tracking the values that are used during a computation so that computation can be memoized. Lots to learn here.
Chris Garrett
V8 v8.1's Intl.DisplayNames — Another six weeks have passed so there’s another version of the V8 JavaScript engine that underpins Chrome and Node. In 8.1 we gain a Intl.DisplayNames method for displaying translated names of languages, regions, written scripts and currencies. More detail here.
Dominik Inführ
React v16.13.0 Released — Mostly a release for bugfixes and new deprecation warnings to help prepare for a future major release.
⚡️ Quick Releases
Snowpack 1.5.0 — Compile-time dependency arranger gets even faster.
Vue.js 3.0.0 alpha 7 — The big 3.0 is still on the way :-)
Ava 3.4 — Popular Node testing system.
Normalizr 3.6 — Schema-driven nested JSON normalizer.
Mocha 7.1 — Popular test framework gets native ES module support on Node.
💻 Jobs
Find a Dev Job Through Vettery — Vettery is completely free for job seekers. Make a profile, name your salary, and connect with hiring managers from top employers.
Vettery
Lead Server-Side Developer (Sydney or Remote across AUS/NZ) — Build back-end frameworks server side software (Express.js + MongoDB + GraphQL) and write server-side code (JavaScript, Node.js).
Compono
ℹ️ If you're interested in running a job listing in JavaScript Weekly, there's more info here.
📘 Articles & Tutorials
Metrics, Logs, and Traces in JavaScript Tools — A look at the different types of useful metrics available to JavaScript developers.
Shawn Wang
You've Got to Make Your Test Fail — Tests are great, but they need to (initially) fail! “If you’re not careful you can write a test that’s worse than having not tests at all.”
Kent C Dodds
Interactive Lab: Build a JS+Python Serverless Application — Join IBM's Upkar Lidder and learn how to build a cloud-native Visual Recognition service.
IBM Developer sponsor
How to Use requestAnimationFrame() with Vanilla JS — If you’ve never really had a use for this feature, but want to know how it works, this is easy to follow with some simple demos.
Chris Ferdinandi
Getting Started with Ember Octane: Building a Blog — We haven’t linked an Ember framework tutorial for a while and this is a neat one.
Frank Treacy
Automated Headless Browser Scripts in Node with Puppeteer — A walk-through on how to use Puppeteer to write scripts to interact with web pages programmatically. The example project is based on a native lands location API.
Sam Agnew
The Mindset of Component Composition in Vue — A step-by-step tutorial building a search bar component. Good for those already familiar with Vue but maybe want to see another developer’s perspective on component composition.
Marina Mosti
Getting Started with Vuex: A Beginners Guide — This claims to be a “brief” tutorial, but there’s lots of meat here for those looking to understand Vuex, the state management solution for Vue.js apps.
codesource.io
Web Rebels Conference - CFP Ends 1st of March — Web Rebels is back on the 14-15th of May 2020 in Oslo, Norway. Submit to our CFP or get a ticket and join us for two days of JS.
Web Rebels Conference sponsor
What is a Type in TypeScript? Two Perspectives — Describes two perspectives (types as sets of values and type compatibility relationships) to help understand types in TypeScript.
Axel Rauschmayer
▶ Building a Reusable Pagination Component in Vue.js
Jeffrey Biles
How to Quickly Scaffold and Architect A New Angular App
Tomas Trajan
🔧 Code & Tools

Scala.js 1.0: A Scala to JavaScript Transpiler — An alternative way to build robust front-end web applications in Scala.
Scala.js
exifr: A Fast, Versatile JS EXIF Reading Library — Exif (EXchangeable Image File Format) is a common metadata format embedded into image and other media files. More here, including examples.
Mike Kovařík
React Query 1.0: Hooks for Fetching, Caching and Updating Data — Hooks that help you keep your server cache state separate from your global state and let you read and update everything asynchronously. There’s a lot to enjoy here.
Tanner Linsley
Electron React Boilerplate 1.0: A Foundation for Scalable Cross-Platform Apps — Brings together Electron (the popular cross-platform desktop app development toolkit) with React, Redux, React Router, webpack and React Hot Loader. v1.0 completes its migration to TypeScript.
Electron React Boilerplate
Optimize End User Experience in Real Time with Real User Monitoring
Site24x7 sponsor
date-fns 2.10: It's Like lodash But For Dates — A popular date utility library that provides an extensive and consistent API for manipulating dates. v2.10.0 has just dropped.
date-fns
Panolens.js: A JavaScript Panorama Viewer Based on Three.js — View examples here. This is a lightweight, flexible, WebGL-based panorama viewer built on top of Three.js.
Ray Chen
Git for Node and the Browser using libgit Compiled to WASM — Naturally, this is a rather experimental idea(!) There is a browser based demo if you’re interested though.
Peter Salomonsen
by via JavaScript Weekly https://ift.tt/3addnFv
0 notes
Text
SVG Web Page Components For IoT And Makers (Part 2)
SVG Web Page Components For IoT And Makers (Part 2)
Richard Leddy
2019-05-15T13:30:16+02:002019-05-15T15:35:00+00:00
So, we already have ways of dynamically loading a menu of SVG icons made to react by loading panels if we so desire, but the icons were not actual components. We were able to use a simple trick of bringing in the SVG for each icon and passing it into the Vue application. It was simple enough to generate a list of icons, and each icon reacted in a similar way except for small data differences. The data difference made it possible to bind the name of a panel to each icon in such a way that the handler for the icon’s button click could pass it on.
When a panel is loaded in the form of Vue component, everything about the panel and its components has to be loaded, templates, JavaScript, and more. So, the job of just managing loading the panel is bigger than what we have encountered so far in this discussion.
Let’s look at Vue’s way of providing a hook for async loading. The following snippet is from the Vue guide.
Vue.component('async-example', function (resolve, reject) { setTimeout(function () { // Pass the component definition to the resolve callback resolve({ template: '<div>I am async!</div>' }) }, 1000) })
The guide tells us that the setTimeout function is an example of how to use the synchronicity with Vue components. Notice that where before there had been an object as the second parameter to Vue.component, there is now a function, which is referred to as a factory function. Within the resolve callback is a component definition, that would have been the second parameter to Vue.component before.
So, I had to stare at this example a while before it made sense to me. Here is another example, which suits me better:
Vue.component('async-example', function (resolve, reject) { // Vue will call this function and promise itself to handle // it when it gets back with data. // this function can then call a promising object loader // here the 'loader' function is some abstract function. // Most likely the application will use 'fetch' // but it could be something else. loader('/my/resource/on/server.json'). then(function (JSON_data) { var object = transformJSONToJSObject(JSON_data); resolve(object) }).catch( (error) => { handle it } );
It seems like the right thing to do to make a more general function to go around this form.
function componentLoader(c_name,resource_url) { Vue.component(c_name, function (resolve, reject) { loader(resource_url). then(function (JSON_data) { var object = transformJSONToJSObject(JSON_data); resolve(object) }).catch( (error) => { handle it } ); }
So, in general, to load a component, we would just need a line like the following:
componentLoader('ThermoPanel','./JSON/thermo-panel.json');
So now, just what is the JSON that is being loaded? It can include everything about the component. In this case, as a panel component, it can include thermometers, machine switches, sliders, gauges, and more. While it seemed nicer to keep the components parts on the web page, it may actually work better to use the subcomponent field that is in the longer example for ‘thermo-panel’ that we made before and also for the other similarly constructed panels. The JSON will contain a complete panel structure.
However, if the reader will notice the inclusion of the function call to transformJSONToJSObject, he will understand that JSON might be coded in some way to make transport easier and to make it easier for a server to handle the definition. After all, the definition will include complete SVG templates, function definitions, and other JavaScript expressions. Also, the JSON object may contain more than just the panel definition because some information may simply aid in bookkeeping or validation. So, one can expect that there will be some treatment of the object upon receipt.
As for the encoding, the data coming in from the server may be encoded in a number of ways. Perhaps it will be simply URL encoded. Or more securely, it might be enciphered. For this discussion, we can just use URL encoding.
Some of the tools that are available for creating Vue applications no doubt take care of the JSON transformation. But, this discussion has so far avoided the use of command line tools. This omission is not that bad as we have also used Vue with the minimum of resources, using only one script tag for the referring to the CDN. However, I certainly do recommend looking into the command line tools especially for organizing projects.
When the JSON arrives at the page, given the component is completely assembled with subcomponents, no more work has to be done to fetch the parts. We can make the assumption that all components will come in fully defined for the rest of this discussion. But, assembling complete component hierarchies will require command line tools at some point.
The SVG editing process will also require some work. The SVG editing processes allow a designer to draw a panel and all the components on it. But, each subcomponent has to be identified, called out in a group, or given a place holder. Any approach to using the drawing requires some treatment of the SVG so that Vue component tags can replace the groups or graphic elements. In this way, any artist rendering can become a template. And, the drawn subcomponents will have to be disassembled into templates for Vue subcomponents.
This sort of parsimony is contrary to the workflow of most of the JavaScript frameworks. The frameworks are about assembling pages. But, editing or drawing, results in something already assembled by an artist. In practice, the result of editing does not provide a text file that corresponds directly to a framework component definition.
More about the editing process may be considered in some other discussion. There is a lot to it. But, for now, we have the tools we need in order to load hierarchal components and make them come alive.
The Lazy Application
For our IoT panel construction, we already have a selection bar that responds to searches. And, we have a way of loading components when we need them. We just need to connect up these parts. And, at last, we have to make sure that the panels appear and that they start working when they do.
The lazy loading of panels done by the async code above provides a sketch of an idea. But, thankfully, some people have experimented to find ways of making sure that all kinds of components can be loaded. There is one codepen entry that shows how to update Vue apps with new components of varying types. That is the mechanism that is needed for updating a designated part of the page with different types of panel.
With the ability to add in different kinds of panels and with a simple mechanism to load their definitions, we can, at last, have our panel searching page.
Here is the HTML that we need in our page so that the Vue app can place components in dynamically:
<template v-for="(panel, index) in panelList"> <component :is="panel" :key="panel.name"></component> </template>
The component tag is a Vue meta tag. See the reference for dynamic components. The properties, special attributes, used for the component tag in this case are is and key. The is attribute exists for dynamic components. And, the key ensures that the new children will have different identities from each other and helps Vue to decide what to draw.
“Children of the same common parent must have unique keys. Duplicate keys will cause rendering errors.”
The template tag will loop through components that are provided in the panelList data field of the application.
So, starting with the application level Vue definition for the icon app, we can make changes to include the panelList in the data elements. (Let’s now call it the panelApp).
var panelApp = new Vue({ el: '#PanelApp', data: { iconList: [ // Where is the data? Still on the server. ], panelList: [ ], queryToken : "Thermo Batches" // picked a name for demo }, methods : { goGetPanel: function (pname) { // var url = panelURL(pname); // this is custom to the site. fetch(url).then((response) => { // this is now browser native response.text().then((text) => { var newData = decodeURIComponent(text); eval(pHat); // widgdef = object def, must be assignment pHat = widgdef; var pnameHat = pname + pcount++; pHat.name = pnameHat; // this is needed for the key this.panelList.push(pHat); // now it’s there. }).catch( error => { /* handle it */ }); } } });
Besides adding in the panel, goGetPanel is now in a form required for getting a component definition from a database or other store. The server side must be careful about delivering JavaScript code in the correct format. As for what the object looks like coming from the server, we have already seen it. It is the kind of object used as a parameter to Vue.component.
Here is the complete body of the Vue app that provides a menu as a search result and a place to put panels fetched from the server when the user clicks an icon.
<div id="PanelApp"> <!-- Recognize the name from the Vue doc --> <div> <h2 itemprop="name">Request MCU Groups</h2> <p itemprop="description">These are groups satistfying this query: .</p> <button onclick="GetIcons(11)">Find All</button> <button onclick="GetIcons(5)">Find 5 Point</button> <button onclick="GetIcons(6)">Find 6 Point</button> </div> <!-- Here is a Vue loop for generating a lit --> <div class="entryart" style="padding:4px"> <button v-for="iconEntry in iconList" @click="goGetPanel(iconEntry.name)" > <div v-html="iconEntry.icon"> </div> </button> </div> <div class="entryart" style="padding:4px" > <template v-for="(panel, index) in panelList"> <component :is="panel" :key="panel.name" :ref="panel.name" ></component> </template> </div> </div>
In the last div, the component tag now has a ref parameter bound to the panel name. The ref parameter allows Vue app to identify which component to update with data and keeps components separate. The ref parameters also allow our application access to the new dynamically loaded components.
In one test version of the panel app, I have the following interval handler:
setInterval(() => { var refall = panelApp.$refs; // all named children that panels for ( var pname in refall ) { // in an object var pdata = refall[pname][0]; // off Vue translation, but it’s there. pdata.temp1 = Math.round(Math.random()*100); // make thermos jump around. pdata.temp2 = Math.round(Math.random()*100); } },2000)
The code provides a little animation, changing thermometers randomly. Each panel has two thermometers, and the app allows the user to keep adding panels. (In the final version, some panels must be thrown away.) The refs are being accessed using panelApp.$refs, a field that Vue creates given the refs information in the component tag.
So, this is what the randomly jumping thermometers look like in one snapshot:

A collection of animated panels for one type of panel (or component). (Large preview)
Connecting The Panel To The IoT Device
So, the last piece of code is a setInterval test updating thermometers with random values every two seconds. But, what we want to do is read in real data from real machines. In order to do that, we will need some form of communication.
There are a variety of ways. But, let’s use MQTT which is a pub/sub message system. Our SPWA can subscribe to messages from devices at any time. When it gets those messages the SPWA can direct each message to the appropriate data handler for the panel mapped to the device identified in the message.
So, basically what we need to do is replace the setInterval with a response handler. And, that will be for one panel. We probably want to map panels to handlers as they are loaded. And, it is up to the web server to see that the correct mapping is delivered.
Once the web server and the SPWA have the page ready for operation, the web server no longer needs to take care of messaging between the page and the device. the MQTT protocol specifies a routing server to handle pub/sub. A number of MQTT servers have been made. Some of them are open source. One very popular one is Mosquito, and there are a few developed on top of Node.js.
The process for the page is simple. The SPWA subscribes to a topic. One good version of a topic is an identifier for an MCU such as a MAC address or a serial number. Or, the SPWA could subscribe to all temperature readings. But, then the page would have to do the work of filtering the messages from all devices. Publication in MQTT is essentially a broadcast or multicast.
Let’s take a look at how the SPWA will interface with MQTT.
Initializing MQTT On The SPWA
There are several client libraries to choose from. One, for instance, is a MQTT.js. Another is eclipse paho. There are more of course. Let’s use Eclipse Paho since it has a CDN stored version. We just need to add the following line to our page:
<script src="https://cdnjs.cloudflare.com/ajax/libs/paho-mqtt/1.0.1/mqttws31.min.js" type="text/javascript"></script>
The MQTT client has to connect to a server before it can send and receive messages. So, lines setting up the connection also need to be included in the JavaScript. We can add in a function MQTTinitialize which sets up the client and the responses for connection management and message receipt.
var messagesReady = false; var mqttClient = null; function MQTTinitialize() { mqttClient = new Paho.MQTT.Client(MQTTHostname, Number(MQTTPort), "clientId"); mqttClient.onMessageArrived = onMessageArrived; // connect the client mqttClient.connect({ onSuccess: () => { messagesReady = true; } }); // set callback handlers mqttClient.onConnectionLost = (response) => { // messagesReady = false; // if (response.errorCode !== 0) { console.log("onConnectionLost:"+response.errorMessage); } setTimeout(() => { MQTTinitialize() },1000); // try again in a second }; }
Setting up Subscription
With the connection ready, the client can subscribe to message channels, send messages on them, etc. Just a few routines can do most of the work necessary to connect panels with the MQTT pathways.
For the panel SPWA, the moment of subscription can be used to establish the association between the panel and the topic, the MCU identifier.
function panelSubcription(topic,panel) { gTopicToPanel[topic] = panel; gPanelToTopic[panel] = topic; mqttClient.subscribe(topic); }
Given that an MCU is publishing on its topic, the SPWA will receive a message. Here, the Paho message is unpacked. And, then the message is passed on into the application mechanics.
function onMessageArrived(pmessage) { // var topic = pmessage.destinationName; var message = pmessage.payloadString; // var panel = gTopicToPanel[topic]; deliverToPanel(panel,message); }
So, now all we need to do is create deliverToPanel which should be somewhat like the interval handler that we had before. However, the panel is clearly identified, and only the keyed data sent in the particular message may be updated.
function deliverToPanel(panel,message) { var refall = panelApp.$refs; // all named children that panels var pdata = refall[panel][0]; // off Vue translation, but it’s there. var MCU_updates = JSON.parse(message); for ( var ky in MCU_updates ) { pdata[ky] = MCU_updates[ky] } }
This deliverToPanel function is abstract enough to allow any panel definition with any number of data points for animation.
Sending Messages
To complete the application loop between the MCU and the SPWA, we define a function to send a message.
function sendPanelMessage(panel,message) { var topic = gPanelToTopic[panel]; var pmessage = new Paho.MQTT.Message(message); pmessage.destinationName = topic; mqttClient.send(pmessage); }
The sendPanelMessage function does no more than sending the message out on the same topic pathway that the SPWA subscribes to.
As we plan to make the icon buttons responsible for bringing in some number of panels for a single cluster of MCU’s, there will be more than one panel to take care of. But, we keep in mind that each panel corresponds to a single MCU, so we have a one-one mapping, for which we may use two JavaScript maps for the map and the inverse.
So, when do we send messages? Usually, the panel application will send a message when it wants to change the state of the MCU.
Keeping The View (Vue) State In Sync With Devices
One of the great things about Vue is that it is very easy to keep the data model synchronized with the activity of the user, who may edit fields, click on buttons, use sliders, etc. One can be sure that button and field changes will be reflected immediately in the components’ data fields.
But, we want changes to fire off messages to the MCU as soon as the changes occur. So, we seek to make use of the interface events that Vue may govern. We seek to respond to such an event, but only after the Vue data model is ready with the current value.
I created another kind of panel, this one with a fairly artistic looking button (perhaps inspired by Jackson Pollock). And, I went about turning it into something whose click reports the state back to the panel that contains it. That was not so simple a process.
One thing that threw me off is that I had forgotten some of the oddities in managing SVG. I first tried to change the style string so that the display field of the CSS style would either be “None” or “something”. But, the browser never rewrote the styles string. But, as that was cumbersome, I tried changing the CSS class. That also had no effect. But, there the visibility attribute, which most of us recall from old HTML (version 1.0 perhaps), but that is very up to date in SVG. And, that works well. All, I had to do was to get the button click event to propagate.
Vue has designed properties to propagate in one direction, parent to child. So, to change data in the application, or in the panel, you have to send a change event to the parent. Then, you can change the data. The change of the data element controlling the button causes Vue to update the property affecting the visibility of the SVG element we have chosen to indicate state. Here is an example:
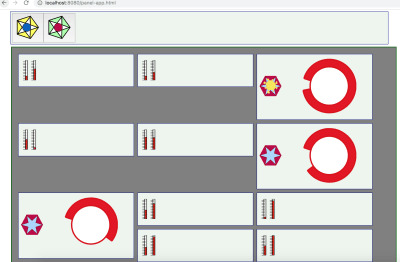
Finally, a collection of different types of panels each with instances assigned to separate MCU’s. (Large preview)
Each instance of the squiggly button panel is independent. So, some are ON and some are OFF.
This snippet of SVG contains the odd-looking yellow indicator:
<path :visibility="stateView" style="opacity:0.98000004;fill:#faea4a;fill-opacity:1;stroke:#eecd5c;stroke-width:1;stroke-miterlimit:4;stroke-dasharray:none;stroke-opacity:1" id="sunthing" d="m -36.544616,12.266886 c 19.953088,17.062165 5.07961,-19.8251069 5.317463,8.531597 0.237853,28.356704 13.440044,-8.847959 -3.230451,10.779678 -16.670496,19.627638 14.254699,-2.017715 -11.652451,3.586456 -25.90715,5.60417 10.847826,19.889979 -8.095928,-1.546575 -18.943754,-21.436555 -1.177383,14.210702 -4.176821,-12.416207 -2.999438,-26.6269084 -17.110198,8.030902 2.14399,-8.927709 19.254188,-16.9586105 -19.075538,-8.0837048 9.448721,-5.4384245 28.52426,2.6452804 -9.707612,-11.6309807 10.245477,5.4311845 z" transform="translate(78.340803,6.1372042)" />
The visibility is populated by stateView, a computed variable that maps the state boolean to a string for SVG.
Here is the panel component definition template:
<script type="text/x-template" id="mcu-control-panel-template"> <div> <control-switch :state="bstate" v-on:changed="saveChanges" ></control-switch> <gauge :level="fluidLevel" ></gauge> </div> </script>
And, this is the JavaScript definition of the Vue panel with its children as subcomponents:
var widgdef = { data: function () { var currentPanel = { // at the top level, values controlling children bstate : true, fluidLevel : Math.round(Math.random()*100) } // return currentPanel }, template: '#mcu-control-panel-template', methods: { saveChanges: function() { // in real life, there is more specificity this.bstate = !this.bstate relayToMCU(this.name,"button",this.bstate) // to be defined } }, components: { 'control-switch' : { // the odd looking button props: [’state'], template: '#control-switch-template', // for demo it is in the page. computed: { // you saw this in the SVG above. stateView : function() { return ( this.state ) ? "visible" : "hidden" } }, methods : { // the button handler is in the SVG template at the top. stateChange : function () { // can send this.$emit('changed'); // tell the parent. See on the template instance } } }, 'gauge' : { // some other nice bit of SVG props: ['level'], template: '#gauge-template' } } }
So, now the mechanism for a single button embedded in a panel has been laid out. And, there has to be a hook for telling the MCU that something has taken place. It must be called immediately after the data state of the panel component has been updated. Let’s define it here:
function relayToMCU(panel,switchName,bstate) { var message = switchName + ':' + bstate // a on element parameter string. sendPanelMessage(panel,message) }
There is the state change on it’s way to hardware in just two lines of code.
But, this is a fairly simple case. Any switch can be viewed as a function call to a piece of hardware out in the world. So, the string might contain the switch name and several other data elements. So, the component method that registers change will have to have some custom handling in it in order that it might gather together all the pieces of data set on the panel and send them along in one command string. Even the command string is a little simple. If the MCU is quite small, the command string might have to be translated into a code. If the MCU has a great deal of capability, the command string might actually be a JSON structure or perhaps all the data that the panel hosts.
In this discussion, the buttons on the icon panel contain the name of the panel to fetch. That may also be fairly simplified as well. It seems to make sense that that parameter can stand for any panel that might be stored in an enterprises databases. But, perhaps it is some formula. Perhaps, information about the panel should be wrapped around the panel definition that we receive from the server. In any case, the basics can be easily expanded upon once certain headaches are out of the way, like making the SVG respond to clicks properly.
Conclusion
This discussion has laid out some basic steps and decisions that lead to the realization of a Single Page Web App (SPWA) that can interface with IoT devices. We now know how to get panels from a web server and turn them into MCU interface.
There is much more to this discussion with quite a few other discussions that may follow. Starting with Vue is one thing to think about. But, then there is the whole MCU story, which we have only briefly touched upon.
In particular, by selecting MQTT as a communication substrate, we assume that IoT devices on the other end can somehow be ruled by MQTT. But, that may not always be the case. Sometimes gateways are needed if MQTT is to gain access to a device with serial links or Bluetooth. Or, perhaps all one ever needs from on the web page is WebSockets. Nevertheless, we used MQTT as an example to show how Vue could both receive and send data while keeping its data state in sync with devices.
Once again we only have part of the story. This time it is for synchronization because the page should be able to deal with alerts and bother the user if something critical is happening. Sometimes messages can get lost. So, we have to have a mechanism for acknowledgments.
Finally, it is my opinion that Vue makes updating data upon receipt quite elegant. But, sending the state changes is not so straight forward. It does not seem to make the job much simpler than can be done with vanilla JavaScript. But, there is a way and it makes sense.
Perhaps a clean library can be built to make a universal set of components for all panels. The elements for making such libraries and having them stored in a database have been briefly mentioned. Tools that go beyond just making SVG pictures may have to be developed. In any case, there are likely many things that can be done for the next steps.

(dm, yk, il)
0 notes
Text
Introduction to Client-Side Development
Introduction to client-side elements
Distributed systems use client-side elements, so that users can interact with.
The client-side elements include,
Views – what user see
Controller – contain event handlers for the views
Client-model – business logic and data
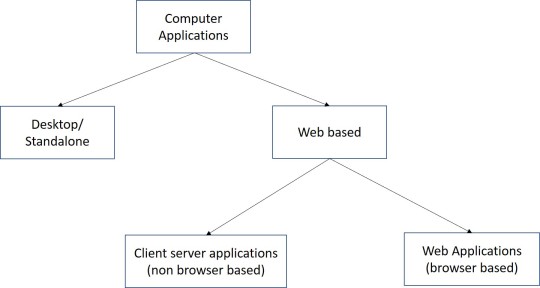
View Development
Browser-based clients’ Views comprises two main elements
Content – HTML
Formatting – CSS
HTML
HTML Elements
o Structural elements – header, footer, nav, aside
o Text elements – headings, paragraphs, line breaks
o Images
o Hyperlinks
o Data representational elements – Lists, Tables
o Form elements – Input, Radio buttons, Check boxes, Buttons
CSS (Cascading Style Sheets)
Used to decorate or format content.
Advantages:
Reduce HTML formatting tags
Easy modification
Faster loading
Save lot of work and time
Three main selectors of CSS
Element Selector
- Selects elements based on the name
ID Selector
- Uses the id attribute of HTML element to select a specific element
Class Selector
- Selects elements with a specific class attribute

Advanced selectors
Pseudo Classes Pseudo Elements
:link first-letter
:visited first-line
:hover first-child
Specificity:
Specificity is, which browser decide which css property values are the most relevant to an element and, therefore, will be applied.
Specificity is a weight that is applied to a given css declaration determined by the number of each selector type in the matching selector.
The following list of selector types increases by specificity
1. Type selector and pseudo elements
2. Class selectors, attribute selectors and pseudo classes
3. ID selectors
CSS Advanced features
Web fonts - Allow you to use custom fonts other than device fonts
Colors, gradients, backgrounds
Transformations and animations
Media
Media queries
Media queries can be used to check many things.
- Width and height of the viewport
- Width and height of the device
- Orientation
- Resolution
Can be used as
o Inline CSS
o Internal CSS sheets
o External CSS sheets
Inline CSS
Advantages:
Inline CSS can be used for many purposes, some of which include:
Testing: Many web designers use Inline CSS when they begin working on new projects, this is because its easier to scroll up in the source, rather than change the source file. Some also using it to debug their pages, if they encounter a problem which is not so easily fixed. This can be done in combination with the Important rule of CSS.
Quick-fixes: There are times where you would just apply a direct fix in your HTML source, using the style attribute, but you would usually move the fix to the relevant files when you are either able, or got the time.
Smaller Websites: The website such as Blogs where there are only limited number of pages, using of Inline CSS helps users and service provider.
Lower the HTTP Requests: The major benefit of using Inline CSS is lower HTTP Requests which means the website loads faster than External CSS.
Disadvantages
Inline CSS some of the disadvantages of which includes:
Overriding: Because they are the most specific in the cascade, they can over-ride things you didn’t intend them to.
Every Element: Inline styles must be applied to every element you want them on. So if you want all your paragraphs to have the font family “Arial” you have to add an inline style to each <p> tag in your document. This adds both maintenance work for the designer and download time for the reader.
Pseudo-elements: It’s impossible to style pseudo-elements and classes with inline styles. For example, with external and internal style sheets, you can style the visited, hover, active, and link color of an anchor tag. But with an inline style all you can style is the link itself, because that’s what the style attribute is attached to.
Internal CSS
Advantages
Since the Internal CSS have more preference over Inline CSS. There are numerous advantages of which some of important are an under:
Cache Problem: Internal styles will be read by all browsers unless they are hacked to hide from certain ones. This removes the ability to use media=all or @import to hide styles from old, crotchety browsers like IE4 and NN4.
Pseudo-elements: It’s impossible to style pseudo-elements and classes with inline styles. With Internal style sheets, you can style the visited, hover, active, and link color of an anchor tag.
One style of same element: Internal styles need not be applied to every element. So if you want all your paragraphs to have the font family “Arial” you have to add an Inline style <p> tag in Internal Style document.
No additional downloads: No additional downloads necessary to receive style information or we have less HTTP Request
Disadvantages
Multiple Documents: This method can’t be used, if you want to use it on multiple web pages.
Slow Page Loading: As there are less HTTP Request but by using the Internal CSS the page load slow as compared to Inline and External CSS.
Large File Size: While using the Internal CSS the page size increases but it helps only to Designers while working offline but when the website goes online it consumers much time as compared to offline.
External CSS
Advantages
There are many advantages for using external CSS and some of are:
Full Control of page structure: CSS allows you to display your web page according to W3C HTML standards without making any compromise with the actual look of the page.
Reduced file-size: By including the styling of the text in a separate file, you can dramatically decrease the file-size of your pages. Also, the content-to-code ratio is far greater than with simple HTML pages, thus making the page structure easier to read for both the programmer and the spiders.
Less load time: Today, when Google has included the Loading time in his algorithm, its become more important to look into the page loading time and another benefit of having low file-size pages translates into reduced bandwidth costs.
Higher page ranking: In the SEO, it is very important to use external CSS. In SEO, the content is the King and not the amount of code on a page. Search engines spider will be able to index your pages much faster, as the important information can be placed higher in the HTML document. Also, the amount of relevant content will be greater than the amount of code on a page. The search engine will not have to look too far in your code to find the real content. You will be actually serving it to the spiders “on a platter”.
There are many frameworks/libraries/plugins to support view development
o They dynamically generate HTML+CSS code
o In server and/or client side
o May have JS-based advanced interactive features
Other tools
jQuery - A JS library, but can be seen a framework too
jQuery UI - Focus on GUI development
Bootstrap - To rapidly design and develop responsive web pages and templates
Angular - A JS framework/platform to build frontend applications
React – A JavaScript library for building user interfaces
Templates are used to maintain consistency across pages in the web site/application.
Template engines are available for both server and client sides
Client-side (JS-based) template engines - NUNJUCKS, PUG, MUSTACHE.JS, HANDLEBARS
Server-side template engines - Twig, jTwig, Thymeleaf, Apache Velocity
Plug-ins
Plug-ins are mainly to add widgets to the Views
Component Development
Browser-based clients’ components comprises two main aspects
Controllers
Client-model
The components of browser-based clients are developed using JS/JS-based frameworks, libraries, and plugins.
Main features of client-side development tools
o DOM processing (dynamic content generation, change, removal)
o Data processing
o Data persistence
o Session management
o Communication
JS6 (JavaScript6)
Also called ECMAScript6
New features
JavaScript let
- The let statement allows you to declare a variable with block scope.
JavaScript const
- The const statement allows you to declare a constant
Exponentiation (**)
- The exponentiation operator (**) raises the first operand to the power of the second operand.
Default parameter values
- Default parameter values allows function parameters to have default values.
Array.find()
- The find() method returns the value of the first array element that passes a test function.
- function takes 3 arguments:
The item value
The item index
The array itself
Array.findIndex()
- The findIndex() method returns the index of the first array element that passes a test function.
- function takes 3 arguments:
The item value
The item index
The array itself
Web workers
This API is meant to be invoked by web application to spawn background workers to execute scripts which run in parallel to UI page
Web storage / Session storage
This is for persistent data storage of key-value pair data in Web clients.
GeoLocation
Identify the device location
File API
Handle the local files
Image capturing
Use local hardware
Top JS frameworks/ libraries
jQuery - Basic and simple. Cover the complexity of JS and provides cross-browser compatibility.
React - powers Facebook, Ease of Learning, DOM Binding, Reusable Components, Backward Compatibility
Angular - Support for Progressive Web Applications, Build Optimizer, Universal State Transfer API and DOM, Data Binding and MVVM
Vue – light weight, with a much-needed speed and accuracy
Generic client-side features
Form/ data validation
Dynamic content generating/updating
Some business logic
Delta communication
References
https://www.w3schools.com/css/css_syntax.asp
https://developer.mozilla.org/en-US/docs/Web/CSS/Specificity
https://www.w3schools.com/cssref/css3_pr_mediaquery.asp
https://vineetgupta22.wordpress.com/2011/07/09/inline-vs-internal-vs-external-css/
https://www.w3schools.com/js/js_es6.asp
0 notes
Text
How To Do More With Vue Router
About The Author
Front-end developer based in Lagos, Nigeria. He enjoys converting designs into code and building things for the web. More about Timi …
Vue Router is the official router for Vue that is mostly used for creating multiple pages living on different routes (/home, /profile) in your application but has some features that some people do not know about. In this tutorial, we’re going to learn about some amazing features the Vue Router has and how we can make use of them in our app.
Vue Router is the official router for Vue. It deeply integrates with Vue core to make building Single Page Applications with Vue a breeze. Some of its popular features include:
Dynamic Route matching.
Named Routes.
Named views.
Programmatic navigation.
These features are heavily used when developing with Vue and this is because they are part of the basics you need to understand to efficiently use the Router. But the Vue Router has some very useful features that can be very helpful in development and in this article, we’re going to take a look at them.
For the purpose of this tutorial, we’re going to be building a simple application that would help in understanding some of the concepts covered in this article. You can find all the code used in this article on GitHub. If you are interested in doing more with the router, you’ll benefit from this tutorial.
Note: This article requires a basic understanding of Vuejs and Vue Router.
Scroll Behaviour
This is the behavior that is observed when navigating from one page to another. The default behavior of Vue router is only noticeable after scrolling to a position that isn’t the top of the page. This is because, by default, the scroll position when navigating away from a page is maintained on a new page. What this means is, if you click on a link that leads to a new route ( i.e from /home to /about) in a position that is let’s say close to the footer of the current page, the new page would start from that same position instead of starting from the top of the page.
I have created a Vue application using the Vue CLI command vue create vue-router-demo, I also selected Vue Router as part of the options while setting up my app because we will be using it throughout this tutorial.
We will also need to make API calls to JSONPlaceholder, to illustrate some of the concepts using Vue router. For this, we will be using Axios. To install Axios:
# using YARN yarn add axios # or NPM npm install axios
After installing Axios, we can update our Home.vue to look like this:
<template> <div class="home"> <p v-if="loading" class="post--empty">Loading....</p> <ul v-else> <li v-for="post in posts" :key="post.id"> <router-link :to="{ name: 'Post', params: { id: post.id, post: post } }" > </router-link> </li> </ul> </div> </template> <script> // @ is an alias to /src import axios from "axios"; export default { name: "Home", data() { return { posts: null, loading: false, }; }, mounted() { this.getPosts(); }, methods: { async getPosts() { this.loading = true; try { let res = await axios({ url: "https://jsonplaceholder.typicode.com/posts", method: "GET", }); let posts = res.data; this.posts = posts; this.loading = false; } catch (error) { this.loading = false; } }, }, }; </script> <style> .home { padding: 0 30px; max-width: 800px; margin: 0 auto; } @keyframes blink { from { opacity: 1; } to { opacity: 0; } } .post--empty { height: 250px; margin-top: 30px; animation: blink 0.8s ease-in-out infinite alternate both; display: flex; align-items: center; justify-content: center; font-family: "Lobster", cursive; } ul { text-align: left; } a { color: inherit; } </style>
Here, we’re importing axios and using it to fetch a list of posts from JSONPlaceholder in the getPost method. We’re also assigning the array of posts gotten from this API call to posts from the data function from this page, this is because we want to use this data in our template section. After this, we loop through the array of posts in a list ( <ul></ul>) and also attach a link to each post using id of each post as the link param (this is called dynamic route matching). We have also added a paragraph that would serve as a loading indicator.
At this point, here’s what this page looks like:
List of posts from JSONPlaceholder. (Large preview)
The next thing would be to create the page that will display the info for each post and create a link for it in the router of our app.
Post.vue
<template> <div class="about"> <div class="post"> <h1></h1> <p v-html="post.body"></p> </div> <p>End of page</p> </div> </template> <script> export default { name: "Post", props: ["id", "post"], }; </script> <style> .post { padding: 0 30px; height: 110vh; margin: 0 auto; } p { margin: 10px 0; } </style>
Here, we make use of passing props to route components to define id and post which we’re passing from the previous page in the form of route params. This is a neat way of accessing route params and query as opposed to doing this:
Post.vue
<script> export default { name: "Post", data() { return { post: this.$route.post, }; }, }; </script>
We then make use of this post value in the template section to display post title and body. Finally, we add a paragraph to the end of the page. We also add styling for the page in the styling section, which includes defining a height of 110vh. This is because we need the page to have a height that is more than the default height 100vh so we can observe the default scroll behavior of the router.
The next thing would be to create a route that would display each post. Update your index.js file in the /router folder ( or router.js file) to look like this:
import Vue from 'vue' import VueRouter from 'vue-router' import Home from '../views/Home.vue' Vue.use(VueRouter) const routes = [{ path: '/', name: 'Home', component: Home }, { path: '/:id', name: 'Post', props: true, component: () => import ( /* webpackChunkName: "post" */ '../views/Post.vue') } ] const router = new VueRouter({ mode: 'history', base: process.env.BASE_URL, routes }) export default router
Here, we define a new route that makes use of id that would be passed to this route from the homepage. We’re also decoupling the router param (in this case, post and id) using props.
The top of this page looks like this:
Top of post page. (Large preview)
If we click on any of the posts on the home page that does not require us to scroll, we would not notice any weird behavior scroll wise, but if we scroll down a little and click on the last post in this list, this should be the position the /post page would land on:
Default scroll position. (Large preview)
This is bad for UX and this is because the user isn’t expecting this behavior and they might need to start from the top of a page to get the full information on the said page.
Vue Router comes with the option to customize this behavior to individual preferences, an example would be saving scroll position of a previous route when trying to move back/forward. To fix the current issue in our app, we would update our router file to include the following:
import Vue from 'vue' import VueRouter from 'vue-router' import Home from '../views/Home.vue' Vue.use(VueRouter) const routes = [...] const router = new VueRouter({ mode: 'history', base: process.env.BASE_URL, routes, //add this scrollBehavior(to, from, savedPosition) { return { x: 0, y: 0 } } }) export default router
Now, if we scroll to the bottom of the home page and click on the last post, you should notice that it now starts from the top of the page.
New scroll position. (Large preview)
Data Fetching
When fetching data from an API, we either call the method in the mounted or created lifecycle hook, these are by far the most popular methods people use when developing in Vue. Vue router comes with another method in which we make this API request before navigating to a new route by making this request using the beforeRouterEnter guard in such a component. Here is an example of how to fetch data from JSONPlaceholder using this method:
beforeRouteEnter(to, from, next) { axios .get("https://jsonplaceholder.typicode.com/posts") .then((res) => { next((vm) => vm.fetchData(res)); }) .catch((err) => { console.error(err); }); }, methods: { fetchData(res) { let post = res.data; this.posts = post; }, },
Here, we’re fetching a list of posts from an API using Axios and when this request is complete, we call next. At this point in the lifecycle of this component, this is not available because the component has not been created but we have access to vm which gives us access to the component’s instance. Inside this function, we pass the response from the API request res to our method fetchData which we’ve created to assign the value from this response to post so we can use it in our template. Now, if we refresh our / route, we would notice that the data gets updated very fast and at no time is there a blank or page ( provided the request is successful).
Transitions
Vue comes with a <transition></ transition> component that enables easy implementation of CSS transitions and animations. This feature can be extended to work for navigation between routes in Vue. Here’s an example:
<template> <div id="app"> <div id="nav"> <router-link to="/">Home</router-link> </div> <transition name="slide-fade"> <router-view /> </transition> </div> </template> <style> #app { font-family: Avenir, Helvetica, Arial, sans-serif; -webkit-font-smoothing: antialiased; -moz-osx-font-smoothing: grayscale; text-align: center; color: #2c3e50; } #nav { padding: 30px; } #nav a { font-weight: bold; color: #2c3e50; } #nav a.router-link-exact-active { color: #42b983; } .slide-fade-enter-active { transition: transform 0.3s cubic-bezier(1, 0.5, 0.8, 1), color 0.5s cubic-bezier(1, 0.5, 0.8, 1); } .slide-fade-leave-active { transition: transform 1s cubic-bezier(1, 0.5, 0.8, 1), color 1s cubic-bezier(1, 0.5, 0.8, 1); } .slide-fade-enter { color: mediumblue; transform: translateY(20px); } .slide-fade-leave-to { transform: translateX(100px); color: cyan; } </style>
Here, we’re adding a transition with the name slide-fade to our application and wrapping it around all the route navigation that would take place in the app. We’re also adding a set of styles that control/define the way the transitions would work in our app. Without these rules, there would be no visible transition taking place. Now, if we try to navigate from the homepage to the individual posts, we would notice a sliding and fading transition taking place during the navigation process.
There are two types of route based transitions.
1. Per-route Transition
This type of transition is defined in the component that renders a route and so, it only affects the navigation to and from such a page. This gives us the ability to define a special transition for individual routes if we want. Here is an example of how to do that.
<template> // add a transition component with name and mode props <transition name="slide-fade" mode="in-out"> <div class="about"> <div class="post"> <h1></h1> <p v-html="post.body"></p> </div> <p>End of page</p> </div> </transition> </template> <script> export default { name: "Post", props: ["id", "post"], }; </script> <style> //... .slide-fade-enter-active { transition: transform 2s cubic-bezier(1, 0.5, 0.8, 1), opacity 2s ease-in; } .slide-fade-leave-active { transition: transform 2s cubic-bezier(1, 0.5, 0.8, 1), opacity 2s ease-out; } .slide-fade-enter { opacity: 1; transform: skewY(20deg); } .slide-fade-leave-to { transform: skewY(-45deg); opacity: 0.5; } </style>
If you try to navigate away from this page, we would notice the page gets skewed and fades for a duration of 2s as the navigation changes.
2. Route-Based Dynamic Transition
This is similar to the general method of adding transitions to all routes in your application but it has one major difference, that is, it accepts a dynamic transition name prop which gives you the ability to change the transition type any way you want. Let us create an example of how to do this.
We’re going to update our App.vue file with a dynamic name prop and configure it to choose a transition name depending on a value.
<template> <div id="app"> <div id="nav"> <router-link to="/">Home</router-link> </div> <transition :name="transitionName"> <router-view /> </transition> </div> </template> <script> export default { data() { return { transitionName: "slide-fade", }; }, watch: { $route(to, from, params) { const toParam = to.params && to.params.id ? to.params.id : 0; this.transitionName = toParam % 2 === 0 ? "slide-left" : "slide-fade"; }, }, }; </script> <style> /* add transition styles */ .slide-fade-enter-active { transition: transform 0.3s cubic-bezier(1, 0.5, 0.8, 1), color 0.5s cubic-bezier(1, 0.5, 0.8, 1); } .slide-fade-leave-active { transition: transform 1s cubic-bezier(1, 0.5, 0.8, 1), color 1s cubic-bezier(1, 0.5, 0.8, 1); } .slide-fade-enter { color: mediumblue; transform: translateY(20px); } .slide-fade-leave-to { transform: translateX(100px); color: cyan; } .slide-left-enter-active { transition: transform 0.3s cubic-bezier(1, 0.5, 0.8, 1), color 0.5s cubic-bezier(1, 0.5, 0.8, 1); } .slide-left-leave-active { transition: transform 1s cubic-bezier(1, 0.5, 0.8, 1), color 1s cubic-bezier(1, 0.5, 0.8, 1); } .slide-left-enter { color: mediumblue; transform: translateY(20px); } .slide-left-leave-to { transform: skewY(90deg); color: cyan; } </style>
Here, we’re adding a dynamic transition name which is defined in the script section of our app. We’re also watching the $route so that whenever it changes, we run the function that checks if the current route has a param of id otherwise, we give it a value of 0. We also determine the transition name based on the type of number the id is (i.e even or odd number). Now, if we navigate between the landing page and the different posts available, we would observe there are two types of transitions occurring as we navigate.
Meta Fields And Navigation Guards
Meta Fields
Meta fields help provide extra context to a certain route. An example of such context would be if a user needs to be authenticated to access such route or not. Here’s what this looks like:
import Vue from 'vue' import VueRouter from 'vue-router' import Home from '../views/Home.vue' Vue.use(VueRouter) const routes = [{ path: '/', name: 'Home', component: Home, // add meta to this route meta: { requiresAuth: true } }, ] const router = new VueRouter({ mode: 'history', base: process.env.BASE_URL, routes }) export default router
Here, we’ve added a meta property requiresAuth to the / route meaning we want users to be authenticated before they can access that route. Note that ‘requiresAuth’ is not a standard property, so you can choose any name you prefer. Whatever value you select at the end can be accessible in the $route object. This meta field at this point would not prevent unauthorized users from accessing that route, we need to hook it up to the Navigation guard.
Navigation Guard
Just as the name implies, the navigation guard helps protect and guard routes based on your preferences (i.e redirect to another page or preventing the navigation). This feature works together with the Route Meta Fields to effectively guard the routes of your application. There are 3 ways of adding router guard in our app:
1. In-component
Vue offers the option to configure your router guard for a particular route directly inside your components. Here’s an example in our Home.vue file:
<template> <div class="home"> <p v-if="loading" class="post--empty">Loading....</p> <ol v-else> <!-- add this text to your template --> <p v-if="guest">Hi Guest</p> <li v-for="post in posts" :key="post.id"> <router-link :to="{ name: 'Post', params: { id: post.id, post: post } }" > </router-link> </li> </ol> </div> </template> <script> // @ is an alias to /src import axios from "axios"; export default { name: "Home", data() { return { posts: null, // add this property guest: false, loading: false, }; }, // add this function beforeRouteEnter(to, from, next) { if (to.matched.some((record) => record.meta.requiresAuth)) { // this route requires auth, check if logged in // if not, display guest greeting. const loggedIn = JSON.parse(localStorage.getItem("loggedIn")); if (!loggedIn) { next((vm) => { vm.guest = true; }); } else { next(); } } else { next(); // make sure to always call next()! } }, methods: {...} }; </script> <style>...</style>
Here, we’re adding a paragraph that is only visible to unauthenticated users. We also add a property that controls the visibility of this text. Finally we have a router method beforeRouteEnter in which we also connect the router guard and check if the user is authenticated or not using a value that would be manually added later. We also have an if/else statement, and inside this statement, we change the value of guest depending on the authentication of the user.
And in your App.vue, add this lifecycle to the file.
export default { mounted() { localStorage.setItem("loggedIn", false); } };
So if you refresh your app, we should see the text we added in the Home.vue file.
Guest text visible. (Large preview)
2. Per-route
We can also add a router guard to our apps per-route in our router file as another property inside the specific route object. Here’s an example:
{ path: '/', name: 'Home', component: Home, // add meta to this route meta: { requiresAuth: true }, beforeEnter: (to, from, next) => { if (to.name !== 'Home') { console.log('Per-Route navigation guard ti wa online'); next() } else next() } }
Here, we add a router guard to the / route and we’re currently just logging a random text to the console but we can do a couple of things inside this guard. Now, each time you visit the home page, you would see this in your console:
Message printed in terminal. (Large preview)
3. Globally
We also have the option of creating a router guard that works globally for every part of the app (provided it meets the guard condition). This global guard is created in the router file just like the per-route guard but instead of defining it inside a specific route object, it is defined as a method of the router instance. For an example of how it works, we’re going to create a new file and route in our app and name it guest.vue, then add the following lines of code to the file.
<template> <div> <h1>Guest page</h1> <p>You're seeing this page because you are not logged in</p> </div> </template> <script> </script> <style></style>
Next, we create a /login route with this newly created page and add a meta property to other existing routes.
// create new route { path: '/login', name: 'login', component: () => import ( /* webpackChunkName: "auth" */ '../views/guest.vue') }, { path: '/:id', name: 'Post', props: true,a // add meta property meta: { requiresAuth: true }, component: () => import ( /* webpackChunkName: "post" */ '../views/Post.vue') }
The next thing would be to create the global navigation guard for all routes that require authentication and check the user’s authentication using localStorage (previously created). We would redirect users that have a loggedIn value of false to /login.
router.beforeEach((to, from, next) => { if (to.matched.some((record) => record.meta.requiresAuth)) { // this route requires auth, check if logged in // if not, display guest greeting. const loggedIn = JSON.parse(localStorage.getItem("loggedIn")); if (!loggedIn) { next({ path: '/login' }); } else { next(); } } else { next(); // make sure to always call next()! } })
So if you check your app in your browser, you would notice it is currently on this page:
Guest page. (Large preview)
If we try to navigate to any of the existing routes, we would automatically get redirected to this page no what we do and that means our router guard is effectively guarding those routes.
Conclusion
We can see that the Vue Router is a very powerful tool that can be used for more than just creating routes in your application. We have learned how to configure the scroll behavior of routes in our application, the different ways to add transitions to routes in our app, how to fetch data from an API before a component gets mounted, how to use meta property for our routes and the different ways to set up router guard.
Resources
Vue Router
CSS Transitions In Vuejs And Nuxtjs
(ks, ra, yk, il)
Website Design & SEO Delray Beach by DBL07.co
Delray Beach SEO
source http://www.scpie.org/how-to-do-more-with-vue-router/ source https://scpie.tumblr.com/post/628084272888184832
0 notes