#yorututorials
Explore tagged Tumblr posts
Visit Tumblr Blog
Explore Tumblr blogs with no restrictions, modern design and the best experience.
Last Seen Tumblr Blogs


Fun Fact
Premium Tumblr themes are available from anywhere between $9 to $49.
Text
Tutorial: Converting all types of CAS CC to work with color sliders (+ how to disable it)
This enables CAS CC to work with Color Sliders for Hair, Clothes, & Accessories by thepancake1 and @mizoreyukii.
Since S4 Studio only let's you batch convert hairs and update makeup for compatibility, I present to you: TS4AlphaConverter_2_2_0_0 by CmarNYC.

Keep in mind that enabling CAS CC for color sliders will increase the file sizes of your .package files!
Sliders will also always affect all the texture, i.e. you can't exclude accessories like buttons or zippers, so some textures might not work well.
Also check out this tutorial: Fixing slider compatible CAS CC with broken textures

💜 Requirements:
Color Slider mod
TS4AlphaConverter_2_2_0_0
CAS CC you want to enable
Featured CC by @trillyke @daylifesims @jius-sims @magic-bot
💜How to enable CC for color sliders
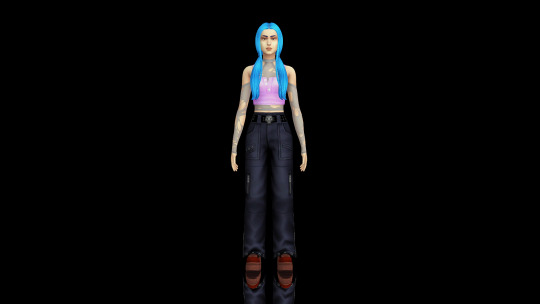
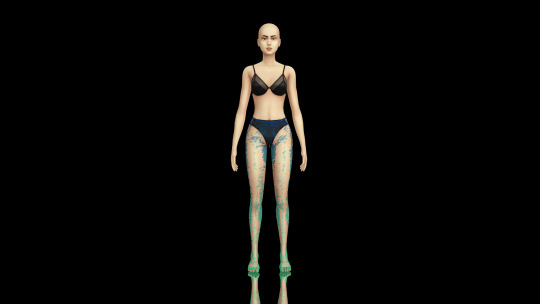
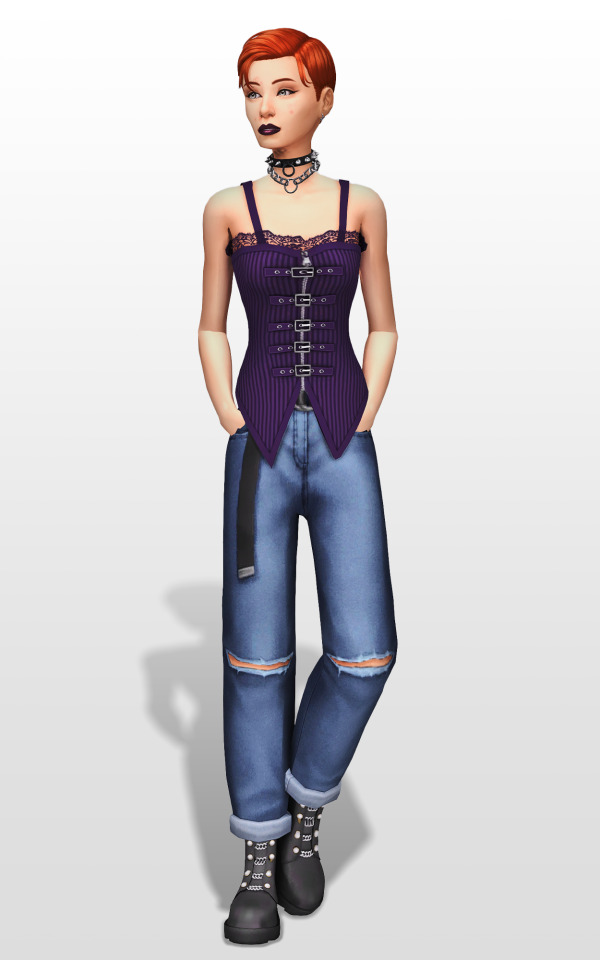
1. Download the required program, mod and CC you want. This is my outfit before sliders:

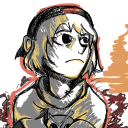
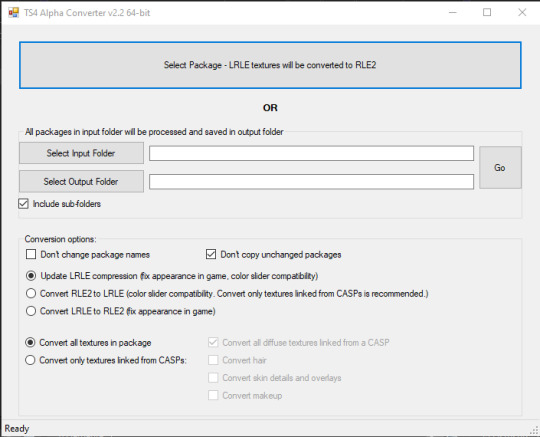
2. Open up Alpha Converter
3. For enabling sliders, you can only use the folder option and not single files: Select your input folder which contains the .packages you want to enable. Then select your output folder where you want to save the new files. "Include subfolders" is handy if your CC goes into more folders inside your input folder. It will reproduce the same file structure.
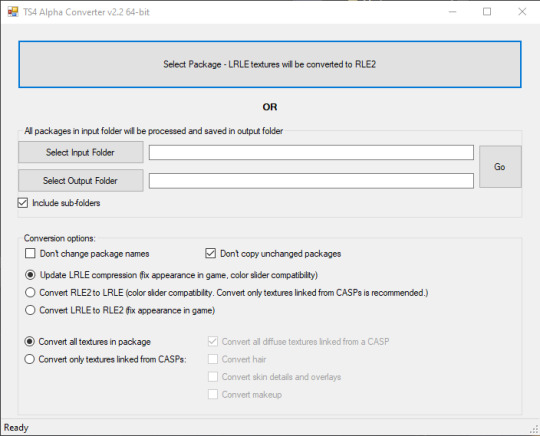
4. I would recommend enabling "Don't change package names" so you can just replace your input files directly, otherwise it adds "_Fixed" at the end of the filename. I will also leave "Don't copy unchanged packages" checked.
5. Next we will select "Convert RLE2 to LRLE" to enable color sliders. I will explain the others later. It then enables "Convert only textures linked from CASPs" which is good, e.g. it will only target actual CAS CC textures then and no Build & Buy for example. Leave "Convert all diffuse textures linked from CASP" checked if you want to convert all types of CAS CC.
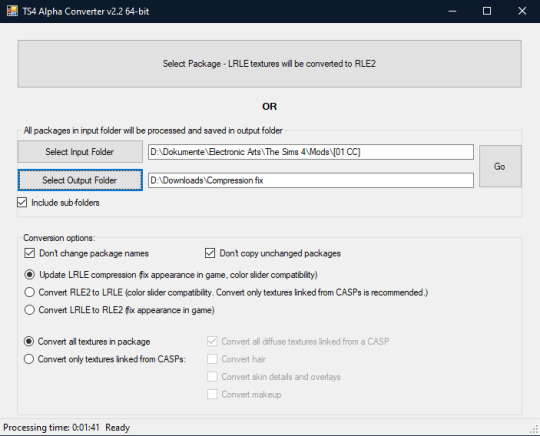
6. These are my finished settings:
7. Press "Go". It will then take a while depending on file amount and swatches, as it will have to go through textures one by one.
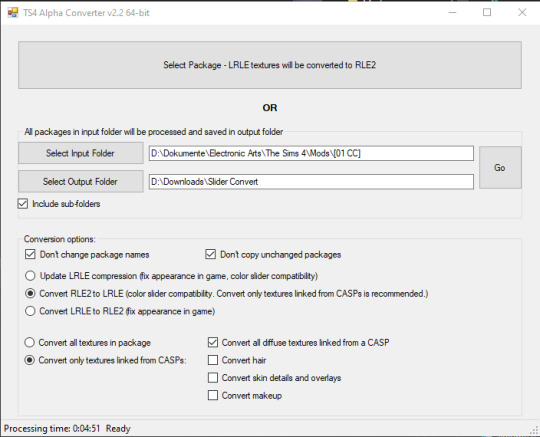
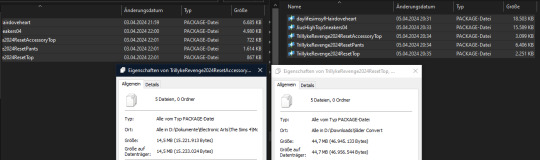
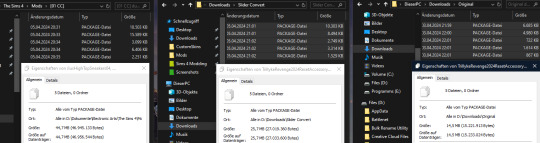
8. Check your finished files. The file size should be bigger, in this case it went up by 30 MB for only 5 files.
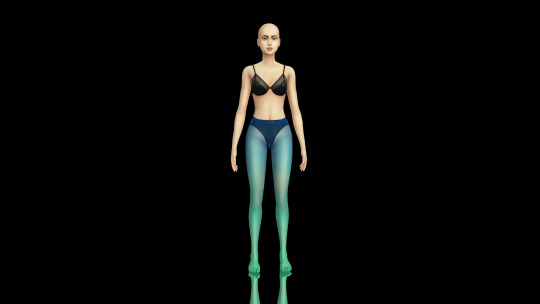
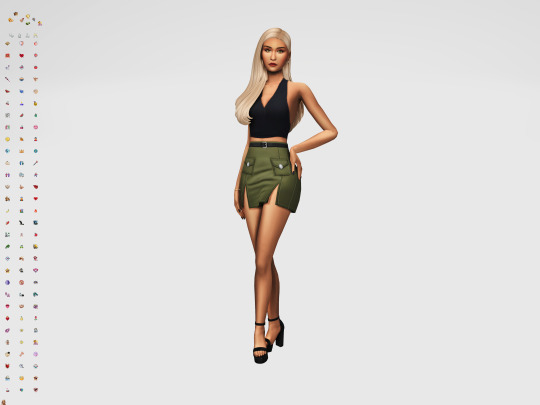
This is how the outfit looks after applying sliders to all pieces:
💜 How to disable CAS CC for color sliders
This time select "Convert LRLE to RLE2". You can leave "Convert only textures linked from CASPs".

2. Press "Go" and let it do it's thing.
3. As you can see, the file size went down again (middle), but it is not the same size as from the original file (right).
You will no longer be able to use sliders on the CAS CC piece, except transparency, which always works.
💜 Fixing slider compatible CAS CC with broken textures
If some of your CAS CC displays huge areas of missing, pixelated textures there is an issue with compression.

I don't know how and why this happens, but check out * this tutorial * on how to fix it.
@thefoxburyinstitute @maxismatchccworld @emilyccfinds @sssvitlanz
#ts4 tutorial#ts4 resources#tutorial#Sims 4 tutorial#s4 guide#ts4 guide#Sims 4 studio#Sims 4 cas#ts4 cas#color slider#cmarnyc#thepancake1#mizoreyukii#yorututorials
109 notes
·
View notes
Note
As an addition to this post by @trillyke:
Another option is to open the file in S4 CAS Tools.
This makes it quicker, as you don't have to edit each and every swatch, but can edit the package as a whole.
Under "Clone package editor" open your package file.
2. On the right, under "Exclude parts" scroll down completely and uncheck "Fingernails",

3. Press "Commit Changes" and then "Save Package".
Hi! I saw you had some issues where some overlays were preventing the use of nails cause they were in the gloves category and you can't both at the same time, at least that's what I understood, you think you could shows us how to fix this? I have some old overlays from creators that are not longer making cc that have the same issue and I would like to fix it myself please
Heya!! Yes, it is a very easy fix luckily!
So if you make an accessory or overlay in the Gloves section it automatically disables the Nails section and you can't use nails at the same time! To enable it these are the steps you have to make in Sims4Studio!
To open the pic in big click here.
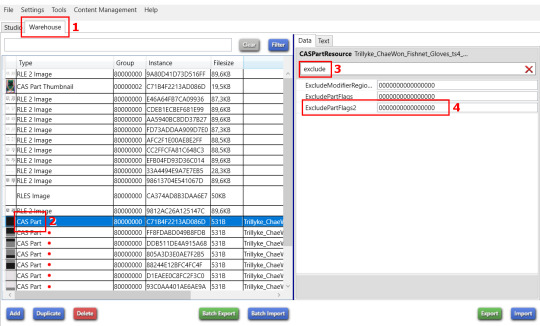
0. Open the package file in S4S! (Click on My Projects and search for the file) 1. Go to Warehouse!
2. Click on a CAS Part!
3. On The right side in the search bar type 'exclude'.
4. Change the digits to all zeros for 'ExcludePartFlags2' (Originally there is a 2 hiding in there, make sure you change it to a 0)
5. You have to make this change to ALL the CAS Parts (which are basically all the swatches the CC has)
6. Don't forget to save!
178 notes
·
View notes
Text
How to create visual "custom categories" with the new Sims 4 Studio Batch-Edit
As discovered by @vyxated Sims 4 Studio now supports batch-changing the Display Index number which allows you to easily sort your CC (see post here)
Using that, you can create visual "custom categories" for any existing category to sort your CC into smaller groups that share a thematic.
━━━━━━ ・❪ ☾ ❫ ・ ━━━━━━
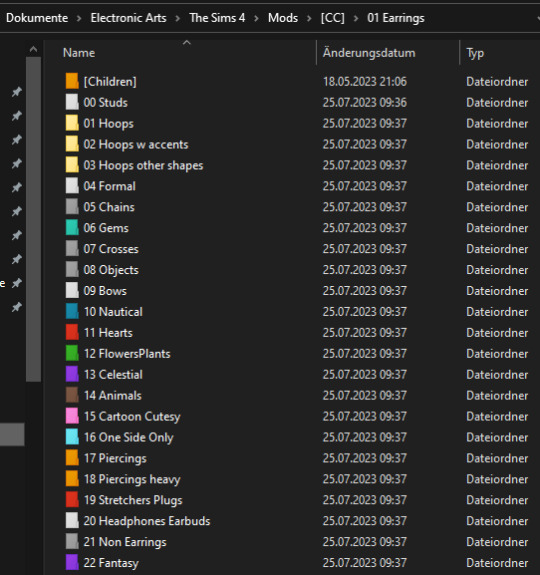
Step 1: Creating folders
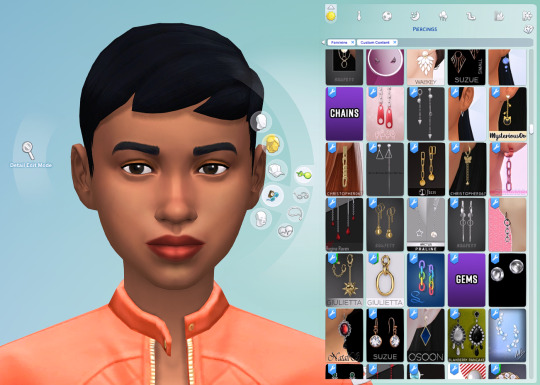
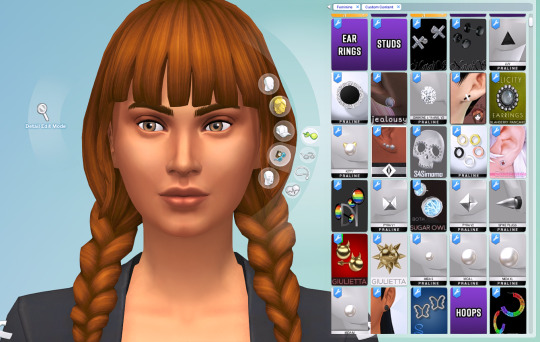
First you need to sort your CC into whatever categories you want. I am sorting my earrings.
( I use Folder Painter to get colored folders)
━━━━━━ ・❪ ☾ ❫ ・ ━━━━━━
Step 2 (Optional): Creating dividers
I highly recommend you to make some sort of divider for your categories (basically like my TidyCAS).
For that, in S4Studio start out by cloning any basegame CAS item.
I usually always use the sunscreen facepaint, but it doesn't really matter, you shouldnt use smth with a mesh.
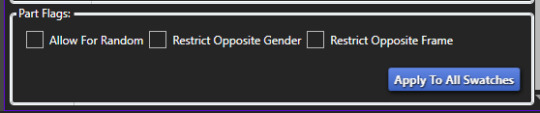
Or you can download this file and place it in Documents\Sims 4 Studio\Mods. It has no texture, is enabled for a lot of things and disabled for random.
IMPORTANT: For every new divider you want to create, you have to clone the CAS item from S4Studio again. You cannot simply duplicate your divider CC and simply change it.
Save it as the number and name of your category. For me it would start with "00 Studs".
In that file, first import any type of custom thumbnail you want to use to display the category name.
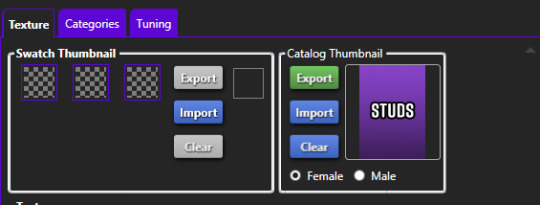
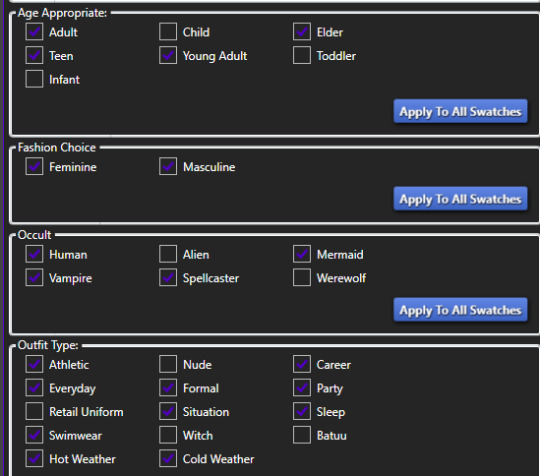
Then, change the category to whatever category you are working on and enable it for all ages, genders, fashion choices & outfit types you want and disable it for random.
Now if you want, import an empty texture to get rid off the sunscreen, but since you won't apply that CC, it won't matter.
Download the empty texture here
Make sure to place the dividers OUTSIDE your sorted folders.
━━━━━━ ・❪ ☾ ❫ ・ ━━━━━━
Step 3: Batch processing in S4Studio
Now you want to batch process your folders in S4Studio.
First click on "My CC" and let it load.

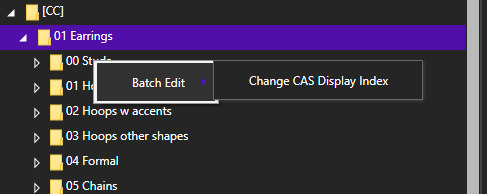
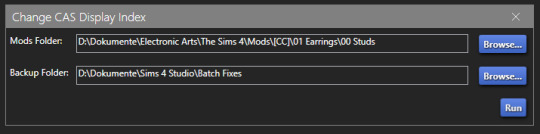
Now right click your first folder and select "Batch Edit - Change CAS Display Index"
In the next window, press "Run".
Then, enter whatever number you want to start with. The smaller the number, the higher up the content is. You can go into negatives and the limit is a veeeeeeeeeery high number.
If you just want to sort some normal CC, I recommend starting with 0 simply.
For the next folder I then always go up by 10, so 0-10-20-30-etc.

Then press "OK".
You will then get a popup with all your changed files (I sorted mine before so it's non lol)
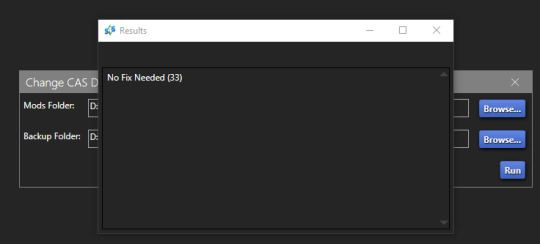
Note: Keep in mind that it does not sort your CC alphabetically. Apparently it's by last modified date.
━━━━━━ ・❪ ☾ ❫ ・ ━━━━━━
If you have done step 2:
Step 4: Sorting your dividers
Lastly you want to make sure that your dividers show up at the beginning of the custom categories.
Open up your divider in S4Studio again if you closed it.
Click on "Warehouse", select the "CAS Part" and on the right in the "Filter" field search for "display".
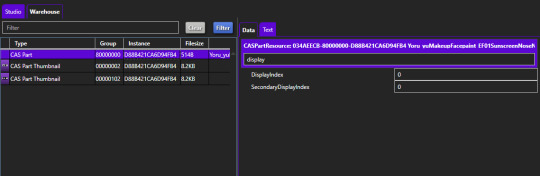
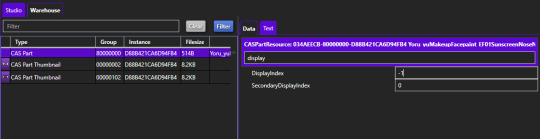
Under "DisplayIndex" you now want to input a number that's before your category.
My category starts at 0, so I will change it to -1. If the category starts with 10, I input 9 and so on.
"SecondaryDisplayIndex" is swatch order, so it doesn't matter here.
Then just save it.
━━━━━━ ・❪ ☾ ❫ ・ ━━━━━━
And that's it!
@thefoxburyinstitute
#ts4 tutorial#ts4 resources#tutorial#sims 4 studio#sims 4 tutorial#s4 guide#ts4 guide#sims 4 cas#sims 4 organazation#ts4 cas#yorututorials
371 notes
·
View notes
Text
How to clone CAS CC into multiple categories while keeping filesize to a minimum
Thanks to Monochaos and amethyst lilac for the help I am using @simandy's Spotlight V2 CC to demonstrate
💜 Explanation
You might want to have some CC in multiple categories, for example if you want to layer them, if you want to have more options if a category is already taken, etc.
This however will create the issue, that it will take up a lot of PC storage space if you keep everything inside the package, textures etc. which can slow down your game.

💜 How does this work
Instead of loading it's own textures, the file you created takes the exact textures from the original file on all of the swatches.
That is why it also only works if the original file is in the game too.

💜 What you need
Your package you want to have in multiple categories
Sims 4 Studio
💜 Tutorial
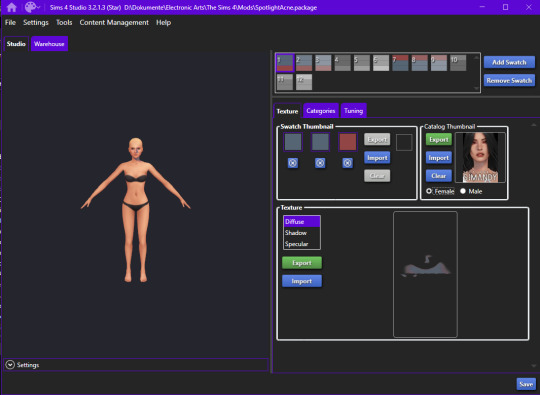
1.Place the package you want to clone inside the Mods folder of Sims 4 Studio, NOT YOUR ACTUAL GAME For me it's: D:\Dokuments\Sims 4 Studio\Mods

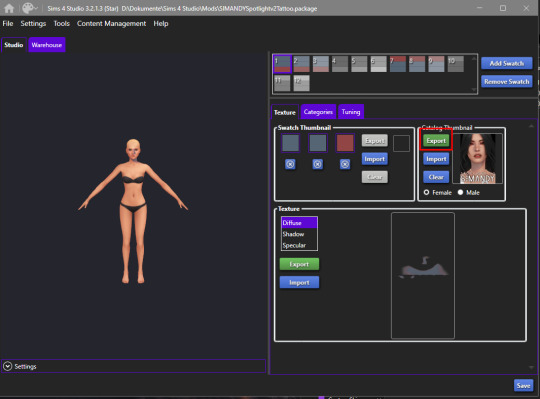
2. Open the package file in Sims 4 Studio and extract the catalog thumbnail. Cloning it will not keep the thumbnail so if you want it, you need to add it manually. Export it as .png.
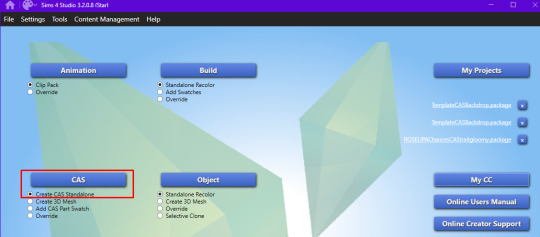
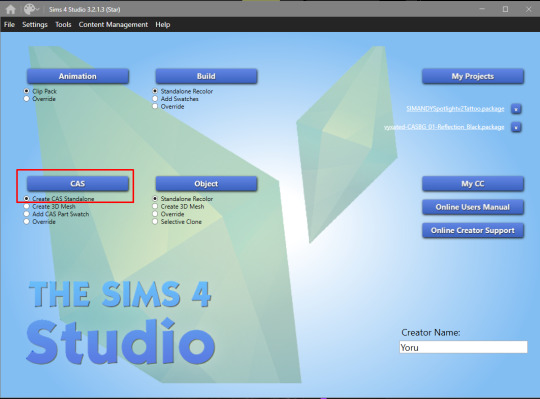
3. Go back to S4 Studio home and select "Create CAS Standalone"
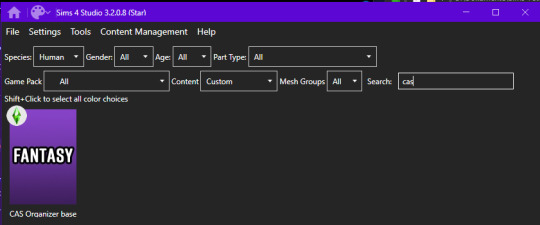
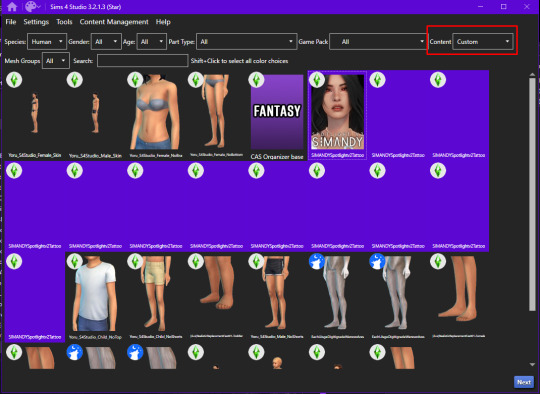
4. Under "Content" select "Custom" and select all swatches of your package by Shift-Clicking the thumbnail. Then press "Next" and save your package under whatever name you want.
5. Import the thumbnail
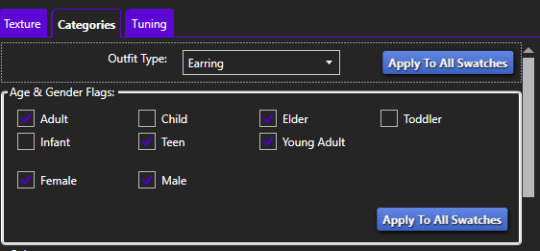
6. Under Categories change "Outfit Type" to whatever you want and press "Apply to all swatches"

7. Save your package.
8. Now take both your package from the S4 Studio mods folder, the original package and and the one you just created and copy them into your actual game mods folder. For me it's: D:\Dokumens\Electronic Arts\The Sims 4\Mods As you can see, the file you just made is significantly smaller.

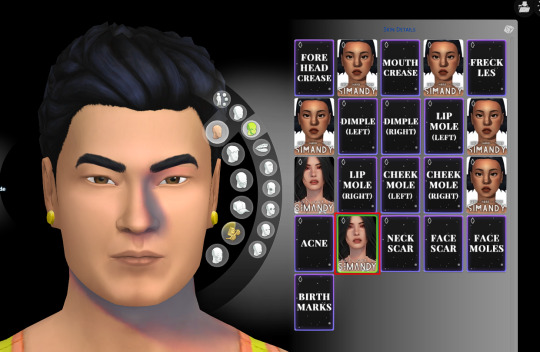
9. Check in-game if it worked. Yup.
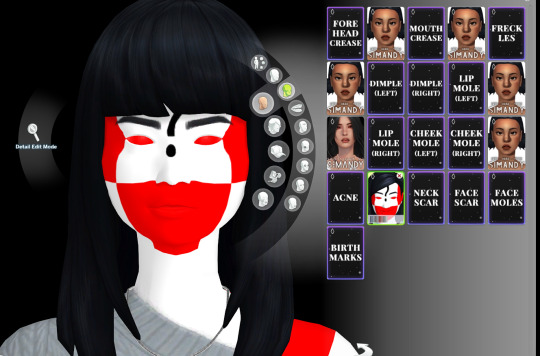
If your Sim has a white and red texture overlay with question marks, you probably forgot to place the original file back into the game.
💜 How do I add the textures back in?
If you want your new package to work on its own again, do this:
1.Make sure the original file you used for cloning is still inside the S4 Studio mods folder
2. Open your cloned package
3. Go to "Tools - Modding - Embed all externally references resources (CAS)"
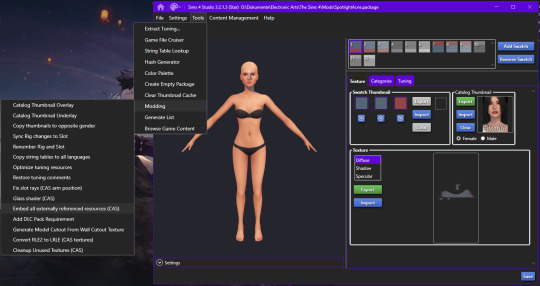
4. Now your Warehouse tab will be full again, the file will work on its' own and the filesize will be around the same size of the original package.

@thefoxburyinstitute
#yorututorials#yoru tutorials#ts4 tutorial#ts4 resources#tutorial#Sims 4 tutorial#s4 guide#ts4 guide#Sims 4 studio#Sims 4 cas#ts4 cas
84 notes
·
View notes
Text
Tutorial: Fixing slider compatible CAS CC with broken textures
If your CAS CC is compatible with Color Sliders for Hair, Clothes, & Accessories by thepancake1 and @mizoreyukii is looking something like this (Tights by @magic-bot):
then I will show you to fix this using TS4AlphaConverter_2_2_0_0 by CmarNYC.
I don't know how or why this happens, but it seems to be an issue with LRLE texture compression.

💜 Requirements:
TS4AlphaConverter_2_2_0_0
CAS CC you want to fix
There are 2 Options you can choose from:
Letting the program fix the LRLE compression if you want to keep the slider compatibility
Disabling the CC for color sliders
💜 1. Fixing LRLE compression
1. Select your input folder which contains the .packages you want to fix. Then select your output folder where you want to save the new files. "Include subfolders" is handy if your CC goes into more folders inside your input folder. It will reproduce the same file structure.
2. I would recommend enabling "Don't change package names" so you can just replace your input files directly, otherwise it adds "_Fixed" at the end of the filename. I will also leave "Don't copy unchanged packages" checked.
3. Next we will select "Updated LRLE compression". You can leave "Convert all textures in package" checked.
4. These are my finished settings:
7. Press "Go". It will then take a while depending on file amount and swatches, as it will have to go through textures one by one.
8. Now it works properly in-game:
💜 2. Disabling the CC for color sliders
Refer to "How to disable CAS CC for color sliders" from * this tutorial *.
@thefoxburyinstitute @maxismatchccworld @emilyccfinds @sssvitlanz
#ts4 tutorial#ts4 resources#tutorial#Sims 4 tutorial#s4 guide#ts4 guide#Sims 4 studio#Sims 4 cas#ts4 cas#color slider#cmarnyc#thepancake1#mizoreyukii#yorututorials
40 notes
·
View notes
Text
How I edit my Sims' shadow in Photoshop
as requested by @adelarsims
& based on this tutorial.
━━━━━━ ・❪ ☾ ❫ ・ ━━━━━━
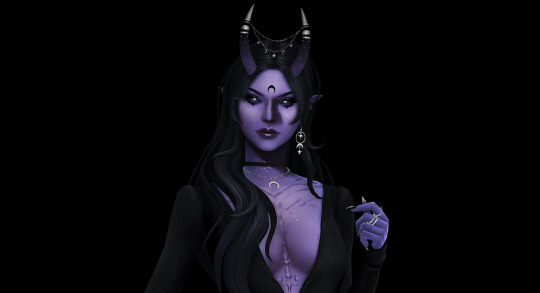
1. Taking a screenshot
First of all take a screenshot of the Sim - I always do CAS but in-game works too ofc.
I take mine in front of a background that loosely matches the color of the background of my edit, in this case white. If you have a fancy CAS background, I recommend this CC by @sonyasimscc to easily get a simple background for screenshots.
I also use this tutorial by @katverse to get really good screenshots, I use 4000x3000px resolution, and this tutorial by @vyxated to not have a CAS UI in your screenshot if you use a reshade like me.
━━━━━━ ・❪ ☾ ❫ ・ ━━━━━━
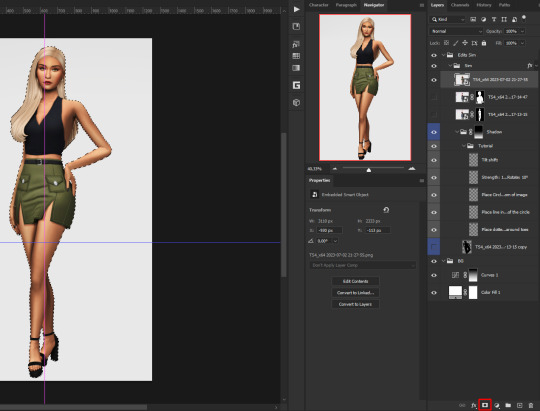
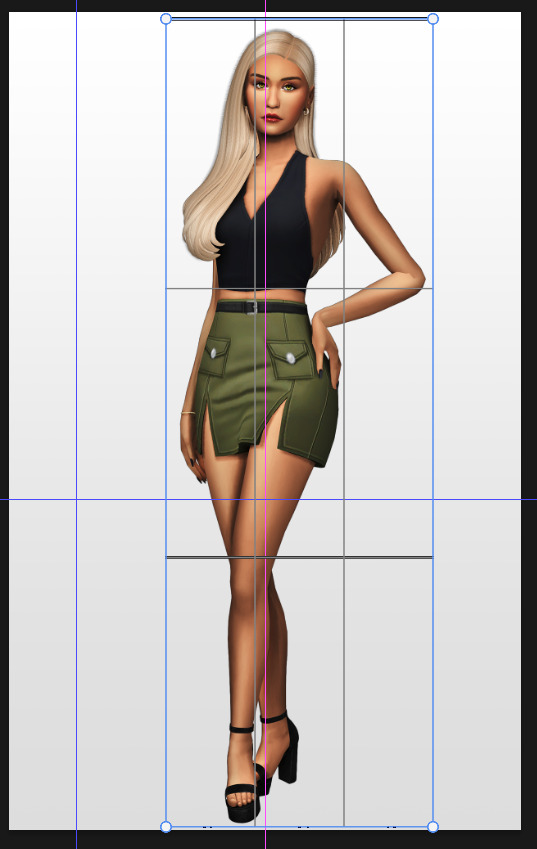
2. Setting up the Photoshop file
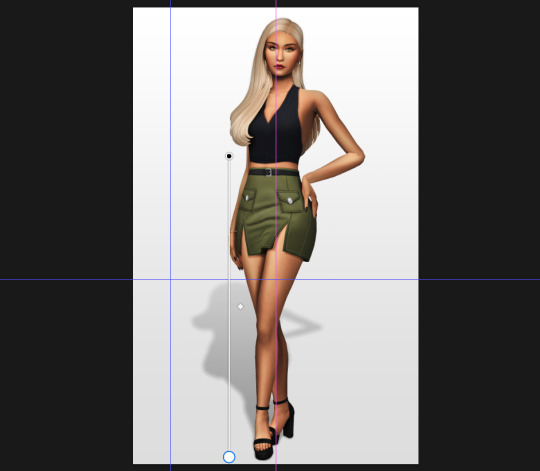
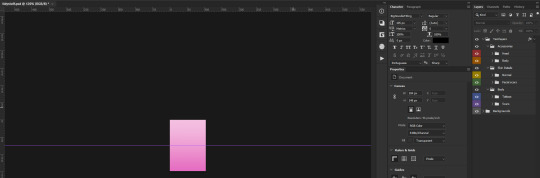
Now in Photoshop create a file, I use 1250x2000 px.
I made a few guidelines, pink being the middle of the image and dark blue guidelines for my shadow editing.

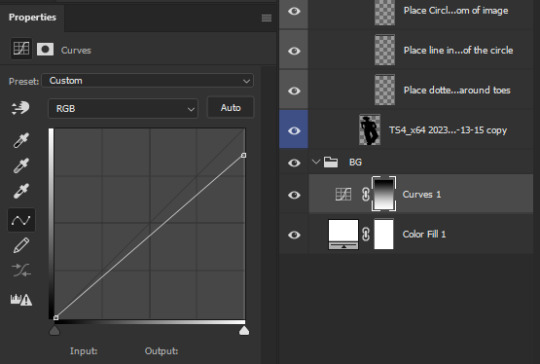
I have a usually white background and a slight Curves adjustment layer with a gradient layer mask so it gets slightly darker at the bottom, completely optional ofc.
━━━━━━ ・❪ ☾ ❫ ・ ━━━━━━
3. Removing the original background
Import the screenshot and place it however you want. I try to align the Sim in the middle and make it as big as possible.
Then select the layer and go to Select - Subject.

This will usually do a decent job.
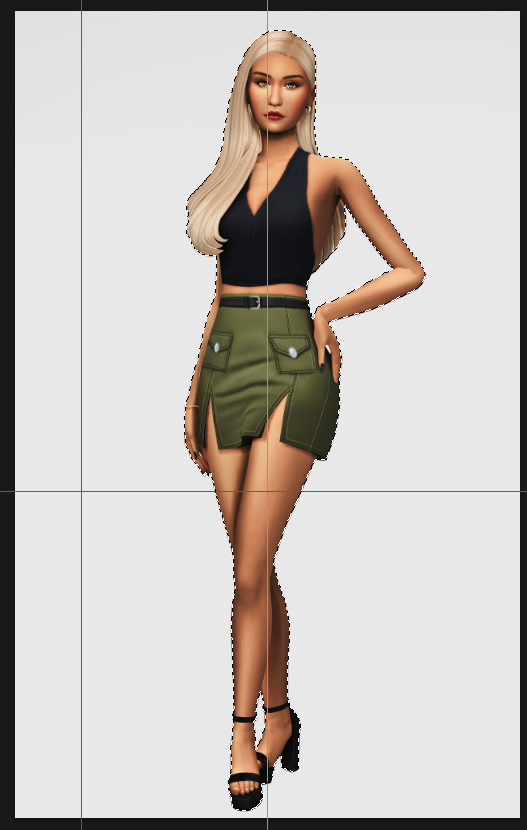
If there are some leftover unselected areas (like on her left hand on the hip) you can either add them to the selection now or edit the layer mask later.
Then create a layer mask.
Since the screenshot has a similar background, it shouldn't show too much if it is not perfect.
━━━━━━ ・❪ ☾ ❫ ・ ━━━━━━
4. Creating the shadow
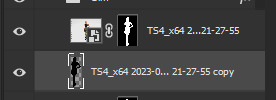
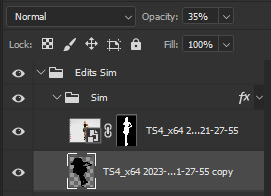
First duplicate the Sims' layer (Shortcut: Ctrl + J).
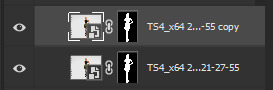
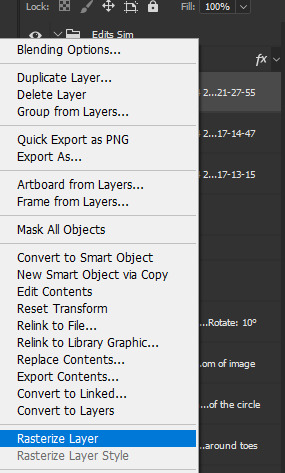
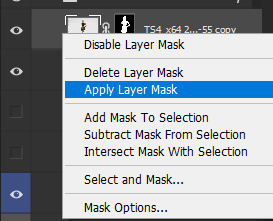
The layer is probably a Smart Object, so you need to rasterize it and right click the layer mask to apply the layer mask.
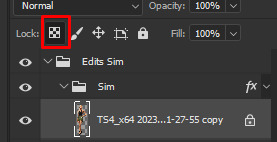
Now lock transparent pixels and paint the layer black.
Next unlock the transparent pixels again and move the black layer below the actual Sim. Leave it selected.
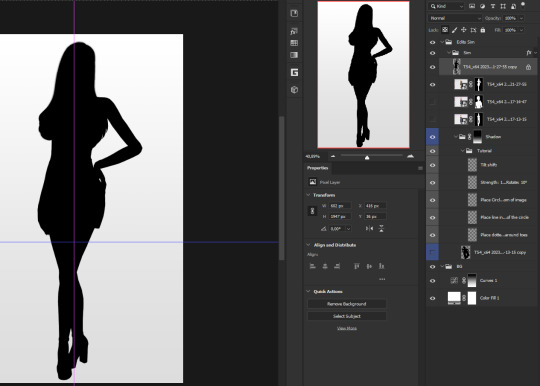
Now you will need the Perspective Warp tool.
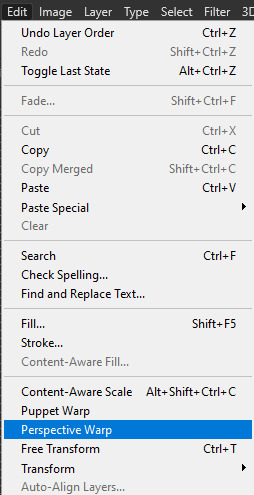
Draw the grid over the Sim, it doesn't have to be perfect, but make sure every part of your Sim is in the grid and nothing pokes out.
Press enter.
Now you want to drag the upper 2 corners separately wherever you want the shadow to be. I always put mine to the left and around the upper thigh area. I also try to match how slanted the left and right side are.
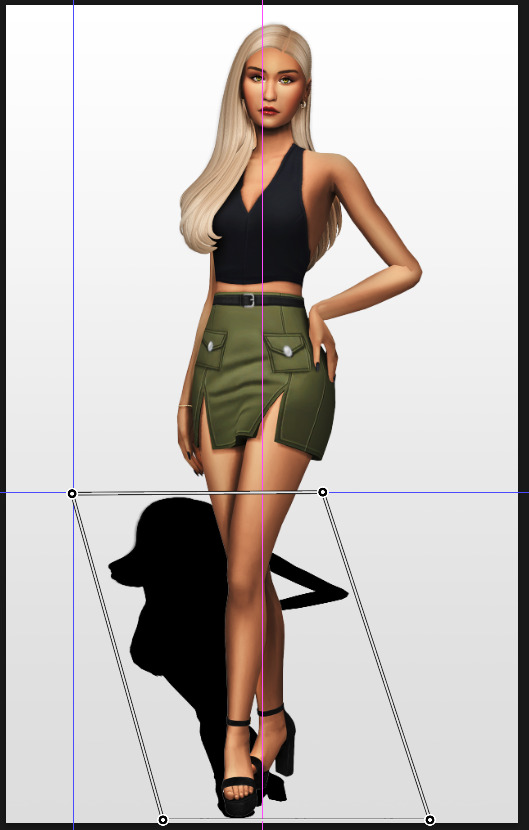
Now move the bottom 2 corners to try and match the shadow with the Sims' feet kinda. It won't work perfectly and you will need to fix it by hand after.
Press enter again.
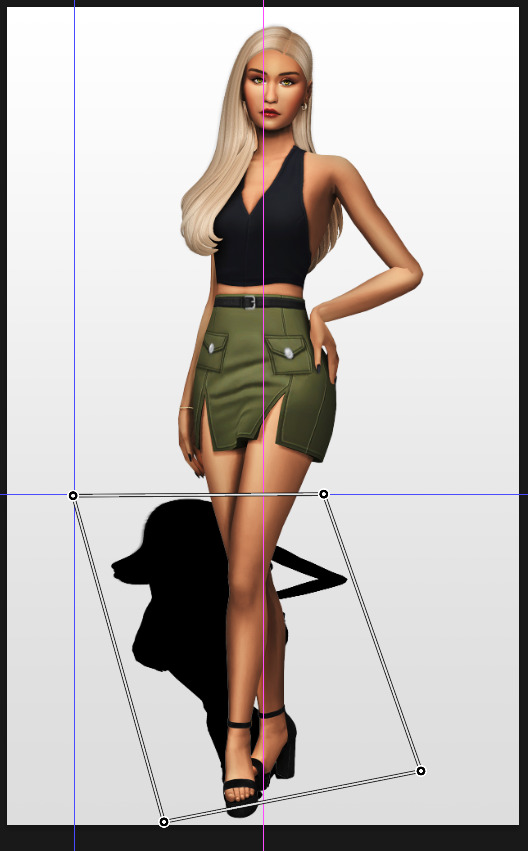
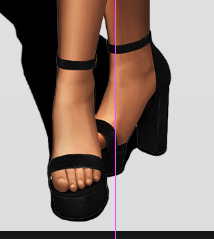
Now go in by hand and fix the shadow around the feet.
Simply paint with black on the same layer and erase parts if necessary.
━━━━━━ ・❪ ☾ ❫ ・ ━━━━━━
5. Making the shadow look nice
I like to change the layer opacity to 35%, but it depends how strong you want the shadow to be.
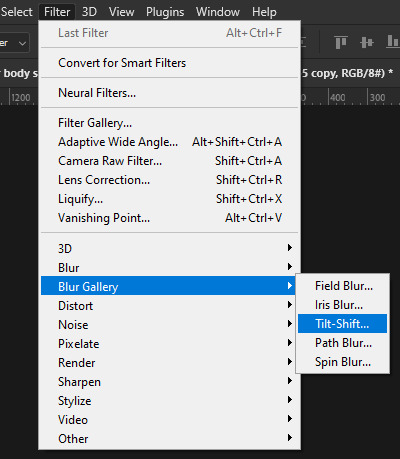
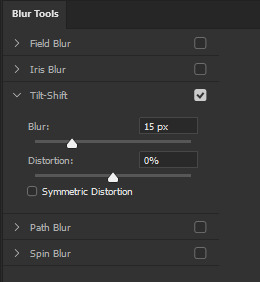
Next I apply a tilt shift blur, unlike in the video.
I use a blur of 15px.
Move the circle at the edge of the image basically or a bit below by dragging the middle of it. Then rotate it on the bottom line by around 10°.
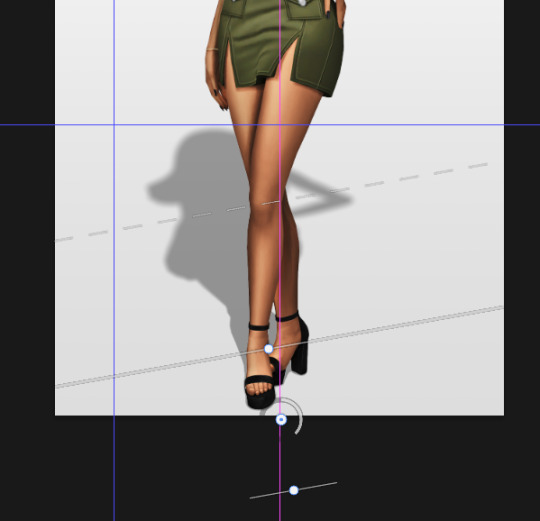
Next move the solid line to the middle of the circle and the dashed line around the ankles.

Then press OK at the top.

━━━━━━ ・❪ ☾ ❫ ・ ━━━━━━
6. Optional: Gradient layer mask
Lastly I like to make the shadow fade out a bit towards the top.
Apply a layer mask to the shadow.
Then get your gradient tool and the default black to white gradient.

Hold shift to make a straight line and drag the gradient down.
This is how I roughly place mine so it's not too strong.
━━━━━━ ・❪ ☾ ❫ ・ ━━━━━━
And that's it!
If you have any questions, let me know~
99 notes
·
View notes
Text
i need this later
Small guide on CAS Poses
Last updated: 25. July 23
This will be a tutorial on how you can organize your CAS poses. I will give you an overview of which traits have which animations and I will show you how you can change the trait the CAS pose replaces.
━━━━━━ ・❪ ☾ ❫ ・ ━━━━━━
Q: What are CAS poses? A: CAS poses are used to take pretty screenshots in CAS. They replace the normal animations that play when you select any trait. This works for all ages of Sims and also pets, but it does not work for occult forms, as you cannot change traits while in occult form.
Pose by @catsblob

Which CAS traits use which animations
First I will be listing all CAS traits with the name of their animation from Sims4 Studio. Some traits share the same animation, therefore you can't have animations for all of them.
You can find the Google spreadsheet here: https://docs.google.com/spreadsheets/d/1eYwZzo_tBA-vhxFXz4ANd0n075Ls_cEbfiQlaM0QNtU/edit?usp=sharing
━━━━━━ ・❪ ☾ ❫ ・ ━━━━━━
How to organize your CAS poses
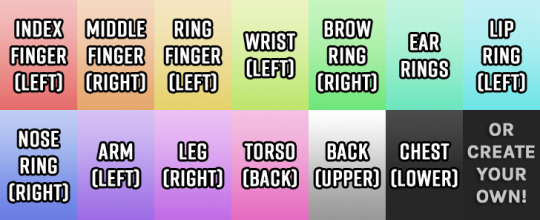
I wrote down the name of the CAS traits in front to make sure i don't use the same ones multiple times and kept the original name of the CC.
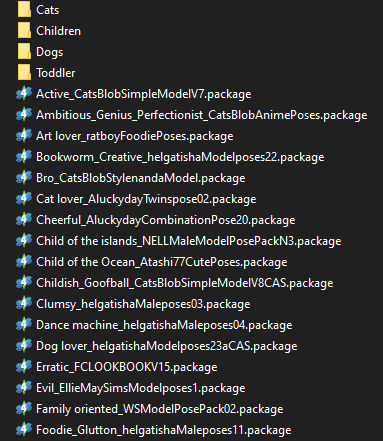
It's also nice to write down which traits you still can use for CAS poses (I crossed the traits out as I don't own the packs yet):
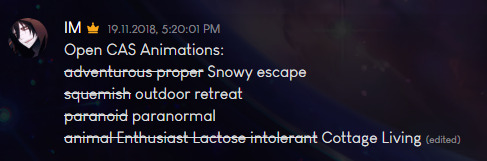
━━━━━━ ・❪ ☾ ❫ ・ ━━━━━━
How to change which CAS trait poses use
Most pose creators offer 1 or 2 CAS traits for their CAS poses, but if you already have poses installed for those, you can easily change that to any other CAS trait.
Requirements:
S4 Studio
The CAS pose you want
The trait you want to use
1. Download and install S4 Studio 2. Download the poses you want
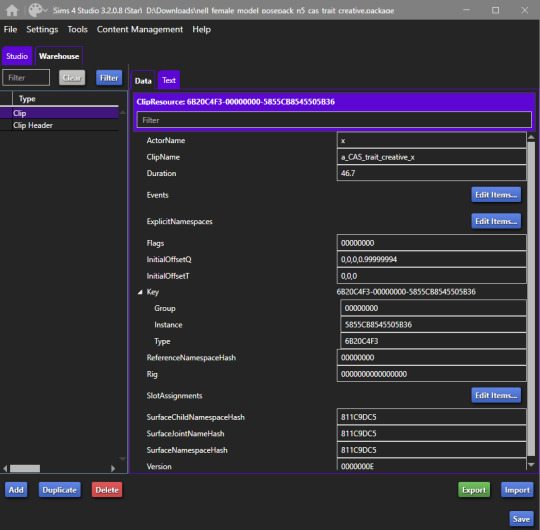
3. Open up your downloaded pose and go into the warehouse tab.
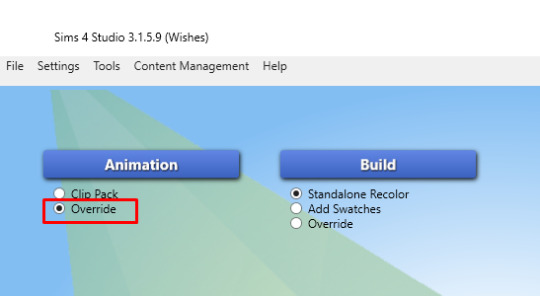
4. Open a second S4 Studio, select “Override” under “Animation” in the main menu.
5. Select the animation name according to the spreadsheet of which trait you want to replace. I will just use the trait "Proper" for adults, so I select "a_CAS_trait_proper_x"
6. Save the file as whatever, you only need it for values and not the file itself. This is your Source. Then also go into the warehouse tab.
7. Now you need to copy over the values in "ClipName" and "Key-Instance" from the source file to the animation you want to change the traits in. They text after "Key" will change automatically later.
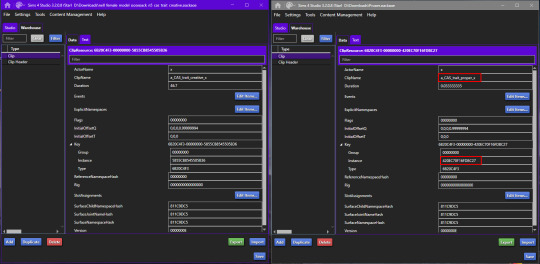
8. Now do that for both Types "Clip" and "Clip Header".
9. The Warehouse should now look exactly the same for both files.
10. Rename the animation files to however you organize your animations. I will add "Proper_" as a prefix for my package (see "How to organize your CAS poses" above).
11. Done!
━━━━━━ ・❪ ☾ ❫ ・ ━━━━━━
Bonus: My favorite CAS pose creators
@catsblob @helgatisha @nell-le @ratboysims @roselipaofficial @a-luckyday
━━━━━━ ・❪ ☾ ❫ ・ ━━━━━━
@maxismatchccworld @sssvitlanz @emilyccfinds
#sims 4#s4 studio#sims 4 tutorial#sims 4 cas poses#sims 4 cas poses tutorial#s4tutorial#s4guide#sims4#ts4#s4#sims tutorial#yorututorials
383 notes
·
View notes
Text
How to customize my Tidy CAS
Feel free to make your own images and cutomize it to fit your needs. If you want to upload your edited version, please credit and @ me! I'd love to see & reblog them :)
Download the .psd file (Simfileshare, no ads)
━━━━━━ ・❪ ☾ ❫ ・ ━━━━━━
💜 How to use my Photoshop template
I will just be explaining very simple steps.
If you want to change the background color/image, simply create a new layer inside the "Backgrounds" folder an make it whatever you want.

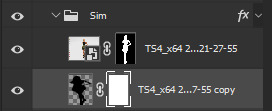
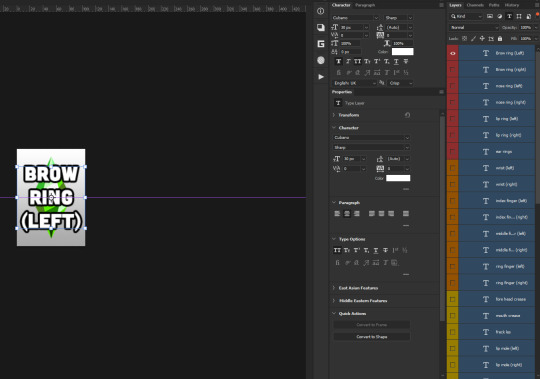
In order to change the font and other text settings, first sort your Photoshop layers by just text:
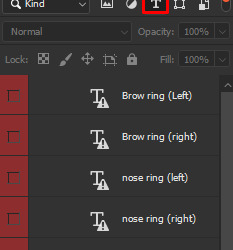
Now if you want the same font on all of them, just select all text layers and edit their properties to whatever you like. You might have to adjust all layers by hand if your font doesnt fit in the window, you have to play around with that.
Next I will change the outline style or rather delete it.
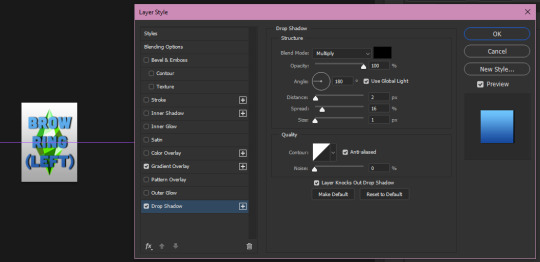
If you want to change the color, make a drop-shadow etc. you have to simple double click on the right side of the "Text layers" folder where it says "fx".
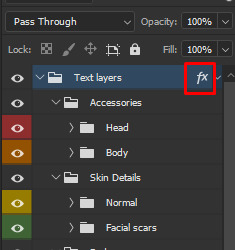
Now you can adjust the style to whatever you want and all text layers will change.
Lastly you want to save all the organizer separately as .png files. You should have 43 image files after saving all.
━━━━━━ ・❪ ☾ ❫ ・ ━━━━━━
💜 How to load your textures into the merged package file in Sims4Studio
First just open up the package. Since it's merged it will look a bit confusing.
What you want to do is look for all "CAS part Thumbnail" entries. (You can sort by type, that will however mix up the order of the categories so I don't recommend it)
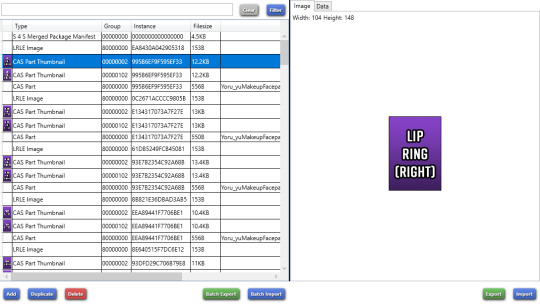
Now on the right click on "import" to import your new image.
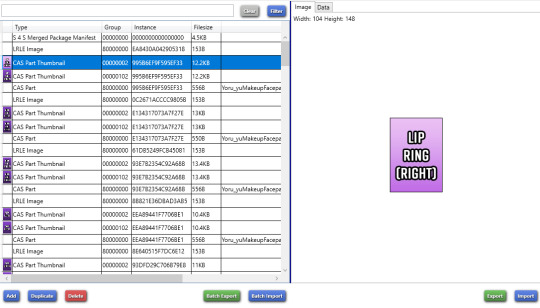
Now do that for every single "CAS part Thumbnail" entry. Make sure you replace it with the right image so the names still match. If you did not sort by type, all the groups of 2 should be the same category.
Then just save in S4Studio and you are done!
53 notes
·
View notes
Text
Small guide on CAS Poses
Last updated: 10. March 2025 (Life & Death, Businesses & Hobbies, Grouch)
This will be a tutorial on CAS poses.
Including:
How do CAS poses work
Which traits use which animations
How you can change the trait the CAS pose uses
How to organize your CAS poses

Q: What are CAS poses? A: CAS poses are used to take pretty screenshots in CAS. They replace the normal animations that play when you select any trait. This works for all ages of Sims and also pets, but it does not work for occult forms, as you cannot change traits while in occult form.
Which CAS traits use which animations
First I will be listing all CAS traits with the name of their animation from Sims4 Studio. Some traits share the same animation, therefore you can't have animations for all of them.
You can find the Google spreadsheet here: https://docs.google.com/spreadsheets/d/1eYwZzo_tBA-vhxFXz4ANd0n075Ls_cEbfiQlaM0QNtU/edit?usp=sharing
How to change which CAS trait poses use
Most pose creators offer 1 or 2 CAS traits for their CAS poses, but if you already have poses installed for those, you can easily change that to any other CAS trait.
Requirements:
S4 Studio
The CAS pose you want
The trait you want to use
1. Download and install S4 Studio 2. Download the poses you want
3. Open up your downloaded pose and go into the warehouse tab.
4. Open a second S4 Studio, select “Override” under “Animation” in the main menu.
5. Select the animation name according to the spreadsheet of which trait you want to replace. I will just use the trait "Proper" for adults, so I select "a_CAS_trait_proper_x"
6. Save the file as whatever, you only need it for values and not the file itself. This is your Source. Then also go into the warehouse tab.
7. Now you need to copy over the values in "ClipName" and "Key-Instance" from the source file to the animation you want to change the traits in. They text after "Key" will change automatically later.
8. Now do that for both Types "Clip" and "Clip Header".
9. The Warehouse should now look exactly the same for both files.
10. Rename the animation files to however you organize your animations. I will add "Proper_" as a prefix for my package (see "How to organize your CAS poses" above).
11. Done!
How to organize your CAS poses
I wrote down the name of the CAS traits in front to make sure i don't use the same ones multiple times and kept the original name of the CC.
It's also nice to write down which traits you still can use for CAS poses (I crossed the traits out as I don't own the packs yet):
Bonus: My favorite CAS pose creators
@catsblob @helgatisha @nell-le @ratboysims @roselipaofficial @a-luckyday
@maxismatchccworld @sssvitlanz @emilyccfinds
#sims 4#s4 studio#sims 4 tutorial#sims 4 cas poses#sims 4 cas poses tutorial#s4tutorial#s4guide#sims4#ts4#s4#sims tutorial#yorututorials
383 notes
·
View notes