Follow for Blender tutorials, tips and tricks!
Last active 60 minutes ago
Don't wanna be here? Send us removal request.
Statistics
We looked inside some of the posts by salemsimsrender and here's what we found interesting.
Average Info
Notes Per Post
1K
Likes Per Post
818
Reblog Per Post
249
Reply Per Post
12
Time Between Posts
19 days
Number of Posts By Type
Note
5
Text
12
Last Seen Tumblr Blogs


Fun Fact
The Tumblr office adopted Tommy, an 11-year-old Pomeranian.
Note
I received this ask on my main account and wanted to share it here too! If there's enough interest I'll do a more in-depth tutorial at some point! (:
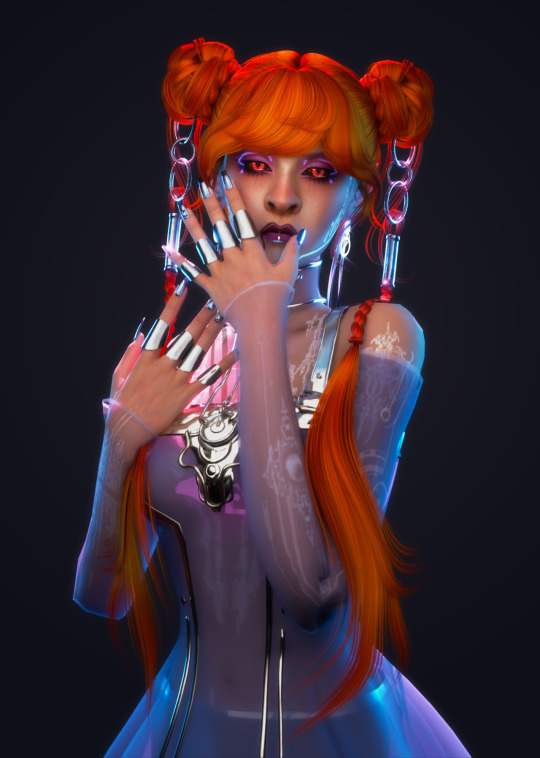
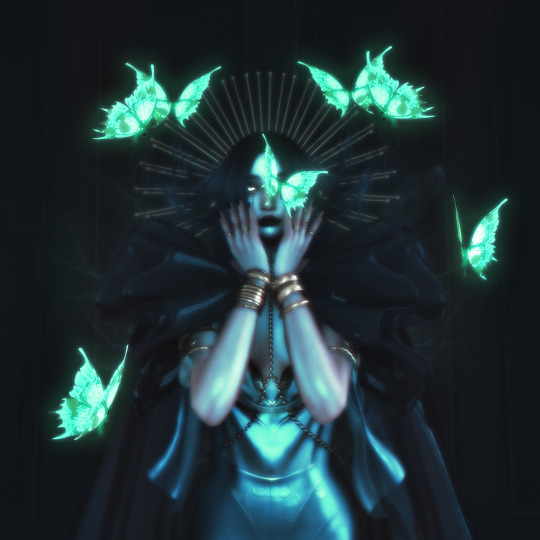
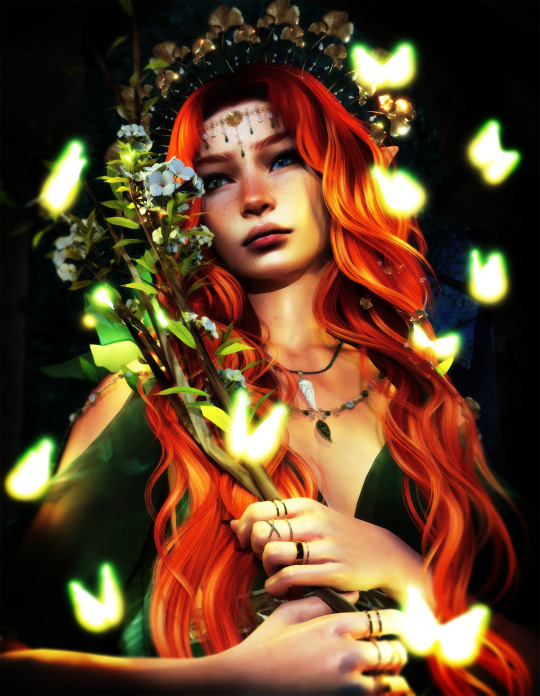
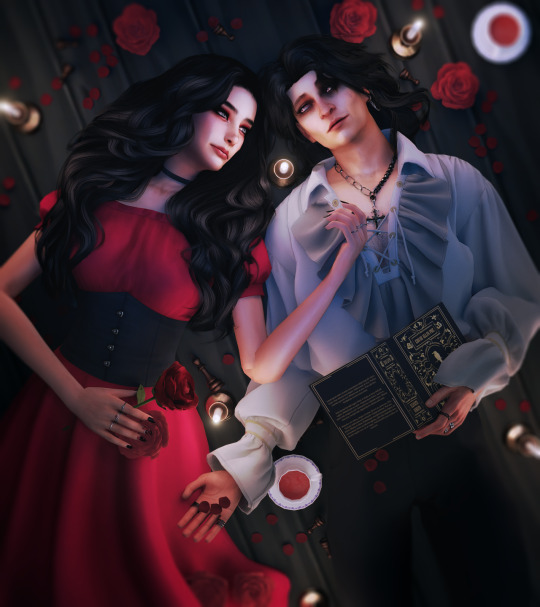
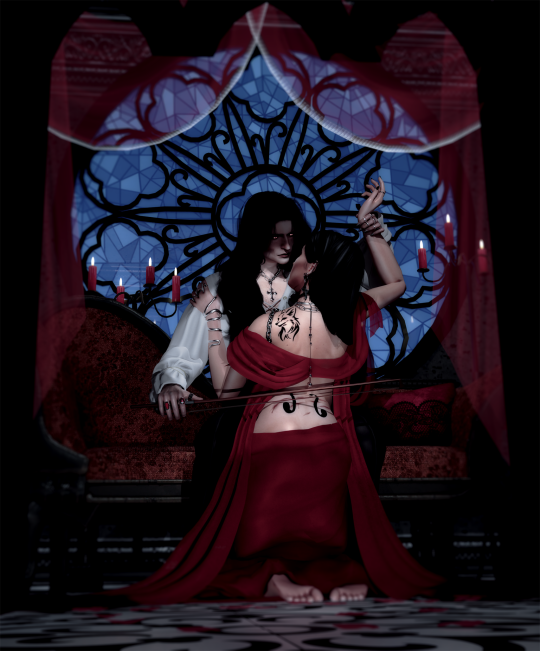
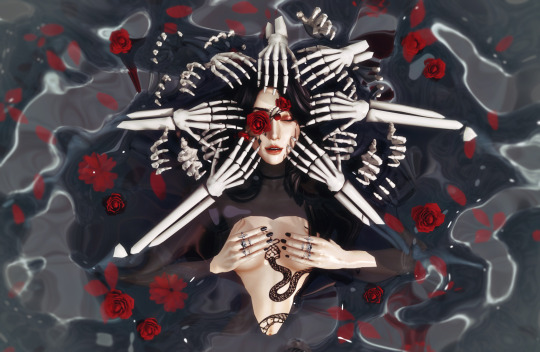
Hello, I hope you're doing well. I had a question about how you were able to get that glowing outline on your death flower's hand?
Thank you <3
Hello! I'm doing well & hope you are too (:
The glowing outline/skeleton hand for my death flower sim is a bit of blender magic and is not achievable in game!
But basically I separated the mesh for my sim's body, "cutting" the hand and half of the chest away from the rest and applying a different texture to it. Then I added in a skeleton body & parented it to my sim's rig as well, so it would sit under the skin.
A full tutorial may come later (if there's enough interest) but here's some closeup screenshots of just her hand.
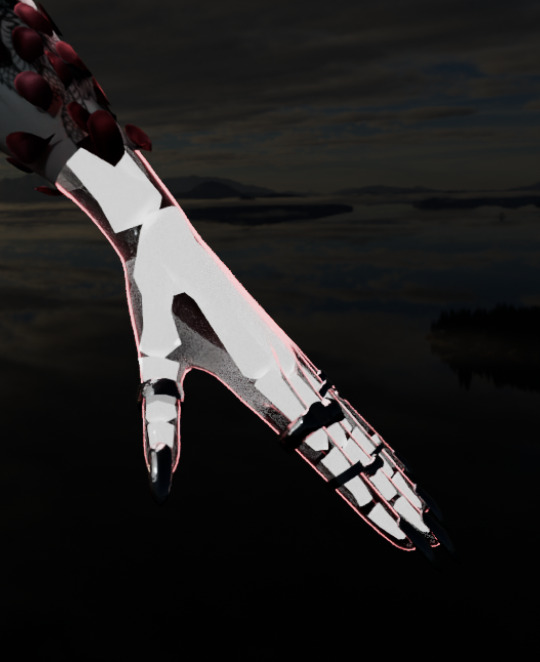
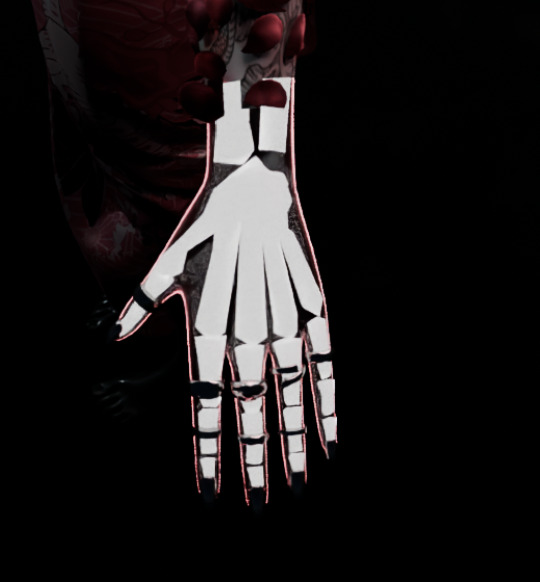
I set the skeleton hand to glow and admittedly I used and adjusted a material from blenderkit for the cut out hand (in this case a material called "green glowing toon shader", which I obviously adjusted to be pink lmao). Both node trees are below:
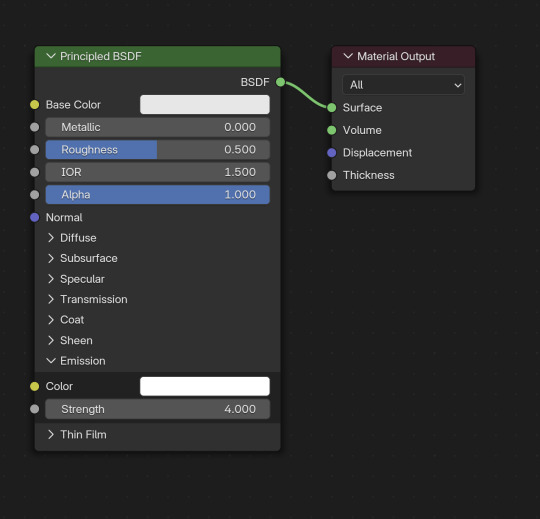
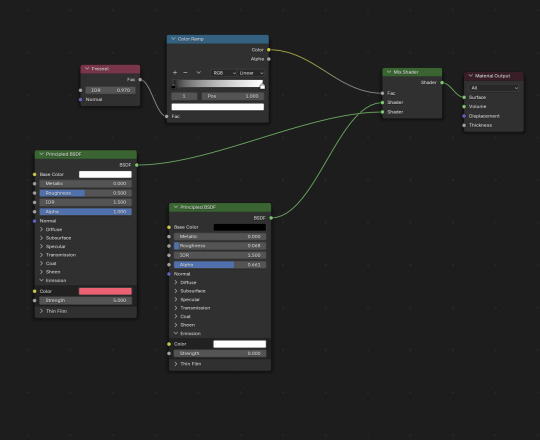
As long as all of these pieces are parented to your sim's rig, they'll pose as normal!
I hope this helps! <3
#salemsims tutorial#render school tutorial#sims 4 render tutorial#render tutorial#blender tutorial#tutorial
8 notes
·
View notes
Note
are there any photoshop tutorials you recommend? I usually just use procreate but now I’m looking for a faster process.
Heyo! I'm so sorry I'm replying to this so late, I was out of town!
What kind of tutorials are you looking for specifically? I can help better if I have a direction.
But as far as my own, I haven't posted too many except for this answer to an ask a while ago that outlines my typical editing process!
2 notes
·
View notes
Text
Wipes out my nameFires up my veinsBites in my skinMy heroine
26 notes
·
View notes
Text
⚛ Atomic⚛
Oh, your hair is beautiful Oh, tonight Atomic
Thanks to all wonderful CC creators💕
60 notes
·
View notes
Note
Can I still follow your blender tutorial with the current blender 4.4 version? Thank you
Yes, you can follow my tutorials in newer versions. For the most part everything is mostly the same. The principled BSDF node is laid out differently but everything you need is there. And instead of the “alpha hashed” setting, you’ll have to change “blended” to “dithered” but I can’t think of any other glaring changes off the top of my head.
Also I’ll be reworking my older tutorials soon to support the newer versions of blender, so stay tuned for that!
6 notes
·
View notes
Text
FYI I’m probably going to be revisiting/redoing my earlier tutorials!
I’ll also be doing another lighting tutorial and a materials tut soon!
#Salem rambles#I had just switched to 4.1 before starting the tutorials#& I look back and don’t love how the results came out#also I need to do a new scene tutorial because I’ve gotten so much better#and can tut it better now!#so look out for that#(:
3 notes
·
View notes
Text
The reason all my tutorials are written 🤣
1 note
·
View note
Text
I wanted to share this render here and say that I mostly used the tricks shared in my most recent tutorial on environmental lighting!
For this render I didn't use the light disc, but I did use an HDRI, point lighting and the glare node! (:

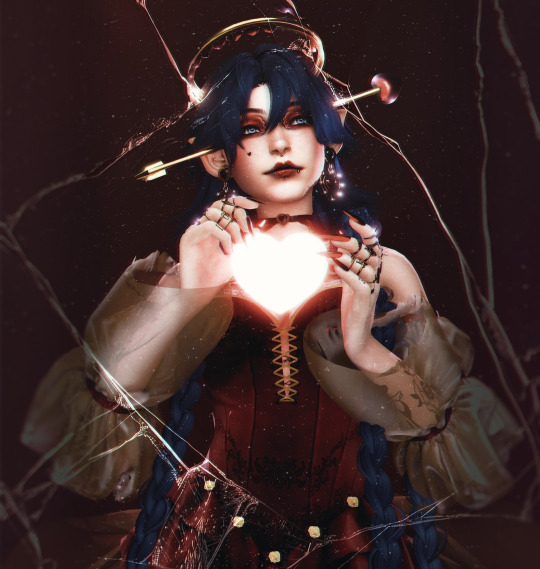
Realized I never used this gorgeous halo by @gloomiegalaxie so figured I should rectify that (; for no particular reason (; (I did edit the colors & glow slightly but still, look at it it's beautiful)
Full size before/after cause I haven't done that in a min:


#reblog#showcase#showcase: salemssims#ts4 render#ts4 edit#sims 4 render#sims 4 edit#ts4 blender#sims 4 blender#ts4#sims 4#sims
248 notes
·
View notes
Text
Sims 4 Render Lighting Tutorial

"Environmental Lighting" won my most recent poll, so let's get right into it!
A few notes before we begin:
I render exclusively in cycles!
This tutorial assumes some basic knowledge of blender
Though this tutorial covers the basics, HDRIs can be used in conjunction with any scene/your built scenes
I decided to focus on environmental and other lighting in this tutorial, since they all kind of go hand in hand.
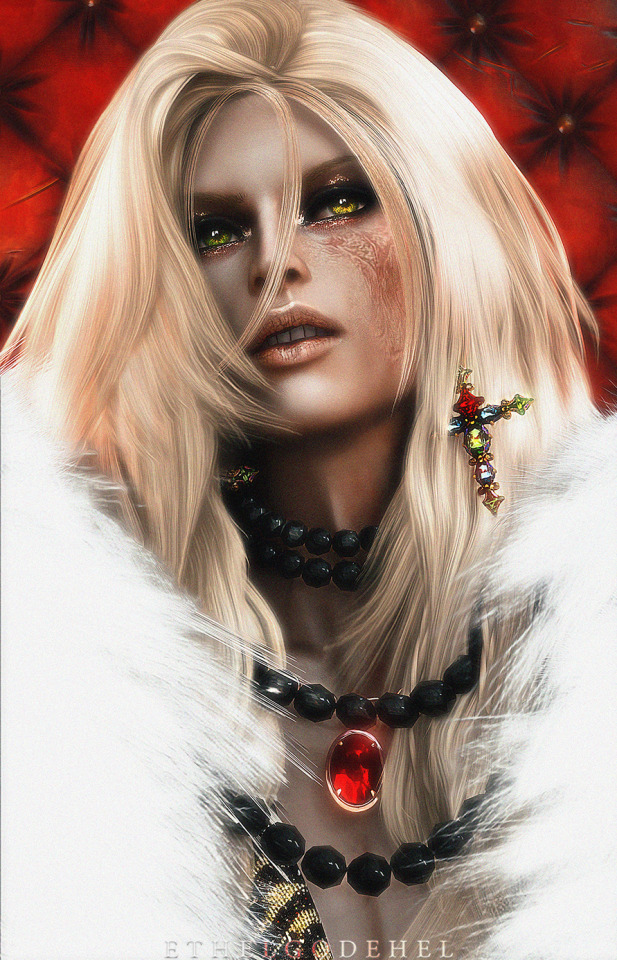
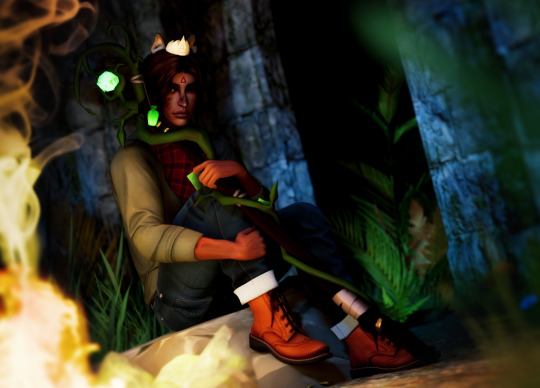
For this tutorial, I'll be using my recent Cupid Sim. Here's a render of her with no additional lighting:

1. Base lighting
In any full body, single sim render (like lookbooks, for example), I really like to use a glowing base. It grounds the sim a bit and casts some interesting lighting on them.
To do this, I add a circle under their feet by pressing shift+A and selecting circle.

An empty circle will appear, but we need it to be a solid disk, so go into Edit mode (by pressing tab while the circle is selected) then hitting F on the keyboard to fill it.


After that, you can go into the Materials tab and add in color and glow.
Mine is adjusted like this:

And gives this rendered result:

2. HDRIs
HDRIs (High Dynamic Range images) are extremely useful when it comes to environmental lighting, I always use them now to add better/more dynamic lighting to my renders.
HDRIs are 3D/panoramic, which makes them extremely useful.
You can find/download HDRIs online in a few diff places: PolyHaven, AmbientCO, and Blender Market.
There are also several available for FREE using BlenderKit (my preferred method).
So how do you use an HDRI?
We can add HDRIs to our render by navigating to the world tab and changing the color to "environment texture".


I chose this vaporware HDRI from BlenderKit, & here it is with no adjustments, but it's looking a little rough so let's adjust it.

By adding vector nodes, we can adjust how the HDRI behaves. Here I mostly use the Z rotation and the background strength:


Here's the same render with the Z-rotation set to 50, 150, 200, & 250.


You can put in any value for the Z-rotation, this is just an example of how the HDRI turns. This is maybe not the best example of the rotation, but putting her in a forest just didn't feel right lmfaooo, hopefully you can see how the light changes on her depending on the rotation.
You can also adjust the strength of the HDRI. Here's the HDRI (rotated to 150) set at .5 and 1.5 strength:


For this tutorial, my favorite lighting is the HDRI set to 150, and the strength set to .5, like this (this is a rendered image):

3. Transparent HDRIs + Point Lights
But I'm not fully happy with the lighting. I don't love how the HDRI is a bit blurry, so I'm going to set it to be transparent.
To do this, go to the Render Tab, scroll down to the Film option, and check Transparent:


The lighting effect from the HDRI will stay the same, but the background will be transparent.
From here, you can add a background (when I do this, I like adding a plane, & moving/shading it until I'm happy (kinda like this):


NOTE that you have to put the plane far enough behind your sim so it doesn't affect the HDRI lighting too much.
SECOND NOTE You can use this same method to use HDRIs in conjunction with scenes. They can provide the perfect backdrop!
This is still really dark, so I'm going to add three point lights: -Two on either side of her head/shoulders that will be smaller (in radius) and brighter -One in front of her to add actual light (so details aren't lost)

Here's how I set up my lights.


The pink light settings are for the two point lights on the sides The white light setting is for the light in front of her
For a basic render, this is almost good enough for me, but I really like the glowing effect I get in my renders.
To achieve this, we have to go to the compositing tab:
4. Compositing
Full disclosure, my compositing tab is set to glow by default (that's how much I love it), so all of the renders in this tutorial have it turned on.
I use the glare node and set it to fog glow.
Here's my preferred setting:

I prefer the fog glow effect, but bloom, ghost, streaks and star are also options.
Here's a guide to the glare node!
Tbh, I never use any of the other settings, so I'll leave this tutorial here for today.
Here's the final result (with no additional editing):

If you have any questions, please don't hesitate to send an ask, message or join my discord (no minors pls) for help! <3
#ts4 render tutorial#ts4 blender tutorial#sims 4 render tutorial#sims 4 blender tutorial#sims render tutorial#sims blender tutorial#salemsims tutorial#render school tutorial#blender
209 notes
·
View notes
Text
Thank you everyone who voted!
Expect a tutorial on environmental lighting within the next week or so!
& after that I'll do one on materials (:
Gonna brush the dust off this blog if it kills me lmao
LOVE YALL
Next Tutorial?
I've neglected this blog for wayyyyyyyy too long, & it's definitely time to brush off the dust.
So!
What kinds of tutorials do you want to see next?
#thank you for voting!#these help so much#tuts take a long time so I don't want to just do them in a vacuum#or on things that aren't useful#<3
6 notes
·
View notes
Text
Next Tutorial?
I've neglected this blog for wayyyyyyyy too long, & it's definitely time to brush off the dust.
So!
What kinds of tutorials do you want to see next?
#ts4 poll#sims 4 poll#ts4 render poll#sims 4 render poll#help#I want to give yall what you want#so just lmk#PLEASE#<3
6 notes
·
View notes
Text
An excellent tutorial by the ever wonderful @wistfulpoltergeist !
How to apply textures in Blender 4.0 For newbies (´。• ᵕ •。) ♡
So you imported your lovely doll into Blender 4.0, but the textures are messed or missing, here's how to apply base simple textures from the scratch!
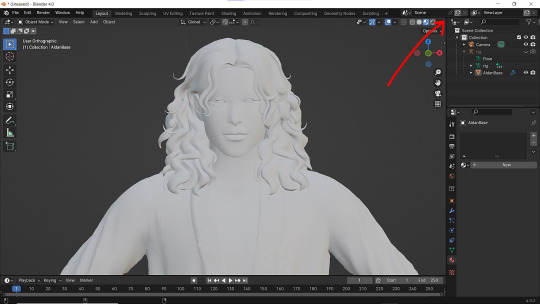
I'm using Blender 4.0.2 (Sorry 4.3, but your EEVEE is currently nothing but tears for me) and my lovely Aidan is here to assist me. SO! Seat your bum comfortable and let's begin!
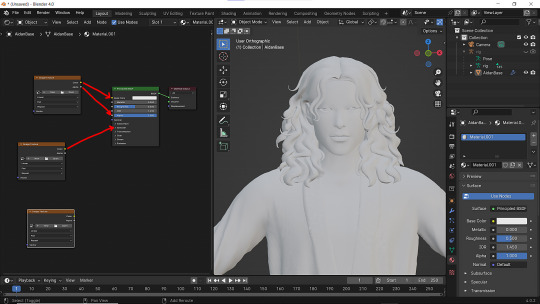
1 - Split your working space by pulling the corner of the screen:
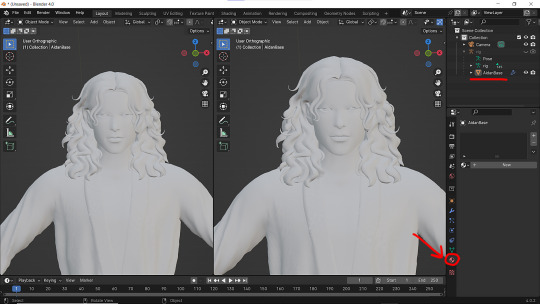
2 - Then click on Material with your mesh selected.
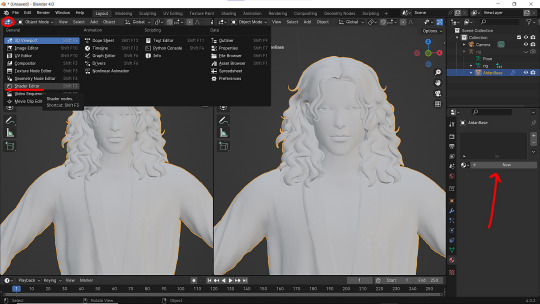
3 - Pick Shader Editor on the left part of the screen and hit New in the Material on the right. You'll get something like this:
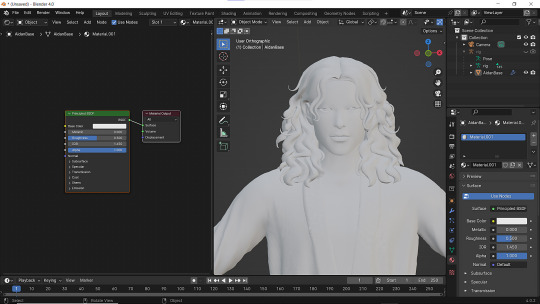

4 - On the left choose Add - Texture - Image Texture. We need three of them at very least :D
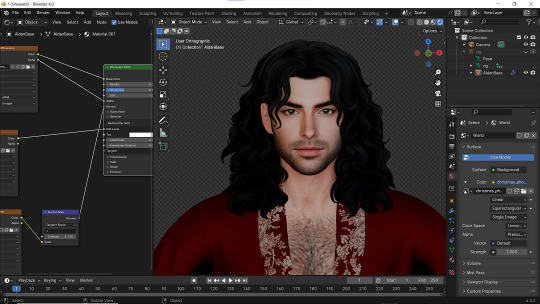
5 - First Image texture: Connect Color to the Base Color and Alpha to Alpha. Second Image texture connect to Specular IOR Level. Don't forget to upload your textures! Color - is well... color pics. Specular looks like Black/White pics and Normal is purple!
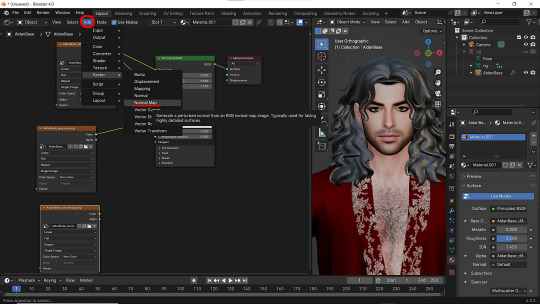
6 - Now add Normal Map. And connect it like on the picture below:
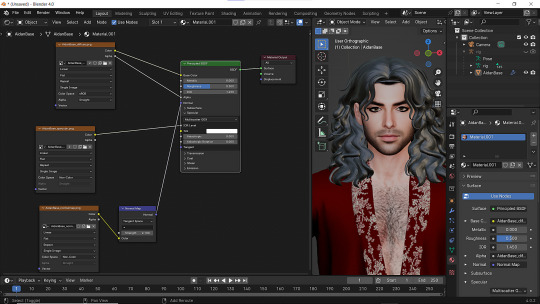
7 - Specular and Normal maps should be NON - COLOR in the Image Texture - Color Space
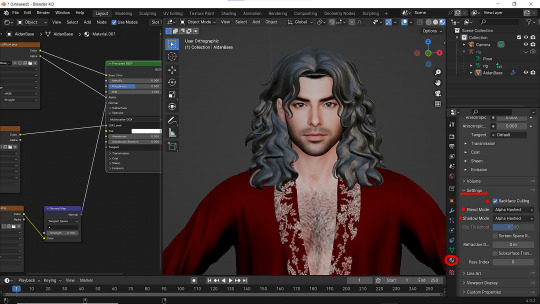
8 - Turn on the alpha. In Material - Settings - Blend Mode/Shadow Mode change on Alpha Hashed + You can check Backface Culling. In some cases it's vital :D
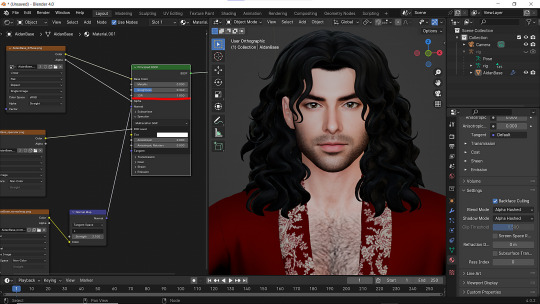
9 - Change the Specular settings in case of weird shining by changing IOR and Roughness parameters.
10 - You did it! (ノ◕ヮ◕)ノ:・゚✧
289 notes
·
View notes
Note
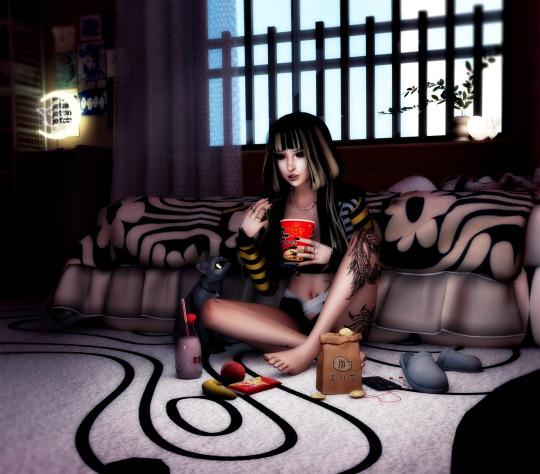
Cigarette smoke tutorial from my main blog!
I'll post it here properly soon! (:
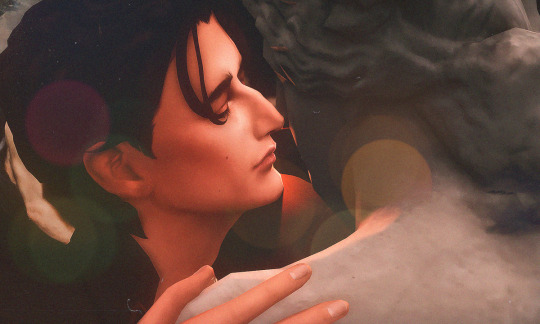
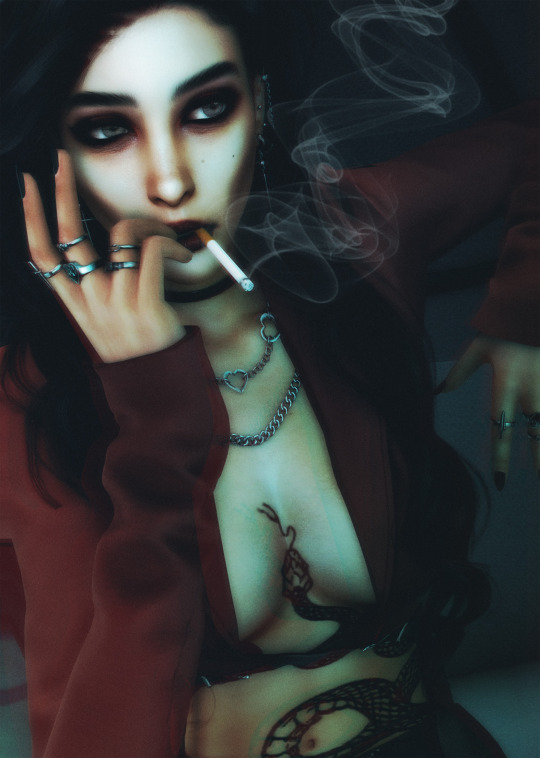
hellooooooooo i love all of your renders and posts you're so talented oml. may i ask for a tut on how you did the smoke in this post? tysm ily :D
Hey, thank you so much ahhh!!! That means so much to me!! ILY! 😘
In truth, my method for smoke is not sophisticated at all... It's actually laughable how simple/easy my process is for this, I'll admit 😅
There is a way to do it right in blender, but for this particular trick I don't use blender (mostly because I've never been able to get it to work right, user error I'm sure haha). But if that's what you're looking for, there's an (untested) tutorial here!
I personally use photoshop for my smoke, and, I admit, brushes!
This tutorial assumes you have a basic knowledge of photoshop, but if you don't or if any of this is confusing feel free to send me an ask and I'll be glad to help!
A while back I scoured the internet for free cigarette smoke brushes and amassed a small collection of them. Unfortunately none of mine are marked with a name or anything so I can't link to specific ones, but here are a few I've found for this tut:
Click with caution! I use ad blockers and these sites are fine for me but as always be careful!
Brusheezy free smoke brushes 15
Brusheezy free smoke brushes 12
Resource boy 200+ free smoke brushes
If you're using photoshop, make sure the brushes are in .abr format!
Once downloaded (& unzipped), if you double click the .abr file it should automatically install and open your photoshop if it's not open already.
I've pulled one of my renders of Ariss (pre-smoke) into photoshop, so let's make some smoke.

Step 1: Create a new Layer!
Make sure you are working on a new, empty layer! This will be important in later steps!

Step 2: Add smoke using your smoke brushes
On the new layer, select the smoke brush you want to use, and make sure your color is set to white/off white/grey.
Hover over your image and select where you want your smoke to be. I was unable to take a screenshot of this process, but I put my smoke here:

Step 3: Adjust opacity/shading

You should have a layer for your smoke now. Double click it and the layer style window should pop up.

In this step... honestly go ham. If you follow exactly what I'm doing, it won't look the same because of differences in our base image (color, brightness, saturation, etc). But I usually adjust:
Blend mode
Opacity
Color overlay
Outer glow
If your smoke isn't on a separate layer, any adjustment you make here will be on the main layer, which we don't want!
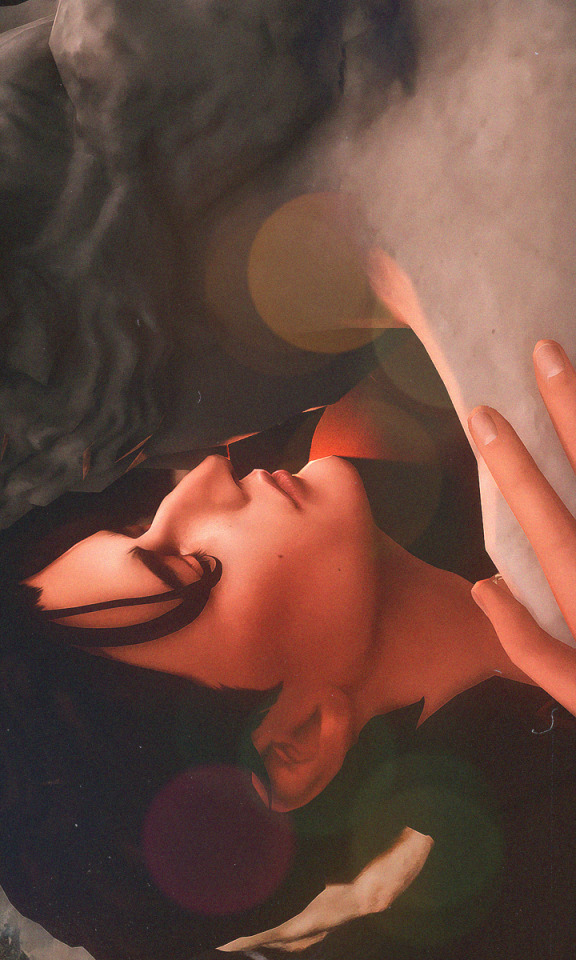
I've adjusted mine, & ended up with this:


Step 4: Move & adjust your smoke
Because your smoke is on a separate layer, now you can move and adjust it.

This is all up to your preference! I typically just move, adjust, and edit the layer style until I get something I want.
Sometimes I'll also blur the smoke, which you can do by selecting filter -> blur -> gaussian blur, just make sure you're on your smoke layer!

You'll know you did it right when you get this window showing the transparency instead of your image, & if the smoke blurs when you adjust the radius!

& that's it!
There's a way to also use the standard brush tool and "path blur", which I've used before but don't usually like the result of it.
But if you'd prefer to try that, here's a tutorial for it!
26 notes
·
View notes
Text
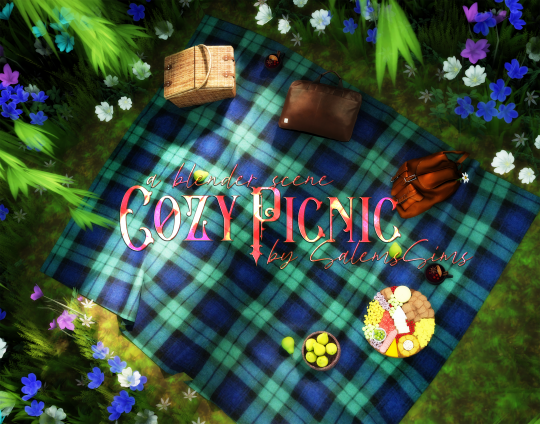
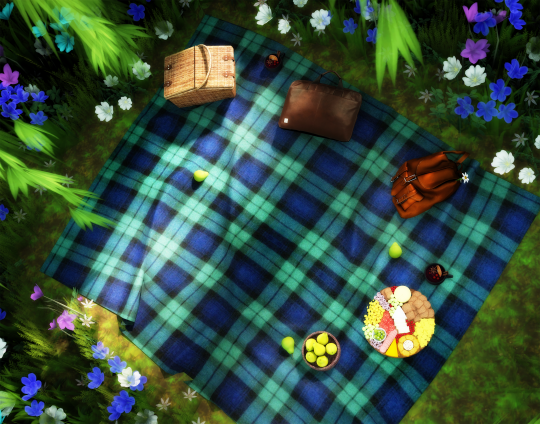
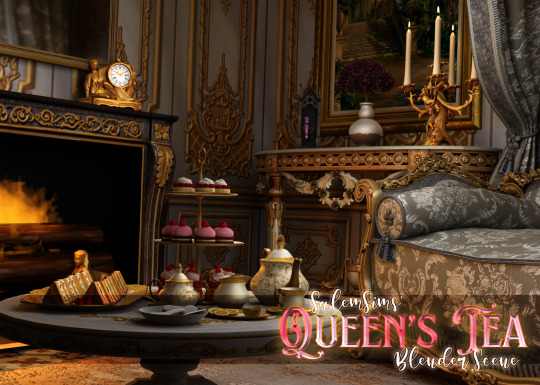
Cozy Picnic ~ a Blender Scene by SalemsSims
❗️This is a scene for blender and WILL NOT WORK in game ❗️
Another birdseye (& nothing else) scene from me lmao
Info:
I RUN MY RENDERS IN CYCLES - this was built for cycles and NOT tested with Eevee! (but feel free to adjust/run in Eevee!)
Saved with and tested in Blender 4.2
Includes one camera setup (birdseye)
Organized files for easy editing
Includes a textures folder
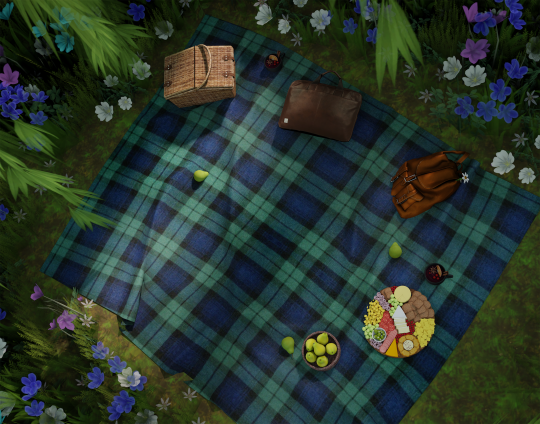
Previews are edited for lighting/depth but otherwise straight from blender (see "raw" preview below!)
Includes de-noise & glare compositing
Optimized for the birdseye angle (there's no other furniture or anything, but feel free to add some!)
ALL CC CREDIT GOES TO THE CREATORS - this scene includes CC objects but no meshes (which means you will NOT be able to put any of this cc in your game)
Tested but as always please let me know of any issues!
Download all files in the folder, the textures included will be needed if anything shows up fuschia in blender!
TOU:
Do not redistribute or claim as your own
Do not steal pieces/parts to create your own scenes
Do not put behind a paywall
FEEL FREE to adjust/move/edit/recolor anything as you need it!
DOWNLOAD (google drive, free!) Make sure you download the .blend file and textures!
Unedited vs edited below the cut!
#ts4 blender#ts4 blender scene#sims 4 blender#sims 4 blender scene#sims blender#sims blender scene#salemsims download#render school scene#render school download#ts4 blender scene free#sims 4 blender scene free#sims blender scene free#ts4#sims 4#sims
48 notes
·
View notes
Text
Render commissions open!
Commissions are Open! Render, Blender Scene, Poses!
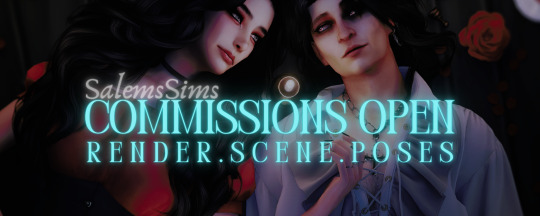
All pricing is negotiable! If you can't commission please share!
Ever wanted a render of your sim but don't know how to use blender? Perused rendering tutorials but ultimately decided it was too much work to learn?
Well today's your lucky day!
Unforeseen (& crazy) work circumstances have left me very suddenly with a job but without a paycheck (& therefore unable to collect unemployment). My health prevents me from taking on a number of "normal" jobs, and while I'm currently on the hunt for another remote position to fill this interim at my current job, I'm still strapped on cash and in a lurch. But I want to work for any help I receive.
Info for Sim Renders:
Pricing is negotiable! (send me an ask if you're not sure how much what you want will cost and I'll gladly work with you within reason)
$30 base price for a simple sim render (simple or no bg)
Additional $10 for more sims (simple or no bg)
$50 base price for sims in a custom blender scene
Additional $10 for each additional sim in custom scene
Additional $5 for 'features' such as: accessories, metals, anything that'll cause me to separate meshes, gravity manipulation, etc
No limits, you can send me reference images for sim, scene, and pose
I'll do NSFW (within reason), gore, horror etc
All purchases include a .blend file as well as final, edited renders
Info for Blender Scenes:
Pricing is negotiable!
$30 base price for a 'simple' (single room, minimal clutter) scene
$60 base price for a more complex (multi-room) scene
Additional $5 for 'features', such as separated meshes (for metal, glowing effects, changing in colors etc)
All purchases include a .blend file
Info for Poses:
Pricing is negotiable!
$30 base price for one or two sims
Additional $10 for more sims
Additional $5 for accessories
How to Commission Me!
Send me an ask, message, or discord message (@ashidorable)
Send your sim's tray files (including all CC!) and any additional items you'd like included (accessories etc)
ALL relevant details (inspiration pictures, vibe ideas, "must have" poses, items, etc)
Any additional info
I'll compile all the information and give you a price (we can negotiate at this stage or if you have a max you can spend I can work within it!)
Half of the full price will be due before any work is started
Remaining balance will be due before the final work is sent to you
I will send low-resolution screenshots throughout the process to keep you updated!
My work turnaround is about a week (more for more complex work, less for simpler pieces)
Commissions taken on a first come, first-served basis! (I won't overwhelm myself and take too many at once, but I'll communicate with you when I'll be able to start on yours!)
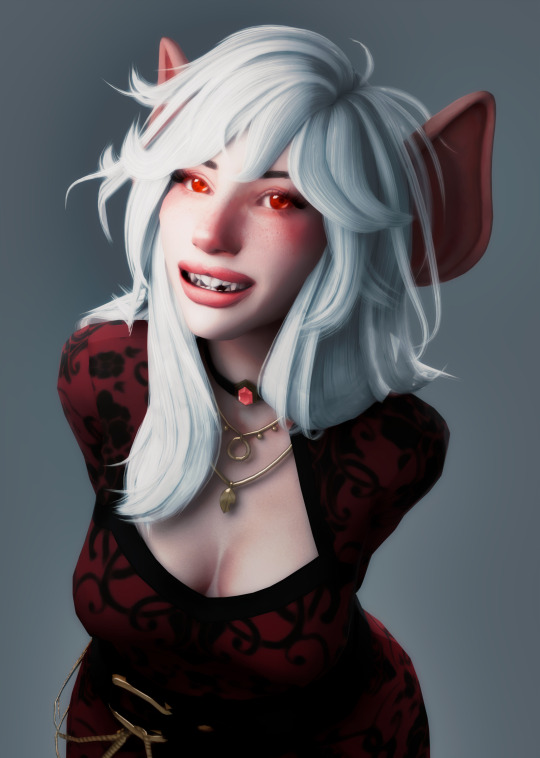
Examples of my work:
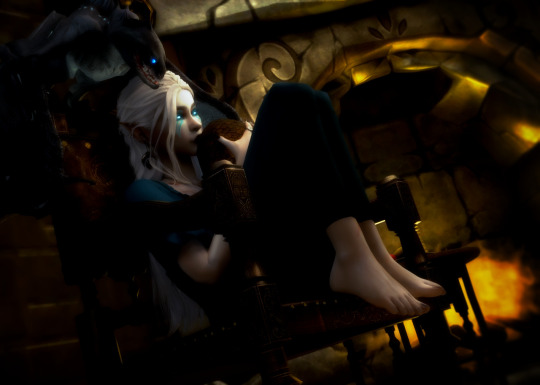
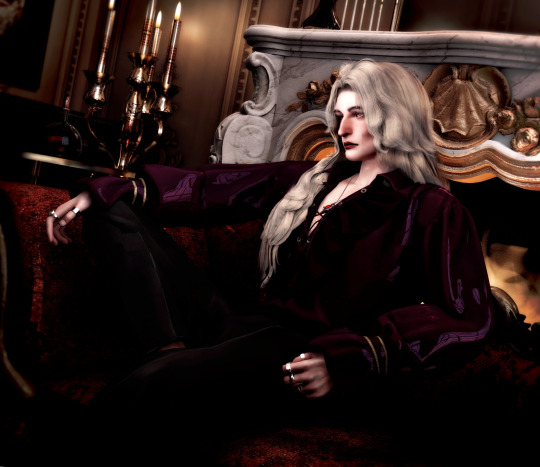
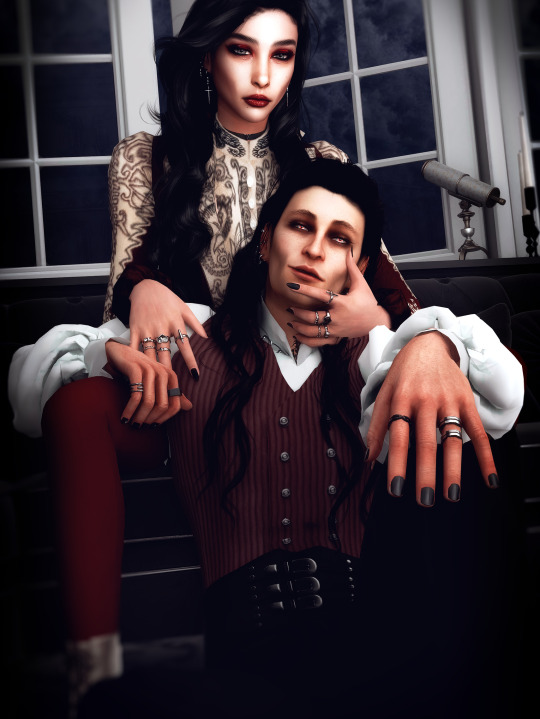
A single sim/simple bg example ($30 base):
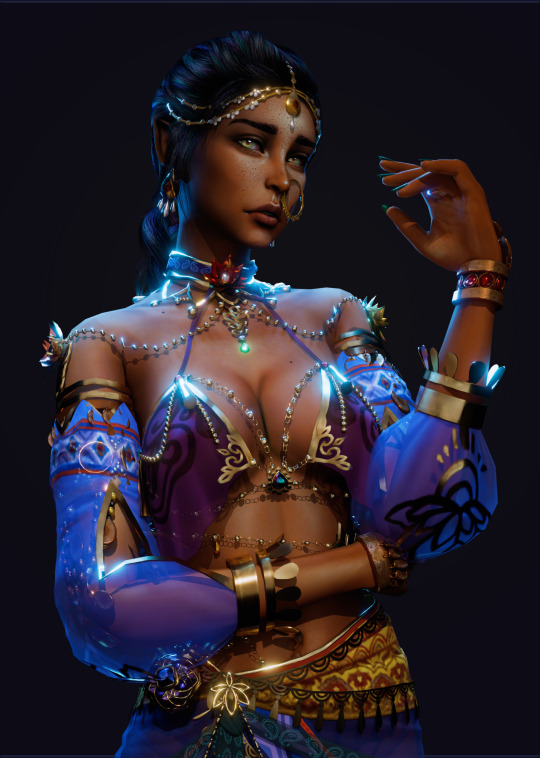
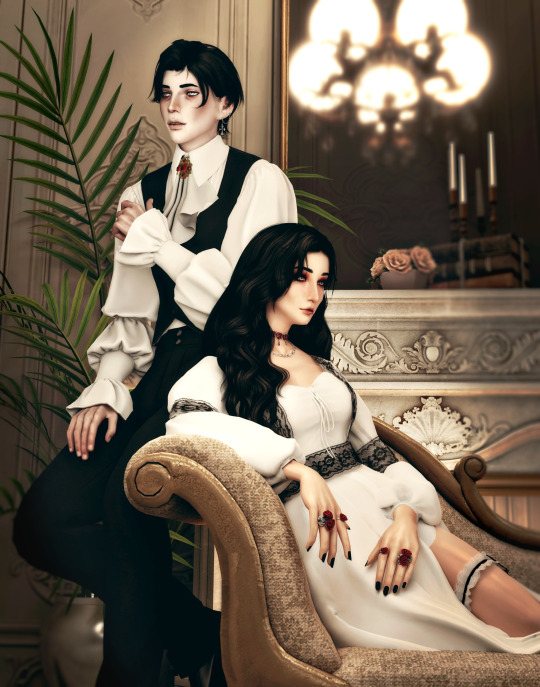
Example of single sim in a blender scene ($50 base):

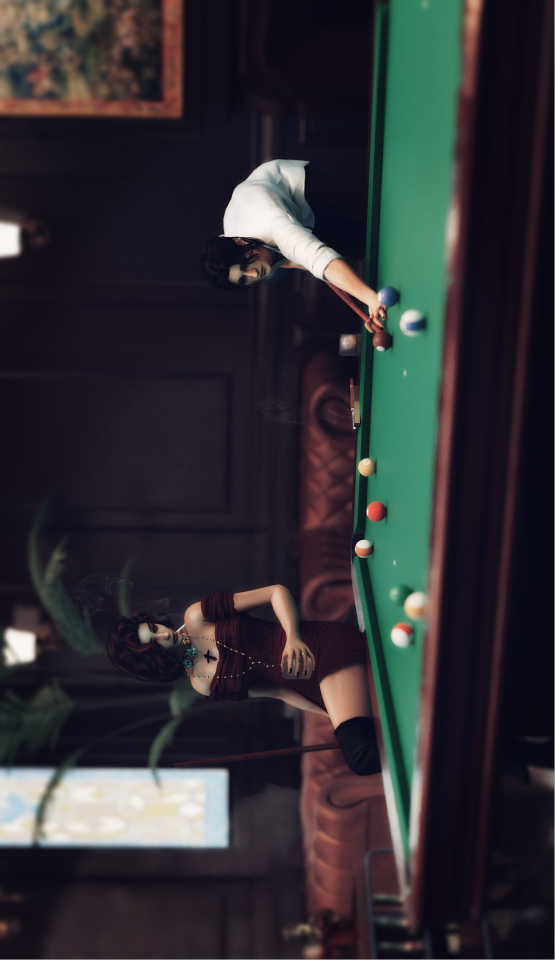
Example of two or more sims in a blender scene ($60 base):

Additional examples:


Blender scene examples:
Pose examples:
#ts4 render#ts4 blender#ts4 poses#ts4 commissions#sims 4 render#sims 4 blender#sims 4 poses#sims 4 commissions#sims render#sims blender#sims poses#sims commissions#ts4#sims 4#sims
81 notes
·
View notes
Note
just spreading some simblr love! 💖💖💖hope you have a great day/night! send this message to other simblrs if you'd like.
THANK YOUUUUUU!!!!
I'm sorry I'm replying to this sooooo late I suck ; ; But ILYSM!!!!!!!! & I hope you're having a great day!
0 notes
Text

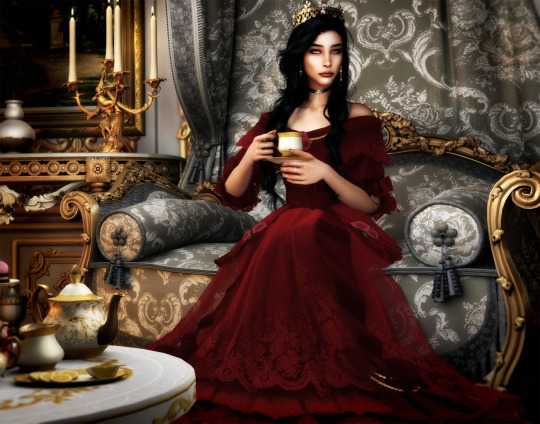
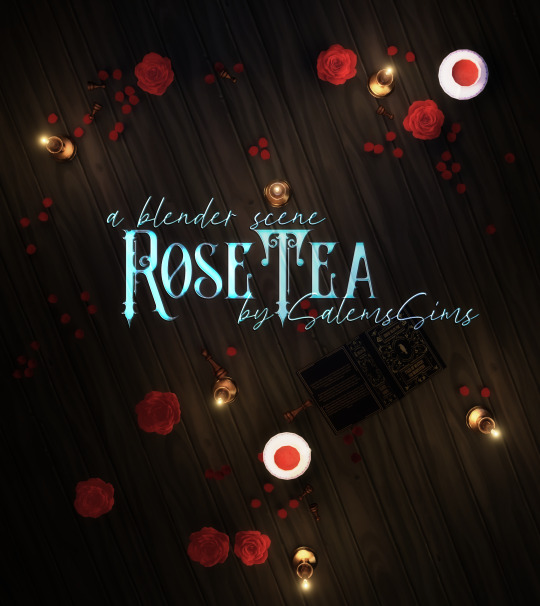
Rose Tea ~ a Blender Scene by SalemsSims
❗️This is a scene for blender and WILL NOT WORK in game ❗️
I wanted to share the companion scene for these poses!
Info:
I RUN MY RENDERS IN CYCLES - this was built for cycles and NOT tested with Eevee! (but feel free to adjust/run in Eevee!)
Made with & tested in Blender 4.1
Includes one camera setup (birdseye)
Organized files for easy editing
Includes a textures folder
Previews are edited for lighting/depth but otherwise straight from blender
Set up with glare and denoising compositing
Optimized for the birdseye angle (there's no other furniture or anything, but feel free to add some!)
Features CC (but NO PACKAGE FILES) from @oydis. @madameriasims4. @simcredibledesigns, @kerriganhouse & others - NO PACKAGE FILES means you will not be able to put any of this cc in your game, but it will work in the scene
Tested but as always please let me know of any issues!
Download all files in the folder, the textures included will be needed if anything shows up fuschia in blender!
TOU:
Do not redistribute or claim as your own
Do not put behind a paywall
Otherwise, do literally whatever you want with this scene
FEEL FREE to adjust/move/edit/recolor anything as you need it
DOWNLOAD (sfs, download all files) Make sure you unzip the file, otherwise everything shows up pink!
#ts4 blender#ts4 blender scene#sims 4 blender#sims 4 blender scene#sims blender#sims blender scene#salemsims download#render school download#ts4 blender scene free#sims 4 blender scene free#sims blender scene free#ts4#sims 4#sims
60 notes
·
View notes