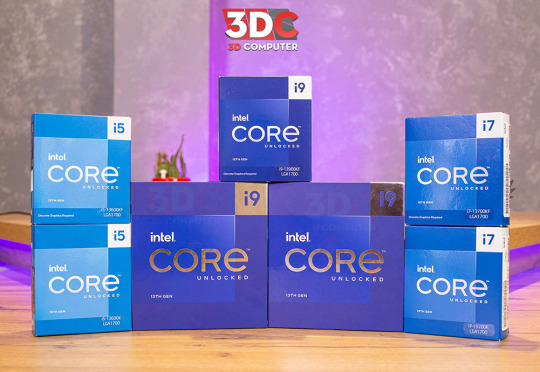
#12GB Graphics Card PC for AI
Explore tagged Tumblr posts
Visit Tumblr Blog
Explore Tumblr blogs with no restrictions, modern design and the best experience.
Last Seen Tumblr Blogs


Fun Fact
Tumblr.com rank in the US is 25.
Text
Best PC for Data Science & AI with 12GB GPU at Budget Gamer UAE

Are you looking for a powerful yet affordable PC for Data Science, AI, and Deep Learning? Budget Gamer UAE brings you the best PC for Data Science with 12GB GPU that handles complex computations, neural networks, and big data processing without breaking the bank!
Why Do You Need a 12GB GPU for Data Science & AI?
Before diving into the build, let’s understand why a 12GB GPU is essential:
✅ Handles Large Datasets – More VRAM means smoother processing of big data. ✅ Faster Deep Learning – Train AI models efficiently with CUDA cores. ✅ Multi-Tasking – Run multiple virtual machines and experiments simultaneously. ✅ Future-Proofing – Avoid frequent upgrades with a high-capacity GPU.
Best Budget Data Science PC Build – UAE Edition
Here’s a cost-effective yet high-performance PC build tailored for AI, Machine Learning, and Data Science in the UAE.
1. Processor (CPU): AMD Ryzen 7 5800X
8 Cores / 16 Threads – Perfect for parallel processing.
3.8GHz Base Clock (4.7GHz Boost) – Speeds up data computations.
PCIe 4.0 Support – Faster data transfer for AI workloads.
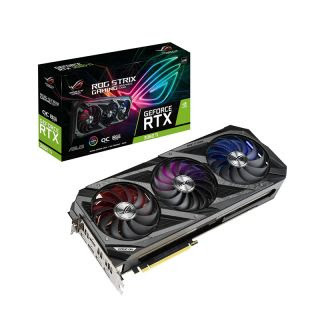
2. Graphics Card (GPU): NVIDIA RTX 3060 12GB
12GB GDDR6 VRAM – Ideal for deep learning frameworks (TensorFlow, PyTorch).
CUDA Cores & RT Cores – Accelerates AI model training.
DLSS Support – Boosts performance in AI-based rendering.
3. RAM: 32GB DDR4 (3200MHz)
Smooth Multitasking – Run Jupyter Notebooks, IDEs, and virtual machines effortlessly.
Future-Expandable – Upgrade to 64GB if needed.
4. Storage: 1TB NVMe SSD + 2TB HDD
Ultra-Fast Boot & Load Times – NVMe SSD for OS and datasets.
Extra HDD Storage – Store large datasets and backups.
5. Motherboard: B550 Chipset
PCIe 4.0 Support – Maximizes GPU and SSD performance.
Great VRM Cooling – Ensures stability during long AI training sessions.
6. Power Supply (PSU): 650W 80+ Gold
Reliable & Efficient – Handles high GPU/CPU loads.
Future-Proof – Supports upgrades to more powerful GPUs.
7. Cooling: Air or Liquid Cooling
AMD Wraith Cooler (Included) – Good for moderate workloads.
Optional AIO Liquid Cooler – Better for overclocking and heavy tasks.
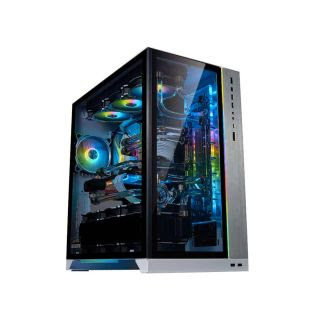
8. Case: Mid-Tower with Good Airflow
Multiple Fan Mounts – Keeps components cool during extended AI training.
Cable Management – Neat and efficient build.
Why Choose Budget Gamer UAE for Your Data Science PC?
✔ Custom-Built for AI & Data Science – No pre-built compromises. ✔ Competitive UAE Pricing – Best deals on high-performance parts. ✔ Expert Advice – Get guidance on the perfect build for your needs. ✔ Warranty & Support – Reliable after-sales service.

Performance Benchmarks – How Does This PC Handle AI Workloads?
TaskPerformanceTensorFlow Training2x Faster than 8GB GPUsPython Data AnalysisSmooth with 32GB RAMNeural Network TrainingHandles large models efficientlyBig Data ProcessingNVMe SSD reduces load times
FAQs – Data Science PC Build in UAE
1. Is a 12GB GPU necessary for Machine Learning?
Yes! More VRAM allows training larger models without memory errors.
2. Can I use this PC for gaming too?
Absolutely! The RTX 3060 12GB crushes 1080p/1440p gaming.
3. Should I go for Intel or AMD for Data Science?
AMD Ryzen offers better multi-core performance at a lower price.
4. How much does this PC cost in the UAE?
Approx. AED 4,500 – AED 5,500 (depends on deals & upgrades).
5. Where can I buy this PC in the UAE?
Check Budget Gamer UAE for the best custom builds!
Final Verdict – Best Budget Data Science PC in UAE

If you're into best PC for Data Science with 12GB GPU PC build from Budget Gamer UAE is the perfect balance of power and affordability. With a Ryzen 7 CPU, RTX 3060, 32GB RAM, and ultra-fast storage, it handles heavy workloads like a champ.
#12GB Graphics Card PC for AI#16GB GPU Workstation for AI#Best Graphics Card for AI Development#16GB VRAM PC for AI & Deep Learning#Best GPU for AI Model Training#AI Development PC with High-End GPU
2 notes
·
View notes
Text
Dominate the Battlefield: Intel Battlemage GPUs Revealed

Intel Arc GPU
After releasing its first-generation Arc Alchemist GPUs in 2022, Intel now seems to be on a two-year cadence, as seen by the appearance of the Battlemage in a shipping manifest. This suggests that Battlemage GPUs are being supplied to Intel’s partners for testing, as it’s the first time they’ve seen any proof of them existing in the real world. Intel is probably getting ready for a launch later this year given the timing of this.
Two Battlemage GPUs are being shipped by Intel to its partners, per a recently discovered shipment manifest that was published on X. The GPUs’ designations, G10 and G21, suggest Intel is taking a similar approach as Alchemist, offering one SKU that is more or less high-end for “mainstream” gamers and one that is less expensive.
Intel Arc Graphics Cards
As you may remember, Intel had previously announced plans to launch four GPUs in the Alchemist family:
Intel Arc A380
The A380, A580, A750, and A770. However, only the latter two were officially announced. They anticipate that the A750 and A770, which Intel most likely delivers at launch for midrange gamers, will be replaced by the G10.
They’ve never heard of cards being “in the wild,” but two Battlemage GPUs have shown up in the Si Soft benchmark database before. The fact that both of those cards have 12GB of VRAM stood out as particularly noteworthy. This suggests that Intel increased their base-level allowance from 8GB, which is a wise decision in 2024. As stated by Intel’s CEO earlier this year, Battlemage was “in the labs” in January.
Intel Arc A770
A previously released roadmap from Intel indicates that the G10 is a 150W component and the G21 is 225W. It is anticipated that Intel will reveal notable improvements in Battlemage’s AI capabilities, greater upscaling performance, and ray tracing performance. As 225W GPUs were the previous A750 and A770, it seems Battlemage will follow the script when it comes to its efficiency goals. The business has previously declared that it wishes to aim for this “sweet spot” in terms of power consumption, wherein one PCIe power cable is needed rather than two (or three).
While the industry as a whole is anxious to see how competitive Intel will be with its second bite at the apple, gamers aren’t exactly waiting impatiently for Intel to introduce its GPUs like they do with Nvidia or AMD’s next-gen. Even if the company’s Alchemist GPUs were hard to suggest when they first came out, significant performance advancements have been made possible by the company’s drivers.
The Intel Battlemage G10 and G21 next-generation discrete GPUs, which have been observed in shipment manifests, are anticipated to tackle entry into the mid-range market. They already know from the horse’s mouth that Intel is working on its next generation of discrete graphics processors, which it has revealed are being code-named Battlemage. The company is developing at least two graphics processing units, according to shipping excerpts.
Intel Battlemage GPUs
The shipping manifest fragments reveal that Intel is working on several GPUs specifically for the Battlemage G10 and G21 versions. The newest versions in Intel’s graphics processor lineup include the ACM-G11, an entry-level graphics processor, and the ACM-G10, a midrange market positioning and higher-end silicon graphics processor. As a result, the names Battlemage-G10 and Battlemage-G21, which are aimed at entry-level PCs and bigger chips, respectively, match the present names for Intel’s Arc graphics processors. Both stand a strong chance of making their list of the best graphics cards if they deliver acceptable levels of performance.
The Battlemage-G10 and Battlemage-G21 are being shipped for research and development, as stated in the shipping manifest (which makes sense considering these devices’ current status). The G21 GPU is currently in the pre-qualification (pre-QS) stage of semiconductor development; the G10’s current status is unknown.
Pre-qualification silicon is used to assess a chip’s performance, reliability, and functionality. Pre-QS silicon is typically not suitable for mass production. However, if the silicon device is functional and meets the necessary performance, power, and yield requirements, mass production of the device could be feasible. For example, AMD’s Navi 31 GPU, if it meets the developer’s objectives, is mass-produced in its A0 silicon phase.
They rarely get to cover Intel’s developments with its next-generation graphics cards, but they frequently cover Nvidia’s, as they did recently with the GeForce RTX 50-series graphics processors, which should appear on their list of the best graphics cards based on industry leaks.
This generation, Nvidia seems to be leading the laptop discrete GPU market, but Battlemage, with Intel’s ties to OEMs and PC manufacturers, might give the green team some serious competition in the next round. According to the cargo manifest, there will be intense competition among AMD’s RDNA 4, Intel’s Battlemage, and Nvidia’s Blackwell in the forthcoming desktop discrete GPU market.
Qualities:
Targeting Entry-Level and Mid-Range: The ACM-G11 and ACM-G10, the successors to the existing Intel Arc Alchemist series, are probably meant for gamers on a tight budget or seeking good performance in games that aren’t AAA.
Better Architecture: Compared to the Xe-HPG architecture found in Intel’s existing Arc GPUs, readers can anticipate an upgrade in this next-generation design. Better performance per watt and even new features could result from this.
Emphasis on Power Efficiency: These GPUs may place equal emphasis on efficiency and performance because power consumption is a significant element in laptops and tiny form factor PCs.
Potential specifications (derived from the existing Intel Arc lineup and leaks):
Production Process: TSMC 6nm (or, if research continues, a more sophisticated node) Unknown is the core configuration. Possibly less cores than Battlemage models at higher levels (should any exist).
Memory: GDDR6 is most likely used, yet its bandwidth and capacity are unclear. Power Consumption: Designed to use less power than GPUs with higher specifications.
FAQS
What are the Battlemage G10 and G21 GPUs?
Intel is developing the Battlemage G10 and G21, next-generation GPUs that should provide notable gains in capabilities and performance over their predecessors.
What markets or segments are these GPUs targeting?
Targeting a wide range of industries, including professional graphics, gaming, and data centres, the Battlemage G10 and G21 GPUs are expected to meet the demands of both consumers and businesses.
Read more on Govindhtech.com
#Intel#IntelArc#intelarcgpu#govindhtech#INTELARCA380#intelarca770#battlemagegpu#G10#G21#news#technologynews#technology#technologytrends
2 notes
·
View notes
Text
Price: [price_with_discount] (as of [price_update_date] - Details) [ad_1] Experience unparalleled computing power with this high-performance desktop PC, engineered for gaming, editing, and trading. At its heart lies the formidable Core i9-14900K processor, complemented by a massive 128GB DDR5 RAM that ensures seamless multitasking. The RTX 4070 12GB graphics card delivers stunning visuals and ray-tracing capabilities for immersive gaming and professional content creation. Storage is abundant with a lightning-fast 1TB NVMe SSD for quick boot times and frequently used applications, plus a spacious 4TB hard drive for extensive data storage. The system features an ARGB liquid cooler that maintains optimal temperatures while adding a touch of sophistication to your setup. Built-in WiFi and Bluetooth connectivity ensure you stay connected without additional peripherals. This powerhouse comes pre-installed with Windows 11 Pro and essential software, ready to tackle demanding tasks right out of the box. The combination of cutting-edge components makes this PC an ideal choice for enthusiasts who demand top-tier performance across gaming, content creation, and professional applications. Experience next-level performance with the NXTGN Core i9 14th Gen High-Performance Desktop PC, engineered for gaming, professional editing, and high-frequency trading. Powered by the Core i9-14900K processor and 128GB DDR5 RAM, this beast ensures ultra-smooth multitasking, faster rendering, and seamless gameplay. The 1TB NVMe SSD delivers blazing-fast boot times, while the 4TB HDD provides ample storage for your files. Equipped with the RTX 4070 12GB graphics card, enjoy stunning visuals and AI-enhanced performance. The ARGB Liquid Cooler ensures optimal cooling, keeping temperatures low under heavy workloads. PROCESSOR : Latest 14th Gen Core i9-14900K processor delivers exceptional performance for gaming, content creation, and multitasking MEMORY & STORAGE: 128GB DDR5 RAM for seamless multitasking, combined with 1TB NVMe SSD and 4TB HDD for ample storage space GRAPHICS: RTX 4070 12GB graphics card enables stunning visuals, ray tracing, and smooth gaming performance at high resolutions COOLING SYSTEM: Advanced ARGB liquid cooling system with LCD Display Temperature Monitoring maintains optimal temperatures during intensive tasks while adding aesthetic appeal CONNECTIVITY: Integrated WiFi and Bluetooth capabilities, pre-installed Windows 11 Pro, and essential software for immediate use Premium Build Quality & Warranty – Durable, high-performance components backed by 3 years warranty for peace of mind. [ad_2]
0 notes
Text
How to Train and Use Hunyuan Video LoRA Models
New Post has been published on https://thedigitalinsider.com/how-to-train-and-use-hunyuan-video-lora-models/
How to Train and Use Hunyuan Video LoRA Models
This article will show you how to install and use Windows-based software that can train Hunyuan video LoRA models, allowing the user to generate custom personalities in the Hunyuan Video foundation model:
Click to play. Examples from the recent explosion of celebrity Hunyuan LoRAs from the civit.ai community.
At the moment the two most popular ways of generating Hunyuan LoRA models locally are:
1) The diffusion-pipe-ui Docker-based framework, which relies on Windows Subsystem for Linux (WSL) to handle some of the processes.
2) Musubi Tuner, a new addition to the popular Kohya ss diffusion training architecture. Musubi Tuner does not require Docker and does not depend on WSL or other Linux-based proxies – but it can be difficult to get running on Windows.
Therefore this run-through will focus on Musubi Tuner, and on providing a completely local solution for Hunyuan LoRA training and generation, without the use of API-driven websites or commercial GPU-renting processes such as Runpod.
Click to play. Samples from LoRA training on Musubi Tuner for this article. All permissions granted by the person depicted, for the purposes of illustrating this article.
REQUIREMENTS
The installation will require at minimum a Windows 10 PC with a 30+/40+ series NVIDIA card that has at least 12GB of VRAM (though 16GB is recommended). The installation used for this article was tested on a machine with 64GB of system RAM and a NVIDIA 3090 graphics cards with 24GB of VRAM. It was tested on a dedicated test-bed system using a fresh install of Windows 10 Professional, on a partition with 600+GB of spare disk space.
WARNING
Installing Musubi Tuner and its prerequisites also entails the installation of developer-focused software and packages directly onto the main Windows installation of a PC. Taking the installation of ComfyUI into account, for the end stages, this project will require around 400-500 gigabytes of disk space. Though I have tested the procedure without incident several times in newly-installed test bed Windows 10 environments, neither I nor unite.ai are liable for any damage to systems from following these instructions. I advise you to back up any important data before attempting this kind of installation procedure.
Considerations
Is This Method Still Valid?
The generative AI scene is moving very fast, and we can expect better and more streamlined methods of Hunyuan Video LoRA frameworks this year.
…or even this week! While I was writing this article, the developer of Kohya/Musubi produced musubi-tuner-gui, a sophisticated Gradio GUI for Musubi Tuner:
Obviously a user-friendly GUI is preferable to the BAT files that I use in this feature – once musubi-tuner-gui is working. As I write, it only went online five days ago, and I can find no account of anyone successfully using it.
According to posts in the repository, the new GUI is intended to be rolled directly into the Musubi Tuner project as soon as possible, which will end its current existence as a standalone GitHub repository.
Based on the present installation instructions, the new GUI gets cloned directly into the existing Musubi virtual environment; and, despite many efforts, I cannot get it to associate with the existing Musubi installation. This means that when it runs, it will find that it has no engine!
Once the GUI is integrated into Musubi Tuner, issues of this kind will surely be resolved. Though the author concedes that the new project is ‘really rough’, he is optimistic for its development and integration directly into Musubi Tuner.
Given these issues (also concerning default paths at install-time, and the use of the UV Python package, which complicates certain procedures in the new release), we will probably have to wait a little for a smoother Hunyuan Video LoRA training experience. That said, it looks very promising!
But if you can’t wait, and are willing to roll your sleeves up a bit, you can get Hunyuan video LoRA training running locally right now.
Let’s get started.
Why Install Anything on Bare Metal?
(Skip this paragraph if you’re not an advanced user) Advanced users will wonder why I have chosen to install so much of the software on the bare metal Windows 10 installation instead of in a virtual environment. The reason is that the essential Windows port of the Linux-based Triton package is far more difficult to get working in a virtual environment. All the other bare-metal installations in the tutorial could not be installed in a virtual environment, as they must interface directly with local hardware.
Installing Prerequisite Packages and Programs
For the programs and packages that must be initially installed, the order of installation matters. Let’s get started.
1: Download Microsoft Redistributable
Download and install the Microsoft Redistributable package from https://aka.ms/vs/17/release/vc_redist.x64.exe.
This is a straightforward and rapid installation.
2: Install Visual Studio 2022
Download the Microsoft Visual Studio 2022 Community edition from https://visualstudio.microsoft.com/downloads/?cid=learn-onpage-download-install-visual-studio-page-cta
Start the downloaded installer:
We don’t need every available package, which would be a heavy and lengthy install. At the initial Workloads page that opens, tick Desktop Development with C++ (see image below).
Now click the Individual Components tab at the top-left of the interface and use the search box to find ‘Windows SDK’.
By default, only the Windows 11 SDK is ticked. If you are on Windows 10 (this installation procedure has not been tested by me on Windows 11), tick the latest Windows 10 version, indicated in the image above.
Search for ‘C++ CMake’ and check that C++ CMake tools for Windows is checked.
This installation will take at least 13 GB of space.
Once Visual Studio has installed, it will attempt to run on your computer. Let it open fully. When the Visual Studio’s full-screen interface is finally visible, close the program.
3: Install Visual Studio 2019
Some of the subsequent packages for Musubi are expecting an older version of Microsoft Visual Studio, while others need a more recent one.
Therefore also download the free Community edition of Visual Studio 19 either from Microsoft (https://visualstudio.microsoft.com/vs/older-downloads/ – account required) or Techspot (https://www.techspot.com/downloads/7241-visual-studio-2019.html).
Install it with the same options as for Visual Studio 2022 (see procedure above, except that Windows SDK is already ticked in the Visual Studio 2019 installer).
You’ll see that the Visual Studio 2019 installer is already aware of the newer version as it installs:
When installation is complete, and you have opened and closed the installed Visual Studio 2019 application, open a Windows command prompt (Type CMD in Start Search) and type in and enter:
where cl
The result should be the known locations of the two installed Visual Studio editions.
If you instead get INFO: Could not find files for the given pattern(s), see the Check Path section of this article below, and use those instructions to add the relevant Visual Studio paths to Windows environment.
Save any changes made according to the Check Paths section below, and then try the where cl command again.
4: Install CUDA 11 + 12 Toolkits
The various packages installed in Musubi need different versions of NVIDIA CUDA, which accelerates and optimizes training on NVIDIA graphics cards.
The reason we installed the Visual Studio versions first is that the NVIDIA CUDA installers search for and integrate with any existing Visual Studio installations.
Download an 11+ series CUDA installation package from:
https://developer.nvidia.com/cuda-11-8-0-download-archive?target_os=Windows&target_arch=x86_64&target_version=11&target_type=exe_local (download ‘exe (local’) )
Download a 12+ series CUDA Toolkit installation package from:
https://developer.nvidia.com/cuda-downloads?target_os=Windows&target_arch=x86_64
The installation process is identical for both installers. Ignore any warnings about the existence or non-existence of installation paths in Windows Environment variables – we are going to attend to this manually later.
Install NVIDIA CUDA Toolkit V11+
Start the installer for the 11+ series CUDA Toolkit.
At Installation Options, choose Custom (Advanced) and proceed.
Uncheck the NVIDIA GeForce Experience option and click Next.
Leave Select Installation Location at defaults (this is important):
Click Next and let the installation conclude.
Ignore any warning or notes that the installer gives about Nsight Visual Studio integration, which is not needed for our use case.
Install NVIDIA CUDA Toolkit V12+
Repeat the entire process for the separate 12+ NVIDIA Toolkit installer that you downloaded:
The install process for this version is identical to the one listed above (the 11+ version), except for one warning about environment paths, which you can ignore:
When the 12+ CUDA version installation is completed, open a command prompt in Windows and type and enter:
nvcc --version
This should confirm information about the installed driver version:
To check that your card is recognized, type and enter:
nvidia-smi
5: Install GIT
GIT will be handling the installation of the Musubi repository on your local machine. Download the GIT installer at:
https://git-scm.com/downloads/win (’64-bit Git for Windows Setup’)
Run the installer:
Use default settings for Select Components:
Leave the default editor at Vim:
Let GIT decide about branch names:
Use recommended settings for the Path Environment:
Use recommended settings for SSH:
Use recommended settings for HTTPS Transport backend:
Use recommended settings for line-ending conversions:
Choose Windows default console as the Terminal Emulator:
Use default settings (Fast-forward or merge) for Git Pull:
Use Git-Credential Manager (the default setting) for Credential Helper:
In Configuring extra options, leave Enable file system caching ticked, and Enable symbolic links unticked (unless you are an advanced user who is using hard links for a centralized model repository).
Conclude the installation and test that Git is installed properly by opening a CMD window and typing and entering:
git --version
GitHub Login
Later, when you attempt to clone GitHub repositories, you may be challenged for your GitHub credentials. To anticipate this, log into your GitHub account (create one, if necessary) on any browsers installed on your Windows system. In this way, the 0Auth authentication method (a pop-up window) should take as little time as possible.
After that initial challenge, you should stay authenticated automatically.
6: Install CMake
CMake 3.21 or newer is required for parts of the Musubi installation process. CMake is a cross-platform development architecture capable of orchestrating diverse compilers, and of compiling software from source code.
Download it at:
https://cmake.org/download/ (‘Windows x64 Installer’)
Launch the installer:
Ensure Add Cmake to the PATH environment variable is checked.
Press Next.
Type and enter this command in a Windows Command prompt:
cmake --version
If CMake installed successfully, it will display something like:
cmake version 3.31.4 CMake suite maintained and supported by Kitware (kitware.com/cmake).
7: Install Python 3.10
The Python interpreter is central to this project. Download the 3.10 version (the best compromise between the different demands of Musubi packages) at:
https://www.python.org/downloads/release/python-3100/ (‘Windows installer (64-bit)’)
Run the download installer, and leave at default settings:
At the end of the installation process, click Disable path length limit (requires UAC admin confirmation):
In a Windows Command prompt type and enter:
python --version
This should result in Python 3.10.0
Check Paths
The cloning and installation of the Musubi frameworks, as well as its normal operation after installation, requires that its components know the path to several important external components in Windows, particularly CUDA.
So we need to open the path environment and check that all the requisites are in there.
A quick way to get to the controls for Windows Environment is to type Edit the system environment variables into the Windows search bar.
Clicking this will open the System Properties control panel. In the lower right of System Properties, click the Environment Variables button, and a window called Environment Variables opens up. In the System Variables panel in the bottom half of this window, scroll down to Path and double-click it. This opens a window called Edit environment variables. Drag the width of this window wider so you can see the full path of the variables:
Here the important entries are:
C:Program FilesNVIDIA GPU Computing ToolkitCUDAv12.6bin C:Program FilesNVIDIA GPU Computing ToolkitCUDAv12.6libnvvp C:Program FilesNVIDIA GPU Computing ToolkitCUDAv11.8bin C:Program FilesNVIDIA GPU Computing ToolkitCUDAv11.8libnvvp C:Program Files (x86)Microsoft Visual Studio2019CommunityVCToolsMSVC14.29.30133binHostx64x64 C:Program FilesMicrosoft Visual Studio2022CommunityVCToolsMSVC14.42.34433binHostx64x64 C:Program FilesGitcmd C:Program FilesCMakebin
In most cases, the correct path variables should already be present.
Add any paths that are missing by clicking New on the left of the Edit environment variable window and pasting in the correct path:
Do NOT just copy and paste from the paths listed above; check that each equivalent path exists in your own Windows installation.
If there are minor path variations (particularly with Visual Studio installations), use the paths listed above to find the correct target folders (i.e., x64 in Host64 in your own installation. Then paste those paths into the Edit environment variable window.
After this, restart the computer.
Installing Musubi
Upgrade PIP
Using the latest version of the PIP installer can smooth some of the installation stages. In a Windows Command prompt with administrator privileges (see Elevation, below), type and enter:
pip install --upgrade pip
Elevation
Some commands may require elevated privileges (i.e., to be run as an administrator). If you receive error messages about permissions in the following stages, close the command prompt window and reopen it in administrator mode by typing CMD into Windows search box, right-clicking on Command Prompt and selecting Run as administrator:
For the next stages, we are going to use Windows Powershell instead of the Windows Command prompt. You can find this by entering Powershell into the Windows search box, and (as necessary) right-clicking on it to Run as administrator:
Install Torch
In Powershell, type and enter:
pip install torch torchvision torchaudio --index-url https://download.pytorch.org/whl/cu118
Be patient while the many packages install.
When completed, you can verify a GPU-enabled PyTorch installation by typing and entering:
python -c "import torch; print(torch.cuda.is_available())"
This should result in:
C:WINDOWSsystem32>python -c "import torch; print(torch.cuda.is_available())" True
Install Triton for Windows
Next, the installation of the Triton for Windows component. In elevated Powershell, enter (on a single line):
pip install https://github.com/woct0rdho/triton-windows/releases/download/v3.1.0-windows.post8/triton-3.1.0-cp310-cp310-win_amd64.whl
(The installer triton-3.1.0-cp310-cp310-win_amd64.whl works for both Intel and AMD CPUs as long as the architecture is 64-bit and the environment matches the Python version)
After running, this should result in:
Successfully installed triton-3.1.0
We can check if Triton is working by importing it in Python. Enter this command:
python -c "import triton; print('Triton is working')"
This should output:
Triton is working
To check that Triton is GPU-enabled, enter:
python -c "import torch; print(torch.cuda.is_available())"
This should result in True:
Create the Virtual Environment for Musubi
From now on, we will install any further software into a Python virtual environment (or venv). This means that all you will need to do to uninstall all the following software is to drag the venv’s installation folder to the trash.
Let’s create that installation folder: make a folder called Musubi on your desktop. The following examples assume that this folder exists: C:Users[Your Profile Name]DesktopMusubi.
In Powershell, navigate to that folder by entering:
cd C:Users[Your Profile Name]DesktopMusubi
We want the virtual environment to have access to what we have installed already (especially Triton), so we will use the --system-site-packages flag. Enter this:
python -m venv --system-site-packages musubi
Wait for the environment to be created, and then activate it by entering:
.musubiScriptsactivate
From this point on, you can tell that you are in the activated virtual environment by the fact that (musubi) appears at the beginning of all your prompts.
Clone the Repository
Navigate to the newly-created musubi folder (which is inside the Musubi folder on your desktop):
cd musubi
Now that we are in the right place, enter the following command:
git clone https://github.com/kohya-ss/musubi-tuner.git
Wait for the cloning to complete (it will not take long).
Installing Requirements
Navigate to the installation folder:
cd musubi-tuner
Enter:
pip install -r requirements.txt
Wait for the many installations to finish (this will take longer).
Automating Access to the Hunyuan Video Venv
To easily activate and access the new venv for future sessions, paste the following into Notepad and save it with the name activate.bat, saving it with All files option (see image below).
@echo off
call C:Users[Your Profile Name]DesktopMusubimusubiScriptsactivate
cd C:Users[Your Profile Name]DesktopMusubimusubimusubi-tuner
cmd
(Replace [Your Profile Name]with the real name of your Windows user profile)
It does not matter into which location you save this file.
From now on you can double-click activate.bat and start work immediately.
Using Musubi Tuner
Downloading the Models
The Hunyuan Video LoRA training process requires the downloading of at least seven models in order to support all the possible optimization options for pre-caching and training a Hunyuan video LoRA. Together, these models weigh more than 60GB.
Current instructions for downloading them can be found at https://github.com/kohya-ss/musubi-tuner?tab=readme-ov-file#model-download
However, these are the download instructions at the time of writing:
clip_l.safetensors llava_llama3_fp16.safetensors and llava_llama3_fp8_scaled.safetensors can be downloaded at: https://huggingface.co/Comfy-Org/HunyuanVideo_repackaged/tree/main/split_files/text_encoders
mp_rank_00_model_states.pt mp_rank_00_model_states_fp8.pt and mp_rank_00_model_states_fp8_map.pt can be downloaded at: https://huggingface.co/tencent/HunyuanVideo/tree/main/hunyuan-video-t2v-720p/transformers
pytorch_model.pt can be downloaded at: https://huggingface.co/tencent/HunyuanVideo/tree/main/hunyuan-video-t2v-720p/vae
Though you can place these in any directory you choose, for consistency with later scripting, let’s put them in:
C:Users[Your Profile Name]DesktopMusubimusubimusubi-tunermodels
This is consistent with the directory arrangement prior to this point. Any commands or instructions hereafter will assume that this is where the models are situated; and don’t forget to replace [Your Profile Name] with your real Windows profile folder name.
Dataset Preparation
Ignoring community controversy on the point, it’s fair to say that you will need somewhere between 10-100 photos for a training dataset for your Hunyuan LoRA. Very good results can be obtained even with 15 images, so long as the images are well-balanced and of good quality.
A Hunyuan LoRA can be trained both on images or very short and low-res video clips, or even a mixture of each – although using video clips as training data is challenging, even for a 24GB card.
However, video clips are only really useful if your character moves in such an unusual way that the Hunyuan Video foundation model might not know about it, or be able to guess.
Examples would include Roger Rabbit, a xenomorph, The Mask, Spider-Man, or other personalities that possess unique characteristic movement.
Since Hunyuan Video already knows how ordinary men and women move, video clips are not necessary to obtain a convincing Hunyuan Video LoRA human-type character. So we’ll use static images.
Image Preparation
The Bucket List
The TLDR version:
It’s best to either use images that are all the same size for your dataset, or use a 50/50 split between two different sizes, i.e., 10 images that are 512x768px and 10 that are 768x512px.
The training might go well even if you don’t do this – Hunyuan Video LoRAs can be surprisingly forgiving.
The Longer Version
As with Kohya-ss LoRAs for static generative systems such as Stable Diffusion, bucketing is used to distribute the workload across differently-sized images, allowing larger images to be used without causing out-of-memory errors at training time (i.e., bucketing ‘cuts up’ the images into chunks that the GPU can handle, while maintaining the semantic integrity of the whole image).
For each size of image you include in your training dataset (i.e., 512x768px), a bucket, or ‘sub-task’ will be created for that size. So if you have the following distribution of images, this is how the bucket attention becomes unbalanced, and risks that some photos will be given greater consideration in training than others:
2x 512x768px images 7x 768x512px images 1x 1000x600px image 3x 400x800px images
We can see that bucket attention is divided unequally among these images:
Therefore either stick to one format size, or try and keep the distribution of different sizes relatively equal.
In either case, avoid very large images, as this is likely to slow down training, to negligible benefit.
For simplicity, I have used 512x768px for all the photos in my dataset.
Disclaimer: The model (person) used in the dataset gave me full permission to use these pictures for this purpose, and exercised approval of all AI-based output depicting her likeness featured in this article.
My dataset consists of 40 images, in PNG format (though JPG is fine too). My images were stored at C:UsersMartinDesktopDATASETS_HUNYUANexamplewoman
You should create a cache folder inside the training image folder:
Now let’s create a special file that will configure the training.
TOML Files
The training and pre-caching processes of Hunyuan Video LoRAs obtains the file paths from a flat text file with the .toml extension.
For my test, the TOML is located at C:UsersMartinDesktopDATASETS_HUNYUANtraining.toml
The contents of my training TOML look like this:
[general]
resolution = [512, 768]
caption_extension = ".txt"
batch_size = 1
enable_bucket = true
bucket_no_upscale = false
[[datasets]]
image_directory = "C:UsersMartinDesktopDATASETS_HUNYUANexamplewoman"
cache_directory = "C:UsersMartinDesktopDATASETS_HUNYUANexamplewomancache"
num_repeats = 1
(The double back-slashes for image and cache directories are not always necessary, but they can help to avoid errors in cases where there is a space in the path. I have trained models with .toml files that used single-forward and single-backward slashes)
We can see in the resolution section that two resolutions will be considered – 512px and 768px. You can also leave this at 512, and still obtain good results.
Captions
Hunyuan Video is a text+vision foundation model, so we need descriptive captions for these images, which will be considered during training. The training process will fail without captions.
There are a multitude of open source captioning systems we could use for this task, but let’s keep it simple and use the taggui system. Though it is stored at GitHub, and though it does download some very heavy deep learning models on first run, it comes in the form of a simple Windows executable that loads Python libraries and a straightforward GUI.
After starting Taggui, use File > Load Directory to navigate to your image dataset, and optionally put a token identifier (in this case, examplewoman) that will be added to all the captions:
(Be sure to turn off Load in 4-bit when Taggui first opens – it will throw errors during captioning if this is left on)
Select an image in the left-hand preview column and press CTRL+A to select all the images. Then press the Start Auto-Captioning button on the right:
You will see Taggui downloading models in the small CLI in the right-hand column, but only if this is the first time you have run the captioner. Otherwise you will see a preview of the captions.
Now, each photo has a corresponding .txt caption with a description of its image contents:
You can click Advanced Options in Taggui to increase the length and style of captions, but that is beyond the scope of this run-through.
Quit Taggui and let’s move on to…
Latent Pre-Caching
To avoid excessive GPU load at training time, it is necessary to create two types of pre-cached files – one to represent the latent image derived from the images themselves, and another to evaluate a text encoding relating to caption content.
To simplify all three processes (2x cache + training), you can use interactive .BAT files that will ask you questions and undertake the processes when you have given the necessary information.
For the latent pre-caching, copy the following text into Notepad and save it as a .BAT file (i.e., name it something like latent-precache.bat), as earlier, ensuring that the file type in the drop down menu in the Save As dialogue is All Files (see image below):
@echo off
REM Activate the virtual environment
call C:Users[Your Profile Name]DesktopMusubimusubiScriptsactivate.bat
REM Get user input
set /p IMAGE_PATH=Enter the path to the image directory:
set /p CACHE_PATH=Enter the path to the cache directory:
set /p TOML_PATH=Enter the path to the TOML file:
echo You entered:
echo Image path: %IMAGE_PATH%
echo Cache path: %CACHE_PATH%
echo TOML file path: %TOML_PATH%
set /p CONFIRM=Do you want to proceed with latent pre-caching (y/n)?
if /i "%CONFIRM%"=="y" (
REM Run the latent pre-caching script
python C:Users[Your Profile Name]DesktopMusubimusubimusubi-tunercache_latents.py --dataset_config %TOML_PATH% --vae C:Users[Your Profile Name]DesktopMusubimusubimusubi-tunermodelspytorch_model.pt --vae_chunk_size 32 --vae_tiling
) else (
echo Operation canceled.
)
REM Keep the window open
pause
(Make sure that you replace [Your Profile Name] with your real Windows profile folder name)
Now you can run the .BAT file for automatic latent caching:
When prompted to by the various questions from the BAT file, paste or type in the path to your dataset, cache folders and TOML file.
Text Pre-Caching
We’ll create a second BAT file, this time for the text pre-caching.
@echo off
REM Activate the virtual environment
call C:Users[Your Profile Name]DesktopMusubimusubiScriptsactivate.bat
REM Get user input
set /p IMAGE_PATH=Enter the path to the image directory:
set /p CACHE_PATH=Enter the path to the cache directory:
set /p TOML_PATH=Enter the path to the TOML file:
echo You entered:
echo Image path: %IMAGE_PATH%
echo Cache path: %CACHE_PATH%
echo TOML file path: %TOML_PATH%
set /p CONFIRM=Do you want to proceed with text encoder output pre-caching (y/n)?
if /i "%CONFIRM%"=="y" (
REM Use the python executable from the virtual environment
python C:Users[Your Profile Name]DesktopMusubimusubimusubi-tunercache_text_encoder_outputs.py --dataset_config %TOML_PATH% --text_encoder1 C:Users[Your Profile Name]DesktopMusubimusubimusubi-tunermodelsllava_llama3_fp16.safetensors --text_encoder2 C:Users[Your Profile Name]DesktopMusubimusubimusubi-tunermodelsclip_l.safetensors --batch_size 16
) else (
echo Operation canceled.
)
REM Keep the window open
pause
Replace your Windows profile name and save this as text-cache.bat (or any other name you like), in any convenient location, as per the procedure for the previous BAT file.
Run this new BAT file, follow the instructions, and the necessary text-encoded files will appear in the cache folder:
Training the Hunyuan Video Lora
Training the actual LoRA will take considerably longer than these two preparatory processes.
Though there are also multiple variables that we could worry about (such as batch size, repeats, epochs, and whether to use full or quantized models, among others), we’ll save these considerations for another day, and a deeper look at the intricacies of LoRA creation.
For now, let’s minimize the choices a little and train a LoRA on ‘median’ settings.
We’ll create a third BAT file, this time to initiate training. Paste this into Notepad and save it as a BAT file, like before, as training.bat (or any name you please):
@echo off
REM Activate the virtual environment
call C:Users[Your Profile Name]DesktopMusubimusubiScriptsactivate.bat
REM Get user input
set /p DATASET_CONFIG=Enter the path to the dataset configuration file:
set /p EPOCHS=Enter the number of epochs to train:
set /p OUTPUT_NAME=Enter the output model name (e.g., example0001):
set /p LEARNING_RATE=Choose learning rate (1 for 1e-3, 2 for 5e-3, default 1e-3):
if "%LEARNING_RATE%"=="1" set LR=1e-3
if "%LEARNING_RATE%"=="2" set LR=5e-3
if "%LEARNING_RATE%"=="" set LR=1e-3
set /p SAVE_STEPS=How often (in steps) to save preview images:
set /p SAMPLE_PROMPTS=What is the location of the text-prompt file for training previews?
echo You entered:
echo Dataset configuration file: %DATASET_CONFIG%
echo Number of epochs: %EPOCHS%
echo Output name: %OUTPUT_NAME%
echo Learning rate: %LR%
echo Save preview images every %SAVE_STEPS% steps.
echo Text-prompt file: %SAMPLE_PROMPTS%
REM Prepare the command
set CMD=accelerate launch --num_cpu_threads_per_process 1 --mixed_precision bf16 ^
C:Users[Your Profile Name]DesktopMusubimusubimusubi-tunerhv_train_network.py ^
--dit C:Users[Your Profile Name]DesktopMusubimusubimusubi-tunermodelsmp_rank_00_model_states.pt ^
--dataset_config %DATASET_CONFIG% ^
--sdpa ^
--mixed_precision bf16 ^
--fp8_base ^
--optimizer_type adamw8bit ^
--learning_rate %LR% ^
--gradient_checkpointing ^
--max_data_loader_n_workers 2 ^
--persistent_data_loader_workers ^
--network_module=networks.lora ^
--network_dim=32 ^
--timestep_sampling sigmoid ^
--discrete_flow_shift 1.0 ^
--max_train_epochs %EPOCHS% ^
--save_every_n_epochs=1 ^
--seed 42 ^
--output_dir "C:Users[Your Profile Name]DesktopMusubiOutput Models" ^
--output_name %OUTPUT_NAME% ^
--vae C:/Users/[Your Profile Name]/Desktop/Musubi/musubi/musubi-tuner/models/pytorch_model.pt ^
--vae_chunk_size 32 ^
--vae_spatial_tile_sample_min_size 128 ^
--text_encoder1 C:/Users/[Your Profile Name]/Desktop/Musubi/musubi/musubi-tuner/models/llava_llama3_fp16.safetensors ^
--text_encoder2 C:/Users/[Your Profile Name]/Desktop/Musubi/musubi/musubi-tuner/models/clip_l.safetensors ^
--sample_prompts %SAMPLE_PROMPTS% ^
--sample_every_n_steps %SAVE_STEPS% ^
--sample_at_first
echo The following command will be executed:
echo %CMD%
set /p CONFIRM=Do you want to proceed with training (y/n)?
if /i "%CONFIRM%"=="y" (
%CMD%
) else (
echo Operation canceled.
)
REM Keep the window open
cmd /k
As usual, be sure to replace all instances of [Your Profile Name] with your correct Windows profile name.
Ensure that the directory C:Users[Your Profile Name]DesktopMusubiOutput Models exists, and create it at that location if not.
Training Previews
There is a very basic training preview feature recently enabled for Musubi trainer, which allows you to force the training model to pause and generate images based on prompts you have saved. These are saved in an automatically created folder called Sample, in the same directory that the trained models are saved.
To enable this, you will need to save at last one prompt in a text file. The training BAT we created will ask you to input the location of this file; therefore you can name the prompt file to be anything you like, and save it anywhere.
Here are some prompt examples for a file that will output three different images when requested by the training routine:
As you can see in the example above, you can put flags at the end of the prompt that will affect the images:
–w is width (defaults to 256px if not set, according to the docs) –h is height (defaults to 256px if not set) –f is the number of frames. If set to 1, an image is produced; more than one, a video. –d is the seed. If not set, it is random; but you should set it to see one prompt evolving. –s is the number of steps in generation, defaulting to 20.
See the official documentation for additional flags.
Though training previews can quickly reveal some issues that might cause you to cancel the training and reconsider the data or the setup, thus saving time, do remember that every extra prompt slows down the training a little more.
Also, the bigger the training preview image’s width and height (as set in the flags listed above), the more it will slow training down.
Launch your training BAT file.
Question #1 is ‘Enter the path to the dataset configuration. Paste or type in the correct path to your TOML file.
Question #2 is ‘Enter the number of epochs to train’. This is a trial-and-error variable, since it’s affected by the amount and quality of images, as well as the captions, and other factors. In general, it’s best to set it too high than too low, since you can always stop the training with Ctrl+C in the training window if you feel the model has advanced enough. Set it to 100 in the first instance, and see how it goes.
Question #3 is ‘Enter the output model name’. Name your model! May be best to keep the name reasonably short and simple.
Question #4 is ‘Choose learning rate’, which defaults to 1e-3 (option 1). This is a good place to start, pending further experience.
Question #5 is ‘How often (in steps) to save preview images. If you set this too low, you will see little progress between preview image saves, and this will slow down the training.
Question #6 is ‘What is the location of the text-prompt file for training previews?’. Paste or type in the path to your prompts text file.
The BAT then shows you the command it will send to the Hunyuan Model, and asks you if you want to proceed, y/n.
Go ahead and begin training:
During this time, if you check the GPU section of the Performance tab of Windows Task Manager, you’ll see the process is taking around 16GB of VRAM.
This may not be an arbitrary figure, as this is the amount of VRAM available on quite a few NVIDIA graphics cards, and the upstream code may have been optimized to fit the tasks into 16GB for the benefit of those who own such cards.
That said, it is very easy to raise this usage, by sending more exorbitant flags to the training command.
During training, you’ll see in the lower-right side of the CMD window a figure for how much time has passed since training began, and an estimate of total training time (which will vary heavily depending on flags set, number of training images, number of training preview images, and several other factors).
A typical training time is around 3-4 hours on median settings, depending on the available hardware, number of images, flag settings, and other factors.
Using Your Trained LoRA Models in Hunyuan Video
Choosing Checkpoints
When training is concluded, you will have a model checkpoint for each epoch of training.
This saving frequency can be changed by the user to save more or less frequently, as desired, by amending the --save_every_n_epochs [N] number in the training BAT file. If you added a low figure for saves-per-steps when setting up training with the BAT, there will be a high number of saved checkpoint files.
Which Checkpoint to Choose?
As mentioned earlier, the earliest-trained models will be most flexible, while the later checkpoints may offer the most detail. The only way to test for these factors is to run some of the LoRAs and generate a few videos. In this way you can get to know which checkpoints are most productive, and represent the best balance between flexibility and fidelity.
ComfyUI
The most popular (though not the only) environment for using Hunyuan Video LoRAs, at the moment, is ComfyUI, a node-based editor with an elaborate Gradio interface that runs in your web browser.
Source: https://github.com/comfyanonymous/ComfyUI
Installation instructions are straightforward and available at the official GitHub repository (additional models will have to be downloaded).
Converting Models for ComfyUI
Your trained models are saved in a (diffusers) format that is not compatible with most implementations of ComfyUI. Musubi is able to convert a model to a ComfyUI-compatible format. Let’s set up a BAT file to implement this.
Before running this BAT, create the C:Users[Your Profile Name]DesktopMusubiCONVERTED folder that the script is expecting.
@echo off
REM Activate the virtual environment
call C:Users[Your Profile Name]DesktopMusubimusubiScriptsactivate.bat
:START
REM Get user input
set /p INPUT_PATH=Enter the path to the input Musubi safetensors file (or type "exit" to quit):
REM Exit if the user types "exit"
if /i "%INPUT_PATH%"=="exit" goto END
REM Extract the file name from the input path and append 'converted' to it
for %%F in ("%INPUT_PATH%") do set FILENAME=%%~nF
set OUTPUT_PATH=C:Users[Your Profile Name]DesktopMusubiOutput ModelsCONVERTED%FILENAME%_converted.safetensors
set TARGET=other
echo You entered:
echo Input file: %INPUT_PATH%
echo Output file: %OUTPUT_PATH%
echo Target format: %TARGET%
set /p CONFIRM=Do you want to proceed with the conversion (y/n)?
if /i "%CONFIRM%"=="y" (
REM Run the conversion script with correctly quoted paths
python C:Users[Your Profile Name]DesktopMusubimusubimusubi-tunerconvert_lora.py --input "%INPUT_PATH%" --output "%OUTPUT_PATH%" --target %TARGET%
echo Conversion complete.
) else (
echo Operation canceled.
)
REM Return to start for another file
goto START
:END
REM Keep the window open
echo Exiting the script.
pause
As with the previous BAT files, save the script as ‘All files’ from Notepad, naming it convert.bat (or whatever you like).
Once saved, double-click the new BAT file, which will ask for the location of a file to convert.
Paste in or type the path to the trained file you want to convert, click y, and press enter.
After saving the converted LoRA to the CONVERTED folder, the script will ask if you would like to convert another file. If you want to test multiple checkpoints in ComfyUI, convert a selection of the models.
When you have converted enough checkpoints, close the BAT command window.
You can now copy your converted models into the modelsloras folder in your ComfyUI installation.
Typically the correct location is something like:
C:Users[Your Profile Name]DesktopComfyUImodelsloras
Creating Hunyuan Video LoRAs in ComfyUI
Though the node-based workflows of ComfyUI seem complex initially, the settings of other more expert users can be loaded by dragging an image (made with the other user’s ComfyUI) directly into the ComfyUI window. Workflows can also be exported as JSON files, which can be imported manually, or dragged into a ComfyUI window.
Some imported workflows will have dependencies that may not exist in your installation. Therefore install ComfyUI-Manager, which can fetch missing modules automatically.
Source: https://github.com/ltdrdata/ComfyUI-Manager
To load one of the workflows used to generate videos from the models in this tutorial, download this JSON file and drag it into your ComfyUI window (though there are far better workflow examples available at the various Reddit and Discord communities that have adopted Hunyuan Video, and my own is adapted from one of these).
This is not the place for an extended tutorial in the use of ComfyUI, but it is worth mentioning a few of the crucial parameters that will affect your output if you download and use the JSON layout that I linked to above.
1) Width and Height
The larger your image, the longer the generation will take, and the higher the risk of an out-of-memory (OOM) error.
2) Length
This is the numerical value for the number of frames. How many seconds it adds up to depend on the frame rate (set to 30fps in this layout). You can convert seconds>frames based on fps at Omnicalculator.
3) Batch size
The higher you set the batch size, the quicker the result may come, but the greater the burden of VRAM. Set this too high and you may get an OOM.
4) Control After Generate
This controls the random seed. The options for this sub-node are fixed, increment, decrement and randomize. If you leave it at fixed and do not change the text prompt, you will get the same image every time. If you amend the text prompt, the image will change to a limited extent. The increment and decrement settings allow you to explore nearby seed values, while randomize gives you a totally new interpretation of the prompt.
5) Lora Name
You will need to select your own installed model here, before attempting to generate.
6) Token
If you have trained your model to trigger the concept with a token, (such as ‘example-person’), put that trigger word in your prompt.
7) Steps
This represents how many steps the system will apply to the diffusion process. Higher steps may obtain better detail, but there is a ceiling on how effective this approach is, and that threshold can be hard to find. The common range of steps is around 20-30.
8) Tile Size
This defines how much information is handled at one time during generation. It’s set to 256 by default. Raising it can speed up generation, but raising it too high can lead to a particularly frustrating OOM experience, since it comes at the very end of a long process.
9) Temporal Overlap
Hunyuan Video generation of people can lead to ‘ghosting’, or unconvincing movement if this is set too low. In general, the current wisdom is that this should be set to a higher value than the number of frames, to produce better movement.
Conclusion
Though further exploration of ComfyUI usage is beyond the scope of this article, community experience at Reddit and Discords can ease the learning curve, and there are several online guides that introduce the basics.
First published Thursday, January 23, 2025
#:where#2022#2025#ADD#admin#ai#AI video#AI video creation#amd#amp#API#approach#architecture#arrangement#Article#Artificial Intelligence#attention#authentication#author#back up#bat#box#browser#cache#challenge#change#clone#code#command#command prompt
0 notes
Text
Chia sẻ kinh nghiệm chọn mua PC Thiết Kế Đồ Họa
Khi tham gia lĩnh vực thiết kế đồ họa, việc chọn mua một chiếc PC phù hợp là một quyết định quan trọng. Máy tính chuyên dụng cho thiết kế đồ họa không chỉ giúp nâng cao hiệu suất làm việc mà còn đảm bảo khả năng xử lý đồ họa phức tạp. Tuy nhiên, việc lựa chọn một chiếc PC phù hợp không phải lúc nào cũng dễ dàng. Trong bài viết này, chúng tôi sẽ chia sẻ kinh nghiệm để giúp bạn lựa chọn một chiếc PC thiết kế đồ họa tốt nhất cho nhu cầu của mình.
1. Kinh nghiệm khi chọn build PC thiết kế đồ họa
So sánh với các dòng máy văn phòng hoặc máy tính dùng cho mục đích giải trí thông thường, máy tính dành cho công việc đồ họa và sản xuất nội dung đòi hỏi một mức độ hiệu năng cao hơn. Để lựa chọn được cấu hình phù hợp, đặc biệt đối với những người không có nhiều kinh nghiệm, dưới đây là một số lời khuyên mà chúng tôi muốn chia sẻ:
Về CPU
Khác với dòng máy gaming, đối với PC đồ họa chúng ta không cần lựa chọn 1 con chip có quá nhiều nhân, điều quan trọng cần chú ý đó là tốc độ xung nhịp càng cao thì càng tốt, vì nó sẽ giúp bạn dựng hình, render nhanh và mượt mà hơn. Xung nhịp của CPU cũng sẽ tác động lớn đến hiệu quả của các phần mềm dựng 2D và 3D.
Vậy lựa chọn CPU thế nào vừa đảm bảo chạy ngon, vừa phù hợp túi tiền?
Với công việc thiết kế đồ họa 2D dạng nhẹ, để đảm bảo khả năng hoạt động mượt mà, đa nhiệm tốt, nên chọn các dòng CPU Intel Core i3 mới nhất trở lên như i3 10105, i3 12100,…
Về Card đồ họa
Khi sử dụng phần mềm Chaos Vantage và các phần mềm Render Realtime khác, card đồ họa là một thành phần vô cùng quan trọng và ảnh hưởng đáng kể đến hiệu suất toàn diện của hệ thống. Đặc biệt, khi chọn GPU để thực hiện các tác vụ render, bạn cần chú ý đến dung lượng VRAM của card, vì nếu không đủ VRAM, bạn sẽ không thể mở các tệp nặng hoặc render ảnh, video ở độ phân giải cao hơn.
Do đó, để hệ thống hoạt động tối ưu nhất bạn nên lựa chọn các mã card màn hình thuộc dòng GeForce RTX của NVIDIA, với hiệu năng cao, giá thành hợp lí cùng mức VRAM cực lớn như RTX 3060 12GB, RTX 4070 12GB, RTX 4080 16GB, RTX 3090 24GB, RTX 4090 24GB,…
Về ổ cứng

Về RAM
RAM là một thành phần không thể thiếu trong hệ thống và đóng vai trò quan trọng trong xử lý các tác vụ. Nó ảnh hưởng đến khả năng xử lý của hệ thống, xem xét việc nhanh chóng hoặc chậm chạp thực hiện các tác vụ.
Các phần mềm đồ họa thường được biết đến như là “kẻ sát RAM” vì chúng tiêu tốn một lượng lớn dung lượng RAM của máy tính khi thực hiện các tác vụ. Đặc biệt, khi làm việc với phần mềm như Photoshop để chỉnh sửa hình ảnh chất lượng cao, hoặc các phần mềm như Premiere và After Effects để xử lý đồ họa liên quan, sự tăng cường RAM là vô cùng quan trọng.
Mặc dù RAM chỉ là một bộ phận lưu trữ, nhưng khi bộ nhớ RAM đầy, chắc chắn sẽ ảnh hưởng đến việc truyền tải dữ liệu vào bộ nhớ đệm. Do đó, chọn RAM có độ bus cao càng cao thì tốc độ chạy chương trình càng nhanh và mượt mà.
Nếu bạn là 1 Graphic Designer thì chúng tôi khuyên bạn nên chọn RAM 16GB. Còn đối với những ai chuyên về thiết kế đồ họa 3D thường xuyên sử dụng các phần mềm nặng như Lumion, Sketchup, 3Dsmax,… nên chọn tối thiểu 32GB RAM trở lên.

2. Cấu hình tối thiểu build PC thiết kế đồ họa
Như đã nói ở phía trên, máy tính vẽ đồ họa, hay máy tính học thiết kế nội thất khác với nhu cầu chơi game và nó đặc biệt khắt khe về cấu hình. Vậy chuẩn cấu hình máy tính như thế nào thì đáp ứng được từ yêu cầu từ cơ bản đến nâng cao của công việc thiết kế đồ họa?
Cấu hình tối thiểu của một PC thiết kế đồ họa chuyên nghiệp bao gồm:
Bộ xử lý CPU: Đối với CPU, nên chọn Intel Core i5, i7 hoặc cao hơn, AMD Ryzen 5, Ryzen 7 hoặc AMD Ryzen Threadripper để đảm bảo khả năng xử lý mạnh mẽ và đáp ứng được yêu cầu của các phần mềm đồ họa.
Bo mạch chủ (Mainboard): Chọn bo mạch chủ tương thích với CPU và có khả năng nâng cấp trong tương lai. Nên chọn mainboard từ dòng trung cấp trở lên như dòng B hoặc Z để có các tính năng và hiệu năng tốt hơn.
Bộ nhớ RAM: Dung lượng RAM nên từ 16GB đến 32GB. Tối thiểu nên có 8GB để hỗ trợ việc sử dụng đồng thời nhiều tác vụ phần mềm.
Card đồ họa (VGA): Tối thiểu nên chọn card đồ họa từ dòng NVIDIA GeForce GTX 1650 trở lên. Tuy nhiên, nếu có điều kiện, nên chọn dòng card màn hình cao cấp như GeForce RTX để tận dụng được hiệu suất xử lý đồ họa tốt nhất.
Ổ cứng SSD/HDD: Nên trang bị ít nhất một ổ cứng SSD dung lượng 256GB để cài đặt các ứng dụng, phần mềm và hệ điều hành. Ngoài ra, có thể thêm một ổ cứng lưu trữ HDD với dung lượng tùy chọn để lưu trữ dữ liệu và tệp tin lớn.
Nguồn máy tính: Đảm bảo có nguồn máy tính có công suất đủ lớn để cung cấp điện năng cho toàn bộ các linh kiện trong hệ thống.
Ngoài cấu hình trên, ban cũng cần có một màn hình có kích thước đủ rộng. Độ phân giải hỗ trợ chuẩn 1920×1080 (Full HD) trở lên để màu sắc được hiển thị tốt nhất. Việc lựa chọn màn hình máy tính bàn cho dân thiết kế cũng là một công việc cực kỳ quan trọng.
Việc chọn mua một chiếc PC thiết kế đồ họa là một quá trình quan trọng và đòi hỏi sự tìm hiểu kỹ lưỡng. Bằng việc hiểu rõ nhu cầu của bạn, nắm vững các yếu tố quan trọng như CPU, GPU, RAM, và lưu trữ, bạn có thể tạo ra một môi trường làm việc tốt nhất để thể hiện tài năng sáng tạo của mình. Hy vọng rằng các kinh nghiệm chia sẻ trong bài viết này đã giúp bạn có cái nhìn tổng quan và cung cấp cho bạn những hướng dẫn cần thiết để chọn mua một chiếc PC thiết kế đồ họa tốt nhất.
Website chính thức: 3dcomputer.vn
0 notes
Text
Best Gaming PC Build in India 2022 In All Price Ranges
Bringing home a dedicated Gaming PC with all essential components at an even better price range is what every game enthusiast often looks forward to. If you’re someone, who would like to game intensively for hours, you fortunately have multiple options that come with pretty impressive specs when shopping around for a desktop.
This is when it becomes hard to pick an ideal Gaming PC Full Setup, hence before finalizing the one, don’t forget to determine your specific needs & budget. And, if you don’t have enough money to get a new gaming rig, we have a list of the various custom-built gaming PCs in every price range that you can take into consideration when buying.
List Of The Best Gaming PC In All Price Ranges:
Low PC Builds: Hades-Series
Price: ₹ 84,900.00
Processor: Intel Core i5 12400F (6 Core, 12 Threads, Up to 4.4 GHz)
RAM: 16GB ADATA XPG Spectrix D50 RGB 8GB X 2 3200 MHz DDR4
Graphics Card: MSI GEFORCE RTX 3060 Ventus 2 X OC 12 GB GDDR6-LHR
Primary Storage: SSD 512 GB GEN M.2 NVME ADATA XPG S11 PRO
Secondary Storage: 1 TB WD / Seagate SATA HDD 7200 RPM
Case Fans: Pre-Installed Fans
Average PC Builds: Ares-Series
Price: ₹ 86,200.00
Processor: AMD Ryzen 5 5600X (6 Core, 12 Threads, Up to 4.6 GHz)
RAM: 16GB ADATA XPG Spectrix D50 RGB 8GB X 2 3200 MHz DDR4
Graphics Card: INNO3D GEFORCE RTX 3060 TWIN X 2 12GB GDDR6 - LHR
Primary Storage: SSD 512 GB M.2 NVME ADATA XPG S11 PRO
Secondary Storage: 1 TB WD / Seagate SATA HDD 7200 RPM
Case Fans: Pre-Installed Fans
Average PC Builds: Freya-Tower
Price: ₹ 1,31, 550.00
Processor: AMD Ryzen 7 5700X (8 Core, 16 Threads, Up to 4.6 GHz)
RAM: 16GB RGB 3200 MHz DDR4
Graphics Card: INNO3D GEFORCE RTX 3060 AI TWIN X 2 8GB GDDR6 - LHR
Primary Storage: SSD 512 GB GEN 4 M.2 NVME ADATA XPG S50 LITE
Secondary Storage: None
Case Fans: Pre-Installed Fans
High PC Builds: Fluid Neil
Price: ₹ 4,59,535.00
Processor: Intel Corei9 12900K (16 Core, 24 Threads, Up to 5.2 GHz)
RAM: 8GB ADATA XPG D30 3200 MHz DDR4
Graphics Card: INNO3D GEFORCE RTX 3090 FORSTBITE 24 GB GDDR6 X
Primary Storage: SSD 1 TB GEN M.2 NVME ADATA XPG S70 Blade
Secondary Storage: 1 TB WD / Seagate SATA HDD 7200 RPM
Case Fans: Pre-Installed Fans
Let’s Conclude!!
So, if you also fall into the category of passionate gamers & planning to buy the Best Gaming PC but are not sure how then simply get in touch with a trusted Custom PC Builder in India like SMC, ANT PC, or others. With their assistance, you will surely find the incomparable options as mentioned above that you can choose from on an on-needed basis. And, get a chance to have an immersive gaming experience whilst playing your favorite high-end games!!
0 notes
Text
How to choose the best and cheap VGAS card in Kuwait
The best graphics card for gaming PC can deliver silky-smooth frame rates, is inexpensive, and is simple to obtain. That last one has been difficult for a while, but things are getting back to normal now, and we've managed to round up the top three inexpensive VGA cards and put them through their paces to help you choose the best. This information is especially valuable if you're looking for the best prebuilt gaming PC in kuwait, which is still the most convenient option to get the top graphics cards at nextstore shop Kuwait.
What factors you should consider while choosing a VGA card to enhance the gaming experience
The gaming industry has played a key role in the advancement of GPU technology. Today's PC games are more realistic and intricate than ever before, thanks in part to the improved performance of contemporary graphics cards, as well as a response to gamers' demands for better-looking and more complex games. The GPU will be your most significant buy if you're creating a PC to play games. Other aspects, such as the CPU, memory, and RAM, may have an influence on productivity, but the GPU has the strongest link to what you see on the screen when playing.
However, there are numerous types of games, and not all of them necessitate the most capable graphics card available. To ensure that you receive a compatible GPU, read the game's necessary, recommended, and ideal specs.
Investing in the greatest and most affordable video card is a fantastic method to future-proof your system and ensures that it is capable of playing popular games that have yet to be launched.
Cooling
GPUs generate a significant amount of heat. This heat production is represented by the TDP figure, which is important when choosing a graphics card for your PC. If your TDP is high, your computer will need extra fans to transfer heat effectively. Because fans necessitate more space and power. Smaller computer towers require GPUs with low TDP, but larger computer towers provide more flexibility.
Power
You'll also need to examine if your power supply has adequate 8-pin or 6-pin connectors for your graphics card, in addition to the TDP number for space concerns. You may simply ensure this by investing in a power supply that is at least 80 Plus Bronze.
Memory
Most graphics cards have video RAM ranging from 2 to 12 GB. However, there is a lot of debate about how much memory is needed for the best computer performance. Some forums claim that the amount of memory doesn't matter, while others state that it is a critical factor to consider when buying a graphics card.
Bandwidth
While some may understand the wisdom of GPU memory, everyone agrees that bandwidth is critical. The amount of memory that the GPU can access at any given time is referred to as bandwidth.
Data is supplied to the graphics cores at a quicker rate when a GPU has more bandwidth. As a result, games and video images operate smoothly and clearly.
To understand connectivity, you must first understand how it works. When memory speed and bus width are combined, bandwidth is determined.
List the top 3 Kuwait cheap VGA cards for your pc?
Asus Rog & Tuf Series Graphics Cards ( Rog is high end product and TUF series comes with standard features
This is a powerful and affordable VGA card available to shop at the nextstore Kuwait, with excellent characteristics. This affordable VGA card, which is based on the Ampere architecture and built to meet the graphical demands of 4K gaming and 1440p at high frame rates, gives your PC games the power of real-time ray tracing and AI. 2nd Gen RT Cores and 3rd Gen Tensor Cores make up the Ampere architecture. It has 12GB of GDDR6X VRAM and a 384-bit memory interface, and it outperforms the previous Turing-based iteration in terms of performance and power efficiency. DisplayPort 1.4a and HDMI 2.1 are among the outputs on the card's front panel. HDMI 2.1 supports up to 48 Gb/s bandwidth and a wide range of higher resolutions and refresh rates, such as 8K at 60 frames per second, 4K at 120 frames per second, and even 10K. The RTX 3080 Ti is made to provide you with a better gaming experience.
PNY GeForce RTX XLR8 Gaming Revel Epic-X RGB Triple Fan
Zotac AMP Extreme Holo, Twin Edge Trinity LHR and Non LHR Series
With the visual fidelity of real-time ray tracing and the ultimate performance of Al-powered DLSS, experience today's biggest blockbusters like never before. Ampere-2nd NVIDIA's gen RTX architecture powers the GeForce RTXTM 3070. It has improved RT Cores and Tensor Cores, as well as new streaming multiprocessors and high-speed G6 RAM, allowing you to play even the most demanding games.
New 2nd generation Ray Tracing Cores and 3rd generation Tensor Cores with higher throughput are also included.
MSI Suprim, Trio & Gaming X Series
PNY XLR8 Graphics Cards
The powerful GIGABYTE RTX 3060 VISION OC Graphics card enhances your work's performance dramatically. If you enjoy gaming, this graphic card will provide you with an excellent experience because of its color saturation, visibility, and smoothness. Its WINDFORCE 3X cooling system includes 3X80mm unique blade fans, alternate spinning, 3 composite copper heat pipes direct touch GPU, 3D active fan, and Screen cooling, all of which contribute to excellent heat dissipation efficiency. GIGABYTE RTX 3060 VISION OC Alternate fan spinning can reduce turbulence and boost air pressure by spinning the fans in a different direction.
Conclusion
You should have no trouble in picking the correct graphics card for your computer if you know how to cope with each of the criteria listed above. If you're looking for the best VGA card, go to the nextstore Kuwait and acquire yours for the best price. At Kuwait Cheap VGA card we have a broad range of gaming graphic cards that superficially enhance your gaming experience in each aspect.
0 notes
Text
Best Graphics Card for AI Development at Budget Gamer UAE

Choose a powerful GPU like the RTX 4090 or RTX 3090 if you're looking for the best graphics card for AI development, whether it's neural networks, computer vision, or data science. Combine it with a strong ecosystem that includes a CPU, RAM, storage, cooling system, and power source. Additionally, Budget Gamer UAE, your local expert in high-end AI development PCs, offers the greatest service, pricing, and performance.
#Best GPU for AI Model Training#16GB GPU Workstation for AI#12GB Graphics Card PC for AI#AI Training PC#Data Science PC Build#AI Development PC
1 note
·
View note
Text
NVIDIA GeForce RTX 5060 Ti Release Date, Price And Specs

Blackwell Innovations Are Now Available to Gamers and Creators with the RTX 5060 Family. Current Events NVIDIA will introduce the GeForce RTX 5060 desktop and laptop GPUs on May 19, 2025. These powerful GPUs allow more people to enjoy NVIDIA Blackwell architecture and advancements.
GeForce RTX 5060/Ti
The GeForce RTX 5060 Family builds on the success of 60-class cards to make cutting-edge graphics capabilities more accessible. The RTX 5060 and 5060 Ti support the latest NVIDIA technology and AI features.
GeForce RTX 5060 desktop GPU
Price and specs:
MSRP: $299.
3840 cores.
Boost clock: 2.50 GHz.
VRAM: 8 GB GDDR7.
Characteristics
The NVIDIA Blackwell RTX architecture. has the latest GDDR7 VRAM, Shader, Tensor, and Ray Tracing Cores. supports AV1 and DisplayPort 2.1 UHBR20 screens and better video encoding and decoding.
Performance
Over GeForce RTX 4060, DLSS 4 Multi Frame Generation doubles gaming performance. Upgrades from GTX 1660 or RTX 2060 improve performance and responsiveness.
It has more features, performance, and gaming responsiveness than the more expensive GeForce RTX 3060 and 2060.
Play your favourite games at over 100 fps with the RTX 5060.
The RTX 5060 outperforms the 4060, 3060 (12GB), and 2060 in many games with maximum settings and DLSS.
Goal: Power 1080p high-frame rate gaming. While 2560×1440 is possible, frame rates will decrease, hence it is recommended to play at the original display resolution.
Upgrade Considerations: Check chassis and power supply compatibility (typically 550W). Check for PCIe power cables, usually one 8-pin cable.
GeForce RTX 5060 laptop GPU
Availability
New computers from leading brands cost $1099.
Features
Max-Q technologies maximise power efficiency, and NVIDIA Blackwell powers it. lets RTX laptops live longer and be slimmer (14.9mm). Few models are confirmed by NVIDIA Studio.
Performance
With Blackwell and DLSS 4, gamers may expect twice the performance of prior generations. more than twice as fast as older laptops with NVIDIA Reflex and DLSS 4 Multi Frame Generation. gives games 100+ FPS.
Uses cutting-edge AI to accelerate creativity. speeds up data science, engineering, and architecture student apps.
Portability
Lightweight 14-inch laptops weigh 1.46 kg. Battery life reached 14 hours.
Creative Skills
In 3D design, video, and generative AI apps, RTX 50 Series laptops and NVIDIA Studio double creativity. Supported are 6th-gen NVDEC, H.264, 9th-gen NVENC, AV1 UH Quality mode, and 4:2:2 video editing and encoding. D5 Render and Chaos Vantage viewports speed up with DLSS 4.
GeForce RTX 5060 Ti
Release is April 2025.
Details: ◦ Initial Cost: $379 (prices vary).
4608 CUDA cores, 20% more than RTX 5060.
Boost: 2.57 GHz.
VRAM: 8 or 16 GB GDDR7.
Performance
Faster than RTX 5060. much faster in 1440p than the RTX 4060 Ti (16GB). Ray tracing can reach 180 FPS on the 16GB model with DLSS Multi Frame Generation at 1440p. Many times quicker than the RTX 3060 Ti. RTX 2060 SUPER is sluggish.
Target Use
An wonderful modernisation option. Resolution of 2560×1440 or greater is optimal.
Discussing RTX 50 Series Ecosystem and Technologies
RTX 5060 and 5060 Ti use NVIDIA's ecosystem. Important technologies include:
Multi-frame generation DLSS 4
This method multiplies frame rates by adding up to three frames per normal frame using the Blackwell architecture. This works with other DLSS technologies. It supports 75 games and apps, 100 in March, and over 125 titles, with updates improving.
DLS Super Resolution
Improves performance and image quality with transformer AI models. available in over 220 games.
NVIDIA Reflex
Lowers PC latency to improve control responsiveness in 150+ games.
Full Path (Ray) Tracing
A complex light modelling tool for photorealistic images. dramatically boosts realism and immersion.
DLSS Ray Reconstruction
By replacing conventional denoisers with a single AI model, path and ray tracing become more accurate and stable.
RTX NRC neuroradiance cache
This feature works with all GeForce RTX GPUs and is the first neural shadier to assess indirect illumination using AI. It optimises lighting during live gaming. Turning on DLSS 4 and NRC concurrently boosts performance and image quality.
NVIDIA Studio
Optimises leading productivity, creative, and work apps. Creators benefit from Studio Drivers' stability.
NVDA Broadcast
Smart chat, video, and streaming audio and video enhancements.
G-Sync monitors
These monitors match GPU refresh rates for seamless gaming.
NVIDIA App
This sophisticated software optimises settings and upgrades drivers with a click.
Game-Ready Drivers
Regularly released drivers ensure optimal performance and compatibility with new games.
Price and availability of GeForce RTX 5060
GeForce RTX 5060 desktop GPUs cost $299. Add-in cards from ASUS, Colourful, Gainward, Galaxy, GIGABYTE, INNO3D, MSI, Palit, PNY, and ZOTAC complement system makers' pre-built PCs.
All major OEMs sell the $1099 GeForce RTX 5060 laptop GPU. Long battery lives are characteristic of thin laptops up to 14.9 mm.
New GeForce RTX 5060 desktop and laptop GPUs enable DLSS 4 with Multi Frame Generation, trebling speed, and bringing neural rendering and other Blackwell advances to creators and gamers. The $379 GeForce RTX 5060 Ti debuted in April 2025. The 5060 Family offers a faster option.
Geforce RTX 5060 Ti Cost
NVIDIA introduced RTX 5060 Ti. 16GB GDDR7 costs $429 USD, while 8GB costs $379 USD.
Purchase Choices
Many manufacturers sell GeForce RTX 5060 and 5060 Ti desktop graphics cards. Models differ in factory overclocks, size (case compatibility), style (aesthetics, RGB lights), and power connectors. Most ITX versions are tiny due to dual-fan designs. Fully built GPU systems are available from major brands and system builders. The NVIDIA Marketplace Product Finder lists models and PCs.
#NVIDIAGeForceRTX5060#GeForceRTX5060andRTX5060Ti#RTX5060Ti#GeForceRTX5060#RTX5060andRTX5060Ti#GeForceGraphicsCardRTX5060Ti#technology#technologynews#TechNews#news#govindhtech
0 notes
Text
iGame RTX3060 Ultra W OC Review: Next Gen Graphics at an Affordable Price
iGame RTX3060 Ultra W OC
8.00 / 10
Read Reviews
Read More Reviews
Read More Reviews
Read More Reviews
Read More Reviews
Read More Reviews
Read More Reviews
Read More Reviews
Read More Reviews
Read More Reviews
Read More Reviews


Shop Now
With a Turbo button to enable a factory overclock, the iGame3060 Ultra W OC is the cheapest entry to next-gen graphics yet. Thanks to Nvidia crippling the card for cryptomining, you might actually be able to buy one. But probably not.
However, VR users beware: there's a serious bug affecting VR rendering performance and Nvidia still doesn't know why.
Specifications
Brand: Colorful
Cooling Method: Three fans
GPU Speed: 1320MHz
Interface: PCI-Express 4.0 x16
Memory: 12GB GDDR6
Power: 170W
Buy This Product
iGame RTX3060 Ultra W OC other
Shop
// Bottom var galleryThumbs1 = new Swiper('.gallery-thumbs-1', { spaceBetween: 10, slidesPerView: 10, freeMode: true, watchSlidesVisibility: true, watchSlidesProgress: true, centerInsufficientSlides: true, allowTouchMove: false, preventClicks: false, breakpoints: { 1024: { slidesPerView: 6, } }, }); // Top var galleryTop1 = new Swiper('.gallery-top-1', { spaceBetween: 10, allowTouchMove: false, loop: true, preventClicks: false, breakpoints: { 1024: { allowTouchMove: true, } }, navigation: { nextEl: '.swiper-button-next', prevEl: '.swiper-button-prev', }, thumbs: { swiper: galleryThumbs1 } });
The RTX3060 is the newest addition to NVidia's 30-series graphics cards. It's the cheapest yet, and the strangest, with a whopping 12GB of RAM. There is no Founder's Edition, so while I could tell you the recommended retail price is $330, the price will actually be set at whatever retailers think they can get away with.
Today we're taking a look at the iGame RTX3060 Ultra W OC Edition, from Colorful.cn. But it's a bittersweet review, since you probably can't buy it. It's out of stock on official channels, and I'm certainly not going to link that little buy button up there to eBay scalpers.
youtube
But in case you can get your hands on one: this review is aimed at those of you, like me, who are upgrading from a GTX10-series or 9xx card. If you already own an RTX20-series, the performance gains will be minimal, and you've already had a taste of ray tracing.
iGame RTX3060 Ultra W OC Edition Design
Measuring 4.25 inches tall, 11.75 inches deep, and 2.25 inches thick, I had no problem fitting it into a Corsair 500D case.
It requires two standard 8-pin power plugs and draws up to 170W, so you should be fine with a 550W or better PSU.
The card's shroud is predominantly matt white plastic, with three fans to provide cooling. Around the fans, there's a little blue and purple gradient accents, as well some curious red on yellow banding that almost looks like warning tape. The design is certainly unique.
You'll find a small pulsating iGame logo under the power pins—which is largely covered by the 12V cables in my case where the PSU is seated at the bottom. There's no other RGB lighting to be found. But the fact that the card is mostly white means it's reflects nicely whatever lighting your case features, as you can see from the photos.
Alongside the three DisplayPorts and one HDMI, you'll find a Turbo boost button. Children of the 80s may have flashbacks to the early days of computing, when all IBM PCs had a Turbo button (which was technically a "slow down" button when off, as some software relied on the PC clock speed to function correctly). But I digress. Depress the Turbo button, reset your system, and the card switches over to the factory overclocked BIOS settings.
The overclocked BIOS seemed to add a few frames to no detriment, so I left it on after some initial performance tests. Those who like to tweak their own overclock settings will no doubt be able to squeeze more power from the card, but for me, a preconfigured overclock is a welcome addition.
Goodbye, Cryptominers?
Graphics card prices have skyrocketed in the past few years, for a number of reasons.
Firstly, because of a global chip shortage. The pandemic certainly hasn't helped—shipping routes have been crippled—but there's also increasing demands on chip manufacturers to feed the global consumer demand for smart cars, smart gadgets, new phones, and more.
Secondly, the proliferation of scalper bots: automated software that purchases stock as soon as it's listed, then relists it at a higher price on eBay and elsewhere. Changes in the law will be needed to tackle these particular parasites (just as the UK did with ticket scalpers).
Thirdly, and perhaps most significantly, is the use of graphics processors for intensive cryptocurrency mining algorithms.
Starting with the RTX3060, Nvidia is at least trying to tackle the problem of crypto. The latest GeForce drivers are trained to detect when they're being used for the Ethereum hashing algorithm, and will forcefully limit the computing power available, halving the effective "hash rate".
Although Ethereum isn't the only cryptocurrency around that can be mined on standard PC hardware, it's one of the most popular and therefore limits profitability for mining apps that automatically swap to the most profitable coin. At the time of writing, NiceHash estimates you can make about $5/day using an RTX3060 Ti; with the RTX3060, that drops to $2.75. So for miners, the RTX3060 is the least attractive option. Even if they could get their hands on a card at RRP, it would take four months to get a return (and remember, mining gets harder every day as the total hash power increases). Of course, not wanting to leave money on the table, Nvidia also took the opportunity to announce a new line of cards that were optimized for mining, which it's calling the CMP range.

Sadly, this change can't be pushed onto other cards, since miners would always be able to drop back to a previous driver version that wasn't nerfed for mining. Still, it's a good first step, and I applaud Nvidia for taking strides to tackle the issue. It's one less evil entity vying for these gaming cards, at least.
Resizable BAR
Also available first to the RTX3060 cards (but rolling out at a later date to existing cards via a VBIOS upgrade), Resizeable BAR is a PCI Express technology that enables faster transfer of assets between the GPU and host system. Instead of queuing items to load, they should be able to transfer concurrently.
Performance testing indicates a roughly 10% uplift in frame rates, but with some caveats. Firstly, you'll need both a compatible CPU and a compatible motherboard. Games will also need to be specifically written to take advantage of the technology.
Neither my motherboard nor CPU is compatible, so I can't confirm any performance gains from this.
DLSS2.0, and Ray Tracing
The two headline features of the RTX30 series are Ray Tracing and DLSS2.0. Both were first introduced in the first generation of RTX20 cards, but have received upgrades for this generation.
Ray Tracing is a more realistic way of presenting light sources and how they interact with objects and surfaces in a scene, particularly when it comes to reflections.
youtube
It more accurately models the behavior of light by drawing a series of rays to determine where they fall (and where they reflect to). It's the last step on the road to true photo-realistic graphics. But it needs a huge amount of computational power.
Read more: What is Ray Tracing?
DLSS stands for Deep Learning Super Sampling, and I can only summarise it as utterly magic. Since the RTX20-series, Nvidia GPUs have also housed Tensor Core AI chips. These contain neural networks that are trained on thousands of rendered sequences of identical scenes; one of a lower resolution and lower quality, and one of a higher resolution with more details. They learn what must be done to upscale the poorer quality sequence into the higher resolution one, and can then apply that knowledge later to games as they're being played. The upshot is that you can run a game internally at a lower resolution, and simply upscale the output to your screen.
It's a bit like seeing a tree in winter, and imagining what it looks like in full bloom because you've seen that kind of tree before.
While the first generation of DLSS needed to be trained for specific games, Nvidia now has a more generalized model that works on novel games, too.
Personally, I find it fascinating that this is the evolutionary step that graphics cards took. Instead of simply throwing on more RAM and faster processors at the job, Nvidia literally created a form of digital imagination.
Read more: How DLSS Can Give Budget PCs High-End Graphics
Performance Benchmarks
I've been struggling along with a GTX1080 for a few years now, so that's my point of comparison for these benchmarks. All other specs remained identical: 16 GB RAM, Intel Core i7-6700K, on an Asus Z170 Pro Gaming motherboard.
3D Mark TimeSpy DX12 Test
Baseline GTX1080: 6562
iGame RTX3060: 7738 (17% better)
iGame RTX3060 Turbo mode: 7771 (18.4% better)
Next, I turned to VR Mark, and it was here that I hit a bug plaguing many RTX30-series cards since last year.
VR Mark Cyan Room
Baseline GTX1080: 6377 / 139fps average
iGame RTX3060 Turbo mode: 2750 / 60fps average (54% worse)
Clearly, there's something very wrong here, with the RTX3060 achieving less than half the framerate of a five-year-old card. Nvidia is aware of the issue, but seemingly unable to fix. The bug doesn't just affect the 3060. Precisely how widespread the bug is on the 3060 specifically isn't clear; at the time of writing this review, there are only a few other VR Mark Cyan Room results in the world from RTX3060 owners. One other result is very similar to mine, while those with a Core i9 CPU seemed to fare significantly better.
VR Mark Blue Room
Baseline GTX1080: 2229
iGame RTX3060 Turbo mode: 2645 (18.6% better)
Results on the Blue room were more in line with expectations (though still didn't meet the target frame rate). The Blue Room is a more demanding test, designed to check readiness for future headsets rather than current models.
Will It Cyberpunk?
Despite criticisms, Cyberpunk 2077 remains one of the most engrossing depictions of a possible dystopian future that humanity is headed for. It's also graphically demanding with beautiful neon cityscapes, which is why I chose it as my main point of testing to see exactly how pretty it could look running on this card.
For consistency, I recorded average frame rates during the same sequence of events; walking the path outside V's apartment to a little beyond the elevator, and back again. You can view some of the recorded footage and comparisons in the full review video; the screenshots below do not do it justice.
Anytime I enabled raytracing, it was at ultra settings; while DLSS was used on the balanced profile. A summary of results is shown below (including the settings I settled on eventually), with frame rate along the X-axis.
1080p Ultra
As a baseline, my GTX1080 achieved around 50 frames-per-second playing at 1080P resolution, with Ultra settings for everything else. For me, that's playable, but not ideal. If you'd consider 50fps to be unplayable, adjust your expectation appropriately when reading my opinions.
Keeping all settings the same and swapping out for the overclocked iGame RTX3060 Ultra W pushed this up to an average of 75fps. That's a great improvement, but of course one of the standout features of the RTX-era cards is the namesake raytracing. Enable RTX on Ultra settings pulled the framerate down to 30fps. DLSS can compensate somewhat though, and enabling this (at Balanced settings) brought the framerate back to around 58fps.
1440p Ultra
As a baseline, the GTX1080 managed a largely paltry 30fps.
The RTX3060 again showed a roughly 50% uplift, to 44fps. With DLSS activated (but no ray tracing), that went up to an impressive 78fps. As expected, with ray tracing enabled at full quality, it dropped back to 44fps.
4K Ultra
Let's be clear: using this card for 4K gaming is not viable for most modern games. You could tweak everything else to lower quality and perhaps get something playable, but you'd be missing out on a lot.
Still, for the sake of comparison, I did it anyway. As a baseline, the GTX1080 coughed and spluttered up a measly 11fps average.
Swapping that out for the RTX3060 nearly doubled that score to 20fps. Enabling DLSS (without raytracing) managed to push this up even more impressively to around 40fps; but RTX dragged it back down to 22fps.
What does this tell us?
Firstly, that raytracing is a lot more computationally demanding than I'd expected. I'd come into this review thinking I could enable raytracing and otherwise keep the roughly the same framerates as before. Not so.
Secondly, that DLSS can largely compensate for this performance loss of enabling raytracing. Alternatively, DLSS without raytracing can make Ultra HD 4K gaming more feasible (but probably not on Cyberpunk 2077).
In the end, I felt that the resolution upgrade to 1440p was the biggest feasible upgrade, so I made that my target. Though it sounds like a small increase, it's actually 78% more detail compared to 1080p, and if you're playing on a smaller monitor, the jump to 4K after that may not be worth it. I also turned on raytracing at medium quality, and dropped some other settings down to medium quality as well. With DLSS set on Performance, this netted me around 60fps average, which I'm more than happy with.
1440p Cyberpunk is definitely playable on the iGame RTX3060 Ultra W OC with a little tweaking.
4K? Not a chance, but this isn't a surprise.
Should You Buy the iGame RTX3060 Ultra W OC?
The GTX1060 remains the most popular graphics card among Steam users, as of the February 2021 hardware survey. It offered the best price to performance ratio of that generation. The value proposition for the lowest powered card of the 30-series generation is less clear than it was for the 10-series, though.
Compared to the already released RTX3060 Ti ($400), you'll find 3584 CUDA cores vs 4864, and a base clock speed of 1320Mhz vs 1410Mhz. That's roughly 25% less computing power for only a 17% lower price. So if you were purely to look at value for money, the Ti Edition comes out on top.
But in reality, you can't buy either at those prices, so any discussion about the price to performance ratio is ultimately pointless. You aren't buying the RTX3060 because it's the cheapest; you're buying it because it may be one of the few 30-series cards you can actually get your hands on.
Also, if you haven't previously considered Colorful and the iGame brand because you've never heard of it, you absolutely should. It's the most popular brand in the Asian market for a good reason, with great quality kit.
But VR users beware. Nvidia still hasn't figured out what's wrong with these cards for VR in some setups. Your ancient 10-series card may outperform this generation until that gets fixed.
Why Should You Trust My Opinion?
Consoles were banned in our house, so I've been a PC gamer since the early days of DOS. I felt the struggle of getting Wing Commander to run in 640K of RAM. The 3DFX Voodoo was my first real graphics card, and I was gaming in glorious Nvidia-powered stereoscopic 3D way back in 2000, before 3DTVs or VR were a thing. Most of my student loan was spent on PC upgrades.
iGame RTX3060 Ultra W OC Review: Next Gen Graphics at an Affordable Price published first on http://droneseco.tumblr.com/
0 notes
Text
Price: [price_with_discount] (as of [price_update_date] - Details) [ad_1] Experience unparalleled computing power with this high-performance desktop PC, engineered for gaming, editing, and trading. At its heart lies the formidable Core i9-14900K processor, complemented by a massive 128GB DDR5 RAM that ensures seamless multitasking. The RTX 4070 12GB graphics card delivers stunning visuals and ray-tracing capabilities for immersive gaming and professional content creation. Storage is abundant with a lightning-fast 1TB NVMe SSD for quick boot times and frequently used applications, plus a spacious 4TB hard drive for extensive data storage. The system features an ARGB liquid cooler that maintains optimal temperatures while adding a touch of sophistication to your setup. Built-in WiFi and Bluetooth connectivity ensure you stay connected without additional peripherals. This powerhouse comes pre-installed with Windows 11 Pro and essential software, ready to tackle demanding tasks right out of the box. The combination of cutting-edge components makes this PC an ideal choice for enthusiasts who demand top-tier performance across gaming, content creation, and professional applications. Experience next-level performance with the NXTGN Core i9 14th Gen High-Performance Desktop PC, engineered for gaming, professional editing, and high-frequency trading. Powered by the Core i9-14900K processor and 128GB DDR5 RAM, this beast ensures ultra-smooth multitasking, faster rendering, and seamless gameplay. The 1TB NVMe SSD delivers blazing-fast boot times, while the 4TB HDD provides ample storage for your files. Equipped with the RTX 4070 12GB graphics card, enjoy stunning visuals and AI-enhanced performance. The ARGB Liquid Cooler ensures optimal cooling, keeping temperatures low under heavy workloads. PROCESSOR : Latest 14th Gen Core i9-14900K processor delivers exceptional performance for gaming, content creation, and multitasking MEMORY & STORAGE: 128GB DDR5 RAM for seamless multitasking, combined with 1TB NVMe SSD and 4TB HDD for ample storage space GRAPHICS: RTX 4070 12GB graphics card enables stunning visuals, ray tracing, and smooth gaming performance at high resolutions COOLING SYSTEM: Advanced ARGB liquid cooling system with LCD Display Temperature Monitoring maintains optimal temperatures during intensive tasks while adding aesthetic appeal CONNECTIVITY: Integrated WiFi and Bluetooth capabilities, pre-installed Windows 11 Pro, and essential software for immediate use Premium Build Quality & Warranty – Durable, high-performance components backed by 3 years warranty for peace of mind. [ad_2]
0 notes
Text
Samsung Galaxy S20 Ultra May Pack More RAM Than Typical PCs
According to rumor, Samsung’s next-generation phone won’t be the Galaxy S11. It’ll be the Galaxy S20, presumably because it’s 2020 and Samsung wants a bigger number than Apple. The new device will ship in different flavors, as has been typical for the past few years, but the specs on the supposed top-end model are truly something to behold.
Yesterday, Samsung confirmed the Galaxy S20 name of the device family and the overall design, as covered by my colleague Ryan Whitwam. Today, Max Weinbach of XDA Developers leaked the specs on the hardware. The S20 family will ship as the S20, S20+, and S20 Ultra, with the S20 and S20+ offering LTE and the S20 Ultra as a 5G product. Qualcomm’s Snapdragon 865 SoCs are only available when paired with the X55 5G modem, which means the S20 and S20 Ultra might use Samsung’s own custom CPU cores and its LTE modem technology. Historically, Samsung has used its own CPU cores for some Korean and international versions of Galaxy S-class products, but bought from Qualcomm for the US variant. Here are the rumored specs on the upcoming phones:
The S20 Ultra 5G is going to keep the SD Card slot. Support for up to 1TB.
It will also be available in 128GB/256GB/512GB and have a 12GB and 16GB RAM option.
108MP main, 48MP 10x optical, 12MP ultra wide.
5000 mAh battery with 45W option fast charge. 0 to 100% in 74 min.
— Max Weinbach (@MaxWinebach) January 13, 2020
With integrated storage up to 512GB, support for a 1TB SSD, and 16GB of RAM, the Galaxy S20 Ultra is packing PC-like specs in several regards. Of course, the actual experience of using an Android device is nothing like a PC, and thus far we’ve seen only limited attempts to give Android devices an actual PC-like experience or UI. An article earlier this year at Android Police argued that Chrome OS has stalled out precisely because Android apps are not designed for Chrome OS and the experience of using them in that manner is subpar. Samsung has its DeX software, but software development isn’t exactly Samsung’s thing, if you take my meaning.
The statement that the S20 Ultra will “keep” the SD slot may imply that the lower-end devices in the tier are dropping it entirely — it’s hard to parse. The 16GB of RAM is an enormous amount that’s clearly meant to impress more on paper than to offer any kind of practical use. Large amounts of RAM doesn’t guarantee that applications are left open in the background, for example. We’ve seen bugs on various devices where phones were closing apps too aggressively, leading to annoying lag times when switching from application to application.
The RAM loadout on smartphones has begun to remind me of the low-end graphics card market. Historically, OEMs would often load more RAM on a low-end GPU than it could ever possibly make use of. If “High” detail requires 4GB of RAM and your GPU can only run things at “Low,” which requires 2GB, then putting 4GB of RAM on the card is useless. OEMs did it because they could sell the 4GB flavor for an extra $15 – $25, which was less than the cost of putting the RAM chips on in the first place. It’ll be interesting to see if Samsung can articulate a use-case for stuffing a desktop’s worth of RAM into a smartphone.
There’s been a lot of back-and-forth on how much the shift to 5G will hit power consumption on these devices. I’m not willing to take a guess until we see actual power consumption figures. I’ve never been a fan of pushing more RAM into smartphones than they can practically use; higher density RAM configurations typically require more chips, and more chips typically consume more power. Granted, yes, the difference in power consumption between an 8GB and a 16GB device is going to be very small — but in a product where every milliwatt counts, I’d sooner have less RAM if it isn’t actually being used for something useful.
The 5000 mAh battery and 74-minute charge time should both be welcome, but there’s no mention of battery life. It’ll be interesting to see what kind of balance Samsung has struck between temperature, performance, and longevity. It certainly looks like the company has gone for broke on the spec sheet side of the equation.
Now Read:
Leaked Photos Confirm Samsung Galaxy S20 Name and Design
Samsung Dives Into the Uncanny Valley With Neon ‘Artificial Humans’
Samsung’s Latest AI Project Is an Imaginary Keyboard for Your Phone
from ExtremeTechExtremeTech https://www.extremetech.com/mobile/304820-samsung-galaxy-s20-ultra-may-pack-more-ram-than-typical-pcs from Blogger http://componentplanet.blogspot.com/2020/01/samsung-galaxy-s20-ultra-may-pack-more.html
0 notes
Text
NVIDIA TITAN V Benchmarks Leaked | This 12nm Volta GPU Is Huge
New Post has been published on https://www.ultragamerz.com/nvidia-titan-v-benchmarks-leaked-this-12nm-volta-gpu-is-huge/
NVIDIA TITAN V Benchmarks Leaked | This 12nm Volta GPU Is Huge
NVIDIA TITAN V Benchmarks Leaked | This 12nm Volta GPU Is Huge
Leaked | NVIDIA TITAN V Benchmarks | This Volta GPU Is The Strongest Ever – credit by Nvidia
Based on the leaked benchmarks the Titan V beats the Titan Xp and 1080 TI with a huge margin. This $3000 graphic card is strangely strong. A user on Reddit has assembled a collection of links to some early, unofficial benchmarks of the TITAN V. NVIDIA TITAN V Benchmarks show this Volta GPU Is the Strongest Graphic Card Ever Made In PC ever. To be safe lets call them unofficial benchmarks. TITAN V has 21.1-billion transistor GV100 GPU based on a 12nm FFN high-performance process by NVIDIA. It has 5,120 CUDA cores, 640 Tensor cores, a 1,200MHz base clock and 1,455MHz boost clock, 12GB of HBM2 memory running at 1.7Gbps, with a 3,072-bit interface for an effective 653GB/s of memory bandwidth.
Using NVIDA’s latest 388.59 WHQL drivers, the card posted a graphics score of 32,774. It does show performance numbers with the card overclocked by 170MHz, which bumped up the score to nearly 36,000 points (35,991, to be precise). To put those numbers into perspective, a TITAN Xp based on NVIDA’s Pascal GPU architecture typically scores around 28,000, as does the GeForce GTX 1080 Ti. In Unigine’s Superposition benchmark TITAN V scored 5,222 in the 8K preset, and 9,431 in the 1080p Extreme preset. GeForce GTX 1080 Ti overclocked to 2,581MHz, resulted in a score 8,642 in the 1080p Extreme preset. The TITAN V scored nearly 800 points higher.
The full specs of the Titan V is as follows: 6 Graphics Processing Clusters, 80 Streaming Multiprocessors, 5120 CUDA Cores (single precision), 320 Texture Units, 1200 MHz Base Clock (MHz), 1455 MHz Boost Clock (MHz), 850 MHz Memory Clock, 1.7 Gbps Memory Data Rate, 4608 KL2 Cache Size, 12288 MB HBM2Total Video Memory, 3072-bit Memory Interface, 652.8 GB/s Total Memory Bandwidth, 384 Giga Texels/secTexture Rate (Bilinear), 12 nmFabrication Process, 21.1 Billion Transistor Count, 3 x Display Port, 1 x HDMI Connectors, Dual Slot Form Factor, One 6-pin, One 8-pin Power Connectors, 600 Watts Recommended Power Supply, 250 Watts Thermal Design Power (TDP), 91° C.
As we have mentioned before the Titan V is not made for gaming purposes but for fast computing, machine learning and AI Applications and Nvidia is giving the Nvidia Titan V owners free access to GPU-optimized deep learning software on NVIDIA GPU Cloud to be able to control and program the coda cores. NVIDIA TITAN V graphic card has 12 GB HBM2 memory and 640 Tensor Cores, delivering 110 TeraFLOPS of performance and a unique Volta-optimized NVIDIA CUDA: Frame Buffer 12 GB HBM2, Boost Clock 1455 MHz, Sensor Cores 640, CUDA Cores 5120. The price tag on the graphic card is $2,999 so it is not exactly for everybody and mainly not released for gaming market. Titan V has 5120 CUDA Cores and 640 Tensor Cores and NVIDIA is saying that it is going to bring “supercomputing” is going to be available for you with this GPU architecture for your PC. This Volta-Powered GPU Delivers up to 110 Teraflops of Deep Learning Horsepower which is 9x Its Predecessor to Researchers and Scientists and data/AI proccessing. Here is the Full specs of the Monster Titan V graphic card.
youtube
Huang the Nvidia CEO said about the Titan V release in High performance computing:
“Our vision for Volta was to push the outer limits of high performance computing and AI. We broke new ground with its new processor architecture, instructions, numerical formats, memory architecture and processor links,” said Huang. “With TITAN V, we are putting Volta into the hands of researchers and scientists all over the world. I can’t wait to see their breakthrough discoveries.”
Titan V Made by Nvidia Volta For PC Finally For $3000 – Credits Nvidia
Tags: Technology, nvidia, nvidia graphic cards, nvidia volta, nvidia vlta first graphic card, nvidia volta titan v, titan v, titan v spes, titan v price, titan v release date, titan v benchmarks
#Nvidia#nvidia graphic cards#NVIDIA TITAN V Benchmarks Leaked | This 12nm Volta GPU Is Huge#nvidia vlta first graphic card#nvidia volta#nvidia volta titan v#technology#titan v#titan v benchmarks#titan v price#titan v release date#titan v spes#Gaming hardware#Gaming News#Technology
0 notes
Text
NVIDIA Titan V Graphics Card Officially Unveiled, Has 110 TFLOPs Deep Learning Compute
There's the 1080Ti, and then NVIDIA's all-new Titan V, which is touted as the "most powerful PC GPU ever created," but it comes at a hefty price, $2999 to be exact. It features 80 streaming multiprocessors (SMs), 5120 CUDA cores, 12GB of HBM2 memory, and 640 tensor cores that all work together to offer 110 TFLOPs of deep learning compute. "Our vision for Volta was to push the outer limits of high performance computing and AI. We broke new ground with its new processor architecture, instructions, numerical formats, memory architecture and processor links. With Titan V, we are putting Volta into the hands of researchers and scientists all over the world. I can't wait to see their breakthrough discoveries," said NVIDIA founder and CEO Jensen Huang. Continue reading for another video and more information.
from North Shore Outlet - Tech http://ift.tt/2jx0T3D via http://ift.tt/2gPD319
0 notes
Text
RTX 2000 Ada gives workstations AI and performance

Industries are changing as a result of generative AI, and companies need to choose the correct hardware to support their processes in order to reap the rewards.
In professional workflows, the new NVIDIA RTX 2000 Ada Generation GPU offers up to 1.5 times the performance of the previous generation RTX A2000 12GB, bringing the newest AI, graphics, and compute technologies to small workstations.
By enabling professionals to do more without sacrificing speed or capabilities, the card’s capabilities pave the road for an AI-accelerated future. These include creating breathtaking 3D worlds, expediting intricate design reviews, and improving industrial designs.
GPU memory is heavily used in modern multi-application workflows with AI-powered tools, multi-display setups, and high-resolution content. Professionals may take use of the newest tools and technology to deal with data more efficiently and quickly thanks to the 16GB of memory in the RTX 2000 Ada.
The new GPU, which is powered by NVIDIA RTX technology, produces ultra-high-quality, photorealistic ray-traced pictures more than three times quicker than before. It also boasts amazing realism in visuals with NVIDIA DLSS. Furthermore, the RTX 2000 Ada makes it possible for corporate virtual reality workflows like product design and engineering design reviews to have an immersive experience.
Professionals in many sectors may attain efficiency with the RTX 2000 Ada because to its combination of performance, adaptability, and AI capabilities.
It may expedite structural analysis and visualization processes for architects and urban planners, improving design accuracy. Industrial PCs enable engineers and product designers to quickly iterate on product concepts with AI-powered generative design and quick, photorealistic rendering. With AI, content producers can easily edit high-resolution photos and movies and create realistic visual effects. AI can also help with content development.
Additionally, the RTX 2000 Ada can power real-time data processing for medical devices, streamline industrial processes with predictive maintenance, and allow AI-driven intelligence in retail settings via critical embedded applications and edge computing.
Extending NVIDIA RTX’s Scope Rob Wolkers Design and Engineering, WSP, and Dassault Systèmes with its SOLIDWORKS applications were among the first to take use of the RTX 2000 Ada’s capabilities.
According to Mark Kauffman, associate vice president and technical lead at WSP, “the new RTX 2000 Ada Generation GPU boasts impressive features compared to previous generations, with a compact design that offers exceptional performance and versatility.” “Its ability to run programs like Autodesk 3ds Max, Adobe After Effects, and Unreal Engine, as well as support path tracing, expands my creative possibilities. Its 16GB of RAM is a game-changer, enabling smooth loading of asset-heavy content.”
“SOLIDWORKS users will benefit from the new NVIDIA RTX 2000 Ada with its higher-efficiency, next-generation architecture, low power consumption, and large frame buffer,” said Olivier Zegdoun, director of graphics applications research and development at Dassault Systèmes for SOLIDWORKS. Even with bigger datasets, it provides designers and engineers with exceptional performance to speed up the creation of novel product experiences with full-model accuracy.
Rob Wolkers, the owner and senior industrial design engineer of Rob Wolkers Design and Engineering, said that “more advanced compute and horsepower are required for today’s design and visualization workflows.” “Working with large datasets in full fidelity and generating renders with more lighting and reflection scenarios three times faster, the RTX 2000 Ada Generation GPU’s next-generation architecture and large frame buffer improve productivity in my everyday industrial design and engineering workflows.”
Boosting Workflows With RTX Technology of the Next Generation The newest innovations in the NVIDIA Ada Lovelace GPU architecture are available on the NVIDIA RTX 2000 Ada, including:
Third-generation RT Cores: Up to 1.7x quicker ray-tracing speed for lifelike, high-fidelity rendering. Fourth-generation Tensor Cores: Featuring structured sparsity and FP8 precision to provide greater inference performance for AI-accelerated tools and applications, these cores can process up to 1.8 times the amount of artificial intelligence data as the previous generation. CUDA cores may achieve up to 1.5 times the FP32 throughput of the previous generation, which can lead to significant gains in graphics and computing application performance. Efficiency in terms of power: up to a 2x performance gain in tasks related to professional graphics, rendering, AI, and computation, all while using the same 70W of power as the previous generation. Immersion processes: VR workflows may achieve up to three times the performance of its predecessors in virtual reality. 16GB of GPU memory: an enlarged canvas that lets users work on bigger projects; error correction code memory support that improves computational correctness and dependability for applications that are crucial to mission success. In terms of AI-powered graphics, DLSS 3 offers a major improvement over previous versions, producing more high-quality frames and hence increasing performance. AV1 encoder: The eighth-generation NVIDIA Encoder, also known as NVENC, supports AV1 and is 40% more efficient than H.264, opening up new opportunities for broadcasters, streamers, and video callers. The NVIDIA RTX Enterprise Driver Introduces New Features and RTX 2000 Ada Support Along with support for the RTX 2000 Ada, the most recent version of the RTX Enterprise Driver is now available for download. It offers a number of enhancements that improve graphics operations.
When watching material in Chrome or Edge browsers, the AI-based Video TrueHDR tone-mapping function enhances the color spectrum and brightness levels. It works from standard dynamic range to high dynamic range. Video quality of low-resolution sources may be improved, and SDR material can be readily converted to HDR, thanks to the addition of support for Video Super Resolution and TrueHDR to the NVIDIA NGX software development kit.
This edition includes additional features such as:
An open-source package called TensorRT-LLM enhances and speeds up inference performance for the newest large language models running on NVIDIA GPUs. By using innovative low-delay B frames and bit depth expansion methods, video codecs may achieve improved coding efficiency and improved video quality. With the execute indirect extension NVIDIA API, work may be offloaded from the CPU to the GPU to speed up job completion. To facilitate faster registration for the NVIDIA AI Enterprise and NVIDIA Omniverse Enterprise platforms, the GPU serial number may be shown in the NV Control Panel on desktop computers. Accessible With worldwide distribution partners like Arrow Electronics, Ingram Micro, Leadtek, PNY, Ryoyo Electro, and TD SYNNEX, the NVIDIA RTX 2000 Ada is now accessible. In April, it will also be offered by Dell Technologies, HP, and Lenovo.
Read more on Govindhtech.com
0 notes