#2) move it into photoshop and colour it in
Text
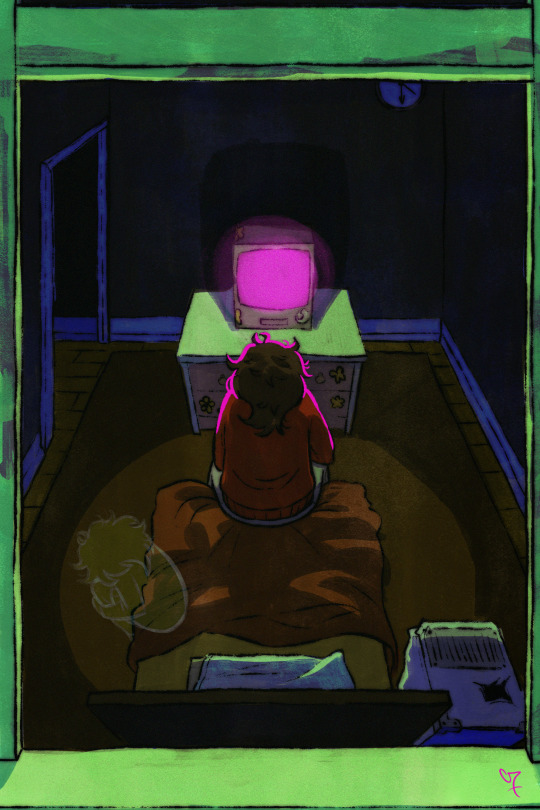
you appear familiar dear; you look just like my bathroom mirror!
#i love to just make a love letter to petscop and then disappear for a week. like hey guys :)#my art#digital art#artists on tumblr#petscop#paul leskowitz#petscop paul#carrie mark#petscop care#i downloaded the kyle webster megapack of photoshop brushes and just had so much fun trying out brushes#against all odds i am actually a watercolour bitch so i used a lot of water colour brushes for this#except this is so much easier and more enjoyable bc i could ctrl z and didnt have to wait for anything to dry lol#i adhere to the theory that paul moves back in with anna when the family takes over the channel. so paul stays in the ''guest room'' O_O;#i made this while frustrated by my homework in a library. i cant draw doorknobs but i can draw an entire room in 2 point perspective <3
546 notes
·
View notes
Photo


Rotoscoping Tutorial by @antoniosvivaldi
Hi everyone! I’m excited to announce my long-delayed Rotoscoping Tutorial - requested by a number of people over the past calendar year.
In this tutorial, I will show you how to create the cutout gifs like this (and seen in most of my gifsets under this tag) with Rotoscoping on After Effects. I’ll also provide additional examples and a number of things that I do to optimise my giffing / Rotoscoping workflow (e.g. useful shortcuts & other things to be aware of).
This is the structure of the tutorial:
Why Rotoscoping? Photoshop video timeline’s limitations
Photoshop workflow pt 1: Preparing your gif
After Effects workflow: Interface, shortcuts, and Rotoscoping tools
Photoshop workflow pt 2: Assembling your gif; with multiple examples
Bonus content: Rotoscoping tips* & workarounds to common issues
For quick reference, here are example gifsets (and where Rotoscoping is used in the posts) that I will mention in the tutorial:
Example 1: Cutout gif effect | panels 2 + 4
Example 2: Changing a gif’s background colour | all panels
Example 3: Cutout gif effect in a shape | all panels
Example 4: Putting it all together | panels 1, 3, & 5
What you need & need to know:
Software: Photoshop & After Effects (After Effects 2021 or later for Rotobrush 2.0)*
Hardware: 16GB RAM required to run later versions of AE*
Difficulty: Advanced; Knowledge in making gifs, applying layer masks, and using video timeline interface assumed
Key concepts: Rotoscoping (AE) / Video Timeline (AE+ PS) / Layer Masks & Groups (PS)
Supplementary files: tutorial resources
*I’m currently running the latest version of PS & AE on an M2 Mac, but I’ve also used older versions (CC 2015 & 2020) on Intel-based Macs. I’ll outline some known compatibility & performance issues, and workarounds later in this tutorial that could help streamline your giffing workflow.
Tutorial under the cut. Like / Reblog this post if you find this tutorial helpful. Linking this post / the example gifsets in your post caption, will be greatly appreciated if you read this to create effects seen in Examples 3 + 4.
1) Why Rotoscoping?
My Rotoscoping journey is motivated by the shortcomings on Photoshop - namely the limited options to manipulate the Layer Mask keyframes in the video timeline interface, as well my need to gif more efficiently.
Suppose I want to cutout this subject or recolour the background of a gif on Photoshop: I personally classify the gifs that I prepare on PS into 3 types based on the motion of the subject
These are the common Photoshop-only approaches when attempting to mask the subject in the gif.
Case 1: minimal motion in the subject → a simple layer mask will do the trick
Case 2: some linear panning of the subject in the gif → using the Layer Mask Position keyframes in the video timeline interface will do the trick
Case 3: subject moves around a lot (e.g. zoom motion) → Unfortunately this is where a Photoshop-only workflow will require frame by frame masking. Layer Mask Position keyframes only apply positional translation (but not transformation / rotation) on the layer mask
Enter Rotoscoping on After Effects: Instead of resigning to frame by frame procedure on Photoshop, I opted to make my life easier by learning to Rotoscope on After Effects. This essentially provides me an opportunity to cutout / recolour a wider range of gifs with relative ease.
2) Photoshop pt. 1: Preparing your gif
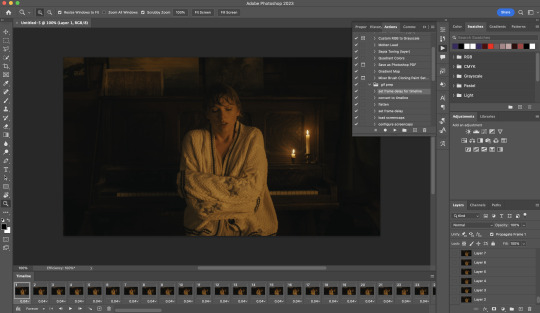
Prepare your gif the usual way - whether you screencap or import frames from video.
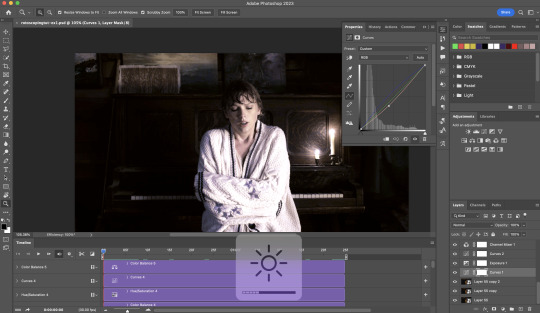
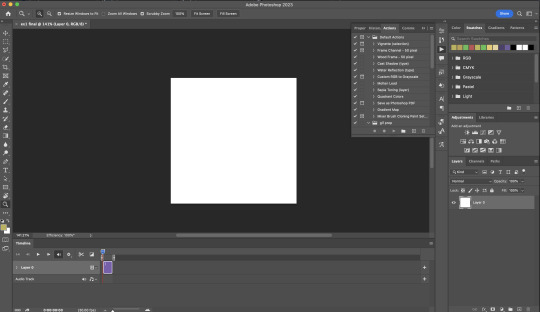
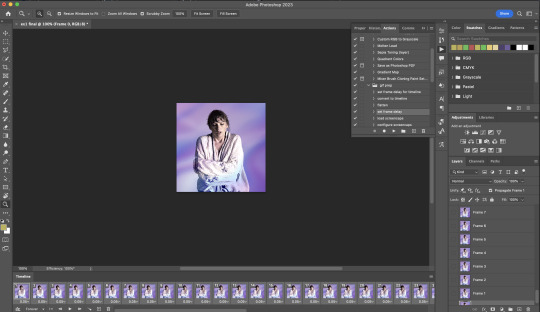
Then your Photoshop should look like this:
Now, I shall walkthrough & explain my personal giffing workflow (as of 2023) after loading the gif frames. To speed up the process, import my gif prep action file to Photoshop.
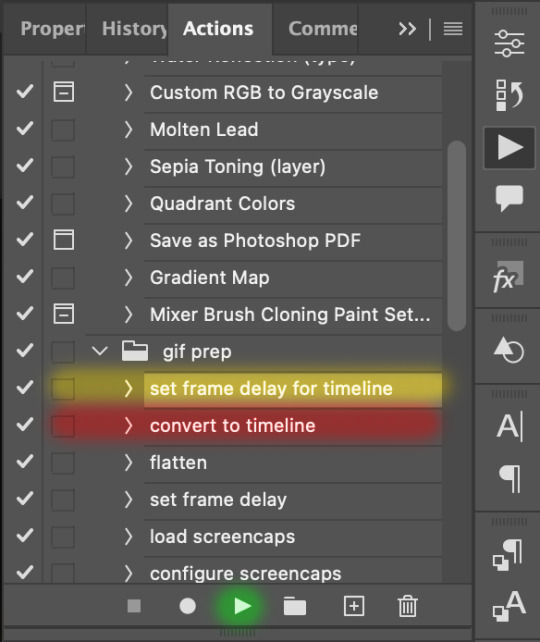
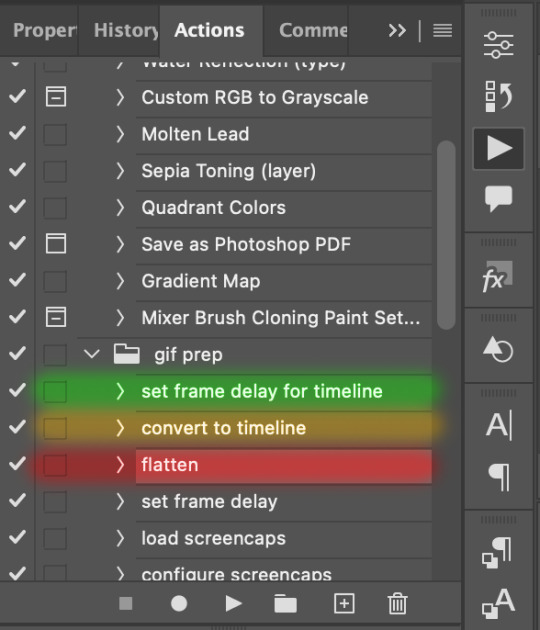
Going to Window > Action, you’ll see a set of actions under the “gif prep” folder.
"set frame delay for timeline” (highlighted in yellow) will set all of your entire gif’s frame delay to 0.03s
“convert to timeline“ (highlighted in red) will take you to the Video Timeline interface
To play an action, press on the Play button (highlighted in green)
i. Set the frame delay of the entire gif to 0.03s. (play “set frame delay for timeline” from my gif prep action pack)
I work with everything in 0.03s frame delay (or equivalently 30fps) at first. It’s always possible to change the frame delay of the final gif to 0.05s before uploading onto Tumblr.
ii) Convert this gif to a Smart Video Layer (play “convert to timeline” from my action pack)
Note: I personally don’t resize the gif just yet. That’s because Rotoscoping in full video resolution will render higher quality details around the edges as well as more flexibilities later on in the editing process.
Performance optimisation: If your computer has 8GB of RAM or less, you might find it helpful to crop / resize your gif to Tumblr dimensions now for a less sluggish performance in After Effects later on.
(I have giffed on a desktop with 8GB of RAM and it’s quite slow at rendering individual frames of a 1080p short clip on AE)
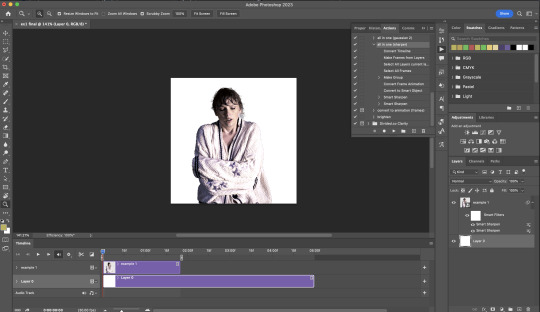
iii) Add colouring adjustments on the gif. This will save you A LOT of time when you Rotoscope gifs that are originally very dark / poorly lit (e.g. the uncoloured Taylor Swift gif shown just above).
If you usually colour your gifs at the very end of your giffing process (i.e. after sharpening), this will be a bit of a change.Nevertheless I still highly recommend adding some base colourings now to at least increase the contrast between the subject and the background.
iv) To minimise lagging on After Effects, simplify this gif file as follows:
Flatten / Unsmart this gif file back to frame animation mode: play “flatten” (highlighted in red) from my gif prep action pack
Set the frame delay to 0.03s: play “set frame delay for timeline” (highlighted in green)
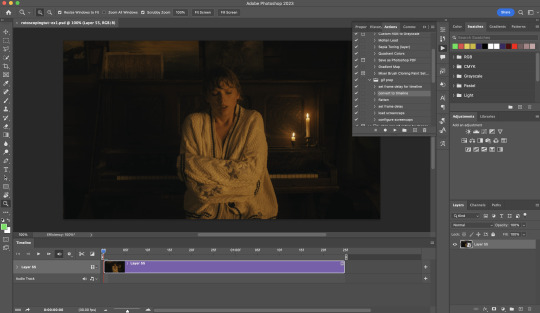
Convert the simplified gif file back to the video timeline interface: play “convert to timeline” (highlighted in yellow)
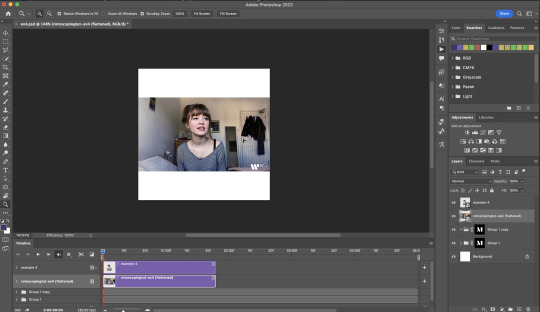
After “unsmarting” and converting back to the video timeline, your interface should look like this

And voila! This gif PSD is now ready to be imported to After Effects for Rotoscoping work!
3) After Effects: Interface and useful shortcuts
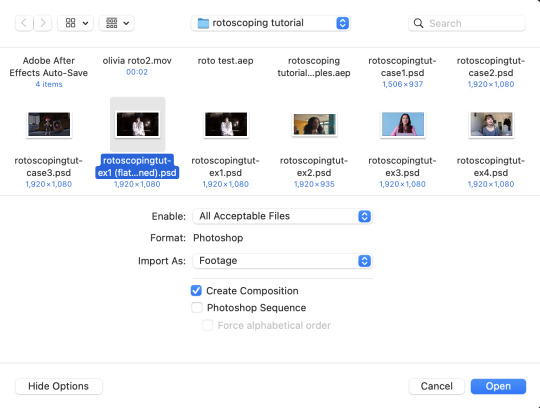
Open After Effects and Import (Cmmd / Ctrl + I) your gif PSD that you’ve just prepared.
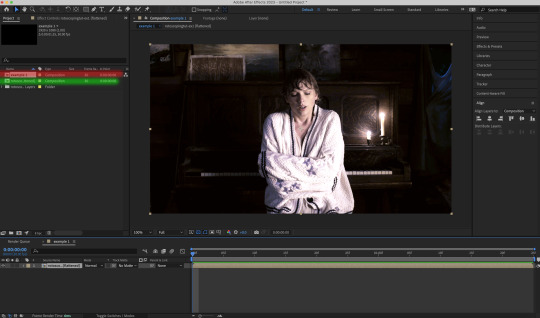
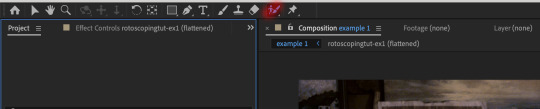
After importing your gif PSD to After Effects, the interface should look like this.
In the screenshot below, there are two compositions: the imported gif (highlighted in green) & another composition file made from selecting the imported gif (highlighted in red)
For the rest of the workflow, we will edit from the clone composition (the one highlighted in red), so select this one.
Before we take our plunge into the Rotoscoping, here are a few useful shortcuts to remember. I’ll explain the Roto Brush tool in the next section.
Preview the previous: fn + up arrow
Preview the next frame: fn + down arrow
Add to Roto Brush selection: holding Shift while you’re using the Roto Brush Tool
Subtract from Roto Brush selection: holding Alt while you’re using the Roto Brush Tool
Change Roto Brush size: while holding Cmmd / Ctrl, click + drag your mouse left / right
4) After Effects: The Rotoscoping Process
To access the Rotoscoping tools, click on the Roto Brush icon (highlighted in red in the screenshot below)
Then you’ll get the following dropdown options with two Rotoscoping Tools
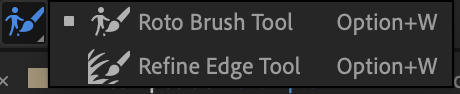
Roto Brush Tool: This is where you add / subtract your Rotoscoping selection in your composition
Refine Edge Tool: Paint around the edge of your selection for more refined edges. Very helpful for Rotoscoping fuzzy edges / hairs
To make some Rotoscoping selection, first grab the Roto Brush Tool and click on the subject you want to cut out from your composition.
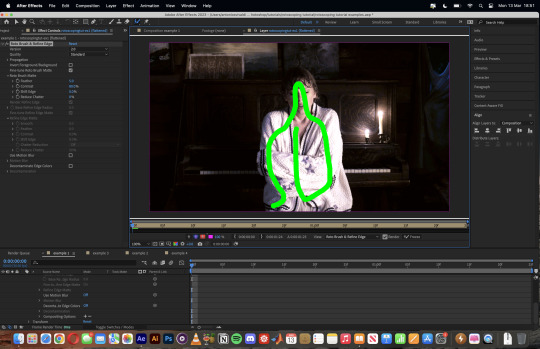
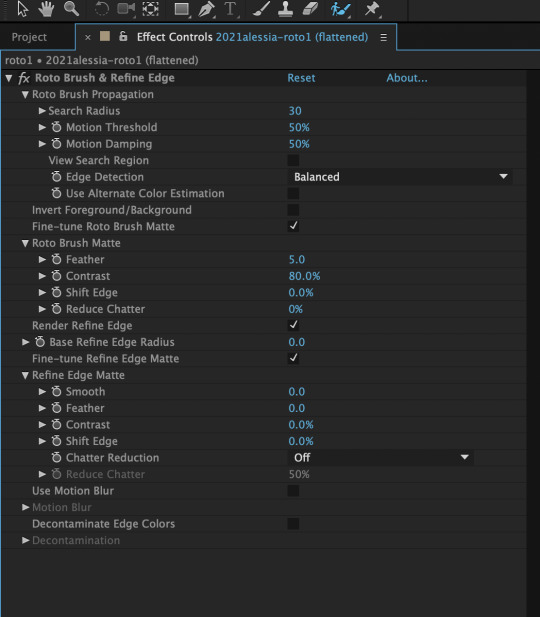
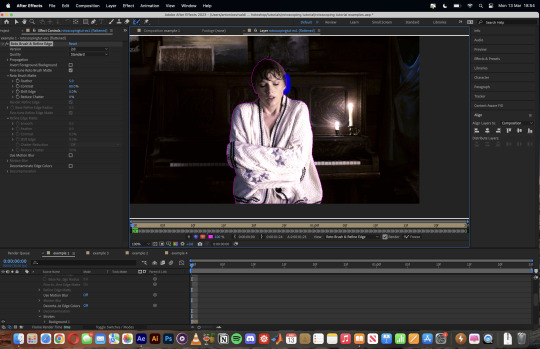
When you’re Rotoscoping you’ll see this in the Effect Controls panel.
There are two versions of Roto Brush:
Version 2.0: The Rotoscoping selection is powered by AI for higher accuracy when you propagate the frames.
Version 1.0 (Classic): This is the legacy Roto Brush Tool that uses a lesser algorithm. Recommended only if Roto Brush 2.0 is unstable on your machine due to RAM issues.
And two quality settings for Roto Brush 2.0:
Standard
Best
Note: I am currently unable to use Roto Brush 2.0 with Best quality model on my machine to compare the differences myself, so I’ll link this page that explains the two quality settings.

Note: if you’re using an older version of After Effects you’ll see this instead. This corresponds to Roto Brush 1.0 / Classic in the newer versions of AE.
When you’ve made a selection using the Roto Brush Tool, you’ll see the pink lines around the subject. This is the region that you’ve selected to Rotoscope!
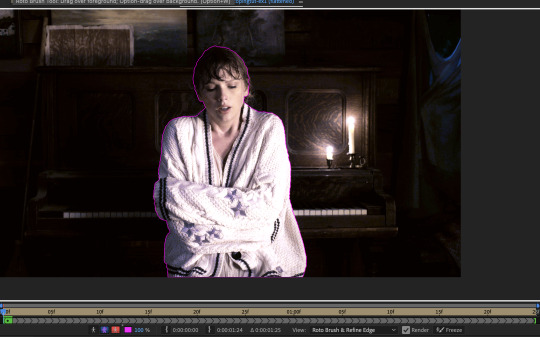
To bring out some details around the edges, grab the Refine Edge Tool and paint around the edges
Then the interface will look like this

To view the Rotoscoping selection that you’ve made more intuitively, you could click on the following buttons.
Personally I like the viewing my selection using Toggle Alpha (the second box from the left) & Toggle Alpha Boundary (the 3rd box from the left)

Toggle Alpha
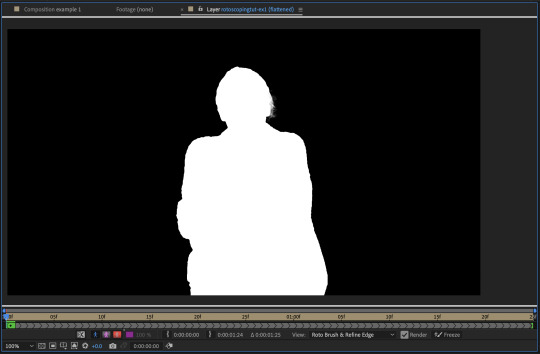
Toggle Alpha Boundary

Note: If you aren’t happy with the initial Roto Brush selection, you can always add (press Shift while using the Roto Brush Tool) / subtract (press Alt / Option using the Roto Brush Tool) your selection.
After you’re happy with your Rotoscoping selection in the first frame of your composition, press fn + down to view the next frame.
Repeat pressing fn + down and fix the selection along the way (e.g. I subtracted a small area from my Rotoscoping selection with the Roto Brush tool to make the edge look cleaner).

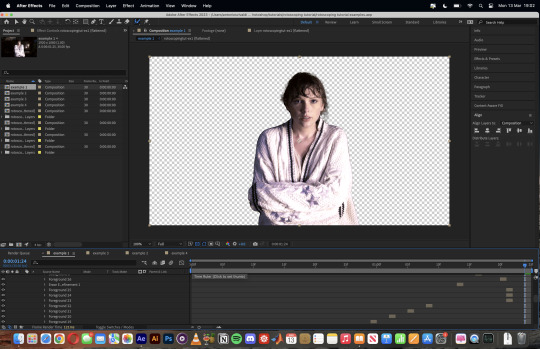
After fixing the selection along the way, go back to the composition file (select the clone composition again) and you will see that a cutout gif is made!
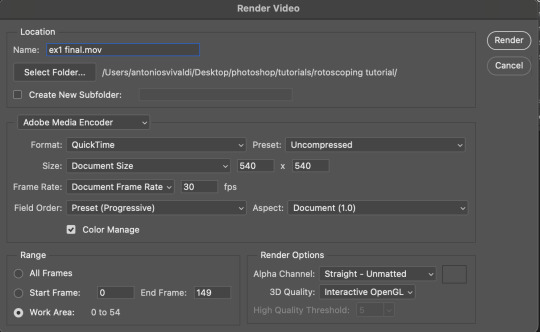
To export this, go to File > Export > Add to Render Queue. You’ll be redirected to the Render Queue panel at the bottom of After Effects.
Highlighted in red: click to change export setings
Highlighted in green: click to change save destination
Highlighted in yellow: click to render video

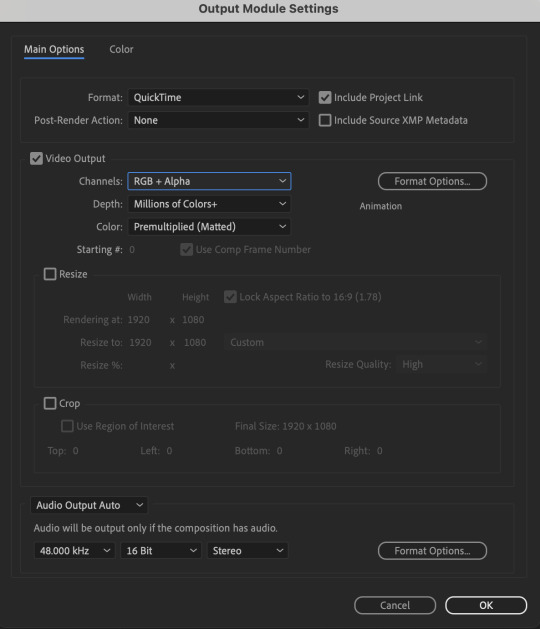
To preserve the transparency of your cutout gif, you need to change your export settings in the Output Module.
Under the Video Output section, change your Channels to RGB + Alpha. Press OK. Then Render the video.
5) Photoshop pt. 2: Assembling your final gif
The essence is to drag the cutout gif (aka the video file that you’ve just rendered on AE) into a new PSD composition file. This will be where you’ll do the rest of your giffing. Your workflow will contain the follow steps:
Make a new blank PSD composition file in Tumblr dimensions
Enable the Video Timeline
Follow the instructions detailed in the individual examples i.e. drag the cutout gif into the PSD & adjust the timeline start / end points
Exporting the final gif. If you’ve worked in 0.03s frame delay all the way up to here, just play the action that I’ve provided in the tutorial in the following order to set the frame delay to 0.05s.
EXAMPLE 1: finalising your cutout gif | sample gifset
After enabling the Video Timeline in your PSD composition file you’ll see something like this
Go to your folder, drag the cutout gif you’ve made on After Effects, resize / reposition, then press Enter.
And also make sure to adjust the Video Timeline’s start / end values.
Add some finishing touches. Because I did the Rotoscoping at full HD resolution, I’ll also need to sharpen my gif in this step.
After you’re happy, you can export this into a gif file and do what you usually do to change the frame delay to 0.05s.
Notes on my “Unsmarting” approach:
To prevent accidentally writing over a PSD composition file that I’ve spent time editing, I personally render this into a short video (File > Export > Render Video) and use the following export settings (to prevent quality loss)
Then I open the rendered clip and play the actions in my gif prep action pack as follows:
flatten: this “Unsmarts” the clip / video
set frame rate: this sets all frames to have 0.05s frame delay
This is the final interface that I get before I pull up the Save For Web window.
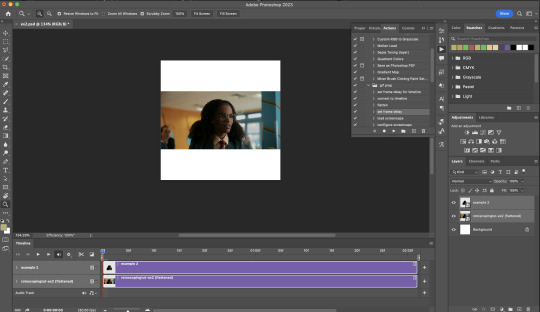
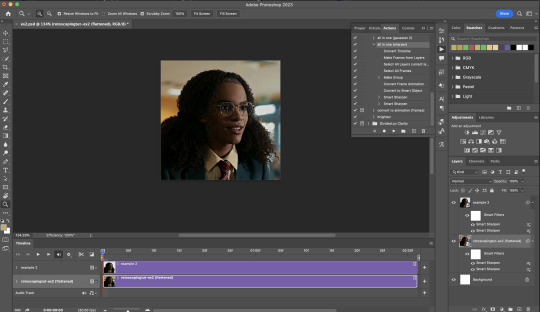
EXAMPLE 2: changing your gif’s background colour (for Case 3 gifs) | sample gifset
From your folder, drag BOTH the cutout gif (rendered on AE) and the original gif to your blank composition.
Important: you need to make sure that both layers are properly lined up in the composition file (i.e. selecting both layers when repositioning / resizing)
On Photoshop, press Enter twice and place the cutout gif on top of the original gif from the Layers panel. Then you should get something like this
Select both layers and resize / reposition them in your PSD composition until you’re satisfied with the placements.
The basic idea here is to add some adjustment layers / other things in between the cutout gif and the original gif. To do this, select the original gif layer in the Layers panel.
Then you can start adding.a bunch layers e.g. textures, onto the composition.
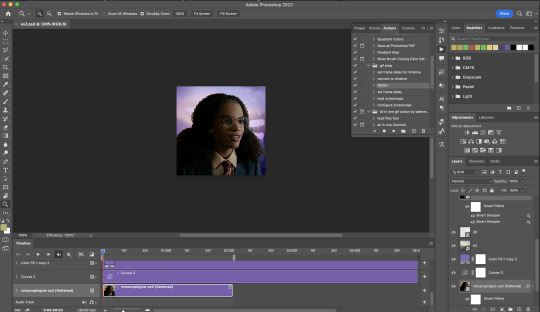
And then here’s the exported gif!

6) Fancier Rotoscoping examples
Note: knowledge in using layer masks / groups and making shape / text layers assumed
In the next two examples, I’ll show you how to combine the two previous examples with shape / text layers.
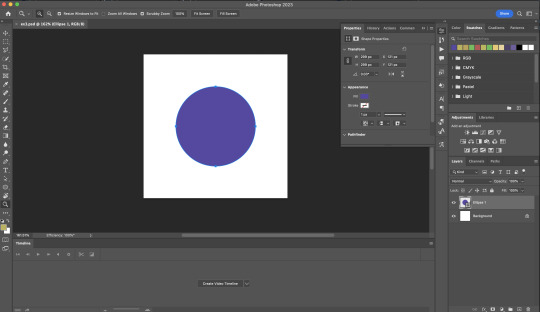
EXAMPLE 3: Placing your cutout gif into a shape / text layer | sample gifset
Add a text / shape layer to your blank PSD composition
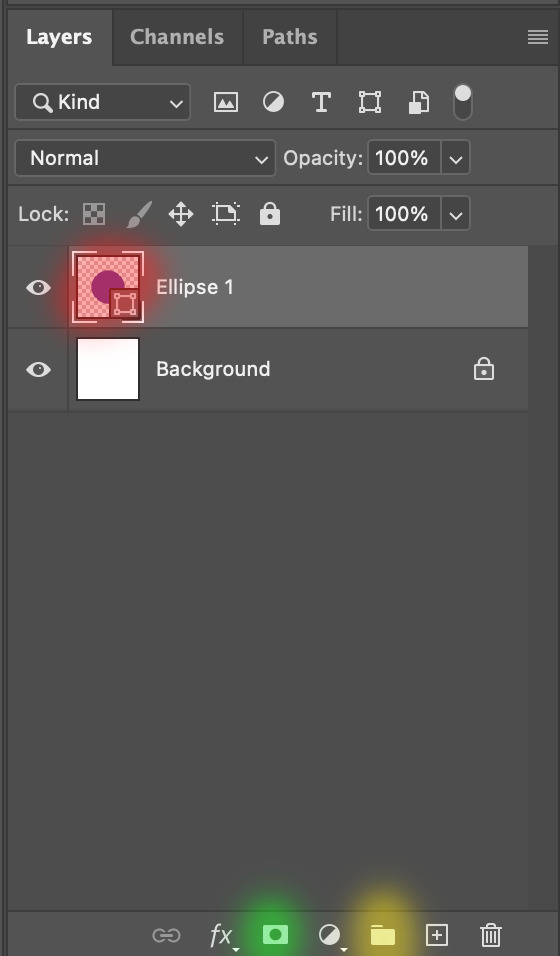
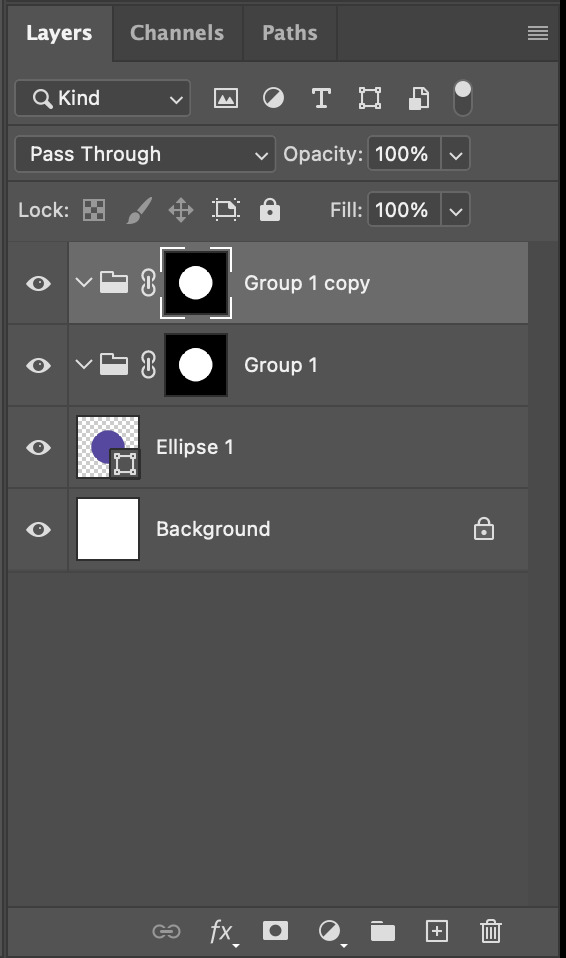
We want to prepare a masked group so in the Layers panel:
Make selection from layer: Cmmd / Ctrl + Click (highlighted in red)
Make a new group: click on the folder icon (in yellow)
Create layer mask: click on the icon (in green)
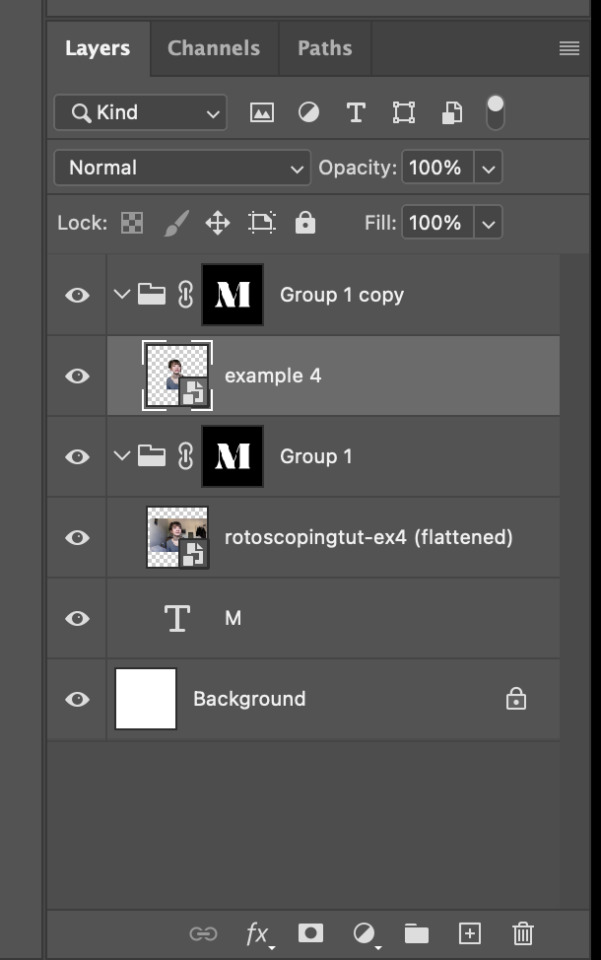
After duplicating the masked group you’ll get something like this in the Layers panel
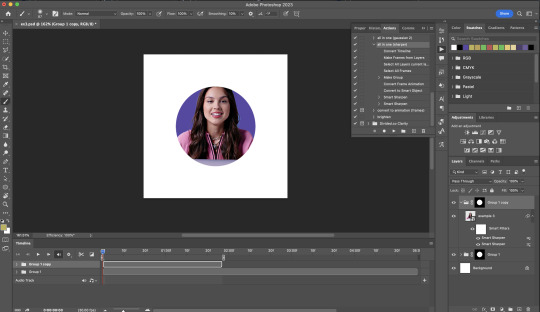
Drag your cutout gif into the PSD composition

Place the cutout gif into the masked group on top
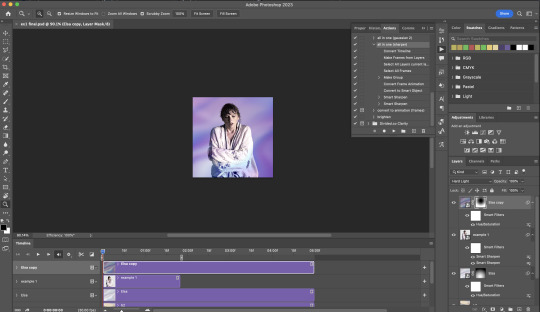
Select the mask of the top group and paint (in white) over the region you want to reveal for the cutout gif
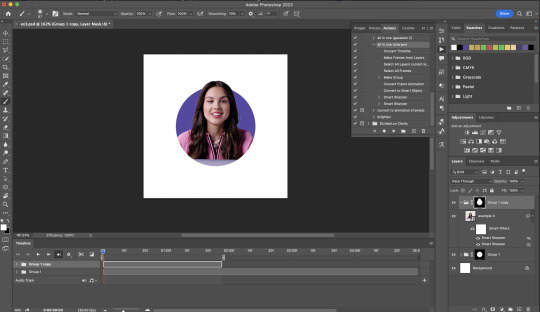
Add some finishing touches & export the gif!
EXAMPLE 4: Putting it all together | sample gifset
You follow the same approach as in Example 3 to prepare the masked groups, but you need to drag two gif layers in (and resize them using the approach outlined in Example 2)
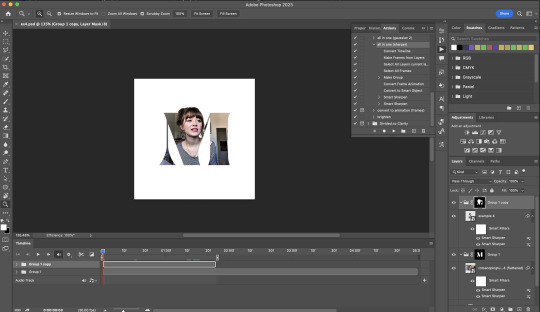
Place the gif layers as follows
While selecting the mask of the group on top, paint (in white) over the region that you want to reveal in the cutout gif
Now select the original gif (placed within the other group) and add some adjustment layers
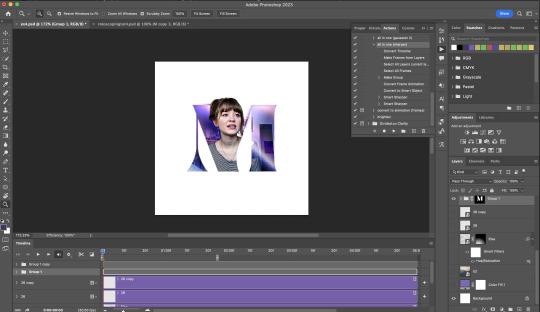
After adding some finishing touches & exporting the gif, I get this!
Note: you can do even more overlay effects in the background portion of example 4. There will just be more masked groups + adjustment layers
7) Bonus: Some useful Rotoscoping / giffing lifehacks
GIFFING LIFEHACKS:
— Use best quality footage that you could find & Rotoscope in full video resolution, for better details around the edges
— Poorly lit scenes & low contrast edges are harder to Rotoscope (e.g. Toy Story set / TS evermore set).
If you’re new to AE, I would recommend choosing videos with well-lit gifs with simpler backgrounds and high contrast edges (e.g. Maisie Peters Cate’s Brother set)
— Use Rotobrush 2.0 if you’re using After Effects 2021 or later. It’s more difficult to Rotoscope / change background colour for gifs with a lot of movements with the classic Rotobrush tool. If the scene is tricky, you might want to switch to the “Best” quality model.
HARDWARE-RELATED PERFORMANCE OPTIMISATION:
— The recent versions of Photoshop require at least 8GB of RAM. If you have less RAM, it will still work provided you have enough scratch disk space. For better performance, it’s best to close other applications when you’re using Photoshop.
— The recent versions of After Effects require at least 16GB of RAM. If your machine has less RAM than this, there are some workarounds to prevent your machine from hanging:
Essential: close other applications that you’re running on your computer
Resize your gif down to Tumblr dimensions & sharpen it before importing to After Effects.
Install an older version of AE
8) Bonus: Some known software + hardware issues, and workarounds
KNOWN ISSUES ON PHOTOSHOP:
I currently have minimal issues in my giffing workflow, but I’ll nevertheless outline a few common known Photoshop issues for anyone who needs some workarounds.
— Video Timeline interface missing: this affects Apple Silicon Macs (i.e. M1 / M1 Pro / M1 Max / M1 Ultra / M2 / M2 Pro / M2 Max)
Update to newer version of Photoshop (updated 2022 or 2023)
Open Photoshop with Rosetta
— Scratch disk full error: This is a common issue with machines that lack RAM & have nearly used up internal storage. Editing video layers in the timeline interface uses a lot of memory hence will require a lot of scratch disk space.
Make sure that you have enough free storage space while using Photoshop. Alternatively you can use an external hard drive as a scratch disk.
KNOWN ISSUES ON AFTER EFFECTS:
These are a few issues that I have personally ran into over the course of giffing on multiple devices & multiple versions of After Effects.
Note: Inputs from M1 / M2 Mac users with regards to experiences on using the After Effects Rotoscoping tools are welcome!
— Rotobrush 2.0 set to “Best” quality model causes AE to crash: this affects anyone who’s using MacOS Ventura
I’m currently experiencing this issue on my M2 Mac. The workaround right now is to change the Roto Brush 2.0 quality setting to Standard.
This is due to some software compatibility issues on Adobe’s side specifically with MacOS Ventura. Fingers crossed that they will properly fix this bug in the future updates!
— Cannot re-open project files with Rotoscoping: this affects anyone using the initial release of After Effects 2020 (I had installed this on an Intel-based machine and it sucked)
The only option here is to update to a later version of After Effects.
8) More useful Rotoscoping resources
Rotoscoping + Keyframes Tutorial by @jenna--ortega
Rotoscoping + Masking Tutorial by @usergif
Rotoscoping For Beginners in After Effects | Motion Graphics Tutorial
I hope you enjoy reading this! If you have any questions / need any help related to this tutorial, feel free to send me an ask!
#after effects#tutorial#gif tutorial#photoshop tutorial#dearindies#tusermelissa#usernik#useryoshi#usershreyu#usercim#userrobin#useralison#userannalise#userkosmos#userisaiah#usergiu#userives#*#my resources#my tutorials
2K notes
·
View notes
Text

Thank you @cobbbvanth for asking me for this; I’ve never been more flattered! ☺️ I’ve only been making gifs for a little more than 2 years, so I’m really still only figuring Photoshop out, and my colouring owes everything to other people’s tutorials (some of which can be found here). To be honest, I was only asked some tips, but I have no clue what to include and what to leave out; so, here’s my complete (if random) colouring process.
NOTE: This is a colouring tutorial, not a gif-making one. The tutorial that taught me everything I know about that (and to which I am eternally grateful) is this one by @hayaosmiyazaki.
I. SHARPENING
My standard sharpening settings are:
One Smart Sharpen filter set to Amount: 500 | Radius: 0,4
A second Smart Sharpen filter set to Amount: 10 | Radius: 10
One Gaussian Blur filter set to Radius: 1,0 and Opacity: 30%
One Add Noise filter set to Amount 0,5 | Distribution: Gaussian
II. BASIC COLOURING
This is the part where I add most of the adjustment layers available and just play around with them. Obviously different settings work for different scenes, but I do have some standard ones.
Brightness/Contrast
I usually up the Brightness to +10-30, and the Contrast to about +10.
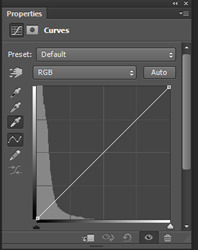
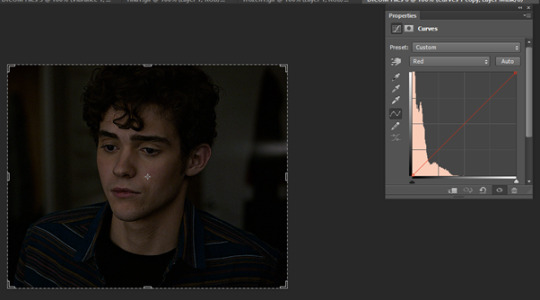
Curves
For the first Curves layer I go to Auto Options > Enhance Brightness and Contrast, and then adjust the opacity until I’m happy.
I might repeat the above step if the gif still looks too dark to me.
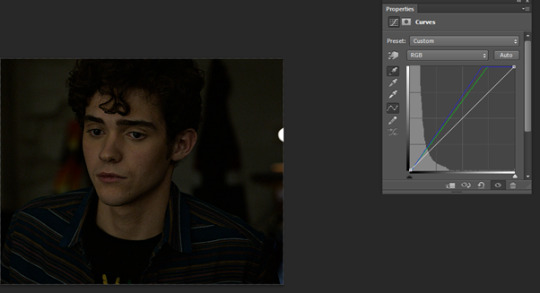
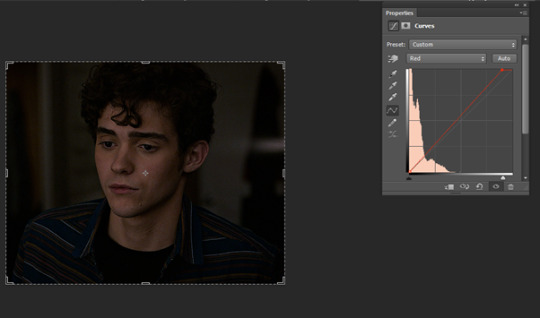
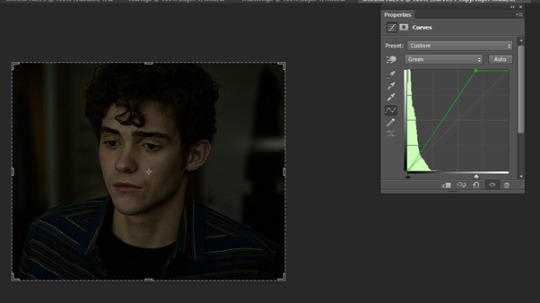
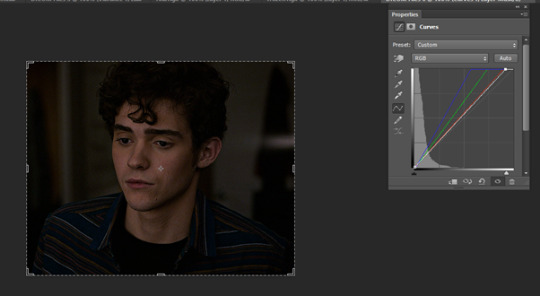
I add another Curves layer, I go to Auto Options and this time I pick either Find Dark & Light Colors or Enhance Per Channel Contrast, and check or uncheck the Snap Neutral Midtones option, until I see something I like. I will then adjust the opacity.


Levels
I add a Levels layer that usually looks something like this:

Exposure
I add an Exposure layer, where I usually set the Offset to around -0,0010.
Selective Color
To make the faces look okay, I create a Selective Color layer, select the Reds and usually add some Cyan (+10-20%) and play around a little (±5%) with Magenta and Yellow too. I might also add another layer, select the Yellows and make slight tweaks there too.
III. FUN COLOURING
About colour manipulation: PiXimperfect just uploaded a tutorial that explains everything so much better than I ever could, so I highly recommend you go watch it. It’s made for static images though, and things are more complicated with moving images, so I also recommend @elizascarlets’s tutorial.
The reason I usually go for a softer colouring is that a more vivid one requires a lot of patience and precision, and I honestly can’t be bothered. Instead, I try to tweak the colous only a little, so that the edges can be a little rough without it looking too wrong.
One thing to remember is that each gif is different, and there isn’t one foolproof way to do this, so you will need to use a different technique depending on the gif you’re working with.
Okay, so, after I’ve decided what colour I want my background to be:
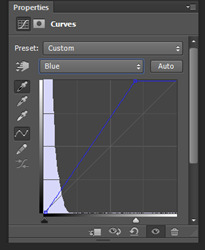
1. I create a Hue/Saturation layer and change the greens, cyans, blues and magentas to that colour. That’s easy enough, since it doesn’t mess with the face colour. I then set the blending mode to Color. If your background doesn’t include any yellow or red, you might be done here, like in the case bellow:


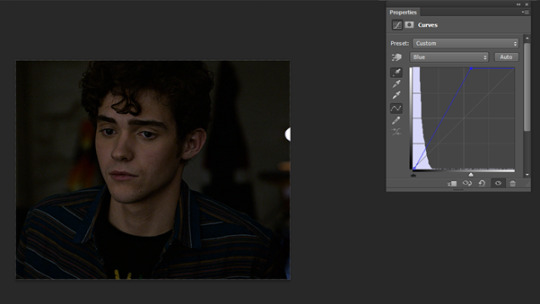
2. To change the yellows and reds, I create a new Hue/Saturation layer, select the yellows/reds, move Saturation to 100 (temporarily) and then play around with the sliders until the face colour isn’t affected. I then change it to whatever I’ve chosen and change the blending mode to Color.
3. If for whatever reason step 3 doesn’t work (the background is white or black for example, or just too red), I might create a Solid Color layer set to whatever colour I want, set the blending mode to Color and then select the layer mask and carefully paint with a soft, black brush over the people’s faces/bodies. I will then lower the Opacity, to whatever looks smooth enough. If there’s a lot of movement in your gif, you might have to use keyframes (see elizascarlets’s tutorial linked above). However, my main goal is to avoid using those; that’s why I try my hardest to tweak around as many Hue/Saturation layers as needed and not have to create a solid color layer.

4. Once my background looks the colour I want it, I might add a Selective Color layer that matches my background color and then try to make it look more vibrant. For this Aziraphale gif below for example, I’ve selected the Cyans and then set Cyan to +100%, Yellow to -100% and Black to +60, then created another one, selected the Cyans again and then set Cyan to +20 and Black to +20.


5. If the gif has a white area, I create a Solid Color layer with a colour that matches the rest of the background and then set the Opacity low. I might also create a Selective Color layer, increase the Black and then play around with the colours.
IV. FINISHING TOUCHES
I create a Vibrance layer and set the Vibrance to around +30 and the Saturation to about +5.
I create a black and white Gradient Map layer (with black on the left end of the spectrum and white on the right), set the blending to Luminosity and the Opacity to about 20-30%.

AAAND that’s about it I think! This ended up way too long and perhaps a little incoherent. I tried to make it as general as possible, so you might have to mix and match for best results. Feel free to ask me for further explanations about any one of these steps, and please tell me if you want me to go through the colouring of a specific gifset (although, as I said, I'm by no means an expert). Happy gifmaking!
#gif tutorial#allresources#completeresources#dailyresources#photoshop tutorial#chaoticresources#uservivaldi#userdanahscott#usersanshou#userfanni#userbuckleys#userrobin#tuserjen#userdavid#userzaynab#tusermimi#thingschanged#tuserju#usertj#userhallie#tutorial#minee
284 notes
·
View notes
Text
COMMISSIONS ARE OPEN ✨
My current situation, as well as living with chronic pain that often leads to me being sleep-deprived, make it difficult for me to work, especially scheduled hours, but I would like to make a little bit of money off my art, be it the pixel-kind or other. Most of my options are for Baldur's Gate 3, however, the simple edits as well as the physical items step outside of that realm. Here are the options:
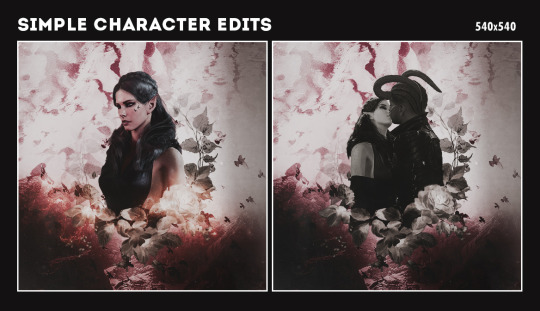
A set of 2 simple edits optimized for tumblr use (540x540) featuring your favorite character or an OC.
With or without text, with the color scheme of your choice.
I will need HQ shots of the character for the edits.
You can find more examples of the edits HERE.
PRICE: 5 EUR.
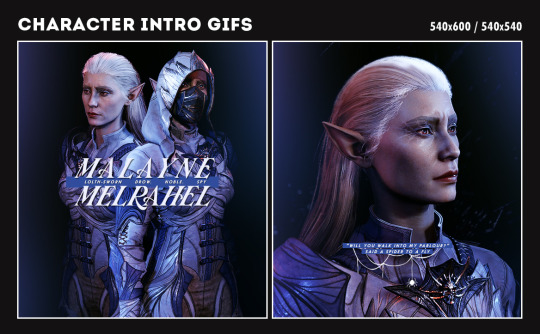
A set of 2 character intro gifs featuring your favorite character or an OC.
Color scheme of your choice.
I will need the sliders/mod list of your character.
You can find examples of these gifs HERE.
PRICE: 20 EUR.
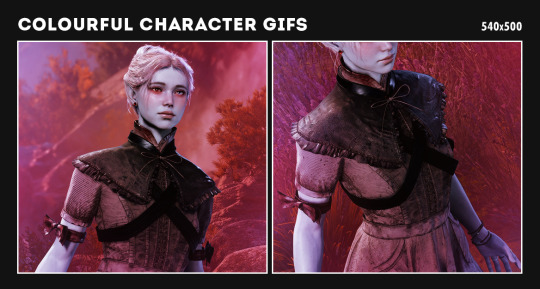
A set of 4 colourful gifs featuring your favorite character or an OC.
Color scheme of your choice.
I will need the sliders/mod list of your character.
You can find examples of these gifs HERE.
PRICE: 20 EUR.

A set of 2 cut-out gif edits featuring your favorite character, an OC, or a couple.
With or without text.
The background/color scheme can be adjusted slightly.
I will need the sliders/mod list of your character.
You can find more examples of these gif edits HERE.
PRICE: 30 EUR.
A minimum of 2 shots featuring your favorite character, an OC, or a couple.
Editing in photoshop is free (or optional)!
I will need the sliders/mod list of your character.
The background/setting/animation is your choice, but I might need your save file if it's something very specific.
For posed shots you can either choose a simple background or in-game setting.
Standard vp dimensions: 2560x1440.
More examples of my virtual photography HERE.
PRICE: Listed above per 1 shot.

I ALSO accept custom orders for the headpieces on my Etsy page.
Can customize the primary and secondary colors to your liking. The only limit will be the paint available to me, but I have a pretty decent collection, so don't be afraid to DM if you have a very specific idea!
PRICE: Listed on my Etsy store page.

CONTACT ME:
You can reach me through tumblr DMs to inquire about a commission and then we could move to either email or discord for files/details.
WAIT TIME:
I reserve 2 weeks for each order or commission, please do not rush me, I am doing my best and will get back to you as soon as I can!
PAYMENT:
I accept payment through ko-fi, paypal, or etsy (if it's physical goods).
100% of the price is paid upfront after confirming the details. Please, do not send me a payment without confirming first (especially on ko-fi where I'd consider it a donation).
I reserve the right to decline a commission for any reason.
#commissions#edit commissions#art commisions#graphic commissions#artists on tumblr#commission info#baldur's gate 3#bg3 commissions#was super nervous to make this but hey#i can make a lot of things and if people want i can make things for them!#reblogs would be very very much appreciated! ♥#slightly UPDATED because my wrists are turning to ash
189 notes
·
View notes
Note
hi! i was wondering if you could share the overlay and/or explain how you made the first gif in the last set you posted? thank you very much in advance <3
Hi anon! I'd be happy to share how I created the ripped paper effect in this gifset !

You’ll need a basic knowledge of gifmaking and photoshop, and I’ll put the rest of this under the cut.
1) Creating your gifs
So to start off you're going to create your gifs in separate canvases. I work in timeline mode and I add my sharpening and colouring, and I put both gifs in groups (explained here).
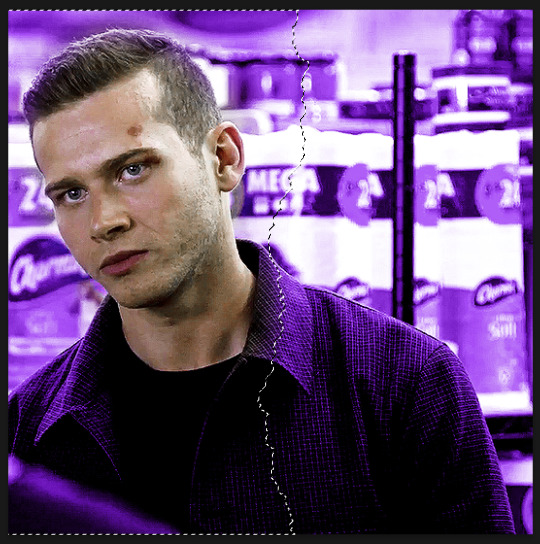
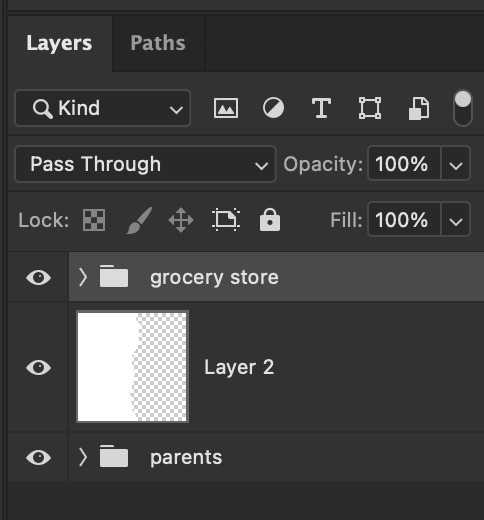
Here are my gifs on separate canvases. For reference, I've called the one on the left "grocery store" and the one on the right "parents".

You'll then want to copy and paste your gif groups onto the same canvas. This is what my canvas and layers panel looks like once that's done. From here, you're ready to start the ripped paper effect.


2) Ripped paper overlay
For this step, you want to obtain your ripped paper overlay. You can find various ripped paper textures/overlays using google, but I used these overlays by @peytonsawyers !
You open up the overlay you want to use, and either copy and paste or just drag it onto your gif canvas. You can then resize and rotate the texture and orient it where you want.
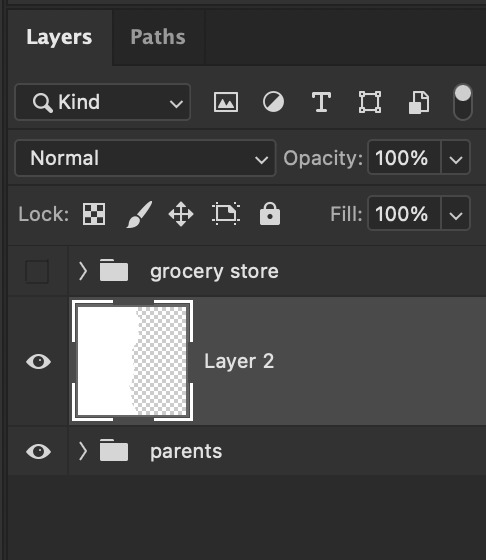
I then drag the ripped paper layer so that it's placed between my two gif groups. I also hid the top group just so that I can see the overlay, but this is only temporary. Your canvas and layers panel should now look like this:


2.5) Filling in the overlay
So as you can see we have an issue because the ripped paper doesn't cover the entire area where we want our top gif to show. To fix this, I just use a white brush at 100% hardness and paint in the area that needs to be covered, making sure the ripped paper layer is selected (this doesn't have to be perfect, just make sure that the entire area is filled.
Now this is what it should look like:

3) Masking the top gif
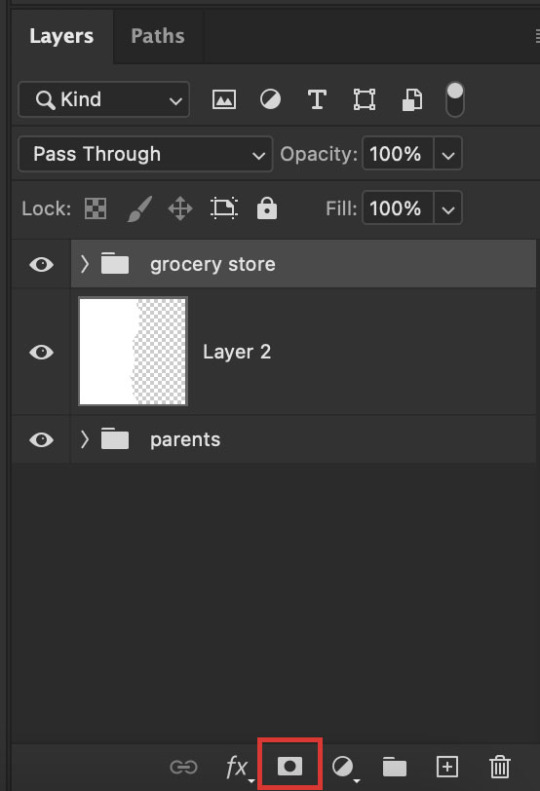
Use the command (or ctrl) key and click on the thumbnail in the layers panel for your ripped paper layer (the square highlighted in white in that last screenshot). You should get a marching ants selection around the ripped paper like so:
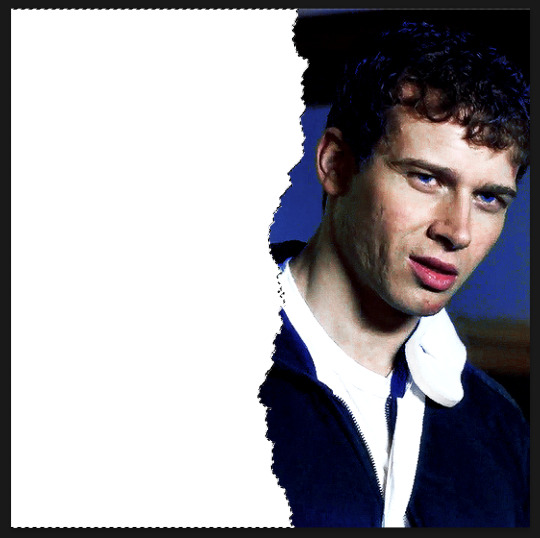
Now reveal your top gif group (by clicking on the eye icon), and make sure you have the group selected in the layers panel. You should still see the selection around where your ripped paper is, like so:
Now go to the bottom of your layers panel and click on the little mask icon:
And now you should get a mask on your top group in the shape of the ripped paper, and you should be able to see both gifs simultaneously on the canvas:
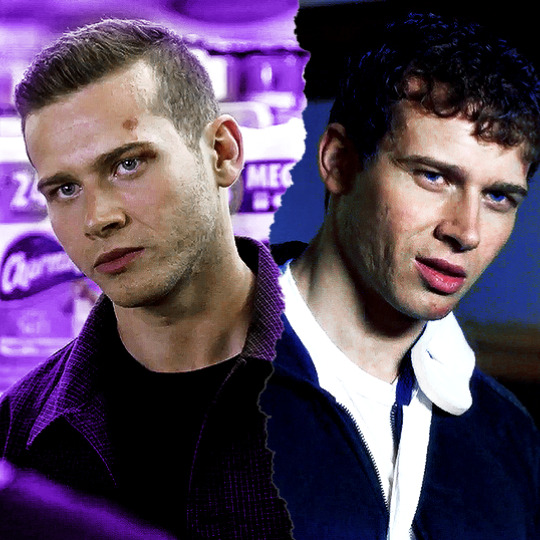

If the black and white areas on your layer mask are flipped after you click on the mask icon, just click on the layer mask and use the command + i (ctrl + i) keys to switch it back so that you can see both your gifs.
4) Final touches
Now if you're happy with the result so far, you can absolutely stop here. However, I wanted to show the uneven rip (like how when you rip a piece of paper you can see some white bits on the edges).
To do this, select your move tool (shortcut: click the v key on your keyboard) and making sure your ripped paper layer (NOT the mask) is selected, use your arrow keys to move it slightly until it shows between the two gifs.


It currently looks a little too clean for my liking, so I like to move it slightly up/down as well so that it looks more uneven and natural. If your overlay is too small, just use the transform function (command + t or ctrl + t) to resize it so that it fills the canvas. This is what mine looks like after I mess around with it:

And you're done! If you want to adjust any colouring, just go into the gif group and you can edit the layers from there.
Hope this helps anon! Let me know if you have any questions!
#answered#Anonymous#*tutorial#alielook#usernik#userdean#usersalty#userriel#userraffa#usershreyu#userbess#userrobin#usercats#tuserheidi#userkimchi#userelio#usershale#usercharisse
279 notes
·
View notes
Text
tutorial contents:
1 ‣ gshade & photoshop actions
2 ‣ template or cropping & colouring
3 ‣ notifs & pop-ups
okay hi! i have a really old editing tutorial from back in january that i've been linking people to, but it's pretty outdated by now. i also keep getting anons asking about the same things, which is fine, but i always have to go searching for the post explaining it, so having it all in one place will be a lot more convenient lol
i use a ☠ copy of photoshop cc 2017 to edit my screenshots, however the majority of everything i'm doing also works on photopea
photopea is an online version of photoshop that's 100% free and works very well! i can't recommend it enough, it's fantastic
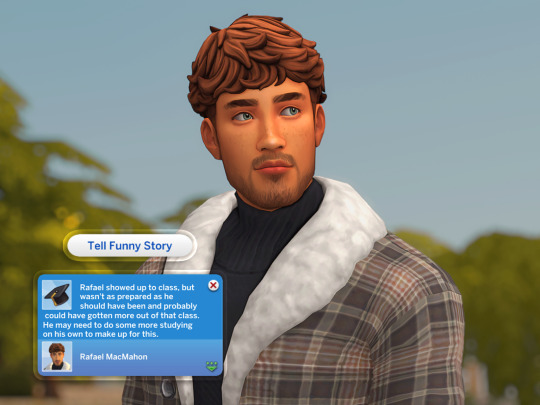
first things first, you're going to need some screenshots to edit. for the sake of this tutorial i'll be working with this one of raffy:
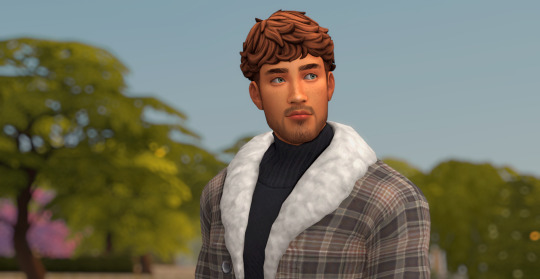
in all honesty, gshade will do most of the work for you. of course it's not needed, but i definitely don't think i could live without it! in this screenshot i used sunset n' vinyl by nesurii
when opening the screenshot, the first thing i do is run it through 2 photoshop actions:
butter action by early-grape
smooth sharp (no topaz) by poolbrop
to add actions in photoshop go:
windows > actions > the 4 lines at the upper right corner of the newly opened window > load actions > your downloads folder > open up the .atn files!
if you're using photopea, as far as i'm aware you can't use photoshop actions, but i've found that 'filter > stylize > oil paint' and 'filter > sharpen > smart sharpen' have a very similar effect when using the right settings. try these:
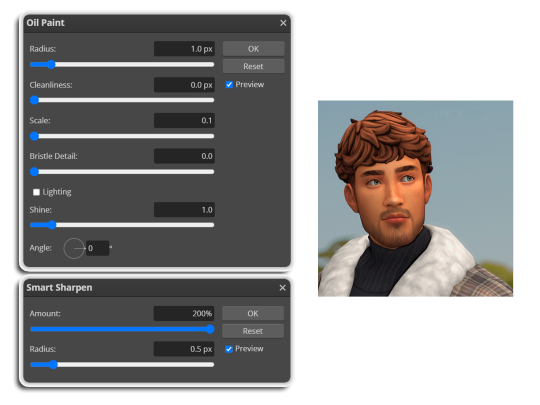
i like these two actions because they smooth everything out nicely, but keep it sharp at the same time! i always run butter before i run smooth sharp, however butter may leave you with 2 layers. make sure to merge these layers before running smooth sharp to achieve the full effect.
here's a before and after (of the photoshop action):

from here you can move on to step 2
before anything else i want to share the template that i use to make editing a lot faster. you don't need to use it but it's definitely made things a lot easier for me! it's a .psd file and will work perfectly in photopea
download (simfileshare)
if you're using the template you can skip right on to the next section, as it's already cropped to the right size and has the colouring folder included. just drag your screenshot into it and resize to fit the height.
if you're not using it, crop your edited screenshot to:
1707 width x 1280 height
then adjust the colours to your liking. it always varies slightly depending on the picture but my regular process for each screenshot would be:
up the saturation by 8%
up the lightness by 3%
up the contrast by 12%
all of this can be done by looking in the 'images > adjustments' tab
you should end up with something similar to this!
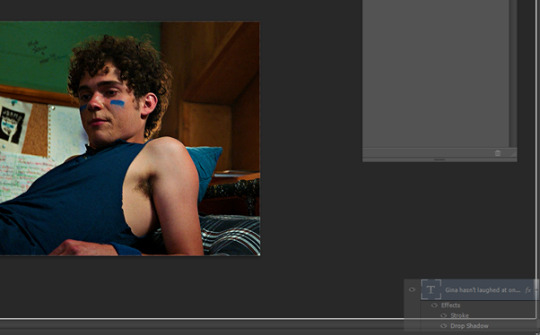
if you want to add a moodlet or social interaction or anything similar, it's all the same process. what you'll need is a screenshot of it straight from the game. i just press the 'c' key to capture them! i'll be working with these two:
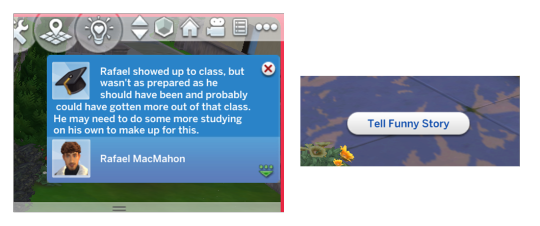
for the blue notification i'm going to select it using the box select tool. try to get it as exact as possible. one you have it selected
for photoshop users:
click on the 'select and mask...' option located at the top
adjust the global refinements at the side as follows:
smooth: 70
feather: 0.0px
contrast: 50%
shift edge: 0%
for photopea users:
go to select > modify > smooth
set it to 15
select 'ok' and press 'ctrl + c' to copy it, then 'ctrl + v' to paste it into your screenshot. adjust the size and position and you should end up with something like this:
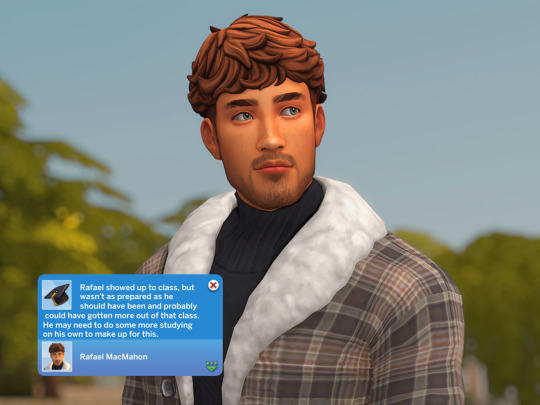
next you want to add the transparent border around the notification. if you're using my editing template, right click on the reference notif in the layers tab and select 'copy layer style' (photopea > 'layer style > copy'). from there you can paste that layer style onto your own notif through the layers tab.
if you're not using the template, here's how to set it up on photoshop:
right click your notification layer and select 'blending options'
under styles, tick the checkboxes for stroke and drop shadow
input these settings:
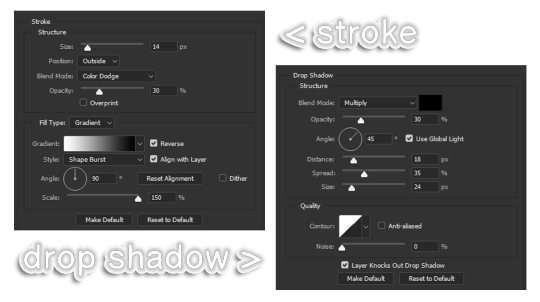
on photopea, it should be more or less the same. repeat the exact same process with the social menu option, but instead of selecting it with the box select tool, use the magic select tool. in the end you should end out with this!
from here you're finished! thanks for reading! go to file and export as png
if you've got questions never hesitate to ask, just make sure to read the faq in my pinned. i might edit this post soon to include the gen intro traits and aspirations bit, but this is all for now. hope it helps, my editing process post has been in need of a revamp for a very long time. i haven't proof-read this so apologies for any mistakes!
#ts4#sims 4#ts4 tutorial#5 anons in my inbox asking the same question after not reading my faq#this ones for you#3 anons in my inbox asking about cas pics#ones coming for you soon#okay maybe not soon but sometime#all my free time has been eaten up#i signed up for extra saturday morning classes and not having a lie in is sucking the life out of me lmao#when i'm busy i just wanna play video games and when i get the chance#to play games i just wanna sleep#its a vicious cycle#i'm currently playing resident evil biohazard tho#enjoying it very very much#i've only got 2 and 3 left to play and i've played every mainstream re game 💪💪#it was a very fun journey! i played them all within this year#long post
1K notes
·
View notes
Text
Using Neural Filters to colour correct
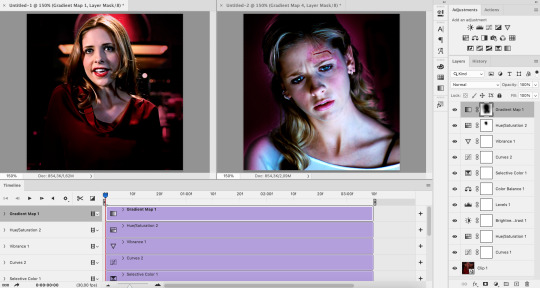
i’ve had a couple of people ask about how i’ve coloured the pocket dimension scenes so i thought i’d just do a run-through tutorial kind of thing to show it, rather than going through it with everyone separately.
so this is a tutorial for how i made this:
from this:
follow along under the cut:
so just some things to point out before we move on which are essential and could get in the way of this working for you:
you will need adobe photoshop cc - v.22 or above. any versions older than this won’t work. you can find what version you currently have by opening photoshop, clicking ‘help’ on the top toolbar, and selecting ‘about photoshop’. my current version is 23.2.2.
you should know how to make a gif from frames, use timeline and work with the gif as a smart object. if you don’t know what i mean, i’ve tried to explain it briefly below.
using neural filters is resource heavy so expect photoshop to be slow in processing/exporting/saving anything you use them on. it might be worth having other programs closed while you use it if your computer has a lower or mid-range spec.
and so...
1. make your gif
to do this, import your frames, crop, set frame speed etc however you normally would. if you usually make gifs with the animation bar set to ‘frame animation’, you will need to change this so that you can create a smart object. you will need to press the button with the video timeline symbol on your animation bar:
then you should select all your layers (not frames as you shouldn’t see them anymore) and right-click > convert to smart object:

you should leave your animation in timeline mode, but the purpose of the smart object is so you can add smart filters. this is especially good for things like sharpening, any effects you want to add, and of course... neural filters.
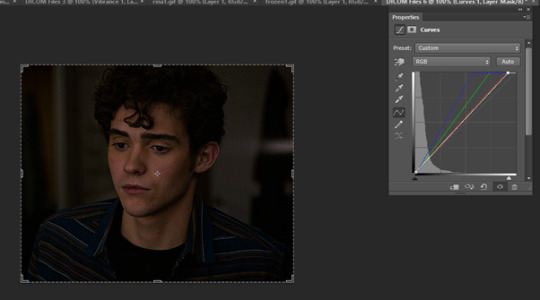
2. brighten the image and convert to black and white
contrary to what we’re trying to achieve here, you should change the image to black and white and brighten it up so that you have as smooth and plain a base for the filters to apply to.
i do this by adding a black and white adjustment layer, and clicking ‘auto’ on the properties tab:

you should then add a ‘levels’ adjustment layer and drag the right tab along until it meets the beginning of the histogram. you should also move the left tab along a little bit for some contrast - how far depends on how you want your gif to look:

following this, select the smart object and two adjustment layers > right-click > convert to smart object. you don’t have to do this but i find it helps and it reduces the number of layers you have to work with.

my gif now looks like this:

3. adding the neural filter
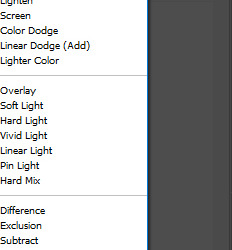
now your image is about to change in a huge way. click on filter on the top toolbar and select ‘neural filters’:

from here, you will see this screen and a bunch of current filters and beta filters on the right-hand side. you may have to download them to get them to work. for this, we’re using ‘colorize’ so at least make sure you have that one downloaded and ready to use:

when you turn the ‘colorize’ filter on, after processing (this can take a few seconds), your image now looks like this:

(note: this gif is an exception in how well it turned out first time - the filter has applied evenly minus a couple of issues i’ll go over below. how successful it will be depends on how much movement is in the clip, or how many colours it will need to find, and it sometimes gets confused with dark and light tones. you’ll find most of the time that the gifs will have patches that aren’t coloured, or will have incorrect colour correction that you’ll need to go in frame-by-frame and patch in by hand. the filter does do a lot of heavy lifting though.)
you can then play around with the saturation (i usually reduce it to -10) and the colours similarly to how you would in ‘colour balance’, however it has a more all-over even tone:

the last thing you need to do is select ‘smart filter’ on this drop-down menu:
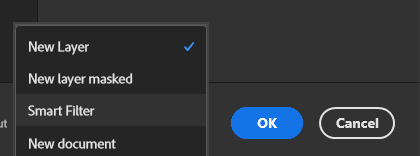
if you don’t change it to smart filter, the filter will only apply to the frame you can currently see and won’t apply to the whole animation.
my gif now looks like this:

this might be enough for you in which case great news! you get to stop here, apply whatever sharpening and colouring you want, and save as normal!
however, i’m a perfectionist to a fault so i need to do a few more things first...
(note: it’s always worth doing the next step even if you’re happy with the finished product here, just in case you missed a spot)
4. check the filter has applied throughout the whole gif
you’ll see that you now have a much more even base to work from and colour your gif as normal, however neural filters aren’t perfect and do leave funny little glitches throughout your gif sometimes. in order to check this, i usually scrub through to see if there are any issues. in this gif, i spotted two.
in these two areas - on the moving gif - i can see the colouring flickering. the filter hasn’t applied the right colour on every frame, or simply hasn’t coloured it at all:
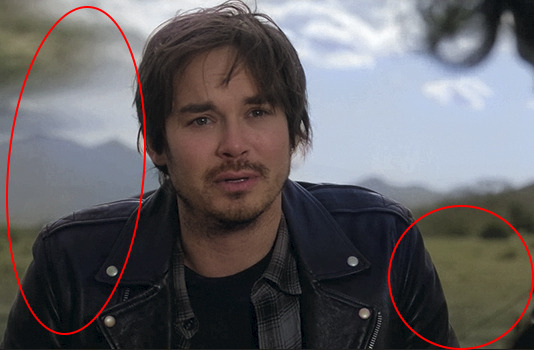
this gif isn’t the worst offender for this, but if you look closely you’ll see it. so...
5. make a new layer and fill in the flickering areas
press the ‘new layer’ button:

and now use the ink dropper tool to pick up the colour you want to use, and paint over the area where the colour is flickering - e.g. i used the dropper to pick up the colour from the desert in the background and painted over that area. i also picked up some of the colour from the sky and coloured over the flickering by the storm. i used these brush settings:

when you’ve painted on the colour you want, and as much as you want, set the layer to ‘color’. i also change the opacity to 80% to let some of what’s underneath still come through a little bit, but do what’s best for you and your gif:
my gif now looks like this, with less noticeable flickering:
7. brighten, colour and sharpen however you normally do
idk if you have an existing psd or just experiment with adjustment layers, but your gif is now ready to start colouring however you normally would. the neural filter is basically acting as a reset to give you a blank canvas in which to gif as normal. for this gif i started with a ‘hue and saturation’ adjustment layer to change the green background to a more dirt/sand colour as it’s meant to be the desert, and then just played around with my usual combination of adjustments until i came up with the final product! i then sharpen using filter > sharpen > smart sharpen and it should be done.
8. export (save for web)
you all know how to do this by now, but be aware that these will load slowly. gifs aren’t the fastest things to save on a good day but with the neural filter applied, they’re particularly slow. this is why i said to do work on the gifs one at a time - don’t have photoshop doing more than it needs to do or it might slow down to a halt.
so after all that, this is the final version of my gif:
tips and tricks
avoid making gifs of moments with a lot of movement - this could be the subject of the gif moving, the background, the wind blowing something around etc. while normal colouring can tolerate these changes, the filter isn’t yet clever enough to work it out and it makes the gifs unsalvageable because you can’t paint over the flickering accurately enough - e.g.:

(p.s. if anyone knows how to get the filter to work on this specific scene you have to tell me lmao it’s been driving me mad...)
try and keep the gifs short - i haven’t made one above 55 frames, i think. that is still quite a lot but it is a challenge to ensure the filter can cope with it. shorter gifs would probably mean a cleaner result.
you have to set the gif to black and white first - the colorize filter is designed to bring black and white photos/videos to life. i tried it over the blue filter directly and it was successful but i had more consistent luck when starting in black and white.
make sure you brighten the gif significantly before applying the filter - it really helps to give a cleaner canvas for the filter to apply to, but it’s not essential if you really don’t want to.
if you have any questions, don’t hesitate to ASK. i’m by no means an expert and this is just what i’ve observed from using this feature and the workarounds i’ve found working for me so far, but happy to try and help where i can and happy to take suggestions too! <3
#malex#roswell new mexico#gif tutorial#photoshop tutorial#ps help#allresources#completeresources#itsphotoshop#*laurengifs#*tutorial#this is so long#but i hope it's helpful#i think needing the newer versions of ps is probably what's going to get in the way most but just in case it doesn't... ta-daaa#1k
2K notes
·
View notes
Text
CELLPHONEHIPPIE'S EDITING CHALLENGE
Try your best to accumulate as many points as you can! More info under the cut!
Hey! I'm back with a little challenge. In this challange you are trying your best to score as many points as you can by following the score sheet. There are ways to gain points and lose points. You have to decide what points you want to gain and if you are going to sacrifice any points by including anything that is in the -1 points list. In the end you are to tally your points, you can include your total in your caption so everyone can see what they have to try and beat! Please tag your edits to #cpheditchallenge and/or usercellphonehippie
Here are the points guides written out, they are in three catergories "+5", "+2", "-1".
+5
+5 including a zoo animal (+2 points if it’s from the north or south pole)
+5 a quote from a movie
+5 including a word that has the letter ‘z’ in it
+5 analog collage
+5 includes your astrology sign
+5 a board game
+5 including a woman
+5 a vehicle
+5 takes you less than an hour to make
+5 something from your native country
+5 uses a word from your URL/username
+2
+2 including only the colours black and white
+2 a lyric
+2 something you’ve never done before
+2 nostalgia
+2 no words
+2 including stickers
+2 including the colour blue
+2 moving aspect (gif or alluding to motion)
+2 using a photo you’ve taken
+2 bugs
+2 including a hair dryer
+2 including a banana
+2 referencing the 60s or 80s
+2 birds
+2 a bowing ball
-1
-1 if the person or quote origins from the US
-1 majority of the piece is white
-1 capital letters
-1 if your quote includes the pronouns ‘I’m/I’
-1 if your quote is from something released in 2023 or 2020
-1 using a dust texture
-1 using the colour pink
-1 if you use the magic wand tool in photoshop
-1 roses
-1 anything from space
-1 glitter or sparkle
-1 if your quote is about love
-1 if your subject/s is blonde
-1 less that two parts
Please send me an ask if any of this is confusing! Also this is all light hearted so don't stress about it! If this is dumb and flops let's pretend it never happened lol. But any reblogs will be appreciated!!
No due date, ignore the graphic
63 notes
·
View notes
Text

Hi so I’ve had a couple of anons asking me how I make my gifs (some specifically hsmtmts gifs lol) so I’ve decided to write up a tutorial of the basics of how I make my gifs. I’m going to try and make it as detailed and clear as possible - but I have been pretty busy with uni and stuff so if I miss anything or anything isn’t clear just lmk and I will do my best to clarify. I’m going to try and include any resources or other tutorials which may be useful as I go along. This is going to be quite long and detailed so tutorial follows under the cut. For some basic steps I know of good tutorials for - I will link tutorials rather than re-explaining :)
Before we begin with the tutorial part bear with me there are a couple of screencaps which I took out of sequence because I forgot to take them at the step I did it - and the final gif colouring result looks kind of different from the rest of the screencaps because when I was adding the gif to the gifset I was making it for I decided it needed to be brighter because the s3 scene was much brighter than the s2 gif I made for this tutorial (none of this really matters, just explaining the slight discrepancy in some of the caps).
1. SOFTWARE
To make all of my gifs I use Photoshop CS5 (this is the version I use). Any version of Photoshop should work with the methods in this tutorial and you can find a masterlist of cracked photoshops here
2. FINDING HQ VIDEO
When making gifs I always use 1080p video - but not all 1080p is created equally. Generally remux files and larger file sizes will produce better quality screencaps so this is what I search for when giffing. I know a lot of gifmakers who swear by using 4k, but personally I find 4k is more trouble than its worth in my opinion (screencaps always come out weird on my computer - like with a full on green tint, and they take forever to download). For HSMTMS in particular I like to use the release labelled 1080p SALT.
In terms of finding videos, this is a good guide on downloading.
3. SCREENCAPPING
I use mpv player to take screencaps for my gifs. This is a tutorial on how to use and install mpv. When taking your screencaps make sure you have continuous screencaps and no frames are skipped or duplicated. These missing/extra frames will make your gif look choppy and the animation won’t be smooth.
After finishing my screencaps I put them all in folders and move the folders to my desktop (but it can be anywhere you easily can access the folder) to import into Photoshop.
4. IMPORTING SCREENCAPS TO PHOTOSHOP
Open Photoshop. Open the Menu path "File > Scripts > Load Multiple DICOM files” and select the folder where the screencaps for your gif are.
5. CROPPING AND RESIZING GIFS
Click the ‘Crop’ button on Photoshop (the little button shown in the screenshot below). Typically I like to use a preset so that all the gifs in the set I make are the same size. For this set I used the 4x5 crop preset because that is what I typically use.

Position the crop where you want the gif (typically I like the character in the center).
Then push enter (or the tick next to the crop buttons) to confirm your crop.
Use the keyboard shortcut Ctrl + Alt + I to resize your image. This will bring up a little pop up like this:

Resize your gif accordingly based on the width. It is important to use the correct dimensions for the size of the gif you wish to make. These are summarized in the below image.

When you change the width to the correct size (e.g. in this case 540px) the height will automatically change as well.

Click Ok to resize.
6. ANIMATING YOUR GIF + SHARPENING
There are quite a lot of steps to turning your frames into a timeline animation. They are covered in detail in this amazing gif tutorial (which is the main one which helped me learn to gif).
It would be useful to have a read of how the process works, but to speed things up for myself I use a Photoshop action (shared here) I made that does all these steps for me plus my sharpening😊 (Here is a tutorial explaining how to create & install Photoshop actions)
I just highlight the word animate click the play sign and it does all the tedious steps in a couple of seconds. Note it is important to keep the reverse frames one unticked as shown in the screencap otherwise your gifs will move backwards

After that runs through we have our gif in timeline mode sharpened and ready to colour :)

7. BASIC COLOURING TECHNIQUE
My basic colouring process is very simple and honestly it may shock some people but I primarily colour my basic scene gifs using only the curves and vibrance adjustment layers. There a few reasons for this – 1) The curves tool is a powerful tool and you can do a lot with it 2) Less adjustment layers = better quality gifs 3) This works for me and it is what I find easy. Essentially, I like to keep things simple where ever possible.
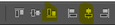
First I add a curves layer by clicking on the highlighted adjustment layer
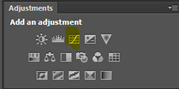
This gives you a menu that looks like this:
The great thing about Curves is that Photoshop will do a lot of the work for us if we use the eyedropper tools.
First I click the white eye dropper – then I pick a white point on the gif and see how it goes. This can take a few times to get right and often I will try a few times to see which I like best.
For this gif I selected the white light in the background but it looks a little green to me

After I have selected my white point I will usually do the same thing except with picking a black point of the gifs. I don’t always pick a dark point it kind of depends on how much I like what Curves has done with the white point and if I think the gif needs more contrast.
For this gif I picked a black point of the area behind Ricky. This is what the gif looks like now with the dark point chosen:
This looks a little better to me than just the white point – but the screencap still looks kind of yellowy and dark to me. So what I do now is I go into each colour channel for the curve and manually adjust it to my liking.
Since this gif is yellow I start in the blue channel and add more blue. I do this by changing the drop down menu on the curves screen from RGB to blue. This gives me something like this to work with:
Essentially I adjust the amount of blue in the gif by sliding the white arrow down the bottom up or down to add more or less blue to the gif. For this gif I am going to slide white arrow at the bottom to the left to make the gif more blue (i.e. neutralise yellow). If I think I have added too much blue I slide it back to the right to add yellow back in.
This is what I adjusted it to and it already looks a lot better
I am actually pretty happy with the overall colouring of this for the moment and I don’t think I need to go into the red and green curves. But I will briefly explain what they do/how they work by showing what some adjustments to these curves looks like.
Red curve – here is our starting point
Dragging the curve to the left will introduce more red into the image

Dragging it back to the right will take out red (the gif will become more cyan)
Green curves: this is our starting point

Dragging the green curve to the left will add more green to the image
Dragging it to the right will take green out (adding pink/magenta)

So after I am happy I have coloured the image in curves If I want the gif to be a little brighter I go back to the main RBG Curves screen and drag the white arrow a little up to the left to add some additional brightness
After colouring with Curves I add in a Vibrance layer (highlighted adjustment layer)

Typically I set the vibrance somewhere between 50 and 60.

This is what the gif looks like now:
At this point I also have another quick look at the gif and see if I think I need to go back into curves and tweak the colouring a bit and add a bit of extra brightness. When I add in the Vibrance I find it easier to see if there is any underylying colours I want to go back and neutralise/adjust in my curves layer again.
This is what I end up with after making my adjustments post vibrance layer:

Another step I do sometimes is grabbing the black slider on curves and dragging it just a little bit to the right to add some depth and contrast to the gif. As s2 of hsmtmts is really dark I didn’t do it for this gif because I don’t think it needs it. But I will show an example of what this might look like:

This is basically it for my basic colouring. Of course there are a lot of different steps to making my colourful gifsets, but this is just a basic tutorial for the way I gif standard scenes so I will move on to subtitling gifs.
8. CAPTIONS
My go to subtitle font is Arial Rounded MT Bold. I have Faux Italic and Faux Bold Selected for this. I like bigger font sizes because I have bad eyesight so usually I will opt between 20 – 24 pt font size

I click the T button to add text then I type out my caption.
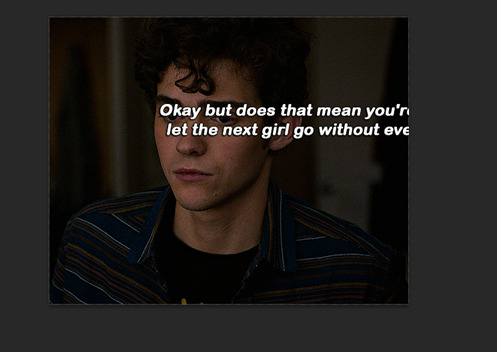
Obviously we don’t want our text here so I align it to the bottom and centre of the gif I do this by first selecting the move tool then going ctrl + a (this selects our gif as the boundary for our alignment). You will know this is done based on the border that comes around the gif (also please ignore that drop shadow and outline settings have already been applied here lol – I added this in because I forgot to screen cap/ explain this part initially)
Then I align my text using the following menu buttons:
Next I Ctrl +D to remove the selection (you need to do this to be able to nudge your text up for the next step). This is the result of the alignment:
Now I nudge the caption up by selecting the text layer and pushing ctrl + shift + up
This is the result:

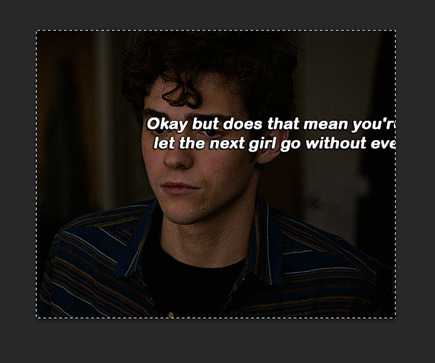
This looks ok, but I always add an outline and dropshadow to make the text more readable. To do this I go into the blending options for the text layer. You can do this by right clicking the layer and selecting blending options or by double clicking the layer (but not on the text).
First I add Stroke with these settings
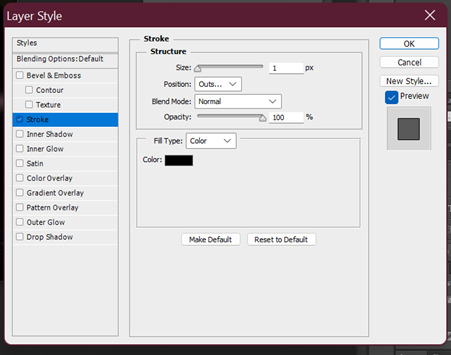
Then I add Drop Shadow with these settings:

9. SAVING GIFS
To save your file use the keyboard shortcut Ctrl + Alt + Shift + S to open the save for web settings. You will get a screen like this. The settings shown in this screen are my typical save settings (except it should say ‘Forever’ on looping options)
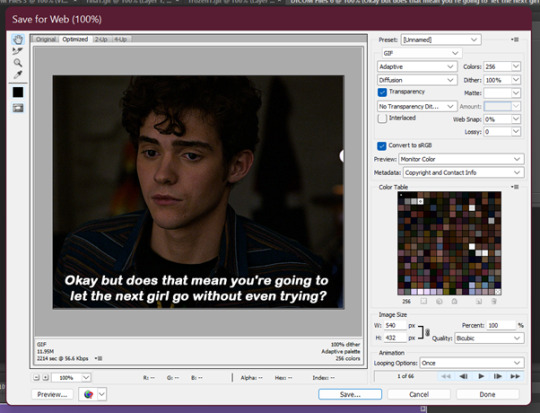
However, Tumblr’s gif limit is 10mb so the size of this gif is too big to upload (it is nearly 12 mb) so we have to go back in the timeline to shorten the gif a bit so we can upload it to tumblr.
I do this by dragging the red preview thingy (idk what else to call it) around till I find a point where I feel the gif has a natural end. Then I grab the timeline bar thingy (idk what it’s called but the silver gray bar at the end of the gif) to the red bar to shorten the gif.


Now press Ctrl + Alt + Shift + S again to save your gif and make sure you set the Looping Option to ‘Forever’. Sometimes I have to shorten the gif a few times to get it under 10mb - but luckily I got it first go this time :)
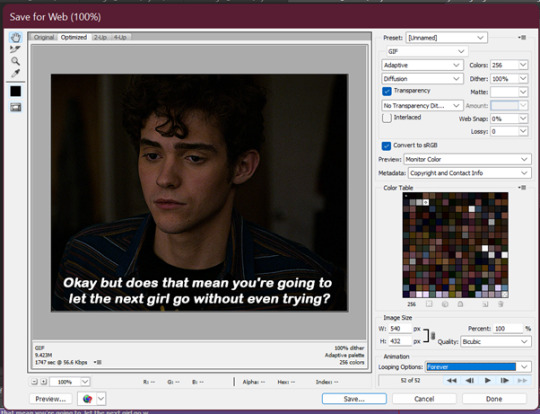
Now your gif is saved but there is still one step left to do. Photoshop has a glitch where it automatically sets gif speed to 0.7 after saving from the timeline function – we don’t want that! The gifs look very slow and are not very smooth.
So what we do is we open the gif that we just saved and this will open in the frame format. All we have to do is select all frames and set the gif speed to 0.5 – I also have this in my action so I go back to the actions and highlight the line that says ‘set frame speed’ and play the action through

Then we just save the gif again as we just did 😊
This is the end result:
and what the gif looks like without any colouring or text:

One other helpful tip:
If you are giffing from the same scene you can do your colouring and text manually as per the tutorial on the first gif for the set and then drag what you did across to the second (after cropping, resizing and animating it). All you need to do is drag the colouring outside to a different window then highlight your adjustment layers + text and drag them to the new canvas off of the gif (If you drag it on top of the gif it will place it where you put it. Make sure to go off the canvas to so it will keep you positioning/alignment of the text you made 😊)
Basically - you drag the text, curves, vibrance (and any other layers you need) to the gray area of your photoshop document and your colouring will be applied and your text will be placed in the same position as your source doc.
Ok so that is my super basic gif tutorial - if anyone has any questions feel free to ask!
#hsmtmtsedit#*mine#request#gif tutorial#resources#ps help#photoshop tutorial#usergif#allresources#yeahps#completeresources#resourcemarket#dailyresources#userelsbeth#usersavana#useraurore#userrobin#usersole#uservalentina#tuserheidi#okkk so this is kind of a weird choice of gif for the tutorial but I just followed my process as I made a gif request this morning#plus I do feel like its a really ugly screenshot so shows the results of the colouring quite well#but anyway i hope this helps someone
1K notes
·
View notes
Text
hello friends! 🌷
recently i got an ask on how i edit my instagram screenshots and here in gemville, all you have to do is ask and you shall receive my child
fun stuff under the cut!
this guide will be divided into two parts: how i take & edit my gameplay screenshots and how i edit my simstagram posts

before we get into the actual tutorial, here are a list of things that i use to help me take better screenies :)
gshade
i'm using an older version of gshade because - thanks to my procrastination - i never updated the version before everything went to shit.
2. presets!
i switch around between presets a lot lmao but for the most part, i use ellcrze's gshade preset for my family dynamics save, sunset n vinyl for my globetrotter save & sim download pictures and a modified boho dreams for my tjol legacy save (first post coming up soon!) sometimes i use lithium for cas pics too :p click here for a somewhat detailed explanation lol
3. tab mode camera mod
this camera mod is a godsend and makes taking screenshots soooooo much easier! 😌 i highly recommend getting this mod!!!

i think i mentioned this before in an ask - i edit my screenshots in photoshop before posting them on tumblr :D i don't really do much, just running a few actions and cropping my screenies. gshade does most of the work for me lol
this tutorial by @buglaur is insanelyyyy helpful omg i based my entire editing process on her tutorial, except for the colouring part because i'm lazy hehe
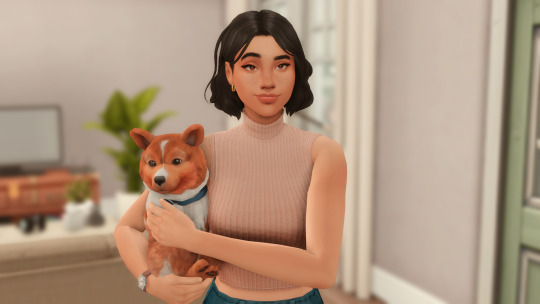
here's an example of my screenshots before and after editing (cropping the screenshot and running some actions)! there’s not much difference because as i said earlier, gshade will basically carry your entire editing process 💀

sometimes i put text in my pics like these screenies below :) i mainly use these two fonts - winkle and lemon milk :D
and that's about it for part one! now it's time for

here's what you neeeeeed
1. photoshop
i'm using a 🏴☠️ version of photoshop that i got from a somewhat sketchy website but it runs great so i'm not complaining 💀
2. instagram post template and instagram story template
a HUGEEEE thank you to @windslar for sharing the instagram story template link 😭 she is such an inspiration to me 💛
3. the actual instagram app
this is how i add text and emojis to my simstagram posts lol
disclaimer: i am NOT a photoshop expert. there's probably an easier way to do what i'm about to show you, but this works for me and i don't really mind the steps hehe
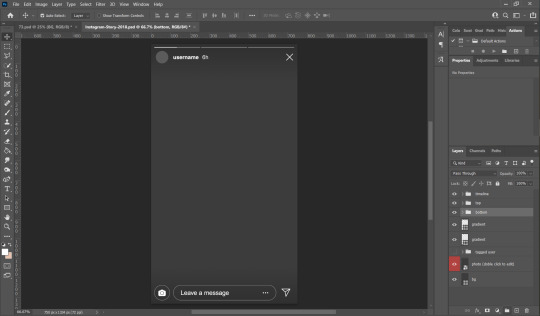
first things first, you're gonna want to open the psd files on photoshop and it'll look like this, depending on which file you opened
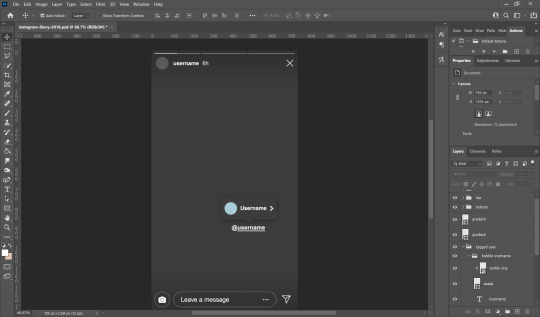
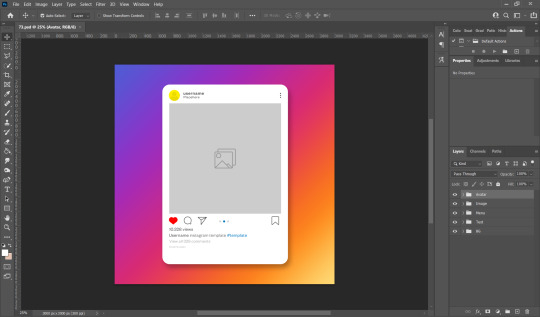
i usually just hide the layers that i don't need so in this case i'll hide the tagged users layer from the story psd and the bg layer from the post psd.
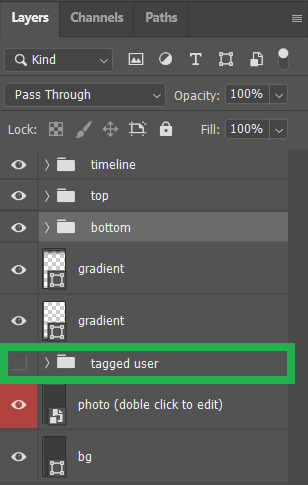

these are the layers that i hide but you can also leave them on if you want hehe totally up to you my dude. then you'll end up with something like the pics below

now we move on to the profile pictures! so what i do is i click these layers (shown below) and go 'file > place embedded > selected picture'

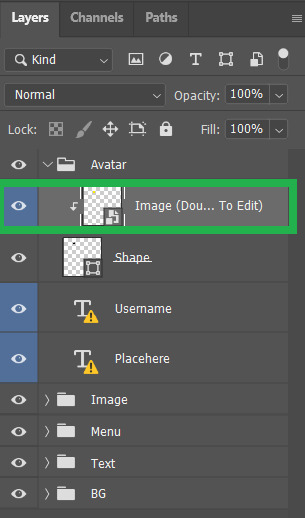
once you do that, you'll end up with something like this (below)! use 'ctrl + t' to resize your picture to fit into where the profile picture would go.


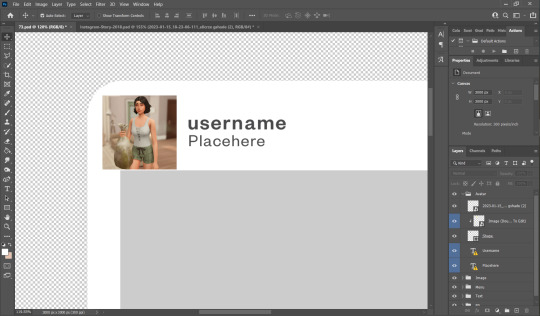
right click on the layer of your selected picture and click 'create clipping mask'. then you can hit 'ctrl + d' to adjust the picture to your liking!
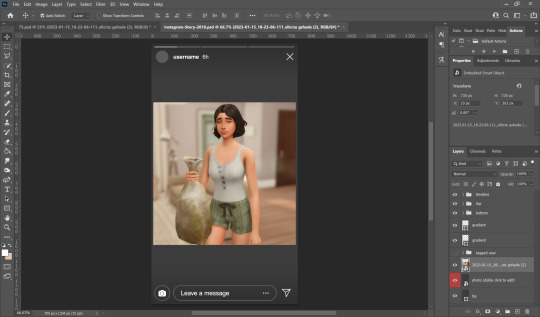
now for the actual pictures for the posts. click on these layers (shown below) and go 'file > place embedded > your selected picture'


now all you have to do is 'ctrl + t' to resize your pictures, right click on the layer of the selected picture and click 'create clipping mask' then 'ctrl + t' again to adjust the pics!
after this whole process, i'll export my pics to my family dynamics folder on my desktop and queue it up on tumblr! :D sometimes my simstagram story posts have text and emojis like these ones below
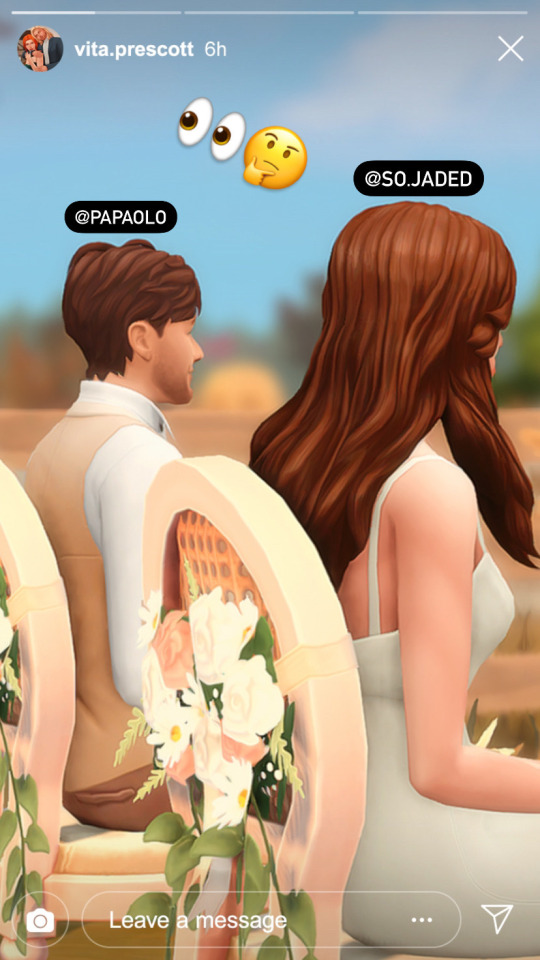

all i did was upload the pics to google drive, download it to my phone, add text/emoji on the actual instagram app then saving the story to my phone... a lot of work but i don't really mind <3
aaannnnddd that's it!!!! i can't believe i made this guide 😭 hopefully this helps :D english isn't my first language so apologies for any grammar/spelling mistakes i've made in this post 🙈 feel free to ask any questions and i'll try my best to reply to you asap!!
173 notes
·
View notes
Text
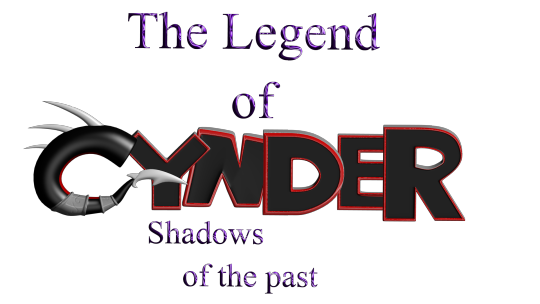
Ok so the saga with my old PC continues and is only fueling my desire to get back into fanfiction lol because I found all of the files from my attempt at making a legend of spyro fan-game! I honestly thought they were lost, I'm so excited to see all this stuff again! This was the "logo" for the game (I know its nearly unreadable lol, so it says "The Legend of Cynder, Shadows of The Past". 14/15 year old me didn't seem to care much for readability, I think I'd just discovered photoshop's layer effects lol)
Here's a bunch of random stuff I found.


I'm defiantly going to do a redraw of that last one at some point. That was like, THE thing I remember being super proud of when I first did it. I think it was going to be part of the trailer my now-partner was putting together for the game lol.
Actually, a lot of these were actually just frames from animations, but either the files are either just corrupted, or high school me didn't know how to set fps and resolution properly in the output so I got a headache trying to watch them lol. It's probably the second one honestly. Also I remember my old laptop wasn't able to play back the animation because it would lag so much, so I just had to kind of...guess at timing, and that went about as well as you'd expect. It didn't help that blender used to have this bug where your audio would move around your timeline so it really was just random guessing. I'm amazed anything got done at all, let alone how far we actually got (that is to say, not far at all but we had something playable at least).
I also found the demo files and footage of the "game" running (running at 12fps but running)! I'm curious if they still work, I'll have to download an older version of blender to test them out!
There's actually a lot more but actually finding it is proving to be quite a challenge since this laptop seems to be the digital equivalent of an ADHD "doom box" - meaning nothing is sorted into folders that make even a remote lick of sense to me, it's all just kind of thrown in together lmao.
I wanted to post these though because even though I don't really do 3D stuff anymore, It still made me really happy to see how much progress I've made over the years and how far I've come. Also a few folks who worked on this project with me back on Deviantart have started finding me lol, so in case there's anyone else out there, hello! I'm not dead, I'm still around, I'm just a lot more (openly) queer now lmao.
Image descriptions:
[ID 1: A game title that reads "The Legend of Cynder, Shadows of the Past". The two lines, "the legend of" and "shadows of the past" are written in dark purple text. The purple material is supposed to look like liquid, but instead just looks hard to read. "Cynder" is writen in black, 3D text with red outlines, with the exception of the C. The "c" is modeled as a black tube instead of in a blocky style like the rest of the letters. The inside of the C has a red underbelly, and the bottom of the C ends in a tail, resembling Cynder's from the Legend of Spyro Series. There are 3 white spikes at the top of the C. /end ID]
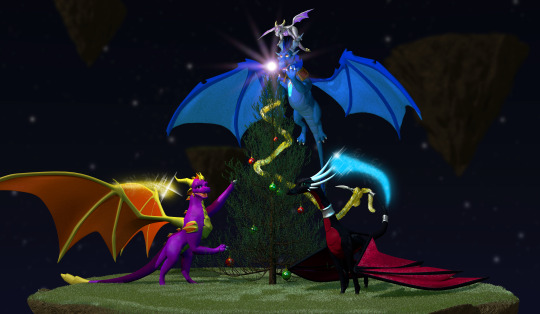
[ID 2: a 3d render of 4 dragons around a christmas tree. A black dragon at the front, Cynder, is using her tail to hang tinsel, a pruple dragon, Spyro, on the left is reaching up into the branches of the tree. A blue dragon, Ignitus, is hovering behind the tree, his paws outstretched, implying he is placing the glowing star at the top. On his head is a silver dragon, Zerali, balancing on his horns. behind them is a series of floating islands. /End ID]
[ID 3: A render of Cynder with a darker colour pallet than the previous image and glowing yellow eyes, snarling at the camera, guarding a black gem. The sky in the background is blood red and the terrain is flat and barren. /End ID]
[ID 4: A render of an incomplete model of Terrador, a green dragon with brown horns and rocky shoulder decorations. He has no underbelly or wings. /end ID]
[ID 5: A render of a fan character named ekkosel, a blue, anthropomorphic dragonfly with an unsettling, uncanny face and green wings, T-posing. Her green wings are a blur /End ID]
[ID 6: two sketches of a anthropomorphic cheetah heads. One has long ears like a lynx and is labeled DotD design, the other has small, rounded ears like a cheetah usually has, labled TLoC design. /end ID]
[ID 7: A render of Zerali, the silver dragon from the second image, and ekkosel, from the 5th, playing together. In this image, we can see Zerali has a pinky-purple underbelly and shiny gold horns.]
[ID 8: A rendered scene showing a close up of blue ignitus with his eyes closed. He appears to be talking to Cynder, who is in the background, but blurry. The game's logo is visible in the bottom left of the image. /end ID]
#nostalgia#old art#image descriptions#Spyro#The Legend of Spyro#tlos#cynder#spyro the dragon#spyro fanart#cynder fanart#queer artist#old projects#Blender#Blender Game Engine#I had no idea what I was doing but I had a blast!#tlos spyro#spyro oc#legend of spyro#old ocs
60 notes
·
View notes
Photo
Some anons asked me how to make the transitions in the middle gif of this set, so in this tutorial I’ll show you how I did it. This tutorial assumes that you know the basics of gif making, so let’s begin, tutorial under the cut:
Long story short, this effect can’t be done with Photoshop, or at least not as smooth. I used After Effects to do it. Nevertheless, I created an overlay which makes the process much easier and achievable in PS using Video Timeline (Frame Animation won’t work for this effect.)
You’ll need to download the transition overlays I made. Don’t worry if the video software in your computer can’t open the videos because Photoshop can (most video softwares won’t because the background is transparent.)
Download the transition overlays here (ɔ◔‿◔)ɔ ♥
CREATE THE TRANSITION
First of all crop, sharpen and colour your gifs as usual In this case I’m using two gifs of 50 frames each. This is how my ps looks like:
Now, let’s move the gifs to the same file. I selected all the layers of my second gif and copied them, then I went to my first file and pasted them above.

Now, grab one of the two overlays and drag it to your file. It should appear above all your other layers (1). Let’s drag that layer under the clip and coloring (2), select the clip and coloring layers and double click > Create clipping mask. Your layers should look like (3).

Now this is how my gif looks like:
In this gif I wanted the transition to start around the middle of the first gif, so I clicked on my “Clip 2″ folder and dragged it to the middle of my timeline, and my transition is done!
MAKE IT LOOP
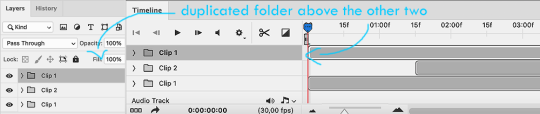
Okay, now that my gif is done I want it to loop. I went to my layers and selected my “Clip 1″ folder, double click > Duplicate group, and I put that duplicated folder above the other two.
Now let’s repeat the process I explained above, but in this case I added the diagonal transition. I also wanted to change the direction the transition played. After I put the overlay in my file, I selected the layer > Ctrl + T > Changed the angle to whatever I wanted, in this case 90º. You can put 0º, 90º, 180º or -90º to change the direction, like I did in my set.

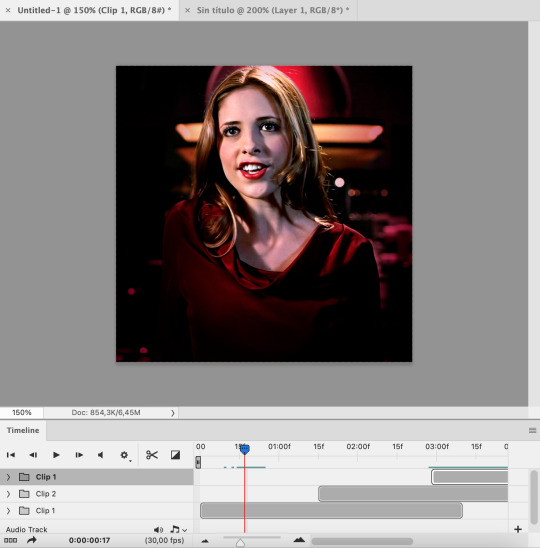
Okay, so now I created my second transition. Like I did before, I’m going to select the duplicated group and drag it towards the end of the timeline, trying to make sure both gifs last around the same time:

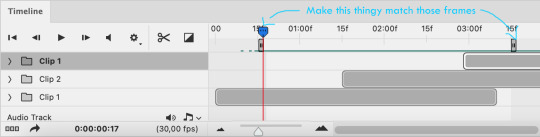
To make it loop, I need to make the first frame of the whole gif match the last frame. My second transition finishes in this frame:

Which is the same frame as this one:
So now I’m going to drag these timeline things and “crop” the gif:
And this is the result:

If you have any questions feel free to send me an ask!
#ps tag#tutorial#resources#usermills#userstar#userdre#uservivaldi#usercim#userkosmos#tuserabbie#usershreyu#useryoshi#usernik#tuserssam#usernanda#allresources#completeresources
692 notes
·
View notes
Note
Oh I’m sorry I have GOT to ask! How did you do the text animation in the first gif of 718688291365502976/pscentral-event-15-favourite-ships-kanej?? It’s just. It’s so beautiful
Hi anon! I've used After Effects to create the text animation in the first panel of this post. I'll show you the basic idea of how I've created the animated text effect here :D
What you need:
A cutout font (the font that I've used is Trouble Child Outblack by @justlikethistrain)
Adobe Photoshop with Video Timeline feature
Adobe After Effects
Supplementary files: gif prep action pack / golden outline layer style / assorted textures
Difficulty: advanced; knowledge in gifmaking with the video timeline interface assumed
Note: This tutorial assumes that you're working with all of the composite gifs in a Photoshop composition file and using the video timeline interface
Other useful tutorials to refer to: Text overlay effect / After Effects text animation / clipping mask vs layer mask
Tutorial under the cut. Like / reblog if you find this useful!
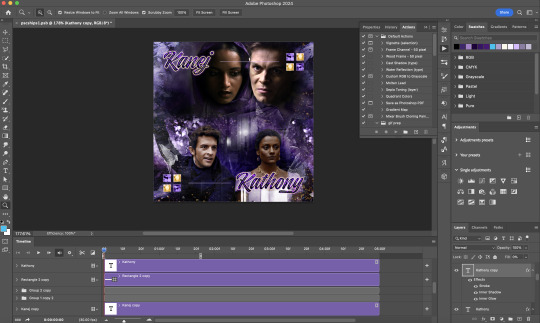
1) Photoshop: Preparing your gif panel
Setting up your PSD composition panel: Create a blank PSD file and set it to Tumblr dimensions (540px x 540px in this particular gifset)
Enable Video Timeline and drag all of the component gifs from your folder to the PSD composition file. Resize / move these gifs around until you're happy with the placements.
Trim the timeline work area so it's the same length as the shortest component gif you've added to the PSD composition file. You can also add some textures & additional adjustment onto this panel.
2) Photoshop: Exporting your base gif
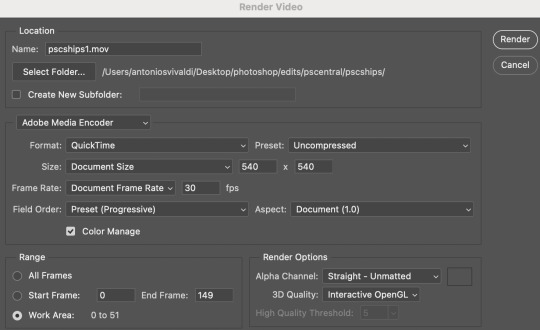
I highly recommend exporting the base gif right now, to ensure a smoother experience scrubbing through the video timeline when adding finishing touches later on in the workflow.
My preferred method is to render the composition as a video clip from File > Export > Render video.
To get the optimal export quality, I use the following settings:
3) Photoshop: Preparing your text layer
Make a new Photoshop composition file of Tumblr dimensions

Drag in the video clip that you've just rendered (the base gif) to this composition file
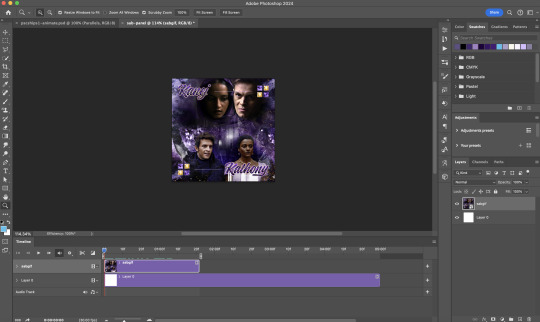
Add a new text layer in your PSD composition file and set the colour to white then tweak this layer until you're happy with the text placement.
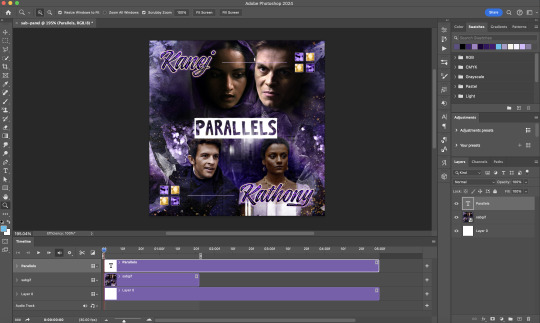
For performance optimisations on After Effects, I duplicate the PSD composition file and delete all other layers. This PSD file contains only the text layer that will be animated.
4) Photoshop: Adding overlays & decorations on the text layer
This step allows you to preview the text effect without the animations (i.e. allows you to tweak the texturings & colourings)
Duplicate the text layer. Set the bottom layer's (highlighted in red) blend mode to Exclusion and apply the gold outline layer style to the top layer (highlighted in green). Make sure the Inner Shadow is disabled!
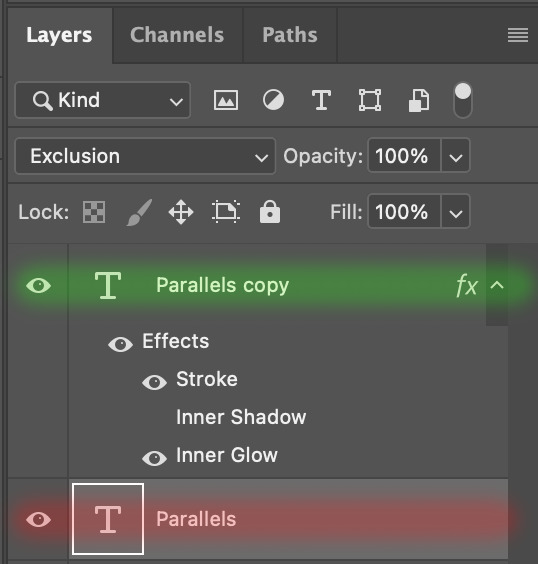
The panel now looks like this
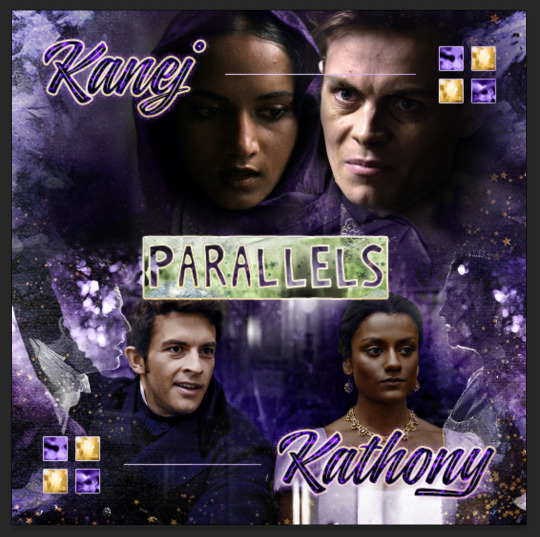
I want to have the liberty to use different colours & textures on the bottom text layer with animation, so the next thing I do is to right click on the bottom text layer and select "Group from Layers"
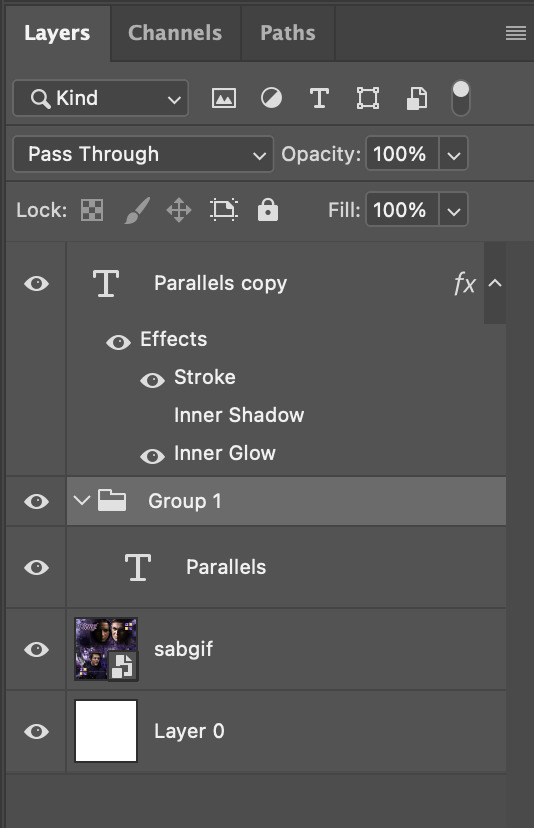
To change the colour of the filled text layer to purple:
Collapse the Group that you've just created
On top of the collapsed Group a purple Colour Fill layer,
Set the Fill layer's blend mode to "Colour"
Right click on the Fill layer and select "Create Clipping Mask"
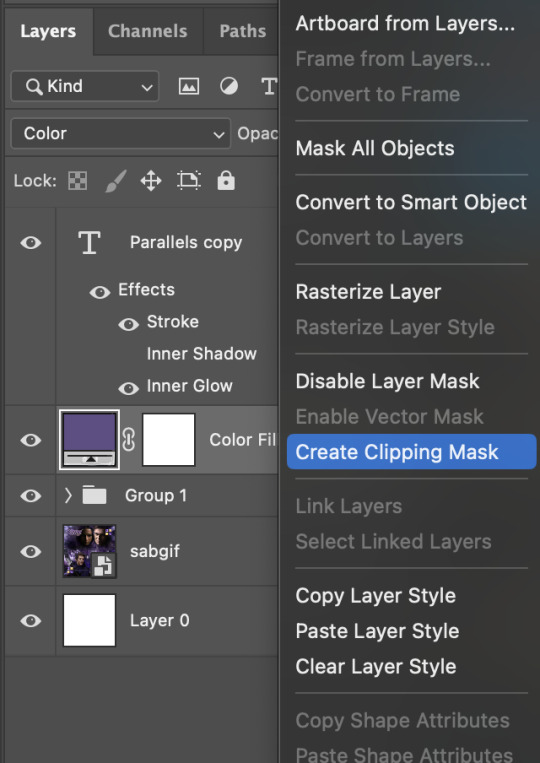
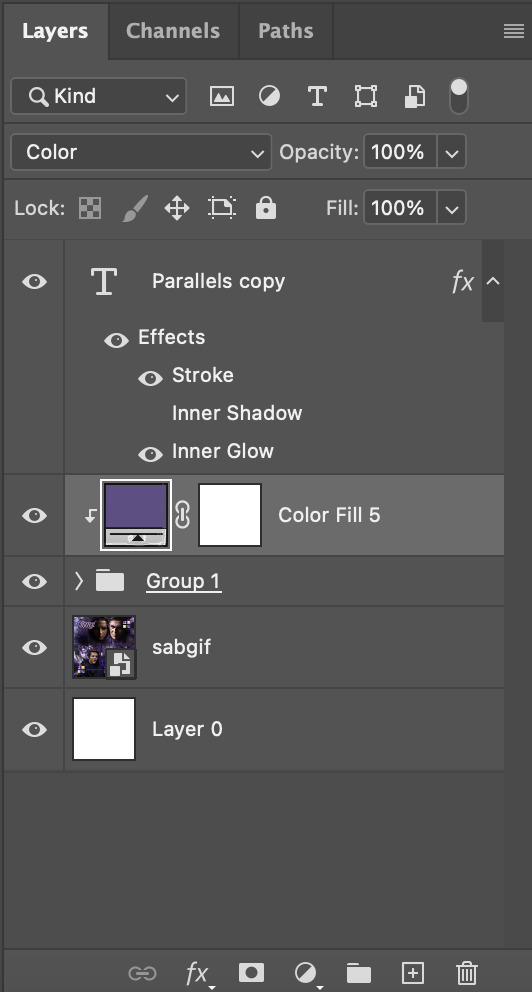
Now the colour of the filled text layer is purple
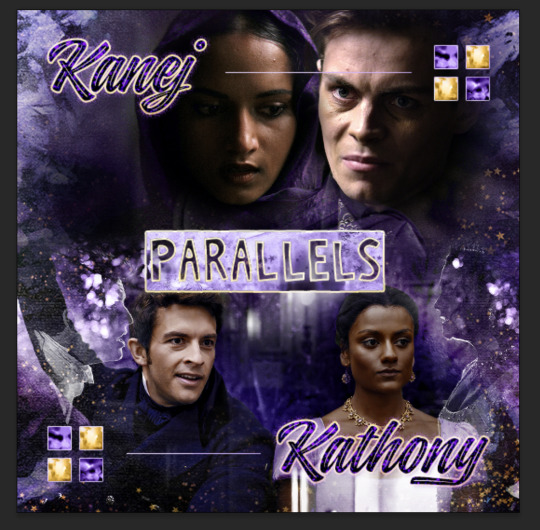
After adding more textures & decorations on the text layer (with photo negative effects) I get the following:
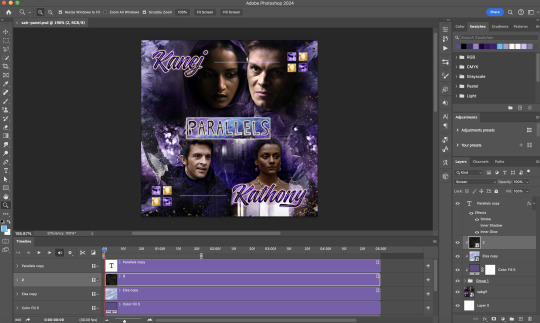
5) Photoshop: Adding overlays & decorations on the text layer
To avoid performance issues on After Effects, I make a new PSD file of the same dimension. With both the PSD files open, I select the text layer (highlighted in red) while holding Shift, I drag this to the blank PSD file (see the green arrow)
Holding Shift ensures that the layer's placement is preserved when it's copied to a separate PSD file.

In the new PSD file, I set the text layer's blend mode to "Normal"
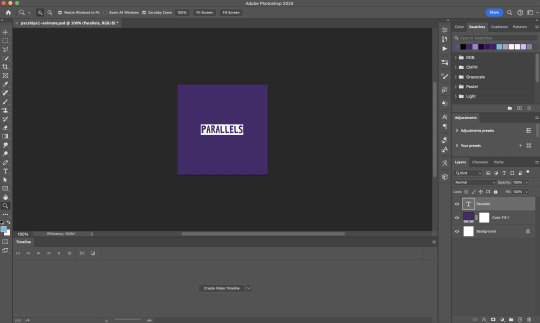
6) After Effects: Animating your text layer
Make a new project on After Effects and drag in the text layer PSD file. Import this file as a Composition

Also drag in the base gif video clip to the AE project.
While we won't be exporting anything with the base gif visible, having this file in the project file is useful if you want to have a better picture of how the animation will look in tandem with the gif.
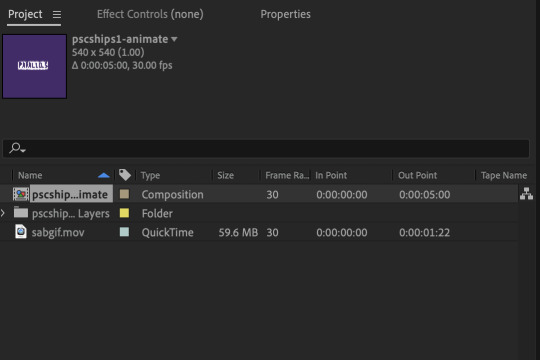
Double click on the composition. Hide the colour fill and background layers. Then right click on the text layer, go to Create > Convert to Editable Text
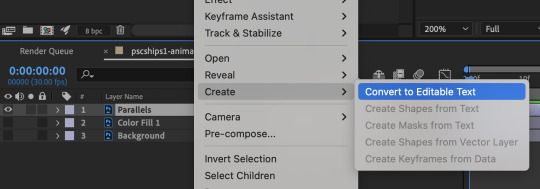
To be able to preview the animation with the base gif, drag the video clip to the composition file and below the text layer. The visibility of the layer can be toggled on / off anytime in the After Effects workflow
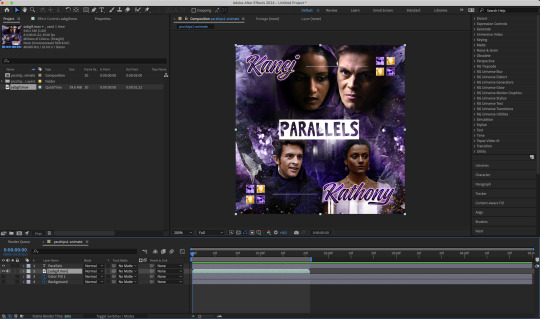
Now we prepare the text layer to be animated. Because the final animated effects is 3D & has motion blur, right click on the text layer and select "3D layer" (highlighted in green) and Switches > Motion Blur (highlighted in red)

Go to Animation Presets > Text to browse through some presets that you could use to animate the text layer. For this gifset, I've used a preset within the 3D Text folder called "3D Random Spike Tumble in".
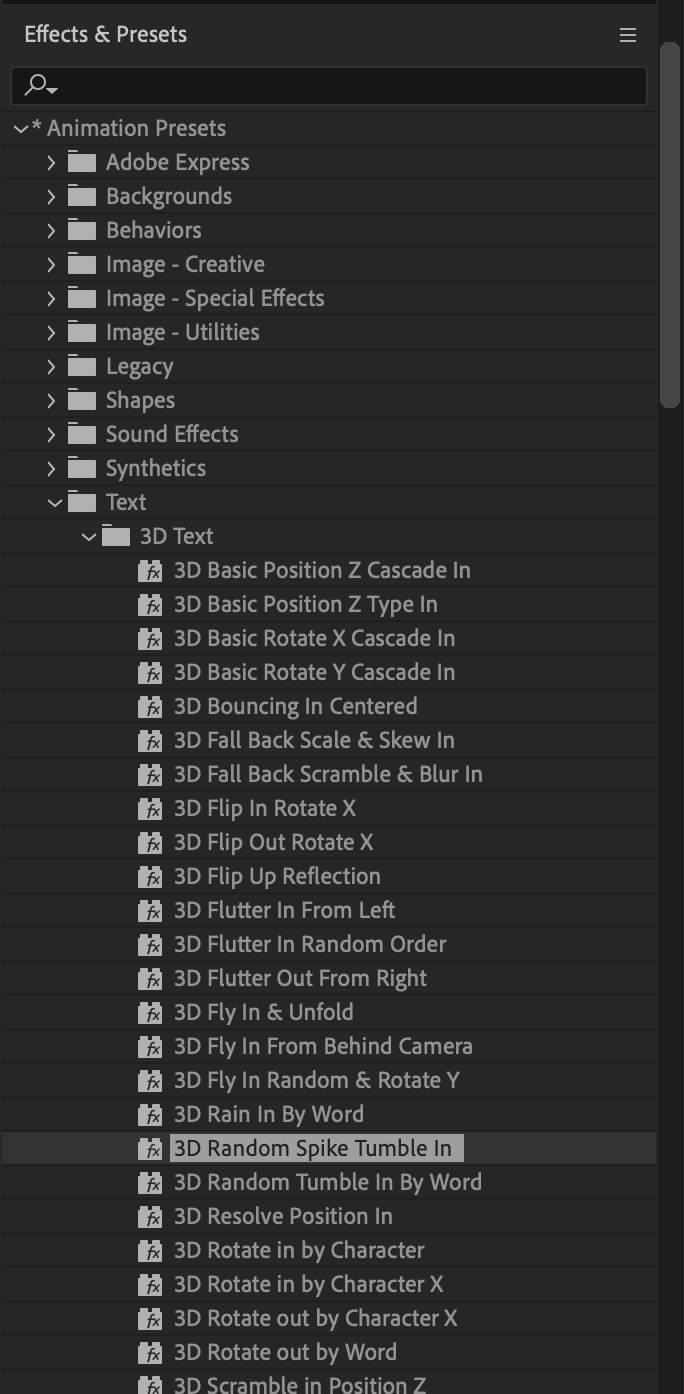
While selecting your text layer, press U to view the keyframes and you can adjust the position of these keyframes until you're happy.
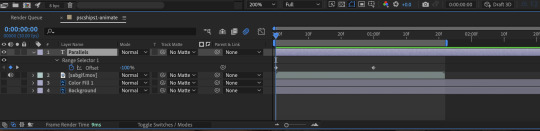
For more finishing touches, press U again to tweak more options in this preset. In this case, I do to Animato 1 > Range Selector and changed the Colour Fill to #fff (the default colour is light yellow)
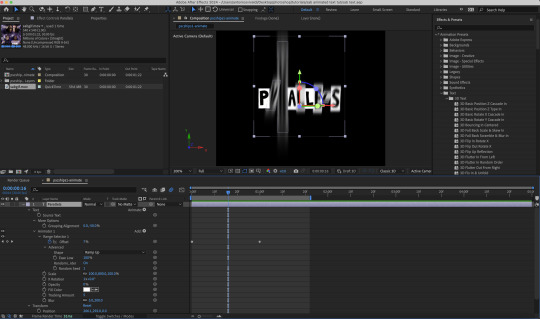
Then do you File > Export > Add to Render Queue
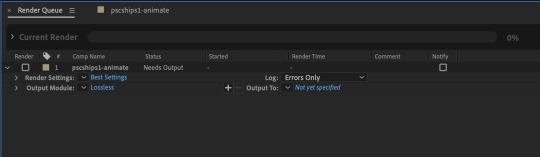
Click on the Output Module and use the following settings to render the text layer as a video file with transparency
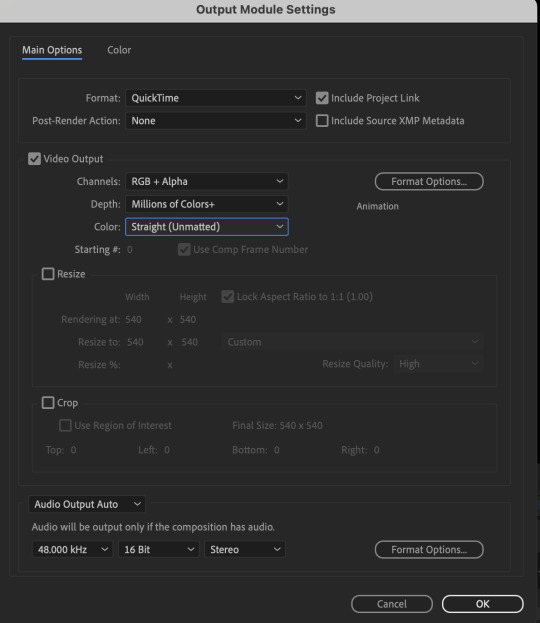
Then after specifying the folder in which you'll export the video to, click "Render" to render the video file containing your animated text layer.

7) Photoshop: Adding the animated text & finishing touches
On Photoshop, drag the rendered clip containing animated text, to the PSD composition file with the static text layers.
Duplicate the animated text video layer
Drag one of the layers inside Group 1 and set the blend mode to "Exclusion" (Highlighted in green)
Move the other layer to the top and apply the gold outline layer style with Inner Shadow disabled (highlighted in red)
Hide both text layers (highlighted in yellow)

By scrubbing through the timeline, I've noticed that the animation didn't look clean enough, so I'll add some finishing touches
By selecting the upper text layer containing layer styles, go to the timeline and add opacity keyframes going from opacity 0% to 100% a few frames apart

Once you're happy with the finishing touches, flatten / render your PSD composition file, change the frame delay to 0.05s and export your gif and voila!

I hope this helps 💖
#tutorial#gif tutorial#photoshop tutorial#after effects#chaoticresources#dearindies#userriel#useralien#userraffa#usershreyu#user.tee#useryoshi#usernik#userjoeys#usersole#arthurpendragonns#userhallie#*#my tutorials#my resources
112 notes
·
View notes
Note
Could you make a tutorial on how you go about making your vhs screenshots? They look awesome and I want to try to implement that style in some of my own art. Thanks so much!!!
So i use clip studio and the settings i always see on other tutorials are only on photoshop (vibrance) so i baso made my own auto actions copying them and i've uploaded them. This will also be long becoz i always try make tutotials that I would want to see when looking up a tutorial.
Sketch ur scene. I don't worry about sticking to 1980s (or whatever era) framing or style choices usually. For backgrounds i can do a bigger tutorial but i basically use clips gouache or some watercolour brushes for blending. Ghibli and 1942 Bambi for the textures and don bluth etc for the colours as a rough guide. I use this blog for some references but also just searching '[film name] backgrounds' or something like 'ghibli snow/roads/grass'
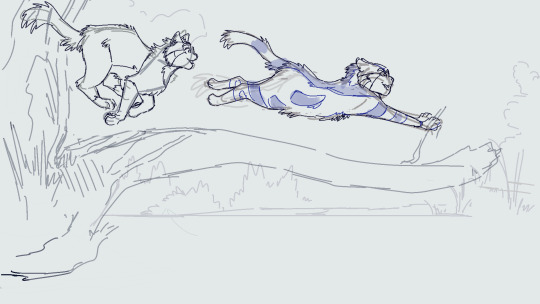
So i draw the scene. Use a dark brown for inks. Duplicate that, fill with yellow, blur 5 and 30% opacity underneath. I copy the base layer/character layer, fill with same brown and blur so its a “drop shadow”
I also duplicate the shadows, blur one about 12-18 and set both to half opacity. Same with lighting. Any rim light is the Ink layer duplicated, filled white, overlay or glow it depends on what fits best, and the bits i dont want white erased.

All text is Arial yellow with a black border. My style of drawing varies a lot by i try for a fuzzy 80s fur look- like kosperry or don bluth i guess. thats what the 'cats' layer looks like ^^^.
Okay onto edits. Flatten image and duplicate in case u fuck up. Auto actions are linked above (i have the box ticked/the action closed to speed things up and only adjust the important bits)
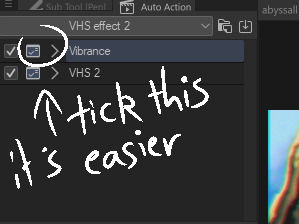
Blur - gaussian, start mild and u can build up from there.

Fake vibrance- you can use saturation ig but this (to my knowledge) targets the light and shadow differently. I literally copied how the photoshop vibrance works. I use anywhere from 25-85 strength (mainly 40), it looks less saturated once u click okay so just experiment.
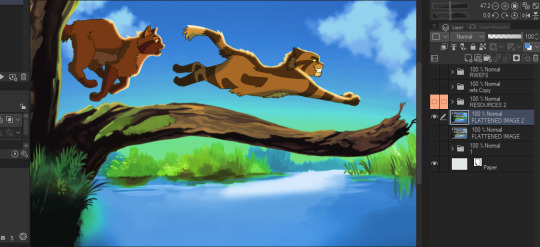
Chromatic abberation - I use this one. Move to liking and merge
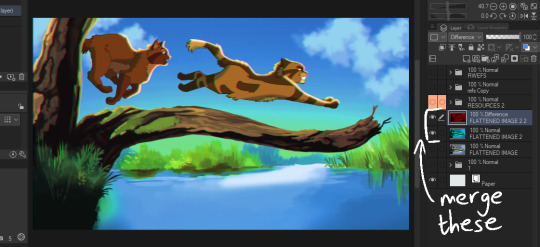
Vhs 2 - this is the other auto action i made, it’s basically another blur, motion blur and some image adjustments.
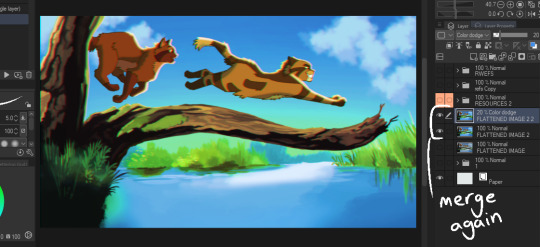
Final additions - 1 is a noise layer (clip studio perlin noise), 2 is a free VHS overlay set to hue (find one with colours u like!), 3 is a new layer filled with a bright colour/colour that fits the vibe you are going for (here i used blue for the blue background + sunny vibes) set to lighten and adjust
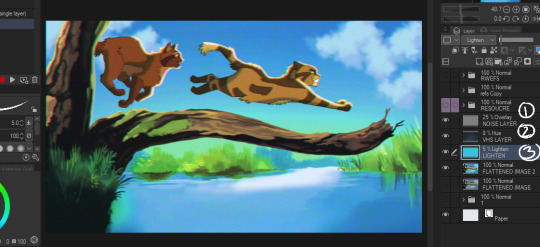
and thats it for me!
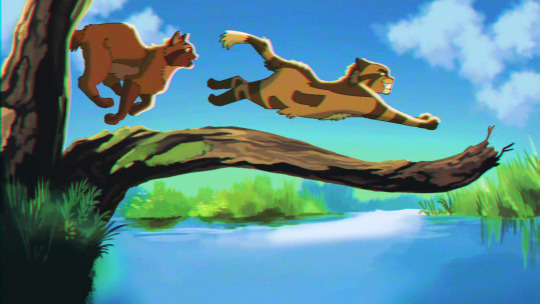
Happy VHSing!
#please let me know if these autoactions work! there shud be two in the download!!!#warrior cats#vhs#ghibli aesthetic#retro aesthetic#art tutorial#vhs tutorial
104 notes
·
View notes
Note
Oh I aodre this very much, and I've got to know how you did that overlay transition if you wouldn't mind telling me 👀👀
Hiiii, sorry this took me a while, so this was my first time doing this effect on that gifset so i wanted to do another to make sure i was doing right so i could give this little tutorial for you, so i'm gonna be doing it using this gif from one of my latest gifsets

So for this tutorial you are gonna need:
2 gifs you want to use
a transition/stock video of ink or something similar (i got mine here)
and at least basic knowledge of making gifs with timeline on photoshop
So first off get the 2 gifs you want to use and colour and sharpen how you please, then drag one of them on top of the other so they're both on the same gif - for the sake of this tutorial i've labelled the layers as the background and the foreground
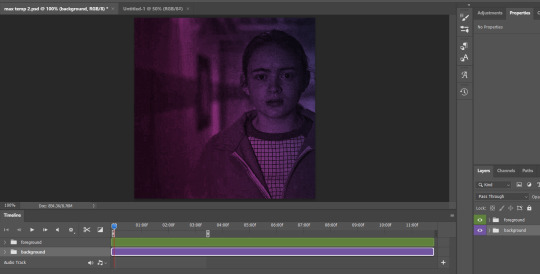
Next i get the ink footage (uploaded to photoshop the same way i'd normally upload gifs convert to smart object etc. etc.) and then drag that into the foreground folder
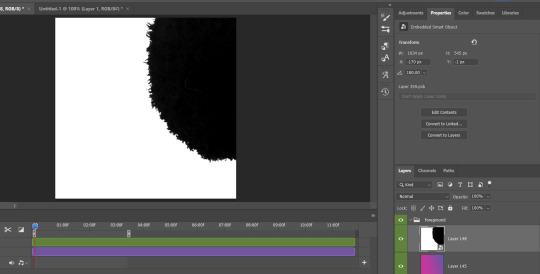
Then set the ink layer to screen and it'll show the foreground gif in the black ink like this:

Now copy the ink layer and move that to the background layer, change the layer style to multiply and you'll get this;

Now here is where i had to do a lot of experimenting to actually figure out how to get the background to show - there's probably an easier way to do it? but if there is i couldn't work it out.
I found to get it to show i had to set the foreground grouped layer to difference - but then it shows the background like this;

So to remedy this i placed a white layer set to difference under the ink layer in the background group;

That then counteracts the foreground layer being set to difference on the background layer and there you have it - an ink overlay transition
I hope i explained this decently i'm not the best at explaining this, if you have any questions don't be afraid to ask - and if you wanna see the gifset i used this with it's here
75 notes
·
View notes
Text
Dear EA/Maxis
We need to talk....
As a builder I don't actually play the game a lot but, recently, I had the opportunity to get more into the game play side of things and I am just gobsmacked at how frustrating of an experience it was.
You need to know these 3 things before we have our chat, 1. I have NO script mods in, as I have been prepping for your next update apocalypse. I do have a default skin, eyes, sliders and my choice of skin details because, well, let's be honest, you lot are terrible at creating acceptable looking body beautifuls. 2. ALL of my drivers are checked daily and updated, if needed. And 3. without getting into specifics, my system is very capable of handling the taxing of your 8 year old game.
I have been a sims player for over 20 years, I have dumped thousands into your franchise. I own every single expansion, game, and stuff pack you have ever released including your most recent money grab "kits" I do not feel that telling you this should garner me a higher standard of propriety because EVERY Sims player should have the ability to enjoy your game without the need to take a Xanax first! I just want you to be aware that my simlish is fluent (with and without alcohol).
Below is a glimpse of the issues I was having, and there were MANY, that I had in the few short hours I played, I have also included some colourful pictures because...well...some people learn differently...
Let me introduce you to Marley, she has been in my game for a long time, mostly to help me take screenshots for thumbnails (she is using the CC listed above, using the CC I normally have in my game and completely nude for reference)


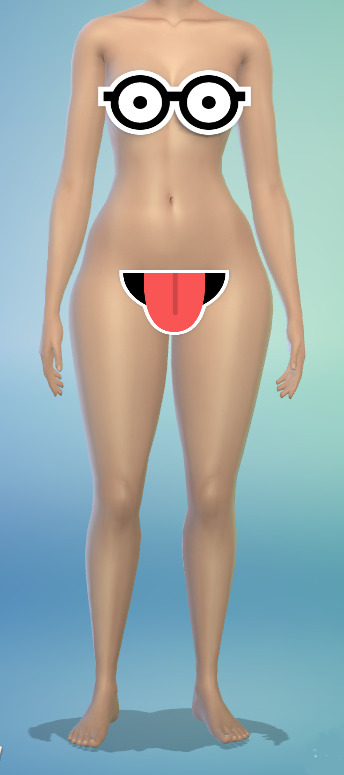
Please fix your clothes so my normally healthy looking sims don't look like they have successfully dropped 20 pounds instantly without the need of some photoshop magic, your clothes should NOT being slimming my sims no matter how slim or heavy they are!
While Marley and I were in CAS we noticed that there is an alarming amount of clothes with texture oddities, mostly pants that made Marley look like she had taken a mahoosive shite, don't get me wrong it's a look, but? There were also several shirts and shoes that need fixing, too, however, I think the pants are the worst. Here are some examples:
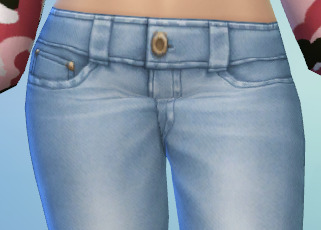

When we were done discovering the horrors of CAS, I took Marley in game and moved her into a lovely little build in simlicy's save file (2.0) Here's a peak just in case you're feeling nosey:

After we loaded in, Marley stood on the lawn, while I immediately opened buy mode (be thankful this is a game play observation because I could blow your mind with the issues I have found while building) I bought Marley an easel, a bed, a knitting bag (the first of MANY mistakes I made) and a rocking chair. Going back into live mode I set Marley to apply for a painter job, then "cook" a salad, when she was done the welcome wagon arrived. I told Marley to invite her neighbours in, instead of doing as I had asked Marley sat down in the rocking chair and stared smugly at me until the welcome wagon left. Defense Exhibit A:
After shunning her new neighbours Marley settled in for some knitting relaxation with her new earbuds in. I selected "cottagecore" which was a genre neither of us had heard before and definitely will NOT again as it sounds like the entire "cottagecore" list played all at once with the added background noise that I can only describe as "living in a haunted house with a ghost that just had its nails did" I closed my game out of fear of being possessed by this entity and went immediately to your forums, where I discovered that this is a known bug that has been happening since 2017.
When I loaded back in, I was instantly hit with a phone call from a cat who wanted to know if he or she should go on a date with Eliza Pancakes and of course I said yes because pfffft what could possibly go wrong there, am I right?! Probably not but *shrugs*
After Marley told the cat that we would like to receive an invitation to the wedding and hung up my eyes were instantly drawn to the floor...what...what is THAT?! DUST?! At this point I was starting to get exasperated, and I am pretty sure Marley was, too. So back into buy mode I went to buy a vacuum for a house Marley hadn't even slept in yet. (reported fixed 23/03/2021 Patch PC: 1.72.28.1030, still broken)
I asked Marley if she felt like knitting in the rocking chair, she said she was a bit tired so I reminded her that we needed to recoup the cost of the expensive vacuum I just had to buy. Begrudgingly, Marley sat down and started knitting a panda beanie. Before long she began waving and yelling insisting I let her go to bed, she was exhausted, and truly, so was I. So off Marley trudged. I worried that she would not make it the 15 or so steps to her bed but she did. I sighed. Then, out of the blue and with the drama level of a high school Shakespearean actress, Marley stood up and threw herself on the floor next to her bed where she slept, I presume, like a baby. Ok Marley, you do you, boo! (broken with toddler patch - 2017)
While Marley slept I slipped into build/buy mode to add a pop of colour to her bedroom with a piece of art that had 2 birds on it and attempted a paint change. The art disappeared when I applied the paint, where did it go? Marley did you take the art?! No, of course not, you're still asleep on the floor.....(reported fixed 17/01/2023 Patch PC: 1.94.147.1030, still broken)
Marley got up bright and early the next morning, I asked her to make eggs and toast....she canceled the request repeatedly insisting she needed to search the web on her phone. (reported fixed 30/08/2022 Patch PC: 1.91.186.1030, still broken)
Finally Marley made it to the kitchen and began to cook...and apparently light the stove on fire

......thanks Marley.....I didn't know you were a closet arsonist.
After breakfast I clicked on the knitting bag and asked Marley to finish the beanie she had started the night before, she said she could not, so I clicked on the rocking chair and asked again, she just waved
I repeatedly tried the bag and the chair to get her to knit, she just kept on waving, she is such a friendly sim <3 Ok Marley, please go knit the beanie on the bed
No? Ok Marley, please scoot over and try the other side of the bed, still waving I see....Marley you have to use the loo, so go do that while I cue up knitting one more time before I reload, ok? Marley, you have been in the bathroom for over an hour....

Are you knitting on the loo?! Are you serious Marley?? Let's move you to a more comfortable place. WHAT DO YOU MEAN YOU CAN'T KNIT IN THE DAMN ROCKING CHAIR?! Ok Marley, my face is red and I am annoyed let me just hit pause for a minute...Marley...why are you still moving...did you just "break the space-time continuum" like they cracked that joke about in the "patch" that was supposed to fix this issue?! (reported fixed 17/01/2023 Patch PC: 1.94.147.1030, still broken)
Alright Marley I am going to pull the knitting bag from your inventory, sell it and then buy you a new one, this one is clearly borked...let me just...wait, why can't I put this bag down, what do you mean I can't put it in the middle of the floor where there is literally nothing else around it...*click click click click* Wait, where'd the bag go?!
Marley let's just forget about knitting for a while, please go turn on the vacuum and then we will work on a painting to calm us both down. Oml, Marley that painting is lovel...why is the vacuum cleaner smoking?! Sh*t Marley, I think the vacuum found the knitting bag....
When Marley got home from work the next day she was clearly upset, after a SINGLE DAY at work she was feeling like she was stuck in a dead end passionless job, I sighed.
I asked her to change her clothes and then go paint, she changed her clothes and then stood on her front lawn for over an hour in game time, made a face at me then finally went to paint (known issue, reported as far back as 08/2020, still broken)
When I attempted to save and close the game out of frustration my save got stuck for 40 minutes before I gave up and restarted my PC.
The point of all this, EA/Maxis is you have chosen money over your players. These "fixes" you say you're doing are clearly not actually fixing anything! Your players are crying out for theirs games to be fixed while you are announcing the release of "growing together" And quite honestly I have found myself disgusted with this whole thing. WE SHOULD NOT HAVE TO ADD MODS TO THE GAME TO FIX IT!! To quote a member of this community who I admire greatly "no other ea game is this fucking borked and no other gaming community would accept this but cc and mods more or less served as some sort of bandaid for this broken ass game." -xldkx 31/07/2022 (original post here)
When I am finished posting this I will be going into that horrible buggy af app (I am sensing a theme here) that you have forced us all to switch to, where I will be canceling my pre-order of "growing together" I am done blindly throwing money at you for a game I can not even play in its current state!
FIX YOUR DAMN GAME!!!
99 notes
·
View notes
Last Seen Blogs
luxububazar
∆ F i k a ∆
just-skyrim-things
Just-Skyrim-Things
just-skyrim-things
Just-Skyrim-Things

areesquivel
areesquivel
talixsims
TalixSims