#3D Modeling Tips
Explore tagged Tumblr posts
Visit Tumblr Blog
Explore Tumblr blogs with no restrictions, modern design and the best experience.
Last Seen Tumblr Blogs


Fun Fact
130K people were victims of a chain letter scam that affected Tumblr in May 2011.
Text
Essential Tools for 3D Product Modeling: A Comprehensive Guide for Beginners

Creating realistic and detailed digital representations of physical objects has become essential in today’s digital world. 3D Product Modeling is a crucial aspect of industries like e-commerce, gaming, and architecture, making it necessary for professionals and beginners alike to understand the tools involved in this process. If you’re a beginner stepping into the realm of 3D design, having the right tools at your disposal can make all the difference.
Software for Beginners
Choosing the right software is the first step in mastering this art. Popular programs like Blender, Autodesk Maya, and SketchUp are ideal for newcomers. These tools offer intuitive interfaces and comprehensive tutorials to get you started. Blender, for instance, is free and open-source, making it accessible for beginners exploring 3D modeling services without a hefty investment.
Hardware to Enhance Efficiency
While software is essential, hardware plays an equally important role in delivering high-quality results. A high-performance computer with a powerful GPU, sufficient RAM, and ample storage ensures smooth rendering and modeling. For those working in professional environments or providing 3D product modeling services, investing in tools like 3D scanners and tablets can significantly enhance accuracy and efficiency.
Learning Resources
To build a strong foundation, beginners can explore online courses, tutorials, and forums. Platforms like Udemy, Coursera, and YouTube offer detailed guides on using tools effectively. Many 3D product modeling companies also share free resources and insights to help beginners gain industry-specific knowledge.
Conclusion
Mastering 3D modeling requires a mix of the right tools, consistent practice, and access to valuable resources. Whether you’re a hobbyist or an aspiring professional, these tools can help you unlock your creative potential. As a leader in product design and development, Advertflair provides innovative solutions tailored to meet industry standards, ensuring clients receive the best services in this dynamic field. Start your journey with the right tools, and watch your skills grow in no time!
0 notes
Text
MMD model making tip:
If you want your model to have pants or stockings, unless you want your model to have baggy pants or a specific pants shape (bell bottoms, cuffed jeans, etc), it's much easier to simply retexture the existing leg material rather than adding someone else's stocking or tight fitting pants model part to your model. You won't have to worry about the legs clipping through the pants when using motions, and you also don't have to manually fit the pants to the model's leg shape!
You can either edit the texture of the whole body using your preferred image editing software and retexture just the leg part of the texture, or you can separate the legs from the main body material and edit them separately.
I recommend the second method, as it'll make editing the textures simpler. You don't have to worry about the pants part of the texture spilling (for lack of better wording) onto the rest of the body, as the pants have their own texture. It's also better for when you're making renders of the model, you can give the pants a different shader from the main body, useful for when you want to apply a cloth/fabric shader to the pants but not the skin.
I see SO MANY models with stocking and pants related clipping issues which could easily be fixed by simply retexturing the legs rather than fitting pants or stockings to a model. I'm guilty of this, and after learning this life hack making models wearing pants or stockings is much simpler!
This method is also useful for things like gloves and some shirts, assuming you don't plan on having any 3D added details to the gloves.
If you want your model to have baggy pants or cuffs on the legs then this method won't help as much, but for tight fitting pants and socks such as stockings it'll make things much simpler!
Will update with images when I get my computer back from being repaired!
#mmd#mikumikudance#3d modeling#3d modeling tips#mmd tips#mmd tutorial#mikumikudance tutorial#3d modeling tutorial#pmx#pmx editor#pmxe#pmx editor tips#pmx editor tutorial
1 note
·
View note
Text
Answer to an ask I accidentally deleted
:"D idk remeber the user of the person who asked this but they asked something like,
"the mailbox you made is made of separate boxes but the bird you made looks like it's one mesh could you explain your process with the bird model and show off it's wire frame?"
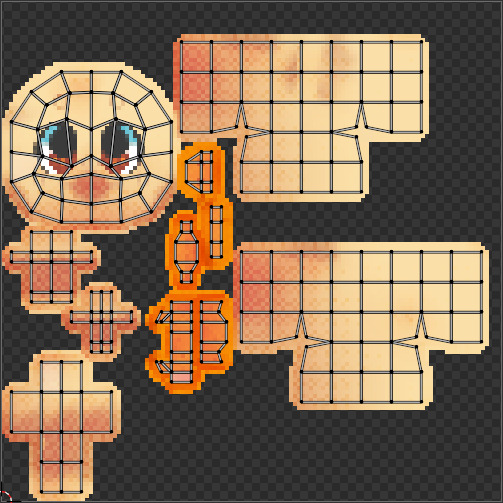
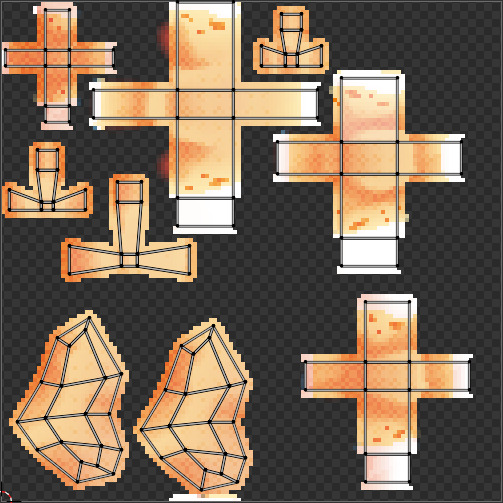
Thank you so much for the ask! Sorry it took me a while to respond but I hope this is still helpful! The bird is actually split up into a ton of different parts just like the mailbox these ones are just a bit less square
I think the most difficult part of this project was the uvs. Making the pixels look constant was definitely a challenge for certain body parts. I didn't take the time to merge all my uvs so I have like 5 separate textures for this one model which is probably really silly but I'm not gonna put it in a game or anything so I didn't bother. thinking about it like a minecraft skin really helped me with get it right haha but that might not help everyone.
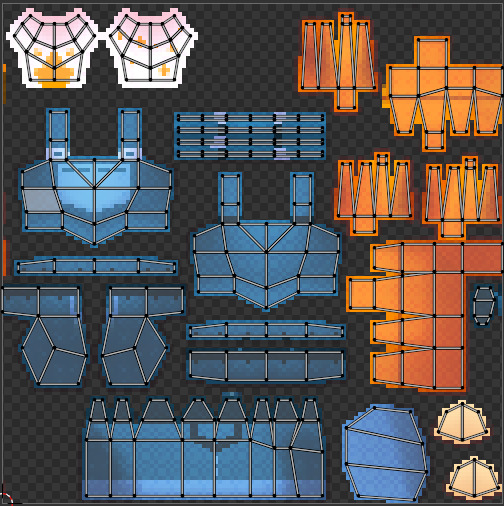
for the pixel art gradients I used a method I figured out a while ago that is really easy. I shade on an image size about 4x the size of my pixel art and use a screen tone effect on those shading layers I then rasterize the effect and resize it back to my pixel art size, using different big image sizes, screen tone sizes/shapes, and the resize style will change the look of the funky gradient it's a bit of trail and error but when you get it right it's so fun.

#artists on tumblr#3d art#3d modeling#3d blender#behind the scenes#3d tips#pixel art#pixel art tips#my art#my 3d art
60 notes
·
View notes
Text

weird guy. peculiar creature even.
#for the 3d model i wanted to do a cool pose BUT I FORGOT TO SPLIT HIS ARMS AND LEGS INTO TWO PARTS#no knee batter </3#he has no elbows aswell#off the batter#off batter#the batter#batter off#off game#low poly#3d model#blockbench#art#artists on tumblr#may have used some parts from ashleys model but thats ok#look making heads is hard#i should probably watch some tutorials#but i am. lazy#if anyone has tips for how to make them posable please help.. i am clueless#i wish you could rig it like a gmod character#that would be nice#scotcharts#scotchdoesthings#<almost forgot my tags
161 notes
·
View notes
Text
I wanted to put this here to show you all something!
Blender defaults to saving PNGs and when you click Render Animation it will give you a giant file full pngs of each frame of your render. then you have to use a separate program to paste the pngs.


You can change the file format to FFmpeg Video and the container (under encoding) to MPEG-4 and it will save the video as an MP4, ready for sharing on platforms such as tumblr.
90 notes
·
View notes
Text
zbrush asks MY permission before crashing
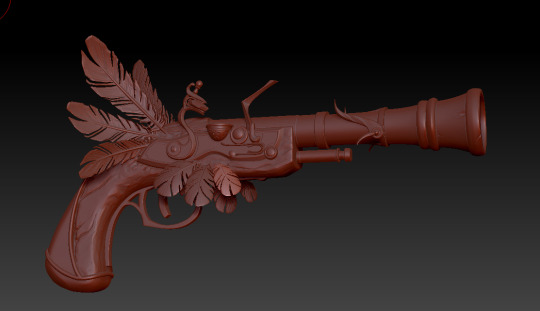
working on this gun model for class and just got the feathers on, absolutely thrilled with how everythings coming together
#if anyone has any tips on how the hell to retopo this thing#thatd be great#game art#3d modeling#zbrush#game artist#art for school
50 notes
·
View notes
Text
for all you who love to write smut or draw 18+ content, there's a site that has 3d models of all the kama sutra poses. i mean it helpful for me
it's a pretty chill way to see sex positions in 3D thats similar to the 3d models artists use for artwork.
#personal#the dank archives#smut tips#3d modeling#free resources#maybe visit with adblock tho#reference#pose reference
36 notes
·
View notes
Text

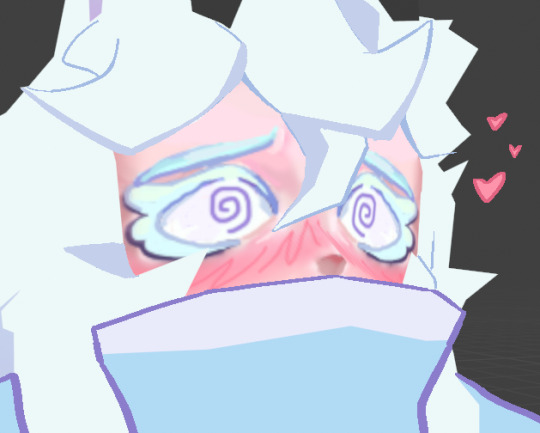
A model I'm making for fun!
guess who it is based on
#furry art#oc art#anthro#furry artist#lgbtq#oc artist#artists on tumblr#furry#character design#art#trans artist#trans#transgender#3d model#3d art#3d artwork#sfw furry#sfw furry art#Tip the color of the text matters#zemmie.art
20 notes
·
View notes
Text
Friendly reminder to donate to the small indie resources
If you use a free art software like Krita or GIMP
If you use free and open source 3D software like Blender
If you use a free resource like PureRef, Quickposes, or AdorkaStock
If you use a free game-making software like Renpy, Twine, or GBStudio
Your favorite digital brush makers, like Devin Elle Kurtz
Your favorite free font makers, such as Blambot
feel free to add more
A lot of these are made and maintained by one person or a small team of people, who likely have day jobs and other responsibilities, but also create these resources for us to use.
Obviously these are all free to begin with for a reason. So you don't need to feel guilty using it if you can't afford to donate.
But If you can afford just $5 or $10 dollars, show the creators of your favorite free software your thanks. Remember that there are real people behind these resources who make them free and open source out of the kindness of their own hearts. It's easy to forget the human behind the screen.
#art resources#art#poses#3d modeling#art help#art tips#artists on tumblr#krita#gimp#blender#pureref#quickposes#adorkastock#renpy#twine#GBstudio#digital art
22 notes
·
View notes
Text
Get 3D'd bozo

#art#my art#oc#oc art#oc artwork#blender#blender3d#3d modeling#kinda just learning blender#after so long of failing to make anything at all#i was suddenly able to make this#artist tip when doing anything do it about your hyperfixation and you'll do it better immediately#used crashune academy's tutorial for low poly characters#uv unwrapping is going to be a nightmare
17 notes
·
View notes
Text
Behind the scenes: interiors and architecture
Hey, guys! I know that it isn't that type of a post that are interesting for the general public and/or gain much attention, but I still wanted to share some of the stuff that I usually keep to myself. So here are the screenshots of my 3D-models that I use for the background art! I created all of them myself and collected them carefully within the years to reuse some of the smaller models/elements in my future works.
Starting with my favourite one: The MacFragan inn for @inwilis. It's also my biggest model so far! It took WEEKS to finish. This version is slightly edited: I combined a few different shots with different lighting.
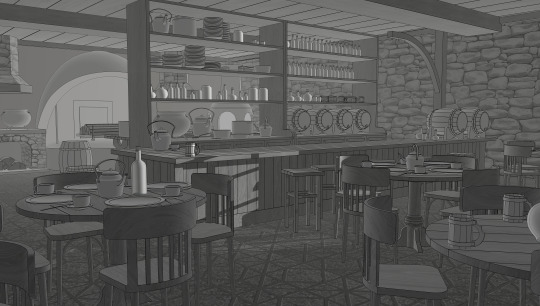
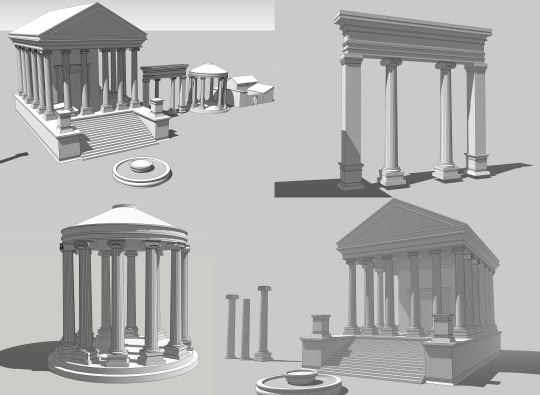
And this is how the model looks like in Sketch-Up:
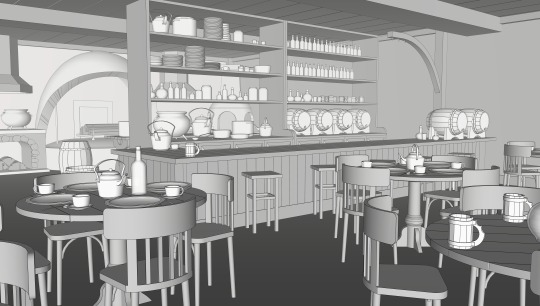
There's also the stairway that didn't end up in the shot.

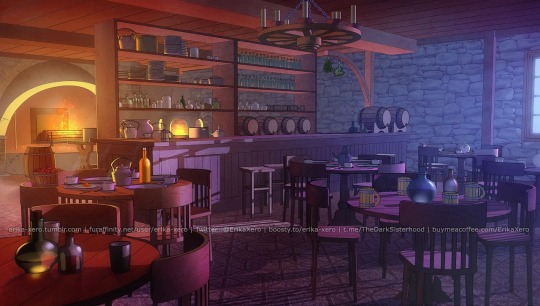
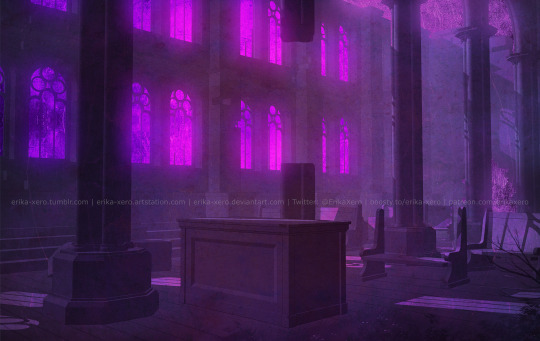
This is how it ended up looking in color:
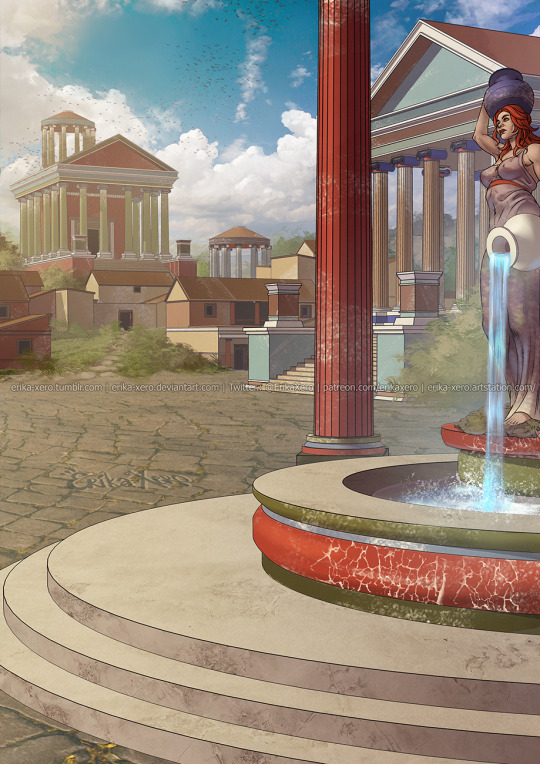
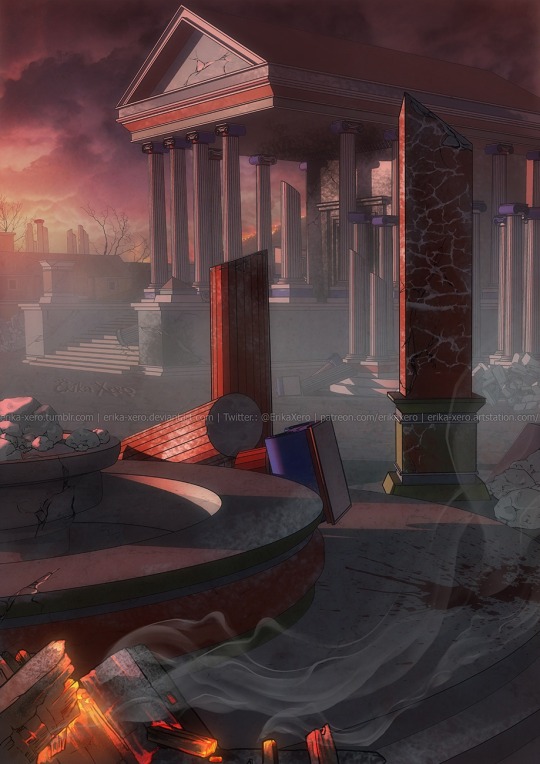
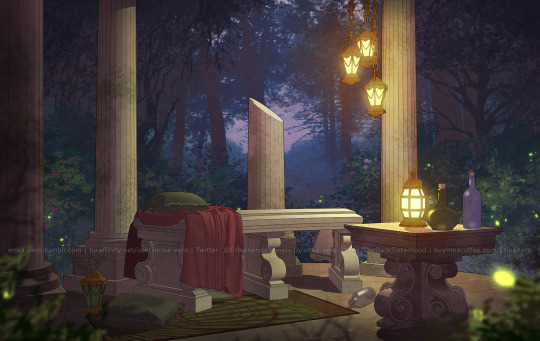
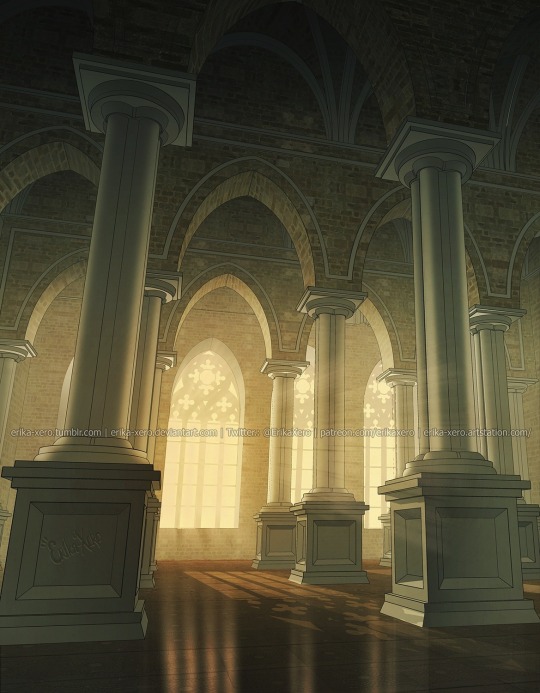
Moving on to the next one! The abandoned chirch for the mixed media art featuring Kirsi that I did for Evelynn Gonti!
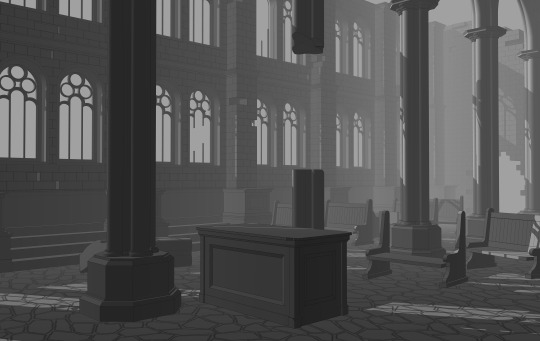

Different angle!
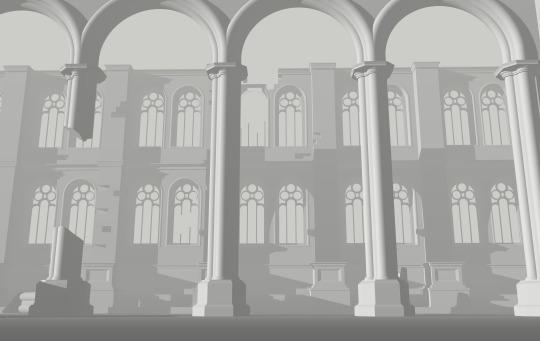
Here's an earlier version of the model. This was a small experiment on coloring:

And the finished background:
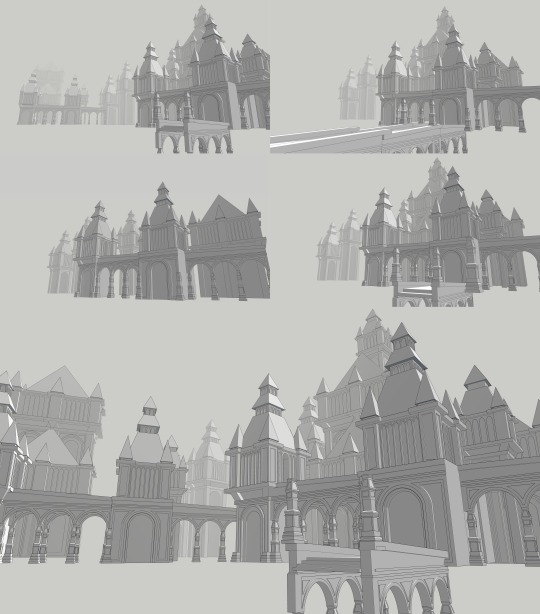
Next one! The city model for the tryptich piece I did for @inwilis. There were actually two versions of this model: the regular one, and the post-war one. Enjoy the little random vase on the left, because my models are a mess!

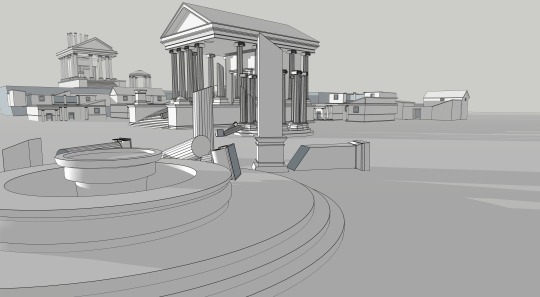
Some architecture details!
Finished backgrounds:
Oh! This one is interesting. I actually never posted this piece online, because it's a bit n/s/f/w.

Finished background:

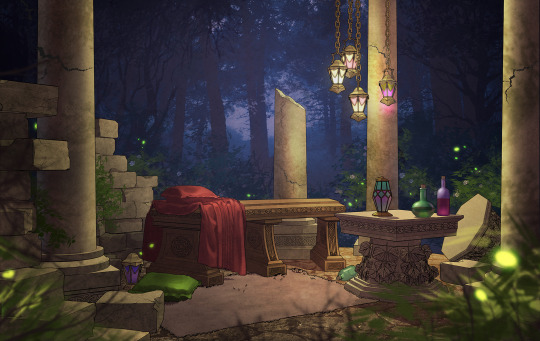
Another abandoned church! This one is for the piece I did for CaIamarti!
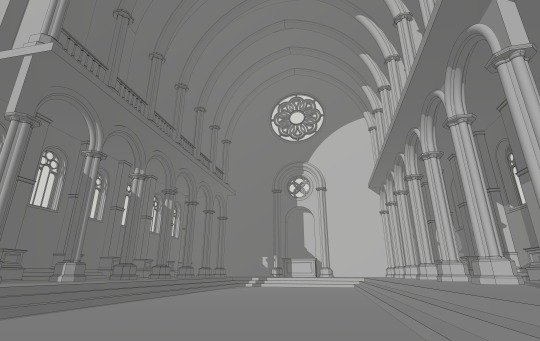
And a coloring WIP!

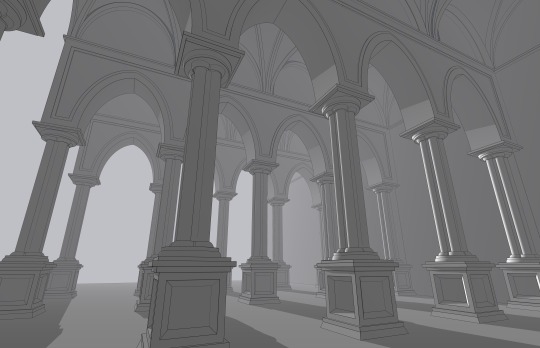
Another background for the piece I did for @inwilis and @bitemerogers. This one actually exists in two versions. The first model was scrapped, but I used it to make a tutorial.

Some earlier work! Drow architecture for the piece I did for Nielspeterdejong back in 2021.
And another oldie that I still adore:
Colored version! Still use it as an example of how cool I am at doing backgrounds xD
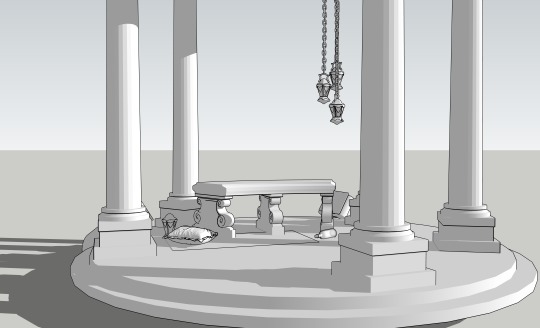
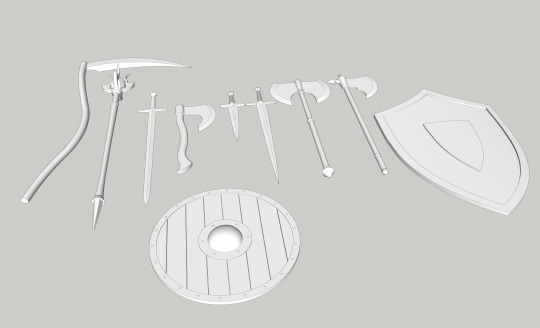
Here comes some of the smaller models! My fantasy assets. The staff can be seen on the Vesta commission I did for @glatissart!
Winterhold model I did for this commission for gnomonics!

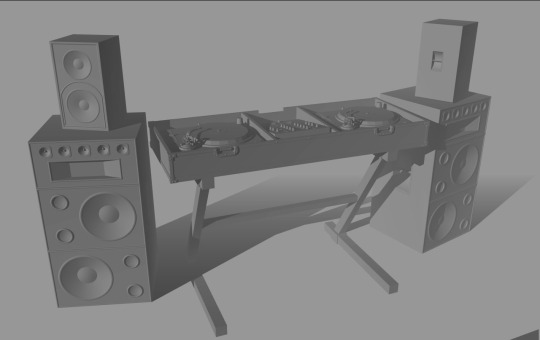
The DJ-set I modeled for @happy-go-pucky's commission! Bonus: the analogue one.

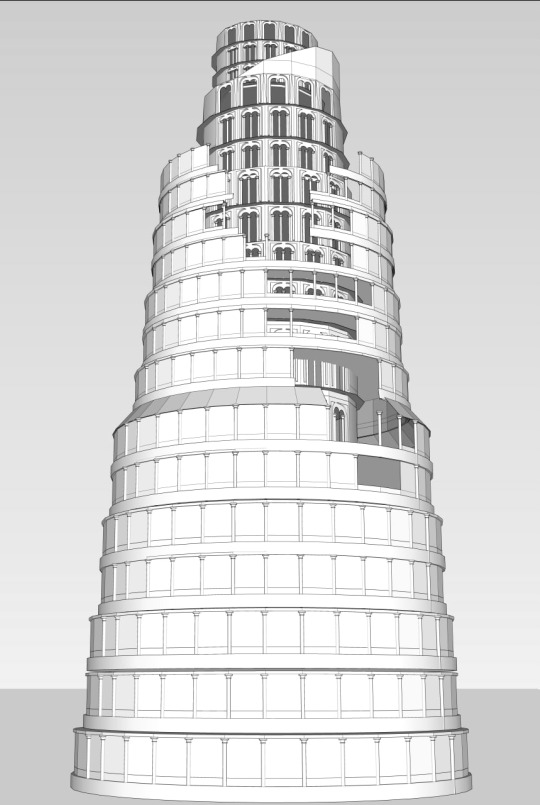
Beware! The first model I did for my 2D art: the Temen-Ni-Gru tower (it's horrible and completely broken).
That's all for now! Some of the models are lost forever, some of them are made for other people's projects, and some of them I forgot. I also have a tutorial on how I color this models!
Cоmmission prices | terms of sеrvice | cоmmission inquiry form
135 notes
·
View notes