#3dmax
Explore tagged Tumblr posts
Visit Tumblr Blog
Explore Tumblr blogs with no restrictions, modern design and the best experience.
Last Seen Tumblr Blogs


Fun Fact
70% of Tumblr users say the Dashboard is their favorite place to spend time online.
Text

16 notes
·
View notes
Text
3DMAX’s Genius Mid Smoke Boost on Inferno! 🔥
#3dmax#cs2#counterstrike 2#counter-strike 2#counterstrike2#counterstrike#counter-strike#gaming#esports#valve#steam
3 notes
·
View notes
Text


Our recognisable products that we have brought back into series production: the TUTTU Monteur armchair and sofa and the Ramus floor rack 👑
#levantin#levantindesign#wowinyourspace#design#interior#product design#designer#дизайн#productdesign#интерьер#rack#sofa#armchair#art#render#3d max#3d model#3dmax#3d
25 notes
·
View notes
Text

3 notes
·
View notes
Text
Proper Modeling and Material Setup
The starting point for architectural visualization work is modeling and material setup. Using 3D Max, you need to accurately model the building and its surrounding environment and precisely configure the properties of each surface using V-Ray's material editor. In particular, the materials and lighting settings of the building have a significant impact on the final result.
Lighting and Camera Setup
V-Ray allows you to create lighting effects that resemble the real world. Configure natural light, interior lighting, shadows, and other elements precisely to bring realism to your visualization. Also, adjust camera settings to achieve your desired perspective and angles. Consider the camera's focal length and lens type to enhance the visual effects.
Rendering and Post-Processing
During the rendering phase, use V-Ray to generate high-quality images. Rendering time directly affects the quality, so you need to optimize your computer's performance and rendering settings. In the post-processing stage, use software like Photoshop or other image editing tools to fine-tune the image and add necessary effects.
Continuous Practice and Learning
Finally, architectural visualization work requires ongoing practice and learning. Stay updated on new technologies and tools, analyze the work of other artists, and improve your skills. Developing artistic sensibility is essential, and understanding design principles and color theory can be helpful.
Creating architectural visualizations using 3D Max and V-Ray demands effort and practice, but the results can be astonishingly realistic and beautiful. I encourage you to use these software tools to create your own creative works. Thank you.
#Architecture#3DModeling#Visualization#Design#Rendering#Vray#3DMax#Materials#Lighting#Camera#ArchitecturalRendering#Building#NaturalLight#InteriorDesign#Photoshop#PostProcessing#Creativity#Art#DesignPrinciples#ColorTheory#Realism#VirtualReality#VisualEffects#DigitalArt#FineArt#Architect#VisualDesign#Space#Modernism#ArchitecturalDesign
2 notes
·
View notes
Photo

3D DENDERAH CONSOLE Creator: Antoine Vignault Offered by: OAK Oneofakind Gallery Dimensions: W.94 cm;H.100 cm;D.36 cm
https://www.turbosquid.com/3d-models/3d-denderah-console-2075238
2 notes
·
View notes
Text
Heyy
Haven't posted in a while


I've been trying to figure out 3D modeling back a few years ago and I've finaly got a printed figure of my model.
So, the only logical thing to do was to paint it, so here she is, my cute alien girl
(I've also made her lashes out of carsdboard since I could't make them in original 3D model.)
0 notes
Text


3d models that were made in Corona Render and Vray
0 notes
Text
GameDevRomania Jam - Evolution (2/3) 3D Modelling
Este timpul să dăm formă ideilor din etapa Concept Art și să le transformăm în modele 3D impresionante!
Folosind ilustrațiile din prima etapă ca referință, participanții vor modela obiecte, personaje sau environment-uri care să definească universul jocului.
Suntem nerăbdători să vedem cum prind viață aceste creații!
Aceste modele 3D vor fi folosite în etapa a treia pentru a crea un joc bazat pe ideea principală a modelului
1 note
·
View note
Text
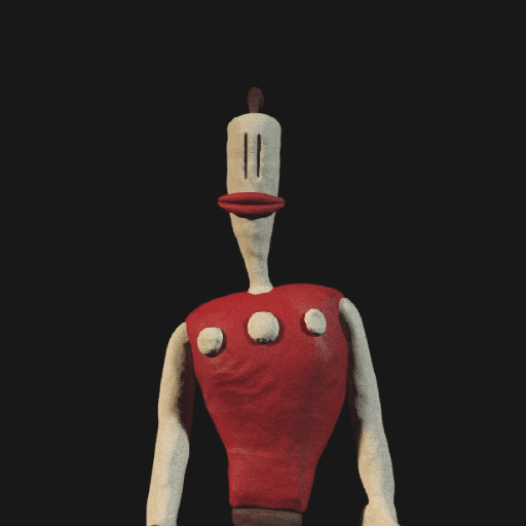
Klaymen
60 notes
·
View notes
Text
Pro CT Nade Combo to Destroy Inner – 3DMAX Train Play 💣
0 notes
Text
How to Make a Reflective Metal Texture in Unity?
Creating a reflective metal texture in Unity is crucial for developers aiming to achieve realistic, polished metal surfaces in their projects. In Unity, reflective materials require precise adjustments to shaders and material properties, but with the right steps, you can create a surface that mimics the shiny, reflective nature of metal. This article will guide you through the process of creating a reflective metal texture in Unity, focusing on key elements like surface smoothness, metallic properties, and environmental reflections.

Preparing the Scene and Materials
Before diving into the technical process of creating a reflective metal texture, you should prepare your scene in Unity. Set up a basic 3D object (such as a sphere or cube) where you will apply the reflective material. Unity’s Standard Shader or the more advanced HDRP Shader will be essential in achieving the desired metallic look.
1. Creating a New Material
Start by creating a new material. Right-click in the Project panel, go to Create and select Material. You can then name this material something like "MetalReflective." With the material selected, head over to the Inspector window.
2. Selecting the Shader
To create a reflective effect, Unity's Standard Shader is a good starting point. Set the Shader drop-down to Standard. You will see several properties in the material, including Albedo, Metallic, Smoothness, and Normal Map. These will be the key controls to make your metal reflective.
Adjusting Metallic and Smoothness Settings
For metals, the metallic property is the primary factor in creating the reflective look. Metals typically have a high metallic value, while non-metallic materials like wood or plastic are set to a lower value.
1. Metallic Property
Set the metallic slider to 1 (fully metallic) to simulate a pure metal surface. Unity’s metallic workflow is based on the assumption that a value of 0 represents non-metallic surfaces, while a value of 1 represents a fully reflective, metallic surface.
2. Smoothness Property
The smoothness property controls how glossy or rough the metal surface appears. For a reflective, polished metal, set the smoothness value to a high number (close to 1). This will make the surface highly reflective and shiny. Lower smoothness values simulate more rugged, duller metallic surfaces.

Adding Reflections
To achieve accurate reflections, it’s important to have proper environmental reflection maps in your scene. Reflections are what gives metals their polished, mirror-like appearance. There are a few ways to handle reflections in Unity, depending on whether you are using the Standard Rendering Pipeline or the HDRP.
1. Reflection Probes
Reflection probes are essential tools for capturing the environment and creating accurate reflections. To use Reflection Probes, create one in your scene by right-clicking in the Hierarchy and selecting Light > Reflection Probe. Position the probe in the center of your scene, or wherever your metal object is located.
Next, go to the Inspector window of the Reflection Probe and set it to Baked or Real-time depending on the needs of your scene. The real-time option will update reflections dynamically, which is ideal for interactive environments.
2. Skybox Reflections
If you are using a Skybox in your scene, Unity can automatically generate reflections from the Skybox texture. In the material properties, make sure that the Environment Reflections toggle is enabled and the Reflections Source is set to Skybox. This will automatically use the Skybox to generate environmental reflections for your metal texture.
Adding Normal Maps for Surface Detail
To make your reflective metal texture more realistic, adding normal maps can enhance the surface detail. Normal maps simulate small surface imperfections like scratches or dents, which are crucial for achieving a more natural, complex reflection.
1. Importing a Normal Map
Find or create a suitable normal map for your metal texture. If you’re using a pre-made texture, you can often find normal maps that correspond to it. Once imported, assign the normal map to the Normal Map slot in your material’s Inspector window. This will add surface detail to your reflective metal and allow light to interact with the surface more realistically.
2. Adjusting the Strength
After applying the normal map, you can adjust its strength using the Normal Map slider in the material’s settings. A value of 1.0 gives a strong effect, while lower values make the surface smoother and less bumpy.
Fine-Tuning the Reflective Effect
At this point, you’ll have a reflective metal material, but it may still need some fine-tuning to achieve the right look. The following properties will help refine your material:
1. Albedo Color
Although metals typically have a metallic finish, you can still tweak the Albedo color to give your material a slight tint. Most metals have a natural color: gold has a yellow hue, copper has a reddish tone, and silver has a cooler, bluish shade. You can adjust the Albedo color to match the specific type of metal you’re trying to create.
2. Fresnel Effect
The Fresnel effect controls the way light reflects off a surface depending on the angle of view. For metals, this is especially important, as they typically show a more pronounced reflection at shallow angles. Unity’s Standard Shader includes a basic Fresnel effect through the smoothness and metallic properties. However, if you want more control over the effect, you can create a custom shader using Unity’s Shader Graph or write one manually in HLSL.
3. Environmental Lighting
The overall lighting in your scene will heavily affect how the reflective metal looks. Ensure that you have appropriate light sources, such as directional lights or point lights, to illuminate the metal surface. The reflections on the metal will change depending on the light's position, intensity, and color, so adjusting these elements can significantly alter the material's appearance.
Using Advanced Shaders (HDRP and URP)
For more advanced rendering features, such as physically-based rendering (PBR), you may want to switch to Unity’s HDRP (High Definition Render Pipeline) or URP (Universal Render Pipeline). These pipelines offer more accurate rendering of reflective materials, including improved lighting models, real-time reflections, and post-processing effects.
1. HDRP
In HDRP, you can create more complex reflective metals using the Lit Shader. This shader is designed for high-quality rendering and supports advanced features such as subsurface scattering, anisotropic reflections, and clear coat effects. Using HDRP can result in much more detailed and realistic reflective metals compared to the standard pipeline.
Common Issues and Troubleshooting
As you work with reflective metal textures in Unity, you may encounter some common issues. Here are a few troubleshooting tips:
1. Lack of Reflections
If your metal surface isn’t reflecting the environment correctly, ensure that reflection probes are set up properly in your scene. You should also check that environment reflections are enabled in your material settings.
2. Overly Blurry Reflections
If the reflections are too blurry or too sharp, adjust the smoothness property. A lower smoothness value will create a more diffused, less reflective surface, while higher smoothness values produce sharper, clearer reflections.
Creating a reflective metal texture in Unity requires a mix of material properties, shaders, and environment settings. By understanding the key factors like metallic and smoothness values, reflections, and normal maps, you can craft a realistic and visually striking metal surface for your projects. Whether you’re using the Standard Shader or the HDRP pipeline, Unity provides powerful tools to simulate the complex interactions of light with metal surfaces. If you’re looking to enhance your designs further, download high-quality 3D models and textures from the Relebook website to elevate your Unity projects to the next level.
FAQ
How do I make my reflective metal less shiny?
You can reduce the shine by lowering the smoothness property of your material. This will make the surface appear rougher and less reflective.
Can I create a reflective metal without using reflection probes?
Yes, you can use a Skybox reflection or other environmental textures, but Reflection Probes will provide more accurate reflections, especially in dynamic scenes.
How can I make my metal texture look like gold or copper?
Adjust the Albedo color of the material to match the desired hue (yellow for gold, red for copper) and fine-tune the reflectivity using the metallic and smoothness properties.
1 note
·
View note
Text

𝗥𝗘𝗡𝗗𝗘𝗥 || 𝗖𝗢𝗡𝗧𝗥𝗔𝗦𝗧𝗘𝗦 𝗨𝗥𝗕𝗔𝗡𝗢𝗦: 𝗟𝗮 𝗶𝗻𝗱𝗶𝗳𝗲𝗿𝗲𝗻𝗰𝗶𝗮 𝗲𝗻 𝗺𝗲𝗱𝗶𝗼 𝗱𝗲 𝗹𝗮 𝗲𝗹𝗲𝗴𝗮𝗻𝗰𝗶𝗮 𝗮𝗿𝗾𝘂𝗶𝘁𝗲𝗰𝘁𝗼́𝗻𝗶𝗰𝗮.
Diseño : Arquitecto Santiago Rojas @arq-sant
#design#architecture#exterior#interiordesign#arquitectura#archilovers#3d render#decor#designer#architecturephotography#3dmax#coronarender#archdaily#architect santiago rojas#arquitectosantiagorojas#arquiteto#arquiteturadesign#buildings
1 note
·
View note
Text
🚀 3DMAX pulls off a stunning underdog victory at the Skyesports Championship 2024!
🎮 They triumphed over The MongolZ in a one-sided final, taking home the $100,000 prize.
🏆 Read more 👇

0 notes
Text
Fellow visualisers, give your clients flowers. In pots. We have prepared 3D models of our Aiuola cachepots right away with beautiful greenery (3dsMax 2014 + obj (Vray+Corona). 🌿 Go on, download and apply in your projects! Available on the site: Menu > 3D-models

#planter#pottery#pots#potten#pot#plantpot#plant#aiuola#flowerpot#flowerpots#flowerbed#flowers#flower#planten#cachepot#3dmax#3dsmax#3d max#3d model#3d
0 notes
Text


1 note
·
View note