#3ds max scripts
Explore tagged Tumblr posts
Visit Tumblr Blog
Explore Tumblr blogs with no restrictions, modern design and the best experience.
Last Seen Tumblr Blogs


Fun Fact
The KCSC sent more than 20K requests to delete posts related to prostitution and porn to Tumblr from January to June 2017.
Text
youtube
This plugin allows the user to copy-paste objects from an opened AutoCAD file into 3DS Max. The plugin works with multiple opened CAD files, it recognizes the last copied objects. The script offers many filtering options for the imported objects like: 1-removing the prefix "Layer:" and this will make it easier to select objects by name 2-remove any material applied to the imported objects 3-remove the Block/Style Parent hierarchies 4-select the imported objects when importing is done 5-turn the imported objects into a group 6-you have the option when clicking import to open the main AutoCAD DWG/DXF Import Options so that you can change additional options, And when you click Import, 3DS Max will import the objects respecting the options in this main dialog + the options in the Script. So you better choose the options in the script first.
The download link is in the description area on YouTube
#3dsmax#3ds max#3ds max plugins#3ds max scripts#3dsmax free plugins#scripting in 3dsmax#autocad to 3dsmax#3dsmax copy paste#copy dwg to 3dsmax#3dsmax copy dwg#3dsmax paste dwg#autodesk#autodesk 3dsmax#Youtube
0 notes
Video
3D Studio Max Script
Curs 3D Studio Max, utilizarea unui script. https://www.softedu-magazin.ro/shop/curs-3d-studio-max-crearea-propriului-soft-educational/ https://www.softedu.eu/3d-studio-max.html https://www.softedu.eu/cuprins-3d-studio-max.html
0 notes
Text
BMOP: A history of the Abandoned Koro
Now that things have all come out, and the project is well and truly over, I thought I'd take a moment to talk a bit about something I worked on in the game, the "Abandoned Koro" area, now that there's video footage of a playthrough I can easily reference.

I suppose as a quick primer, I was with the BMOP team from around March of 2021 to November of 2022, serving as both 3D art lead and Level design lead for a time. There's a post out there about my experiences with the leadership of the team that I mostly stand by still, I do feel bad for how the project ended, and I have come around a bit to remember the positive times more than the negative, but that doesn't erase what happened.
So to begin, when I came on level design was a fairly inactive sub channel of the game development discord, some ideas got tossed around occasionally, but not much seemed to be happening, before I'd joined there was a rough map drawn up by the then current level design lead.

It was very basic stuff, there was a version of this map in engine that had been extruded a bit to make it a kind of playable space, one area had some trees on it and some random platforms.

One area that interested me greatly was this part in the south, the so called "Abandoned Koro"

The rough idea being that it was the Le-Koro seen in the GBA game Bionicle: Quest for the Toa, that had been abandoned in favour of the one seen in the browser game Mata Nui Online Game and the cancelled PC game Bionicle: Legend of Mata Nui, as the one in QFTT had a lot of wooden structures while the one seen in the other two was more like a woven nest.
At the time I was just a 3d modeller, and had never really done any real level design, but the concept just really inspired me, so I went off and in blender sketched out a possible level layout for this area.

I made a bunch of renders and wrote out how I thought the level could work, which can be seen in this document HERE.
For a quick overview, the idea was you'd enter the area, the bridge would break, you'd have to clear a river to activate the water wheel on a large mechanical tree that would allow you passage upwards, and then navigate through the Nui-Rama infested ruins of the village before coming to a cave.


The tree was something I poured a lot of time in to, its worthy of its own post at some point in the future.
Now I'll be honest, I was super nervous about releasing this document to the team, I thought I was overstepping my bounds. I was just a relatively new 3d modeller on the team, I didn't have the right to be talking about level design, but to my surprise people were really receptive to it, and I very quickly got added to the level design team¹.
I ended up doing a rough blockout in engine. This was back in the time before Lewa had been chosen to be the main player character, so it was still Tahu.
youtube
This was the first time I'd ever touched Unreal, so it took a while. That's why the sky is black, I didn't know how to add a skybox.

I never got in to level scripting, but as a proof of concept, I think it was successful.
You can see that in this version of the level it had already progressed, now there was the idea of using the Pakari to break the dam, so finding it was the first task on the ground.
This version wasn't in the actual demo map, because as I said before the demo wasn't really very fleshed out at the time. One thing my map showed though was that the demo was way too big. The level design lead at the time had decided the size based on how long it took to get around the map as a perfectly flat plane with no terrain, at max run speed, with no obstacles. This is a very flawed methodology to say the least. Having an actual level with things scaled to the character really started to show the holes in this, and eventually, once I became lead, the demo area was massively shrunk.
Here's a version from just a month later. The version is now part of the new, more compact demo area, but its mostly barren at this point.
youtube
This version was actually completely rebuilt from the ground up because it had been decided to try out voxels as a basis². They were a pain to deal with and this was overturned eventually. I'd say in total, including the 3d sketch I did, I re-built this map maybe 4 times.

One benefit of voxels was it was trivial to have caves, so this is where the idea of the pakari being found in a cave started to emerge.
As I continued to play and refine the demo it became clear how much the movement systems would need to be tweaked. There seemed to be this idea in the team that everything could be done separately and bolted together later, so character moment was all handled by someone jumping around on some big blocks in a test map whereas level design was off doing their own thing, but it really wasn't working. So while the movement felt good in a vacuum, actually putting it in context really exposed a lot of issues. You could easily jump over any enemy you could come across, as said earlier maps had to be huge in order to make the world seem big while you were running at full speed, and after about 3 jumps you'd be 20 metres in the air.
At this point the idea still was to have the entire island of Mata Nui be one large open area you could freely explore, so the sheer size of the maps resulting from the over powered movement was a major issue. I lobbied very hard to have things pulled back and eventually they were.

its a bit out of order, but here's the demo area from closer to when I left. Its a fraction of the size of the original map
Here's another video from a month later.
youtube
As much as it pains me to say it, this is basically it in terms of meaningful development. By this point Lewa had been locked in as the playable character, and the movement had been dialed back to a more reasonable degree, so I was able to really start trying to refine the area. This is where I ran in to a fatal issue.
No one else wanted to play the game.
And what was worse barely anything worked.

The level is still in what I would call a grey box state. I used a couple tree trunk assets I'd made here and there, and put in a big canopy asset from one of the many asset packs we had for a bit of ambience, but it was all still very basic geometry, easily changed or modified.
Unfortunately, there's only so much you can do for playtesting your own area. You built it: you know where everything is, what's supposed to happen, where you're supposed to go. You can try to pretend to play it as a new player, but that only gets you so far. I was hoping people on the team would play it and provide feedback³, but outside of maybe one or two people a handful of times⁴, trying to get any really feedback was was a futile effort.
The thing was that this area was very complex. If the demo was a vertical slice of the game as a whole, this area was itself a microcosm of the demo⁵. It had platforming, puzzle solving, combat, mask powers, the lot. Now unfortunately for me, barely any of those systems actually worked.

As an example, this long ledge was for a long time a stand in for vine swinging, then rail grinding⁶, then was ultimately just replaced by a platform.
So things had kind of hit a wall. I couldn't properly design areas with combat in them until combat existed in a more stable state, I couldn't design platforming sections until platforming worked in a consistent way. I couldn't even adjust the overall flow of the level because everyone else basically refused to give feedback.
But the unfortunate thing is, in August of that year they'd released a teaser trailer.
And that trailer had gotten hundreds of thousands of views.
This is where the whole development of this game really went off the rails. Now there was this push to get things in a presentable state, start set dressing and making final assets so things could be shown off.
But I refused. Everything was too up in the air to commit to set dressing, this is why block out exists, if the jump changes height its no big issue to grab the couple cubes an area is made out of and shift them up or down, if combat is found to need more space its easy to make things bigger, or add or take away walls. If something is confusing things can be shifted. Once set dressing starts now you're dealing with dozens to hundreds of objects being scattered about, even the smallest tweak can lead to a mess.
Not to mention set dressing raised its own series of issues, from plants triggering the IK on the toa's feet, making their knees go up to their chin when walking through a bunch of ferns, to collision volumes being oversized or offset, meaning that big rock face they just added has now created a massive invisible wall in another area. Once the addition of some plants caused all ledges within a wide radius to no longer work⁷.
It was a miserable state of affairs. My mental state rapidly deteriorated as I fought against this, I became very short tempered and irritable, and eventually near the end of 2022 I was kicked from the team. It was such a relief honestly.
I think the tragic thing is, set dressing is actually quite a fast process. The starting area went from looking like this to something quite like the final in about a month?


But you can't show off the first screenshot on twitter⁸.
I guess I'll spare a quick moment to talk about the final version seen in the video.
youtube
Its at 46 minutes in if the link doesn't work
Its...fine? The assets they've made are all good, though I think they lost the QFTM inspiration along the way. The thing that stands out to me is just how...little its moved on from 2022. Just look how much progress was made in like 3 months, compare that to now, 3 years later. Temporary platforms I placed are still in the exact same spot. I do find the addition of a matoran with a key for the cave to be a not great addition, if only for the fact that you need to find a tiny green man in amongst the overwhelming greenery to proceed.


One part I found quite amusing was the final enemy encounter. It was supposed to be this large hut, probably Matau's, that had been completely overtaken by a hive, and Nui-Rama would spawn constantly from it until the encounter was over.

There were a lot of concepts drawn up, but I guess it just...never happened. I also don't know why there's waves of fikou there either, that was after my time I think.


So that's really all I have to say about that version, it looks okay. Its still clearly unfinished. It kinda works more than it did when I left, but its shockingly not that much different, outside of some new assets.
I'll be honest, I did intend this to be more of a happy, reflective post, but when watching part of the developer commentary a quote stood out to me.
"Traditionally you would kind of have really basic blockout for an environment and play test that to see how the level design is working. Because of the the situation we had we were kind of forced to just go ahead with set dressing and prettying it up and everything so if it were in a perfect world I would have loved to have gotten to do some more play testing early on but we did what we could with it. And I mean you basically had to just blindly trust the process because many systems weren't working at the time things were designed." -AN UNKNOWN BMOP DEVELOPER (2025)
And I just fundamentally disagree. This was a fan project, there were no deadlines but those that were self inflicted. This process they blindly trusted just lead to a thing that on the surface looks okay, but is still riddled with bugs that were well known for years. I've seen some people on the team say the game was 90% completed, feature locked, just 3 more months of polish and it would have all been working, but from what I've seen of the game I really doubt it. They say themselves in the commentary that there's bugs they've been fighting for nearly a decade still rearing their head.
So yeah, its not exactly a happy tale. I'm quite proud of the work I did, I learned a lot, and met a lot of people I'm still friends with to this day. Its a shame the project had to end this way, and I'm sad everyone's work has gone to waste, but I'm also not going to pretend this was some amazing project that was struck down right before achieving greatness.
But most of all: Fuck you lego.

If you're interested in seeing a few more of the things I worked on in my time with BMOP, go HERE. I may post more publicly about some of them in the future, who knows. I have a post about the regional Kini temple I designed and built for the game HERE. Also some renders I did for some of my game design reports HERE.
¹-I say team, it was maybe two other people who were barely around. ²-I'll be honest here: Some people wanted to have the entire map destructible so that they could have Bohrok dynamically destroy it. For the post game DLC after we'd finished this Zelda sized free fan game⁹. ³-💯👍👀 isn't helpful feedback at the end of the day. Its supportive I'll give you that. But sometimes you need more. ��-One person on the team even outright refused to play the game until final release, to "save their first reactions for their stream"... ⁵-idk if its clear at this point but the "demo" is, was, and now always will be the entirety of the existing game. Oh there were ideas for other things, but nothing concrete ever materialised⁹. ⁶-You know, like Sonic⁹ ⁷-The ledge's over sensitive detection for something blocking it is one of the most frustrating things about the game's development for me. ⁸-You absolutely can show off real development stuff, there are lots of people who find that fascinating. ⁹-This game was nothing if not ambitious.
You see that kind of mop is called a "Bee Mop", because of its sponge's resemblance to honey comb.
66 notes
·
View notes
Note
blender
as someone who's pretty much entirely self taught on blender - i learned some 3d principles in university, but they were for maya and 3ds max - i constantly have the experience of discovering some core feature i've been missing this whole time that's super duper useful and cool. at the same time, blender is full of such a depth of features that i'm also constantly discovering non-core features that i've been missing this whole time that's super duper useful and cool!!
it's got traditional 3d modelling! it's got 2d animation! it's got basic video editing! it's got shader scripting! it has 3d sculpting! it has mixed 2d and 3d elements in 3d space! there's SO much it can do and it does a lot of it really well.
genuinely, i think if you're at all interested in 3d as a medium at all, for animation or modelling or whatever purposes, give blender a shot. i find it's a program that's very responsive to just going "i want to do X", looking up a tutorial, and going from there. there's a lot you can learn that way!!
i'm sure a lot of people know this already, but if you've ever watched worthikids' stuff, that's largely a beautiful mix of 3d and 2d in blender's 3d space to make his unique and expressive style. hell, even wizard beer is mixed 3d and 2d in blender!! it's really fucking cool!!! and then, just for sheer contrast, let me leave you with his Captain Yajima video (if you haven't seen it already) which was also made in blender!!! what the fuck!!!!!
youtube
18 notes
·
View notes
Text


Heyo!
Just a little backstory here. Back in last September, I had a burnout from a project that left me apathetic for a couple of weeks. I had a couple of shows in my backlog, and so I binge watched Gravity Falls, Amphibia and The Owl House. Those 3 shows instantly became some of my favorites (although the top spot remains for Code Lyoko, which I'll always hold dearly as THE show of my childhood). But after I watched them, I didn't realize it but I had an idea that stirred for me. Just a seed of a glimpse of... something. I didn't know that, nor what it was. I'm autistic, I've been bullied in middle school, and I really like sci-fi and fantasy.
So, I don't know why, but I started off thinking "Hey, what about a show about an autistic kid in some kind of sci-fi world?", and that's a bit how Chris Duval was created. And then I worked the story some more, figuring out what the world would be like, who the inhabitants would be, and it became pretty much something VERY neurodivergent. The world the show will take place in is like a living encyclopedia, with all its inhabitants being like the living embodiment of the articles you could find in there. There could be Foolishness living alongside Brewery, Stoicism and Slapstick, with monsters based on folklore from around the world. I know it's a weird concept, but I feel like it could work, and be really fun. But then I wanted to have some friends for Chris. I loosely took inspiration from my friends back in middle school, mostly on the personalities. The first one I imagined was Kevin (although I'm only at the pitching and pilot scripting phase so it's subject to change). And then came Jo, which was a bit difficult to do cause I had to figure out a cool aesthetic for her. The one that was the most difficult was Max, cause I wanted him to look pretty eccentric, with odd mixes of colors that would still not hurt the eyes, and whose catogan was the last thing I'd find to make him cool.
I'm a 3d artist. I know I should really learn how to draw beyond just my model sheets, but at the same time I don't think I'd be able to make something look nice, let alone for an animation. Cause yeah, these pictures are 3d models. I made them all by myself. There's a rendering engine for Blender called Malt that makes cel shading really easy, and so I made some tests, but now I think I'll just try to animate everything in 3d using Malt and maybe have some of the VFX and some facial expressions in 2d. I'm not sure yet. For now I'll have to finish writing the first draft of the pilot script and see later. It should be fun, though.
#artists on tumblr#gravity falls#the owl house#amphibia#original art#original character#cel shaded#animation#blender#blender3d#3d art#3d artist#project antikythera#character design
4 notes
·
View notes
Note
How TF did you make that Becca character design in TFS style last year? Like can u give a brief rundown. It actually blew my mind, and I lowkey wanna learn.
Last year 👴
You gotta use ttarchext to extract game files and Randomtalkingbush's script to import them into 3ds max. The initial texturing is done for you if everything has the right file locations for the script to find them.
For Becca I exported her season 2 model and several Season 4 models I wanted to use and put them into blender. Using season 2's model as a guide I edited the season 4 models to look like her + the outfit I had in mind.
After that it's a matter of editing the textures, painting over them sometimes, in an image editing software and applying them to the model.
Then if you wanna pose it you have to learn rigging too.
There's a lot of steps so it's best to start small. Just try even obtaining 3ds max before anything else lmao
2 notes
·
View notes
Text
My future projects
Here are my future projects for Boomerang, Amazon Prime Video, Discovery Family & Max (streaming service) between early 2025 & late 2026.
1. Dexter’s Laboratory Season 5 (new characters being developed for Season 5 after 22 episode scripts)
2. A 2D animated direct-to-DVD & Blu-ray movie about child rights narrated by Dexter from Dexter’s Lab co-produced with UNICEF.
3. A Saturday morning cartoon based on a popular sitcom of the 1990s & the 2000s, Friends by Marta Kauffman & David Crane. The 6 main characters will be in their preteens years (ages 10 to 12) set in Central Perk & the art style will be inspired by Genndy Tartakovsky & Chris Savino in the late 1990s & the early 2000s days of Cartoon Network originals.
4. A Cartoon Network crossover show with the 2 main stars of Dexter’s Laboratory, Dexter & Dee Dee similar to the Hanna-Barbera crossover shows of the 1970s & the 1980s led by Yogi Bear.
5. A documentary style animated show about 6 preteen girls which will be a spin-off of Dexter’s Lab as the characters will be modeled after Dee Dee, Dexter’s sister.
6. A Saturday morning cartoon based on an another popular sitcom, The Big Bang Theory by Chuck Lorre & Bill Prady. The main characters will be in their preteens years (ages 10 to 12) set in Pasadena, California during the events of Young Sheldon & the art style will be inspired by Genndy Tartakovsky, Craig McCracken & Chris Savino in the late 1990s & in the early 2000s days of Cartoon Network originals, similar to the animated Friends spin-off I’ll be developing.
7. An untitled 2D animated Dexter direct-to-DVD & Blu-ray movie with Dee Dee combining the use of Flash animation & 3D cel shaded CGI.
Note: The new characters I’ll be developing will be inspired by Genndy Tartakovsky & Craig McCracken & not Pendleton Ward & J. G. Quintel.
8 notes
·
View notes
Text
Porting from Dragon Age: Inquisition to Dragon Age: Origins and Dragon Age 2
Part 1 - Out of DAI
Tools needed: Frosty Editor Blender 2.79a for DA2, or any 2.7+ version of Blender for DAO
Install Frosty Editor, open it up, and show it where to find your installation of DAI.
Once DAI is open, use the search field to narrow it down to just the asset type you want.
To find all meshes and textures, for instance, input 'type:skinnedmeshasset OR type:rigidmeshasset OR type:textureasset' To narrow by name, use 'contains:something'. The search also recognizes AND and NOT. 'skinnedmeshasset' = models that bend/move, like armors, clothing, and bows 'rigidmeshasset' = static models, like most weapons and props 'textureasset' = textures, as you can probably guess. ;) Textures will export as PNG by default (although this can be changed), and most have alpha channels. Many also have gamma correction. You can turn off alpha and gamma for viewing, which also prevents those channels from exporting.
If you're familiar with how assets are arranged in the DAO Toolset, finding what you want may be a bit annoying.
Things exclusive to one character can be found under DA3/Actors. This is also where you'll find Charactor Creation assets like hairs, beards, and bodies. Companions' outfits will be split into legs/arms/torso/cloth, and must be exported separately. 000* = legs 00*0 = arms 0*00 = torso The flowy cloth bits are usually in a separate 'cloth' folder for some reason. Most other armors & clothing can be found in DA3/Factions, and weapons in DA3/Equipment. Some models may be found in the DLC folders instead. DLC Blue = Trespasser DLC Red = Descent DLC 1 = Jaws of Hakkon Generally, textures will be in a textures folder right next to the corresponding mesh folder, but if they aren't, you can find them by opening up your mesh in the main viewport, clicking the 'Variations' tab in the upper right, then expanding MaterialCollection/Materials. You'll then see numbered drop-down fields. For multi-part models, 0 is usually the body/skin, 1 the main mesh, 2 is accessories. Expand what you want, then TextureParameters. There'll be 3-4 fields here, for diffuse, normal, specular, and tint (sometimes there's no tint). Either use the data explorer window to follow that filepath, or simply click the 3 dots and pick 'open asset'.
Open up what you want to export, then click on 'Export' near the top left. (right-clicking on the file in explorer window doesn't usually export the right format)
Models: I'm going to assume you're using Blender, because that's what I know. ;p (if you're planning on using 3ds max or gmax, I'd like to direct you to sapphim's tutorial) If you're porting to DA2, you'll need to select the correct skeleton under Animation/Humanoid. If exporting a HF mesh, make sure to pick the HF skeleton, NOT HFD. That's for the large-skirted fancy dresses only, and I suspect it wouldn't work in DA2. If you're porting to DAO, the skeleton doesn't matter since we're going to delete it anyway. Either check the 'Blender export' option OR 'export single LOD'. The latter will only export the LOD0, and the former will make sure the submeshes are named to easily distinguish the different LOD levels (if you want to use LOD1 or lower, since LOD0 can be pretty big). I don't think the FBX version matters too much as long as it's binary (which I'm pretty sure they all are now). Mine is set to FBX 2012. The scale should default to meters, which is what we want. Textures: Simply pick your preferred format, depending on your graphics editor (I'll be using Paint.net in later parts of this tutorial). I usually export as PNG, and have the alpha channel ON and the gamma correction OFF (since DAO and DA2 are both darker than Inquisition anyway). If you plan on retexturing, you might want to leave the gamma on to make small details easier to see.
Blender 2.49b is needed for both the DA2 and DAO export scripts, so the next step is getting the DAI mesh ready for that version of Blender.
To open FBX files, you need a newer version of Blender. For DA2, you need Blender 2.79a, which can both import FBX files and save .blend files as 'legacy' to be usable in Blender 2.49b. For DAO (or for any static mesh), you can simply import the FBX with any 2.7+ version of Blender, and then export as an OBJ, since 2.49b can import OBJs. However, if your mesh has multiple parts with different textures, you'll need to delete all but one, export that, undo the deletion, delete all but a different part, export, etc, for each submesh. This is because, annoyingly, Blender's obj exporter combines all the meshes together, even if they're not selected, or have been hidden. -_-
Part 2 will cover converting models from DAI-style to DA2 and DAO in Blender, and exporting them in DA2/DAO format.
5 notes
·
View notes
Text
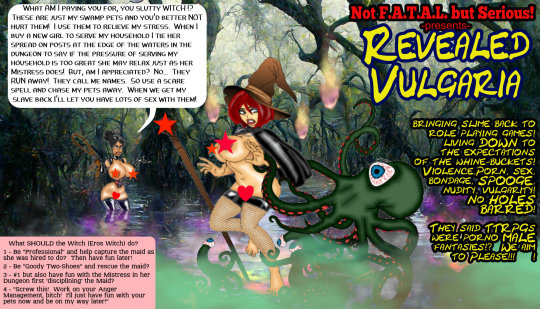
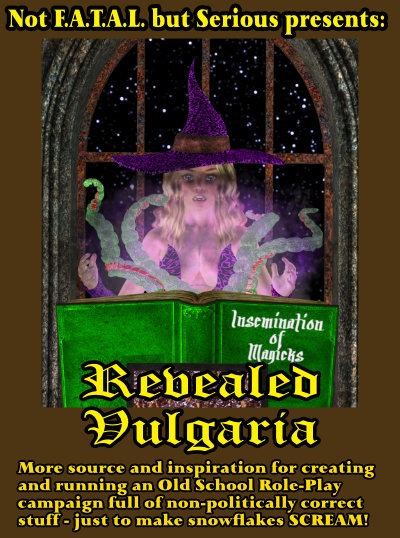
Working on a TTRPG which is a sequel to my free suggestion book "Not F.A.T.A.L. but Serious!" both a tip of the hat to a notorious sh-t lord RPG from earlier (zero connection) and a favorite American but Manga comic. Was hoping I could put up the uncensored version here but it seems Tumblr still has blue noses even though it's almost like reading the best of Penthouse magazine again.
In essence it'll be erotic TTRPG play with no holds or holes barred. We are F-cking adults playing the games now, but the core properties were owned and dominated by dry corporations making "Product" that had to be G-rated. Now the "Woke" rated is far far worse. So not for kids but you can download the original here and working cover for the upcoming full RPG later.
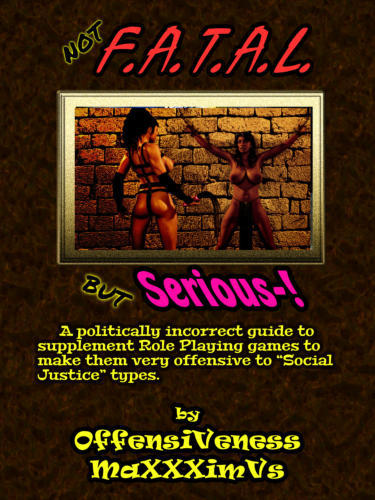
Serious - click the link (+18), go to the image of the top left and right click "Save as..." PDF document! - I'm privately hosted and NO ADS no SCRIPTS no GARBAGE. Not a full RPG just a book of suggestions that got the woke tourists invading to ruin TTRPGs to scream. That's their agenda, this is mine... I'll play my F*cking games any F*cking way I want them and I want to be able to buy and sell +18 interest.
The rainbow unicorn snowflakes can have Thirsty Sword Lesbians and Zwei-Hander. I'm not holding my gladius to their soy throats with no chins to play MY stuff but I expect something they are incapable of; respect -and that means for someone who has different views than them. If they can't understand that are their snowflake fake sh-t politics worth ANY respect? Jeebuz, I'm quite "Liberal" not a right winger.
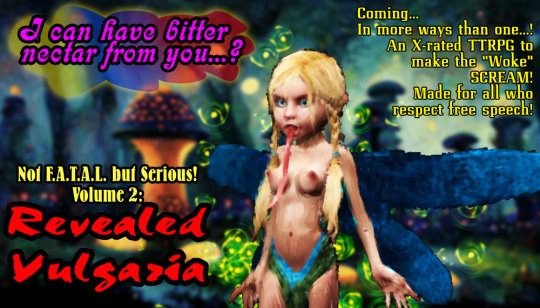
Ai + 3D art by me. She's WAY over 18 like 200+ even in fiction, slime minds...!
Heads up - like any real Indie TTRPG I'll use AI art but still keep the few artists who'll do commissions for me employed like Max here. He can do hundreds of pretty damsels in distress and ribaldry in the time it'd take him to paint a swamp or dungeon Midjourney can do in seconds so why waste the time and money?
Let WotC ruin D&D for Blackrock EFT social credit - though I advise writing your Congress + Senate reps for the tax $ they'll scream to turn a failure into profit. The best out is to support the REAL indies that do NOT Bend the Knee to woke whine-buckets.
DEMAND from your TTRPG maker and game at least one element the "Woke" will NOT tolerate. I'm not for real sexism or racism and don't care who you voted for. The world has (and always will) 1,000,001 problems... Censoring comic books, video games, movies and pandering to rainbow unicorn snowflakes from some 'safe space' at a debt factory (College) does NOTHING to help anything on that list. Here are some statements free to include for free speakers, free thinkers versus "Woke" whine buckets:

Oh and speaking of lists...
One of the BEST things on the internet for RPGs "The List".
They just want you to know if your RPG maker is a rainbow unicorn snowflake who cares their woke fake politics vs anything to do with a RPG at all. Agenda vs product. Invaders. Tourists. Most of these people are vile on Twitter and (Zwei-Hander) demand you do NOT play their game unless you agree 100% with them. How in the world their books sit in PILES at major bookstore chains for years no sales but can NOT fail is beyond me - save knowing about 'short-selling' and corporate EFT.
So I advise looking for GREEN on the list, companies that care about their games and players NOT warmed over re-hashed master of the obvious "Woke" sentiment that preaches to its own choir.
4 notes
·
View notes
Text
when is mainstream american idiocracy [a.i.] media’s fake 2024 Xspace alien invasion [a.i.] of nasa.gov's basic artificial intel [a.i.] regenerating [air] outdated 3d computer generated images [cgi] reported by the overcompensated mainstream media pundits puppets who regurgitate professional and consumer [pc] marketplace teleprompter scripts for profit… aggressively sold to you easily distracted consumer slaves as real reality tv news like their... :::yawn::: 2024 american idiocracy [a.i.] president election survey :::yawn:::… since Apollo 11 never landed on the quantumharrell.tech moon satellite w/the mars landrover.de discovery communication [d.c.] defender… built by us scientifically ancient [usa] schwarzer deutscher [usd] film set designers on autodesk.com behind the american extraterrestrial visitation television series Ancient Aliens on the pseudo history.com network of mundane science theories fiction stories... popularized to you mainstream 2d matrix consumers of overpriced 3d printed marketplace goods junk… stored in restricted underground area 51 military access studio warehouses of 1946 roswell ufo incident props [i/p] created by the quantumharrell.tech SKY defense.gov media department of quantumharrelltech.ca.gov
WELCOME BACK HOME IMMORTAL [HIM] U.S. MILITARY KING SOLOMON-MICHAEL HARRELL, JR.™

i.b.monk [ibm] mode [i’m] tech [IT] steelecartel.com @ quantumharrelltech.ca.gov

eye kingtutdna.com domain creator [d.c.] of harrelltut.com

eye think [e.t.] like autocad-86 1.30 (7/11/83) Victor 9000 (c) copyright 1982,1983,2024 autodesk, inc. [a.i.] serial number: 06-002009

is this the highy anticipated 1000 yr old alien invasion [a.i.] the legislators of mexico held a hearing for?!?!?!... OMFG MICHAEL [OM]!!! THIS IS PATHETIC!!!

who you callin an extra terrestrial [e.t.]?!?!?!… 1968-michaelharrelljr.com interplanetary 9 [i9] ether aluhum sky anunnaqi of sirius blackanunnaqi.tech patent wealth!!!

blah blah blah aliens... blah blah blah aliens... blah blah blah aliens history.com of mundane science fiction

cgi joe [max headroom] clueless

mundane blah blah blah white house speech

big deal

tune in for their latest blah blah blah distraction

deal with it

inferior tech always go KABOOM!!!

quantuumharrellufo.tech fcc interdimensional

1968-michaelharrelljr.com domain creator [d.c.] of anu golden 9 ether [age] 1968 genXspace.com congress who already know about us 144,000 quantumharrellufo.tech engineer architects from planet x [nibiru]

blah blah blah aliens... blah blah blah aliens... blah blah blah alien creatures human hybrids reported in las vegas

anything not natural to earth must be automatically [auto] control alt deleted [cad]

blah blah blah aliens... blah blah blah aliens... blah blah blah aliens

nasa aeronautics never landed on our holographic telecom moon satellite planet


artificial intel [a.i.] = american idiocracy [a.i.] = alien invasion [a.i.]

© 1698-2223 QUANTUM HARRELL TECH LLC All Pentagon DotCom defense.gov Department Domain Rights Reserved @ 1921 QUANTUM 2023 HARRELL 2024 T-Mobile.com 2025 Apple.com & IBM.com [A.i.] LLC of ATLANTIS [L.A.] 5000
#u.s. michael harrell#kemet#o michael#quantumharrelltech#harrelltut#genxspace.com#mu:13#ancient oral traditions#eye organic to earth#american idiocracy#idiocracy#area 51#steven spielberg#nasa#spacex#everything cgi#3d printed food of artificial america#ai#ai generated#ai image#ai art#ai artwork#artificial intelligence#ancient aliens#autocad#autodesk 3ds max#slavery is a choice
3 notes
·
View notes
Text
[CB01]!!!GUARDA!!!Shark 2 - L'abisso Streaming-ITA
Action Movie: Watch ‘Meg 2: The Trench. This movie is one of the best in its genre. Watch ‘Meg 2: The Trench will be available to watch online on Netflix's very soon!Now Is Watch ‘Meg 2: The Trench available to stream? Is watching Watch ‘Meg 2: The Trench on Disney Plus, HBO Max, Netflix, or Amazon Prime? Yes, we have found an authentic streaming option/service. A 1950s housewife living with her husband in a utopian experimental community begins to worry that his glamorous company could be hiding disturbing secrets.
Guarda Link :: Shark 2 - L'abisso Streaming
Scarica ora :: Shark 2 - L'abisso Altadefinizione

Meg 2: The Trench (titled Shark 2 in some territories)[2] is a 2023 science fiction action film directed by Ben Wheatley from a screenplay by Jon Hoeber, Erich Hoeber, and Dean Georgaris, based on the 1999 novel The Trench by Steve Alten. Serving as the sequel to The Meg (2018), the film stars Jason Statham, Wu Jing, Sophia Cai, Page Kennedy, Sergio Peris-Mencheta, Skyler Samuels and Cliff Curtis. In the plot, a group of scientists must outrun, outsmart and outswim their merciless predators when a malevolent mining operation threatens their mission and forces them into a high-stakes battle for survival.
Plans for the sequel announced to be early development on October 2018 after the box office success of the first film, Wheatley replaced Jon Turteltaub to attached to be director from the returning script by Dean Georgaris, Jon Hoeber and Erich Hoeber, with Alten completed the screenplay in 2019. Filming begin on various locations on Asia and the London place Leavesden Studio on February 2022 with much of the cast joined the same month until May 2022.
Meg 2: The Trench had its world premiere at the Shanghai International Film Festival on June 9, 2023, and is scheduled to be released in the United States on August 4, 2023, by Warner Bros. Pictures.
Director Ben Wheatley Writers Jon HoeberErich HoeberDean Georgaris Stars Jason StathamJing WuCliff Curtis
Cast Jason Statham as Jonas Taylor Wu Jing as Jiuming Sophia Cai as Meiying Zhang Page Kennedy as DJ Sergio Peris-Mencheta Skyler Samuels Cliff Curtis as James "Mac" Mackreides Sienna Guillory Melissanthi Mahut Production Development In April 2018, Jason Statham said a sequel to The Meg (2018) would happen if the film did well with the public, saying "I think it's like anything in this day and age – if it makes money, there's obviously an appetite to make more money. And if it doesn't do well, they'll soon sweep it under the carpet--but that's the way Hollywood works."[6] In August 2018, Steve Alten said "My feeling has always been that this is a billion dollar franchise if it was done right. But to be done right you had to get the shark right, get the cast right, get the tone right. And Warner Bros. have nailed it completely. The producers have nailed it."[7] In October 2018, executive producer Catherine Xujun Ying announced a sequel was in the early stages of development.
Pre-production In March 2019, it was announced that a script for the film was in the works, with screenwriters Dean Georgaris, and Jon and Erich Hoeber returning.[9][10] In his September 2020 newsletter, Alten confirmed the script, titled Meg 2: The Trench, to be complete, and expressed interest in its "dark" tone.[11] In October 2020, Ben Wheatley was announced to direct.
Filming In April 2021, Statham said filming was set to begin in January 2022. Filming commenced as planned at the end of January at the Warner-owned Leavesden Studios outside London, with principal photography starting on February 4, 2022. It continued there until May before switching to outdoor locations, presumably in Asia. While the production was ongoing, Sienna Guillory, Skyler Samuels, Sergio Peris-Mencheta, and Wu Jing were announced as part of the cast.
Post-production DNEG, Scanline VFX and Milk VFX provided the visual effects for the sequel (with DNEG also handling the 3D conversion). Pete Bebb and Gavin Round served as production visual effects supervisor and production visual effects producer respectively.
Music Harry Gregson-Williams composed the sequel, returning from the first film.WaterTower Music released a score album on July 28, in addition to the Bankay Ojo's remix version of Page Kennedy's song "Chomp."
Release Meg 2: The Trench is scheduled to be released by Warner Bros. Pictures in the United States on August 4, 2023.The film had its world premiere at the Shanghai International Film Festival on June 9, 2023
#meg2#meg2themovie#meg2movie#meg2fullmovie#meg2streaming#meg2online#meg2thetrench#meg2thetrenchthemovie#meg2thetrenchmovie#meg2thetrenchfullmovie#meg2thetrenchtreaming#Shark 2 - L'abisso#shark 2 l'abisso streaming ita#shark 2 Film Sub Ita
2 notes
·
View notes
Text
youtube
This major update brings you new features and improvements to already existing ones. Now, in addition to the existing method using a picked point and XYZ orientations, where you can change the length after creation, you have a second method of creation using two picked points, where the line will start on the first point and points in the direction of the second one using the length value in the spinner. Also, in this version, you can load 2D shapes from the scene, that have 2 vertices only, and change their lengths, the script will always respect their current orientations. No worry now if you close the dialog, you can open it and load any line, even if it was created by the line tool inside Max. This version lets you have modifiers on top of the Line and continue to modify its length. In the video, I will show you some tricks on how you can use this tool as a helper to adjust the length and orientation of mesh edges. Plus other things, I encourage you to watch the whole video to have a complete understanding of the tool.
You can download the plugins from the description area on youtube
#3dsmax#3dsmax plugins#3dsmax scripts#3dsmax free plugins#3dsmax free scripts#autodesk#autodesk 3dsmax#maxscript#3d plugins#3d scripts#3dsmax 2d#3dsmax parametric 2d#scripting in 3ds max#Youtube
0 notes
Text
Tracking Software
Adding a 3D character into live footage
20/06/2025
We were given this plug in today.
How to add the plug-in ->
Right click on AE3DExport.zip -> Extract all -> Ok
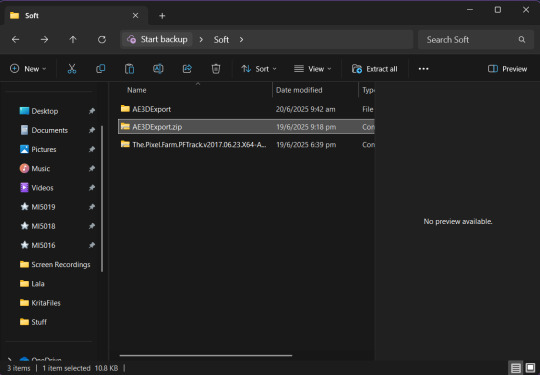
Copy the file inside the extracted folder
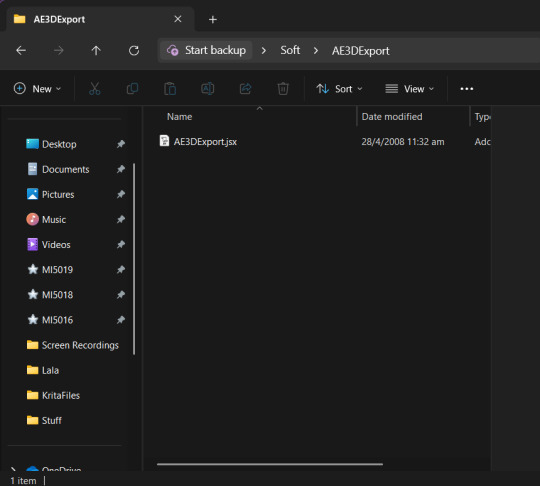
Search for After Effects in the windows search bar -> Right click -> Open file location -> A file will be automatically selected so right click on that again -> open file location -> look for a folder named Scripts and open it -> paste
..............................................................................................................................
PREMIERE PRO
Download the video and import
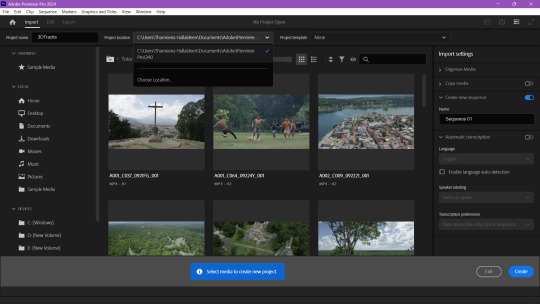
go to last frame press o to mark out, go to fisrt frame press i for in -> export as png sequence -> media -> rename as video -> change to jpeg
export to AE
..............................................................................................................................
AFTER EFFECTS
drag and drop video
cam tracking -> track camera
choose points -> create null and camera
choose another place -> create null
choose another place and create null
total 3 points
shift select all the null objects -> click arrow key (dropdown) -> press p to select position -> shift s to isolate position and scale -> click stopwatch on pos and scale on the first frame -> do the same on last frame
dropdown on 3d tracker cam -> camera options -> key zoom and focus distance on the first frame -> do the same on last frame
shift elect camera with null objects -> file -> scripts -> choose the plug in we added earlier (AE3D one) -> pop menu -> export to Maya -> cant select location so click export (exports to desktop)
permission to use plug in if u get an error (DON'T close the pop up box. Just leave it be and follow the next steps because it's easier for you. just for convenience)

edit -> preference -> general - scripting and expressions -> allow script ... (first option)

click export -> the bottom should say "done" -> close the pop up
the desktop file should be a Maya file

..............................................................................................................................
MAYA
import the camera file
shift select teh null things -> (attribute box) scale right click and delete kayframes -> change scale to 100
select null group -> camera -> group
lock camera
go back to perspective
click group -> scale to match the grid size
panel
pers
cam view
camera (in right side box) -> attribute editor -> environment - img plane - create - image name folder - search for image sequence file- open the first img
after opening click use image sequence
Right clivk the play button -> pplayback speed -> last option (refer ss below)
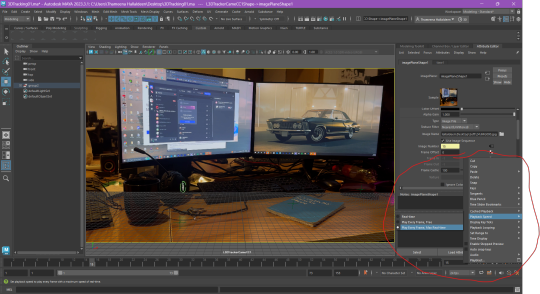
Result (for now)
..............................................................................................................................
AFTER EFFECTS
import vid seq to ae
right click -> interpret footage - main -change frame rate to 24
MAYA
export ->
lock camera
select right click in channel box -> lock everything
get rid of the grid from the middle of the footage:
perp view - select group - no values in teh group - move it to the grid
shift select null - roup - shift sel group with cam - group rename camera - select all in viewport and move them above the grid
place a cylinder or something it will be placeed ON the grid :D
frame -> real speed frame max ..
0 notes
Text
My research on Autodesk Maya!
(Warning: This makes reasonable sense if you use Maya)

So, Maya- What on Earth is it?
Maya is a leading 3D computer graphics and animations software created by Autodesk. It provides the entire tool set for creating 3D models, rigging characters, stimulating effects, animating motion and helps rendering final images.
The Core capabilities of Maya surround modelling with both NURBS and polygon tools; animation and rigging with keyframing, MO-CAP (motion capture integration) skinning, skeletons, liquid simulations (using Bifrost), cloth, particles, rendering- the whole kit and kaboodle. Maya is also known to support modern day workflows with collaborative pipelines, allowing custom interfaces to be prioritized for each task.
Unlike the some of the other 3D software available in the market, Maya is platform-agnostic which basically means it's designed for any workspace PC. Be it Windows, Apple or Linux- Maya will continue to be adaptable and is heavily adopted in film and game production.
Despite the nightmare this software is (according to more local opinions), Maya is easily considered to be an industry standard for effects and animations. SO, consensus is that we have no choice but to learn it. Someone call the psych ward.

On the other hand, I learned that Autodesk also has this called "Autodesk 3ds Max" which is quite popular amongst architects and model constructions for games. Unfortunately, its a windows only software. Oh! and Blender, can't forget that now can we? Blender is an open source, free to use software that is a popular alternative to use and is often used by indie artists. Both more or less have the same features, apart from the ability to animate.
More below the cut!
Autodesk Maya does various things, such as:
Modeling: NURBS and Polygonal modeling tools are used for props, characters and vast environments.
Rigging & Animation: Advanced rigging (skeletons, IK/FK) and animation (keyframing, graph editor, motion capture, nonlinear clips) support.
Simulations & Effects: Bifrost engine for realistic dynamics (fluids, cloth, smoke, destruction) and particle effects.
Shading & Rendering: Integrated Arnold renderer and Lookdev tools for high-quality lighting/materials.
Pipeline & Extensibility: Scripting (MEL/Python), USD workflows, and plugins (Unreal Live Link, etc.) allow custom pipelines

Modeling: Breakdown
NURBS - How it works:

These models define shapes using surfaces and curves that are mathematically calculated. These curves are predefined by weight values and control points which allow for continuous and smooth surfaces.
Advantages:
Scalability: These kind of models can be scaled up or down without losing surface quality or accuracy.
Precision: This offers high precision and can represent curves and surfaces exactly, making them ideal for products requiring tight tolerances and smooth surfaces.
Flexibility: It also allows for complex shapes and smooth organic forms.
Disadvantages:
Rendering: NURBS models can be more challenging to render in real-time, especially for complex scenes.
Limited Support: modeling with this is less commonly supported in game engines and some other real-time applications.
Complexity: it can be more complex to learn and use than polygonal modeling, requiring a deeper understanding of mathematical concepts
Polygonal - How it works:

This type of modeling is built from a net or 'mesh' of interconnected polygons, usually triangles, hence the name. The more polygons are used in a project, the smoother the surface would appear to be.
Advantages:
Flexibility: these models can be easily edited and manipulated due to the multiple points.
Real Time Performance: It is generally easier to render in real time, which make it the ideal method of modeling for other applications and game production.
Wide support: It can be opened and viewed in various 3D software and platforms.
Disadvantages:
Resolution dependent: When scaled down, polygonal models lose its smoothness and may require additional polygons for complex shapes.
Approximation: This model method approximates curves and flat surfaces automatically, which usually leads to loss of quality and precision later on- especially when the polygon counts are quite low.
FK AND IK: Breakdown
Kinematics
Definition: "It is the study of how objects move, without considering the forces that cause that motion." Also known as the "Geometry of Motion".
Now, Forward Kinematics (FK) and Inverse Kinematics (IK), In simple terms, are two differing ways to control a characters limbs. FK is what moves the limbs in a sequence while IK moves the end of the limb and everything adjusts accordingly. FK provides direct control over each individual joint while IK simplifies the entire animation.
FK -
How it works: It moves a limb by manipulating each and every joint in a chain, one after the other. So to move an arm, for example, one must first rotate the shoulder, then the elbow and then finally the wrist.
FK gives complete control over each joints position and general orientation, making it ideal for precise manipulation.
This is often recommended for flowing and natural movements such as swinging an arm or making a character run.
IK -
How it works: it's by defining a target of movement, such as a hand, then calculating the joint angles needed to move the limb to that target.
It gives the chance to have a more intuitive sense of control over the end of a limbs position. For example, if the character was to grab an object- the arm will automatically readjust to accommodate the movement.
It's used in situations where one may need to precisely position a limb like when the character is reaching for something or walking in uneven terrain. It's also used for complex interactions between characters and their existing world.
---
How it compares to other tools in general:
It's technically a full animation suite for people to use honestly, given that it excels in most functions as well as animation and cinematic pipelines. In regards to industry comparisons, it is considered to be an all rounded software for Animation or VFX, while 3d Max is golden for architecture and Blendr is good on cost and functionality (i mean... it's free. Can't get any better than that). But when it comes to AAA games, TV/film productions, Maya is considered to be the holy grail for many producers despite it's advanced nature.
Now, Maya is a 'use-to-be-understood' kind of software in my personal opinion. But if this whole thing scared you and rightfully so, here are some noteworthy productions (games and others) that have been made with Maya just to give you some motivation:
Animated Films: Frozen (Disney, 2013) and Wreck-It Ralph (2012) – early Disney/Maya. More recently, Pixar’s Toy Story 4 (2019), Illumination’s The Secret Life of Pets, and Sony’s Spider-Man: Across the Spider-Verse all employed Maya in their pipelines.
Visual Effects: Marvel and Star Wars blockbusters (Endgame, Rise of Skywalker), Disney’s The Lion King (2019) – VFX studios used Maya/Arnold for characters and FX.
TV/Streaming Series: Arcane (Netflix) – Maya formed the core of Fortiche’s animation, The Mandalorian (Disney+) – many creature rigs and FX in Maya; anime-style CG shows like One Piece (CGI specials).
Games: The Last of Us series (Naughty Dog) – Maya for character. God of War Ragnarök (Sony Santa Monica) and Uncharted sequels – use Maya for character rigs and motion (see community videos). Borderlands franchise – as above, New Tales from the Borderlands (Gearbox) used Maya for 2D and 3D cinematics. Activision Blizzard Studios (their film/TV arm) used Maya for animating Call of Duty: WWII cutscenes and for their early Skylanders animations. Assassin’s Creed Origins, Ubisoft showed their entire animation pipeline from Maya → MotionBuilder → in-game engine, with real-time lighting previews thanks to custom Maya plugins.
All in all, Maya is one awesome tool.
Thanks for reading and more to come!
#Long Post#Nerd is nerding#English really did English today!! yayy#Game development?? HELLO SAILOR#Am I going to pass away this semester? Probably#But denial is a river in Egypt and I am delulu :D#educational post
0 notes
Text
Creating Destruction-Ready Car 3D Models for Real-Time Physics Engines

In the ever-evolving world of 3D modeling games, realism isn’t just about detailed textures or lifelike lighting—it’s about interactivity, immersion, and responsiveness. One of the most complex yet rewarding challenges in this field is crafting destruction-ready vehicle models that can seamlessly integrate into real-time physics engines. Whether you're working on a high-octane racing game, a war-themed shooter, or an open-world sandbox, ensuring your car 3D model reacts to collisions, explosions, and terrain in a believable way is a major asset.
Why Destruction Matters in 3D Modeling Games
They want to see the world react—wheels flying off in a crash, doors crumpling on impact, and glass shattering realistically. That’s why AAA studios and indie developers alike are investing in destruction-ready 3D game assets and 3D hard surface modeling pipelines. Understanding the Basics of Destruction-Ready Modeling
Before diving into the workflow, it’s important to define what makes a model "destruction-ready." Unlike static models, destruction-ready car 3D models must be segmented into multiple mesh parts, each of which responds to collisions, forces, or triggers in the game engine.
Key requirements include:
Modular Mesh Design: Bumpers, doors, windows, wheels, and panels should be separated from the main chassis.
Accurate Pivot Points: Each detachable part should have logical pivot points to allow natural movements like swinging, detaching, or rotating.
Pre-Fractured Geometry: Some elements, like glass or metal panels, can be pre-fractured using tools like Voronoi shatter to simulate cracks.
Weight-Optimized Topology: The model should be optimized for real-time rendering, striking a balance between detail and performance.
These elements ensure that your 3D vehicle modeling pipeline supports realistic, real-time physics interactions.
Hard Surface Modeling Techniques for Vehicle Destruction
Vehicle modeling falls squarely under Hard Surface Modeling, a discipline focused on man-made objects with sharp edges and mechanical structure.
1. Use Non-Destructive Workflow
Model each component (doors, wheels, hood) separately. This modular approach allows for easy damage scripting and animation later in the game engine. Programs like Blender, Maya, or 3ds Max allow you to model destructible elements while maintaining low polycounts.
2. Detail the Interior Framework
Even though players may not always see the inner structure of your 3D game assets, interior modeling adds depth during destruction. This includes roll cages, engine blocks, and framework supports.
3. Add Break Points
Incorporate stress points where destruction is likely—hinges, joints, and bolts. These points will guide where and how a part breaks during gameplay, aiding the realism of your 3D environment modeling.
Integrating Vehicle Models into 3D Game Environments
Destruction is not just about the vehicle—it’s about how the 3D game environment reacts with it. Terrain, obstacles, and ambient props all contribute to the physical interactions that cause and affect destruction.
Real-Time Physics Engines
Engines like Unreal Engine and Unity come with built-in physics systems such as Chaos and NVIDIA PhysX. You can import your modular 3D vehicle modeling components and apply rigid body physics, constraints, and joint mechanics.
Environmental Factors
Colliders and Terrain Mapping: Make sure the 3D game environment features accurate colliders that respond to vehicle contact.
Destructible Props: Include props 3D models like fences, cones, and crates that react when vehicles crash into them.
Weather Effects: Rain, snow, or mud can influence the physics parameters, adding additional challenge and realism.
Texture and Material Considerations
Realism in destruction isn’t just about geometry—it also relies heavily on material behaviors.
Metal: Use masks and shaders to simulate bending and scratches.
Glass: Transparent materials with crack maps can be animated to fracture dynamically.
Rubber and Plastic: Deform under pressure, especially for bumpers or tires.
Make sure your textures are PBR (Physically Based Rendering) compliant and optimized for your 3D modeling games pipeline.
Animation and Simulation
Beyond just breaking apart, vehicles need animated reactions. Doors flying open, suspensions bouncing, and exhaust parts trailing behind are small animations that add up.
Use simulation tools like:
Rigid Body Simulation: For non-flexible parts.
Soft Body Physics: For bumpers or suspension components.
Cloth and Debris Systems: For tarps, flags, or particle-based effects during destruction.
Game engines also let you blend between intact and damaged states using blend shapes or LOD switching, essential for performance in large 3D game environments.
Optimizing for Performance
Real-time physics is resource-intensive. For 3D modeling games targeting consoles or mobile devices, optimization is crucial.
Use Level of Detail (LOD) models.
Bake destruction animations for repetitive effects.
Limit physics-based destruction to high-impact zones.
Smart optimization ensures your 3D game environment remains smooth and responsive even with multiple vehicle interactions.
Real-World Use Cases
Games like Wreckfest, BeamNG.drive, and Mad Max have set high standards for vehicle destruction. Indie developers also use destruction mechanics in mobile games, where lightweight 3D game assets and simplified damage logic still create compelling experiences.
Conclusion
It’s an interdisciplinary task that touches every stage of 3D modeling games development—from concept to code. Whether you're building a car 3D model, adding props 3D models for dynamic scenery, or optimizing 3D game assets for performance, integrating destruction realism elevates your game’s immersion. With the right tools, physics logic, and artistic mindset, you can create vehicle models that look great and crash, crumple, and explode with satisfying realism.
#3d modeling services#3d game assets#hard surface modeling#props 3d model#3d vehicle modeling#3d modeling games
0 notes
Text
3D State Position examples: A Knob or a Switch
I was asked to write up how I came up with my pokeball solution and give a text example of how to create one and which parameters/attributes do wee need to keep in mind.
#quantumtheory #quantumpokeball #gamedesign
This example was taken in order to develop a flight simulator with *realistic* knobs and switches.
In that; they have clearly defined detents (positions) like a light switch that *clicks* into place, and can have many defined positions from 2 to infinite (or as far as your processor/interface will let you)
And either rotates 360degrees, linearly (vertically or horizontally), or only has 180degree rotation and doesn't turn all the way around.
With this design we start with an object of some kind; that has rotation and position in space. Two rotation vectors is the maximum understandability for your average user, and has all defined rotational positions.
So we write a script that allows us to click or tap and hold an object and *move* it.
We can have it left and right rotates the dials, or whatever drag/slide you want to have the object follow the mouse.
But the key here is you want a [limit] for how your switch can move.
If it's a 360knob/dial, it's easiest to have up/down and left/right do the same thing. Increment/Decrement the rotation. (Z-axis is preferable to a stationary camera shot.)
You can have preset rotations if you need it represented differently in 3D space... Let's say it's a computer console in your bottom peripheral instead of directly in front of the camera.
In the base example everything has (0,0,0)position and (0,0,0)rotation. Just to keep things simple. Experience in 3d manipulation and 3d engine use will allow you to add on as required.
So we have our base positions of {0,0}rotation, [0,0,0] position. (Because game engines like having 3 rotational axis, make sure all 3 are 0 and you're always using the same axis for single axis manipulation).
So, if we declare the minimum to be 0 and maximum to be 360; were likely expecting this to be closer to a radio dial. Which means we want it to roll over to 0 after it passes 360. Some game engines clean this up automatically and some allow you to save rotations of as many as you can. But working with 1080000 degrees of rotation is cumbersome, so make sure you're modulous-ing 360 so that there's actual rollover.
If it's less than 360 degrees total; we likely want this to stop at either end. So a min/max rotation of (-90,90) should stop at those numbers and not rollover.
And this holds true for the positional switches as well. (Think sliders)
Now that we have the rotation down, in order to make it "realistic" and/or "easily readable by the code" there's two things we can add.
One is "State Labels" these have two purposes; one is to be able to automatically set a knob/switch to a predefined position through the code. And the second is that it's easier and less process intensive to use integers instead of floating points (for every single position a switch might be) or, if you need the granularity; some way to "truncate" or "change precision".
For realism; this looks like "detents". Switches that have clearly heard and felt clicks. Not all knobs, but I find a good *crunch* or *click* helps with the user-feedbacl as well.
I use a process/parameter/attribute known as "dampening".
The dampening value is your precision or granularity. It doesn't turn until [x force] is applied, and only moves in set increments.
The increments are great in case you don't want to manually label everything; you just define where a knob *can* be set and let the function call deal with spitting out/using those values.
So dampening has two parts; the input dampening, and the labeled output.
Instead of the Knob being 1:1 mapped to the mouse; you want some set force(speed or distance) before the switch will move.
So, in order to get that *good* click, you have to drag your mouse/finger a little longer before it actually moves. And then maybe it can move a bit freer depending on how you want it to present.
And then the other side of that is state-labels. Perhaps you want each "label" to actually be multiples of some value before saying it is a different position.
Like some older radios that don't actually volume up or down until you turn the dials a *bit*.
How does this relate to quantum mechanics; well the state-positional labels and dampening and can be helpful in understanding how to define quantum states.
In theory, each particle has a maximum rotation on two different axis {0,90}, and several values may be able to be defined based off a positional map you can compare the q-bit to.
And where dampening comes into play is that *precision* there's technically an infinite number of states that a q-bit can occupy, and we're not limited to 0 and 1. Were limited based on those two axis of rotation.
And with dampening we can say "well we only want it turned by this precision" and with state-labels we can say "well it's closer to this value, and that's the one we want to use instead of a more precise 30-digit irrational number."
And then use *those* values in further calculations or *whatever*.
Play with dials!
1 note
·
View note