#BitLocker Drive Encryption Administration Utilities
Explore tagged Tumblr posts
Visit Tumblr Blog
Explore Tumblr blogs with no restrictions, modern design and the best experience.
Last Seen Tumblr Blogs


Fun Fact
69% of Tumblr users are millennials.
Text
Perform BitLocker Recovery Password Rotation in Active Directory
BitLocker Recovery Password Rotation in Active Directory Maintaining the security of BitLocker-encrypted drives is crucial. Situations may arise where users forget their PINs or significant changes in the system configuration necessitate the use of the 48-character BitLocker recovery key. Often, users are not at their desks and may need the key communicated via phone or mobile device, which…

View On WordPress
#Bitlocker#BitLocker Backup#BitLocker Drive Encryption Administration Utilities#BitLocker in Active Directory#Windows#Windows 10#Windows 11#Windows Server#Windows Server 2016#Windows Server 2019#Windows Server 2022
0 notes
Text
The Importance of a Valid Product Key for Windows 10 Pro
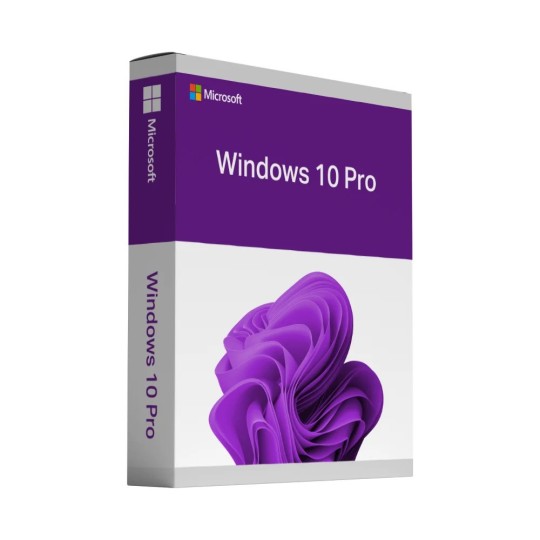
A valid product key for Windows 10 Pro is essential for activating and unlocking the full potential of Microsoft's powerful operating system. Windows 10 Pro offers a range of advanced features and capabilities that can enhance productivity, security, and performance for users, especially in professional and business environments. This unique alphanumeric code is more than just a key to access the software; it ensures that users use a legitimate, adequately licensed operating system. In this composition, we will discuss the significance of having a valid product key for Windows 10 Pro, its impact on performance, and the benefits of using a licensed operating system. It would help if you used the Premium Software and Support for the crucial work.
Understanding the Product Key for Windows 10 Pro:
A product key for Windows 10 Pro is a 25-character code that is proof of purchase and is required to activate the operating system. This key is a vital component of Microsoft's activation process, ensuring that only authorized copies of the software are used. When purchasing Windows 10 Pro, whether as a standalone product or as part of a device package, the product key of Windows 10 Pro is provided to the user, typically via a sticker on the device or through an email for digital purchases.
Unlike the Windows 10 Home operating system, which is suitable for everyday home use, Windows 10 Pro is designed for more advanced needs. It includes enhanced productivity tools, BitLocker encryption, remote desktop access, and more robust security protocols. With a valid product key for Windows 10 Pro, users can fully activate these capabilities and use a restricted operating system version.
Activation and Licensing, Why It Matters:
Activating Windows 10 Pro with a valid product key is crucial not only for legal compliance but also for accessing the full functionality of the OS. Once activated, users can enjoy the comprehensive features that differentiate Windows 10 Pro from the basic Home version. These features include enhanced productivity tools, enterprise-level security options, and support for advanced hardware configurations.
One key benefit of a genuine Windows 10 Pro product key is the ability to access enterprise-grade security features like BitLocker, which provides full disk encryption to protect sensitive data. This is especially important for businesses that handle confidential information or employees who need to secure their devices against unauthorized access. BitLocker, along with other built-in security measures like Windows Defender, offers a layer of protection that is not available on the Home edition.
Furthermore, a valid pro product key Windows 10 ensures compatibility with various software and hardware. Windows 10 Pro is designed to work seamlessly with multiple enterprise applications and advanced peripherals, ensuring that users can maximize their productivity. From managing network resources to utilizing specific software for business needs, the Pro edition is optimized for a more demanding environment.
Enhanced Productivity and Security Features:
One of the primary reasons users choose Windows 10 Pro over the Home edition is its advanced productivity features. With a valid product key of Windows 10 Pro, users can enjoy convenient access to the apps they need in a more streamlined environment. Features like Windows Ink, which allows for digital drawing and annotation, and Group Policy Management, which enables IT administrators to configure settings across multiple devices, are key elements that enhance personal and professional productivity.
Another key aspect of Windows 10 Pro is its BitLocker encryption. For businesses and individuals who store sensitive data on their devices, BitLocker provides an essential layer of protection. With a valid product key for Windows 10 Pro, users can encrypt their entire hard drive, ensuring that data remains secure even if the device is lost or stolen. This security feature is critical for businesses that must comply with data protection regulations, such as GDPR or HIPAA, and for anyone who values their privacy.
Moreover, Windows 10 Pro allows logging in with Remote Desktop to use a computer from another location. This feature is handy for businesses with remote workers or individuals needing to access their desktops from different locations. The ability to remotely control and work on a machine provides additional flexibility, making Windows 10 Pro a top choice for professional environments.
Compatibility and Updates: The Key to Stability:
A valid Windows 10 Pro product key ensures that your operating system is kept up-to-date with Microsoft's latest features and security patches. Regular updates help protect the system against emerging threats, fix bugs, and ensure that it remains compatible with the latest hardware and software.
Windows 10 Pro is specifically designed to work with software and hardware that the Home edition might not support. With the right product key, users can access specialized tools such as Hyper-V for virtualization and manage Windows Update settings to defer updates or choose when installed. These functionalities are essential for IT professionals and businesses that must maintain system stability and environmental control.
Additionally, a valid product key guarantees access to Microsoft's support services. When issues arise, users can rely on Microsoft's customer service and troubleshooting tools to resolve them. Using an unlicensed or pirated version of Windows 10 Pro limits access to these resources and exposes users to potential security risks and performance issues due to missing updates or system vulnerabilities.
Legal Compliance and Avoiding Risks:
Using a pirated or counterfeit version of Windows 10 Pro can lead to serious legal and security risks. A fake product key or one used on multiple devices can cause the operating system to become deactivated, restricting the user's ability to access features like security updates, support services, and premium functionalities. Furthermore, using an unauthorized copy of Windows 10 Pro violates Microsoft's terms of service and could expose the user to legal action.
Additionally, pirated software often comes with hidden malware or other malicious programs that can compromise the user's data or the security of their system. This is why it is crucial to ensure that the product key of Windows 10 Pro is legitimate and properly activated. By purchasing the software through authorized channels, users can protect themselves from these risks and enjoy the full benefits of the operating system without compromise.
Conclusion
In conclusion, a valid product key for Windows 10 Pro is not just a requirement for activating the operating system; it is a key to unlocking a suite of advanced features that enhance productivity, security, and overall performance. From the BitLocker encryption that protects sensitive data to the ability to log in with Remote Desktop for convenient access, the benefits of having a licensed version of Windows 10 Pro are clear. Furthermore, a legitimate product key ensures users receive regular updates, technical support, and advanced hardware and software compatibility. Whether you want to enhance your personal computing experience or a business seeking to improve operations, investing in a valid Windows 10 Pro product key is a wise decision to help you get the most out of your operating system while avoiding potential legal and security risks.
0 notes
Text
How to introduce and actuate BitLocker on my gadget?
In the domain of network safety, safeguarding delicate information has become fundamental. BitLocker, a powerful encryption instrument created by Microsoft, fills in as a defend against unapproved admittance to your gadget and guarantees the classification of your information. In this thorough aide, we will walk you through the bit by bit course of introducing and enacting BitLocker on your gadget, normally alluded to as aka.ms/yourpc.
I. Figuring out BitLocker:
Prior to digging into the establishment cycle, it's critical to comprehend what BitLocker is and why it's a fundamental apparatus for getting your information. BitLocker is a full-plate encryption highlight included with Microsoft Windows working frameworks aka ms yourpc. It scrambles the whole plate to safeguard the information put away on it from unapproved access.
II. Framework Prerequisites:
Prior to continuing with the establishment, guarantee that your gadget meets the essential framework necessities. BitLocker is available on Windows 10 Pro, Enterprise, and Education editions, among others. Moreover, your gadget ought to have a Confided in Stage Module (TPM) rendition 1.2 or later for improved security.
III. Bit by bit Establishment Guide:
Presently, we should go through the bit by bit course of introducing BitLocker on your gadget.
Getting to the BitLocker Setup:
Open the Beginning menu and select "Settings."
Explore to "Update and Security" and snap on "Gadget encryption."
Really take a look at BitLocker Similarity:
Guarantee that your gadget meets the important prerequisites for BitLocker encryption.
Check to see if your device supports TPM versions earlier than 1.2.
Activate TPM (if required):
In the event that your gadget's TPM isn't empowered, access the Profiles/UEFI aka ms mfasetup firmware settings during the framework boot.
Enable the TPM settings wherever you find them. After making changes, exit.
Make use of BitLocker:
Get back to the "Gadget encryption" segment in the "Update and Security" settings.
On the off chance that your gadget is qualified, you'll track down the choice to "Turn on BitLocker." Click on it to start the establishment interaction.
Pick Encryption Technique:
Select by the same token "TPM as it were" or "TPM and PIN" in light of your inclination and security necessities.
Pick a Method for Unlocking Your Drive:
Choose whether to utilize a secret key, a savvy card, or both to open your drive.
Take a Backup of Your Recovery Key:
Save your BitLocker recuperation key in a solid area. In the event that you forget your password or run into other problems, you will need this key to unlock your drive.
Pick Encryption Mode:
Select the encryption mode - by the same token "Scramble utilized plate space as it were" or "Encode whole drive." The last option gives more complete assurance.
Start the encryption procedure:
To begin the BitLocker encryption process, select "Start encrypting" and then "Next."
IV. BitLocker activation with MS YourPC:
Since you have effectively introduced BitLocker, how about we investigate how to initiate it utilizing Otherwise known as MS YourPC.
Getting into AKA MS YourPC:
Navigate to the AKA MS YourPC portal using your browser.
Signing In:
Use the credentials from your Microsoft account to log in.
Gadget Approval:
Find the part for BitLocker gadget approval.
Follow the on-screen prompts to interface your gadget to your Microsoft account.
Two-Element Validation (2FA):
Add an extra layer of protection by enabling two-factor authentication.
Evaluating Gadget Status:
Actually look at the Also known as MS YourPC dashboard to guarantee that your gadget is effectively connected and approved.
Far off Administration:
Exploit Otherwise known as MS YourPC's distant administration highlights for BitLocker, permitting you to screen and deal with your gadget's encryption status from the entryway.
V. Best Practices and Investigating:
To expand the viability of BitLocker and aka ms myrecoverykey, think about the accompanying accepted procedures:
Make regular backups of your BitLocker recovery key in a number of safe places.
Update your operating system and device with the most recent security patches.
Test your recuperation key to guarantee it fills in true to form.
In the event that you experience any issues, allude to the BitLocker investigating documentation given by Microsoft or look for help from Otherwise known as MS YourPC support.
Conclusion:
Getting your gadget and information is a basic part of mindful registering. By introducing and initiating BitLocker on your gadget and utilizing the capacities of Also known as MS YourPC, you can essentially upgrade the security of your delicate data. Follow the bit by bit guide gave in this article to guarantee a smooth and secure establishment process. Make sure to remain informed about the most recent security practices and updates to keep up with the honesty of your scrambled information.
0 notes
Text
trend micro apex one download || trend micro deep security manager
Utilizing Summit One with Trend Micro Vision One™, you gain market-driving XDR abilities. Upgrade discovery, examination, and reaction abilities across various security layers for thorough perceivability of dangers influencing the whole association.
Figure out how you can further develop endpoint security with industry-driving XDR. Experience Trend Micro Vision One inside a virtual pre-designed lab.
Viable security for your delicate information Safeguard your delicate information, on or off network, for greatest perceivability and control. Endpoint encryption,* incorporated DLP, and gadget control:
Covers the broadest scope of gadgets, applications, and document types Helps with most administrative consistence, including GDPR Safeguards information with full-circle, organizer, document, and removable media encryption Sets granular strategies for gadget control and information the board Oversee Microsoft BitLocker and Apple FileVault encryption keys
Upgraded application control against malignant programming Keep obscure and undesirable applications from executing on your corporate endpoints. Trend Micro Peak One™ Application Control permits you to:
Block vindictive programming from running utilizing customisable lockdown, safelisting, and blocklisting arrangements Make dynamic approaches by utilizing Trend Micro's application categorisation and notoriety insight to decrease the executives above Relate information from a large number of use occasions to recognize dangers and keep a forward-thinking data set of approved applications
TrendConnect allows clients to remain current with continuous item cautions and danger data With the TrendConnect application clients will actually want to:
Quickly see sending status to abstain from running obsolete renditions of Trend Micro Pinnacle One Adjust organizations to Trend Micro Zenith One prescribed procedures to guarantee your endpoints are ideally secured Remain one stride ahead with ongoing warnings of new weaknesses/dangers and notices of new fundamental and basic patches
Expand Pinnacle One
Additional items for additional usefulness
Endpoint identification and reaction (EDR): Empower broadened recognition and reaction (XDR) abilities with Trend Micro Vision One. Grow the worth of XDR with connected identifications and coordinated examinations and reaction across various Trend Micro arrangements.
Overseen discovery and reaction (MDR): Trend Micro™ Oversaw XDR gives master danger recognition, examination, and hunting administrations for endpoint as well as email, servers, cloud jobs, and additionally network.
Cloud Sandbox: The sandbox-as-a-administration offering examinations multistage downloads, URLs, C&C, and more in a "safe live" mode.
Something other than an output, Peak One Weakness Security utilizes a host-based interruption counteraction framework (HIPS) to practically fix known and obscure weaknesses before a fix is accessible or deployable, empowering you to:
White Mark of approval Symbol Wipe out risk openness
White Mark of approval Symbol Stretch out insurance to basic stages and physical or virtual gadgets
White Mark of approval Symbol Lessen recuperation and crisis fixing personal time
White Mark of approval Symbol Distinguish weaknesses in light of CVE, MS-ID, and seriousness
White Mark Symbol Distinguish a greater number of weaknesses than some other seller by utilizing our industry-driving weakness research
High level location procedures
Summit One use a mix of cross-generational danger strategies to give the broadest security against a wide range of dangers
Trend Micro AI Symbol Pre-execution and runtime AI
Digital Assault Focus Symbol More exact identification of cutting edge malware, like fileless, living off the land, and ransomware dangers
Symbol for an information sheet Commotion dropping methods - like registration and safelisting - all through each layer of recognition to decrease misleading up-sides emphatically
Conduct Investigation Symbol Compelling assurance against scripts, infusion, ransomware, memory, and program assaults through inventive conduct examination
1 note
·
View note
Text
What Is the WMI Provider Host, and also Why Is It Using So Much CPU?

The WMI Provider Host procedure is an integral part of Windows, and frequently runs in the history. It permits various other applications on your computer to inquire regarding your system. This process should not generally utilize many system resources, yet it might use a lot of CPU if one more procedure on your system is acting severely. What Is WMI Provider Host? "WMI" represents "Windows Administration Instrumentation". This is a Windows feature that gives a standard method for software program as well as administrative scripts to inquire about the state of your Windows os and data on it. "WMI Providers" offer this info, when asked for. For example, software or commands could find info concerning the state of BitLocker drive encryption, sight entries from the occasion log, or request information from set up applications that include a WMI provider. Microsoft has a list of included WMI providers on its internet site. This is a particularly beneficial feature for business that centrally take care of Computers, specifically as info can be requested using manuscripts as well as displayed in a typical method management consoles. Nevertheless, even on a home COMPUTER, some software application you have actually installed may request information about the system with the WMI user interface. You can also utilize WMI on your own to find a selection of helpful items of details that aren't normally exposed in the Windows user interface on your own PC. For instance, we have actually covered the WMI Command line device (WMIC) to get your PC's serial number, discover your motherboard's version number, or just to see the WISE health condition of a hard disk. Why Is It Utilizing A Lot CPU? WMI Provider Host should not generally utilize much CPU, as it shouldn't typically be doing anything. It may occasionally use some CPU when an additional item of software program or script on your PC requests information via WMI, which's normal. High CPU usage is likely simply a sign that an additional application is requesting information via WMI. Nevertheless, prolonged high CPU use is a sign something is incorrect. wmi provider host should not be using lots of CPU sources constantly. Rebooting the Windows Monitoring Instrumentation solution may aid if it's stuck in a poor state. You can additionally simply restart your computer system, yet there's a way to reactivate the service without rebooting your computer system. To do this, open your Beginning menu, kind "Services.msc", and press Go into to release the Solutions tool.
1 note
·
View note
Text
What Is the WMI Provider Host, and also Why Is It Utilizing A Lot CPU?
The WMI Provider Host procedure is a fundamental part of Windows, and commonly runs in the background. It enables various other applications on your computer to request information about your system. This procedure shouldn't typically use many system sources, however it might use a great deal of CPU if an additional process on your system is behaving severely.

What Is WMI Provider Host? "WMI" represents "Windows Management Instrumentation". This is a Windows feature that offers a standardized method for software and management scripts to inquire about the state of your Windows os as well as data on it. "WMI Providers" offer this details, when requested. As an example, software or commands might locate details concerning the state of BitLocker drive file encryption, sight entrances from the event log, or request information from installed applications that include a WMI provider. Microsoft has a listing of included WMI service providers on its website. This is a specifically helpful feature for ventures that centrally take care of Computers, specifically as details can be asked for via scripts and displayed in a common method management gaming consoles. However, also on a home PC, some software program you have set up might request information regarding the system through the WMI user interface. You can additionally use WMI on your own to find a range of helpful items of info that aren't typically subjected in the Windows user interface by yourself COMPUTER. For example, we have actually covered the WMI Command line tool (WMIC) to obtain your COMPUTER's serial number, find your motherboard's model number, or just to see the SMART health condition of a hard disk. Why Is It Making Use Of A Lot CPU? wmi provider host shouldn't generally make use of much CPU, as it should not normally be doing anything. It might periodically utilize some CPU when an additional item of software program or script on your PC requests for details via WMI, and that's regular. High CPU use is most likely just an indication that an additional application is asking for information via WMI. Nonetheless, prolonged high CPU use is an indicator something is wrong. WMI Provider Host should not be making use of lots of CPU sources regularly. Rebooting the Windows Administration Instrumentation solution might assist if it's stuck in a negative state. You can also simply restart your computer, however there's a method to restart the solution without restarting your computer. To do this, open your Begin food selection, type "Services.msc", as well as press Enter to launch the Services tool.
1 note
·
View note
Text
Bitlocker recovery & its recovery key - waredot
What is bitlocker recovery ?
Bitlocker recovery is a procedure of recovering the access of bitlocker during when it’s impossible to unlock it in a normal way. It is a default attribute of complete encryption that is drawn in order to provide protection & security to your data. This attributes utilizes the AES Encryption algorithms in CBC/XTS modes with 128 or 256 bit key.
The options of restoration of drive is stated below
Using recovery password which is of 48 digits. This password can only be saved in your Microsoft account if your device is protected by bitlocker which is a non-member of domain.
The credential of data recovery agents can be used to recover the access of your drive. In case of operating-system drives, it needs to be plugged to https://www.waredot.com/rescuedata some other device for starting the process of unlocking of your drive.
This password can be recovered from AD DS by domain administrators or IT professionals.
What is bitlocker recovery key ?
Bitlocker recovery key is a numerical number containing 48 digits that can be utilized to recover the access to your drive. It is usually stocked in the Microsoft Account, printed, set aside as files, or is kept with firm who runs your devices.
How to get bitlocker recovery key from cmd ?
Follow the step below:
Open administrator: command prompt and type the commands & press on “enter”. Replace the “C” with the bitlocker encrypted drive letter. manage-bde -protectors C: -get
Right at the end, will flourish you with your bitlocker recovery key of 48 digits. Save it for your use.
How to get bitlocker recovery key with key id ?
Open the recovery wizard by looking into the safeguard management center and selecting tools and then recovery.
In this page, choose bitlocker recovery key id and press on next.
Click on the dots (..) to look for the id
On this page, look for search name & type first few digits of your id and click “find now”
Choose the desire key and press ok. Here the key information is displayed.
Click on “next”. You’ll get to see your bitlocker recovery key.
#What is bitlocker recovery ?#Bitlocker recovery#Bitlocker recovery key#How to get bitlocker recovery key from cmd ?#How to get bitlocker recovery key with key id ?
0 notes
Text
How and where to find your BitLocker recovery key in Windows
How and where to find your BitLocker recovery key in Windows.
BitLocker Recovery Key A BitLocker Recovery Key is required to access a data disk encrypted with the Windows built-in encryption tool BitLocker. You can use the 48-digit password to access your disk drive. It is always a good idea to back up your BitLocker Recovery Key in case you lose it. This post will go through how to retrieve your BitLocker Recovery Key on a Windows 11/10 PC. BitLocker is…

View On WordPress
#Bitlocker#BitLocker Drive Encryption Administration Utilities#BitLocker Recovery Keys#BitLocker Status#BitLocker Unlock#Microsoft BitLocker Administration and Monitoring#Microsoft Windows#Windows#Windows 10#Windows 11
0 notes
Text
McAfee Complete Data Protection Advanced
Overview:
The McAfee Complete Data Protection — Advanced suite shields your data from danger of misfortune, robbery, and openness utilizing a blend of amazing venture grade endpoint encryption, access control, and client conduct checking. The suite encourages you build up and implement a data protection strategy and unifies data security the executives utilizing the McAfee ePolicy Orchestrator (ePO) the board reassure. This high level suite highlights data misfortune avoidance, gadget control, and alternatively, the board of local encryption for encryption local to Mac and Microsoft Windows PCs*. Also, McAfee Activate antivirus”s ePO Deep Command gives distant security the board to get to Intel vPro-based PCs to execute patches, reset passwords, and to remediate broken endpoints.
The McAfee Complete Data Protection — Advanced suite makes a difference:
Control how representatives access, use, and move delicate data by means of basic channels, for example, email, IM, printing, and USB drives. You stay in charge of your data protection whether clients are in the workplace, at home, or progressing.
Shield your data from misfortune or burglary with a bursting quick endpoint encryption arrangement that is FIPS 140-2 and Common Criteria EAL2+ guaranteed, and quickened by the Intel Advanced Encryption Standard New Instructions (Intel AES-NI).
Scramble stockpiling on work areas, virtual work area framework workstations, PCs, tablets, and removable media, for example, CD/DVD and USB streak gadgets. You control what explicit record types and envelopes are scrambled.
Use the executives of local encryption for Mac with Apple FileVault — soon accessible for Microsoft BitLocker and local to Microsoft Windows.
Broaden the range of IT with Intel vPro and Intel Active Management Technology-based stages for secure distant access, paying little mind to PC power or scrambled state.
Convey and arrangement with certainty with the Endpoint Encryption Go utility to guarantee your endpoints have passed pre-encryption examinations and continuous wellbeing observing.
Utilize progressed announcing and evaluating abilities to rapidly and effectively exhibit security consistence to interior and outer evaluators, and other key partners.
McAfee Complete Data Protection — Advanced is the full data protection suite that incorporates DLP Endpoint, Device Control, drive encryption, record and removable media protection, the board of local encryption and ePO Deep Command.
Touchy data is continually in danger of misfortune, burglary, and openness. Commonly, the data just strolls directly out the front entryway on a PC or USB gadget. Organizations that endure such a data misfortune hazard genuine results, including administrative punishments, public exposure, brand harm, client doubt, and monetary misfortunes. As per a Ponemon Institute report, 7% of all corporate PCs will be lost or taken at some point during their helpful life.1 The fast multiplication of cell phones with huge capacity limits and regularly Internet access is opening up significantly more channels for data misfortune or robbery, so securing delicate, restrictive, and actually recognizable data should be a first concern. McAfee Total Protection /data protection Suites address these worries and some more.
Key Features
McAfee Complete Data Protection—Advanced
McAfee Data Loss Prevention Endpoint
McAfee Device Control
Drive encryption
Record and removable media protection
The executives of local encryption v1.0
McAfee ePO Deep Command
Key Advantages
Oversee your data by checking and controlling how representatives use and move data by means of normal channels, for example, email, IM, printing, and USB drives—both in and away from the workplace.
Stop data misfortune started by sophisticated malware that captures touchy and individual data.
Secure data when it's put away on work areas, PCs, tablets, and other cell phones.
Oversee Apple FileVault Native Encrypted OS X Mountain Lion and OS X Mavericks endpoints.
Speak with and assume responsibility for your endpoints at the equipment level whether they are fueled off, crippled, or scrambled to end deskside visits and interminable assistance work area calls because of security episodes, flare-ups, or failed to remember encryption passwords.
Demonstrate consistence with cutting edge announcing and evaluating abilities; screen occasions and produce definite reports that show reviewers and different partners your consistence with inner and administrative security necessities.
Highlights Specific to McAfee ePO Deep Command
Decrease remediation times.
Oversee far off remediation to any PC anyplace on the planet with access from the equipment.
Improve client efficiency.
Lead resourceintensive undertakings during off hours to restrict effect on clients.
Lower IT costs by lessening regular deskside visits and long assistance calls.
Diminishing PC power costs by embracing a force investment funds program, yet keep up access for security or fixing.
Rapidly find and arrangement Intel AMT by effectively distinguishing Intel vProequipped PCs and afterward empowering Intel AMT for smoothed out initiation.
0 notes
Text
Windows 10 1809 and Later Install RSAT Feature

Windows 10 1809 and Later Install RSAT Feature. Starting from Windows 10 1809, Microsoft has changed the way to install the Remote Server Administration Tools (RSAT) package. Starting with Windows 10 October 2018 Update (1809), RSAT is included as a set of “Features on Demand” in Windows 10 itself. You can now install RSAT from the Settings app. To install RSAT package you need the Internet access. NOTE: Only Professional (Education Pro) and Enterprise (Education) versions are suitable.
Install with Settings GUI
To install RSAT, go to Settings\Apps\Manage Optional Features\Add a feature. Here you can select and install specific tools from the RSAT package;

The following server administration tools are available in Windows 10 1903: RSAT: Active Directory Certificate Services Tools;RSAT: Active Directory Domain Services and Lightweight Directory Services Tools;RSAT: BitLocker Drive Encryption Administration Utilities;RSAT: Data Center Bridging LLDP Tools;RSAT: DHCP Server Tools;RSAT: DNS Server Tools;RSAT: Failover Clustering Tools;RSAT: File Services Tools;RSAT: Group Policy Management Tools;RSAT: IP Address Management (IPAM) Client;RSAT: Network Controller Management Tools;RSAT: Network Load Balancing Tools;RSAT: Remote Access Management Tools;RSAT: Remote Desktop Services Tools;RSAT: Server Manager;RSAT: Shielded VM Tools;RSAT: Storage Migration Service Management Tools;RSAT: Storage Replica Module for Windows PowerShell;RSAT: System Insights Module for Windows PowerShell;RSAT: Volume Activation Tools;RSAT: Windows Server Update Services Tools;
Install with PowerShell
You can install RSAT admin components using PowerShell. Using the following command, you can check whether RSAT components are installed on your computer: Get-WindowsCapability -Name RSAT* -Online You can view the status of installed RSAT components in a more convenient table: Get-WindowsCapability -Name RSAT* -Online | Select-Object -Property DisplayName, State

To install a specific RSAT tool, such as AD management tools (including the ADUC console and the Active Directory module for Windows PowerShell), run the command: Add-WindowsCapability –online –Name "Rsat.ActiveDirectory.DS-LDS.Tools~~~~0.0.1.0" To install the DNS management console and the PowerShell DNSServer module, run: Add-WindowsCapability –online –Name "Rsat.Dns.Tools~~~~0.0.1.0" Etc. Add-WindowsCapability -Online -Name Rsat.FileServices.Tools~~~~0.0.1.0 Add-WindowsCapability -Online -Name Rsat.GroupPolicy.Management.Tools~~~~0.0.1.0 Add-WindowsCapability -Online -Name Rsat.IPAM.Client.Tools~~~~0.0.1.0 Add-WindowsCapability -Online -Name Rsat.LLDP.Tools~~~~0.0.1.0 Add-WindowsCapability -Online -Name Rsat.NetworkController.Tools~~~~0.0.1.0 Add-WindowsCapability -Online -Name Rsat.NetworkLoadBalancing.Tools~~~~0.0.1.0 Add-WindowsCapability -Online -Name Rsat.BitLocker.Recovery.Tools~~~~0.0.1.0 Add-WindowsCapability -Online -Name Rsat.CertificateServices.Tools~~~~0.0.1.0 Add-WindowsCapability -Online -Name Rsat.DHCP.Tools~~~~0.0.1.0 Add-WindowsCapability -Online -Name Rsat.FailoverCluster.Management.Tools~~~~0.0.1.0 Add-WindowsCapability -Online -Name Rsat.RemoteAccess.Management.Tools~~~~0.0.1.0 Add-WindowsCapability -Online -Name Rsat.RemoteDesktop.Services.Tools~~~~0.0.1.0 Add-WindowsCapability -Online -Name Rsat.ServerManager.Tools~~~~0.0.1.0 Add-WindowsCapability -Online -Name Rsat.Shielded.VM.Tools~~~~0.0.1.0 Add-WindowsCapability -Online -Name Rsat.StorageMigrationService.Management.Tools~~~~0.0.1.0 Add-WindowsCapability -Online -Name Rsat.StorageReplica.Tools~~~~0.0.1.0 Add-WindowsCapability -Online -Name Rsat.SystemInsights.Management.Tools~~~~0.0.1.0 Add-WindowsCapability -Online -Name Rsat.VolumeActivation.Tools~~~~0.0.1.0 Add-WindowsCapability -Online -Name Rsat.WSUS.Tools~~~~0.0.1.0 To install all the available RSAT tools at once, run: Get-WindowsCapability -Name RSAT* -Online | Add-WindowsCapability –Online To install only disabled RSAT components, run: Get-WindowsCapability -Online |? {$_.Name -like "*RSAT*" -and $_.State -eq "NotPresent"} | Add-WindowsCapability -Online After that, the installed RSAT tools will appear in the Manage Optional Features panel (Settings\Apps\Manage Optional Features). Read the full article
0 notes
Text
AOMEI Partition Assistant - Review and Test Drive

As you most likely already know, disk partitioning (also known as disk slicing) is the process of creating of one or more regions within a disk storage (such a HDD or SSD drive) so that each region can be managed separately. The disk stores the information about the partitions' locations and sizes in an area known as partition table, which is read by the system before any other part of the disk and - depending on what is found there - will determine what your PC will actually load on each boot: the operating system also reads the partition table before anything else, giving the user the chance to access the various regions (if they are formatted with a supported filesystem standard) to read and/or write stuff. The various "partitions" can be created using the operating system built-in tools or via third-party software - usually called partition editors, partition managers and so on: these tools can be used to create, resize, delete, and otherwise manipulate the partitions. The most widespread partition editor tools available in the past years are EaseUS Partition Master, Paragon Partition Manager and AOMEI Partition Assistant, which we'll be testing and reviewing in this article.
Standard and Professional
AOMEI Partition Assistant comes in two different versions: Standard (freeware) and Professional (trialware). Standard Features The standard version, which is free for personal use, comes with the following features: Basic Partition Management: Create, Format, Delete, Label, Check, Hide, Unhide Partitions, Set Active Partition, Change Drive Letter. Disk Partition Utilities: Rebuild MBR, Wipe Disk or Partition, Change Partition Type ID, Check Bad Sector. Change Partition Size: Extend, Shrink and Move Partitions, Merge Partitions or Unallocated Space Copy Data Disk & Partition Migrate OS from MBR Disk to MBR SSD or HDD Convert Data Disk between MBR and GPT Styles Convert File System between NTFS and FAT32 Create Windows PE Bootable CD/USB Professional Features The professional version covers all the standard stuff plus the following advanced features: Recover Lost or Deleted Partitions Copy System Disk from MBR to GPT, GPT to MBR and GPT to GPT Advanced Data Migration features: OS from GPT Disk to GPT/MBR SSD or HDD Advanced Convert features: System Disk between MBR and GPT; Dynamic Disk to Basic Disk (and Vice Versa); Partition Type between Primary and Logical Align Partition to Optimize SSD Performance Allocate Free Space from one Partition to another Extend Partition Wizard to Enlarge NTFS System Partition without the need of a reboot Advanced Partition Split features, such as spliting one large Partition into two or more smaller ones Command-Prompt mode, to be used within batch files and scripts Dynamic Disk Management: Resize, Move, Create, Format Dynamic Volumes SSD Secure Erase Wizard 24/7 VIP Technical Support Sector-level Data Protection AOMEI Partition Assistant embeds a proprietary sector-level data protection technology to ensure safer partitioning operations even with large drives (> 2 TB).
Supported OS, FS and Storage Devices
Both Standard and Professional versions supports the following: Operating Systems Windows 10 Windows 8.1/8 Windows 7 Windows Vista Windows XP Windows 2000 Pro SP4 File Systems NTFS FAT32/FAT16/FAT12 exFAT/ReFS * Ext2/Ext3/Ext4 * Bitlocker and other encrypted file systems * * These file system cannot be resized, but you can still move and clone them. Supported Storage Devices Traditional hard disk drives, solid-state drives (SSD) and SSHD, etc. (MBR disk and GPT disks) of any size External hard drives (USB drives), PC cards, all Flash Drives and Thumb Drives and other removable media All storage devices recognized by Windows, such as RAID, etc As for the maximum supported size, there seems to be no limit: we tested the Standard version against a 16 TB HDD and we got no issues.
Installation and EULA
The Standard Edition has an installer file of just 22 Megabytes with a typical installation wizard, which briefly mentions the Professional edition, giving you the chance to Try it now! but doesn't suggest or force anything else (no third-party software sponsored advices). Before running the program, you get the choice to Join the User Experience (UX) Improvement Program, which is the usual anonymous info-collecting feature used by most modern softwares to gather info regarding their end-users - hardware, usage, and so on. The Program is also briefly mentioned in the End-User Licence Agreement, which is indeed a good thing because they let you know what will be going on before accepting. Here's the relevant excerpt: In order to understand our user's needs, and deliver better products and services to our user, we invite you to join our User Experience Improvement Program. If you choose to join the program, you will not be interrupted by additional messages when using your computer, and the operation of the program will not decrease the performance of your computer. AOMEI collects anonymous information about your computer hardware configuration, how you use our products and problems you might have with our products. We respect your privacy. No personally identifiable information will be collected, like your name, address, phone number, or keyboard input. The program is voluntary. You can opt in/out the program at any time by checking/unchecking Menu » Settings » Other » Join the User Experience Improvement Program.
User Interface
The software comes with a easy-to-use interface, much similar to other AOMEI products. You are immediately prompted for the preferred language (we chose English among the 20+ supported ones) and then the main control screen will load:

As we can see, there's no introductory dashboard - we're immediately brought into action thansk to a full-featured control panel which already contains everything we can do. With a single click we can start to work on our partitions, migrate OS to SSD, start the recovery wizard, and so on. This is a great approach for practical people such as the vast majority of System Administrators - which are the ones that will actually use the product anyway. As you can see, some of the available Disk Operations do have an orange "Pro" label on them: it goes without saying that those will require the Professional version. Similarily, there are other features (such as the "Disk Backup") that do require other AOMEI products, such as AOMEI Backupper:

That's nice to know, but maybe it would've been better to place a label on them as well.
Overall Performances
During our test-drive we performed the following activities: Disk Partition on a 16 TB Hard-Disk Drive (create, split, merge and delete) Disk Copy from a 256GB SSD Drive to another identical 256GB SSD Drive. Wipe Hard Drive on that same 16 TB Hard-Disk Drive that we partitioned early on. Rebuild MBR from a damaged HDD with Windows 7 Home Premium. The software performed really well on each task, with no nag screen, no delays and better performances compared to the aforementioned competitors. We found nothing to complain about, therefore we can only praise the overall results. We also checked our Task Manager to analyze the impact on system resources during the various tasks, and we found no significant issues there as well: needless to say, the software will ask you to reboot to ensure that your Operating System will reckognize the changes, but it's not mandatory - as long as you can live with the partition misalingments.
Conclusion
AOMEI Partition Assistant is definitely a great free partition manager tool which we can recommend it for any personal use. If you plan to use it on your company or business activity, the fair price of the Professional version ($49.95 at the time of writing, with lifetime free upgrades included) makes it a highly affordable choice for every business size. Read the full article
0 notes
Text
A Step by Step Guide on What to Do After Installation of Windows Operating System

Set up your security layers before introducing whatever else. You'll be happy you did. Installing your Windows operating system requires significant investment and ends up being a relentless activity, which none of us jumps at the chance to take after. Since it is a vocation we don't do each day, we need to ensure that when we install the operating system, we take extra measures to enhance our security. We urge you to take after the safety measures beneath to build your security: Keep your Windows operating system up to date

Ensure that you have the most recent security updates accessible for your Windows operating system. To get the security updates, go to Control Panel. Ensure that your programmed updating is turned on. If not, take after the means beneath: Go to the search box in your Windows operating system. Type update. Go to Windows Update. Select Change settings. Click Install updates automatically. Install a traditional antivirus for reactive protection It is essential to have a solid security arrangement on your operating system, which ought to incorporate constant filtering, programmed update and a firewall. Utilize a known antivirus from a major security organization. On the off chance that you introduce an antivirus that does exclude a firewall, ensure you have turned on the Windows firewall. Install a proactive security solution for multiple defense layers Financial malware is made to steal private information and secret data and it utilizes refined strategies to do as such. To have the best security against financial malware, for example, the notorious Zeus family or CryptoLocker, it is smarter to utilize a uniquely planned program. Install a security solution against spyware Spyware alludes to that classification of software which introduces on your PC sending pop-ups, diverting your browser to pernicious sites or at times, it might even screen your history. There are various famous anti-spyware items you can use to shield your windows operating system from malware. For instance; Malwarebytes, Spybot Search and Destroy, Lavasoft's Ad-Aware and others. Create a Clean Installation restore point

Ensure you have made a Restore Point for your installation. You can make the Restore Point when your Windows installation is prepared. Name it Clean installation. Keep installing drivers and applications afterward. On the off chance that one of the drivers causes issues on the PC, you can simply backpedal to the Clean installation point. Backup your system You may experience hardware issues that could jeopardize your private data. To ensure your information remains safe, you ought to utilize a twofold procedure, which ought to incorporate joining an external hard drive utilization with an online backup service. Having a backup solution gives dependability, it's anything but difficult to utilize, enables you to synchronize your records with the online reinforcement servers and gives a type of security, for example, encryption capacities. You could essentially utilize your Windows Backup framework. Keep your User Account Control turned ON UAC screens what changes will be made to your PC. At the point when vital changes show up, for example, introducing a program or evacuating an application, the UAC flies up requesting an administrator-level authorization. Rather than debilitating the UAC, you can diminish the force level utilizing a slider in the Control Panel. Keep your software up to date Since malignant programmers attempt to exploit famous software, for example, Java, Adobe Flash, Adobe Shockwave, Adobe Acrobat. Peruse, Quicktime or prominent web programs like Chrome, Mozilla Firefox or Internet Explorer, dependably ensure you have the most recent accessible patches. Install a dedicated solution to perform these activities for you. What's more: take after the experts' recommendation! Utilize a standard user account to access your Windows Operating System Windows operating system gives a specific level of rights and benefits relying upon what sort of client account you have. You may have a standard account or an administrator account. It is prescribed to utilize standard account for your PC to keep clients from rolling out improvements that influenced everybody who utilizes the PC, for example, erasing critical Windows documents fundamental for the Windows. We additionally prescribe that you set a solid password for your Windows account. Use BitLocker to encrypt your hard drive Even if you set a password to your account, intruders can still get access to your private files. They can do this by booting into their own operating system from a special disc or USB drive. The encryption of the hard drive is an excellent solution to protect your files. The latest Windows operating systems offer BitLocker that you can use anytime. For the activation of BitLocker on your PC, follow these steps: Click Start. Access Control Panel. Go to System and Security. Click BitLocker Drive Encryption. Turn on BitLocker. Be careful online and don’t click suspicious links To ensure you won't be affected by tapping on perilous links, drift the mouse over the link to check whether you are coordinated to a legitimate area. Now and again an obscure link may send you to a noxious site that can introduce malware on the PC. To ensure you are setting off to the correct course, utilize free devices, for example, Redirect Detective or VirusTotal. These instruments will enable you to see the entire way of a diverted link. Secure your browser before going online Since our browser is the primary instrument happen to get to the Internet, it is essential to secure it before going on the web. To remain safe while getting to different website pages, ensure you regard the accompanying: Pick the most recent adaptation for your browser. Roll out a progression of security improvements in your browser settings. Pick a private perusing session when you get to a site you don't know about. Ensure your browser can block pop-ups: Google Chrome Safari Web Explorer Mozilla Firefox Lock it Up The last touch for the security of your framework is to include a Kensington lock. It's so natural nowadays to have your cell phones lost, particularly a laptop, that including a physical safety effort doesn't appear to be an awful thought. Conclusion The means above are intended to guard you on the web. In any case, in the meantime, tailing them implies that you likewise set up your PC to work easily for web-based perusing and financial tasks, exercises we do each day. Read the full article
0 notes
Text
11 STEPS TO SECURE YOUR WINDOWS VPS HOSTING
Protecting your Windows VPS Hosting is critical. Indeed, it is equivalent to keeping your VPS live on the public network. The majority of us do dismiss this fundamental approach. In the wake of purchasing your Windows VPS hosting and getting your VPS login, security is the next ingenious move. Today, we are sharing 11 tips that you must do to ensure the security of your Windows VPS Hosting.

Our 11 Steps to Securing your Windows VPS Hosting is a simple to follow control that everybody should use to make sure about the nuts and bolts of a web server. Follow this manual to keep your server from getting hacked. Most administrators opt for Windows Cloud VPS and anticipate that the Cloud Provider would give security to their server. Notwithstanding the notion, most public cloud providers give IAAS which implies that you as an administrator are accountable for the security of your Windows Cloud Server. Follow these active strides underneath to make sure about your Windows 2012/2016 Cloud VM before making it accessible to the public -
1. Firewall -
Ensure that your Windows VPS Hosting has a firewall running continually. The default Windows Firewall accompanies each window OS and is prescribed to keep it empowered. The following are a portion of its advantages -
Protects you from hackers
Filters data originating from the Internet as indicated by your settings
Figure out what ports are open and how to block and unblock an IP address. These are essential things you have to comprehend in the everyday security of your system. On the off chance that somebody from an IP starts a beast power assault, you will know how to stop them immediately.
2. Keep OS updated -
If you are not sure which service packs and updates to buy and how to keep your OS updated, then enable Microsoft auto-update option. Avoiding these updates may make your server an easy target for the hackers.
3. SSL / TLS -
While there are numerous other options, upholding a free SSL Certificate can be one of the essential strides for your Windows VPS hosting. Confining association by IP and empowering SSL/TLS encryption on database ports is an unquestionable requirement for remote associations. A certificate is expected to validate your Windows VPS. SSL (TLS 1.0) will be utilized for server confirmation and for scrambling all information moved between the server and the customer. Encryption secures against the danger of interference of the customer/server correspondence.
4. Limit Public Network Access -
Enabling public network access is a double-edged sword. Enabling it might open many doors and opportunities for your business, but it will also put your server at a higher risk of getting hacked. The middle way can be to set up VPN tunnels so that the outsider usage and your private network communication are encrypted with 128-bit encryption keys.
5. Intrusion Detection System -
An intrusion detection system or IDS resembles a robbery alert on your Windows VPS Server. It tracks which documents were changed and when. It alarms you of anything new or adjusted. This is basic since programmers usually attempt to supplant binary applications. Apply IDS to spare your Server from the danger. We suggest looking at the Top 5 Free Windows IDS, which you can use to make sure about your Windows Server.
6. Enable a Bastion Host -
A bastion host is a distinctive computer on a network explicitly structured and designed to withstand assaults. A bastion host can keep direct access to your server from the open system and limit the odds of infiltration. The PC mainly hosts a solitary application, for instance, other services and a proxy server are limited or removed to decrease the threat to the computer. It, as a rule, includes access from untrusted systems or PCs.
7. BitLocker -
You must enable the BitLocker for server encryption. Because of the upgrades of virtualization and capacity advancements, it's not hard to clone a hard drive. An extraordinary bit of leeway for calamity recuperation, yet besides a potential hazard for the security of your data.BitLocker shields your Windows VPS hosting from disconnected assault. Furthermore, secures your information if a noxious client boot from another Operating System. It always requires the owner’s privileges.
8. Alternate Ports -
Another way to secure the Windows VPS system is to use alternate ports for standard services. Default ports for common services like RDP, SQL Server can be a hazard and can cause an attack on your server. Change the ports to your own needs to avoid the malicious attack. This significantly will reduce your chance of getting hacked remotely. It also secures your Terminal Server or Remote Desktop Server in the long run. If still anyone tries to connect to alternate ports, they are blocked entirely for a while.
9. Virus Protection Solution -
When you install and configure a virus protection solution, you protect your server online and offline. It checks for viruses and threats during uploads and downloads of files. It also protects you against Windows-based file servers, various kinds of malware, such as viruses, spyware, adware, rootkits, etc.
10. Disable unnecessary protocols and bindings -
Use port binding to figure out where and how messages are transmitted and delivered within the network. Remove all the unnecessary services, and bindings from the network, it will improve your security.
11. Password for your Admin Account -
Make sure you password protect your Admin account. Also, never write your password anywhere to be seen. Your password should be strong and have these following requirements to make it impossible for a hacker to get through -
Longer the better, make your password at least 10 characters long.
Use one Capital case, few numbers, some lowercase, and a symbolic figure.
Do not repeat your old password.
Apply SSL/TLS over Remote Connections.
SSL/TLS encryption on database ports is an absolute action for remote connections.
Security is fundamental when you are on the web. We ought to never chance our clients close to home and private data. Neither should we welcome interlopers and their issues.
Shared by: www.epichosts.co.uk
0 notes
Text
So getting BitLocker enabled in an Active Directory environment is fairly painless and helps to get your end user devices more Secure. I’ll outline the steps you need to take to enable it as well as get the recovery keys stored in Active Directory. I’ll also dive into replicating this setup on Azure AD/Intune in a future post.
First thing is to create a new GPO (i.e. Configure – BitLocker) – Edit it and navigate to Policies > Administrative Templates > Windows Components > BitLocker Drive Encryption. Enable the following Options:
Choose drive encryption method and cipher strength (Windows 10 Version 1511 and later)
Choose drive encryption method and cipher strength (Server 2012, Win 8.1 etc…)
Choose how users can recover BitLocker protected drives
Store BitLocker recovery information in Active Directory Domain Services
Then go down one folder into Operating System Drives and enable the following:
Choose how BitLocker protected operationg system drives can be recovered
Once you’ve set this all up, it should look something similar to the image below.
#gallery-0-6 { margin: auto; } #gallery-0-6 .gallery-item { float: left; margin-top: 10px; text-align: center; width: 33%; } #gallery-0-6 img { border: 2px solid #cfcfcf; } #gallery-0-6 .gallery-caption { margin-left: 0; } /* see gallery_shortcode() in wp-includes/media.php */
Group Policy Settings for BitLocker
BitLocker Recovery Key in Active Directory
Now target the GPO to some machines and if you’re running 1809 (from what I’ve discovered so far) or later you’ll notice them start the BitLocker process to encrypt automatically. If not then you may need to check and ensure the TPM is enabled for the device (as we haven’t specified to encrypt devices without a TPM in this case).
What happens if you have already enabled BitLocker but now want to store the recovery keys in Active Directory? With this GPO set it will allow windows to write the recovery key to AD however we need to use the manage-bde utility, that is a command based utility that can be used to configure BitLocker
manage-bde -protectors -get c: for /f "skip=4 tokens=2 delims=:" %%g in ('"manage-bde -protectors -get c:"') do set MyKey=%%g echo %MyKey% manage-bde -protectors -adbackup c: -id%MyKey%
I saved that as a batch file and ran that on the machines that had already been encrypted prior to rolling out the GPO. Once run, it escrows the key into Active Directory.
The last bit you will need to do so you can actually see the keys in the Properties tab or via the Search function in Active Directory Users and Computers, ensure that the BitLocker RSAT is enabled in Server Features and Roles.
Enabling BitLocker with Group Policy and backing up Existing BitLocker recovery keys to Active Directory So getting BitLocker enabled in an Active Directory environment is fairly painless and helps to get your end user devices more Secure.
0 notes
Text
When Should I Use TPM or TPM + PIN
When Should I Use TPM or TPM + PIN.
Trusted Platform Module (TPM) One of the main requirements in Microsoft’s Windows, particularly Windows 11, operating system is a little-known PC security feature known as the Trusted Platform Module. If you are looking to build your own Windows 11 PC or upgrade one that is running an earlier version of Windows, this might be cause for concern. Please see this detailed guide on how to Get TPM…

View On WordPress
#Bitlocker#BitLocker Drive Encryption Administration Utilities#BitLocker Recovery Keys#Enable BitLocker#Enable TPM Auto-Provisioning#Get TPM information#Microsoft Windows#TPM#TPM Support#Trusted Platform Module#Windows#Windows 10#Windows 11
0 notes
Text
What Is the WMI Provider Host, as well as Why Is It Making Use Of So Much CPU?

The WMI Provider Host process is a vital part of Windows, and also typically runs in the background. It allows various other applications on your computer system to request information regarding your system. This process shouldn't usually make use of many system sources, but it might make use of a great deal of CPU if another process on your system is acting severely. What Is WMI Provider Host? "WMI" stands for "Windows Administration Instrumentation". This is a Windows function that offers a standard method for software application and management scripts to request information concerning the state of your Windows os and information on it. "WMI Providers" provide this details, when requested. For instance, software application or commands can discover information about the state of BitLocker drive file encryption, view access from the occasion log, or request information from set up applications that include a WMI provider. Microsoft has a list of consisted of WMI carriers on its internet site. This is a particularly helpful feature for enterprises that centrally take care of Computers, specifically as info can be asked for by means of scripts as well as displayed in a typical method administrative gaming consoles. However, also on a home PC, some software application you have actually set up may request information about the system with the WMI interface. You can additionally utilize WMI yourself to find a range of helpful pieces of details that aren't normally subjected in the Windows user interface by yourself COMPUTER. For example, we've covered the WMI Command line device (WMIC) to get your COMPUTER's serial number, discover your motherboard's design number, or just to see the WISE health status of a hard drive. Why Is It Using So Much CPU? wmi provider host shouldn't usually use much CPU, as it should not normally be doing anything. It might occasionally utilize some CPU when an additional piece of software application or script on your COMPUTER asks for information through WMI, and that's typical. High CPU usage is most likely just a sign that an additional application is asking for information by means of WMI. However, long term high CPU use is an indication something is incorrect. WMI Provider Host should not be using lots of CPU sources all the time. Reactivating the Windows Management Instrumentation solution might assist if it's stuck in a negative state. You could likewise simply reboot your computer system, however there's a method to reboot the solution without reactivating your computer. To do this, open your Beginning menu, kind "Services.msc", and also press Enter to introduce the Services tool.
0 notes