#Bootable USB Creator
Explore tagged Tumblr posts
Visit Tumblr Blog
Explore Tumblr blogs with no restrictions, modern design and the best experience.
Last Seen Tumblr Blogs


Fun Fact
Tumblr is available in 18 languages.
Text

05.09.24
Linux laptop project 2024.
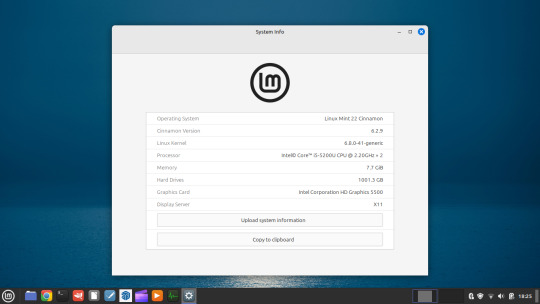
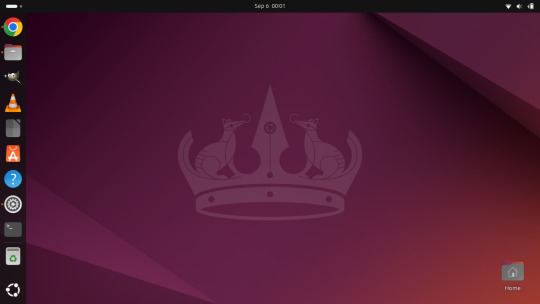
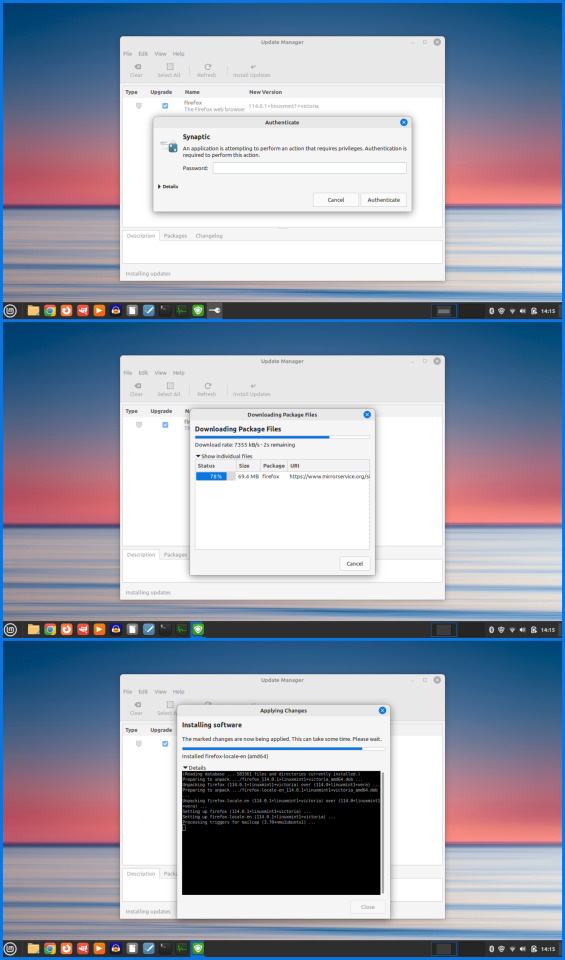
I decided to upgrade my old laptop by making it a Linux dual boot system. I had never done this before. I downloaded the ISO files for Linux Mint 22 'Wilma' and Ubuntu 24.04.1 'Noble Numbat' LTS.
The selected files include the standard desktop environments for each, Cinnamon, for Linux Mint and GNOME for Ubuntu.
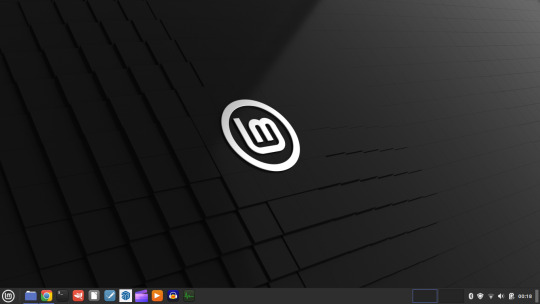
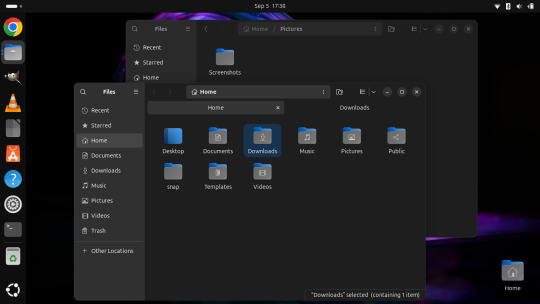
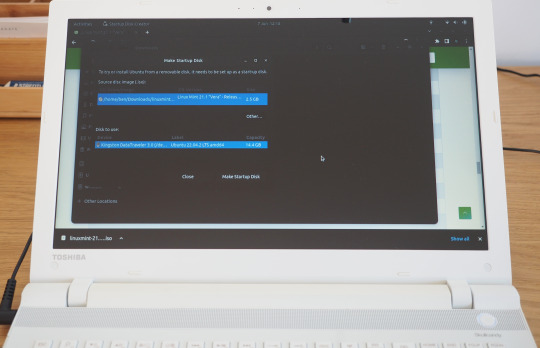
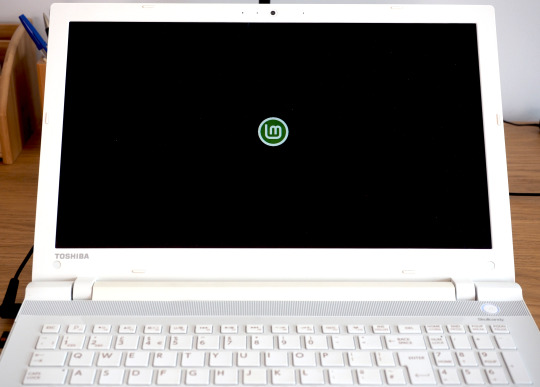
Then using the built in USB disk creator on Linux Mint, I created bootable USBs, one for Linux Mint and one for Ubuntu. I decided to install Linux Mint first. The installation includes creating partitions and I used the installation partition creator to create a 25 Giga-byte partition in which I installed Linux Mint. The installation went ahead smoothly, and when it completed, I booted up Linux Mint. It looked perfect.
See screenshots below.


I then installed GParted, which is a more powerful partition manager to create the additional partitions I needed. I created a 25 Giga-byte partition for Ubuntu, two other 25 Giga-byte partitions and I hundred Giga-byte data partition formatting them all using ext4.
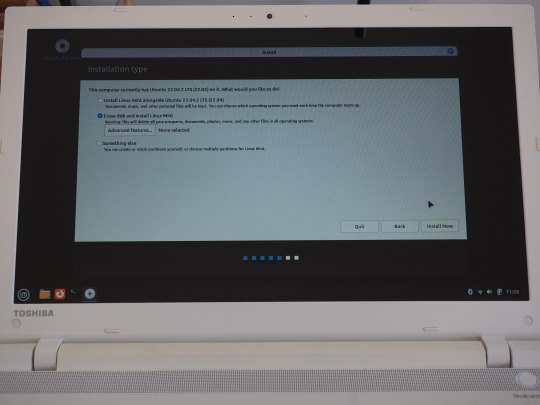
I then installed Ubuntu. During the installation, I selected the extended install, rather than the minimal install, so I had a full Ubuntu desktop installation on the second partition on my laptop hard drive. This all went well and at the end of it all I had a system which could boot either Linux Mint or Ubuntu.


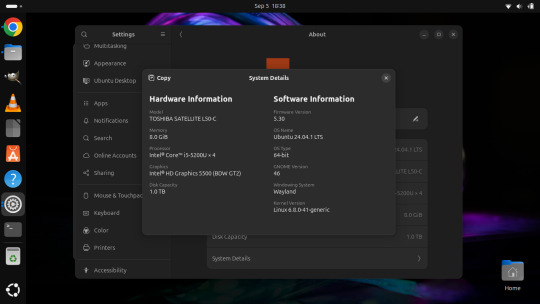
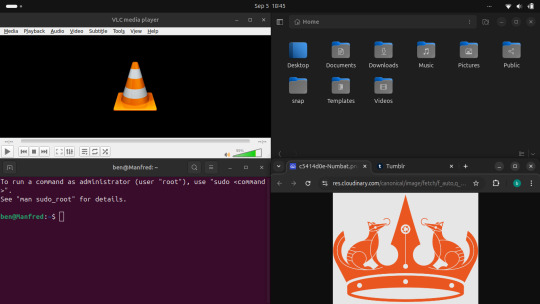
After installation, I booted each system up individually and updated them with the latest updates available, and then I installed necessary software that I wanted such as the Google Chrome Browser, Audacity, VLC Media Player, GIMP, Asunder CD ripper.
I also reinstalled the Chrome web apps for Microsoft Clipchamp and Trimble SketchUp web.
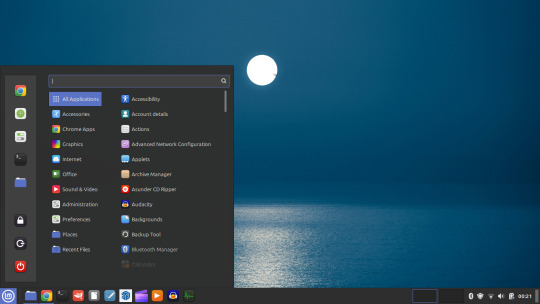
The majority of software bundled on these Linux distros is already preinstalled. I then had fun tweaking each install and making them look how I wanted.
Here is a list of some of the tasks I did in both installs:
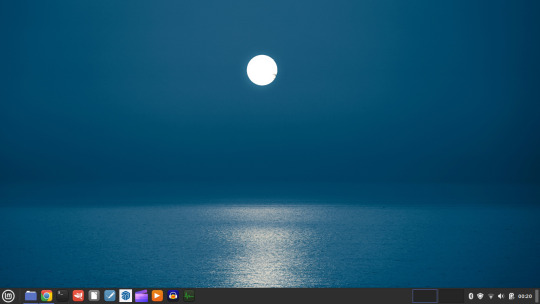
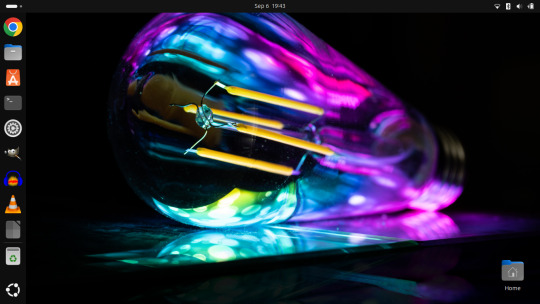
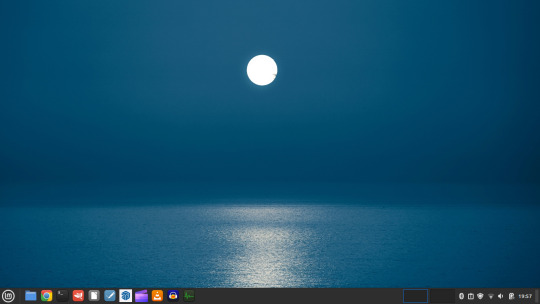
- configuring the desktop environment to my liking, e.g. background, theme colour, dark theme (Ubuntu) mixed colour scheme (Mint). - added Bluetooth devices (headphones, Mini-Rig speaker) - added the printer device - dual booted into each one to check them out!
-
After this, Dad wanted to finish the set-up in such a way that I could link my local laptop Documents, Downloads, Pictures, Music and Video folders directly to the data partition, which would mean that I could access those folders automatically from any installed Linux distributions, however this didn't quite go to plan and messed some things up, so we decided to re-install both operating systems again and I repeated all the previous steps and left out the folder sharing part for now.
-
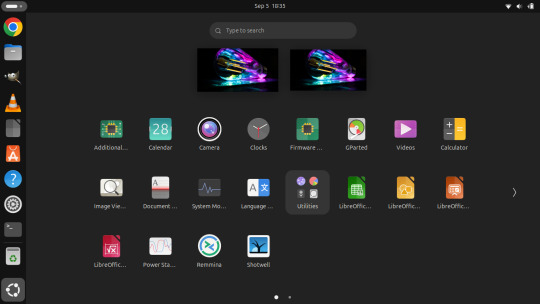
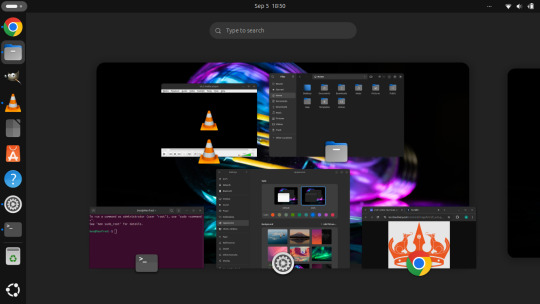
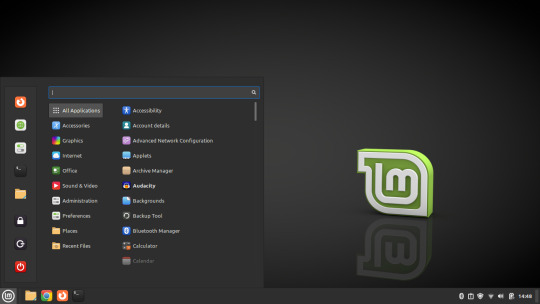
The images underneath show the final desktop installs with my various theme and desktop personalisation's applied and all the installed apps.
Here is a screenshot of the 'GNOME image viewer' in Mint and Ubuntu.

Ubuntu Linux is celebrating its 20th anniversary with a web post.
See link below:
https://ubuntu.com/20years
For more information about the Linux laptop project, search 'Linux' on my Tumblr blog!
6 notes
·
View notes
Text
Anyway the post I wanted to reblog was about making a bootable usb with persistence! It's essentially a little computer hosted on the usb, and can be run on almost any laptop/computer with a USB port. Download Windows on that USB, Linux Mint, Ubuntu, anything you want! You could even download multiple OSes if you use a multi boot creator (and you have enough space)!
You can go to pendrivelinux and use the Yumi creator (Your USB Multiboot Installer). There are even guides on there for how to download various OSes, though the basic rules should be the same. Plus, you can always use guides from other sites and other installers!
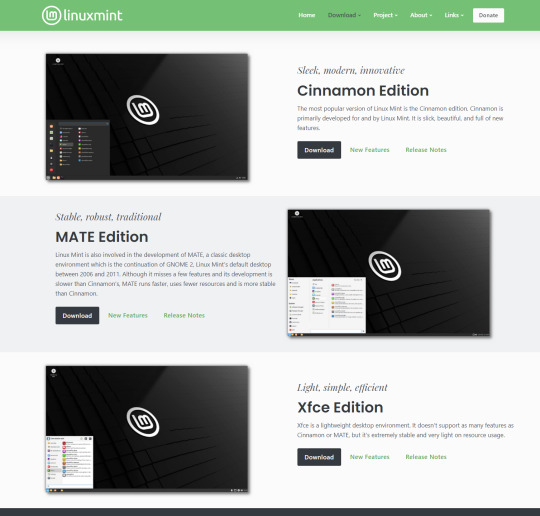
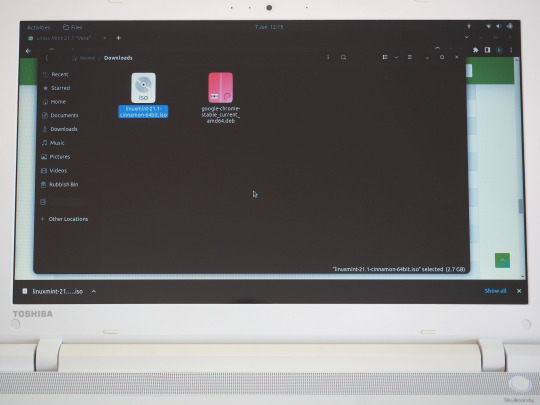
Personally, I plan to use Mint once I get a new USB (I need a new one for various reasons). I'm going to put Mint Cinnamon version on there (it's the most popular) and try to download it onto my laptop as well. My laptop is slow though so if that doesn't pan out I'll use the XFCE version since it's very light weight and uses little resources!
Here is a guide for installing Mint via Yumi and Here is Mint's guide to verifying the integrity and authenticity of the iso you download.
#I heard Linux lite is also a good one for slow devices#MAN I really want to make a bootable USB RIGHT NOW but I want to get a new USB first.#Firstly cus while yumi says you can use the USB as a normal USB after#I'm not sure if it means *only* after or not. Like will it delete all my files but then afterwards I can put new files on it just fine? Cus#I want to keep my old stuff. More pressingly though I bent my USB a little and then bent it back. But now I don't think it goes into ports#Smoothly. I don't want to damage a random laptop so I try not to use it much. But if I made a bootable USB I'd want to use it all the time.#On the plus side if I get a new USB I can get one with a lot more GBs. So I can download multiple OSes! I think I'd be able to do that with#Current USB but I'm planning on going from 32GB to 128GBs so it's a significant improvement! Plus it'd come with a thing to loop a keychain#Through. So that'd be nice.
2 notes
·
View notes
Text
Windows Recovery Environment and Bootable USB Creator in 200KB
https://github.com/joshuacline/windick
0 notes
Text
How To Create a Bootable macOS Catalina USB Drive
How To Create a Bootable macOS Catalina USB Drive

How To Create a Bootable macOS Catalina USB Drive.
Making a bootable USB installer for the latest macOS Catalina helps in many ways. One of the reasons you might want to do this is because it allows you to perform a completely clean install of the update on your Mac. Other areas where you can use a bootable macOS installer is when you have multiple Macs and want to install the same update on…
View On WordPress
#Create a macOS Catalina USB Installer Using Disk Creator#How To Create a Bootable macOS Catalina USB Drive#How To Use The macOS Catalina USB Installer#Use Terminal To Make A macOS USB Installer
0 notes
Photo

Ubuntu? Never ever... 🤬
At the end of the week, after years of abstinence, I stopped by Ubuntu again! I should have left it! Download Ubuntu, burn image to DVD, get started... Nope! The .iso comes with a rich 4.9 GByte around the corner! The old trick: "Content of the .iso burn" of course does not work! So debunk an old USB stick and make it bootable by means of startup media creator. The laptop takes half an eternity until it makes Ubuntu available as a live system. F.ckin "4.9 GByte! Really? The desktop in #4K? Screaming cramp! Off!!! On PC the website of Linux Mint controlled and - no shit sherlock! - Linux Mint 5 Debian Edition: Download, burn to DVD, install: NO 30 minutes! Ready! Only 2.9 GByte and everything you need on board! For this Canonical-Shi...[censored!] I have a special greeting here...
3 notes
·
View notes
Text
youtube
How to Boot Linux ISO Images Directly From Your Hard Disk Drive

Booting Linux ISO Images on your hard drive is useful for testing new versions of linux distributions without using up a CD or USB Flashdrive. It is quicker than using a Live USB Creator such as rufus, balena etcher or unetbootin.
This tutorial requires you have a Linux system installed on your hard drive example: Ubuntu. Your computer must be using the GRUB2 boot loader, which is a standard boot loader on most Linux systems.
Download the Linux ISO images files you want to use and store them on your Linux partition. GRUB2 should support most Linux systems. if you want to use them in a live environment without installing them to your hard drive, be sure to download the “live CD” versions of each Linux ISO. Many Linux-based bootable utility discs should also work.
#Linux#BootLinuxISO#OpenSource#Ubuntu#LinuxMint#KaliLinux#Fedora35#ManjaroLinux#open source#operating system#linux distribution#Youtube
25 notes
·
View notes
Text
How do I download Windows 10 on my Mac for free without Boot Camp?
Macs don't come with a Windows 10 installation disc, so if you want to install it on your Mac, you'll need to use Boot Camp. But there's a way to install Windows 10 without using Boot Camp: by downloading and installing it through the Windows 10 Creators Update. This is free, and it doesn't require any extra hardware or software.
How to install Windows 10 on a Mac using Boot Camp?
If you have a Mac and you want to install Windows 10 on it using Boot Camp, here's how to do it. First, make sure your Mac is running macOS High Sierra or later. If it isn't, you can update your Mac software by going to the App Store and clicking Updates in the toolbar.

Then, download and install the Windows 10 ISO file. Next, open Boot Camp Assistant, which is in the utility folder of your Applications folder. In Boot Camp Assistant, click Continue and then select "Create a Windows 10 installer disk." When the process is finished, insert the disk into your Mac. Restart your computer while holding down the Option key. In the Startup Manager window that appears, select the disk with the Windows logo on it and click Start-Up. After your computer has restarted, follow the instructions on-screen to complete the installation of Windows 10 and you know more details https://today4pc.com/ from this blog website.
Download the Windows 10 ISO file
Microsoft Windows 10 is the latest release of the Microsoft Windows operating system. Windows 10 ISO file is the official disc image of Windows 10 and can be used to install or reinstall Windows 10 on a PC. The ISO file can also be used to create a bootable USB drive or DVD.
Install Boot Camp drivers
If you're running a Mac and don't have Boot Camp installed, you can still download and install Windows 10 using a free tool called Parallels Desktop. This software will allow you to use your Mac's resources to run Windows 10, instead of having to use up all the RAM in your computer. After downloading and installing Parallels Desktop, open it up and click on the "Install Windows 10" button. You'll then be asked to create a new account or sign into an existing one.
Partition of your Mac's hard drive
Windows 10 is one of the most popular operating systems on the market. It is available both as a free download for individual users, and as part of a subscription package for businesses. If you want to install Windows 10 on your Mac without using Boot Camp, there are several methods you can use.
Start the Windows 10 installation process
Windows 10 is a personal computer operating system developed and released by Microsoft as part of the Windows NT family of operating systems.

It was announced in September 2014 and released in July 2015. Windows 10 introduces what Microsoft describes as "a new generation of Windows", with a focus on "enabling more personal computing experiences" across different devices.
Conclusion
In the conclusion of an article, the author typically summarizes the main points that were made and provide a final thought on the topic. In some cases, the conclusion may also provide readers with information on what they can do to learn more about the subject matter or how they can get involved in the discussion.
2 notes
·
View notes
Text
El Capitan Mac Os Bootable Usb

It was 2009 when Apple last released a new operating system on physical media. Things have proceeded remarkably smoothly since version 10.7 switched to download-only installers, but there are still good reasons to want an old, reliable USB stick. For instance, if you find yourself doing multiple installs, a USB drive may be faster than multiple downloads (especially if you use a USB 3.0 drive). Or maybe you need a recovery disk for older Macs that don't support the Internet Recovery feature. Whatever the reason, you're in luck, because it's not hard to make one.
El Capitan Mac Os Bootable Usb Drive
As with last year, there are two ways to get it done. There's the super easy way with the graphical user interface and the only slightly less easy way that requires some light Terminal use. Here's what you need to get started.
Bootable USB Stick - macOS X El Capitan 10.11 - Full OS Install, Reinstall, Recovery and Upgrade SANDISK USB FLASH DRIVE 2.0/3.1 - 16GB - 5 years warranty Latest certificate (expires These USBs are NOT produced by Apple.
How to Create a Bootable USB with macOS Installer OS X El Capitan Create bootable USB drive with Mac Disk Utility Now that you have the installation files ready on your Mac, you can move them to your USB drive for future use. To install macOS on an external hard drive: 1. Connect the USB to your MacBook 3. Part 4: Boot Mac from macOS USB Drive for Installation. Now remove the USB drive and insert it into the Mac computer. To boot from the disk, you need to hold down the option key when you hear the boot chime. This will take you to the Startup Disk Manager, where you should be able to see the USB drive.

To install El Capitan, make sure the USB drive is inserted into the computer, then restart the computer while holding the Option (alt) key on your keyboard. Wait until the Startup Manager pops up, then select the 'OS X Base System' volume. Alternatively, you can just hold down the C key while starting up to boot directly into the USB drive. Now Create bootable USB for Mac OS El Capitan on Windows. Now it is the time to create a bootable USB installer using TransMac, To install Mac OS El Capitan on VirtualBox on Windows 10 you need a Bootable USB here you will learn the steps of creating a bootable USB installer for Mac OS El Capitan on Windows.
A Mac that you have administrator access to, duh. We've created El Capitan USB stick from both Yosemite and El Capitan, but your experience with other versions may vary.
An 8GB or larger USB flash drive or an 8GB or larger partition on some other kind of external drive. For newer Macs, use a USB 3.0 drive—it makes things significantly faster.
The OS X 10.11 El Capitan installer from the Mac App Store in your Applications folder. The installer will delete itself when you install the operating system, but it can be re-downloaded if necessary.
If you want a GUI, you need the latest version of Diskmaker X app. Version 5 is the one with official El Capitan support.
Diskmaker X is free to download, but the creator accepts donations if you want to support his efforts.
The easy way
Once you've obtained all of the necessary materials, connect the USB drive to your Mac and run the Diskmaker X app. The app will offer to make installers for OS X 10.9, 10.10, and 10.11, and it should run on OS X versions all the way back to 10.7—support for 10.6 was dropped in the most recent release.
Advertisement
Diskmaker X has actually been around since the days of OS X 10.7 (it was previously known as Lion Diskmaker), and it's still the easiest GUI-based way to go without intimidating newbies. If you're comfortable with the command line, it's still possible to create a disk manually using a Terminal command, which we'll cover momentarily.
Select OS X 10.11 in Diskmaker X, and the app should automatically find the copy you've downloaded to your Applications folder. It will then ask you where you want to copy the files—click 'An 8GB USB thumb drive' if you have a single drive to use or 'Another kind of disk' to use a partition on a larger drive or some other kind of external drive. Choose your disk (or partition) from the list that appears, verify that you'd like to have the disk (or partition) erased, and then wait for the files to copy over. The process is outlined in screenshots above.
The only slightly less-easy way
If you don't want to use Diskmaker X, Apple has actually included a terminal command that can create an install disk for you. Assuming that you have the OS X El Capitan installer in your Applications folder and you have a Mac OS X Extended (Journaled)-formatted USB drive named 'Untitled' mounted on the system, you can create an El Capitan install drive by typing the following command into the Terminal.
sudo /Applications/Install OS X El Capitan.app/Contents/Resources/createinstallmedia --volume /Volumes/Untitled --applicationpath /Applications/Install OS X El Capitan.app --nointeraction
Install Mac Os On Usb
The command will erase the disk and copy the install files over. Give it some time, and your volume will soon be loaded up with not just the OS X installer but also an external recovery partition that may come in handy if your hard drive dies and you're away from an Internet connection.
Whichever method you use, you should be able to boot from your new USB drive either by changing the default Startup Disk in System Preferences or by holding down the Option key at boot and selecting the drive. Once booted, you'll be able to install or upgrade El Capitan as you normally would.
Summary
How to make a bootable USB drive on Linux Mint (19.3) to allow you to install Mac OS X El Capitan on a MacBook with broken or corrupted recovery mode.
Background
I was recently given a 2011 MacBook Pro that had been “well-loved” and was therefore a mess of missing applications, ghost files and generally slow-as-hell. Since there wasn’t much worth saving I wiped it and initiated recovery mode in order to re-install OS X (El Capitan).
Having recently fixed a busted MacBook Air I had learned a bit about Recovery Mode (hold Command+R whilst pushing the Power button and release a few seconds after the machine wakes up). I tried that with this machine, and upon hitting “Reinstall MacOS X” was greeted with a prompt telling me it would take -2,148,456,222 days and 8 hours (an uncaught buffer overflow, me thinks). After about 30 seconds, a window pops up saying “Can’t download the additional components needed to install Mac OS X” and the installation gives up. The detailed error log says “Chunk validation failed, retrying” about 1000 times and eventually gives up altogether.
Further investigation suggests this may be something to do with security certificates having expired and hence the machine not being able to download the necessary files from Apple’s servers, but it seems the error can appear for all sorts of reasons. I also tried Internet Recovery (Command+Option+R) but that gave exactly the same error (and would also only have installed OS X Mountain Lion).
I then turned to attempting to make a bootable USB stick of OS X El Capitan from an image downloaded from Apple. I use Linux Mint on my main laptop and that was all I had available. Apple seem to assume everybody has a spare MacBook from which to create a bootable USB so they provide absolutely no documentation to help with this. I also couldn’t find a single guide online that worked from start to finish, so here I summarise what needs to be done.

Steps
As usual, this is all at your own risk 🙂
First you need to go to Apple’s OS Download Page and (step 4) get ahold of “InstallMacOSX.dmg” for El-Capitan. It’s a 6GB file so it might take a ‘lil while. You will also need to find a USB drive with at least 8GB capacity, and make sure it’s blank. The format doesn’t matter, because this procedure will format it correctly.
(In total you will need to use about 15-18GB of disk space by the time you’ve done all the extracting necessary, which shouldn’t be a problem for most computers but it was a challenge for my laptop with it’s 128GB SSD and dual boot Windows/Linux!)
Then you need to get a program called ‘dmg2img’
You can then extract the DMG
Now double click the .img file to mount it. In there is a InstallMaxOSX.pkg file. This requires a utility called “xar” to extract, which can be installed with these instructions (from https://www.oueta.com/linux/extract-pkg-and-mpkg-files-with-xar-on-linux/)

Then build and install with
Now you can extract the .pkg file. It will extract to the current working directory
Create Bootable Usb For Mac Os X El Capitan
Now, within the extracted files you will find something called InstallESD.dmg. This actually contains all the interesting boot files, but it isn’t a pristine image, so we can’t just burn it to a USB. Thankfully, a script exists to convert this DMG to a bootable usb, and it’s available here. It takes the DMG and writes everything directly to the USB in the right place.
El Capitan Macos Bootable Usb
ONE CAVEAT: When I ran this script on my InstallESD.dmg, it crashed because it didn’t recognise the checksum. I think this is because Apple updates the dmg’s anytime there is a security update for El Capitan so the checksum list isn’t updated. All I did was delete the checksum check from the script above. Essentially, just open the script and delete this section
Mac Os X El Capitan Dmg Bootable Usb
Once I had done this, I ran the script with my USB connected (/dev/sdb for me, but CHECK YOURSELF with fdisk or similar) and after quite a while it finished copying.
I plugged the USB into the MacBook, and opened the startup menu by holding down Option whilst pushing the power button. This gave me the choice of booting from EFI, or choosing a WiFi network. Click on the EFI, and then follow the prompts to install OS X from the USB drive!
When you’re done, you may need to use Parted or a similar utility to re-format your USB as a normal drive again.
1 note
·
View note
Text
Live_USB
One of the quickest strategy, for getting going with Kali Linux is to run it "live" from a USB drive. This technique enjoys a few benefits:It's non-ruinous - it rolls out no improvements to the host framework's hard drive or introduced OS, and to return to ordinary activities, you essentially eliminate the Kali Live USB drive and restart the framework
It's convenient - you Live_USB can convey Kali Linux in your pocket and make them run in minutes on an accessible framework.It's adaptable - you can move your own custom Kali Linux ISO picture and put it onto a USB drive utilizing similar strategies.It's conceivably industrious - with a cycle of additional work, you can design your Kali Linux "live" USB drive to have determined capacity, so the information you gather is saved across reboots
To do this, we first need to make a bootable USB drive which has been set up from an ISO picture of Kali Linux.The points of interest of this strategy will fluctuate contingent upon whether you're doing it on a Linux, macOS/OS X, or Windows framework.
What You'll Need
A confirmed duplicate of the suitable ISO picture of the most recent Kali assemble picture for the framework you'll be running it on.
In case you're running under Windows, there isn't one instrument that is viewed as the general best for imaging. We suggest Etcher (installer or versatile) as it is easier to utilize, anyway Rufus is another well known choice with its development alternatives. In the event that one doesn't work for you, consider the other.A USB drive, 8GB or bigger (Systems with an immediate SD card opening can utilize a SD card with comparable limit. The methodology is indistinguishable.)
Making a Bootable Kali USB Drive on Windows (Etcher)Attachment your USB crash into an accessible USB port on your Windows PC, note which drive designator (for example "G:\") it utilizes once it mounts, and dispatch Etcher.Press Flash from record, and find the Kali Linux ISO document to be imaged with.Press Select objective and check the rundown of alternatives for the USB drive (for example "G:\", the production and size).Snap the Flash! button once prepared.When Etcher cautions you that the picture has been streaked, you can securely eliminate the USB drive and continue to boot into Kali with it.
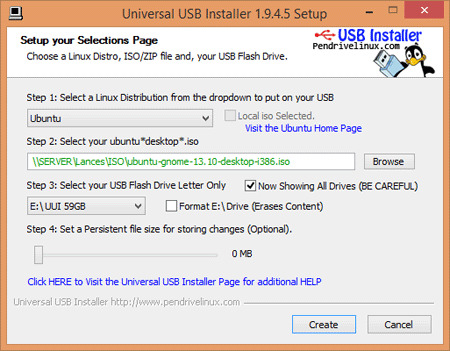
All inclusive USB Installer also known as UUI is a Live Linux Bootable USB Creator. It permits clients to make a USB Boot from a Linux appropriation, Windows Installer, Windows To Go, Antivirus Scanner, Disk Cloning Software or whatever other System Tool that can be put on a blaze drive. The product is not difficult to utilize; Simply pick your dispersion from the rundown, peruse to the ISO record, select your objective blaze drive, and afterward click Create. Once completed, you ought to have a prepared to run Bootable Flash Drive containing the working framework or instrument you chose.
1 note
·
View note
Photo


07.06.23
Linux Laptop Install 6
After trying Ubuntu 22.04 on this laptop, I decided to try a different distro. I chose to install Linux Mint 21.1 Cinnamon desktop edition.
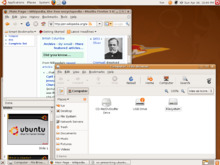
Linux Mint is a Linux distribution based on Ubuntu (which is in turn based on Debian), bundled with a variety of free and open-source applications. It is available with a range of desktop environments including Cinnamon, MATE and XFCE. It uses the Debian package manager and optionally Flatpak to install applications. The Linux Mint project was created by Clément Lefèbvre. See Wikipedia for more information: https://en.wikipedia.org/wiki/Linux_Mint I downloaded the Mint ISO file from: https://linuxmint.com/download.php I created a bootable Linux Mint USB stick using Ubuntu's Start-up Disk Creator. I then used the USB stick to install Linux Mint replacing the previous Ubuntu installation. I decided to name the laptop ‘Manfred’ during the early part of the set-up.
The installation went very smoothly and once it had installed, I used the Update Manager to check for updates. I checked the Driver Manager to see if there were any required drivers for the laptop. It found that no new drivers were needed.
3 notes
·
View notes
Text
Create Bootable Usb On Mac For Ubuntu

Create Bootable Usb Mac Os
Create Bootable Usb For Ubuntu On Mac
Rufus- Open source USB bootable creator. I just cannot ignore Rufus when we talk about the.
The steps to create a bootable USB drive on Mac are very simple when using this powerful utility. Once the software has been downloaded and installed on your Mac, simply insert the drive into an available USB port. When you launch the application, you will see that your drive has automatically been identified.
Create Bootable Usb Mac Os


How to create a bootable MacOS USB. From Linux you can read and write Apple-compatible HFS+ disk images. By creating an El Capitan recovery disc, you can then create an installation disc, and then access the App Store for other free installers, such as Catalina and Mojave.
With a bootable Ubuntu USB stick, you can:
Install or upgrade Ubuntu
Test out the Ubuntu desktop experience without touching your PC configuration
Boot into Ubuntu on a borrowed machine or from an internet cafe
Use tools installed by default on the USB stick to repair or fix a broken configuration
Creating a bootable Ubuntu USB stick from Microsoft Windows is very simple and we’re going to cover the process in the next few steps.

Create Bootable Usb For Ubuntu On Mac
Alternatively, we also have tutorials to help you create a bootable USB stick from both Ubuntu and Apple macOS.
Create Bootable Usb On Mac For Ubuntu
1 note
·
View note
Text
LinunLive USB Creator To Run Linux On PC
LinunLive USB Creator To Run Linux On PC
LinuxLive USB Creator is a free and open-source software for Windows. It will help you in your journey of discovery with Linux. For you, LiLi creates portable, bootable, and virtualized USB stick running Linux.
LinuxLive USB Creator helps you rapidly and effortlessly build for Linux bootable USB creatorsystems for a plethora of Linux distributions available on the market. Just to name a few of…
View On WordPress
#Bootable USB#Bootable USB Creator#Create Bootable USB#generate USB Key#Linux Live USB Creator#LinuxLive USB Creator For PC#Live USB Key#USB Creator#USB Key
0 notes
Text
Create a Bootable Linux Drive Through Lili USB Creator
Check out this new post on WikiProgramming
Create a Bootable Linux Drive Through Lili USB Creator
Thanks to the cheaper technology is not surprising that many of us have more than one flash drive at home laughing not knowing what to do very well with him. We buy more capacity pen drives under are cheaper and no longer use because they stay there. An interesting way to use him there is […]
Read more: http://bit.ly/31ZxhjR #Linux
1 note
·
View note
Text
Bootable USB Creator 2.01 [Latest]
https://weacrack.com/?p=16607 Bootable USB Creator 2.01 [Latest] - https://weacrack.com/?p=16607 -
0 notes
Text

2. Fedora Media Writer
Fedora Media Writer is particularly known to help you create live USB for Fedora Linux distribution. It can download the ISO file for you if you do not have it already.
It is also an excellent utility to fix your USB drive if you cannot format it for an issue caused by other bootable USB creation tools.
Fret not, you can also select a custom image (apart from Fedora Linux) to create a bootable USB.
You can find the Flatpak package on Flathub for the latest version on any Linux distribution. Refer to our Flatpak guide if you’re new to this.
Fedora Media Writer
3. Startup Disk Creator
If you are using Ubuntu on your system, you already have a bootable USB creator pre-installed, i.e., Startup Disk Creator.
You can use it to select the desired ISO file (preferably any Ubuntu version) and choose the target USB device to proceed.
Once you confirm the action, it will proceed with writing the data to complete the bootable drive.
4. SUSE Studio Imagewriter
SUSE Studio Imagewriter is a simple live USB creator.
I did not find it in the software center for Ubuntu, but it was available in the community repositories (Manjaro) and AUR. So, you can take a look at it if it is available for your Linux distribution.
SUSE Studio Imagewriter
0 notes