#Configuring Shared Storage
Explore tagged Tumblr posts
Visit Tumblr Blog
Explore Tumblr blogs with no restrictions, modern design and the best experience.
Last Seen Tumblr Blogs


Fun Fact
Mobile US users spent an average of 115.8 minutes on Tumblr app monthly.
Text
vSphere cluster Shared Storage Configuration with StarWind SAN and NAS
vSphere cluster Shared Storage Configuration with StarWind SAN @vexpert #homelab #vmwarecommunities #vSphereClusterConfiguration #StarWindSAN&NAS #VMwarevSphereClient #SharedStorageSystem #HighAvailabilityvSphere #ESXiHostManagement #vSphereHA&DRS
A vSphere Cluster is a fundamental building block in a VMware environment allowing organizations to configure powerful virtualized environments for running virtual machines and containers. A properly configured vSphere cluster, incorporating multiple ESXi hosts, ensures service continuity and performance for users, providing them access to many features and resources. Shared storage is a vital…

View On WordPress
#Configuring Shared Storage#ESXi Host Management#High Availability vSphere#Load Balancing in vSphere#Shared Storage System#StarWind SAN & NAS#VMware Cluster Resources#VMware vSphere Client#vSphere Cluster Configuration#vSphere HA & DRS
0 notes
Text
How I ditched streaming services and learned to love Linux: A step-by-step guide to building your very own personal media streaming server (V2.0: REVISED AND EXPANDED EDITION)
This is a revised, corrected and expanded version of my tutorial on setting up a personal media server that previously appeared on my old blog (donjuan-auxenfers). I expect that that post is still making the rounds (hopefully with my addendum on modifying group share permissions in Ubuntu to circumvent 0x8007003B "Unexpected Network Error" messages in Windows 10/11 when transferring files) but I have no way of checking. Anyway this new revised version of the tutorial corrects one or two small errors I discovered when rereading what I wrote, adds links to all products mentioned and is just more polished generally. I also expanded it a bit, pointing more adventurous users toward programs such as Sonarr/Radarr/Lidarr and Overseerr which can be used for automating user requests and media collection.
So then, what is this tutorial? This is a tutorial on how to build and set up your own personal media server using Ubuntu as an operating system and Plex (or Jellyfin) to not only manage your media, but to also stream that media to your devices both at home and abroad anywhere in the world where you have an internet connection. Its intent is to show you how building a personal media server and stuffing it full of films, TV, and music that you acquired through indiscriminate and voracious media piracy various legal methods will free you to completely ditch paid streaming services. No more will you have to pay for Disney+, Netflix, HBOMAX, Hulu, Amazon Prime, Peacock, CBS All Access, Paramount+, Crave or any other streaming service that is not named Criterion Channel. Instead whenever you want to watch your favourite films and television shows, you’ll have your own personal service that only features things that you want to see, with files that you have control over. And for music fans out there, both Jellyfin and Plex support music streaming, meaning you can even ditch music streaming services. Goodbye Spotify, Youtube Music, Tidal and Apple Music, welcome back unreasonably large MP3 (or FLAC) collections.
On the hardware front, I’m going to offer a few options catered towards different budgets and media library sizes. The cost of getting a media server up and running using this guide will cost you anywhere from $450 CAD/$325 USD at the low end to $1500 CAD/$1100 USD at the high end (it could go higher). My server was priced closer to the higher figure, but I went and got a lot more storage than most people need. If that seems like a little much, consider for a moment, do you have a roommate, a close friend, or a family member who would be willing to chip in a few bucks towards your little project provided they get access? Well that's how I funded my server. It might also be worth thinking about the cost over time, i.e. how much you spend yearly on subscriptions vs. a one time cost of setting up a server. Additionally there's just the joy of being able to scream "fuck you" at all those show cancelling, library deleting, hedge fund vampire CEOs who run the studios through denying them your money. Drive a stake through David Zaslav's heart.
On the software side I will walk you step-by-step through installing Ubuntu as your server's operating system, configuring your storage as a RAIDz array with ZFS, sharing your zpool to Windows with Samba, running a remote connection between your server and your Windows PC, and then a little about started with Plex/Jellyfin. Every terminal command you will need to input will be provided, and I even share a custom #bash script that will make used vs. available drive space on your server display correctly in Windows.
If you have a different preferred flavour of Linux (Arch, Manjaro, Redhat, Fedora, Mint, OpenSUSE, CentOS, Slackware etc. et. al.) and are aching to tell me off for being basic and using Ubuntu, this tutorial is not for you. The sort of person with a preferred Linux distro is the sort of person who can do this sort of thing in their sleep. Also I don't care. This tutorial is intended for the average home computer user. This is also why we’re not using a more exotic home server solution like running everything through Docker Containers and managing it through a dashboard like Homarr or Heimdall. While such solutions are fantastic and can be very easy to maintain once you have it all set up, wrapping your brain around Docker is a whole thing in and of itself. If you do follow this tutorial and had fun putting everything together, then I would encourage you to return in a year’s time, do your research and set up everything with Docker Containers.
Lastly, this is a tutorial aimed at Windows users. Although I was a daily user of OS X for many years (roughly 2008-2023) and I've dabbled quite a bit with various Linux distributions (mostly Ubuntu and Manjaro), my primary OS these days is Windows 11. Many things in this tutorial will still be applicable to Mac users, but others (e.g. setting up shares) you will have to look up for yourself. I doubt it would be difficult to do so.
Nothing in this tutorial will require feats of computing expertise. All you will need is a basic computer literacy (i.e. an understanding of what a filesystem and directory are, and a degree of comfort in the settings menu) and a willingness to learn a thing or two. While this guide may look overwhelming at first glance, it is only because I want to be as thorough as possible. I want you to understand exactly what it is you're doing, I don't want you to just blindly follow steps. If you half-way know what you’re doing, you will be much better prepared if you ever need to troubleshoot.
Honestly, once you have all the hardware ready it shouldn't take more than an afternoon or two to get everything up and running.
(This tutorial is just shy of seven thousand words long so the rest is under the cut.)
Step One: Choosing Your Hardware
Linux is a light weight operating system, depending on the distribution there's close to no bloat. There are recent distributions available at this very moment that will run perfectly fine on a fourteen year old i3 with 4GB of RAM. Moreover, running Plex or Jellyfin isn’t resource intensive in 90% of use cases. All this is to say, we don’t require an expensive or powerful computer. This means that there are several options available: 1) use an old computer you already have sitting around but aren't using 2) buy a used workstation from eBay, or what I believe to be the best option, 3) order an N100 Mini-PC from AliExpress or Amazon.
Note: If you already have an old PC sitting around that you’ve decided to use, fantastic, move on to the next step.
When weighing your options, keep a few things in mind: the number of people you expect to be streaming simultaneously at any one time, the resolution and bitrate of your media library (4k video takes a lot more processing power than 1080p) and most importantly, how many of those clients are going to be transcoding at any one time. Transcoding is what happens when the playback device does not natively support direct playback of the source file. This can happen for a number of reasons, such as the playback device's native resolution being lower than the file's internal resolution, or because the source file was encoded in a video codec unsupported by the playback device.
Ideally we want any transcoding to be performed by hardware. This means we should be looking for a computer with an Intel processor with Quick Sync. Quick Sync is a dedicated core on the CPU die designed specifically for video encoding and decoding. This specialized hardware makes for highly efficient transcoding both in terms of processing overhead and power draw. Without these Quick Sync cores, transcoding must be brute forced through software. This takes up much more of a CPU’s processing power and requires much more energy. But not all Quick Sync cores are created equal and you need to keep this in mind if you've decided either to use an old computer or to shop for a used workstation on eBay
Any Intel processor from second generation Core (Sandy Bridge circa 2011) onward has Quick Sync cores. It's not until 6th gen (Skylake), however, that the cores support the H.265 HEVC codec. Intel’s 10th gen (Comet Lake) processors introduce support for 10bit HEVC and HDR tone mapping. And the recent 12th gen (Alder Lake) processors brought with them hardware AV1 decoding. As an example, while an 8th gen (Kaby Lake) i5-8500 will be able to hardware transcode a H.265 encoded file, it will fall back to software transcoding if given a 10bit H.265 file. If you’ve decided to use that old PC or to look on eBay for an old Dell Optiplex keep this in mind.
Note 1: The price of old workstations varies wildly and fluctuates frequently. If you get lucky and go shopping shortly after a workplace has liquidated a large number of their workstations you can find deals for as low as $100 on a barebones system, but generally an i5-8500 workstation with 16gb RAM will cost you somewhere in the area of $260 CAD/$200 USD.
Note 2: The AMD equivalent to Quick Sync is called Video Core Next, and while it's fine, it's not as efficient and not as mature a technology. It was only introduced with the first generation Ryzen CPUs and it only got decent with their newest CPUs, we want something cheap.
Alternatively you could forgo having to keep track of what generation of CPU is equipped with Quick Sync cores that feature support for which codecs, and just buy an N100 mini-PC. For around the same price or less of a used workstation you can pick up a mini-PC with an Intel N100 processor. The N100 is a four-core processor based on the 12th gen Alder Lake architecture and comes equipped with the latest revision of the Quick Sync cores. These little processors offer astounding hardware transcoding capabilities for their size and power draw. Otherwise they perform equivalent to an i5-6500, which isn't a terrible CPU. A friend of mine uses an N100 machine as a dedicated retro emulation gaming system and it does everything up to 6th generation consoles just fine. The N100 is also a remarkably efficient chip, it sips power. In fact, the difference between running one of these and an old workstation could work out to hundreds of dollars a year in energy bills depending on where you live.
You can find these Mini-PCs all over Amazon or for a little cheaper on AliExpress. They range in price from $170 CAD/$125 USD for a no name N100 with 8GB RAM to $280 CAD/$200 USD for a Beelink S12 Pro with 16GB RAM. The brand doesn't really matter, they're all coming from the same three factories in Shenzen, go for whichever one fits your budget or has features you want. 8GB RAM should be enough, Linux is lightweight and Plex only calls for 2GB RAM. 16GB RAM might result in a slightly snappier experience, especially with ZFS. A 256GB SSD is more than enough for what we need as a boot drive, but going for a bigger drive might allow you to get away with things like creating preview thumbnails for Plex, but it’s up to you and your budget.
The Mini-PC I wound up buying was a Firebat AK2 Plus with 8GB RAM and a 256GB SSD. It looks like this:

Note: Be forewarned that if you decide to order a Mini-PC from AliExpress, note the type of power adapter it ships with. The mini-PC I bought came with an EU power adapter and I had to supply my own North American power supply. Thankfully this is a minor issue as barrel plug 30W/12V/2.5A power adapters are easy to find and can be had for $10.
Step Two: Choosing Your Storage
Storage is the most important part of our build. It is also the most expensive. Thankfully it’s also the most easily upgrade-able down the line.
For people with a smaller media collection (4TB to 8TB), a more limited budget, or who will only ever have two simultaneous streams running, I would say that the most economical course of action would be to buy a USB 3.0 8TB external HDD. Something like this one from Western Digital or this one from Seagate. One of these external drives will cost you in the area of $200 CAD/$140 USD. Down the line you could add a second external drive or replace it with a multi-drive RAIDz set up such as detailed below.
If a single external drive the path for you, move on to step three.
For people with larger media libraries (12TB+), who prefer media in 4k, or care who about data redundancy, the answer is a RAID array featuring multiple HDDs in an enclosure.
Note: If you are using an old PC or used workstatiom as your server and have the room for at least three 3.5" drives, and as many open SATA ports on your mother board you won't need an enclosure, just install the drives into the case. If your old computer is a laptop or doesn’t have room for more internal drives, then I would suggest an enclosure.
The minimum number of drives needed to run a RAIDz array is three, and seeing as RAIDz is what we will be using, you should be looking for an enclosure with three to five bays. I think that four disks makes for a good compromise for a home server. Regardless of whether you go for a three, four, or five bay enclosure, do be aware that in a RAIDz array the space equivalent of one of the drives will be dedicated to parity at a ratio expressed by the equation 1 − 1/n i.e. in a four bay enclosure equipped with four 12TB drives, if we configured our drives in a RAIDz1 array we would be left with a total of 36TB of usable space (48TB raw size). The reason for why we might sacrifice storage space in such a manner will be explained in the next section.
A four bay enclosure will cost somewhere in the area of $200 CDN/$140 USD. You don't need anything fancy, we don't need anything with hardware RAID controls (RAIDz is done entirely in software) or even USB-C. An enclosure with USB 3.0 will perform perfectly fine. Don’t worry too much about USB speed bottlenecks. A mechanical HDD will be limited by the speed of its mechanism long before before it will be limited by the speed of a USB connection. I've seen decent looking enclosures from TerraMaster, Yottamaster, Mediasonic and Sabrent.
When it comes to selecting the drives, as of this writing, the best value (dollar per gigabyte) are those in the range of 12TB to 20TB. I settled on 12TB drives myself. If 12TB to 20TB drives are out of your budget, go with what you can afford, or look into refurbished drives. I'm not sold on the idea of refurbished drives but many people swear by them.
When shopping for harddrives, search for drives designed specifically for NAS use. Drives designed for NAS use typically have better vibration dampening and are designed to be active 24/7. They will also often make use of CMR (conventional magnetic recording) as opposed to SMR (shingled magnetic recording). This nets them a sizable read/write performance bump over typical desktop drives. Seagate Ironwolf and Toshiba NAS are both well regarded brands when it comes to NAS drives. I would avoid Western Digital Red drives at this time. WD Reds were a go to recommendation up until earlier this year when it was revealed that they feature firmware that will throw up false SMART warnings telling you to replace the drive at the three year mark quite often when there is nothing at all wrong with that drive. It will likely even be good for another six, seven, or more years.

Step Three: Installing Linux
For this step you will need a USB thumbdrive of at least 6GB in capacity, an .ISO of Ubuntu, and a way to make that thumbdrive bootable media.
First download a copy of Ubuntu desktop (for best performance we could download the Server release, but for new Linux users I would recommend against the server release. The server release is strictly command line interface only, and having a GUI is very helpful for most people. Not many people are wholly comfortable doing everything through the command line, I'm certainly not one of them, and I grew up with DOS 6.0. 22.04.3 Jammy Jellyfish is the current Long Term Service release, this is the one to get.
Download the .ISO and then download and install balenaEtcher on your Windows PC. BalenaEtcher is an easy to use program for creating bootable media, you simply insert your thumbdrive, select the .ISO you just downloaded, and it will create a bootable installation media for you.
Once you've made a bootable media and you've got your Mini-PC (or you old PC/used workstation) in front of you, hook it directly into your router with an ethernet cable, and then plug in the HDD enclosure, a monitor, a mouse and a keyboard. Now turn that sucker on and hit whatever key gets you into the BIOS (typically ESC, DEL or F2). If you’re using a Mini-PC check to make sure that the P1 and P2 power limits are set correctly, my N100's P1 limit was set at 10W, a full 20W under the chip's power limit. Also make sure that the RAM is running at the advertised speed. My Mini-PC’s RAM was set at 2333Mhz out of the box when it should have been 3200Mhz. Once you’ve done that, key over to the boot order and place the USB drive first in the boot order. Then save the BIOS settings and restart.
After you restart you’ll be greeted by Ubuntu's installation screen. Installing Ubuntu is really straight forward, select the "minimal" installation option, as we won't need anything on this computer except for a browser (Ubuntu comes preinstalled with Firefox) and Plex Media Server/Jellyfin Media Server. Also remember to delete and reformat that Windows partition! We don't need it.
Step Four: Installing ZFS and Setting Up the RAIDz Array
Note: If you opted for just a single external HDD skip this step and move onto setting up a Samba share.
Once Ubuntu is installed it's time to configure our storage by installing ZFS to build our RAIDz array. ZFS is a "next-gen" file system that is both massively flexible and massively complex. It's capable of snapshot backup, self healing error correction, ZFS pools can be configured with drives operating in a supplemental manner alongside the storage vdev (e.g. fast cache, dedicated secondary intent log, hot swap spares etc.). It's also a file system very amenable to fine tuning. Block and sector size are adjustable to use case and you're afforded the option of different methods of inline compression. If you'd like a very detailed overview and explanation of its various features and tips on tuning a ZFS array check out these articles from Ars Technica. For now we're going to ignore all these features and keep it simple, we're going to pull our drives together into a single vdev running in RAIDz which will be the entirety of our zpool, no fancy cache drive or SLOG.
Open up the terminal and type the following commands:
sudo apt update
then
sudo apt install zfsutils-linux
This will install the ZFS utility. Verify that it's installed with the following command:
zfs --version
Now, it's time to check that the HDDs we have in the enclosure are healthy, running, and recognized. We also want to find out their device IDs and take note of them:
sudo fdisk -1
Note: You might be wondering why some of these commands require "sudo" in front of them while others don't. "Sudo" is short for "super user do”. When and where "sudo" is used has to do with the way permissions are set up in Linux. Only the "root" user has the access level to perform certain tasks in Linux. As a matter of security and safety regular user accounts are kept separate from the "root" user. It's not advised (or even possible) to boot into Linux as "root" with most modern distributions. Instead by using "sudo" our regular user account is temporarily given the power to do otherwise forbidden things. Don't worry about it too much at this stage, but if you want to know more check out this introduction.
If everything is working you should get a list of the various drives detected along with their device IDs which will look like this: /dev/sdc. You can also check the device IDs of the drives by opening the disk utility app. Jot these IDs down as we'll need them for our next step, creating our RAIDz array.
RAIDz is similar to RAID-5 in that instead of striping your data over multiple disks, exchanging redundancy for speed and available space (RAID-0), or mirroring your data writing by two copies of every piece (RAID-1), it instead writes parity blocks across the disks in addition to striping, this provides a balance of speed, redundancy and available space. If a single drive fails, the parity blocks on the working drives can be used to reconstruct the entire array as soon as a replacement drive is added.
Additionally, RAIDz improves over some of the common RAID-5 flaws. It's more resilient and capable of self healing, as it is capable of automatically checking for errors against a checksum. It's more forgiving in this way, and it's likely that you'll be able to detect when a drive is dying well before it fails. A RAIDz array can survive the loss of any one drive.
Note: While RAIDz is indeed resilient, if a second drive fails during the rebuild, you're fucked. Always keep backups of things you can't afford to lose. This tutorial, however, is not about proper data safety.
To create the pool, use the following command:
sudo zpool create "zpoolnamehere" raidz "device IDs of drives we're putting in the pool"
For example, let's creatively name our zpool "mypool". This poil will consist of four drives which have the device IDs: sdb, sdc, sdd, and sde. The resulting command will look like this:
sudo zpool create mypool raidz /dev/sdb /dev/sdc /dev/sdd /dev/sde
If as an example you bought five HDDs and decided you wanted more redundancy dedicating two drive to this purpose, we would modify the command to "raidz2" and the command would look something like the following:
sudo zpool create mypool raidz2 /dev/sdb /dev/sdc /dev/sdd /dev/sde /dev/sdf
An array configured like this is known as RAIDz2 and is able to survive two disk failures.
Once the zpool has been created, we can check its status with the command:
zpool status
Or more concisely with:
zpool list
The nice thing about ZFS as a file system is that a pool is ready to go immediately after creation. If we were to set up a traditional RAID-5 array using mbam, we'd have to sit through a potentially hours long process of reformatting and partitioning the drives. Instead we're ready to go right out the gates.
The zpool should be automatically mounted to the filesystem after creation, check on that with the following:
df -hT | grep zfs
Note: If your computer ever loses power suddenly, say in event of a power outage, you may have to re-import your pool. In most cases, ZFS will automatically import and mount your pool, but if it doesn’t and you can't see your array, simply open the terminal and type sudo zpool import -a.
By default a zpool is mounted at /"zpoolname". The pool should be under our ownership but let's make sure with the following command:
sudo chown -R "yourlinuxusername" /"zpoolname"
Note: Changing file and folder ownership with "chown" and file and folder permissions with "chmod" are essential commands for much of the admin work in Linux, but we won't be dealing with them extensively in this guide. If you'd like a deeper tutorial and explanation you can check out these two guides: chown and chmod.

You can access the zpool file system through the GUI by opening the file manager (the Ubuntu default file manager is called Nautilus) and clicking on "Other Locations" on the sidebar, then entering the Ubuntu file system and looking for a folder with your pool's name. Bookmark the folder on the sidebar for easy access.

Your storage pool is now ready to go. Assuming that we already have some files on our Windows PC we want to copy to over, we're going to need to install and configure Samba to make the pool accessible in Windows.
Step Five: Setting Up Samba/Sharing
Samba is what's going to let us share the zpool with Windows and allow us to write to it from our Windows machine. First let's install Samba with the following commands:
sudo apt-get update
then
sudo apt-get install samba
Next create a password for Samba.
sudo smbpswd -a "yourlinuxusername"
It will then prompt you to create a password. Just reuse your Ubuntu user password for simplicity's sake.
Note: if you're using just a single external drive replace the zpool location in the following commands with wherever it is your external drive is mounted, for more information see this guide on mounting an external drive in Ubuntu.
After you've created a password we're going to create a shareable folder in our pool with this command
mkdir /"zpoolname"/"foldername"
Now we're going to open the smb.conf file and make that folder shareable. Enter the following command.
sudo nano /etc/samba/smb.conf
This will open the .conf file in nano, the terminal text editor program. Now at the end of smb.conf add the following entry:
["foldername"]
path = /"zpoolname"/"foldername"
available = yes
valid users = "yourlinuxusername"
read only = no
writable = yes
browseable = yes
guest ok = no
Ensure that there are no line breaks between the lines and that there's a space on both sides of the equals sign. Our next step is to allow Samba traffic through the firewall:
sudo ufw allow samba
Finally restart the Samba service:
sudo systemctl restart smbd
At this point we'll be able to access to the pool, browse its contents, and read and write to it from Windows. But there's one more thing left to do, Windows doesn't natively support the ZFS file systems and will read the used/available/total space in the pool incorrectly. Windows will read available space as total drive space, and all used space as null. This leads to Windows only displaying a dwindling amount of "available" space as the drives are filled. We can fix this! Functionally this doesn't actually matter, we can still write and read to and from the disk, it just makes it difficult to tell at a glance the proportion of used/available space, so this is an optional step but one I recommend (this step is also unnecessary if you're just using a single external drive). What we're going to do is write a little shell script in #bash. Open nano with the terminal with the command:
nano
Now insert the following code:
#!/bin/bash CUR_PATH=`pwd` ZFS_CHECK_OUTPUT=$(zfs get type $CUR_PATH 2>&1 > /dev/null) > /dev/null if [[ $ZFS_CHECK_OUTPUT == *not\ a\ ZFS* ]] then IS_ZFS=false else IS_ZFS=true fi if [[ $IS_ZFS = false ]] then df $CUR_PATH | tail -1 | awk '{print $2" "$4}' else USED=$((`zfs get -o value -Hp used $CUR_PATH` / 1024)) > /dev/null AVAIL=$((`zfs get -o value -Hp available $CUR_PATH` / 1024)) > /dev/null TOTAL=$(($USED+$AVAIL)) > /dev/null echo $TOTAL $AVAIL fi
Save the script as "dfree.sh" to /home/"yourlinuxusername" then change the ownership of the file to make it executable with this command:
sudo chmod 774 dfree.sh
Now open smb.conf with sudo again:
sudo nano /etc/samba/smb.conf
Now add this entry to the top of the configuration file to direct Samba to use the results of our script when Windows asks for a reading on the pool's used/available/total drive space:
[global]
dfree command = /home/"yourlinuxusername"/dfree.sh
Save the changes to smb.conf and then restart Samba again with the terminal:
sudo systemctl restart smbd
Now there’s one more thing we need to do to fully set up the Samba share, and that’s to modify a hidden group permission. In the terminal window type the following command:
usermod -a -G sambashare “yourlinuxusername”
Then restart samba again:
sudo systemctl restart smbd
If we don’t do this last step, everything will appear to work fine, and you will even be able to see and map the drive from Windows and even begin transferring files, but you'd soon run into a lot of frustration. As every ten minutes or so a file would fail to transfer and you would get a window announcing “0x8007003B Unexpected Network Error”. This window would require your manual input to continue the transfer with the file next in the queue. And at the end it would reattempt to transfer whichever files failed the first time around. 99% of the time they’ll go through that second try, but this is still all a major pain in the ass. Especially if you’ve got a lot of data to transfer or you want to step away from the computer for a while.
It turns out samba can act a little weirdly with the higher read/write speeds of RAIDz arrays and transfers from Windows, and will intermittently crash and restart itself if this group option isn’t changed. Inputting the above command will prevent you from ever seeing that window.
The last thing we're going to do before switching over to our Windows PC is grab the IP address of our Linux machine. Enter the following command:
hostname -I
This will spit out this computer's IP address on the local network (it will look something like 192.168.0.x), write it down. It might be a good idea once you're done here to go into your router settings and reserving that IP for your Linux system in the DHCP settings. Check the manual for your specific model router on how to access its settings, typically it can be accessed by opening a browser and typing http:\\192.168.0.1 in the address bar, but your router may be different.
Okay we’re done with our Linux computer for now. Get on over to your Windows PC, open File Explorer, right click on Network and click "Map network drive". Select Z: as the drive letter (you don't want to map the network drive to a letter you could conceivably be using for other purposes) and enter the IP of your Linux machine and location of the share like so: \\"LINUXCOMPUTERLOCALIPADDRESSGOESHERE"\"zpoolnamegoeshere"\. Windows will then ask you for your username and password, enter the ones you set earlier in Samba and you're good. If you've done everything right it should look something like this:

You can now start moving media over from Windows to the share folder. It's a good idea to have a hard line running to all machines. Moving files over Wi-Fi is going to be tortuously slow, the only thing that’s going to make the transfer time tolerable (hours instead of days) is a solid wired connection between both machines and your router.
Step Six: Setting Up Remote Desktop Access to Your Server
After the server is up and going, you’ll want to be able to access it remotely from Windows. Barring serious maintenance/updates, this is how you'll access it most of the time. On your Linux system open the terminal and enter:
sudo apt install xrdp
Then:
sudo systemctl enable xrdp
Once it's finished installing, open “Settings” on the sidebar and turn off "automatic login" in the User category. Then log out of your account. Attempting to remotely connect to your Linux computer while you’re logged in will result in a black screen!
Now get back on your Windows PC, open search and look for "RDP". A program called "Remote Desktop Connection" should pop up, open this program as an administrator by right-clicking and selecting “run as an administrator”. You’ll be greeted with a window. In the field marked “Computer” type in the IP address of your Linux computer. Press connect and you'll be greeted with a new window and prompt asking for your username and password. Enter your Ubuntu username and password here.

If everything went right, you’ll be logged into your Linux computer. If the performance is sluggish, adjust the display options. Lowering the resolution and colour depth do a lot to make the interface feel snappier.

Remote access is how we're going to be using our Linux system from now, barring edge cases like needing to get into the BIOS or upgrading to a new version of Ubuntu. Everything else from performing maintenance like a monthly zpool scrub to checking zpool status and updating software can all be done remotely.

This is how my server lives its life now, happily humming and chirping away on the floor next to the couch in a corner of the living room.
Step Seven: Plex Media Server/Jellyfin
Okay we’ve got all the ground work finished and our server is almost up and running. We’ve got Ubuntu up and running, our storage array is primed, we’ve set up remote connections and sharing, and maybe we’ve moved over some of favourite movies and TV shows.
Now we need to decide on the media server software to use which will stream our media to us and organize our library. For most people I’d recommend Plex. It just works 99% of the time. That said, Jellyfin has a lot to recommend it by too, even if it is rougher around the edges. Some people run both simultaneously, it’s not that big of an extra strain. I do recommend doing a little bit of your own research into the features each platform offers, but as a quick run down, consider some of the following points:
Plex is closed source and is funded through PlexPass purchases while Jellyfin is open source and entirely user driven. This means a number of things: for one, Plex requires you to purchase a “PlexPass” (purchased as a one time lifetime fee $159.99 CDN/$120 USD or paid for on a monthly or yearly subscription basis) in order to access to certain features, like hardware transcoding (and we want hardware transcoding) or automated intro/credits detection and skipping, Jellyfin offers some of these features for free through plugins. Plex supports a lot more devices than Jellyfin and updates more frequently. That said, Jellyfin's Android and iOS apps are completely free, while the Plex Android and iOS apps must be activated for a one time cost of $6 CDN/$5 USD. But that $6 fee gets you a mobile app that is much more functional and features a unified UI across platforms, the Plex mobile apps are simply a more polished experience. The Jellyfin apps are a bit of a mess and the iOS and Android versions are very different from each other.
Jellyfin’s actual media player is more fully featured than Plex's, but on the other hand Jellyfin's UI, library customization and automatic media tagging really pale in comparison to Plex. Streaming your music library is free through both Jellyfin and Plex, but Plex offers the PlexAmp app for dedicated music streaming which boasts a number of fantastic features, unfortunately some of those fantastic features require a PlexPass. If your internet is down, Jellyfin can still do local streaming, while Plex can fail to play files unless you've got it set up a certain way. Jellyfin has a slew of neat niche features like support for Comic Book libraries with the .cbz/.cbt file types, but then Plex offers some free ad-supported TV and films, they even have a free channel that plays nothing but Classic Doctor Who.
Ultimately it's up to you, I settled on Plex because although some features are pay-walled, it just works. It's more reliable and easier to use, and a one-time fee is much easier to swallow than a subscription. I had a pretty easy time getting my boomer parents and tech illiterate brother introduced to and using Plex and I don't know if I would've had as easy a time doing that with Jellyfin. I do also need to mention that Jellyfin does take a little extra bit of tinkering to get going in Ubuntu, you’ll have to set up process permissions, so if you're more tolerant to tinkering, Jellyfin might be up your alley and I’ll trust that you can follow their installation and configuration guide. For everyone else, I recommend Plex.
So pick your poison: Plex or Jellyfin.
Note: The easiest way to download and install either of these packages in Ubuntu is through Snap Store.
After you've installed one (or both), opening either app will launch a browser window into the browser version of the app allowing you to set all the options server side.
The process of adding creating media libraries is essentially the same in both Plex and Jellyfin. You create a separate libraries for Television, Movies, and Music and add the folders which contain the respective types of media to their respective libraries. The only difficult or time consuming aspect is ensuring that your files and folders follow the appropriate naming conventions:
Plex naming guide for Movies
Plex naming guide for Television
Jellyfin follows the same naming rules but I find their media scanner to be a lot less accurate and forgiving than Plex. Once you've selected the folders to be scanned the service will scan your files, tagging everything and adding metadata. Although I find do find Plex more accurate, it can still erroneously tag some things and you might have to manually clean up some tags in a large library. (When I initially created my library it tagged the 1963-1989 Doctor Who as some Korean soap opera and I needed to manually select the correct match after which everything was tagged normally.) It can also be a bit testy with anime (especially OVAs) be sure to check TVDB to ensure that you have your files and folders structured and named correctly. If something is not showing up at all, double check the name.
Once that's done, organizing and customizing your library is easy. You can set up collections, grouping items together to fit a theme or collect together all the entries in a franchise. You can make playlists, and add custom artwork to entries. It's fun setting up collections with posters to match, there are even several websites dedicated to help you do this like PosterDB. As an example, below are two collections in my library, one collecting all the entries in a franchise, the other follows a theme.

My Star Trek collection, featuring all eleven television series, and thirteen films.

My Best of the Worst collection, featuring sixty-nine films previously showcased on RedLetterMedia’s Best of the Worst. They’re all absolutely terrible and I love them.
As for settings, ensure you've got Remote Access going, it should work automatically and be sure to set your upload speed after running a speed test. In the library settings set the database cache to 2000MB to ensure a snappier and more responsive browsing experience, and then check that playback quality is set to original/maximum. If you’re severely bandwidth limited on your upload and have remote users, you might want to limit the remote stream bitrate to something more reasonable, just as a note of comparison Netflix’s 1080p bitrate is approximately 5Mbps, although almost anyone watching through a chromium based browser is streaming at 720p and 3mbps. Other than that you should be good to go. For actually playing your files, there's a Plex app for just about every platform imaginable. I mostly watch television and films on my laptop using the Windows Plex app, but I also use the Android app which can broadcast to the chromecast connected to the TV in the office and the Android TV app for our smart TV. Both are fully functional and easy to navigate, and I can also attest to the OS X version being equally functional.
Part Eight: Finding Media
Now, this is not really a piracy tutorial, there are plenty of those out there. But if you’re unaware, BitTorrent is free and pretty easy to use, just pick a client (qBittorrent is the best) and go find some public trackers to peruse. Just know now that all the best trackers are private and invite only, and that they can be exceptionally difficult to get into. I’m already on a few, and even then, some of the best ones are wholly out of my reach.
If you decide to take the left hand path and turn to Usenet you’ll have to pay. First you’ll need to sign up with a provider like Newshosting or EasyNews for access to Usenet itself, and then to actually find anything you’re going to need to sign up with an indexer like NZBGeek or NZBFinder. There are dozens of indexers, and many people cross post between them, but for more obscure media it’s worth checking multiple. You’ll also need a binary downloader like SABnzbd. That caveat aside, Usenet is faster, bigger, older, less traceable than BitTorrent, and altogether slicker. I honestly prefer it, and I'm kicking myself for taking this long to start using it because I was scared off by the price. I’ve found so many things on Usenet that I had sought in vain elsewhere for years, like a 2010 Italian film about a massacre perpetrated by the SS that played the festival circuit but never received a home media release; some absolute hero uploaded a rip of a festival screener DVD to Usenet. Anyway, figure out the rest of this shit on your own and remember to use protection, get yourself behind a VPN, use a SOCKS5 proxy with your BitTorrent client, etc.
On the legal side of things, if you’re around my age, you (or your family) probably have a big pile of DVDs and Blu-Rays sitting around unwatched and half forgotten. Why not do a bit of amateur media preservation, rip them and upload them to your server for easier access? (Your tools for this are going to be Handbrake to do the ripping and AnyDVD to break any encryption.) I went to the trouble of ripping all my SCTV DVDs (five box sets worth) because none of it is on streaming nor could it be found on any pirate source I tried. I’m glad I did, forty years on it’s still one of the funniest shows to ever be on TV.
Part Nine/Epilogue: Sonarr/Radarr/Lidarr and Overseerr
There are a lot of ways to automate your server for better functionality or to add features you and other users might find useful. Sonarr, Radarr, and Lidarr are a part of a suite of “Servarr” services (there’s also Readarr for books and Whisparr for adult content) that allow you to automate the collection of new episodes of TV shows (Sonarr), new movie releases (Radarr) and music releases (Lidarr). They hook in to your BitTorrent client or Usenet binary newsgroup downloader and crawl your preferred Torrent trackers and Usenet indexers, alerting you to new releases and automatically grabbing them. You can also use these services to manually search for new media, and even replace/upgrade your existing media with better quality uploads. They’re really a little tricky to set up on a bare metal Ubuntu install (ideally you should be running them in Docker Containers), and I won’t be providing a step by step on installing and running them, I’m simply making you aware of their existence.
The other bit of kit I want to make you aware of is Overseerr which is a program that scans your Plex media library and will serve recommendations based on what you like. It also allows you and your users to request specific media. It can even be integrated with Sonarr/Radarr/Lidarr so that fulfilling those requests is fully automated.
And you're done. It really wasn't all that hard. Enjoy your media. Enjoy the control you have over that media. And be safe in the knowledge that no hedgefund CEO motherfucker who hates the movies but who is somehow in control of a major studio will be able to disappear anything in your library as a tax write-off.
1K notes
·
View notes
Text
Downloading fanfic from AO3
I've been downloading a lot of fanfic lately for personal archival purposes, and I figured I'd share how I do it in case it's useful to anyone else (and so I have it written down in case I forget!).
There are lots of different ways to save fic, including the file download built into AO3, but I find that this gives me the nicest ebooks in the most efficient way.
(Under a cut cause long.)
Download Calibre: https://calibre-ebook.com/ or (clickable link).
Calibre is about the best ebook management and control program around and it's free. You can get it for windows, mac, and linux or download and run it from a portable storage device (I'm using a windows PC).
Install it and run it. It's gonna ask you where you want to put your library. Dealer's choice on this one. I recommend your internal drive (and then back up to external/cloud), but YMMV.
If you want to keep fanfic separate from the rest of your ebooks, you can create multiple libraries. I do, and my libraries are creatively named 'Books' and 'Fic'.
Customise Calibre
Now you're gonna install some plugins. Go to Preferences on the menu bar (far right), click its little side arrow, then choose 'Get plugins to enhance Calibre'.
At the top right of the box that pops up is 'Filter by name'. The plugins you want to get are:
EpubMerge
FanFicFare
Install them one at a time. It will ask you where you want them. I recommend 'the main bar' and 'the main bar when device is attached' (should be selected by default). When you're done, close and reopen Calibre.
The plugins you just installed should appear on the far right of the toolbar, but if you can't see one or both of them, fear not! Just click Preferences (the button, not the side arrow), then Toolbars and Menus (in the 'Interface' section) then choose the main toolbar from the drop down menu. That will let you add and remove things - I suggest getting rid of Donate, Connect Share, and News. That'll leave you room to add your new plugins to the menu bar.
(Do donate, though, if you can afford it. This is a hell of a program.)
Now you're ready to start saving your fave fanfic!
Saving fanfic
I'll go through both methods I use, but pick whatever makes you happy (and/or works best for what you're downloading).
ETA: if the fics are locked you can't easily use FanFicFare. Skip down to the next section. (It does ask for a username/password if you try and get a locked fic, but it's never worked for me - I had to edit the personal.ini in the configuration options, and even then it skips locked fics in a series.)
Calibre and FanFicFare
You can work from entirely within Calibre using the FanFicFare plugin. Just click its side arrow and pick from the menu. The three main options I use are download from URL, make anthology from a webpage, and update story/anthology.
Download from URL: pick Download from URL (or just click the FanFicFare button) and paste the fic's URL into the box (if you've copied it to your clipboard, it will be there automatically). You can do more than one fic at a time - just paste the URLs in one after the other (each on a new line). When you're done, make sure you have the output format you want and then go.
Make Anthology Epub From Web Page: if you want a whole series as a single ebook, pick Anthology Options, then Make Anthology Epub From Webpage. Paste the series URL into the box (if you've copied it to your clipboard, it will be there automatically), click okay when it displays the story URLs, check your output format and go.
Update series/anthology: if you downloaded an unfinished fic or series and the author updates, you can automatically add the update to your ebook. Just click on the ebook in Calibre, open the FanFicFare menu using its side arrow, and select either Update Existing FanFic Books or Anthology Options, Update Anthology epub. Okay the URLs and/or the output format, then go.
Any fic downloaded using FanFicFare will be given an automatically generated Calibre cover. You can change the cover and the metadata by right clicking on the title and picking edit metadata. You can do it individually, to change the cover or anything else specific to that ebook, or in bulk, which is great for adding a tag or series name to multiple fics. Make sure you generate a new cover if you change the metadata.
Browser plugins, Calibre, and EpubMerge
You can also use a browser addon/plugin to download from AO3. I use FicLab (Firefox/Chrome), but I believe there's others. FicLab: https://www.ficlab.com/ (clickable link).
FicLab puts a 'Save' button next to fic when you're looking at a list of fics, eg search results, series page, author's work list etc. Just click the 'Save' button, adjust the settings, and download the fic. You can also use it from within the fic by clicking the toolbar icon and running it.
FicLab is great if you're reading and come across a fic you want to save. It also generates a much nicer (IMO) cover than Calibre.
You can add the downloaded fic to Calibre (just drag and drop) or save it wherever. The advantage to dropping it into Calibre is that all your fic stays nicely organised, you can adjust the metadata, and you can easily combine fics.
Combining fics
You can combine multiple fics into an anthology using EpubMerge. This is great if you want a single ebook of an author's short fics, or their AUs, or their fics in a specific ship that aren't part of a series. (It only works on epubs, so if you've saved as some other format, you'll need to convert using Calibre's Convert books button.)
Select the ones you want to combine, click EpubMerge, adjust the order if necessary, and go.
The cover of the merged epubs will be the cover of the first fic in the merge list. You can add a new cover by editing the metadata and generating a new cover.
Combing with FanFicFare
You can also combine nonseries fics using FanFicFare's Make Anthology ePub from URLs option by pasting the individual fic URLs into the box.
Where there's more than a few fics, I find it easier to download them with FicLab and combine them with EpubMerge, and I prefer keeping both the combined and the individual versions of fic, but again YMMV.
Reconverting and Converting
Once I'm done fussing, I reconvert the ebook to the same format, to ensure everything is embedded in the file. Is this necessary? YMMV, but it's a quick and easy step that does zero harm.
If you don't want your final ebook to be an epub, just convert it to whatever format you like.
Disclaimers
Save fanfic for your own personal enjoyment/offline reading/safeguarding against the future. If it's not your fic, don't distribute it, or upload it to other sites, or otherwise be a dick. Especially if the author deletes it. Respect their wishes and their rights.
This may work on other fanfic sites, eg FFN, but I've never tried so I don't know.
If you download a fic, do leave the author a kudo or a comment; you'll make them so happy.
This is how I save fic. I'm not pretending it's the only way, or even the best way! This is just the way that works for me.
#fanfic#fic#ao3#ficlab#calibre#fanficfare#epubmerge#downloading fanfic#adding the my fic tag so I can find this again#my fic
1K notes
·
View notes
Note
Okay- I had some time to recharge! I'll happily share a head cannon that's been cooking for my own configuration of Skyfire/Jetfire /pos
It's very loose and a small thing but I think about him actually being some form of squishy soft compared to other bots... Not too squishy, but still good enough to knead or press a hand against and it'll give a bit, like a couch cushion or foam /silly But let go and it'll go back to it's regular shape.
I like to dabble some "logic" into it by having it be some kind of highly engineered impact resistant armor? With some really weird oobleck ass reaction to getting thonked with a small object, that thang would ricochet perhaps maybe leave a dent, but wouldn't bother him too much /silly
This is 100% an excuse to turn him into the biggest and best cosmic loaf of bread ever. I also think other bot's reactions to it would be very amusing, the wide-optic stare of confusion you'd get if you ate a table or something, over the fact this guy isn't all hard plated that they're used to other bots being. Illegal second option /j Feel free to branch off!
I loveeee squishy Skyfire headcanons!!! I have one of my own where he has a bit of a tummy due to shuttles requiring more energon storage resulting in storage in excess protoform which is usually protected by detachable armour
I love the oobleck logic to yours!
16 notes
·
View notes
Note
A cute prompt could be Mika and Sam watching horror movies together! Maybe she gets scared and he "protects her"
Yes! Love this one! I got a little off-task, but I think it turned out really cute.
If anyone can tell me what movie they’re watching you’ll unlock bonus content (the story that inspired this piece).
The Basement
Is what's lurking in the basement scarier than demons? Probably when you happen to love a demon.
It was all Matthew’s fault. He was the one who had been insistent on going all out for Halloween, including setting up a haunted house as part of the Halloween ball. Then again, it was James who volunteered the basement for the haunted house venue. No one else was aware of its existence, but of course he remembered seeing it on the floorplan. Still, it was Damien who knew which key to fetch from the study to open the door.
Down the narrow staircase they had found a pretty standard creepy old basement. High shelves filled with forgotten boxes housed ages of dust and plenty of spiderwebs. The unfinished concrete floor was patched with unknown stains. Even the musty odor was unsurprising.
At this point in their adventure, Mika was not a fan of the basement. It was dark, dirty, and a little smelly; however, she was considering how the extra storage space could come in handy. That was until Sam found another locked door. At first Damien scrambled over with the key, the group quickly found that there was no keyhole.
Sam tried the door again. It wasn’t stuck but locked from the other side.
That realization made Mika’s stomach do an uncomfortable flip. James managed to convince Sam not to break the house, reasoning that the basement was probably built in parts, and they could presumably get to this door from an entrance elsewhere in the mansion.
Erik, that traitor, suddenly interrupted. Apparently, he had the best idea for a movie to watch.
And now Mika is stuck in the worst movie night ever, contemplating who’s to blame for her predicament.
She’s not much of a horror fan so she didn’t recognize the title and had no idea what to expect. It started out pretty well, two strangers have to share a rented house due to some scheduling mix up. She debated with James over if the man would kill the woman, or if that was too obvious and the lady would end up being the murderer. Then, the characters found a creepy basement with a creepy door and Mika shot Erik a dirty look.
Since that moment Mika hasn’t dared to look away from the screen. She started watching the movie on the center couch cushion, but almost immediately started receding onto Sam’s. She’s wedged herself between her incubus and the back of the couch, but firmly within his arms.
“Ahhh! What was that?!”, she shrieks as something moves quickly in the darkness on screen.
She shrieks again when something suddenly touches her back. A low oof and, “watch it, doofus!” follow her reflexive strike.
“Sorry, Sam! Don’t startle me!”
“Sheesh! I was just trying to rub your back to get you to relax a little”
After getting shushed by Matthew, Mika and Sam find a configuration where Sam’s hands squish her firmly into his side so neither of them can move too quickly.
“Oh fuck! What is that?!”, Mika presses further into Sam, eyes wide with alarm.
Erik and Damien fail to suppress snickers at Mika’s outburst.
“Don’t go back in there!”, she screeches.
“Oh god, that’s so gross”
“Oh god, that’s so messed up!”
After each outburst Sam gently squeezes the girl in his arms.
Mika visibly relaxes when the basement creature falls limp over the hood of the car, only to scream even louder than before when it is no longer there.
At this point all the demons in the room are giggling openly at her, but Mika is too freaked out to be embarrassed. At least the low rumbling in Sam’s chest is soothing.
Finally, the nightmare is over and the heroine limps away victorious. The second credits start to role Mika bolts up from the couch, “I’m going to go make sure the basement door is locked.”
Sam follows closely behind, mostly out of concern, but also because Mika has a death grip on his hand. Laughter erupts from the living room.
On the way back to the basement door Mika mumbles under her breath, “I’m going to Kill Erik and his stupid Movie, then Damien and his stupid key, and James with his stupid blueprints, and Matthew and his stupid haunted house”
“So, am I spared?” Sam jokes from behind her.
“Yes.” Mika states matter-of-factly, “I need you to protect me should any creepy shit crawl out of this basement.”
Sam guffaws and squeezes her hand.
Mika jiggles the door handle, confirming that it remained as lock as they left it. Her eyebrows knit together, “I should—”
She is cut off by Sam producing the key, “I’ve got it right here.”
Mika nods, but the pinched look remains on her face, “And it’s the only copy.”
“Right…”, Mika glances at the door again and shivers, “let’s just go to bed.”
Sam follows her dutifully. Halfway up the stairs he asks, “We’ve watched horror movies before, why did this one freak you out so bad?”
Mika groans and slides a hand down her face, “I dunno. I guess demons and ghosts are less scary than whatever fucked up shit humans can do.”
“Oi! I think I can be pretty scary!” Sam complains.
Mika laughs, “You know what I mean! I can’t be scared of fictional demons when I live with real ones!”
“Yeah, I do”, Sam grins, “Harold recommended we watch a few movies to understand how humans think about demons. I guess it’s supposed to be scary, but they’re so wrong we were laughing the whole time!”
“Ah so that’s how the horror fixation started”
He shrugs, “I guess. We enjoyed a few movies like that and then it was easier to understand other movies that were similar. And then people start asking you about what movies you like and yeah...”
Safely in her own room, Mika locks the door behind them, and if Sam notices he keeps tactfully quiet about it. The pair go through their nightly routines quickly. Sam finishes first and waits patiently under the covers. When she finishes in the bathroom Mika dives into bed and burrows into Sam’s chest. He chuckles fondly and uses a tiny bit of magic to flick the light switch off.
For a moment Mika thinks she’ll fall asleep peacefully in Sam’s arms, but a sudden spike of fear jolts her upright.
“Woah, hey”, Sam follows her up and holds her face in his hands.
“Ugh! I know it’s stupid and illogical. I don’t really think that some freaky inbred wannabe mother is going to bust in here!”
“I know”, Sam soothes, pressing a kiss to the top of her head.
Mika shoves the heels of her hands into her eyes, “My nerves are just on edge.”
Sam nods and runs his fingers slowly through Mika’s hair.
After a moment Mika adds, “But the basement is really creepy! I mean who would have a door that locks on just one side like that?!”
“Do you want me to go break it down so you don’t have to worry about it? We don’t have to listen to James, it’s your house.”
“No.” Mika calmly holds Sam down, both of her hands wrapped around his bicep, “Because then you’ll get murdered. And I’ll have to find a new boyfriend.”
Sam barks out a surprised laugh, “Well I wouldn’t want to make you go through all that effort!”, he teases.
Mika giggles, “Yeah, the dating scene is what’s really scary!”
After another bout of laughter that definitely disturbs the other residents (but screw them for laughing at me earlier, Mika thinks), she lets Sam pull her back into bed. Most of her tension is gone and Mika finally feels tired.
Sam rubs slow circles into her back as Mika nuzzles into his neck, occasionally mumbling another complaint about the movie into his skin. He whispers, “I’ll protect you from anything” softly into her ear.
Mika’s body immediately relaxes and she’s just able to mumble an, “I love you” before succumbing to a peaceful slumber. She doesn’t hear Sam’s voice, choked with emotion from her display of trust, repeat the words back to her.
#seduce me otome#seduce me the otome#seduce me#seduceme#ask#sam anderson#seduce me fanfiction#sam x mika
13 notes
·
View notes
Text
Tic-Tac-Toe (Part 4)
I have been working on this for a couple weeks, so we are at part 4 of 3.
Alternate Theory
Idea: I wonder if there are two Eddies? I am only saying this because of the E vs E in the score. Also, there is such a discrepancy in the number of wins for each. In Bug-A-Bye, we have two gravestones. Muppets often have multiple puppets.

Not only are there scenes like this, where we see multiples of the same muppet, my understanding is that there are back ups, or muppets styled somewhat differently than their usual configuration. For example, the Welcome Home Halloween puppets might be created differently, as the outfits were too complex to put on the puppet.
From reddit user @josephphilip22:
I toured the workshop in 1998 or so when they were filming the first season of Muppets Tonight! There were multiple puppets of specific puppets, including Kermit and Fozzie and Piggy. However, some puppets are made of foam and fur, such as Gonzo. And have to be changed often considering how much use that character gets. The foam breaks apart faster over time with movement.
But during the production of The Muppet Show, Carolie Wilcox worked specifically on costumes. She would changed puppets out of their costumes depending on the scene. It does save money, but it mostly saves time to just change characters from one outfit to another.
It could make sense that there are multiples of the puppets from Welcome Home. Maybe they decommission puppets that become too self-aware? That image of Frank amongst all his body parts seems to lend credence to the idea of having multiple of the same puppet. What if we are looking at a world of multiples of characters. One thing I found interesting about this image is that there are parts of Frank all over, but most of them appear to be small parts or mutated in some way. For instance:

There is at least that one, with the bad hair. Actually, on closer inspection, that looks to be a trunk with a black collar from the back, with a random floating eyeball on the top. Interestingly, this seems like it could either be Frank lying down in a box or standing as those things fall/float down around him. One thing it did take me a minute to realize is that those hands holding the envelope are not Frank’s. The hands all around him are his, but this red envelope is being held by human hands.

It would be interesting if we learn about Sunny and the concept is, the “You’re Free” image is a kind of decommission of the puppet. I would think as a puppet, a decommissioning would feel like a death or a move to a different realm of existence. According to posters on Muppet Central, puppets are either stored, given to museums/exhibits, stripped for parts and/or scrapped. In an earlier post, I shared an image of marionettes being stored, and those were hung by their strings.
Is this Frank in storage? What gives with the letter? Is it from Eddie? Is it for us? In that vein, if I were going to make a story from the image, knowing what we know, I would guess that Frank is sneaking out with a box full of his parts in order to get this letter out. Still stumped on the human hands.
I do wonder, though, in terms of framework, if we don’t already have strong indicators that the elements from that world that make it to this world appear like real life to us. Case in point, the black stuff, which looks sticky and stringy in the art of the neighborhood, is black and stringy in the staff room (with sticky looking black found on the walls).
We are already dealing with multiple levels of reality, since we have the puppets as drawn, animation, and glimpses of Wally’s puppet (in the Playfellow exhibition and in photos—just the hand.) I just had a really bad thought, what if Wally was alive at Playfellow in the style of The Christmas Toy or Toy Story? Given that The Christmas Toy is a Henson film, it’s not too far a reach.
So, presuming there are multiple puppets for Welcome Home, from what we know of the Muppets and the spare parts image of Frank, it isn’t too wild to think that maybe there are multiple Eddies. If there are multiple Eddies active, it would make for a really good person (persons) to carry the information to our world. Also, he’s the most human looking of the group, and has access to places as a postal worker.

These are probably more a character reference sheet, but there are a lot of Eddies there.
Also: “Reliable, kind, and ever determined, Eddie Dear is the best mailman Welcome Home has ever had, albeit the only one.” What if he is the only one, because they just put another one together?

In looking into possible clone TV Tropes, I ran across “Clone Degeneration.” https://tvtropes.org/pmwiki/pmwiki.php/Main/CloneDegeneration. Essentially, the more copies you make of a clone, the less correct and like the original they are. I think that one goes hand in hand with the copies of the self trying to destroy the original. In the article “Clone Angst” (https://tvtropes.org/pmwiki/pmwiki.php/Main/CloneAngst) TV Tropes describes clones differentiating themselves from prior version or feeling less than real, since they aren’t the original. “Other unlucky clones will just have birth defects, Resurrection Sickness, or be increasingly inexact duplicates.” OMG, his eye:
That could definitely be an example of an imperfect copy.
Extrapolating from that, what if Eddie’s freakout is a version of birth defects or resurrection sickness? He’s sitting in the post office isolated because he is being weird or unrecognizable in some way. The anger and frustration he feels could be related to the breakdown of genetic material or a version of Resurrection Sickness, where he becomes paranoid as a defect, and Frank is trying to minimize the damage? It is possible that Frank is not the creator of the multiple Eddies, but given the Bug-A-Bye theory, the Frank/Dr. Frankenstein connection is difficult to ignore. It would be crazy if Wally or Home are tormented or killing Eddie clones and Frank just keeps making more. The murderers would be very confused. In this article, there is a note that these characters are highly expendable, since we don’t get attached to multiple copies of a thing.
Looking back on the Bug-A-Bye discussion, this could be the explanation for the 2 gravestones seen in the teardrop, and the reference to possibly more than one goodbye. What if Frank is in the unenviable position of seeing multiple Eddies die, a la Supernatural’s "Mystery Spot?"
Also, we’ve already seen Eddie as Frankenstein and discussed the potential meanings behind that. In the Halloween video from Wally’s perspective, we see the weird lights flashing/apple biting moment, and the video focuses specifically on Eddie’s apple. Is that a you’re next? Is it a reference to what happened to Eddie?
And on that subject, what if Eddie’s Frankenstein costume is making a reference to another puppet? He has some of his regular face, and the same face shape, but a portion of his skin is blue. Barnaby is blue, (and we have already seen a Barnaby colored patch in the images) but this fabric isn’t furry. Sunny is blue…but Eddie’s face doesn’t have feathers. It would be wild if Frank repurposed Sunny’s fabric to make part of his new boyfriend’s Halloween costume/Halloween body. He also has some purple in his face, which isn’t represented in the neighborhood, other than Eddie’s color.

Just some way overexplained ideas to account for potential meanings of the tic tac toe boards, something that I think about far too often.
22 notes
·
View notes
Text
Your All-in-One AI Web Agent: Save $200+ a Month, Unleash Limitless Possibilities!
Imagine having an AI agent that costs you nothing monthly, runs directly on your computer, and is unrestricted in its capabilities. OpenAI Operator charges up to $200/month for limited API calls and restricts access to many tasks like visiting thousands of websites. With DeepSeek-R1 and Browser-Use, you:
• Save money while keeping everything local and private.
• Automate visiting 100,000+ websites, gathering data, filling forms, and navigating like a human.
• Gain total freedom to explore, scrape, and interact with the web like never before.
You may have heard about Operator from Open AI that runs on their computer in some cloud with you passing on private information to their AI to so anything useful. AND you pay for the gift . It is not paranoid to not want you passwords and logins and personal details to be shared. OpenAI of course charges a substantial amount of money for something that will limit exactly what sites you can visit, like YouTube for example. With this method you will start telling an AI exactly what you want it to do, in plain language, and watching it navigate the web, gather information, and make decisions—all without writing a single line of code.
In this guide, we’ll show you how to build an AI agent that performs tasks like scraping news, analyzing social media mentions, and making predictions using DeepSeek-R1 and Browser-Use, but instead of writing a Python script, you’ll interact with the AI directly using prompts.
These instructions are in constant revisions as DeepSeek R1 is days old. Browser Use has been a standard for quite a while. This method can be for people who are new to AI and programming. It may seem technical at first, but by the end of this guide, you’ll feel confident using your AI agent to perform a variety of tasks, all by talking to it. how, if you look at these instructions and it seems to overwhelming, wait, we will have a single download app soon. It is in testing now.
This is version 3.0 of these instructions January 26th, 2025.
This guide will walk you through setting up DeepSeek-R1 8B (4-bit) and Browser-Use Web UI, ensuring even the most novice users succeed.
What You’ll Achieve
By following this guide, you’ll:
1. Set up DeepSeek-R1, a reasoning AI that works privately on your computer.
2. Configure Browser-Use Web UI, a tool to automate web scraping, form-filling, and real-time interaction.
3. Create an AI agent capable of finding stock news, gathering Reddit mentions, and predicting stock trends—all while operating without cloud restrictions.
A Deep Dive At ReadMultiplex.com Soon
We will have a deep dive into how you can use this platform for very advanced AI use cases that few have thought of let alone seen before. Join us at ReadMultiplex.com and become a member that not only sees the future earlier but also with particle and pragmatic ways to profit from the future.
System Requirements
Hardware
• RAM: 8 GB minimum (16 GB recommended).
• Processor: Quad-core (Intel i5/AMD Ryzen 5 or higher).
• Storage: 5 GB free space.
• Graphics: GPU optional for faster processing.
Software
• Operating System: macOS, Windows 10+, or Linux.
• Python: Version 3.8 or higher.
• Git: Installed.
Step 1: Get Your Tools Ready
We’ll need Python, Git, and a terminal/command prompt to proceed. Follow these instructions carefully.
Install Python
1. Check Python Installation:
• Open your terminal/command prompt and type:
python3 --version
• If Python is installed, you’ll see a version like:
Python 3.9.7
2. If Python Is Not Installed:
• Download Python from python.org.
• During installation, ensure you check “Add Python to PATH” on Windows.
3. Verify Installation:
python3 --version
Install Git
1. Check Git Installation:
• Run:
git --version
• If installed, you’ll see:
git version 2.34.1
2. If Git Is Not Installed:
• Windows: Download Git from git-scm.com and follow the instructions.
• Mac/Linux: Install via terminal:
sudo apt install git -y # For Ubuntu/Debian
brew install git # For macOS
Step 2: Download and Build llama.cpp
We’ll use llama.cpp to run the DeepSeek-R1 model locally.
1. Open your terminal/command prompt.
2. Navigate to a clear location for your project files:
mkdir ~/AI_Project
cd ~/AI_Project
3. Clone the llama.cpp repository:
git clone https://github.com/ggerganov/llama.cpp.git
cd llama.cpp
4. Build the project:
• Mac/Linux:
make
• Windows:
• Install a C++ compiler (e.g., MSVC or MinGW).
• Run:
mkdir build
cd build
cmake ..
cmake --build . --config Release
Step 3: Download DeepSeek-R1 8B 4-bit Model
1. Visit the DeepSeek-R1 8B Model Page on Hugging Face.
2. Download the 4-bit quantized model file:
• Example: DeepSeek-R1-Distill-Qwen-8B-Q4_K_M.gguf.
3. Move the model to your llama.cpp folder:
mv ~/Downloads/DeepSeek-R1-Distill-Qwen-8B-Q4_K_M.gguf ~/AI_Project/llama.cpp
Step 4: Start DeepSeek-R1
1. Navigate to your llama.cpp folder:
cd ~/AI_Project/llama.cpp
2. Run the model with a sample prompt:
./main -m DeepSeek-R1-Distill-Qwen-8B-Q4_K_M.gguf -p "What is the capital of France?"
3. Expected Output:
The capital of France is Paris.
Step 5: Set Up Browser-Use Web UI
1. Go back to your project folder:
cd ~/AI_Project
2. Clone the Browser-Use repository:
git clone https://github.com/browser-use/browser-use.git
cd browser-use
3. Create a virtual environment:
python3 -m venv env
4. Activate the virtual environment:
• Mac/Linux:
source env/bin/activate
• Windows:
env\Scripts\activate
5. Install dependencies:
pip install -r requirements.txt
6. Start the Web UI:
python examples/gradio_demo.py
7. Open the local URL in your browser:
http://127.0.0.1:7860
Step 6: Configure the Web UI for DeepSeek-R1
1. Go to the Settings panel in the Web UI.
2. Specify the DeepSeek model path:
~/AI_Project/llama.cpp/DeepSeek-R1-Distill-Qwen-8B-Q4_K_M.gguf
3. Adjust Timeout Settings:
• Increase the timeout to 120 seconds for larger models.
4. Enable Memory-Saving Mode if your system has less than 16 GB of RAM.
Step 7: Run an Example Task
Let’s create an agent that:
1. Searches for Tesla stock news.
2. Gathers Reddit mentions.
3. Predicts the stock trend.
Example Prompt:
Search for "Tesla stock news" on Google News and summarize the top 3 headlines. Then, check Reddit for the latest mentions of "Tesla stock" and predict whether the stock will rise based on the news and discussions.
--
Congratulations! You’ve built a powerful, private AI agent capable of automating the web and reasoning in real time. Unlike costly, restricted tools like OpenAI Operator, you’ve spent nothing beyond your time. Unleash your AI agent on tasks that were once impossible and imagine the possibilities for personal projects, research, and business. You’re not limited anymore. You own the web—your AI agent just unlocked it! 🚀
Stay tuned fora FREE simple to use single app that will do this all and more.

7 notes
·
View notes
Text

XML/RSS Post Creator for Neocities
I'm sharing this code because I find it super convenient for making RSS Post on neocities. You still need to copy and paste the code it generates into you rss.xml file; but it saves your drafts, has templates, and you can put a IMGBB api key right into the "configuration box" and it saves via local storage so that way your api key is safe (since it isn't in your code) and you can easily upload photos directly from your files. I use it for every post i make it honestly freaking great. Don't forget to customize it since this is obviously tailored to my website haha.
If you need a blog template to get started, here you go!

#2000s web#webcore#myspace#neocities resources#neocities#webpage#rss feed#code#nekoweb#resource#webmaster#coding
6 notes
·
View notes
Note
do it
make an UTAU
please
i beg you
in fact i have steps right here
(sorry it’s so long i just kinda wanna see one)
Get or borrow a decent quality microphone
Decide the voicebank type you want to record: CV, VCV, CVVC or VCCV (the last is for non-japanese voicebanks). Be sure to look up the basics of each one. Some take more time to record (VCV), some are easier or harder to use in the end (CVVC and VCCV).
Look for the corresponding reclist (recordings list) for the voicebank type you've chosen. It will guide you with which sounds you need to record.
For the actual recording, I can't give you much tips as this is where I lack experience.. Several users have already shared tips though ! Be sure that your recordings are 16 bit wav files. Many people use Oremo to separate recordings.
Once you're done recording, there's the configuration process, the tricky part. Your configuration is saved in a file called "oto.ini". There are decent tutorials lying around about otoing, I can give you precise tips if you need.
Another advised step is to generate an frq (frequency) file for each wav file. UTAU does that when you play a note in UTAU for the first time. There's an frq editor in UTAU which allows you to fix bugs.
WOW THANKS
I’m gonna check if my pc has storage actually hehehe…
3 notes
·
View notes
Note
What are you using to organize and browse your photos on the server?
I'm running Memories, a NextCloud app.
So far it's pretty good! I just dumped over 700GB of images on it and it indexed them all in a couple hours. Previews might take longer to generate, and it is a little slow when you hit a batch of images that haven't got previews yet, but I imagine that in steady state it'll work very well.
It's basically a Google Photos clone, you get a unified timeline of all your photos plus albums. There's plugins to enable facial recognition and even object recognition so that you can search by that, and you can configure the matching smartphone app to sync your photos as you go.
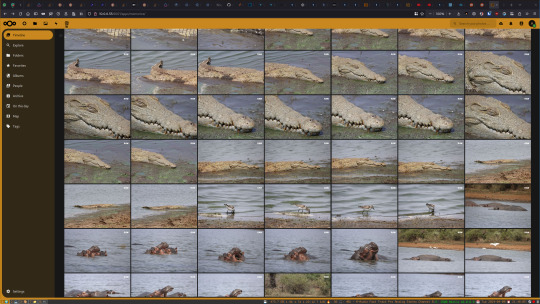
There's other options I've seen people recommend, mainly PhotoPrism and Immich. I might try those out, and it shouldn't be too hard to run multiple image organizers simultaneously for comparison since currently my photos are stored in an External Storage mount for NextCloud. That's mostly so that TrueNAS can make it available as an NFS share, which is a much faster and more reliable way to copy 700GB of photos than trying to upload through the NextCloud interface.
15 notes
·
View notes
Text
Your Next Venture Awaits: Explore Exclusive Commercial Real Estate Listings
Introduction
In today’s fast-paced and ever-evolving business landscape, finding the right commercial real estate (CRE) can be a daunting task. Whether you’re a seasoned investor or a budding entrepreneur, the commercial property market offers opportunities that can catapult your business to new heights. Your Next Venture Awaits: Explore Exclusive Commercial Real Estate Listings is more than just an invitation; it's a gateway to discovering spaces that align with your vision and aspirations.
In this comprehensive guide, we’ll delve into the ins and outs of commercial real estate listings, providing you with expert insights, strategies, and tips to navigate this intricate arena. From understanding market trends to evaluating properties, we aim to equip you with everything you need to make informed decisions. So grab your coffee and settle in, because the journey into exclusive commercial real estate listings starts here!
Your Next Venture Awaits: Explore Exclusive Commercial Real Estate Listings
The world of commercial real estate is vast and varied. With opportunities ranging from handyman Ogden office spaces to retail locations, understanding what’s available is key. This section will provide an overview of the different types of commercial properties and how they can benefit your business.
Types of Commercial Real Estate 1. Office Spaces
Office spaces are crucial for any professional endeavor. They range from small co-working environments to large corporate headquarters.
Co-working Spaces: Ideal for startups or freelancers who need flexibility. Single-Tenant Buildings: Perfect for businesses looking for dedicated space. Multi-Tenant Complexes: Great for companies wanting to share costs while enjoying amenities. 2. Retail Properties
Retail properties are essential for businesses that rely on foot traffic.
youtube
youtube

Shopping Malls: Offer multiple storefronts under one roof. Strip Malls: Smaller configurations usually located in high-traffic areas. Standalone Stores: Offer brand visibility but require strategic location planning. 3. Industrial Properties
Industrial properties are primarily used for manufacturing or distribution.
Warehouses: Serve as storage facilities for goods. Manufacturing Plants: Need specific zoning regulations. Flex Spaces: Combine office and industrial functions in one location. 4. Multifamily Units
These properties serve as residential units but come under the commercial category when considering investment purposes.
Apartments: High-density living spaces often in urban areas. Condos: Individual ownership typically with shared amenities. Why Invest in Commercial Real Estate?
Investing in commercial real estate comes with numerous advantages:
Steady Cash Flow: Commercial properties often have longer lease terms compared to residential properties, ensuring consistent income. Tax Benefits: Investors
2 notes
·
View notes
Text
USA Dedicated Server: The Ultimate Solution for Your Hosting Needs
In the world of web hosting, having a robust, reliable, and fast server is crucial to ensuring the performance of your website or business. Whether you’re running a large-scale business, an e-commerce platform, or a gaming server, your choice of hosting server plays a vital role in the success of your online presence. If you’re looking for high-performance hosting with complete control and flexibility, a USA Dedicated Server is an excellent choice.
DigiRDP offers an array of hosting solutions, including USA Dedicated Servers and Cloud VPS hosting, to provide the reliability, speed, and scalability you need to run your websites, applications, and more. In this article, we will explore the benefits of choosing a USA Dedicated Server, particularly for those looking for Dallas Budget Servers and Cloud VPS options, to help you make an informed decision about your hosting needs.
What is a USA Dedicated Server?
A USA Dedicated Server is a physical server that is entirely dedicated to hosting your website, application, or service. Unlike shared hosting or virtual private servers (VPS), where multiple users share the same server resources, a dedicated server provides you with exclusive access to all the resources, such as CPU, RAM, storage, and bandwidth.
DigiRDP offers premium USA Dedicated Servers, ensuring that businesses of all sizes can enjoy unparalleled performance, security, and uptime. These servers are based in data centers located throughout the United States, providing low-latency connections and fast data transfer speeds for users across the globe.
Why Choose a USA Dedicated Server?
When it comes to hosting your website or applications, the server location can play a significant role in the speed and reliability of your service. Choosing a USA Dedicated Server offers several key benefits:
1. High Performance and Speed
Dedicated servers are built for performance. With all resources reserved for your use, you don’t have to worry about other users affecting your server’s performance. A USA Dedicated Server ensures that your website or application loads quickly, providing a seamless user experience. This is particularly important for businesses that rely on their online presence, such as e-commerce websites or platforms with high traffic volumes.
2. Full Control and Customization
With a dedicated server, you have full control over the server configuration, including the operating system, software, and security settings. This means you can optimize the server for your specific needs, install the software you require, and configure the server exactly how you want it.
DigiRDP’s USA Dedicated Servers give you the freedom to customize everything from the hardware to the operating system, ensuring that your server is tailored to the unique needs of your business.
3. Reliability and Security
Dedicated servers offer superior reliability and security compared to shared hosting or VPS options. Since you’re the only user on the server, you don’t have to worry about other websites causing performance issues or compromising security. Dedicated servers are ideal for handling sensitive data and high-traffic websites that require maximum uptime and protection.
4. Scalability
As your business grows, your hosting needs will evolve. USA Dedicated Servers offer excellent scalability, allowing you to easily upgrade resources such as storage, RAM, or CPU power. DigiRDP provides flexible hosting plans that can grow with your business, making it easy to scale your hosting environment as needed.
Dallas Budget Servers: The Perfect Solution for Cost-Effective Hosting
For businesses on a budget, Dallas Budget Servers are an ideal choice. Dallas is home to some of the best data centers in the United States, providing high-quality infrastructure at competitive prices. DigiRDP’s Dallas Budget Servers offer powerful hardware and reliable performance without the high price tag typically associated with dedicated hosting.
Benefits of Dallas Budget Servers:
Cost-Effective Hosting: Dallas is known for its affordable data center services, and DigiRDP offers Dallas Budget Servers that provide excellent value for money. These servers are ideal for small to medium-sized businesses that require a reliable hosting solution without breaking the bank.
Low Latency for US Traffic: Hosting your server in Dallas ensures that your website or application will have low latency for users in the United States. This leads to faster load times and improved user experience for your American audience.
24/7 Support: DigiRDP offers round-the-clock customer support for its Dallas Budget Servers, ensuring that your hosting environment remains stable and secure at all times. Whether you need technical assistance or have a question about your server configuration, DigiRDP’s expert team is always available to help.
What You Get with DigiRDP’s Dallas Budget Servers:
Affordable pricing without compromising on quality
Reliable performance for small to medium-sized businesses
Expert customer support and management options
High-performance hardware and networking infrastructure
Fast and reliable connectivity for US-based users
Cloud VPS: Scalable and Flexible Hosting
While a USA Dedicated Server offers complete control over your hosting environment, it may not be the best fit for businesses that need more flexibility or are just getting started. In such cases, a Cloud VPS (Virtual Private Server) could be the perfect alternative.
A Cloud VPS offers many of the benefits of a dedicated server but with more scalability and flexibility. Instead of relying on a single physical server, a Cloud VPS leverages the power of multiple virtualized servers. This makes it easier to scale your resources on demand, without the need for physical hardware upgrades.
Benefits of Cloud VPS Hosting:
Scalability: As your business grows, a Dallas Cloud VPS allows you to easily scale your resources, such as storage, CPU power, and RAM, with just a few clicks. This flexibility is ideal for businesses that expect rapid growth or have fluctuating traffic levels.
Cost-Effective: Unlike dedicated servers, you only pay for the resources you use with a Cloud VPS. This can significantly reduce costs, especially for businesses that don’t need a full dedicated server but still require a reliable and secure hosting solution.
Reliability: Cloud VPS hosting ensures high availability because it operates on a network of virtual servers. If one server fails, your data is automatically rerouted to another server in the cloud, ensuring minimal downtime and maximum uptime.
Managed Services: DigiRDP’s Cloud VPS hosting offers fully managed solutions, meaning that all server maintenance, security patches, and updates are handled by their expert team. This allows you to focus on your business while DigiRDP takes care of the technical side of things.
Why DigiRDP is the Best Choice for USA Dedicated Servers and Cloud VPS Hosting
DigiRDP has established itself as a trusted provider of USA Dedicated Servers and Cloud VPS hosting solutions. Here are a few reasons why DigiRDP is the best choice for your hosting needs:
1. High-Performance Infrastructure
DigiRDP uses the latest hardware and networking technologies to ensure that your hosting environment is fast, reliable, and secure. Whether you opt for a USA Dedicated Server or a Cloud VPS, you can rest assured that your hosting solution will meet your performance needs.
2. Customizable Hosting Plans
DigiRDP offers flexible hosting plans, allowing you to choose the resources that best fit your business. From Dallas Budget Servers to high-end dedicated servers, DigiRDP can tailor your hosting solution to your specific requirements.
3. Expert Support
With DigiRDP’s 24/7 customer support, you can get assistance whenever you need it. Whether you’re having technical issues or need advice on how to optimize your server, the DigiRDP team is always available to help.
4. Security and Data Protection
DigiRDP takes security seriously and offers robust protection for your data, including DDoS protection, firewalls, and regular backups. Your website or application will be safe and secure at all times.
5. Global Reach
With data centers located across the United States, DigiRDP provides low-latency hosting solutions for users both in the U.S. and around the world. Their servers are optimized for fast data transfer speeds and minimal downtime, ensuring a seamless experience for your users.
Conclusion
Whether you are looking for a powerful USA Dedicated Server, a cost-effective Dallas Budget Server, or a flexible Cloud VPS solution, DigiRDP has you covered. With high-performance infrastructure, scalable solutions, and expert support, DigiRDP ensures that your hosting needs are met with precision and reliability. Choose DigiRDP for all your USA-based hosting and cheap RDP requirements, and experience top-notch performance, security, and flexibility for your business.
If you’re ready to take the next step in your hosting journey, explore DigiRDP’s USA Dedicated Servers and Cloud VPS offerings today and enjoy the ultimate hosting experience.
2 notes
·
View notes
Text
10 Web Hosting Terms You Should Know Before Building a Website

If you're planning to create a website, understanding web hosting is essential. If you're looking for a website hosting company in Gurgaon, knowing these terms will help you choose the right provider. Web hosting provides the server space and technology needed to make your website accessible on the internet. However, the world of web hosting can be full of technical jargon that might seem confusing at first. To make informed decisions, here are 10 key web hosting terms you should know:
Control Panel A control panel is a user-friendly interface that allows you to manage your server settings without needing extensive technical skills. It simplifies the process of managing your website, offering tools to configure domains, emails, databases, and security settings. Popular control panels include cPanel and Plesk, which let you handle server tasks through a graphical interface rather than typing complex commands.
Bandwidth Limit Bandwidth refers to the amount of data your website can transfer to and from the server each month. Hosting providers, like a Web hosting company in Gurgaon, set a bandwidth limit to ensure resources are distributed fairly among customers. If your site reaches this limit, your hosting provider might slow down access (throttle it) or even temporarily suspend your site until the next billing cycle. Knowing your bandwidth needs can help you choose the right hosting plan.
Managed Hosting Managed hosting is a type of service where the hosting provider handles essential maintenance tasks for you, such as software updates, security monitoring, and backups. This can save time and effort, especially for those who are less experienced with server management. Managed hosting is an excellent option for businesses that want to concentrate on their main activities while entrusting technical tasks to professionals.
IP Address An IP address is a unique set of numbers assigned to each device connected to the internet, including your hosting server. It acts as an identifier, allowing computers to locate and communicate with each other. When you purchase a hosting plan, your server will be assigned an IP address, which you can use to access your website files, manage the server, and set up remote connections.
Uptime Uptime is a measure of the reliability of your hosting service. It represents the percentage of time that the server is online and accessible. Most reliable providers aim for an uptime of 99.9% or higher. A high uptime rate is crucial because frequent downtime can result in lost traffic and frustrated visitors. Some hosts offer an uptime guarantee, promising compensation if their service falls below the agreed uptime rate.
Shared Hosting
It is an affordable hosting option where multiple websites utilize the same server. Since the cost of running the server is divided among all users, shared hosting are generally inexpensive. However, because resources are shared, high traffic on one website can affect the performance of others on the same server. This makes shared hosting ideal for small websites or those just starting.
VPS (Virtual Private Server) A VPS, or Virtual Private Server, provides a more dedicated portion of server resources compared to shared hosting. Although multiple users still share the physical server, each VPS operates independently, with allocated CPU, RAM, and storage. VPS hosting is a good middle-ground option for websites that need more power and customization than shared hosting can provide, but without the higher cost of a dedicated server.
Dedicated Hosting With dedicated hosting, you have an entire server reserved solely for your website. This means you have full control over all resources, including CPU, memory, and storage, without any competition from other users. Dedicated hosting is the most powerful but also the most expensive option. It’s often used by large businesses or websites with high traffic that require top performance and customization.
Disk Spaced
Disk space, or storage space, refers to the amount of space on a server available for storing your website's files, databases, and other content. The two main types of storage drives are HDDs (Hard Disk Drives) and SSDs (Solid State Drives), with SSDs offering faster performance. When choosing a hosting plan, consider the storage needs of your website, especially if you plan to host high-resolution images, videos, or large files.
11. SSL (Secure Sockets Layer) SSL is a security protocol that encrypts data transferred between your website and its visitors, keeping information secure. To activate SSL, you'll need an SSL certificate, which enables HTTPS for your website, signifying a secure connection. This is particularly crucial for websites that manage sensitive data, like login credentials or payment information. Many web hosting providers in Gurgaon now offer SSL certificates as part of their hosting packages
Conclusion Understanding these web hosting terms will help you make better decisions when setting up your website. Choosing the right hosting plan and knowing the features available can save you time, money, and frustration in the long run. Whether you’re just starting with a small website or launching a large-scale project, familiarity with these terms will make the process smoother and more manageable.
If you want to know more about our services, please feel free to contact us at:
Mobile: 08826196688 or 9910248322
Email: [email protected]
Website: www.deltait.co.in
#website hosting company in Gurgaon#Web hosting company in Gurgaon#web hosting providers in Gurgaon#delta web services
2 notes
·
View notes
Video
youtube
Complete Hands-On Guide: Upload, Download, and Delete Files in Amazon S3 Using EC2 IAM Roles
Are you looking for a secure and efficient way to manage files in Amazon S3 using an EC2 instance? This step-by-step tutorial will teach you how to upload, download, and delete files in Amazon S3 using IAM roles for secure access. Say goodbye to hardcoding AWS credentials and embrace best practices for security and scalability.
What You'll Learn in This Video:
1. Understanding IAM Roles for EC2: - What are IAM roles? - Why should you use IAM roles instead of hardcoding access keys? - How to create and attach an IAM role with S3 permissions to your EC2 instance.
2. Configuring the EC2 Instance for S3 Access: - Launching an EC2 instance and attaching the IAM role. - Setting up the AWS CLI on your EC2 instance.
3. Uploading Files to S3: - Step-by-step commands to upload files to an S3 bucket. - Use cases for uploading files, such as backups or log storage.
4. Downloading Files from S3: - Retrieving objects stored in your S3 bucket using AWS CLI. - How to test and verify successful downloads.
5. Deleting Files in S3: - Securely deleting files from an S3 bucket. - Use cases like removing outdated logs or freeing up storage.
6. Best Practices for S3 Operations: - Using least privilege policies in IAM roles. - Encrypting files in transit and at rest. - Monitoring and logging using AWS CloudTrail and S3 access logs.
Why IAM Roles Are Essential for S3 Operations: - Secure Access: IAM roles provide temporary credentials, eliminating the risk of hardcoding secrets in your scripts. - Automation-Friendly: Simplify file operations for DevOps workflows and automation scripts. - Centralized Management: Control and modify permissions from a single IAM role without touching your instance.
Real-World Applications of This Tutorial: - Automating log uploads from EC2 to S3 for centralized storage. - Downloading data files or software packages hosted in S3 for application use. - Removing outdated or unnecessary files to optimize your S3 bucket storage.
AWS Services and Tools Covered in This Tutorial: - Amazon S3: Scalable object storage for uploading, downloading, and deleting files. - Amazon EC2: Virtual servers in the cloud for running scripts and applications. - AWS IAM Roles: Secure and temporary permissions for accessing S3. - AWS CLI: Command-line tool for managing AWS services.
Hands-On Process: 1. Step 1: Create an S3 Bucket - Navigate to the S3 console and create a new bucket with a unique name. - Configure bucket permissions for private or public access as needed.
2. Step 2: Configure IAM Role - Create an IAM role with an S3 access policy. - Attach the role to your EC2 instance to avoid hardcoding credentials.
3. Step 3: Launch and Connect to an EC2 Instance - Launch an EC2 instance with the IAM role attached. - Connect to the instance using SSH.
4. Step 4: Install AWS CLI and Configure - Install AWS CLI on the EC2 instance if not pre-installed. - Verify access by running `aws s3 ls` to list available buckets.
5. Step 5: Perform File Operations - Upload files: Use `aws s3 cp` to upload a file from EC2 to S3. - Download files: Use `aws s3 cp` to download files from S3 to EC2. - Delete files: Use `aws s3 rm` to delete a file from the S3 bucket.
6. Step 6: Cleanup - Delete test files and terminate resources to avoid unnecessary charges.
Why Watch This Video? This tutorial is designed for AWS beginners and cloud engineers who want to master secure file management in the AWS cloud. Whether you're automating tasks, integrating EC2 and S3, or simply learning the basics, this guide has everything you need to get started.
Don’t forget to like, share, and subscribe to the channel for more AWS hands-on guides, cloud engineering tips, and DevOps tutorials.
#youtube#aws iamiam role awsawsaws permissionaws iam rolesaws cloudaws s3identity & access managementaws iam policyDownloadand Delete Files in Amazon#IAMrole#AWS#cloudolus#S3#EC2
2 notes
·
View notes
Text
What Is Linux Web Hosting? A Beginner's Guide
In the ever-evolving digital landscape, the choice of web hosting can significantly impact your online presence. One of the most popular options available is Linux web hosting. But what exactly does it entail, and why is it so widely preferred? This beginner’s guide aims to demystify Linux web hosting, its features, benefits, and how it stands against other hosting types.
Introduction to Web Hosting
Web hosting is a fundamental service that enables individuals and organisations to make their websites accessible on the internet. When you create a website, it consists of numerous files, such as HTML, images, and databases, which need to be stored on a server. A web host provides the server space and connectivity required for these files to be accessed by users online.
There are several types of web hosting, each designed to cater to different needs and budgets. Shared hosting is a cost-effective option where multiple websites share the same server resources. Virtual Private Server (VPS) hosting offers a middle ground, providing dedicated portions of a server for greater performance and control. Dedicated hosting provides an entire server exclusively for one website, ensuring maximum performance but at a higher cost. Cloud hosting uses multiple servers to balance the load and maximise uptime, offering a scalable solution for growing websites.
Web hosting services also include various features to enhance the performance and security of your website. These can range from basic offerings like email accounts and website builders to more advanced features like SSL certificates, automated backups, and DDoS protection. The choice of web hosting can significantly influence your website’s speed, security, and reliability, making it crucial to choose a solution that aligns with your specific requirements.
Understanding the different types of web hosting and the features they offer can help you make an informed decision that suits your needs. Whether you are running a personal blog, a small business website, or a large e-commerce platform, selecting the right web hosting service is a critical step in establishing a successful online presence.
What Is Linux Web Hosting?
Linux web hosting is a type of web hosting service that utilises the Linux operating system to manage and serve websites. Renowned for its open-source nature, Linux provides a stable and secure platform that supports a wide array of programming languages and databases, making it a favoured choice amongst developers and businesses. This hosting environment typically includes support for popular technologies such as Apache web servers, MySQL databases, and PHP scripting, which are integral to modern website development.
One of the distinguishing features of Linux web hosting is its cost-effectiveness. As an open-source system, Linux eliminates the need for costly licensing fees associated with proprietary software, thereby reducing overall hosting expenses. This makes it an attractive option for individuals and organisations operating on a budget.
Moreover, Linux is celebrated for its robust performance and high stability. Websites hosted on Linux servers experience less downtime and faster loading times, which are critical factors for maintaining user engagement and search engine rankings. The operating system’s extensive community of developers continuously works on updates and improvements, ensuring that Linux remains a cutting-edge choice for web hosting.
Linux web hosting also offers considerable flexibility and customisation options. Users have the freedom to configure their hosting environment to meet specific needs, whether they are running simple static websites or complex dynamic applications. This versatility extends to compatibility with various content management systems (CMS) like WordPress, Joomla, and Drupal, which often perform optimally on Linux servers.
In summary, Linux web hosting provides a reliable, secure, and cost-effective solution that caters to a diverse range of web hosting requirements. Its compatibility with essential web technologies and its inherent flexibility make it a preferred choice for many web developers and site owners.
Key Benefits of Linux Web Hosting
Linux web hosting offers several compelling advantages that contribute to its widespread adoption. One of its primary benefits is cost-effectiveness. The open-source nature of Linux eliminates the need for expensive licensing fees, allowing users to allocate their resources more efficiently. This makes it an ideal choice for individuals and organisations with budget constraints. Additionally, Linux is celebrated for its high stability and robust performance. Websites hosted on Linux servers often experience minimal downtime and faster loading speeds, which are essential for maintaining user engagement and achieving favourable search engine rankings.
Another significant benefit is the extensive community support that comes with Linux. The active community of developers and enthusiasts continuously works on updates, patches, and security enhancements, ensuring that Linux remains a secure and reliable platform for web hosting. This ongoing development also means that any issues or vulnerabilities are promptly addressed, offering peace of mind for website owners.
Flexibility is another key advantage of Linux web hosting. The operating system supports a wide range of programming languages, including PHP, Python, and Ruby, making it suitable for various types of web applications. Additionally, Linux servers are highly customisable, allowing users to configure their environment to meet specific needs, whether they are running simple static sites or complex dynamic applications.
Moreover, Linux web hosting is highly compatible with popular content management systems (CMS) like WordPress, Joomla, and Drupal. This compatibility ensures that users can easily deploy and manage their websites using these platforms, benefiting from their extensive plugin and theme ecosystems.
Lastly, Linux's superior security features are worth noting. The operating system is inherently secure and offers various built-in security measures. When combined with best practices such as regular updates and strong passwords, Linux web hosting provides a highly secure environment for any website.
Understanding Linux Distributions in Web Hosting
Linux comes in a variety of distributions, each tailored to meet specific needs and preferences. Among the most popular for web hosting are Ubuntu, CentOS, and Debian. Ubuntu is celebrated for its ease of use and extensive community support, making it a great choice for those new to Linux. CentOS, a favourite in enterprise environments, offers impressive stability and long-term support, which ensures a dependable hosting experience. Debian stands out with its robust package management system and commitment to open-source principles, providing a reliable and secure foundation.
Each distribution brings its own strengths to the table. For example, Ubuntu’s frequent updates ensure access to the latest features and security patches, while CentOS’s extended support cycles make it a solid choice for those requiring a stable, long-term hosting environment. Debian’s extensive repository of packages and minimalistic approach offers flexibility and customisation, catering to the needs of experienced users.
Selecting the right Linux distribution largely depends on your specific requirements and technical expertise. If you prioritise user-friendliness and a wealth of resources for troubleshooting, Ubuntu might be the ideal pick. On the other hand, if you need a rock-solid, stable platform for an enterprise-level application, CentOS could be more appropriate. For those seeking maximum control and a commitment to open-source principles, Debian is a compelling option.
Ultimately, understanding the nuances of these distributions will enable you to choose a Linux environment that aligns with your web hosting needs, ensuring optimal performance and reliability.
Linux Hosting vs Windows Hosting: A Comparative Analysis
When evaluating Linux hosting against Windows hosting, several critical factors come into play. Cost is a significant differentiator; Linux hosting is generally more affordable due to its open-source nature, which eliminates the need for expensive licensing fees. In contrast, Windows hosting often incurs additional costs related to proprietary software licenses.
Compatibility is another important aspect to consider. Linux hosting is renowned for its compatibility with a broad array of open-source software and applications, including popular content management systems like WordPress, Joomla, and Magento. These platforms typically perform better on Linux servers due to optimised server configurations. On the other hand, Windows hosting is the go-to option for websites that rely on Microsoft-specific technologies such as ASP.NET, MSSQL, and other .NET frameworks.
Performance and stability are also crucial elements in this comparison. Linux hosting often provides superior uptime and faster loading speeds due to the lightweight nature of the Linux operating system. The robust performance of Linux servers is further enhanced by the active community that continuously works on optimisations and security patches. Windows hosting, while also reliable, can sometimes be more resource-intensive, potentially affecting performance.
Customisation and control levels differ significantly between the two. Linux offers greater flexibility and customisation options, allowing users to tweak server settings and configurations extensively. This level of control is particularly beneficial for developers who need a tailored hosting environment. Conversely, Windows hosting is typically easier to manage for those familiar with the Windows operating system but may offer less flexibility in terms of customisation.
Security measures also vary between Linux and Windows hosting. Linux is often praised for its strong security features, which are bolstered by a large community dedicated to promptly addressing vulnerabilities. While Windows hosting is secure, it may require more frequent updates and maintenance to ensure the same level of protection.
Common Use Cases for Linux Web Hosting
Linux web hosting is versatile and caters to a broad range of applications, making it a popular choice across various sectors. One of the most common use cases is hosting blogs and personal websites, particularly those built on platforms like WordPress. The open-source nature of Linux and its compatibility with PHP make it an ideal environment for WordPress, which powers a significant portion of the web.
E-commerce websites also benefit greatly from Linux web hosting. Solutions like Magento, PrestaShop, and OpenCart often perform better on Linux servers due to their need for a robust, secure, and scalable hosting environment. The flexibility to configure server settings allows online store owners to optimise performance and ensure a smooth shopping experience for their customers.
Content Management Systems (CMS) such as Joomla and Drupal are another prime use case. These systems require reliable and flexible hosting solutions to manage complex websites with large amounts of content. Linux's support for various databases and scripting languages ensures seamless integration and optimal performance for CMS-based sites.
Developers frequently turn to Linux web hosting for custom web applications. The operating system supports a variety of programming languages, including Python, Ruby, and Perl, making it suitable for a wide array of development projects. Its command-line interface and extensive package repositories allow developers to install and manage software efficiently.
Additionally, Linux web hosting is commonly used for educational and non-profit websites. The low cost and high reliability make it a practical choice for schools, universities, and charitable organisations that need a dependable online presence without breaking the bank.
Setting Up a Linux Web Hosting Environment
Setting up a Linux web hosting environment can be straightforward with the right approach. Begin by selecting a reputable hosting provider that offers Linux-based plans. After signing up, you'll typically be granted access to a control panel, such as cPanel or Plesk, which simplifies the management of your hosting environment. Through the control panel, you can manage files, databases, email accounts, and more.
Next, if you're using a content management system (CMS) like WordPress, Joomla, or Drupal, you can often find one-click installation options within the control panel. This feature makes it easy to get your website up and running quickly. Additionally, ensure that you configure your domain name to point to your new hosting server, which usually involves updating your domain's DNS settings.
For those who prefer more control or are comfortable using the command line, you can manually set up your web server using SSH access. This method allows you to install and configure web server software like Apache or Nginx, as well as databases such as MySQL or PostgreSQL.
Regardless of the setup method you choose, it's crucial to secure your server from the outset. This includes setting up a firewall, enabling SSH key authentication for secure access, and regularly updating all software to protect against vulnerabilities. Regularly monitoring your server's performance and security logs can help you stay ahead of potential issues, ensuring a stable and secure hosting environment for your website.
Security Best Practices for Linux Web Hosting
Securing your Linux web hosting environment is paramount to safeguarding your website against potential threats. Begin by ensuring your server software and all installed applications are up to date. Regular updates often include patches for security vulnerabilities, making this a critical step. Utilise strong, unique passwords for all user accounts, and consider employing SSH key authentication for added security when accessing your server remotely.
Setting up a firewall is another essential measure. Tools like iptables or firewalld can help you configure firewall rules to control incoming and outgoing traffic, thereby reducing the risk of unauthorised access. Implementing intrusion detection systems (IDS), such as Fail2Ban, can provide an additional layer of security by monitoring and blocking suspicious activities.
Consider deploying an SSL certificate to encrypt data transmitted between your server and users' browsers. This not only enhances security but also boosts user trust and can improve your search engine rankings. Additionally, limit the use of root privileges; create separate user accounts with the necessary permissions to minimise potential damage in the event of a breach.
Regularly backup your data to mitigate the impact of data loss due to hardware failure, cyber-attacks, or human error. Automated backup solutions can simplify this process, ensuring your data is consistently protected. Monitoring your server's logs can also be invaluable for identifying unusual activity early. Tools like Logwatch or the ELK Stack can assist in log management and analysis, enabling you to take swift action if anomalies are detected.
Common Challenges and How to Overcome Them
Setting up and maintaining a Linux web hosting environment can present various challenges, especially for those new to the platform. One frequent issue is navigating the command line, which can be daunting for beginners. Engaging with online tutorials, forums, and communities like Stack Overflow can be invaluable for learning the basics and troubleshooting problems. Another common challenge is software incompatibility. Ensuring your web applications are compatible with the Linux distribution you choose is crucial; consulting documentation and support resources can help mitigate these issues.
Security configuration can also be a complex task. Implementing best practices such as setting up firewalls, regular updates, and using strong authentication methods requires a good understanding of Linux security principles. Managed hosting services can offer a solution here by handling these technical aspects for you, allowing you to focus on your website content.
Resource management is another area where users might struggle. Monitoring server performance and managing resources effectively ensures your website runs smoothly. Utilising monitoring tools and performance optimisation techniques can help you stay ahead of potential issues. Lastly, when it comes to server backups, regular, automated solutions are essential to prevent data loss and minimise downtime. Being proactive in addressing these challenges will ensure a more seamless and secure Linux web hosting experience.
Popular Control Panels for Linux Web Hosting
Control panels are invaluable for simplifying the management of your Linux web hosting environment. Among the most popular are cPanel, Plesk, and Webmin. cPanel is renowned for its intuitive interface and extensive feature set, making it a favourite among users who need a straightforward yet powerful management tool. Plesk offers robust functionality and supports both Linux and Windows servers, providing versatility for those who manage multiple server environments. Webmin stands out as a free, open-source option that allows comprehensive server management through a web interface, catering to those who prefer a customisable and cost-effective solution. Each control panel brings unique strengths, helping to streamline tasks such as file management, database administration, and security configurations.
Choosing the Right Linux Web Hosting Provider
Choosing the right Linux web hosting provider involves several key considerations. Firstly, evaluate the quality of customer support offered. Responsive and knowledgeable support can be invaluable, especially when troubleshooting technical issues or during the initial setup phase. Check if the provider offers 24/7 support and multiple contact methods such as live chat, email, and phone.
Another crucial factor is the security measures in place. Opt for providers that offer robust security features, including regular backups, SSL certificates, firewalls, and DDoS protection. These features help safeguard your website against potential threats and ensure data integrity.
Reliability and uptime guarantees are also vital. Aim for providers that offer at least a 99.9% uptime guarantee, as frequent downtimes can significantly affect your website’s accessibility and user experience. Additionally, look into the provider’s data centre infrastructure and redundancy measures, which can impact overall performance and reliability.
Scalability is another important aspect to consider. As your website grows, you’ll need the flexibility to upgrade your hosting plan seamlessly. Check if the provider offers scalable solutions, such as easy transitions to VPS or dedicated hosting, without causing disruptions to your site.
Lastly, consider the hosting plans and pricing structures available. While cost-effectiveness is a significant benefit of Linux web hosting, ensure the plans align with your specific needs. Compare the features, storage, bandwidth, and other resources included in different plans to find the best value for your money.
Reading customer reviews and seeking recommendations can also provide insights into the provider’s reputation and service quality. By carefully evaluating these factors, you can choose a Linux web hosting provider that meets your requirements and supports your online endeavours effectively.
Conclusion and Final Thoughts
Linux web hosting stands out as an optimal choice for both beginners and seasoned web developers. Its open-source nature provides an affordable, highly customisable, and secure environment, suitable for a diverse range of websites, from personal blogs to large e-commerce platforms. The extensive community support ensures ongoing improvements and prompt resolution of issues, contributing to its reliability and performance. Choosing the right hosting provider is crucial; look for robust security measures, excellent customer support, and scalability to accommodate your website's growth. By leveraging the strengths of Linux web hosting, you can build a resilient and efficient online presence that meets your specific needs and goals.
4 notes
·
View notes
Text
Cheap VPS Hosting Services in India – SpectraCloud
SpectraCloud provides Cheap VPS Hosting Services in India for anyone looking to get simple and cost-effective compute power for their projects. VPS hosting is provided with Virtualized Servers, SpectraCloud virtual machines, and there are multiple with Virtualized Servers types for use cases ranging from personal websites to highly scalable applications such as video streaming and gaming applications. You can choose between shared CPU offerings and dedicated CPU offerings based on your anticipated usage.
VPS hosting provides an optimal balance between affordability and performance, making it perfect for small to medium-sized enterprises. If you're looking for a trustworthy and cost-effective VPS hosting option in India, SpectraCloud arise as a leading choice. Offering a range of VPS Server Plans designed to combine various business requirements, SpectraCloud guarantees excellent value for your investment.

What is VPS Hosting?
VPS hosting refers to a Web Hosting Solution where a single physical server is segmented into several virtual servers. Each virtual server functions independently, providing the advantages of a dedicated server but at a more affordable price. With VPS Hosting, you have the ability to tailor your environment, support you to modify server settings, install applications, and allocate resources based on your unique needs.
Why Choose VPS Hosting?
The main benefit of VPS hosting is its adaptability. Unlike shared hosting, which sees many websites utilizing the same server resources, VPS hosting allocates dedicated resources specifically for your site or application. This leads to improved performance, superior security, and increased control over server settings.
For companies in India, where budget considerations are typically crucial, VPS hosting presents an excellent choice. It provides a superior level of performance compared to shared hosting, all while avoiding the high expenses linked to dedicated servers.
SpectraCloud: Leading the Way in Low-Cost VPS Hosting in India
SpectraCloud has positioned itself as a leader in the VPS Hosting market in India by offering affordable, high-quality VPS Server Plans. Their services provide for businesses of all sizes, from startups to established enterprises, providing a range of options that fit different budgets and needs.
1. Variety of VPS Server Plans
SpectraCloud offers a wide range of VPS Server Plans, ensuring that there’s something for everyone. Whether you’re running a small website, an e-commerce platform, or a large-scale application, SpectraCloud has a plan that will suit your needs. Their VPS plans are customizable, allowing you to choose the amount of RAM, storage, and capability that fits your specific requirements. This flexibility ensures that you only pay for what you need, making it an economical choice for businesses looking to optimize their hosting expenses.
2. Best VPS for Windows Hosting
For businesses that require a Windows environment, SpectraCloud offers the Best VPS for Windows Hosting in India. Windows VPS hosting is essential for running applications that require Windows server, such as ASP.NET websites, Microsoft Exchange, and SharePoint. SpectraCloud Windows VPS Plans are designed for high performance and reliability, ensuring that your Windows-based applications run smoothly and efficiently.
Windows VPS Hosting comes pre-installed with the Windows operating system, and you can choose from different versions depending on your needs. Moreover, SpectraCloud provides full root access, so you can configure your server the way you want.
3. Affordable and Low-Cost VPS Hosting
SpectraCloud commitment to providing Affordable VPS Hosting is evident in their competitive pricing. They understand that businesses need cost-effective solutions without compromising on quality. By offering Low-Cost VPS Hosting Plans, SpectraCloud ensures that businesses can access top-tier hosting services without breaking the bank.
Their low-cost VPS hosting plans start at prices that are accessible to even the smallest businesses. Despite the affordability, these plans come with robust features such as SSD storage, high-speed network connectivity, and advanced security measures. This combination of affordability and quality makes SpectraCloud a preferred choice for businesses seeking budget-friendly VPS Hosting in India.
Key Features of SpectraCloud VPS Hosting
1. High Performance and Reliability
SpectraCloud VPS hosting is built on powerful hardware and cutting-edge technology. Their servers are equipped with SSD storage, which ensures faster data retrieval and improved website loading times. With SpectraCloud, you can expect minimal downtime and consistent performance, which is crucial for maintaining the smooth operation of your business.
2. Full Root Access
One of the significant advantages of using SpectraCloud VPS hosting is the full root access they provide. This means you have complete control over your server, allowing you to install software, configure settings, and manage your hosting environment according to your option. Full root access is particularly beneficial for businesses that need to customize their server to meet specific requirements.
3. Scalable Resources
As your business grows, your hosting needs will develop. SpectraCloud offers scalable VPS hosting plans that allow you to upgrade your resources as needed. Whether you need more RAM, storage, or Ability, SpectraCloud makes it easy to scale up your VPS plan without experiencing any downtime. This scalability ensures that your hosting solution can grow with your business.
4. Advanced Security
Security is a top priority for SpectraCloud. Their VPS Hosting Plans come with advanced security features to protect your data and applications. This includes regular security updates, firewalls, and DDoS protection. By choosing SpectraCloud, you can rest assured that your business data is safe from cyber threats.
5. 24/7 Customer Support
SpectraCloud customer support team is available 24/7 to assist you with any issues or questions you may have. Their knowledgeable and friendly support staff can help you with everything from server setup to troubleshooting technical problems. This 24/7 support ensures that you always have someone to turn to if you encounter any issues with your VPS hosting.
Conclusion:
In a competitive market like India, finding the right VPS Hosting Provider can be tough. However, SpectraCloud stands out with a perfect balance of affordability, performance, and reliability. The company's diverse offering of VPS Server Plans, coupled with its expertise in Windows VPS hosting and commitment to cost-effective solutions, make it the first choice for businesses of all sizes.
Whether you're a startup looking for budget-friendly hosting options or an established enterprise in need of a scalable and reliable VPS solution, SpectraCloud has a plan to meet your needs. With robust features, advanced security, and excellent customer support, SpectraCloud ensures you have the hosting foundation you need for your business to succeed. Choose SpectraCloud for your VPS Hosting needs in India and experience the benefits of top-notch hosting services without spending a fortune.
#spectracloud#vps hosting#vps hosting services#vps server plans#web hosting services#hosting services provider#cheap hosting services#affordable hosting services#cheap vps server
3 notes
·
View notes