#Default font for Note file
Explore tagged Tumblr posts
Visit Tumblr Blog
Explore Tumblr blogs with no restrictions, modern design and the best experience.
Last Seen Tumblr Blogs


Fun Fact
There were a total of 171.5 billion posts on Tumblr in 2019.
Text


poppins font override for the sims 3.
nothing fancy, I just wanted to have something to link back to because I've had a lot of people asking about this recently. this package turns the main font of the game into the font 'poppins'. I haven't replaced any of the other fonts used in the game outside of the main one, so whatever uses that ugly papyrus looking font in the game for example will still be what it is by default. I'm sure I'll change that down the line, but I'm just sharing as is for now.
just drop the file into your mods folder and you should be golden (that's all I've done and as you can see it works for me lol).
note that my reshade takes away some of the crispness of text in general, in hindsight I probably should've taken screenshots without my reshade on but I have closed my game and I'm hungry sorry
download.
421 notes
·
View notes
Text

Chop Shop is strictly 18+ for language, themes, and potential explicit content.
🔗 - Game Intro | Bug Report | Ko-Fi
Episode Three is now available! (+ 86,000) - PLAY HERE
Get your first taste of the underground car scene.
Meet some other players in the game.
Be made an offer.
5 achievements up for grabs!
And more!
AN: thank you so much for the patience - i've been dying to put this update out. lots of new characters and lots of variation!! there are 3 major paths to choose between in this ep, i recommend trying them all out! and thank you to my betas for keeping me sane lmao
This update comes with a patch and UI refresh (Version 1.1.2) Notes are under the cut. If preferred, you can access them in game in the start menu.
STORY
EPISODE 01:
MC should now be able to smoke! Buying cigarettes at the shop was not triggering correctly. If playing with an old save, you DO NOT have to restart as code at the beginning of EP 03 has resolved the error. Player will need to restart if they wish to read smoking related scenes in previous episodes.
Updated MC Name selection. Player can now choose from a list of names instead of having to input one to proceed.
Player can now give Taha their chocolate bar if it's in their inventory.
When asking Maz about their scars, the second choice 'You want to ask about it but you're going to keep your mouth shut.' should now take you to the correct response.
Extended and updated 'End Game' scenes.
EPISODE 02:
If MC is faint after exiting the car, but also drunk, they should now get the fainting scene, followed by Dilani helping the MC in the bathroom.
UI + TECHNICAL
SETTINGS:
Autoname Save is now defaulted to ON. This is to add ease and flow to gameplay, especially for mobile, tablet, and app users, instead of calling for an inputted saved name. If player wants to input save names, toggle Autoname Saves to OFF.
Autoname Save previously only used the forename of the MC but now includes the surname as well.
Removed the Fullscreen toggle as it is only intended for desktop use. Player can still toggle fullscreen function via the UI bar on the desktop interface.
Added a choice indicator toggle. (This probably won't come into effect until EP 04 or 05)
Changed serif font from Vollkron to EB Garamond.
OTHER:
Changing the MC's pronouns via the Dashboard has been updated. Additionally, after confirmation will take player back to the Dashboard and not close the dialog boxes entirely.
Hovering over 'Personality', 'Motives', and 'Skills' titles in the Dashboard will now display an information box with a definition. Mobile and tablet users will need to tap on the title.
'Resume Game' now only appears on the main menu when there is an autosave in the saves log.
Choices styling changes.
General UI and button style changes.
Fixed errors with the text message styling.
Added styling for reading text off of a page in game.
Darkened blue in light theme 'Skyline' to reduce eye strain.
CREATE A SAVE
Introducing Create a Save! This feature allows players to quickly manufacture a save file and start at a later point in the game.
Set your identity, appearance, history, and statistics; including personality, motives, and skills. Continue to set key decisions made in previous episodes.
Randomise options available for creating a PC and key decisions.
OTHER
Fixed gaps and spacing issues.
Minor phrasing and sentence structure changes.
Grammar and typo fixes.
whew -- that's a lot of patch notes! apologies for so much that needed to be fixed.
this update shouldn't break/ mess with saves but as a disclaimer i will say, if you spot anything funky, broken, or you don't think things are triggering correctly, try starting a new save. the new create a save feature is incredibly code heavy, and it's been tested relentlessly, but i wouldn't be surprised if something crops up.
if starting a new save doesn't resolve your issue - please submit to bug report or just send me an ask/message.
some things have been meaning to get fixed for Some Time - thank you to everyone that is using the bug report form!
apologies if there are typos and/or bugs - this was a long one to edit and my lovely betas did an OUTSTANDING job reading so much for ep 3 - thank you so much again!!! this time i am going to give it a bit more time before i put together a patch so i can grab more error responses haha.
create a save has also added a wee chunk to the word count, somewhere around 6k, but i'm not including it in the episode 03 word count as it's purely code. so, if you think the total wc is off, that's why!
if you've read this far, happy reading and thank you so much for the continued support!! :) - becky <3
679 notes
·
View notes
Text

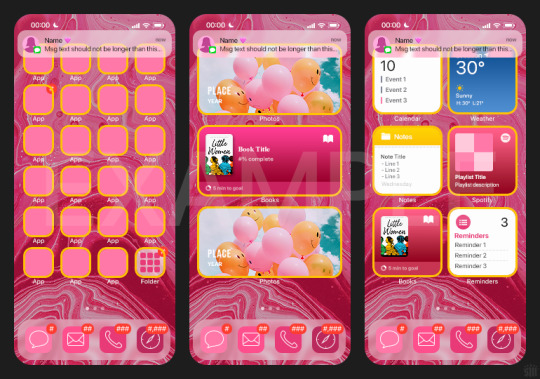
HOW TO: Make an iPhone Layout + Downloadable Template
Hi! I've gotten a few messages asking for a tutorial on my iPhone gifsets — but instead of only doing a tutorial (that would probably be triple the length this one already is), I decided to turn my layout into a template with all the bits and bobs! In the "tutorial" under the cut, I'll share everything you'll need, a free template download, and quickly go over how to use this template. :)
Disclaimer: This template uses Video Timeline and this tutorial assumes you have a basic to intermediate understanding of Photoshop.

PHASE 1: THE ASSETS
1.1 – Download fonts. These are the fonts used for all assets I've included in my template: – SF Pro or SF Pro Display (Regular, Medium, Bold): Either version works, they look nearly identical. You can download directly from https://developer.apple.com/fonts/ or easily find it via Google – Bebas Neue: Free on Google Fonts, Adobe Fonts, and dafont – Times New Roman (Bold): Should be a default font in Photoshop

Make sure to download and install any of the fonts you don't already have before opening my template. That way, once you open the template file, all the settings (font size, weight, spacing, color, opacity, etc.) are as intended.
1.2 – Download my template. Before you use my template, all I ask is that you don't claim or redistribute it as your own and that you give me proper credit in the caption of your post. Making these iPhone gifsets takes me a longgg time and turning this layout into a template took several hours too.
DOWNLOAD TEMPLATE VIA KO-FI ← This template is completely free to download (just enter $0), but if you feel inclined to tip me, I appreciate you! 💖

BTW this template also includes some of my frequently used icons!
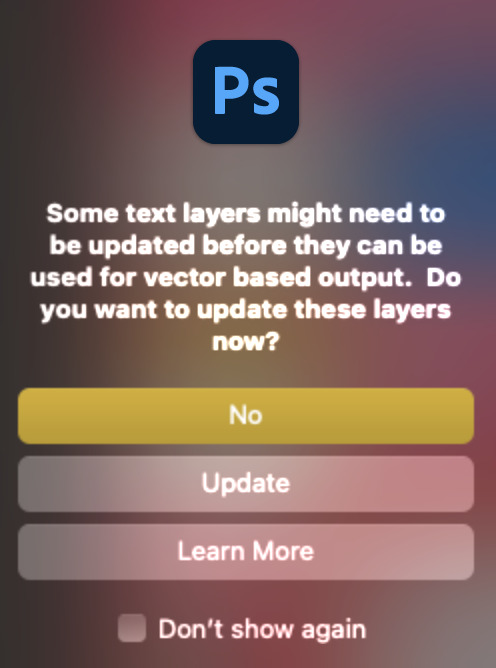
NOTE: If, for some reason, you open the template and see the pop-up shown below, click "NO" — otherwise, the fonts will be all messed up:
And if you see this triangle with an exclamation point by a text layer, don't double-click it — it'll mess up the font as well:

PHASE 2: THE GIFS
I'm just going to briefly go over gif sizes and my recommendations. Also, keep in mind when grabbing your scenes, you'll want all of these gifs to be the same amount of frames.
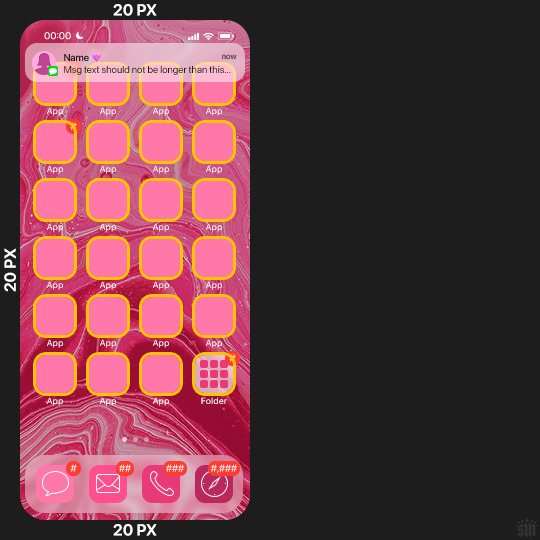
2.1 – Background Gif: 540 x 540 px. I recommend this size so you have a good amount of visibility for the gif behind the iPhone wallpaper. I also recommend making this black and white (or in my case, black and white with a slight blue tint — idk I just like the way it looks) so the wallpaper coloring can stand out.
2.2 – Wallpaper Gif: 230 (w) x 500 (h) px. Keep in mind the very narrow dimensions of the wallpaper! And also keep in mind that you'll have a bunch of apps and widgets covering the image. I try to use wide shots (or layer my clips into looking like wide shots). Also, keep in mind your color scheme for your set and your character's aesthetic! I tend to focus on one or two colors for the wallpaper.
I usually position the wallpaper to the side with 20px bumpers, so there's lots of space to see the background:
2.3 – Large Photo Widget Gif: 201 (w) x 96 (h) px.
2.4 – Small Photo Widget Gif: 94 x 94 px.
PHASE 3: THE TEMPLATE – "IPHONE" FOLDER
In this section, I'll try to quickly walk you through how to use this template and some bits that may require extra instructions. I'll be going through each folder from top to bottom.
3.1 – Status Bar. Time, Service, and WiFi are pretty self-explanatory. In the Battery folder, you can use the shape tool to adjust the shape layers labeled "Fill (Adjustable Shape!)" to customize the battery level.
3.2 – Message Notification. Again, these are pretty self-explanatory. I've already masked the circle for the contact photo, so you can simply import any photo and use the transform tool to shrink it down. The circle is 24x24 px. If you don't want to use a photo, there's another folder called Default Initials.
If your message text can't fit the text box, the message should end with ellipses which is how iOS caps off long texts.
3.3 – Blurred Banner (IMPORTANT) This folder is easy to miss because there's only one placeholder layer in there. On iPhones, the area behind a banner notification and the dock get blurred (including the wallpaper and any apps).
What to do: Make a duplicate of the apps in Row 1 and/or widgets that intersect the message banner, convert them all into one smart object, apply a Gaussian Blur filter (Radius: 3.0 pixels) on the smart object, and move the smart object into this masked folder!
(There's another masked folder in the Wallpaper folder for the dock which I'll go over in that section.)
3.4 – Apps Turn off the yellow guide if you don't need it to keep things aligned and turn off layers you don't need by clicking the eye icon. Replace the "App" placeholder text with your app name, change the color or gradient of the square to compliment your color scheme, and add your custom app icon overlay!
If you can't find an app icon you need from the ones I provided, flaticon.com is a great resource. Also, if you can only find the filled version of an icon, check out this tutorial for how to make any text or shape into an outline.
Also, each app folder has 4 notification bubble options (1-4 digits). Again, you can toggle these on and off as you need!
3.5 – Big Widgets I like using these when my wallpaper has A LOT of negative space to fill. I included the Photos and Books widgets in my template, but there are lots of widgets available on iPhones. You can check some of the other ones I've done here, or if you have an iPhone, simply try adding some widgets to your phone!
There are also widgets bigger than these, but they would take up half of the phone screen which is why I don't use them for these edits.
3.6 – Small Widgets The only thing I'll say about these — because they're pretty straight forward — is there are a lot more weather themes than I included in my template. Also, if you set your character's phone to evening, the weather widget will show a dark background (sometimes with stars), so keep that in mind.
Speaking of, I've included Light Modes and Dark Modes for, I think, every applicable widget.
3.7 – Page Dots These barely perceptible dots indicate that your character has more pages of apps than shown in your gifset (so if an anon tries to come at you, you can just say "it's on the next page of apps" /j /lh)
3.8 – Dock Again, the dock has notification bubble options and I've included the default app designs, custom filled designs, and custom outlined designs for iMessage, Phone, Email, and Safari (there's also a FaceTime alternative if that's how your character rolls). These are usually the apps people keep in their Dock, but this is fully customizable too. So, if your character is, like, super obsessed with Candy Crush or something and needs it in thumb's reach — you can put it in the dock.
3.9 – Wallpaper This whole folder is masked already to a 230x500 px rounded rectangle.
Inside, you'll find another "Blurred Portion" folder for the area behind the message banner notification and the dock.
What to do: Duplicate your gif layer and place it in this folder, remove any sharpening filters, and apply a Gaussian Blur filter (Radius: 3.0 px). Be sure to add any coloring/adjustment layers ABOVE this folder and your original sharpened gif layer.
PHASE 4: EXPORT
We made it!
I hope this template makes it super easy for you to recreate this layout! If you decide to try it out, feel free to tag me with #usernik.
If you notice anything wonky about the template, kindly let me know so I can fix it! And if you have any questions about how to use this template, please don't hesitate to send me a message! I just ask that you try to be specific in your question so I'm able to answer you the best I can!
#gif tutorial#completeresources#userpickles#usersmia#userabs#usertreena#alielook#userkosmos#usershreyu#userzaynab#tuserabbie#useryoshi#usersalty#tuserlucie#usernanda#userelio#userhella#usercats#gfx*#resource*
962 notes
·
View notes
Text
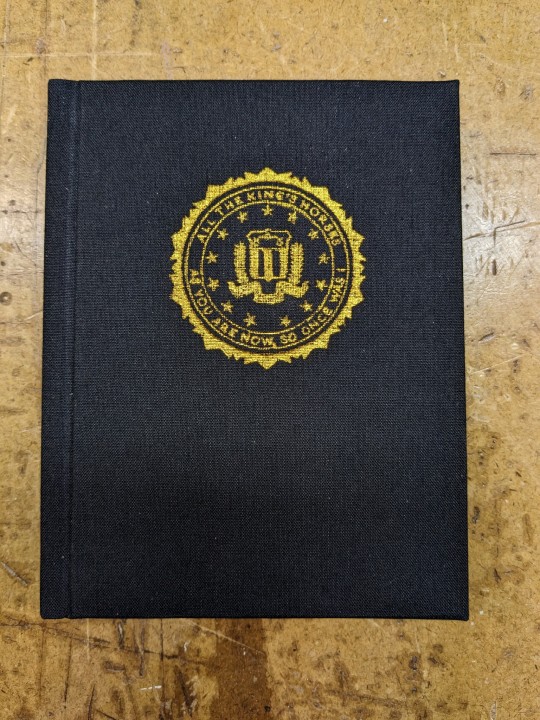

All The King's Horses | As You Are Now, So Once Was I by @samwpmarleau (grumkinsnark)
All The King's Horses [LiveJournal ch1] [Fanfiction.net ch1]
As You Are Now, So Once Was I [LiveJournal ch1] [Fanfiction.net ch1]
Fandom: Supernatural, Criminal Minds
Rating: Teen | PG-13
Category: Gen
Words: ~36,192
All The King's Horses: Protect and Serve. Fidelity, Bravery, Integrity. To what lengths would you go to uphold those oaths? When it comes to a particularly brutal and unsolvable case, the BAU just may have to resort to some more unorthodox methods. SPN/Criminal Minds crossover.
As You Are Now, So Once Was I: Sequel to "All the King's Horses." When Dean catches J.J.'s press conference on the news about a current case and notices a few...inconsistencies, he realizes the BAU is definitely going to need his help. Again. ON HIATUS


About the Book
FORMAT: Letter quarto, flatback bradel binding, french link stitch, no tapes
FONTS: EB Garamond [via Google Fonts], Supernatural Knight [via DaFont], D-Din [via Font Squirrel], Daniel [via DaFont], Permanent Marker [via Google Fonts], Arial
IMAGES: Seal of the FBI [via Wikipedia], Dean's handprint scar [by greenhorn-art]
MATERIALS: 24lb Xerox Bold Digital paper (8.5"x11"), 80pt binder's board (~2mm), 30/3 size waxed linen thread, embroidery floss (DMC #721), 1.9mm cording, brown cardstock, black Cialux bookcloth, gold foil transfer sheet (came with We R Memory Keepers hot foil pen)
PROGRAMS USED: Fic exported with FicHub, word doc compiled in LibreOffice Writer, Typeset in Affinity Publisher, imposed with Bookbinder-JS, title pages designed in Affinity Designer/Photo
.
I first read these stories on LiveJournal back in 2013, some time after I first encountered Tumblr, Supernatural, and the wider world of online fandom. Once I discovered SPNxCriminal Minds crossovers I devoured so many of them. Something about POV Outsider on the Winchesters, the existing connections with investigating monster vs human-crazy cases, and run-ins with the FBI... it's just works so well.
Of all the SPNxCM fics I read and enjoyed, All The King's Horses is among those that bookmarked themselves in my brain. Since it's been living there all these years, I thought it deserved a place on my bookshelf too.
(Rambling below)
Sourcing the Fic
I used FicHub to download the fics off of Fanfiction.net as HTML. Then I pasted them into LibreOffice Writer and created rich text documents of each fic, so I could Place them into Affinity Publisher.
The stories were crossposted, first on LiveJournal and then Fanfiction. I included the metadata from both sites in the appendices.
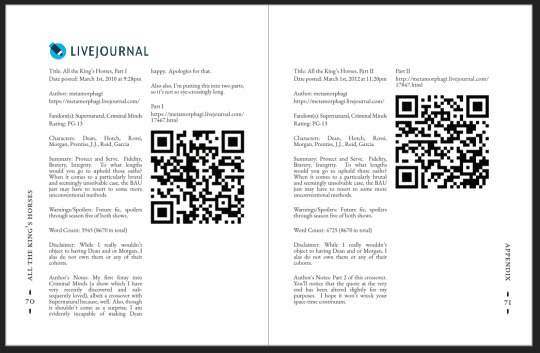
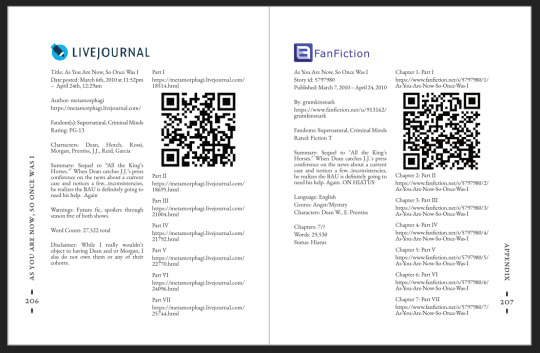
(It's fascinating to see the differences in the same work between platforms. FFN requires genres, so if the author doesn't add them on LJ then by default there's more info on FFN. But FFN limits listed characters to 2, so authors have to pick and choose the most important. Then there's the author's amusing disclaimers and spoiler warnings for these fics, which are only included in the LJ version)
Shoutout to the author for how they linked/listed their accounts on other platforms! Thanks to that I was easily able to track down all the tags/metadata for the fics, and find them here to express my appreciation for their stories!
Typesetting
Fonts
EB Garamond is my new favourite body font, 11pt as per my usual.
The title page is entirely Arial: 1) it was the closest match I have to the case file prop I was copying, and 2) if it was a government doc they wouldn't be using anything but the most basic fonts.
Headings and the the bullets bracketing the page numbers are set it Supernatural Knight, a free font in the style of Supernatural's title.
The location segments are in D-DIN, the closest free match to the font Criminal Minds uses (which is probably DIN).
Daniel is used for Dean's 'rushed but legible' note.
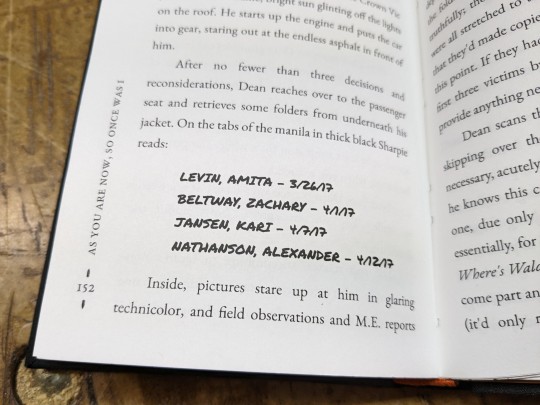
Permanent Marker for the 'thick black Sharpie' case file labels.
Artwork
Title pages designed as FBI case files, copied from a prop found online (specifically Etsy's propfictionstudios', but it's all over the web so no idea who actually created it). I had fun plugging in all the fanfic/bookbinding meta!
The ID# above the author's name is the FFN story ID, and the date is the date originally posted on LJ.
The handprint used in the headings of ATKH is Dean's scar. I traced off of a screenshot from s4e01 Lazarus Rising. I chose to use the handprint instead of the anti-possession tattoo or a Devil's Trap as my SPN art element because 1) it's specific to Dean, and 2) indicates/reminds that the story is not set during the season 3 Agent Henriksen/FBI arc.
Grabbed the FBI seal off of Wikipedia.
Construction
Both fics typeset and printed separately, then sewn together into one book. Title page for the sequel was tipped in like an endpaper prior to sewing.
Endbands sewn with orange embroidery floss (DMC 721) around 1.9mm cording. I chose orange because Dean's being in jail brought to mind the orange prison jumpsuits Sam and Dean wore in s1e19 Folsom Prison Blues.

Black bookcloth for the cover, like the Winchesters' beloved black '67 Chevy Impala. (I'd wanted a Supernatural reference to balance out the Criminal Minds-ness of the FBI case files).
I'd originally planned to make lineart of the front of the car, and have it stretch across the bottom of the cover (maybe even wrap around to the back). Even found a useful reference to trace [from here], but it didn't look as good as I'd hoped. Instead I reused the FBI seal and swapped out its text with the titles.
(The effect of shiny foiled FBI symbol on small black book reminds me of one of those FBI badge wallets!)
The foiling process was an unnecessarily long and gruelling affair. My laptop served as a massive power bank for the hot foil pen as I spent 2hrs ever so slowly tracing the image, and then 15mins on the author name and touch-ups. Did it need to take so long? Moving slowly, pushing down hard, going over everything at least three times? I'm sure it didn't. BUT I did not want to chance peeling up the foil to check how I was doing and risk shifting it. It was worth it in my books (haha) ‒ I feel giddy and kick my feet like a schoolgirl whenever I see it!
New Things
Used 24lb paper for the first time, and I love it! It's a little thicker and heavier then regular 20lb printer paper, feels more substantial.
The page numbers & running/section headers are along the outer margin, instead of in the header/footer. This was my way around Affinity's buggy-ness regarding pinning things inline in master pages. (More about that below). If I had been thinking, I could have formatted them like the tabs on a file folder and cut the textblock to match. Oh well, the things you notice once it's printed 😔
This time I also started new chapters/sections using text flow & paragraph spacing settings, instead of using a master. As always, there are pros and cons.
Pro: much faster and less involved. (find chapter start, apply paragraph style VS working from the end cutting text, inserting a frame break, unlinking frames, inserting new pages with master, relinking, pasting, and adding chapter title to a different text box)
Con: images need to be added manually (whether by adding image directly, or by applying a master with the image). I forgot to do this for the second fic, so only ATKH have Dean's handprint scar.
Difficulties Encountered
Affinity Publisher is fighting me on pinning things inline on master pages. They like to disappear on regular pages I've applied the master to. Sometimes it works, sometimes it doesn't, sometimes it only works on some of the pages. Idk what's up. (The bullet character only faces one way so I had use textboxes, flip/mirror one, and pin them inline to the page number).
So instead of having page numbers in the footer, bookended left and right by text boxes with Supernatural Knight's bullet, I put it vertically down the side.
Updated Publisher and all my paragraph styles' fonts changed/went funny. Something to do with the update's variable font support, I think. What was previously 'EB Garamond' regular, was now something along the lines of 'EBGaramond-Regular' which isn't a font. Issue seems to have ironed itself out in my original (near-complete) doc while I was busy remaking it. 😐
On the bright side, the update brought QR code generation to Affinity!
#All The King's Horses#As You Are Now So Once Was I#grumkinsnark#samwpmarleau#fanfiction#bookbinding#fanbinding#supernatural#criminal minds
109 notes
·
View notes
Text
My Sims 4 Mods Folder in text form.
By SimfintyPlays.
"Ever wonder who meticulously documents every mod in their game? Well, guess what? It's none other than me, Sara – the ultimate perfectionist with no room for glitchy mods. Consider this your go-to mod-slaying guide, not just another mundane list. Below, you'll discover the mod's status (When I mention Mods, I'm referring to gameplay, not cc or custom content) and a direct link to it. I genuinely hope this proves helpful to everyone, and I'll keep updating this document with each patch as best I can"
If you like what I do consider supporting me by subscribing to my YouTube which you can find below:
Important Links:
Let's start by exploring all my mods below 🙂:
KEY:
✓ - New Update Available
X- Broken / Hasn’t Been Updated
✓ (Does not affect the game ) - Pretty simple, no need to update
X / ✓ (unconfirmed) - Again Pretty Simple, The Creator is unsure if it causes issues so use at own risk/ Hasn’t spoken or made a post about their mods.
(The empty Ones are cc! So not mods lol and can be updated with sims4studio using batch fixes. Find the tutorial Here)
Update to Defaults:
Lamatisse Tapicoeyes Default
Lamatisse Tinsel Default Skin
Luumia Skin Vanilla Merged
VP Lush Bra, Boxers, and Panties
CAS MODS:
More CAS Columns ( Weerbesu) ✓
NSW CAS Tuning-Controlled Position MOD (Northern Siberian Winds) ✓
More Traits in CAS (The Pancake 1) ✓
Stand Still In Cas MizoreYukui (Shooksims) ✓
JS Gradual Aging ✓
100 Base Game Trait Pack X / ✓ (unconfirmed)
Kiara’s Traits + Mods X / ✓ (unconfirmed)
CAS HONORABLE MENTIONS:
No EA Eyelashes ✓
CAS Background #6 Oyster by Biancml
Sims 4 Elegant Font Override ✓ (Does not affect the game )
Minimalist Cas Organizer’s ✓ (Does not affect the game )
Ea Teeth Begone (Pyxis) ✓ (Does not affect the game )
BUILD AND BUY MODS:
T.O.O.L MOD (Twisted Mexi) X
BetterBuildBuy (Twisted Mexi) X
ESSENTIAL MODS:
MC Command (Deaderpool) ✓
UI Cheats (Weerbesu) ✓
Gshade - How to Install It Here ✓ (Does not affect the game )
Milk Thistle Lighting Mod (Softerhaze)- How to Install It Here ✓ (Does not affect the game )
No Glo and No Blu (Luumina) ✓ (Does not affect the game )
XML Injector X / ✓ (unconfirmed)
Chalkd UI ✓
FOOD MODS:
Grannie Cookbook and Addons (LBB) ✓ (No Update Needed)
Bulk Download (a bunch of recipes in one file) (LBB)
ROMANCE AND RELATIONSHIP MODS:
Relationship & Pregnancy Overhaul (Lumpinou) X
Realistic Childbirth Mod (PandaSama) ✓ (No Update Needed)
Expanded Pregnancy Options ✓ (No Update Needed)
GAMEPLAY MODS:
First Impression Mod (Lumnipou) ✓ (No Update Needed)
Mood Mod Pack ✓ (No Update Needed)
Talents and Weaknesses ✓ (No Update Needed)
Andirz Smart Sim Randomiser + Smart Shared Core (Required). ✓
DanitySimmer’s Fashion Designer Mod ✓
DISL_Residetal Lots NPC + Brain-blasted injection tools ✓
MapleDaFlap Come Celebrate Mod ✓ (No Update Needed)
Utopya Billard Mod X / ✓ (unconfirmed)
AJJ Cold Drinks ✓ (No Update Needed)
Cry Mod c
Danity Simmer NFL, WNBA, Sports Pie Menu. ✓
LTT’s Gift Override ✓ (No Update Needed)
Midnitetech’s Generic Lot’s Empty No more. ✓ (No Update Needed)
Scumbumbo’s Teleport Any Sim ✓ (No Update Needed)
Tiasha No Random Hair, A New Names For CAS ✓ (Does not affect the game )
Everyday Clutter Kit Becomes Functional ✓ (No Update Needed)
MISSHISSY:
Note;
The following mods will be updated for Lovestruck on Friday but are perfectly okay to use right now, The Creator has listed here their updated mods!
MissyHissy’s Personality Mod
The Custom Wants Mod
The Hobby Mod ✓
Basemental :
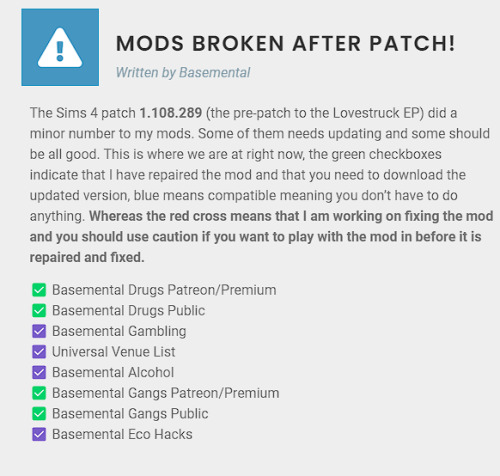
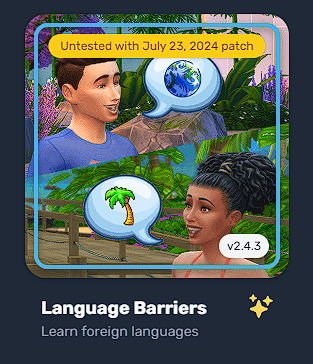
Language Barrier Mod:
SIMSREALIST:
Private Practice ✓ (No Update Needed)
Mortem ✓ (No Update Needed)
Flow Fit ✓ (No Update Needed)
Home and Land Company ✓ (No Update Needed)
All In One Download Here
LMS MODS:✓
*This one is so big that I’m just going to link her curse forge and you can copy and paste the names in the search bar* ↘
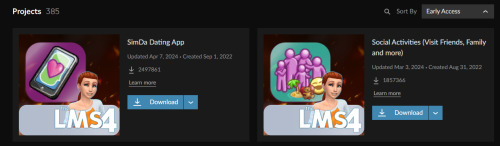
Find That Here
Auto Employee
Babysitter
Better Homework
Chores
Dogwalker
Entrance Lot Fees
Go for a Walk
Improve Kids Night Light
Improved Yoga Mat
Kids go for a Walk with Dogs
No Work Traditions
School Holiday
Better Nanny
Call to Meal
Live in Business
No Auto Food Grab After Cooking
Personal Objects
Quick Shower, Quick Bath
Sui Sui Weather AppWorking Pet Waterbowl
CARL:
Dineout Reloaded X / ✓ (unconfirmed)
Retail Reloaded X / ✓ (unconfirmed)
LOT51:
BirdLife ✓ (No Update Needed)
Doorbell ✓
Sunrise Alarm Clock ✓ (No Update Needed)
ZERBU;
:Go to School ✓
Custom Venue Changes ✓
Staff Icons ✓
All Worlds Residental ✓
Spawn Refresh ✓
QUALITY OF LIFE MODS:
Map Replacements:
20th Centuary ✓ (Does not affect the game )
Dershayan (Fanart Maps) ✓ (Does not affect the game )
Missing Plumbob (Mint Valintine ) ✓ (Does not affect the game )
Selectable Pets Always X / ✓ (unconfirmed)
Control Any Sim X / ✓ (unconfirmed)
AMELLCE:

Steady Sit Mod X / ✓ (unconfirmed)
Clean House X / ✓ (unconfirmed)
IN-GAME OVERRIDES:
✓ (Does not affect the game )
Kitchen Sponge
Spray Bottle
Folded Shirt
Laundry Pile
Mop Default Replacement
Adoption Carrier
Leash
*most of these can be found in an all-in-one download*
You can Find Them Here
RAVASHEEN MODS:
Easy Peasy Lumen Squeezy Lights (RSVN) X
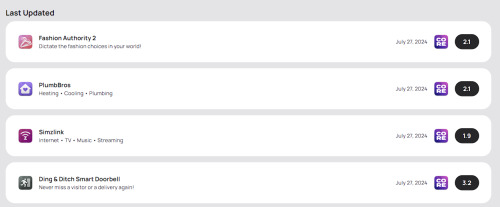
These Mods Work in my Game and Have Been Updated to the newest patch:
As of 7/27/2024 at 10:23 pm this is the Updated List For working with the current
(Lovestruck Pack) PC: 1.108.335.1020 / Mac: 1.108.335.1220
Find Patch Notes Below:
39 notes
·
View notes
Text
Turok remaster now available for PS5, Xbox Series; all versions updated with new features and improvements - Gematsu
Nightdive Studios has released PlayStation 5 and Xbox Series versions of the Turok remaster originally released in 2015, the company announced.
Additionally, the remastered release has been updated on all platforms with new features, menu options, bug fixes, and improvements.
Get the full patch notes.
New Features
Optimized renderer for Vulkan and Nintendo Switch.
Support for high refresh rates.
Ported to Xbox Series X and PlayStation 5.
Improved gamepad functionality and vibration support.
Localized Achievements / Trophies.
The Brachiosaurus from a Turok beta rom has been found and recovered. You’ll find these dinos stomping around in the Treetops level.
You can now swap ammo types for the Tek Bow and Shotgun whenever you want, just like Turok 2.
The Run / Walk toggle button has been added from the original game. By moving at walking speeds on the ground, you can get closer to enemies from behind before they notice you.
You can now bind multiple weapons to the same button to cycle between them.
Restored the High Priests homing blue magic attack and the Purlins unused leap smash melee attack.
Restored the Gallery cheat code with the addition of viewing the Bosses and Turok. You can also preview animations on each of the enemies.
-New Menu Options
You can reset menu options to default with the “Reset to Defaults” menu option.
The Input Bindings menus now shows icons instead of text.
Added binds in Action Bindings menu for Changing Ammo Type and Walk Toggle.
Controller Options: Button Prompts (PC), Look Smoothing, SouthPaw (Swap Sticks), Enable Vibration and Intensity, DeadZones.
Gameplay Options: Radial Fog, Player Shadow, Enable Walk Toggle, Enable Change Ammo
Head Bobbing Options: Added strafe and jump bobbing options and you can now adjust the scale of how much the screen is tilted for each bobbing option.
HUD Options: Automap Show Player, Automap Show Compass, Show All Health Stats (Shows health when you have Armor), Show Alt Ammo, Flash Intensity, Shake Intensity, Horizontal Positioning of the HUD.
Graphic Options: Always Show Lens Flares, Antialiasing: SMAA, FXAA, FXAA Fast, Off
Audio Options: Master Volume, Audio Output, Low-Pass Filtering, Enable Underwater Music, Ambient Environment Sounds
Video Options: Switch between Vulkan and Direct3D (PC)
Save file level names are now localized. The most recent save file is marked in green. The date displayed is now in the format yyyy/mm/dd hh::mm::ss.
-Fixes and Improvements
Improvements to the font.
Fixed animated textures skipping the first frame.
Enemies that have been blown up into air are now able to fall off cliffs and float/sink in water.
Fixed the red and orange Attack Robots from having a huge melee hit radius and removed their random explosion effect being spawned during certain animations.
Reduced the frequency enemies will teleport and their animation is updated right away while teleporting in so you won’t see them pop in for a frame at the start of their animation.
Enemies that are waiting to be triggered can no longer be damaged or killed.
Fixes to enemy headtracking.
Simple shadows take into account the fog when they are drawn. Fixed shadows appearing briefly at the start of enemies dropping from the sky. Fixed shadows drawing on top of other shadows.
The Purlins melee attacks no longer play ambient bird sounds.
Enemies no longer stutter in place when they’re in their initial animation and transition to a root motion animation.
Enemies are no longer removed from the map if they can respawn when the player moves far away from them.
Enemy grenades can impact more surface types instead of just disappearing on impact.
Bosses are now affected by the difficulty setting and have a modifier for the damage they receive similar to regular enemies, to match the original version.
Humvee can no longer be knocked back when damaged and will restore its death state animation correctly when respawning in the arena. The Humvee can be knifed again allowing (glitchless) knife only playthroughs. The wheels no longer spin forever when destroyed and certain sound file paths have been fixed with underscores instead of single quotes.
Fixed Longhunter from being damaged during his non fight states.
Restored Campaigners original behavior with the weapons that can damage him and what weapons get removed from the player. Additionally you will now see your weapons get taken from you and destroyed.
Arrows will now fire from the correct player height when crawling.
Restored super arrow shot chance for enemies to drop Mortal Wounds. Also, only enemies that had the “Teleport Avoid Cliffs” spawn flag set could be hit by a super arrow shot. Corrected to be when the “Mortal Wound Impact” flag is set.
Restored Quad-Rocket Launcher original ammo usage to 4 and max ammo to 24. (48 with backpack)
Particle Accelerator / Shockwave weapon can now freeze dead enemies just like the original and also works on beetles, robots, and turrets.
Dealing direct hits to dead enemies from the Tek Bow and Shotgun explosive shells will now blow enemies away.
Exiting water from the side will now re-equip your previous weapon.
Fixed enemy explosive damage only doing a quarter of the damage to the player.
Fixed players height not getting restored when entering and exiting crawl sectors quickly. As well as after certain animations are played.
The player’s eye height is now used instead of the actor’s height to determine if the player is in water.
The player is now kept at the correct water surface height when swimming on top of the water and water friction is now applied correctly to the player’s z velocity.
Explosive damage no longer does very little damage on enemies under certain conditions.
When entering a Spirit World portal your exact position will be used when you come back through the portal.
Fish will now always try to return to their initial height position in the case you lured them up a ramp.
Falling rocks are now hidden until they are activated.
Minor fixes to a few models.
The small and large cell ammo pickup models were swapped and have been fixed.
Extended weapon models for Ultrawide resolutions.
The underwater screen color now blends to the water color and is now displayed even when the “Show HUD” option is off.
Water surfaces are now displayed at the correct height and are no longer incorrectly offset down by 8 units.
Fixed weapon wheel movement.
Fixed issues caused by interrupting map change cinematics.
Improved noclip sector positioning.
Minor fixes to almost all maps.
Fixed the Time Trial map to no longer show the help messages and play sounds.
In the Ancient City, the time it takes for the gate to raise after pushing the short timed button has been increased.
There were 2 enemies and 2 Life Forces in The Treetops level that were placed far below the floor (in the original as well). They are now placed correctly on the platforms above.
When spawning at the Mantis save point you will no longer immediately be asked if you want to save the game.
In the Catacombs, the Mantis pillars and bars around a level key and the chronoscepter piece now animate correctly.
The water in the outside area in The Catacombs level now drains correctly and will not drain again when reentering the level and stepping on the button.
Fixed audio reverb. Spiritual Invincibility no longer has reverb effects. Added reverb effects to the Spirit World levels.
Sprite bleeding for the bullet splash, fire, and waterfall steam sprites has been fixed.
Fixed artifacts around frames for sprite fx005.
The Boss and Air bar textures now look more like the original, with color.
Platforms that are moving upwards or downwards will no longer force Turok to the floor at high speeds which prevented the player from being able to jump during that time.
Fixed issues with actors z position while on platform sectors.
LifeForce pickups are no longer snapped to the floor when they start in water. Fixes the LifeForces in the level 4 water pillar area.
The precise projectile collision option now works correctly.
Projectile collision against sectors that were linked to another sector and had bridge sectors has been fixed.
Projectiles that collide with ceilings will now use the sector’s wall impact instead of their floor impact.
Particle Emitters will continue to be shown even when only partially off screen.
Particle Trails will now create a final segment when they impact an object or expire.
Fixed some effects like the pulse rifle shots not being affected by game speed.
Billboard effects are now set to use no culling.
Particle effects with the bStickOnTarget flag now works correctly. (Chronoscepter and Shockwave weapons will hit actors origin point + half height)
The Particle effects RestrictAim flag now works with the Projectile flag, and the target must be within a 90 degree field of view. This allows you to dodge certain attacks such as the Ancient Warriors blow darts if you’re fast enough to get behind them.
Lots of additional scripting features for modders. (PC)
Turok is available for PlayStation 5, Xbox Series, PlayStation 4, Xbox One, Switch, and PC via Steam, GOG, and Humble Store.
7 notes
·
View notes
Note
For the ask game...
3, 7, 8 and 19.
hi! c: thanks for the ask! <33
✨fic writer asks✨
3. how you feel about your current WIP
I've been on and off with how I feel about the chapter I've been working on. But I've finally gotten to the point where I feel more positive about it than negative. I know my writing is decent, but sometimes I worry if what I'm writing is necessary. I've cut one scene out of the chapter outline already. I think it'd make the story just too messy character-wise, if that makes sense at all.
As for the fic/series in general? Sometimes I wonder if I should just quit. There's so many faster and/or better writers anyways. I don't say this to garner sympathy/pity. It's just my honest thoughts. ┐(´ー`)┌
7. your preferred writing fonts
Georgia, 12 pt, 1.5 line spacing. I've always found Times New Roman so very hard on the eyes. I've made Georgia my default on google docs. I'm sure there's other good fonts, but I'm set in my ways after so many years lol
However, I do enjoy playing with formatting and corrupted/funny fonts for the horror parts of the story!
8. if you had to write a sequel to a fic, you’d write one for…
Well, Fate-Touched is my only fic. And it's planned to be a 3 part series. (with maybe a one-shot or two) Soooo, yeah.
19. the most interesting topic you’ve researched for a fic
damn, I'm not sure? (Besides reading so much on UESP lol)
I do a lot of research for world building purposes, usually taking from real world stuff. Mainly just for the Altmer right now, since we know so little of the Summerset Isles during the 4th Era, and the first 65 years of my fic is on the Isles. We already know my posts: Thalmor and Fascism, and my headcanons on Praxis, Engagement, and Wedding ceremonies. Those were fun to research and write, and are incorporated into my fic.
I've repeatedly checked out a book on poisonous plants and mushrooms at the library, for stuff like alchemy.
I like to watch chemistry and science videos just for fun. But! Those give me inspiration for more alchemy stuff and spell ideas. I've got loads of ideas from these videos written in my notes app.
I'm also converting DnD spells to TES schools of magic. (Not all, just the ones that I think fit TES magic logic) It helps expand spells characters can use in fics. (It's a file I hope to offer online for anyone interested when I finish it)
8 notes
·
View notes
Note
do you have any tips on where and/or how to make blinkies? i want to learn how to make them but don't know how. have a good day btw :3
hiiii i will do my best to give tips!! o7
first of all if you want to get a feel for blinkie making without diving in directly i recommend using a site like blinkies.cafe which lets you just add text to premade blinkie templates! i think it's a good way to get an eye for the blinkies "aesthetic" especially regarding the actual blinking part, the borders, all of that. and ofc the size (which for the record is traditionally 150x20px!)
if you want to actually get into Real Custom-Made Blinkies, studying ones you like up close is a great idea because it'll help you see what works and what doesn't. obviously everyone will have different design sensibilities, but that's why it's always good to take inspiration from things that you personally like!
here are things that i like, as an example:
dotted/dashed borders that blink between two colors
shadows
outlines
pixel art
keep in mind that blinking can be upsetting to the eyes for some people! i always try to not overdo it, but at the same time, they are blinkies, so it seems kind of like a waste when they don't blink at all...
traditionally, blinkies include two things: a picture, and text. they don't always! sometimes there's only a picture, and sometimes there's only text. for example, this blinkie i made of lysandre only has his card art and little hearts. this is once again going to depend on your preferences. but for the sake of explaining, let's say you want one or two simple pictures, and some text.
i find pokémon to be a pretty easy thing to make blinkies for, because you have a large panel of pixel art to choose from! for example, i made this blinkie for my blog using one of the mini scyther sprites. a lot of them are animated, too, which is fun. i can't really advise you on what program to use for animated stuff because i use really old ones LMAO but i've always had a good time using ezgif! you can just feed it your frames and use the website to put them together into an animation.
the text imo is the trickiest part. the blinkies you find on blinkies.cafe use pixelated fonts, but i've had a really hard time using them outside of that context. it's hard to get them to look good imo, especially at the small scale that blinkies end up at... so what i've been doing is making my own little pixel art alphabet. it's very fun for me and i don't think it's as difficult as it sounds, so i definitely recommend it because it gives you a lot more flexibility imo. i handdrew the text for all of my PSS blinkies, as well as the aforementioned scyther one, and this trans rights one. i actually have the trans rights and PSS alphabets completed and saved in a file for later use in case i need them, lmao:

you can see what the process is like: i make a rectangle, draw one letter, and then copy the rectangle to draw the other ones at the same size and in the same style. it's very, um, vibe-based, i guess? you just have to figure out what looks good for your Vision. but i find it super fun... so it's easy for me to do, i guess...
if you want to see the scyther blinkies text closer up, here it is at 500% size:

uncapitalized letters are more difficult than capitalized letters imo, but i think i did an ok job! maybe i'll make a full alphabet for that one too at some point, lmao. for the "tumblr" text i just copied the style of the logo (hopefully that comes through...)
i'm not sure what else to say, so feel free to ask more specific questions if you'd like! i think a lot of the other stuff is more general art/graphics advice, like color theory and the likes, which i'm not sure is worth going over LOL. but as a parting note, i'd definitely suggest not going overboard on the color palette. blinkies are pretty small at their default size, and too many colors will make them really hard to look at, let alone understand. in general, keep in mind the final size when working on something like blinkies, and make sure to zoom out periodically to double check you've got something readable!
and don't forget to have fun 👍👍👍
#la réponse d#in the process of looking thru my blinkies files for this post i realized i had apparently started working on villain team blinkies so uhhh#maybe i'll get back to that LMAO#blinkies
16 notes
·
View notes
Text
Captain's Log: Day 132
Started editing. Today's editing process looked like downloading the file from my editor, realizing I can't run it properly on Word 2003, signing up for the free online microsoft suite, wrestling with the stupid serifless font they defaulted my document to, and then eventually getting into the red text in the document. (I did not even begin the notes and highlighted repeated words. Baby steps.) Also, editors deserve a gold medal for the stuff they catch in people's writing. Homegirl's over here un-italicisng periods and switching straight quotes and smart quotes and just. Huge props to her; this thing was a MESS and I'm so happy it'll have that Professional feel once I muddle through it all!
Oh also! Made a post here and on insta!
3 notes
·
View notes
Note
Hi Miss Dork!!
Ok, so I have always been one of those people who loves to annotate and highlight their fav bits + thoughts in books, so I was thinking about how much I wanted to do that, physically, with weak spot! (Like all the cute coloured highlighters i can use, little hearts + doodles drawn in, tiny notes analysing and squealing about parts of the fic!)
Long story short, I printed out the first 30 chapters so I could do just that and holy moly...

I DIDNT REALISE HOW MUCH YOU HAD GENUINLEY WRITTEN UNTIL I COULD HOLD THIS BEAST IN MY HANDS?!
THE STACK IS HUGEEEE!! I THINK I USED AN ENTIRE NEW PACKET OF PRINTER PAPER + INK 🧍♀️
All double-sided, size 9 font... I'm going to need a filing cabinet to hold this chunker!
Anyways, catch me sitting here, re-reading WS, annotating, and highlighting bits and pieces for my hyperfixated brain to enjoy!
Just kinda wanted to really show you how impressive your work is in physical form!! And thats not even all of it yet!!!
(I hope that you dont mind me printing my own physical copy to do this. If theres any issues, I have a lighter at the ready!! 🫡)
Thanks as always, Miss Dork! <3
Holy cow, look at that! It really is something to see it stacked up physically!
I'm totally alright with people printing it out as long as it's only for personal use~
I keep track of pages (my own document I use the Word default which is Calibri with font size 11). Currently there are roughly 332,000 words. An average novel is about 80,000 so Weak Spot is already about 4 novels in length and we're bobbing around the halfway point (a little over? Hard to say exactly...)
Wowie!
That doesn't even include the one-shot or sequel!
Thank you for sharing! It's always good to get a nice dose of perspective!
16 notes
·
View notes
Text
Minecraft: Fade to Black Transition Using Resource Packs!
I've always been so fascinated by Minecraft server plugins and their ability to push the boundaries of what's possible in the game; some servers go even further with the use of custom resource packs. I find the most amazing thing about server resource packs are the creative techniques utilized to go beyond the limits of the game. Common examples of such techniques are custom GUIs, HUDs, shaders, entities using models, and cosmetics.
One technique that completely baffled my mind, was the Minecraft Championship's (MCC) fade to black transition effect. I had never seen such a smooth transition and was extremely curious about how they achieved it. I considered and attempted many different approaches: custom models, animated textures, potion effects, and shaders, but none came close to the same smooth transition.
I wondered if there was a way to do it with packets. Perhaps Minecraft already had some fade to black transition that I could trigger. I searched for the word "fade" on the Minecraft Protocol wiki, and instantly realized how it was done. Titles already have a built fade-in and fade-out feature, so utilizing my previous knowledge of custom GUIs using fonts. I was able to recreate the same smooth fade to black transition, and this is how I did it.
youtube
You are going to need your custom resource pack. If you don't already know how to make a custom resource pack you can find more information here.
You are only going to need two files to achieve this effect, a texture and font json. The font file will tell Minecraft to render a specific character with our custom texture. This is how we'll display a fully black image as a title.
The texture file ("black.png") will be a 256x256 fully black image placed somewhere in your pack's texture folder. I put mine in a subfolder named "font"
assets/minecraft/textures/font/black.png
Now for the font file. It's important to know that Minecraft text components allow you specify a font path, so the name of your font json file is important.
You DO NOT want to override minecraft's default font json. If you override the 'default.json' font by adding your custom black character, technical players will be able to exploit your transition and spam the chat with black boxes. We can avoid this problem by creating our own font file with a custom name as opposed to overriding an already existing one. I'm going to name mine "fade.json"
We're going to place the font file ("fade.json") in the font folder directly under the namespace, which is Minecraft in this case.
assets/minecraft/font/fade.json
The contents of the font json will be simple.
We're going to create a new bitmap type font using our black texture.
{ "providers": [ { "file": "font/black.png", "type": "bitmap" } ] }
Now we still have to specify our character. In theory, you can use any character you want because we control the context in which this font is used. BUT it's probably best to use a blank unicode character just to be safe.
I'm going to use this blank character "" the unicode is "\uE01F"
Note: Characters can be inserted directly or as their hex unicode value prefixed with "\u" You can learn more about how resource pack fonts work here
{ "providers": [ { "file": "font/black.png", "chars": [ "\uE01F" ], "type": "bitmap" } ] }
Lastly we need to set a height and ascent. The height value is important because if it's too small, our black character won't fill the screen of high resolution displays or people who play on small GUI scale. This will break the transition effect.
I'm using 1024 for the height. I did some tests and I think this value should be good enough.
You can try higher values if you're worried, but keep in mind I'm not sure what the limit is and going too high will likely cause problems.
As for the ascent value, I'd recommend using half the height. This will center our black character and assure it fully covers the screen.
{ "providers": [ { "file": "font/black.png", "chars": [ "\uE01F" ], "height": 1024, "ascent": 512, "type": "bitmap" } ] }
Now our fade transition is done, and you'll need to run the title command in order to trigger it.
The title text will be your chosen black character, and it's important that you remember to specify your font name.
/title @p title {"text":"","font":"minecraft:fade"}
You can change the duration of the fade by using the title timings command. Here's the command for a one second fade in, two second stay, and one second fade out.
/title @p times 20 40 20
Finally, thank you for reading. I hope you learned something new. I'm so surprised at how easy it was to acheieve. I find it interesting how simple solutions can sometimes take so much thought.
#minecraft#minecraft championships#resource pack#minecraft server#spigotmc#bukkit#minecraft redstone#redstone#minecraft tutorial#minecraft texture pack#minecraft mods#minecraft creative#technical#spigot#Youtube
10 notes
·
View notes
Text
Lesson 2: Sentence Structure, Or Let's Sentence We-Make-It
(Lesson 1 is here: https://www.tumblr.com/fierceawakening/730475950583726080/okay-so-ive-got-more-people-asking-about?source=share)
@lizardywizard @izzet-league-mad-scientist @threeoftwelve
Phyrexian has a different sentence structure than English does.
In English, sentences are generally structured subject, verb, object:
I obliterate the opponent.
(Yes, we just confirmed the Phyrexian for "obliterate." Did you think I wasn't going to spend at least a day saying "obliterate" over and over again? Then you have not met me, friends.)
The subject is "I," a pronoun which tells the hearers that the speaker is talking about the speaker themself, the verb is "obliterate," and the object is "the opponent," the person the subject does the verb-thing to.
Phyrexian works very differently.
First of all, Phyrexian begins almost all sentences with what is officially called "a mood/tense marker," but which I'm going to just call a mood marker, because less typing.
This marker gives information about the sentence it starts. Is this a thing that's happening now? Is this something that the subject wants? Is this something that someone DOES NOT have or want? Is this something Great Yawgmoth did in the glorious bygone past of the original Phyrexia? Is this something Norn is commanding her faithful to do? The marker at the beginning of the sentence is how you know which of those you're dealing with.
To make this a little clearer, the most common mood marker you'll likely see is this guy here:

or, horizontally (which is how I'm gonna type going forward, I just wanted to do it vertically first so you can look at a vertical letter chart and not have to rotate it in your head, you're welcome):

Look at the alphabet from lesson one and you'll recognize these two letters as "xe." (Pronunciation note: "x" is pronounced not the way it is in English, but as it is in the International Phonetic Alphabet (IPA), which is quite different. It's like the "ch" in German ach or Scottish loch. So it sounds much more like "heh" with a breathy h than like "zeh" or "kseh" or something.)
Xe indicates that the sentence is in present tense and is declarative. So whatever the sentence is about is true (rather than false, hypothetical, wished for, etc) and happening now.
Declarative: (Subject verbs object.)
Or, to be a bit silly about it
Trufax: (Subject verbs object.)
So if I'm trying to translate the English sentence above, I begin with xe. I start with my starting bar to make sure my readers know I am a rube who writes horizontally, and begin with xe, as the sentence describes something I'm currently doing. Then I add my word separator/Pretty Spacebar, as xe is a whole word and more words will come next:

If you have any of the Phyrexian fonts (I got mine here: https://drive.google.com/file/d/1yR9HblQ2Hn3v-vlXuaF5NhbhFAfr_WCO/view?usp=share_link ), this looks like:
^xe-
So now let's talk about the obliterating I'm doing!
Right away there's another wrinkle.
Phyrexian does not order sentences like English either.
Where, in English, the order is Subject Verb Object.
the default in Phyrexian is
Mood Subject Object Verb.
This means that the vast majority of Phyrexian sentences you'll come across end with the verb.
Which means our sentence is going to look something like:
Trufax: (I the opponent obliterate.)
The I part is actually going to be indicated when we conjugate the verb, so we don't need to say that. (Think of how in English, if I say "Am hungry," it's a little off but it's still clear who is hungry, as "am" can only refer to the speaker themself.)
The "the" in "the opponent" is also left out. Phyrexian very often doesn't do a, an, the, etc. Usually the rest of the sentence will clarify that, or the noun for the object will specify a particular thing or group in a way that's not ambiguous.
[NOTE YOU CAN IGNORE IF THIS IS TOO MUCH ALREADY: Most likely, I'd translate this sentence using "my opponent," not just "opponent." I'm not doing that here because I'd need to change the word "opponent" to indicate whose opponent it is. I want to leave those specific "how you change basic words" bits for a later lesson. END NOTE.]
Trufax: opponent I-obliterate.
Which means the next word we need is "opponent." That word is:

əxnɒqč
So then we've got:

^xe-əxnɒqč-
Now we need "obliterate." That word is:

kšiπχ
So now we have all the pieces for our sentence.
However, we still need to conjugate the verb, to show that I'm the one doing it and that I'm doing it TO the opponent, rather than them doing it to me, me doing it to myself (ow!), etc.
Those conjugations are complicated and don't work like English, so that will be another lesson. I'm just going to do it myself now:

kšiπaχ
"I obliterate them"
So now we have a mood marker, an object, a subject (implied by the conjugated verb), and a verb!
That's a sentence!

^xe-əxnɒqč-kšiπaχ.
Trufax: Opponent I-obliterate-them.
I obliterate the opponent.
Next Time: How Do You Verbs? Fierce Attempts To Explain.
2 notes
·
View notes
Text
FUCKING THANK YOU PERSON FROM 2016
___
KancerKiller Jun '16
HOW TO CHANGE DEFAULT SETTINGS
First, check your current templates. Select (left-click) “File” (from the menu bar at the top of your screen) > Select “Templates” (top of the drop-down menu) > Manage (small pop-up window). A window will appear listing your current templates. Do you see any duplicates or templates that you do not want? If so, left-click on any template that you do not want and it will then be highlighted and a menu will appear under a “Documents” tab. > Left-click on [Delete] > [Yes] (to confirm delete) > When you are done deleting and/or editing templates click on [Close]. Everything goes away.
Remember that File > Templates > Manage will take you to a list of all your templates. By left-clicking on any template it will be selected/highlighted and the following menu will appear under the tab “Documents”. “Open”, “Edit”, “Properties”, “Set as default”, “Move to folder”, “Export”, and “Delete”.
Now to change your default settings, open a new blank document.
If the margins are not what you desire to be your default, then follow these steps. Select (left-click) “Format” (menu bar at the top of your screen) > Page (from drop-down menu) > Page (a tab) > Under the heading “Margins” change the margins to your preferred settings > Apply > OK
If the font and font size is not already what you want as your default, go to the menu bar at the top of your screen and change the font and/or font size to your preferred settings.
[Step 1 of 3 in short: Open a new blank document and set the margins, font, and font size for your new default page.]
Now left-click on “File” (menu bar at the top of your screen) > Templates (drop-down menu) > Save As Template (small pop-up window). In the large pop-up window that then appears, click on “Save” (located immediately below the “Documents” tab with a green down arrow on the left side of “Save”) [Note: A pop-up may appear asking you to select a folder in which to save your new default template.] > Name your new template (in the small pop-up window that now appears) > OK (everything closes)
[Step 2 of 3 in short: File > Templates > Save As Template > Save > Name your new template > OK]
Now left-click File again (menu bar at the top of your screen) > But this time select New (at the top of the drop-down menu) > Templates (at the bottom of the next drop-down menu) > In the pop-up window that appears, select (left-click) the new template that you just created. [Note: If the new template that you just created appears in a folder, then double-left-click on the folder and then left-click on the template.] A menu bar appears under the “Documents” tab. Left-click on “Set as default” in this menu bar. > Close (everything goes away)
[Step 3 of 3 in short: File > New > Templates > Select your new template > Set as default > Close]
Done! From now on when you click on the “New” icon in the menu bar a new blank document will appear with your preferred margins and font style.
___
6 notes
·
View notes
Text
I'm using Backblaze for in-cloud full backup, as well as a non-cloud external hard drive for the same purpose.
Active writing files, besides inclusion in the full backups, also save to Dropbox, to relevant folders on the PC's hard drive and to an offline USB thumb drive.
As for writing software, I have Scrivener, Fade In and Word 2010 (LibreOffice will replace it if / when need be) along with ProWritingAid, Dragon Naturally Speaking and a computer microphone or recorder.

And now a word from our sponsor.
*****
Voice-to-Text is associated with Handwriting™, one of the oldest and perhaps the best-known word-processing app.
Handwriting™ uses the most widely available OS on the planet.
Handwriting™ can be customised or upgraded with a range of input devices (not included), fonts, colours and even languages, and accepts all off-brand ink and paper consumables with no need for DRM compatibility.
Handwriting™ is environmentally green, has no unusual energy requirements, needs no battery or external power source, and is in most respects almost completely biodegradable.* This also applies to the default OS, a claim few word-processing apps can match.
* For longer-lasting or archive purposes, try Monument™ or Cuneiform™. Please note that input devices and consumables for these apps differ from Handwriting™ in some respects, and may require additional training prior to use.
Handwriting™ is virtually crash-proof apart from exceptional circumstances, and is impossible to modify, hack or censor without direct physical access.
Handwriting™ has not just years or decades but centuries of proven reliability, with millions of satisfied users.
Try Handwriting™, and rediscover how to write in dark places when all other Rights go out.
Amount of light required for successful operation in dark places varies with user, and may be augmented by a range of third-party devices (not included).
Clarity of input varies with user, and may improve.
Quality of output varies with user, and may improve.
Clarity and quality may go down as well as up.
Input language varies with user, and additional languages (not included) may be used at any time or added later, but refer to 4. for more details.
Keep product away from naked flame.
Keep user away from naked flame. Distance varies with ambient temperature, but do not exceed default OS limits.
Do not immerse product in water.
Do not immerse user in deep water. Depth varies with ambient temperature, but do not exceed default OS limits.
Conditions of excessive damp or humidity require modified input devices and consumables, available from specialised dealers.
Use of Handwriting™ implies understanding and acceptance of all terms and conditions.
Handwriting™ has no control over (and accepts no responsibility for the consequences of) views, opinions, comments, truths, lies, propaganda, fiction, myth, religion, controversy, entertainment, historical records, political complications, economic errors, romantic entanglements and / or warm fuzzies generated by use of the product.
dang LOOK its chuck tingle talkin to wired magazine about the danger of technology functioning as unchecked corporate utilities. was nice to give this little quote. good article
5K notes
·
View notes
Text
The Future of Mobile Applications: How Technology is Transforming the Way We Interact
Every e-commerce person needs to know how to build pages with WP bakery page builder. This theme provides support for the Visual Composer plugin as well as a custom-made plugin named “Visual Composer Extension” for our customers. The Visual Composer plugin and extension adds a range of drag-and-drop plugins to your dashboard, allowing you to create your site quickly and easily. This theme provides support for the Visual Composer plugin as well as a custom-built plugin named “Visual Composer Extension” for our customers.
The Visual Composer plugin and extension adds a plethora of drag-and-drop plugins to your dashboard, allowing you to create your site quickly and easily. Creating pages for your WordPress platform is also as simple as a few clicks and drag-and-drop operations with WPBakery Page Builder‘s elaborate but intuitive front-end and back-end editors. I’ll teach you how to add WPBakery Page Builder to your WordPress installation and walk you through all of the key features in this Visual Composer guide.
Requirements for WP Bakery Page Builder
You’ll need the following items to follow along with this WPBakery Page Builder tutorial:
WordPress 5.0 or higher is essential.
a subscription to Envato
In addition, I recommend reading the following article to better understand how to use Visual Composer and why you should use WPBakery Page Builder instead of any of the other page-builder plugins available today:
WPBakery Page Builder Installation
WPBakery Page Builder is a WordPress premium plugin. It’s available on Code Canyon, so sign up with your Envato account and buy a license. It’s still commonly is in reference as Visual Composer. Once you’ve paid for it, you’ll be able to download a ZIP file containing various plugin data.
Look for a file called js composer.zip after extracting the ZIP file. This is a WordPress plugin archive file that you must add to your server. So, go to Plugins > Add New in your WordPress admin line. Then pick js composer.zip from the Upload Plugin drop-down menu. To begin the update, click the Install Now button. When the installation is over, click the Enable Plugin button. You’ll be guided to the WPBakery Page Builder welcoming screen as soon as you do so.
Make Sure WPBakery Page Builder Plugin Is Installed & Active
Make sure the WPBakery Page Builder plugin is turned on. Since this plugin is not included with the theme (for good reason), it must be installed and allowed as described in the “Installing Recommended Plugins” guide. You should have been asked to install the recommended plugins after downloading the theme. Now is the time to install the Visual Composer if you haven’t already.
Configuring the WP Bakery Page Builder Plugin
It’s easy to learn how to use WPBakery Page Builder. The plugin is highly customizable, with hundreds of configuration choices to tailor it to your specific needs. To see them, press the Settings button on the welcome pad.
WP Bakery Page Builder with general settings
The plugin comes with a well-thought-out default setup that will suffice for the majority of use cases. For example, you can see that it supports responsive design right out of the box in the General Settings tab. The plugin also attempts to add different optimizations so that the pages you generate with it load quickly. For example, it defaults to using only the Latin script subset of Google fonts. All you have to do is change the Google fonts subsets option to accept other scripts.
You’ll note that this plugin is only available for your WordPress site’s pages in the Role Manager tab. Select Custom in the Post styles list and allow the post feature if you want it to be eligible for your posts as well.
Configuring post types:
Scroll down and press the Save Changes button once you’ve made the changes.
Finally, go to the Template Options tab and search the Use custom design area if you want to configure the look and feel of WPBakery Page Builder’s content elements. You’ll be able to adjust the plugin’s pre-set colors, margins, and widths after you’ve done so.
Define Main Settings for WP Bakery Page Builder
To configure the plugin, go to Settings > WPBakery Page Builder. The most crucial step is to turn on the composer for the post forms you choose to use it for. This is achieved through the “Role Manager” tab and the “Post Types” options. You can make the page builder accessible based on the user function, but you’ll really just want to change the “Administrator” settings.
Using the WP Bakery Page Builder Plugin
The Visual Composer is really simple and doesn’t need much explanation; for a short guide, see the screenshots below (you can also check out this more detailed Visual Composer guide). To begin, choose if you want to use the Backend or Frontend editor and press the appropriate button.
The Visual Composer Backend Editor
In this Visual Composer tutorial, this is a crucial step. There are two powerful editors included with WPBakery Page Builder: a back-end editor and a front-end editor. They can only be accessed from inside a website or a tweet. As a result, I recommend that you make a new page by heading to Pages > Add New for the time being. You can select which editor you want to use in the page construction GUI. To open the backend editor, first press the Backend Editor button.
You can conveniently connect a number of widely used elements to the website using this editor. Simple elements including text blocks, pictures, and separators are available in WPBakery Page Builder. Advanced features include Facebook “Like” icons, Google Maps, charts, and animated carousels. The components are grouped into four groups for easy access: text, social, structure, and WordPress widgets.
The elements that are available are listed below:
Content elements, as the name implies, are elements that are often used to construct the contents of a blog or an article. Social features, on the other hand, are ones that make it simple for people to share your profile on social media sites. Structure components, on the other hand, are intended for more experienced users who are familiar with writing code. They allow you to add raw HTML and JavaScript to your website directly.
To add an element, simply click the Add Element button and choose the desired element. Alternatively, you should use the Add Text Block button to add text to the website directly.
Text editor
If you don’t like the way an aspect looks by default, you can always change its styles by going to the Design Options page. Once you’ve added a few items, you’ll find that each one has a toolbar with a few buttons associated with it. These buttons show intuitive icons and enable you to perform essential operations like dragging and dropping an entity to alter its position, duplicating, removing, or editing its contents.
Keep in mind to save your page once you’ve finished adding components.
The Visual Composer Frontend Editor
The frontend Visual Composer has the same page building choices as the backend Visual Composer. The main distinction is that instead of position holders, you will see the individual page elements when you insert theme.
Using the WYSIWYG Front-End Editor
The back-end editor is perfect for pages with a number of elements that are lengthy and complicated. You get to deal on the final presentation of your website right from the start if you use the WYSIWYG front-end editor instead. You can swap between editors at any time, so scroll up and click the Frontend Editor button to launch the latest one.
Frontend Editor
Only when you mouse over a feature in this editor can you see the toolbars associated with it. Toolbars and the features they provide are somewhat close to those provided by the back-end editor in frontend editors demo options. You will now see how the website appears on different screen sizes using the front-end editor. You can also continue editing the page in whatever screen size you choose.
Using Templates
Using models is another critical part of learning how to use WPBakery Page Builder. Any page or post you make with WPBakery Page Builder can be turned into a prototype. You will reduce the amount of tedious work you do when making pages for your WordPress site by using this feature.
Open the Templates dialogue, assign the template a tag, and click the Save Template button to save the new layout of your page as a template.
Save the template in the Save Template dialogue box
Working with your own models isn’t the only choice. This plugin has a huge template library that is maintained on a daily basis. Switch to the Template Library tab and hit the Access Library button to access the library. In the template library, you’ll find that the library has a large number of high-quality layout models. You will do any of them for free. However, before you can use them, you must first unlock your WPBakery Page Builder certificate.
0 notes
Text
Best Microsoft Apps Pre-Installed on Windows

Microsoft Windows, right out of the box in Hyderabad, comes equipped with a suite of pre-installed applications designed to cater to a wide range of user needs. Often overlooked in favor of third-party alternatives, these built-in apps have evolved significantly over the years, offering robust functionality and seamless integration with the Windows operating system. In 2025, these pre-installed Microsoft apps continue to be valuable tools for productivity, creativity, communication, and system maintenance for users in Hyderabad and beyond. This comprehensive guide will explore some of the best Microsoft apps that come pre-installed on Windows, highlighting their key features and why they deserve a closer look.
1. Microsoft Edge: Your Integrated Web Gateway
Microsoft Edge has matured into a fast, secure, and feature-rich web browser that serves as the default gateway to the internet on Windows. Built on the Chromium engine, it offers excellent website compatibility and a growing ecosystem of extensions.
Performance and Speed: Edge is optimized for Windows, offering smooth browsing and efficient resource management.
Security Features: Built-in Microsoft Defender SmartScreen protects against phishing and malware, while tracking prevention helps safeguard your privacy.
Collections: This handy feature allows you to easily save and organize web content, making research and project management more efficient.
Vertical Tabs: For users who juggle numerous tabs, vertical tabs offer a more organized and scrollable view, especially beneficial on wider laptop screens common in Hyderabad.
AI-Powered Features: In 2025, expect further integration of AI features like Copilot directly within Edge, offering intelligent assistance for summarizing content, generating text, and more.
2. Microsoft Photos: Managing and Enhancing Your Visual Memories
The Microsoft Photos app provides a comprehensive solution for viewing, organizing, and editing your photos and videos directly within Windows. Its integration with OneDrive offers seamless access to your cloud-based media across all your devices in Hyderabad.
Viewing and Organization: Easily browse your local and OneDrive photos, sort them by date, and create albums to keep your memories organized.
Basic Editing Tools: The app offers a range of intuitive editing tools for cropping, rotating, adjusting brightness and color, and applying filters.
Video Editing Capabilities: Basic video trimming and editing features allow for quick modifications to your video clips.
AI-Powered Enhancements: Expect to see more advanced AI-powered features in 2025, such as intelligent photo enhancement, object recognition, and potentially even generative AI tools for creative photo editing.
3. Snipping Tool: Capturing Your Screen with Ease
The Snipping Tool is a simple yet incredibly useful utility for capturing screenshots of all or part of your screen. Its ease of use and quick annotation features make it an indispensable tool for communication and documentation.
Versatile Capture Modes: Choose from various capture modes, including rectangular snip, free-form snip, window snip, and full-screen snip.
Annotation Tools: Once captured, you can easily annotate screenshots with pens, highlighters, and an eraser to emphasize important information.
Screen Recording: The modern version of Snipping Tool also includes basic screen recording capabilities, allowing you to capture short videos of your screen activity.
4. Notepad and WordPad: Your Essential Text Editors
While basic, Notepad and WordPad serve as quick and readily available text editors for different needs.
Notepad: Ideal for taking quick notes, viewing or editing plain text files, and even basic coding tasks. Its simplicity and low resource usage make it a go-to for fast text manipulation.
WordPad: A step up from Notepad, WordPad offers basic text formatting options like bold, italics, font selection, and paragraph alignment, making it suitable for drafting simple documents and letters without the complexity of a full-fledged word processor.
5. Calculator: More Than Just Basic Arithmetic
The pre-installed Calculator app in Windows is surprisingly versatile, offering a range of modes beyond standard arithmetic.
Standard, Scientific, and Programmer Modes: Cater to different mathematical needs, from basic calculations to complex scientific and programming-related operations.
Unit Conversion: Easily convert between various units of measurement, including currency, volume, temperature, and more, which is particularly useful for travelers and international business in Hyderabad.
Graphing Calculator (in some versions): Some versions of the Calculator include a graphing mode for visualizing mathematical functions.
6. Clock: Managing Time and Focus
The Clock app goes beyond simply telling time, offering tools for alarms, timers, stopwatches, and Focus Sessions to enhance productivity.
Alarms and World Clock: Set multiple alarms and easily track the time in different time zones, crucial for connecting with international colleagues or family.
Timer and Stopwatch: Useful for tracking tasks, workouts, or cooking times.
Focus Sessions: This feature allows you to set work intervals with designated break times, helping you stay focused and manage your time effectively. Integration with Spotify can provide background music during focus sessions.
7. Voice Recorder: Capturing Audio on the Fly
The Voice Recorder app provides a simple and convenient way to capture audio notes, lectures, meetings, or any other sound directly on your Windows laptop in Hyderabad.
Easy Recording and Playback: A straightforward interface allows for quick recording and easy playback of audio files.
Basic Editing: Some versions offer basic trimming capabilities to edit your recordings.
8. Microsoft Store: Your Hub for Apps and More
While it's a store rather than an application you directly use for tasks, the Microsoft Store is a crucial pre-installed app for discovering and installing a wide range of applications, games, and other content on your Windows device in Hyderabad. It serves as a central and trusted source for expanding your laptop's functionality.
Beyond the Basics: Other Useful Pre-Installed Apps
Depending on your specific Windows version and configuration in Hyderabad, you might also find other useful pre-installed apps like:
Mail & Calendar: Provides basic email and calendar functionality, connecting to various email accounts.
OneDrive: Offers seamless cloud storage and file synchronization.
Microsoft Defender: Provides essential built-in antivirus and security protection.
Phone Link: Allows you to connect your Android phone to your PC to view notifications, send texts, and make calls.
Xbox Game Bar: For gamers, this overlay provides quick access to screen capture, performance monitoring, and social features.
Why Utilize Pre-Installed Microsoft Apps in 2025?
Seamless Integration: These apps are designed to work flawlessly with the Windows operating system, often offering better performance and battery efficiency compared to some third-party alternatives.
No Additional Installation Required: They are readily available from the moment you set up your Windows laptop in Hyderabad, saving you time and effort in finding and installing basic tools.
Regular Updates: Microsoft actively updates these apps through the Microsoft Store, ensuring you have access to the latest features and security enhancements.
Cost-Effective: They come included with your Windows license, eliminating the need to purchase separate software for basic tasks.
Conclusion:
The pre-installed Microsoft apps on Windows in 2025 offer a surprisingly powerful and integrated suite of tools for various everyday tasks in Hyderabad. From browsing the web with Edge to managing photos with the Photos app, capturing screenshots with the Snipping Tool, and staying organized with the Clock app, these built-in applications provide a solid foundation for productivity, creativity, and communication. By taking the time to explore and utilize these often-overlooked gems, users in Hyderabad can unlock the full potential of their Windows laptops without immediately resorting to third-party software. As Microsoft continues to enhance these apps with new features and AI integration, they are poised to remain valuable and essential components of the Windows experience in the years to come.
For More Updates visit Our Website: Analytics Insight
0 notes