#writing advice
Explore tagged Tumblr posts
Visit Tumblr Blog
Explore Tumblr blogs with no restrictions, modern design and the best experience.
Last Seen Tumblr Blogs


Fun Fact
Tumblr has 4 main sources of revenue.
Text
Honestly? My main piece of advice for writing well-rounded characters is to make them a little bit lame. No real living person is 100% cool and suave 100% of the time. Everyone's a little awkward sometimes, or gets too excited about something goofy, or has a silly fear, or laughs about stupid things. Being a bit of a loser is an incurable part of the human condition. Utilize that in your writing.
#this is my beef with a lot of 'badass' characters and male romantic leads tbh#writeblr#writing#character writing#writing advice#characters#i'm just sayin'
86K notes
·
View notes
Text
Weirdly Healing Things to Do When You’re Feeling Creatively Burned Out...
Write a fake 5-star Goodreads review of your WIP—as if you didn’t write it. Go ahead. Pretend you're a giddy reader who just discovered this masterpiece. Bonus: add emojis, chaotic metaphors, and all-caps screaming. It’s self-indulgent. It’s delusional. It’s delicious.
Give your main character a Pinterest board titled “Mentally Unstable but Aesthetic.” Include outfits, quotes, memes, cursed objects, and that one painting that haunts their dreams. This is not about logic. This is about ✨vibes.✨
Make a “deleted scenes” folder and write something that would never make it into the book. A crackfic. A “what if they were roommates” AU. The group chat from hell. This is your WIP’s blooper reel. Let it be silly, chaotic, or wildly off-brand.
Interview your villain like you’re Oprah. Ask the hard-hitting questions. “When did you know you were the drama?” “Do you regret the murder, or just the way you did it?” Bonus points if they lie to your face.
Host a fake awards show for your characters. Categories like “Most Likely to Die for Vibes,” “Worst Emotional Regulation,” “Himbo Energy Supreme,” or “Best Use of a Dramatic Exit.” Write their acceptance speeches. Yes, this counts as writing.
Write a breakup letter… to your inner critic. Be petty. Be dramatic. “Dear Self-Doubt, this isn’t working for me anymore. You bring nothing to the table but anxiety and bad vibes.” Rip it up. Burn it. Tape it to your mirror. Your call.
Create a “writing comfort kit” like you’re a cozy witch. A candle that smells like your WIP. A tea that your characters would drink. A playlist labeled “for writing when I’m one rejection email away from giving up.” This is a ritual now.
Design a fake movie poster or book cover like your story is already famous. Add star ratings, critic quotes, and some pretentious tagline like “One soul. One destiny. No chill.”
Write a scene you’re not ready to write—but just a rough, messy outline version. Not the polished thing. Just the raw emotion. The shape of it. Like sketching the bones of a future punch to the gut. You don’t have to make it perfect. Just open the door.
Let your story be bad on purpose for a day. Like, aggressively bad. Give everyone ridiculous names. Add an evil talking cat. Write a fight scene with laser swords and emotional damage. Just remind yourself that stories are meant to be played with, not feared.
#writing#writerscommunity#writer on tumblr#writing tips#writing advice#character development#writer tumblr#writblr#writing help
1K notes
·
View notes
Text
I've already said that my number one piece of writing advice is to read.
But my number two piece of advice is this: be deliberate.
Honestly this would fix so many pieces of bad writing advice. Don't forbid people from doing something, tell them to be conscious and deliberate about it. This could help stop people from falling into common mistakes without limiting their creativity. Black and white imperatives may stop a few annoying beginner habits, but ultimately they will restrict artistic expression.
Instead of "don't use epithets": "Know the effect epithets have and be deliberate about using them." Because yes, beginners often misuse them, but they can be useful when a character's name isn't known or when you want to reduce them to a particular trait they have.
Instead of "don't use 'said'" or "just use 'said'": "Be deliberate about your use of dialogue tags." Because sometimes you'll want "said" which fades into the background nicely, but sometimes you will need a more descriptive alternative to convey what a character is doing.
Instead of "don't use passive voice": "Be deliberate about when you use passive voice." Because using it when it's not needed can detract from your writing, but sometimes it can be useful to change the emphasis of a sentence or to portray a particular state of mind.
Instead of blindly following or ignorantly neglecting the rules of writing, familiarize yourself with them and their consequences so you can choose when and if breaking them would serve what you're trying to get across.
Your writing is yours. Take control of it.
It probably sounds like I'm preaching to the choir here because most of my mutuals are already great writers. But I'm hoping this will make it to the right people.
11K notes
·
View notes
Text
writing? oh, i’m definitely writing. in my head. during the most inconvenient times. like in the shower or when i’m about to fall asleep. actual typing? no, no, we don’t do that here.
#writing#writeblr#writer problems#writing humor#writers on tumblr#writing memes#writing community#writing struggles#writer life#creative writing#writer things#writing motivation#ao3 writer#writer memes#writing is hard#on writing#writerblr#writers block#writing funny#writer thoughts#fiction writing#writer struggles#writing tips#writing advice#writer woes#writing woes#writer quotes#writing inspiration#plot problems#writer chaos
26K notes
·
View notes
Text
Writing Description Notes:
Updated 9th September 2024 More writing tips, review tips & writing description notes
Facial Expressions
Masking Emotions
Smiles/Smirks/Grins
Eye Contact/Eye Movements
Blushing
Voice/Tone
Body Language/Idle Movement
Thoughts/Thinking/Focusing/Distracted
Silence
Memories
Happy/Content/Comforted
Love/Romance
Sadness/Crying/Hurt
Confidence/Determination/Hopeful
Surprised/Shocked
Guilt/Regret
Disgusted/Jealous
Uncertain/Doubtful/Worried
Anger/Rage
Laughter
Confused
Speechless/Tongue Tied
Fear/Terrified
Mental Pain
Physical Pain
Tired/Drowsy/Exhausted
Eating
Drinking
Warm/Hot
#creative writers#creative writing#fanfic review#fanfiction#fanfiction tips#helping writers#how to write#references for writers#wingfic#writer#writers#writers and poets#writers community#writers corner#writers of tumblr#writers on tumblr#writing#writing advice#writing community#writing help#writing inspiration#writing life#writing prompts#writing resources#writing tips#writing tips and tricks#writing description#descriptive writing
40K notes
·
View notes
Text
I'm going to have to try this...
every writing tip article and their mother: dont ever use adverbs ever!
me, shoveling more adverbs onto the page because i do what i want: just you fucking try and stop me
242K notes
·
View notes
Text
10 Non-Lethal Injuries to Add Pain to Your Writing
New Part: 10 Lethal Injury Ideas
If you need a simple way to make your characters feel pain, here are some ideas:
1. Sprained Ankle
A common injury that can severely limit mobility. This is useful because your characters will have to experience a mild struggle and adapt their plans to their new lack of mobiliy. Perfect to add tension to a chase scene.
2. Rib Contusion
A painful bruise on the ribs can make breathing difficult, helping you sneak in those ragged wheezes during a fight scene. Could also be used for something sport-related! It's impactful enough to leave a lingering pain but not enough to hinder their overall movement.
3. Concussions
This common brain injury can lead to confusion, dizziness, and mood swings, affecting a character’s judgment heavily. It can also cause mild amnesia.
I enjoy using concussions when you need another character to subtly take over the fight/scene, it's an easy way to switch POVs. You could also use it if you need a 'cute' recovery moment with A and B.
4. Fractured Finger
A broken finger can complicate tasks that require fine motor skills. This would be perfect for characters like artists, writers, etc. Or, a fighter who brushes it off as nothing till they try to throw a punch and are hit with pain.
5. Road Rash
Road rash is an abrasion caused by friction. Aka scraping skin. The raw, painful sting resulting from a fall can be a quick but effective way to add pain to your writing. Tip: it's great if you need a mild injury for a child.
6. Shoulder Dislocation
This injury can be excruciating and often leads to an inability to use one arm, forcing characters to confront their limitations while adding urgency to their situation. Good for torture scenes.
7. Deep Laceration
A deep laceration is a cut that requires stitches. As someone who got stitches as a kid, they really aren't that bad! A 2-3 inch wound (in length) provides just enough pain and blood to add that dramatic flair to your writing while not severely deterring your character.
This is also a great wound to look back on since it often scars. Note: the deeper and wider the cut the worse your character's condition. Don't give them a 5 inch deep gash and call that mild.
8. Burns
Whether from fire, chemicals, or hot surfaces, burns can cause intense suffering and lingering trauma. Like the previous injury, the lasting physical and emotional trauma of a burn is a great wound for characters to look back on.
If you want to explore writing burns, read here.
9. Pulled Muscle
This can create ongoing pain and restrict movement, offering a window to force your character to lean on another. Note: I personally use muscle related injuries when I want to focus more on the pain and sprains to focus on a lack of mobility.
10. Tendonitis
Inflammation of a tendon can cause chronic pain and limit a character's ability to perform tasks they usually take for granted. When exploring tendonitis make sure you research well as this can easily turn into a more severe injury.
This is a quick, brief list of ideas to provide writers inspiration. Since it is a shorter blog, I have not covered the injuries in detail. This is inspiration, not a thorough guide. Happy writing! :)
Looking For More Writing Tips And Tricks?
Check out the rest of Quillology with Haya; a blog dedicated to writing and publishing tips for authors!
Instagram Tiktok
#hayatheauthor#haya's book blog#haya blogs#writing community#quillology with haya#writing tools#writer things#writing advice#writer community#writing techniques#writing prompt#writing stuff#creative writing#ya writing advice#writing tips and tricks#writer tools#writers of tumblr#writer blog#writers block#quillology with haya sameer#writers on tumblr#writerscommunity#writer stuff#author help#author advice#author#writing inspiration#writeblr#novel writing#on writing
60K notes
·
View notes
Text
if you're trying to get into the head of your story's antagonist, try writing an "Am I the Asshole" reddit post from their perspective, explaining their problems and their plans for solving them. Let the voice and logic come through.
68K notes
·
View notes
Text
You don't actually write creative enough
Read your work again. You see: does, goes, places, etc. Red, blue, ugly, smelly. Authors often take shortcuts when writing and while it gets the job done, it doesn't give the power that it should. Sometimes, the word count is sacrificed for the greater good.
He ran to get her He lunged to steal her, or He charged to catch her
Once you have that, maybe you're still not writing creative. You can use synonyms, it's the easiest path to do. Yet, you can rephrase for a more unique sentence. Walk =/ strut. Do =/ act.
It smelled of decaying bodies Your smell soured of death's traces, or The air soured of death's traces
Describing things doesn't need to be flat either. It's a struggle to describe certain things—hair, eyes, height, posture, rooms, walls, etc.
The room was extremely red The room drowns her with fever-inducing red, or Every surface imaginable bleeds my eyes with red
This can easily become an overbearing way to attempt to reach the word count. However, it does help in situations where the writing has been too flat for too long and the narrator needs to show that this thing holds significance.
#santoelle#writing#writing tips#writing advice#writing help#writing resources#writer on tumblr#writers on tumblr#writer community#writing inspiration#writing ideas#creative writing#fiction#literature
717 notes
·
View notes
Text

#what i’ve so clearly learned#writeblr#novel writing#writing#my writing#novel#fantasy#books#writers block#wip#writers#writing advice#writing life#writing prompt#writing stuff#on writing#creative writing#writer thoughts#writer life#writers on writing#writers life#writer#writer problems#writer stuff#writerblr#writer things#writers and poets#writers on tumblr#writerscommunity#thewordsarestuckinmyhead
753 notes
·
View notes
Text
Things Real People Do in Dialogue (For Your Next Story)
Okay, let’s be real—dialogue can make or break a scene. You want your characters to sound natural, like actual humans talking, not robots reading a script. So, how do you write dialogue that feels real without it turning into a mess of awkward pauses and “ums”? Here’s a little cheat sheet of what real people actually do when they talk (and you can totally steal these for your next story):
1. People Interrupt Each Other All the Time In real conversations, nobody waits for the perfect moment to speak. We interrupt, cut each other off, and finish each other's sentences. Throw in some overlaps or interruptions in your dialogue to make it feel more dynamic and less like a rehearsed play.
2. They Don’t Always Say What They Mean Real people are masters of dodging. They’ll say one thing but mean something totally different (hello, passive-aggressive banter). Or they’ll just avoid the question entirely. Let your characters be vague, sarcastic, or just plain evasive sometimes—it makes their conversations feel more layered.
3. People Trail Off... We don’t always finish our sentences. Sometimes we just... stop talking because we assume the other person gets what we’re trying to say. Use that in your dialogue! Let a sentence trail off into nothing. It adds realism and shows the comfort (or awkwardness) between characters.
4. Repeating Words Is Normal In real life, people repeat words when they’re excited, nervous, or trying to make a point. It’s not a sign of bad writing—it’s how we talk. Let your characters get a little repetitive now and then. It adds a rhythm to their speech that feels more genuine.
5. Fillers Are Your Friends People say "um," "uh," "like," "you know," all the time. Not every character needs to sound polished or poetic. Sprinkle in some filler words where it makes sense, especially if the character is nervous or thinking on their feet.
6. Not Everyone Speaks in Complete Sentences Sometimes, people just throw out fragments instead of complete sentences, especially when emotions are high. Short, choppy dialogue can convey tension or excitement. Instead of saying “I really think we need to talk about this,” try “We need to talk. Now.”
7. Body Language Is Part of the Conversation Real people don’t just communicate with words; they use facial expressions, gestures, and body language. When your characters are talking, think about what they’re doing—are they fidgeting? Smiling? Crossing their arms? Those little actions can add a lot of subtext to the dialogue without needing extra words.
8. Awkward Silences Are Golden People don’t talk non-stop. Sometimes, they stop mid-conversation to think, or because things just got weird. Don’t be afraid to add a beat of awkward silence, a long pause, or a meaningful look between characters. It can say more than words.
9. People Talk Over Themselves When They're Nervous When we’re anxious, we tend to talk too fast, go back to rephrase what we just said, or add unnecessary details. If your character’s nervous, let them ramble a bit or correct themselves. It’s a great way to show their internal state through dialogue.
10. Inside Jokes and Shared History Real people have history. Sometimes they reference something that happened off-page, or they share an inside joke only they get. This makes your dialogue feel lived-in and shows that your characters have a life beyond the scene. Throw in a callback to something earlier, or a joke only two characters understand.
11. No One Explains Everything People leave stuff out. We assume the person we’re talking to knows what we’re talking about, so we skip over background details. Instead of having your character explain everything for the reader’s benefit, let some things go unsaid. It’ll feel more natural—and trust your reader to keep up!
12. Characters Have Different Voices Real people don’t all talk the same way. Your characters shouldn’t either! Pay attention to their unique quirks—does one character use slang? Does another speak more formally? Maybe someone’s always cutting people off while another is super polite. Give them different voices and patterns of speech so their dialogue feels authentic to them.
13. People Change the Subject In real life, conversations don’t always stay on track. People get sidetracked, jump to random topics, or avoid certain subjects altogether. If your characters are uncomfortable or trying to dodge a question, let them awkwardly change the subject or ramble to fill the space.
14. Reactions Aren’t Always Immediate People don’t always respond right away. They pause, they think, they hesitate. Sometimes they don’t know what to say, and that delay can speak volumes. Give your characters a moment to process before they respond—it’ll make the conversation feel more natural.
Important note: Please don’t use all of these tips in one dialogue at once.
#creative writing#writing#writblr#writing advice#writers block#writers on tumblr#WritingTips#AmWriting#DialogueWriting#RealisticDialogue#CharacterDevelopment#WritingAdvice#FictionWriting#WritingRealism#WritingProcess#WritingCraft#WritersOfTumblr#WriterCommunity#CreativeWriting#Storytelling#WritingDialogue
13K notes
·
View notes
Text
Romantic Gestures for Characters
❥ The “I Know You” Gesture
Your character remembers something tiny. Maybe their partner always peels oranges but hates the stringy bits. So they do it for them, meticulously. No grand speech. Just peeled oranges on a napkin, handed over like, I got you. It’s not flowers. It’s better.
❥ The “You Matter More Than My Ego” Move
Apologies. Vulnerable, awkward, ugly ones. Not performative, not flowers-as-a-bandage. Just a raw, honest “I screwed up. And you didn’t deserve that.” That’s romance with guts.
❥ The “I Made This With My Clumsy, Lovesick Hands” Attempt
It’s not a five-star meal. It might be an overcooked mess. But they tried. They Googled recipes, burnt a pan, and still showed up with a crooked smile and a smoke-scented apology. Intimacy lives in the effort, not the execution.
❥ The “I’m Thinking of You Even When You’re Not Around” Habit
A voice memo left in the middle of the day. A text that says, “I saw this book and thought of you.” A saved pastry because “you love those stupid lemon ones.” It’s in the thought, the noticing. The I-carry-you-with-me-even-here of it.
❥ The “You’re Safe With Me” Moment
Middle of a panic attack. They don’t run, they don’t fix. They sit. Hold a hand. Count breaths. They become a lighthouse in the fog. That’s not just romance, it’s sanctuary.
❥ The “Make You Laugh When You Want to Cry” Trick
Silly voices. Bad dad jokes. A spontaneous dance in the kitchen just to make them smile. Love doesn’t always whisper—it cackles, snorts, belly-laughs until you can’t remember what the fight was about.
❥ The “I See the You Nobody Else Gets to See” Love
Noticing the nervous tic they try to hide. The quiet resilience. The softness behind the sarcasm. Your character sees it all and chooses to love them there. Not despite their mess, but because of it.
❥ The “I’ll Go to the Boring Thing Because You Care” Sacrifice
They hate art galleries. Or jazz. Or your character’s weird book club full of PhD students. But they show up. They try. They listen and maybe even ask a thoughtful question. Not because they suddenly love postmodern fiction, but because they love you.
❥ The “Let Me Take Care of You, Just This Once” Flip
Especially powerful when it comes from your fiercely independent character. When they finally let someone in. Accept help. Rest their head on a lap and let themselves be held. Or be the one doing the holding for someone who never asks.
❥ The “I Want to Remember This” Gesture
No, not just a scrapbook. Maybe it's saving movie stubs, or voice recording a partner’s laugh because it's perfect and might not last. Maybe it's writing a poem they'll never read. Romance often lives in what we keep sacred, quietly.
❥ Bonus — The Non-Obvious Public Gesture
Holding hands in public when your character usually doesn’t. Or kissing their partner’s temple in front of their disapproving parents. Or calling them “baby” when it makes their partner smile like a fool. Public affection isn’t about performance, it’s about pride. Claiming someone. Softly, fiercely.
#writing#writerscommunity#writer on tumblr#writing tips#writing advice#character development#writer tumblr#writblr#writing help#romantic gestures#romantic prompts#romance books#aspiring writer#writer community#female writers#writer stuff#writer things#writers life
1K notes
·
View notes
Text
sometimes the best writing advice is "just let it be bad." revolutionary. terrifying. but it works.
#writing#writeblr#writer problems#writing humor#writers on tumblr#writing memes#writing community#writing struggles#writer life#creative writing#writer things#writing motivation#ao3 writer#writer memes#writing is hard#on writing#writerblr#writers block#writing funny#writer thoughts#fiction writing#writer struggles#writing tips#writing advice#writer woes#writing woes#writer quotes#writing inspiration#plot problems#writer chaos
33K notes
·
View notes
Text
10 Quiet Ways Your Character Is Breaking Their Own Heart (And Pretending It's Fine)
These are the betrayals that aren’t loud. They don’t come with fireworks or screaming matches. These are the small, slow deaths. The ones that your character lets happen... while smiling politely.
» They say yes when they desperately want to say no. Every. Damn. Time. They show up when they're exhausted. They agree to things they hate. They make themselves smaller, softer, easier, because "good people" don’t make waves, right? (Spoiler: they're drowning.)
» They keep chasing people who only love them halfway. It's not even subtle anymore. They know these people leave them on "read," show up late, make them feel like an afterthought. But they cling anyway, spinning every scrap of affection into a story about hope. (It’s not hope. It’s hunger.)
» They refuse to believe good things are meant for them. They’ll hype everyone else up. They’ll believe in everyone else's dreams. But when something finally good lands in their lap? They’ll panic. Push it away. Tell themselves it was a fluke. (Because being disappointed feels safer than being lucky.)
» They’re waiting for closure that will never come. An apology. An explanation. A miracle where someone says, "You were right, and I was wrong, and I’m so sorry." They wait years. Decades. Lifetimes. But deep down, they know: some people never come back. Some stories just end without punctuation.
» They’re hoarding all their "almosts" like treasures. The job they almost got. The love that almost worked. The version of themselves they almost became. They replay those maybes like a greatest hits album. (Meanwhile, real life is slipping by while they mourn possibilities.)
» They’re performing a version of success they secretly hate. Look at the Instagram. Look at the LinkedIn updates. Look at the shiny exterior. It looks like winning. But every trophy they collect feels heavier, not lighter. Every promotion tastes a little more like ash. (Turns out, chasing someone else's dream is still losing.)
» They forgive people who aren’t sorry. Not because they’re enlightened. Not because they’ve healed. But because it’s easier to pretend it didn’t hurt than to sit with the fact that it did—and that the person responsible doesn't care. (Some wounds scar better when you stop pretending they were accidents.)
» They punish themselves for still being soft. The world told them, again and again, that soft things get broken. And they believed it. So every time they feel too much? Every time they cry or hope or trust? They tell themselves they’re weak. Stupid. Embarrassing. (They're not. They're just still alive.)
» They downplay their own magic. They call their talents "lucky breaks." Their beauty "average." Their intelligence "no big deal." They shrug off compliments like they're dangerous. Because deep down, they've been taught that being remarkable makes you a target.
» They cling to the idea that if they just work harder, they'll finally be enough. They believe in meritocracy like it’s a religion. That if they hustle hard enough, self-sacrifice deep enough, burn themselves to ash perfectly enough, someone, somewhere, will finally say, "You're worthy now." (They were always worthy. The system is just broken.)
#writing#writerscommunity#writer on tumblr#writing tips#writing advice#character development#writer tumblr#writblr#writing help#i am a writer#writers on tumblr#aspiring writer#indie writer#writer#writer community#writer problems#writer things#writer stuff#writers life
652 notes
·
View notes
Text
“I'm here because the parts I love are worth the rest.”
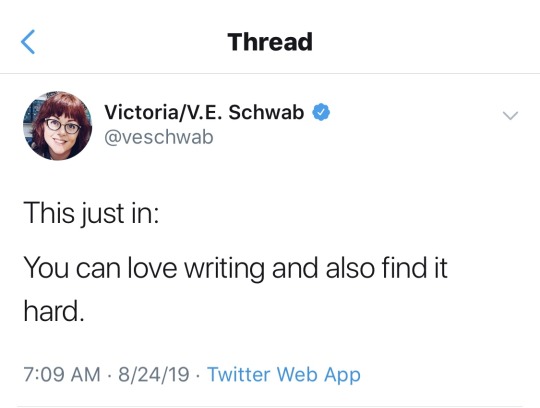

Victoria Schwab Tweets:
“This just in: you can love writing and also find it hard.
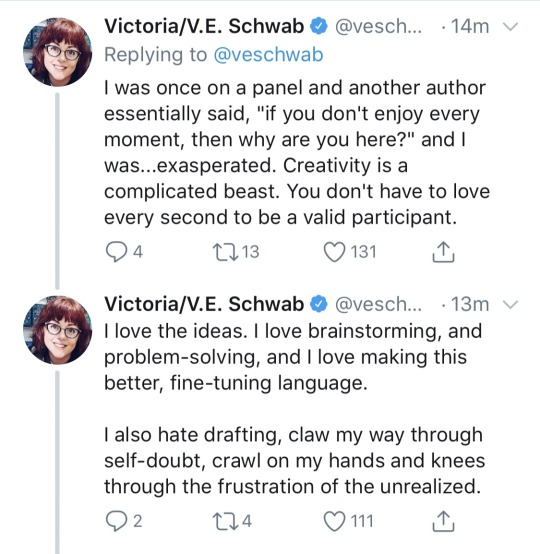
“I was once on a panel and another author essentially said, ‘if you don't enjoy every moment, then why are you here?’ and I was...exasperated. Creativity is a complicated beast. You don't have to love every second to be a valid participant.
“I love the ideas. I love brainstorming, and problem-solving, and I love making this better, fine-tuning language.
“I also hate drafting, claw my way through self-doubt, crawl on my hands and knees through the frustration of the unrealized.
“I'm not here because I love every second.
“I'm here because the parts I love are worth the rest.”
53K notes
·
View notes