#How to use a Cricut Explore 3
Explore tagged Tumblr posts
Visit Tumblr Blog
Explore Tumblr blogs with no restrictions, modern design and the best experience.
Last Seen Tumblr Blogs


Fun Fact
70% of Tumblr users say the Dashboard is their favorite place to spend time online.
Text
How to Use Cricut Explore 3: Get Started With Your First Craft
My childhood friend Emma recently purchased a Cricut Explore 3 to start crafting. Like you, she was confused about how to use Cricut Explore 3. We keep in touch, so she calls me for help. I'm always eager to help; I teach her everything from setting up and connecting the Cricut machine to downloading Cricut Design Space. I also enjoyed her first project; it was fun.
If you have left your machine untouched since buying and are wondering how to get started, I will guide you through it step-by-step, just like I did for Emma. I was once a beginner like you, but with continuous learning, I have done many projects with my Cricut machine. Follow the instructions in this blog, and you will feel comfortable in no time. Let's get started!
How to Setup a Cricut Explore 3 on Your Device?
Now that you have your Explore 3, before you learn how to use Cricut Explore 3, it must first be set up properly so you can start crafting.
Step 1: Unpacking the Machine and Turn It On
If you haven't opened the box yet, open it up and locate the power cable and the Cricut Explore 3 machine.
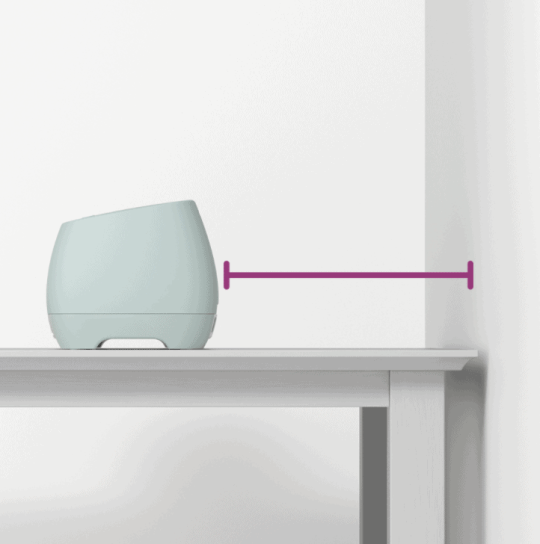
After this, place the machine on a clean and flat surface and ensure that there is 2 feet of free space behind the machine.
This time, plug the round end of the power cable into the back of the Cricut Explore 2 machine and the other end into a power source.
Turn on the machine and the power button simultaneously.

Step 2: Connecting Cricut Explore 3 to a Computer
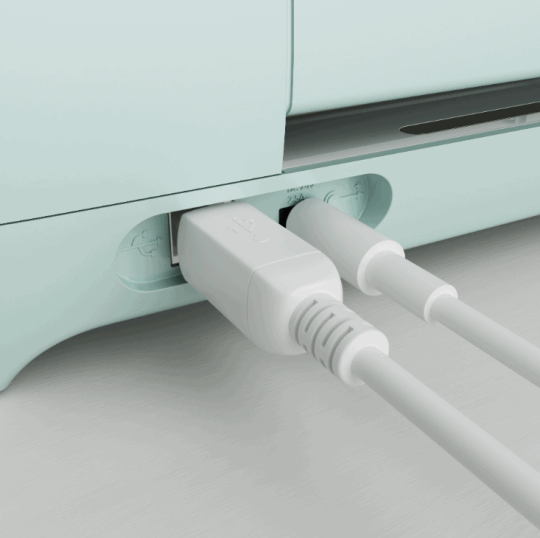
The Cricut Explore 3 comes with a USB port and also supports Bluetooth connectivity. We can use any method for connection.
For a USB connection, plug one end into the computer and another one at the back of the Explore 3 around the power cord.
Step 3: Download Cricut Design Space
Installing Cricut Design Space is essential when you first start learning how to use Cricut Explore 3, as it is integral to the setup.
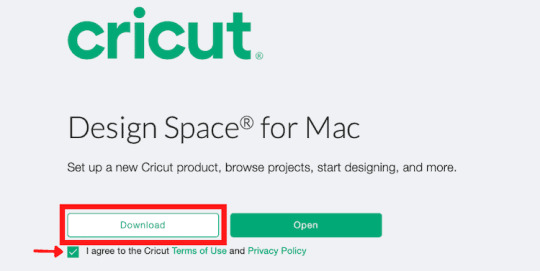
Open the computer and go to the cricut.com site; it will automatically recognize the computer, whether it is a Mac or Windows or not.
After that, tick the box to agree to Cricut's terms and conditions and click "Download."
Moreover, open up the downloaded file, follow the on-screen prompts, and install the Cricut software.
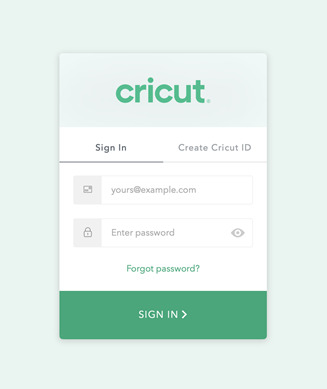
Next, launch the Cricut application and create a Cricut profile. If you have already done so, simply log in.
Step 4: New Machine Setup in Design Space
No matter which Cricut machine you have, it needs to be set up in the Cricut application before use.
Once the Cricut applicationis installed, click the Menu icon.
Next, click New Product Setup and select the Cricut cutting machine.

Now, a new page will open that asks you to select the machine and tap on the Cricut Explore 3.
Follow the on-screen steps, then update if there is any new update, and click Continue to complete setup.
How to Use a Cricut Explore 3 to Make a Mug?
Finally, the setup for the Cricut Explore 3 is complete, and it is connected. Now, let's dive into how to use Cricut Explore 3 by creating a project.
Step 1: Supplies and Tools Required
Given below are the essential Cricut tools and materials you will need to get started with your project.
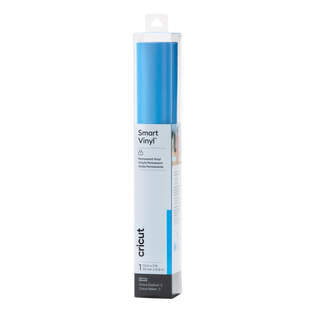
Cricut vinyl
Cricut Explore 3
Weeding tool
Transfer tape
A blank item (I choose a mug)
Step 2: Use the Cricut Software and Create a Design
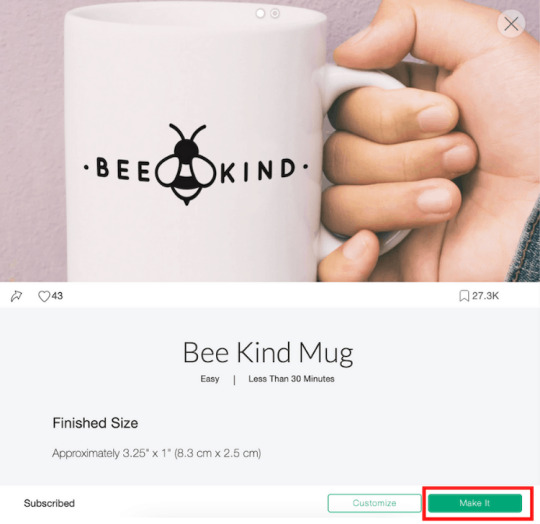
Open the Cricut app, click on the New Project, and look for the "Bee Kind" design in the search bar. Since it is your first project, I recommend skipping any customization. Simply drag and resize the design, then click Make It.
Step 3: Select Your Material
Now, the Cricut software will ask you to choose the load type "Without Mat" and click done.
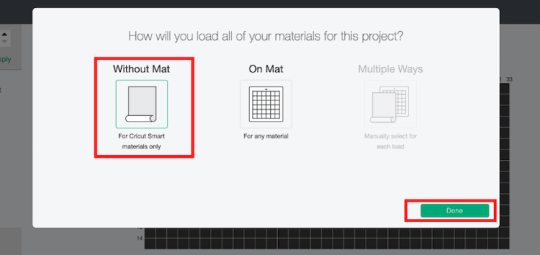
Also, insert the smart vinyl into the machine, ensuring the fine point blade is installed in clamp B.
Then, return to the Cricut app and click the Continue button.
Step 4: Start Cutting Your Design
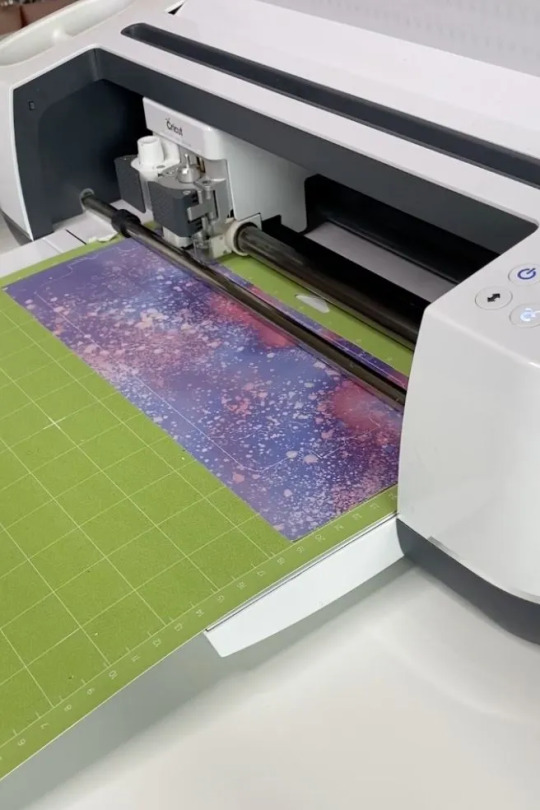
When your design and all the settings are complete in Design Space, it is time to click the Go button and start cutting. Once the machine finishes cutting, hit the Load button to remove the smart vinyl.
Next, trim and weed out the excess vinyl that is not required.
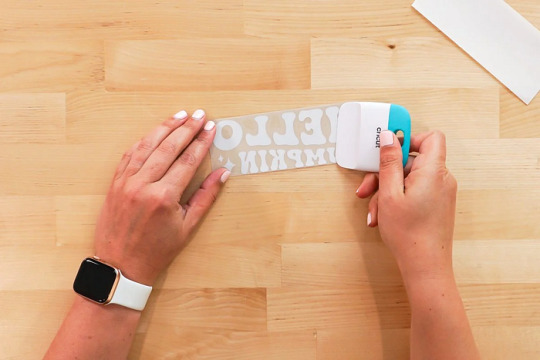
Then, cut the transfer tape to fit the size of the design you have cut out. Peel the white backing away from the transfer tape and place the sticky side down on your vinyl decal.
Finally, peel back the transfer tape and apply it to the blank object (mug) to lift it up; it's as simple as that.

Final Words
The Cricut Explore 3 is a popular machine capable of cutting over 100 materials, making it ideal for various projects like t-shirts, vinyl decals, stickers, cards, and more. Before diving into any projects post-purchase, it's crucial to understand how to use the Cricut Explore 3. I have provided all the information from setup to the first DIY project, assuming you have completed it and are now comfortable using your machine.
Frequently Asked Questions
What can I make with my Cricut Explore 3?
The following projects are beginner-friendly, stunning, and easy to make with the Cricut Explore 3.
Labels
Decals
Personalized apparel
Mugs
Wooden sign
Banners
Bookmarks
Frame
Cupcake toppers
T-shirt
Coasters
How to use Cricut Explore 3 without a mat?
You can follow these simple instructions to use the Cricut Explore 3 without a mat:
First, create a design in the Cricut app and select the load type "Without Mat."
After that, load the material onto your machine and press the Start button.
Finally, complete the on-screen instructions to complete the vinyl cutting process.
How to connect Cricut Explore 3 to a computer or mobile phone?
Follow the steps below to connect the Cricut Explore 3 to a computer or mobile phone:
Ensure that the Explore 3 is turned on.
Open the Bluetooth settings on your computer or mobile phone.
Wait for your system to detect the Explore 3.
Select the machine, and if asked for a PIN, type 0000, then select Connect.
#How to use a Cricut Explore 3#How to use Cricut Explore 3#cricut explore air 2#cricut software#cricut
0 notes
Text
How to Use Cricut Maker: Create a Siser Easy Color DTV Project!
Have you just bought a new Cricut Maker and are wondering how to use Cricut Maker? This brilliant Cricut machine may be overwhelming for beginners, but it is simpler than you think. You get many amazing features with this crafting machine. Let’s get ready to use it and make creative DIY projects with it. I will tell you how to prepare a desired project using this Cricut cutting machine.
Cricut Maker offers various adaptive features that help you create unique and beautiful projects effortlessly. Plus, you get a slot for inserting pens and a number of Cricut tools and supplies. It will be all fun to create something with this ultimate machine. Here, I’ll tell you the best methods to prepare personalized apparel using Siser EasyColor DTV. You’ll learn more about it later in this blog. So, let’s get started.
Supplies and Tools You Will Need for Your Cricut Project
Before we get started to learn how to use Cricut Maker, you must gather some important accessories. I’m listing all of the best accessories here. Use them and follow my step-by-step instructions to create your own project. Check the steps below.
● Brand new Cricut Maker or Explore
● Siser EasyColor DTV
● Siser Easy Mask
● An inkjet printer
● Cricut StandardGrip mat
● A weeding tool
● A Cricut EasyPress
● A Cricut scraper tool
Let me tell you what a Siser EasyColor DTV is. It is an iron-on vinyl type that is typically used on lighter blanks such as garments, T-shirts, etc. This unique vinyl is very convenient and useful for creating better designs and sublimation projects. Let’s check the complete method to create the best project.
How to Use Cricut Maker to Make Personalized Apparel?
Finally, we are here to learn the process of creating personalized T-shirts. So, before we move on to the final steps, measure your blank so that you can create an appropriate design. So, let’s check how to use Cricut Maker for beginners.
Step 1: Upload an SVG File to Cricut Design Space
In the first and foremost step, you’ll need to upload your SVG design file to the Cricut software. If you want, you can create a design manually as well. Once you’re ready, just resize your design and make it fit to your blank.
As you’ll have to print this image, ensure that your Cricut machine will recognize it as a printable file and not a file to be cut. To ensure this, choose your image and hit the Flatten option beneath the Layers Panel.
After that, your Cricut machine will show a preview of the image. When you’re ready, just click the Make It button. And now, this design will go through a Print Then Cut feature. To access it, hit the Continue button.
In the next step, you’re allowed to send that image to your inkjet printer and select the paper type you want to print on. I prefer specialty matte. You can select one based on your printer. Get ready with your printer and insert the Siser EasyColor DTV into it.
Step 2: Start Cutting the Siser EasyColor DTV
In the following step, you’ll need to cut your material. On your Cricut machine, select your material as Premium Vinyl Permanent Glossy and set the pressure to More using the drop-down menu.
Next, load your vinyl material on the Cricut mat at the left-side corner and make it stick to the mat using a brayer tool. Now, load the mat with vinyl into the Cricut machine and hit the Play button to allow your Cricut to cut the image. Continue with the steps to learn how to use Cricut Maker.
Once the cut is done, take off the paper sheet from your mat, turn the mat over, and take the mat away from your DTV. Please note that you don’t have to peel off the DTV from the mat. You can also use a pair of scissors to cut the design if necessary.
Step 3: Weed Out the Excess Vinyl
Once you cut your design, you should weed out the excess vinyl from your design. Do this carefully, so that your design doesn’t ruin. This step will add more detail to your project.
Step 4: Cover Your Image With a Mask
Moving forward, cut your mask to the size of your design. Now, take off the transparent film from the mask and then apply the mask alone to your DTV image. Moreover, ensure that the final design is flat and that there are no air gaps between the mask and the design.
Step 5: Transfer Your Design to Apparel

This design is so amazing; I love making it. This is how to use Cricut Maker to reap good results. All the best to all of you who are keen to make something unique and precise.
FAQs
How to Use a Cricut Maker to Make Shirts?
To create a shirt with your Cricut cutting machine, you’ll need to use the Cricut Design Space and a heating press to create a desired design. Get started with the Cricut software, make a design, resize it, and then print and cut it with your Cricut machine. Now, weed away the excess vinyl, and then preheat it with your Cricut heat press, and give a final heat to it.
Which Heat Press Is Suitable for Making an Iron-on Cricut Project?
As there are many options to create an iron-on Cricut project, you can use any of them depending on your requirements. So, the common machines are Cricut EasyPress, Cricut EasyPress 2 & 3, Cricut EasyPress Mini, etc. You can utilize a heat press to transfer the design to your apparel effortlessly.
Can You Use Regular Iron With a Cricut Machine?
Yes, you can. A regular iron is also effective for your minimalist iron-on projects. However, a regular iron may not deliver the results you want and not give a permanent design. Overall, we can say you can use a household iron for normal, sensitive projects but not for complex projects.
Read more: install cricut design space app
cricut.com/setup
cricut.com/setup mac
Source: How to Use Cricut Maker
#How to Use Cricut Maker#How to use cricut maker for beginners#how to use a cricut maker to make shirts#cricut.com/setup mac#cricut explore 3#www.cricut.com setup login#cricut design space#cricut explore air 2#cricut.com/setup#cricut new machine setup#cricut.com setup mac#cricut setup on computer
0 notes
Text
How to Use Cricut Explore 3: A Complete Tutorial

Cricut Explore 3: Introduction
Cricut Explore 3 is one of the latest models from Cricut. As this machine is bigger, faster, and smarter, it can be a nice addition to the workspace of passionate crafters. Also, this excellent machine can cut Cricut Smart Materials (those materials that don’t need a cutting mat) to make bigger projects. Its sharp blades can cut 12 feet of material completely without a mat. This latest machine comes with the necessary accessories for setup and making a better first project.
How to Set up Cricut Explore 3 on a Desktop?
To get started with an Explore 3 machine, you need to set it up on a PC. As a full-time blogger and a Cricut hobbyist, I want to tell you that the best way to use a Cricut machine is through a desktop. Therefore, if you want to create a nice project out of it, read our complete blog. Go through the steps given to set up your Explore 3 machine.
First of all, unbox your Cricut machine and connect it to your wall outlet.
Then, turn on the machine and connect it to your PC through Bluetooth.
Now, download and install the Cricut app or the Cricut Design Space app from its official website.
After that, sign in to the Cricut account and start the machine’s setup.
At last, when the setup is finished, take the first cut.
By successfully performing all the above steps, you can start creating your very first project
with this lovely Cricut machine that now has multiple users.
How to Use Cricut Explore 3 to Create a Project?
Finally, you are all set to learn how to create a first project with the Explore 3 machine. With this advanced Cricut machine, you can create any project using simple steps. Look at the step-by-step procedure.
Step 1: Essential Materials and Tools
While starting a project with your brand new Explore 3 machine, you will need to gather all the necessary items listed below.
Cutting mat
Cardstock
Smart vinyl
Transfer tape
Weeding tool and scraper
Cricut pen and markers
Apparel or blank to design (tote bags, shoes, hoodies and coasters)
Step 2: Use the Cricut Software to Create a Design
In the first step, you can create a design according to your project. The Design Space has unlimited options for designs, templates, fonts, and images. You can easily select from them to make a unique design for your project.
Step 3: Choose Your Cutting Material
When you complete your design, choose the materials that you need to design. Then, place your material on a mat. After that, load your cutting mat into your Explore 3 machine and hit the Go button. Now, your machine will cut your material as per your instructions.
Step 4: Select Your Material Under Settings
When you are learning how to use Cricut Explore 3, select your material under the settings before cutting it through the machine. The Design Space will ask you to choose a specific material. Once you have selected the material, it will be sent to your cutting machine.
Step 5: Allow the Cutting Process
Once you have selected your material and set all the settings, allow the cutting process to happen and press the flashing button on your machine. Then, your Explore 3 machine will cut your material according to your design.
Step 6: Take off the Material
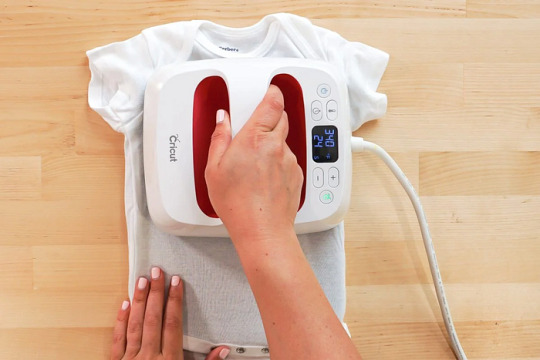
When the cutting is over, you need to remove the cutting mat from your machine. Then, use the weeding tool to remove the extra material from the design. However, if you are working on an iron-on project, you can place your design on the blank apparel and transfer your design using a Cricut Heat Press.
Finally, you have understood how to use Cricut Explore 3 to create a good-looking project. If you are a Cricut admirer and want to create something unique, this blog might be helpful.
Conclusion
We have discussed creating a project. You can create various projects with your only Explore 3 in your spare time as a hobby or start a part-time business by selling your best creations. Cricut Design Space is significant here as it’s the key to using all the Cricut cutting machines. So, better use your creativity in the Design Space and create something out of the box, as you know how to use Cricut Explore 3 now.
FAQs
What Type of Projects Can I Make With Cricut Explore 3?
A Cricut Explore machine opens a room for opportunity to many crafters and allows them to create many projects. Here are some of the best pieces of projects you can create.
Cake toppings
Vinyl Stickers and decals
Banners
Stencils
Metal and wooden sign
Decorative items
What Supplies Do I Need to Create a Project With Cricut Explore 3?
Well, the supplies for your project will vary depending on the project type. But, there are certain supplies that are basic, and you will use them in almost every project. Here is a list of them.
Weeding tool
Materials
Transfer tape
Cricut markers and pens
Cutting mat
Materials such as cardstock, HTV, shirts and shoes
Scraper tool
Adhesives
How Can I Get Cricut Design Space on My Computer?
If you want to install the Cricut app on your computer, you need to visit Cricut’s official website at cricut.com/setup to download and install this smart app. On Cricut’s website, you need to select your Cricut machine and then accept the terms and conditions to download the Design Space. Then, move to the Downloads folder on your computer, click on the downloaded file, and allow the installation.
Read more: install cricut design space app
how to setup cricut explore
cricut.com/setup mac
cricut setup for explore 3
Source: how to use Cricut Explore 3
#how to use Cricut Explore 3#cricut setup for explore 3#cricut.com/setup mac#cricut explore air 2#cricut new machine setup#cricut project ideas#cricut software app#cricut design space login#install cricut design space app#cricut design space download#www.cricut.com/setup login
0 notes
Text
How to Use a Cricut Mug Press: A Step-by-Step Guide
When I first bought my Cricut Mug Press, I was quite nervous about learning how to use a Cricut Mug Press. It took some time to read many articles and gather all the essential information. Now that I have gained experience using it, I want to share all the basic instructions for using this Cricut machine. If you are uncertain about using it, make sure to read this post to the end.
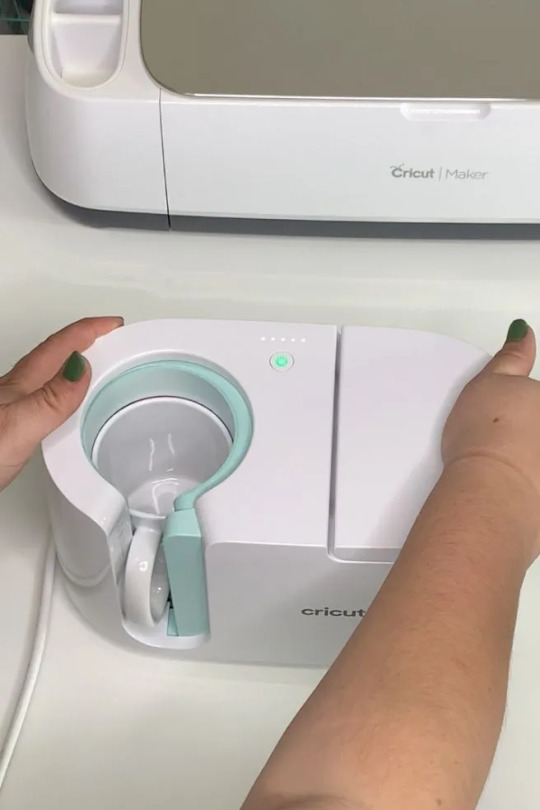
The Cricut Mug Press is a small yet impressive tool that transforms plain mugs into stylish designer pieces. Despite its compact size, it is incredibly capable and essential for crafting custom mugs for personal use or as gifts for loved ones. So, let’s start with the materials you will need for your project.
Tools and Supplies You Need to Create a Personalized Mug
Before learning how to use a Cricut Mug Press, it is important to know the necessary materials you are going to need. Here is a detailed list:
Cricut cutting machine: You will have to use this machine to cut designs from the infusible ink sheet. Suitable Cricut models are Cricut Maker 3, Explore 3, or Joy.
Cricut Mug Press: This is the machine used to transfer the infusible ink design onto your mug.
Sublimation mug: Specific mugs made for the Mug Press machine are necessary because they fit perfectly and ensure the best results. Using other mugs of different shapes and sizes may not fit or work well with the machine.
Infusible ink sheet: This material is basic as it is where you will cut your designs, which will later be transferred onto the mug using heat in the machine.
Heat-resistant tape: It is essential for securing the infusible ink sheet onto the mug during the pressing process.
Lint roller: Used to ensure the surface of the mug is clean and free of debris before applying the infusible ink design.
Weeding tools: These are used to remove excess or unwanted material from the design before transferring it to the mug.
Once you have assembled all these supplies and tools, ensure your setup is ready. Connect your Cricut machine to power and turn it on. Establish a connection between the machine and your device using Bluetooth or USB. Download the Design Space app on your device and log in with your account. This setup is essential before proceeding with the Mug Press.
Before beginning to use the Mug Press, ensure it is on and heating up properly. Following these steps ensures you are ready to create custom mugs with your Cricut machine.
How to Use a Cricut Mug Press in 4 Simple Steps?
When you have assembled all the necessary tools and completed the setup, you can start working on your project. Here are the 4 steps you need to follow to use the Mug Press:
Step 1: Create a Design on Cricut Software

Step 2: Cut and Weed Out the Excess Material

After completing the design, insert the material into the machine and press the Load button. The design will be cut quickly. Once the cutting is done, unload the material and use a weeding tool to peel away any unwanted parts from the design.
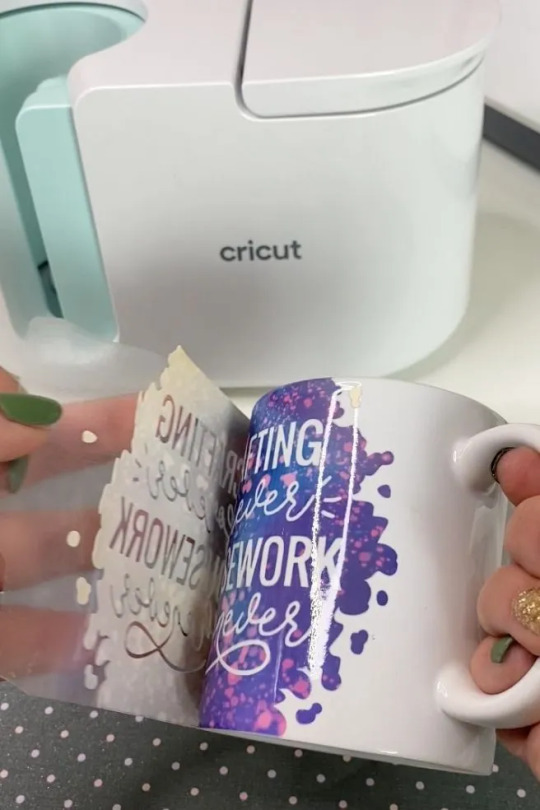
Step 3: Transfer the Design to Your Mug

Step 4: Reveal the Final Result

When the pressing is complete, carefully remove the mug from the machine, handling it by the handle to avoid burns. Allow the mug to cool for 20–30 minutes. During this time, it’s important to avoid touching the heated areas to prevent injury. Once the mug has cooled down completely, it will be ready for use, showing your newly transferred design beautifully.
Conclusion
In short, learning how to use a Cricut Mug Press is quite easy. As you can see, the process is simple. First, gather all the necessary tools and accessories and set them up. Once the setup is done, create a design on the Design Space app, cut it on the Cricut cutting machine, and press the design onto the mug using the Mug Press machine. Once the pressing is finished, you will have a beautiful mug ready to use however you like.
FAQs
What Are the Supplies Required for Cricut Mug Press?
To work with a Cricut machine and create designer mugs, you will need some essential supplies:
Cricut cutting machine
Cricut Mug Press
Infusible Ink
Heat-resistant tape
Weeding tool
Lint roller
Sublimation Ink
These tools are important to prepare and execute projects with Cricut effectively.
Do I Need a Computer to Use Cricut Mug Press?
No, not necessarily! You can download the Cricut Design Space app on your computer or any device. If you don’t have a computer, you can use your Android or iOS mobile instead. However, using a computer for the app allows you to work on projects more effectively. Just ensure your computer runs on either Windows or macOS, as Chromebooks do not support the software.
Can I Use Any Mug in Cricut Mug Press?
No, you cannot! The mug used in the Cricut Mug Press must meet specific criteria. It should have a maximum height of 4.72 inches and a diameter between 3.2 to 3.4 inches, with a capacity of 10 to 16 ounces (295 to 450 ml). Also, the mug’s surface should be plain; textured or rough mug surfaces are not suitable for the machine. Ideally, the mug should be white for best results.
Source: how to use a Cricut Mug Press
Visit here to Know More: Cricut Easy Press
Pinterest
2 notes
·
View notes
Note
Can I ask what cutter/plotter you use? I'm hoping to invest in one but don't know what's the best option (everyone I know who binds uses cricut) I absolutely love the effects you create so would love to get your opinion on it!
OH HI I LOVE YOUR SWIMMING BEAR PLATES THEY ARE SO CUTE
I use a cricut Explorer 3! I originally got a SIlhouette portrait, because several people complained about cricut being overpriced and just not working as it should and switched over to Silhouette.
I had to send my Silhouette back because the pressure of the arm (where the needle is attached and slides back and right to cut) was not working?? It couldn't even cut through normal copy paper.
Got a Cricut then and never looked back since. I also find the Cricut Design space much easier navigate and to use than Silhouette Studio :)
I got mine brand new on Amazon, but I was told if you check your facebook marketplace, people resell theirs for quite a good price
also also, the htv vinyl also plays into how it cuts! some are softer and some are harder. I find gold htv vinyl hardest to work with, because the material seems to be very soft and keep curling up after being cut before I even weed it;;
4 notes
·
View notes
Text
How Do I Set Up My Cricut Maker? [Ultimate Guide]
Buying a new Cricut Maker can be overwhelming for all of us. Initially, setup can be daunting, but once you do it, you will love the overall process. However, you can easily set up any Cricut machine without needing much assistance.
The post is all about how do I set up my Cricut Maker. Through this write-up, we will see the items while unboxing the new Cricut Maker. Further, you will explore the Cricut Maker and its types. Afterward, we will explain the complete process of setting up your Cricut Maker machine.
What Do You Get in the Cricut Maker Box?
Unboxing a new product is always an exciting task. While unboxing the Cricut Maker machine, we got several items that we will be discussing here. However, you always have the option to select the bundles when you buy the machine from Cricut's official website.
Following are the items that you get in the box of the new Cricut Maker:
Apart from these, you will get the following:
The best thing is that we get the blades and tools along with the new Cricut machine. These blades allow us to try various products before buying more blades.
How Do I Set Up My Cricut Maker on a Computer?
When we talk about setting up Cricut Maker machine, it means we want to connect it to our devices like computers or mobile phones. However, there are certain ways to connect these machines to our devices. For example, we can connect our Cricut Maker to our computer or phone via Bluetooth or USB cable. So, it is the users’ choice to choose which way is the most suitable for them.
Below, we explain how to set up Cricut Maker. This method is only applicable for Windows or Mac users only:
How Do I Set Up My Cricut Maker on a Mobile?
Here's how to set up your Cricut Maker on Mobile devices with iOS or Android operating systems:
Cricut Maker is the most advanced and versatile in Cricut's lineup. However, the box contains various items that you can use to make several projects uninterruptedly. In this write-up, we explained the Maker and its features in detail. It helps the users to get an overview of machines so that they can use them without any hassle. After exploring the Maker cutting machine, the blog found out how do I set up my Cricut Maker.
FAQs
Question 1: Can I set up the Cricut Maker easily?
Answer: People think the setup is daunting, but this is not the case. Cricut machines are just like printers. The only difference is that Cricut has blades to cut. However, when you go through the notice period, you will find the setup is too easy and complete in less time. While setting up, you will need to download and install the Design Space app. This app will guide you through the further setup process, making it easy for beginners to set up the machine in one go.
Question 2: How do I connect my mobile phone to my Cricut?
Answer: Here, we are going to show you the method to connect your mobile device to the Cricut machine. Here, we are using iPhone or iOS devices. So, ensure you have an iOS device.
Question 3: Can I use the Cricut without its software?
Answer: No, you must use the Cricut Design Space app to send your design to your Cricut device. The machine is the companion for your Cricut cutting machine. Without this machine, you can't cut anything. However, the Design Space is essential for creating intricate designs and then sending them to the machine. Also, the app is the only way to maintain communication between your computer and Cricut.
Visit: cricut.com/setup
cricut.com/setup
Source: https://cricutmakersetup.wordpress.com/2023/10/21/how-do-i-set-up-my-cricut-maker-ultimate-guide/
#cricut explore air 2#design space setup#cricut maker#cricut.com/setup#cricut.com design space#cricut.com/create#cricut.com sign in#design cricut.com download#digital design
2 notes
·
View notes
Text
What are Smart Materials for Cricut? [Top 5 DIY Craft Tools]
Since the latest versions of Maker & Explore have been launched, all the crafters are looking for one question, “what are smart materials for Cricut?” However, the answer to this question can be easily understood. These clever cutting materials are designed and are directly fed inside the Maker & Explore machine without requiring a mat. Various versions of these cutting machine materials exist, such as Smart Vinyl, Iron-On & Smart Paper Sticker Cardstock.

Apart from that, they have allowed the creators to dream outside by cutting a single image or repeated image up to 12 ft (3.6m) in one go. It means no slicing and dicing the extra-long banners, wall decals, etc. The Cricut roll holder also keeps these materials organized for precise cuts. Learn the best smart materials for creating customized projects from this blog.
1. Matte Metallic Smart Vinyl- Permanent (3 ft)
Equally important, you can add immediate sophistication to big or small projects through this metallic effect. In the presence of this permanent smart vinyl, it isn’t a big task to create some sort of fashion decal for a mug. As per the designers, this permanent smart vinyl is ideal for all outdoor projects.
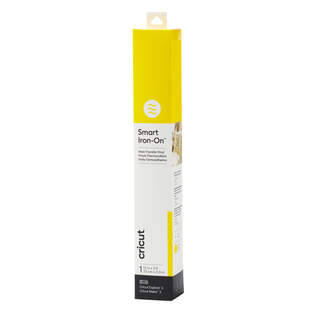
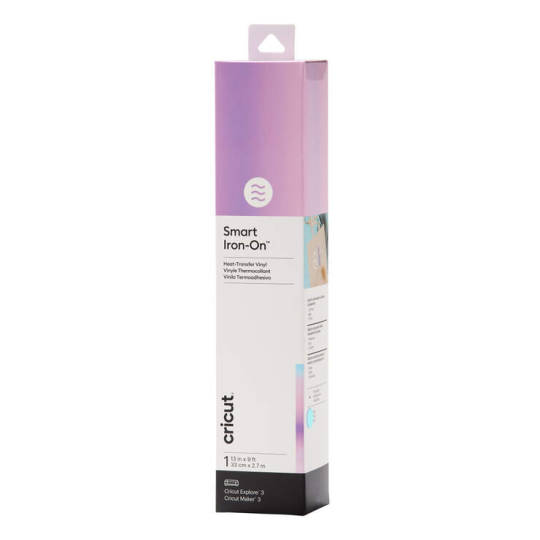
2. Smart Iron-On (3 ft)
Under the catalog of what are smart materials for Cricut, with the smart iron-on, you can carry your creativity along with you anywhere. This substance works perfectly on a wide array of materials and lasts up to 50+ washes. Moreover, the crafters prefer this material by giving little personality to T-shirts, jeans and other garments.
3. Smart Vinyl-Permanent (3 ft)
Furthermore, with smart vinyl, you can quickly make your personalized craft with the load & go button. Moreover, creating birthday banners or other labels has become quite easy, leaving a big impact. On the contrary, this vinyl comes with a matte finish look and a weather-resistant outdoor facility.
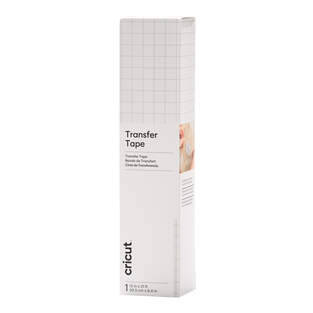
4. Transfer Tape (21 ft)
Among the smart materials for Cricut, the transfer tape has its individual importance. Through this, the user can shift the customized vinyl to various surfaces easily and precisely. Other than that, it is specially designed for some important materials for creating crafts, such as custom decals, labels, decor etc. Moreover, this isn’t recommended for glitter or shimmer vinyl.
5. Smart Iron-On Holographic (9 ft)
Besides what are smart materials for Cricut, these holographic materials permit crafters to add glimmer and shine to the existing project. This material operates without the cutting mat during the cutting process. In addition, you can add more shine to projects compared to earlier times.
Frequently Asked Questions
Question: How to Prepare Smart Materials for Cutting?
Answer: Read the steps to know about the preparation process:
Align the loaded materials to the machine with the left material guide and slide under the mat guides and up against the rollers.
After that, press the Load button, trim the excess material and save it for future uses.
Try to trim the material straight across rather than at an angle if you plan to load it without the mat.
Question: How Do Cutting Machine Smart Materials Work?
Answer: The existing software will prompt you when it is time to load the respective materials and how much quantity. Followed by this, your machine will measure, ensuring the materials loaded are enough for the project. After that, the machine sensors will cross-check the materials fed inside it and will ask for the allowance. You’ve to wait till the trimming process comes to an end.
Question: What are Smart Vinyl and Its Types?
Answer: The brand-new smart vinyl comes in a huge range of colors, effects and material lengths from 3 ft to 75 ft. However, it has been categorized into two types: Permanent & Removable variables. If you want vinyl that lasts for many years indoors & outdoors, then choose permanent vinyl, as it has a longer time duration. However, if you love to display your creativity, then opt for removable vinyl, which can be easily removed and doesn’t damage the wall.
#What are smart materials for Cricut#Cricut.com/setup#design.cricut.com#cricut explore air 2#cricut design space login#cricut design space#cricut setup
2 notes
·
View notes
Text
How to Pair Cricut Machine via Bluetooth or USB? (Easy Tips)
Cricut machines are a must-have for DIY crafters, designers, and small business owners. Whether you’re working on vinyl decals, paper crafts, or fabric designs, pairing your Cricut machine correctly is the first step to getting started.
I still remember the day my Cricut machine arrived as if it were yesterday. But within minutes, my excitement faded as I struggled to connect the machine to my laptop. I couldn’t figure out how to connect it to my laptop. But you don’t have to worry about that. Pairing your Cricut isn’t as complicated as it seems once you know what to do.
In this blog, I’ll explain exactly how to pair Cricut machine with your Windows or Mac, whether you use Bluetooth or a USB cable. It’s a beginner-friendly guide designed to help you avoid the roadblocks I encountered.
Let’s get your machine up and running so you can start creating!
Step 1: Turn On Your Cricut Machine
Before you start pairing, make sure your machine is powered on. Follow these steps:
Plug in your machine: Make sure the power cable is connected to the machine and plugged into a power source.
Turn on the machine: Press the power button (usually located on the side or top) to turn it on. A blinking light indicates readiness.
Step 2: Connect via Bluetooth (Wireless Connection)
You can connect your machine wirelessly via Bluetooth. Here’s how to do it:
For Windows Users
Follow the steps given below to learn how to pair Cricut machine via Bluetooth on Windows:
Open Bluetooth settings: Click onthe Start menu, then select Settings, then Devices. After that, go to Bluetooth & other devices.
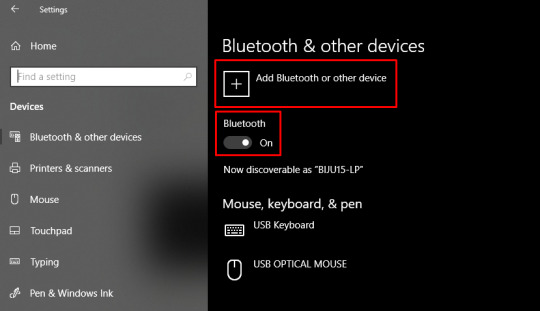
Turn on Bluetooth: Ensure Bluetooth is turned on in your computer’s settings.
Put your machine in pairing mode: Press and hold the Bluetooth button on the machine. The machine’s Bluetooth light will begin blinking, indicating that it’s ready to pair.
Select your machine in Bluetooth settings: On your computer, under the “Bluetooth & other devices” settings, click on Add Bluetooth or another device. Choose Bluetooth, then select your machine from the list of available devices.
Confirm the connection: Once paired, the Bluetooth light on your machine will stop blinking and become solid, indicating that it is connected to your computer.
TIP: Cricut Explore and Maker models include Bluetooth functionality by default. Older models may require a separate Bluetooth adapter.
For Mac Users
Follow the stepwise guide listed below to learn how to pair Cricut machine via Bluetooth on a Mac:
Open Bluetooth settings: Tap on the Apple menu > System Preferences > Bluetooth.
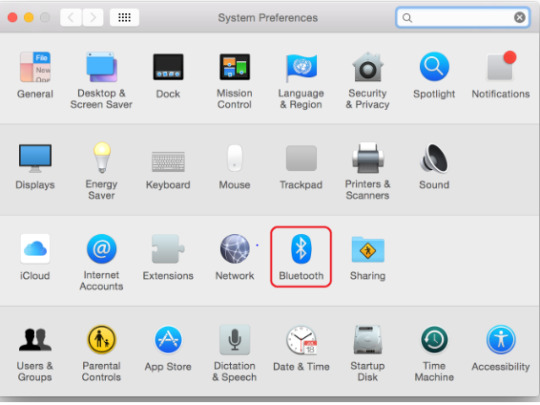
Enable Bluetooth: Make sure Bluetooth is turned on in your Mac’s settings.
Put your machine in pairing mode: Press and hold the Bluetooth button on your machine until the Bluetooth light blinks.
Select your machine name: On your Mac, you should see your machine model in the list of available Bluetooth devices. Click on Pair to connect.
Confirm the pairing: After pairing, the Bluetooth light on your machine will remain solid, confirming the connection.
Step 3: Connect Using a USB Cable (Wired Connection)
If you prefer a wired connection or your device doesn’t support Bluetooth, you can connect your crafting machine using a USB cable.
Locate the USB port on your machine: The USB port is on the left side of the machine, where you can connect the USB cable.
Plug in the USB cable: Now, connect one end of the USB cable to the machine and the other end to a USB port on your computer.
Open Design Space: Launch the software on your computer, and the machine should be automatically recognized.
If prompted, follow the on-screen prompt to complete the setup.
Step 4: Setup Cricut Design Space on Your Device
Now that your Cricut machine is paired with your device, you need to set up Design Space to start creating designs.
Download Design Space: If you haven’t already, download and install Design Space on your computer or mobile device.
Create or sign in to your account: Open the software and either sign in with your existing account or create a new account.
Select your machine name: Once logged in, the software will automatically detect your machine. If not, go to Settings and select your machine from the list.
Start designing: Once everything is set up, you can start creating your projects in Design Space and send them to the cutting machine for cutting.
Troubleshooting Cricut Pairing Issues
Sometimes, your machine may not pair correctly due to device settings or software glitches. Here are quick fixes.
Turn off both the machine and your computer or phone. Turn them back on and retry the pairing steps.
Remove any old Bluetooth devices that could be conflicting.
Ensure both your device’s operating system and the Design Space software are updated to their latest versions.
Clear the cache in the Cricut Design Space software.
Reopen the software and attempt to pair again.
Final Words
Pairing your machine doesn’t have to be difficult. Whether you use Bluetooth or a USB cable, the steps above will help you connect quickly and efficiently. Just keep your software up to date, follow the correct steps, and stay patient!
Once your Cricut machine is paired, the world of crafting will be at your fingertips!
Frequently Asked Questions (FAQs)
What to do if Design Space doesn’t recognize my Cricut machine?
If Design Space isn’t recognizing your machine, make sure of the following key points:
Ensure that the Bluetooth or USB connection is enabled and that the machine is discoverable.
Restart both your computer and machine.
Ensure your machine is within the recommended range of 15 feet from your device.
Make sure Cricut Design Space and your machine’s firmware are up to date.
If updates don’t resolve the issue, consider uninstalling and reinstalling Cricut Design Space.
Do all Cricut Machines have Bluetooth?
No, not all Cricut machines have Bluetooth connectivity out of the box. While newer models like the Cricut Joy, Joy Xtra, Maker, Maker 3, Explore Air 2, Explore 3, and Venture utilize Bluetooth, older models like the Explore One require a separate Bluetooth adapter to connect to devices.
Note: Cricut Explore and Explore One require a Bluetooth adapter.
Can I pair the same Cricut Machine with multiple devices?
Yes, you can connect extra devices to one Cricut machine, but only one device can actively control the machine at a time. This prevents conflicts and ensures that the machine receives clear instructions. You can install Cricut Design Space on multiple devices and access the same account and projects. You can connect to the machine via USB or Bluetooth, and the software will guide you through selecting the desired machine for your project.
SOURCE: How to Pair Cricut Machine via Bluetooth or USB
#how to pair Cricut machine#Cricut Setup#Cricut software app#cricut machine setup#cricut design space app#cricut design space software
0 notes
Text
How to Download Cricut App on Computer? (Complete Tutorial)
In this step-by-step guide, we will show you ‘how to download Cricut app on computer‘, whether you’re using Windows or Mac. Cricut Design Space is the essential software needed to design and connect to your Cricut machine. It allows users to create and personalize various projects, from greeting cards to home decor.
Although Cricut Design Space is also available for mobile users, many users still prefer the convenience and ease of working on a computer. It is also free to use, with additional features available through a paid subscription called Cricut Access.
Basic System Requirements for Using Cricut Design Space
Before downloading Cricut Design Space, ensure that your computer meets the system requirements.
Windows
Mac
How to Download Cricut App on Computer?
In this section, you will learn how to download the Cricut app on Windows and Mac, with step-by-step instructions for downloading the appropriate version for your operating system.
So let’s get started!
For Windows
For Mac
Set Up a Cricut Machine
After installing Design Space, it’s time to set up your machine and start designing!
Troubleshooting Tips While Downloading Cricut App
If you encounter any issues while downloading or using the Cricut Design Space software, here are some troubleshooting tips you can try:
Problem 1: Design Space Won’t Open
Problem 2: Design Space Won’t Connect to Machine
Problem 3: Design Space Freezes or Crashes
Conclusion
Now that you’ve successfully learned ‘how to download Cricut app on computer‘, you can explore the world of possibilities for creating and designing with your crafting machine. Whether you’re using Windows or Mac, you can follow this guide to get you started today. It has a larger workspace, enhanced features, and faster performance so that you can create even more intricate designs for all your crafting projects.
Frequently Asked Questions (FAQs)
How to Connect Cricut to Computer with Bluetooth?
Place your machine and device within 10-15 feet of your computer and follow these steps:
How to Update Cricut Design Space on Windows?
It’s important to update Cricut Design Space regularly to ensure you always use the latest features and fixes.
Can I use Design Space offline after downloading it on my computer?
Yes, you can use Design Space offline, but you need to plan ahead. After downloading the app and logging in at least once with an internet connection, you can save projects and fonts for offline use. Here’s how:
Remember, certain features, such as uploading images, browsing the Cricut library, or accessing the latest updates, still require an internet connection.
Visit: cricut.com/setup
Source: https://explorenewmachine.com/how-to-download-cricut-app-on-computer-complete-tutorial/
#DownloadCricutApponComputer#cricutcomsetup#installcricutdesignspaceapp#wwwcricutcomsetuplogin#cricutcreateconnecttocomputer#cricutcomsetupmac#cricutnewproductsetup#settingupmycricutmaker#connectingcricutmakertocomputer#cricutsetupcreateaccount#cricutcuttingmachinesetup#cricutsetuponcomputer#settingupnewcricutmaker#cricutsetuplogin#cricutaccountsetup#cricutcomsetupdownload#cricutinstallsetup#cricutprintersetup
0 notes
Text
How to Use a Cricut to Make Shirts? (Full Guide)
Do you want to launch your first project but are still unsure about what to create? If so, let me tell you about one of the most popular and easiest crafts you can make: a personalized T-shirt!

Heat transfer vinyl enables crafters to personalize fabric projects by adding designs and text using heat and pressure. It’s a versatile material that is not limited to making T-shirts. You can create various DIY projects, such as wall hangings, hats, caps, tote bags, shoes, and numerous other items.
What You Need to Create a Shirt With Cricut
Make sure you have the following essentials before you start creating shirts with your machine:
Any Cricut Explore, Maker, or Joy machine
Cricut EasyPress 2
Weeding tool
T-shirt
EasyPress mat
Heat transfer vinyl
Scraper tool
Smart iron-on
StandardGrip cutting mat
How to Use a Cricut to Make Shirts: Easy Steps
If this is your first time crafting, follow these simple steps to make a shirt with your Cricut machine:
Step 1: Download Design Space
Go to a web browser and type design.cricut.com/setup
Now, enter your machine model in the search field.
Next, select the checkbox at the bottom left of the page.
After installation, open Cricut Design Space and Sign In. If you don’t have an account, click on Create Cricut ID and follow the instructions.
Step 2: Click on New Project
Once you have signed in successfully, open your Design Space.
Head over to the Cricut Design Space home page and click the New Project icon to start from scratch.
Then, it will take you directly to the canvas where you’ll design.

Step 3: Select the Text Menu
From the left-hand side of the navigation bar, you’ll see an option for “Text.”
After that, you have to click on the Text button.
Next, a text box will show up on your screen for you to enter text. Type whatever you want to get printed on your T-shirt.

Step 4: Design Your Text
At the top of the dropdown menu, select Font if you want to change the Font.
Get ready to choose your favorite text style from a list of hundreds of fonts.

Click on whichever you find the best.
Step 5: Curve Your Text
In the same dropdown menu at the top, you will find the Curve option. Click on it.
After clicking on the Curve option, a slider will show up on your display, allowing you to adjust the curve of your text by moving it left or right.

Step 6: Finalize Your Design
Once you’re satisfied with your design, click “Make It”.
Then, the Cricut Design Space will command your machine to cut.
You will be asked to choose between using a cutting mat and not using one.
Ensure you select “Mirror” on the cut screen when using iron-on and click Continue.
Step 7: Get Ready to Cut
Switch on your machine by pressing the power button.
Next, choose the base material type that best suits your material. I am selecting Smart Iron-On from the list. This step helps your machine determine the required pressure amount for cutting.
Place the HTV’s shiny, plastic sheet down on the mat. Smooth it out to remove any air bubbles or wrinkles.
Place the mat into your machine, positioning it under the rollers.
Press the up and down arrow buttons on your machine. It will pull up your mat, and it will be loaded successfully.
Finally, click on the Go or Start button to begin the cutting process.
Once cut, remove the excess vinyl using the weeding tool. Slowly lift a corner and pull it gently away from the transfer sheet.
Step 8: Transfer Your Design to T-shirt
Preheat your EasyPress. This will make your machine ready to transfer material to the shirt.
Ensure your shirt is clean and ready to receive the transfer design by using a lint roller to remove lint and debris from the shirt.
Place your shirt on the heat mat to ensure your safety.
Place your design on the shirt wherever you prefer, according to your personal preference.
Visit cricut.com/en/heatguide and select your machine from the available options.
Select your specific heat-transfer material and base material, then click the Apply button.
Follow the Cricut heat guide instructions and set your EasyPress to 315°F for 30 seconds if you’re using HTV.
Use light pressure and place your EasyPress on the design you’ve put on your T-shirt.
If your press is smaller than your design, divide your design into sections and heat it accordingly.
Peel off the backing sheet, and that’s it you’re done! Your design will stay intact on your T-shirt even after multiple washes!
Congratulations! Now that you’re no longer a beginner after learning how to use a Cricut to make shirts, your customized T-shirt is ready to wear and shine.
Final Thoughts
Remember, practice makes a man perfect, so don’t demotivate yourself if it doesn’t go as you want. Keep trying to strive for perfection. One last piece of advice I want to share with you is to always try to wash your T-shirt inside out so that it lasts a long time.
Have fun designing your projects, and share your thoughts with us!
Frequently Asked Questions (FAQs)
How Do I transfer a Cricut Image to a Shirt?
Follow the steps to learn if you want to transfer the image to a shirt:
On the left-hand side of the toolbar panel, click on the Image option if you want to use the image from the Cricut library.
If you want to personalize your T-shirt with your own image, slide down the toolbar, find the “Upload” option, and click on it.
Upload and resize your design. Ensure that the Mirror option is activated.
Finalize your design and cut it using the Cricut Design Space instructions.
Weed your T-shirt design and use the heat press machine to transfer the design.
Which Vinyl Is Best for Shirts?
HTV (Heat Transfer Vinyl) is often considered the best option for crafting T-shirts due to its versatility, ease of use, and durability. It allows for complex designs and is affordable for small orders. It also offers a wide range of special effects, textures, and finishes, making it ideal for personalized and high-end customization. However, you can use adhesive vinyl as a cheaper alternative.
Why Is My Cricut iron-on vinyl Not Sticking?
Iron-on transfers might not adhere properly due to several reasons:
Ensure the EasyPress or iron is set to the correct temperature for your specific vinyl and base material, as recommended in the Cricut Heat Guide.
Use firm, even pressure. Ironing boards and plastic surfaces can both hinder and facilitate proper adhesion.
Apply heat for the recommended duration, and consider reapplying heat to the material for an additional 10-15 seconds.
Ensure you’re using the correct peel type for your specific vinyl.
Source: How to Use a Cricut to Make Shirts
1 note
·
View note
Text
Word Play: Crafts That Come Alive with Fonts & Lettering

Today’s lesson is a love letter to letters. Whether you're printing out bold block text for a home sign or hand-lettering a dreamy quote on a canvas, fonts aren't just visual tools—they’re personality with punctuation.
Fonts make crafts speak—literally. So, let's explore fun, beginner-friendly projects where choosing the right typeface is part of the magic.
Why Fonts Are a Crafty Game-Changer
Instant emotion. Serif says classy, sans-serif says modern, script says “I own scented candles.”
Customizable text. Names, quotes, phrases—you’re in charge.
Perfect for gifts. Nothing says “I care” like your friend’s name in glitter vinyl.
Lettering is meditative. Seriously, ask any calligrapher—they vibe hard.
Your Typo-Toolbox (aka Crafting with Fonts Starter Kit)
Whether digital or analog, you’ll want:
Printable letter stencils or font templates
Transfer paper or carbon paper (for tracing)
Paint pens, brush markers, acrylic paint + fine brushes
Cricut or Silhouette (if you're fancy)
X-Acto knife (for DIY stencils)
Ruler, pencil, and eraser
Your favorite fonts downloaded and ready to roll!
And of course—a surface to letter on! Think canvas, wood, paper, jars, fabric banners, even plant pots. (Yes, your ficus wants a name tag.)
Project 1: Custom Canvas Quote Art
Perfect for wall décor or gifts, this is modern-day embroidery for your brain.
What You’ll Need:
Blank canvas or thick paper
Chosen quote or word
Printer + font (or hand-lettering skills)
Transfer paper or lightbox
Paint pen or brush
Steps:
Choose your favorite short quote.
Select a font (script + serif combos are trendy).
Print it out, place it over your canvas with transfer paper underneath.
Trace lightly with pencil.
Go over it with a paint pen or brush.
Add background color, doodles, or washi tape flair.
Font suggestion:
Bold & Friendly? Try Fredoka One
Elegant Script? Try Great Vibes
Rustic Modern? Go Playfair Display + Raleway combo
Project 2: Personalized Wooden Name Signs
These are great for doors, desks, weddings, or bedroom walls. Level-up points if you’re making them as gifts!
Materials:
Wooden board or plaque
Chosen name or word
Cricut (or print-and-trace method)
Acrylic paint or vinyl
Sandpaper (for prep)
Optional: embellishments like flowers, rope borders, mini lights
How-To:
Sand the board for a smooth base.
Either cut the word out with a Cricut or print and trace it using transfer paper.
Paint the letters or apply vinyl.
Add decorations to match your theme.
Font Mood Tip: Want something whimsical? Try Pacifico. Want sleek modern? Use Montserrat Extra Bold.
Project 3: Hand-Lettered Glass Jar Labels
Cute and functional? Now you’re talking.
You’ll Need:
Empty glass jars (mason jars work great)
Paint pens (oil-based for glass)
Rubbing alcohol (clean the surface first!)
Printed font or handwritten labels
Steps:
Clean jar surface thoroughly.
Use printed font as a guide (trace on paper and tape inside the jar for guidance).
Letter your labels on the outside.
Let dry fully and cure if needed.
Now your pantry screams “organized adult” instead of “where’s the sugar?”
Crafting Mindset: Fonts Are Feelings
Don’t overthink your font choice—but do consider the vibe.
Balance readability with personality.
If you make a typo, well… now it’s an abstract art piece.
Mixing fonts = spice of life, just don’t use 5 at once unless you’re going full chaos goblin (in which case, I respect it).
Unique Fact of the Day:
Comic Sans was designed to mimic comic book lettering— but get this: it was originally meant for a Microsoft dog assistant program in the '90s. So the next time you see it in a serious memo, just remember—it was never supposed to be serious in the first place.
https://letterhanna.com/word-play-crafts-that-come-alive-with-fonts-lettering/
0 notes
Text
How to Use Vinyl on Cricut: Create DIY Projects With Me!
Do you want to learn how to use vinyl on Cricut? It’s good to start learning something new. And I can walk you through all the steps included in using vinyl on your Cricut. With vinyl, you can create a beautiful project with your Cricut machine anytime.
I’m a Cricut enthusiast and work full-time to make the best pieces of craft. As much as I have used Cricut, I have closely observed how it works. With this guide, I want to share my learnings with all my readers who are interested in crafting and want to create something.
Do you know what vinyl is? These are flexible materials that are used to transfer designs onto your materials. You can use them to create personalized projects. Let’s get started with this blog post to learn the procedure closely.
What Tools and Supplies Do You Need?
Before you get started with the guide, you’ll have to gather up some necessary materials. Once you’re ready with these materials, you can start with a further guide to create a beautiful craft. Let’s see the list of materials here.
● Cricut machine
● Weeding tool
● Brayer
● Cricut StandardGrip mat
● Scraper
● Transfer tape
● Adhesive vinyl
Finally, you can start with the process and create the best piece of craft with your one and only Cricut machine.
How to Use Vinyl on Cricut to Make a Personalized Craft?
In this section, I’ll tell you some basic steps to get started. Once you have learned the steps clearly, you can experiment with your material and make a similar one. So, without further delay, let’s jump to the final process and learn how to use vinyl on Cricut for beginners.
Step 1: Create a Design in Cricut Design Space
To start, you’ll need to launch your Cricut Design Space software and hit the New Project option. Now, you’ll need to add an image or a text that you want as a final outcome. As Design Space offers you a huge library of images and pre-made designs, it’s quite easy to design anything. Also, you can upload an external file to Canvas.
You can explore all the features of the Design Space. Once you’re satisfied with the design, hit the green “Continue” button.
Step 2: Load Your Vinyl on the Cricut Mat
In this step, you need to place the Cricut StandardGrip mat on a clean, flat surface. Also, take off the plastic covers from the sheet. Now, load the vinyl on your mat, aligning the vinyl with the Cricut mat’s grid lines. Once the vinyl is fixed in place, smooth it down with a scraper tool.
This step will remove all the air bubbles between your Cricut mat and the vinyl.
Moving forward, load your mat into the Cricut machine. Plus, align the edges of your mat with the grid lines. Finally, hit the Load button to load your mat into the machine.
Step 3: Select the Material
I hope you’re learning how to use vinyl on Cricut well with this guide. Moving forward with the next step, choose a material to be cut. For instance, which type of material vinyl you are using - Temporary, permanent or anything else.
To do this, continue with the on-screen prompts to select the Base Material. After that, select the vinyl settings from the options. In case you don’t see your material on the list, hit Browse All Materials to check out the full list.
After selecting the right material, just hit the Go button to start the cutting process.
Step 4: Weed Out Excess Vinyl
Once you get your cut vinyl, it’s time to hit the Load button to unload your Cricut mat. Now, you’ll get the vinyl in the shape you wanted. Remove the excess of vinyl from it using a weeding tool. This tool will remove all the tiny leftovers gracefully leaving the original design untouched.
This method is crucial to give a good finishing to your final project. Once you’re ready with the further steps. Let’s check all of them.
Step 5: Prepare Your Blank
You’ve come here after a long way. So, now you need to prepare the surface of your project with a rubbing alcohol and cotton. This step removes all the dirt, dust and lint from the surface leaving a smooth surface for final vinyl transfer.
Here, I’m using a mug. Let’s wipe it with alcohol and cotton. Let it dry, and continue with the vinyl transfer.
Step 6: Apply Transfer Tape to Your Vinyl
In this step, cut a transfer tape slightly larger than your vinyl design. Next, peel off the paper backing from the transfer tape. Then, apply the transfer tape on your vinyl design in alignment with the grid lines to keep the design straight.
After that, burnish the transfer tape on your vinyl using a scraper tool. This step will help you transfer your vinyl design smoothly.
Step 7: Peel off the Transfer Tape
In this step, carefully peel off the transfer tape from your vinyl’s backing. Ensure that the transfer tape is lifting away smoothly from the backing paper. If it doesn’t happen, you may need to burnish the transfer tape once again.
Step 8: Apply Your Vinyl Design to the Final Project
It’s the final step for transferring your vinyl to the final project. Check if your design is aligned properly on your transfer tape. Once the design is in the correct position, press the vinyl to stick it to the final project. Also, you can use a scraper to burnish the design. Apply the scraper tool all over the vinyl design.
Step 9: Take off Your Transfer Tape
You know how to use vinyl on Cricut. Now, in the final step, just gently peel off the transfer tape away from your project. Ensure that you pull it away at an angle of 45 degrees. Then, the transfer tape will be removed, and the design will be left.
After that, your personalized project is over. Moreover, you need to wait for 24 hours before washing it.
FAQs
How to Place Permanent Vinyl on a Cricut Mat?
Check out the steps below to place a permanent vinyl on your cutting mat:
Getting started with placing the vinyl on a Cricut StandardGrip mat.
Design your project on Cricut Design Space and load it into the machine.
Hit the Go button and finish the vinyl loading.
What Kinds of Vinyl Are Available for Cricut?
There are mainly two types of vinyl- Adhesive and Heat Transfer Vinyl. The adhesive vinyl comes for standard projects that only need transfer of vinyl to the project’s surface. On the other hand, a heat transfer vinyl is suitable for the iron-on projects that demands application of heat to transfer design.
Which Vinyl Should I Use for My Cricut Projects?
Well, it completely depends on the type of your project. If you need a temporary project, you should use removable vinyl that can be removed when you don’t need it anymore. On the other hand, if you want a more professional-looking and high-quality project, you should go with a permanent vinyl type.
Read more: install cricut design space app
cricut.com/setup mac
Cricut Design Space
Cricut.com setup windows
Source: how to use vinyl on Cricut
#how to use vinyl on Cricut#Cricut.com setup windows#Cricut Design Space#cricut.com/setup mac#cricut explore 3#www.cricut.com setup login#cricut explore air 2#cricut.com/setup
0 notes
Text
How to Use Cricut Transfer Tape to Create a DIY Project?

If you wonder about using your Cricut transfer tape, this blog is just for you. Here, I’ll cover the basics of how to use Cricut transfer tape. I’ll cover the main steps in this guide. If you want this method to be easier, keep following my tips and tricks to create a crafting project.
I can teach you its use based on my experience and help you create your first project with your transfer tape and vinyl. Hence, get ready and continue following this post, where you’ll find many informative things.
Introduction to Transfer Tape
As you know, Cricut machines help you design things using different types of materials. They offer certain accessories and tools to reduce your extra effort in using transfer tape. I want to introduce this new accessory under Cricut and reveal its use.
Its basic use is to transfer the vinyl design onto the blank, for instance a coffee mug or tumbler. With this amazing accessory, you can create multiple projects easily without hassle. If I talk about myself, I have explored this accessory many times to create customized items.
How to Use Cricut Transfer Tape With Vinyl?
Finally, you’ll be learning about using a transfer tape for your upcoming projects. In this section, you’ll get some easy steps to get started with your transfer tape project. Let’s explore together.
Step 1: Design a Project on Design Space Canvas
Your first step should be to design your favorite design on the Cricut Design Space canvas. Utilize all the features and tools under the Cricut Design Space. Now, cut that design through your machine using vinyl as a material. Then, remove the excess vinyl with the weeding tool.
Step 2: Cut a Transfer Tape

Once you’ve cut the design on vinyl, start cutting your transfer tape in a slightly bigger size than your design. A transfer tape is reusable; you should always cut it in a bigger size, even if your design is small. This is how you can sustain your accessories for longer.
Step 3: Take off the Backing Paper from the Transfer Tape
In this step, remove the backing or your transfer tape. After use, you can again stick your transfer tape to the backing paper for reuse. Let’s move ahead and learn how to use Cricut transfer tape.
Step 4: Apply Design to Your Transfer Tape

In this step, apply your transfer paper to the design and scrape it well with a scraper. Otherwise, you can use your old cards.
Step 5: Peel off the Backing Paper from Your Design

When you’ve burnished the design on the backing paper, it’s time to peel the backing paper off to get the final design on the tape. Please lift it slowly upside down to avoid ruining the design. Use a weeding tool to do it better.
Step 6: Apply the Design to Your Project

This is the correct time to fix your design on the project and press it gently to let the design stick well to the surface.
Step 7: Remove the Transfer Tape
Once your design is set on the project, you can remove the transfer tape. Before removing it, burn it down on the surface well. Do it again and again until you’re sure that the design stuck well. That’s how to use Cricut transfer tape.
What Else Can I Use Instead of a Transfer Tape?
Yes, there are a few alternatives to using a transfer tape. If you find your transfer tape too sticky or unsuitable for your project type, you can use some other things.
For instance, you can try using painter’s tape. Moreover, contact paper is another good option. Besides, seal saran wrap is also a good option in place of the transfer tape.
Conclusion
So, are you ready to use transfer tape for your projects? I have tried my best to tell you each step, and now it’s your turn to implement everything you’ve learned. This way of DIYing is super easy and cost-effective. As you can save your transfer tape for the next project, you will stay stress-free for the next purchase. As an expert, I will definitely come up with some new tips and tricks to excite all of you who are on this creative journey. Keep exploring new DIY ways till then.
Frequently Asked Questions (FAQs)
Why Choose Cricut Transfer Tape?
Transfer tape is an excellent accessory from Cricut. It helps you apply your cut designs onto the final project’s surface, providing an easy way to transfer the design to the desired blank. Also, it is reusable and sustainable for longer.
Can I Iron the Transfer Tape?
Yes, you can iron-transfer tape. You need a heat press or iron to apply heat to the transfer tape. It works best when you use a heat press to put the design on the blank. However, don’t directly apply the heat to the tape; use a towel instead.
Can I Use Regular Tape Instead of Cricut’s Transfer Tape?
You can use painter’s tape instead of transfer tape. This tape is lightly adhesive, making it ideal for temporary use.
Source: How to Use Cricut Transfer Tape
#how to use Cricut transfer tape#Cricut transfer tape#cricut design space app#cricut design space software#Cricut.com/setup#cricut setup
1 note
·
View note
Text
How to Make Stickers on Cricut? 2025
learn ‘how to make stickers on Cricut‘, then you have come to the right place. Stickers are loved by everyone, whether you’re a child or an adult. You do not need a printer to make custom stickers. You can create stickers at home using the crafting machine and some supplies and tools.
Stickers may look like ordinary sheets of paper, but they are a great way to personalize journals or gifts. Whether you are a Cricut user or a beginner, if you have a crafting machine and Cricut Design Space app downloaded to your device, you can make stickers in any shape, color, or size you can imagine.
There are three general types of stickers you can create with your Cricut cutting machine: written labels, vinyl decals, and Print Then Cut stickers. In this blog, you will learn about Print Then Cut stickers.
What Materials Do You Need for Your Project?
Before starting the process of how to make stickers on Cricut the first step is gathering all of the supplies and equipment needed for sticker making.
Cricut Explore, Explore Air 2, and Maker 3
Design Space
LightGrip cutting mat
Inkjet printer
StandardGrip mat
Sticker paper, printable vinyl sticker paper
Making Print Then Cut stickers is a great way to personalize gifts, decorate water bottles, or add stickers to scrapbooks and journals. Creating stickers is fun and easy, but to get started, you need to gather the materials mentioned above and then follow the steps below to proceed with the sticker-making.
How to Make Stickers on Cricut: 6 Simple Steps
Here are the steps you will need to follow for creating stickers on your crafting machine. So, let’s get started right away.
Step 1: Calibrate Your Machine for Print Then Cut
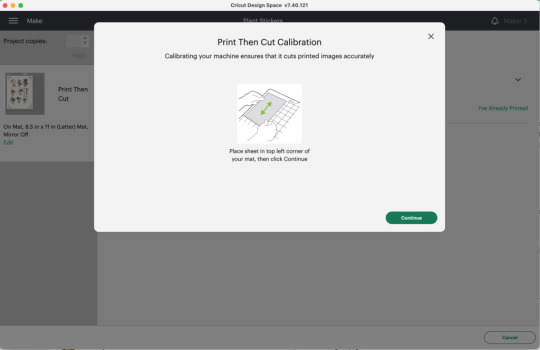
Calibrating your machine can sound optional, but this is the important part of making stickers with Cricut. In the Cricut Design Space app, choose Calibration from the menu, and then choose Print Then Cut. The software will prompt you to print a test sheet and load it into your machine. Tip: If possible, try to use a lightGrip machine mat.
Step 2: Add a Printable Image to Your Canvas
Now, within the Cricut Design Space Software, you can add multiple images to your canvas to make custom stickers. Or you can upload your SVG file. Once you have placed the images on your canvas, select Print Then Cut under the Operation menu and change the design from a Basic cut to a printable design.
Step 3: Format Images With Offset Feature
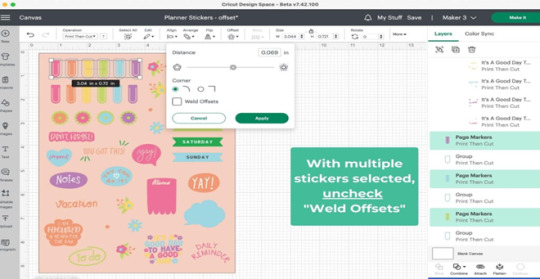
When you are done creating your stickers, you can add a finishing touch. To do this, you need to create a white border around your images. This creates a decorative outline called an offset, adding dimension to your sticker. Choose the design/ image that you want to offset, and then click the Offset option in the toolbar. When you are done selecting the offset feature by default, it can show you dark gray, which you may need to change to white.
Step 4: Attach the Images

Once you are done formatting your stickers, select each with its layers in the layers panel and click Flatten. When you flatten the images, make them into one layer, and to keep your project in order, select all photos and click on the Attach option.
After flattening the design, you cannot change the colors. But you can always Unflatten the images and make changes later.
Step 5: Print Sticker Sheet
Now, you’ve reached the best part of sticker making. Once you click the Make It button, you are ready to print your design. Click on Use System Dialog, and a preview box will appear where you can fix your print settings. Printer settings vary depending on your model, but select the highest-quality print setting if possible. Make sure the sticker paper is compatible with the printer and the paper you have chosen.
Step 6: Cut the Image Using Your Machine
This is the last step of ‘how to make stickers on Cricut‘. Firstly, when your stickers are printed, put them on the Cricut mat, then choose your material settings. After that, load your cutting mat and press start to cut using the standard fine-point blade. Remember to change your custom settings to Sticker paper. They have clear white options, so choose accordingly. When the stickers are done cutting, remove them from the mat, and it is ready to use.
Summary
Making stickers with Cricut is a very fun and creative process. Using your machine, you can make different kinds of stickers in different colors for your journals, scrapbooks, or for your gift hampers. It is a great way to get kids involved in a fun and creative activity. You can create stickers for your journal, notebook, or customized gifts. Not only is it a creative process, but it is also a great way to add a unique touch to your belongings.
In this blog, you explore ‘how to make stickers on Cricut’, and now you can decide which kind of stickers you want to make.
Source: How to Make Stickers on Cricut
#how to make stickers on Cricut#cricut stickers#cricut design space app#cricut design space software#cricut maker setup
1 note
·
View note
Text
Show Off Your Team Spirit with a Buffalo Bills Wallet SVG Design

Buffalo Bills fans are some of the most passionate supporters in the NFL. Whether it's game day or an ordinary afternoon, true fans love representing their team in every way possible. One of the most unique and creative ways to show your support is with a Buffalo Bills wallet design. If you’re looking for an awesome way to personalize your accessories, an SVG design of the Buffalo Bills wallet is the perfect choice.
In this article, we’ll explore the benefits of a Buffalo Bills wallet SVG, creative ways to use it, and why this design is a must-have for any dedicated fan. Whether you’re crafting for yourself or looking for the perfect gift for a fellow Bills fan, this SVG design opens up endless possibilities!
Why a Buffalo Bills Wallet SVG is a Game-Changer
1. Personalize Your Accessories with Team Pride
A wallet is something you carry every day, so why not make it uniquely yours? With a Buffalo Bills wallet SVG, you can create custom designs that showcase your team loyalty. Whether you prefer a classic logo, a bold statement, or a more intricate design, an SVG file allows you to customize your wallet to reflect your personality and passion for the Bills.
2. Perfect for DIY and Handmade Crafts
If you’re a DIY enthusiast, the Buffalo Bills wallet SVG is an excellent resource. These files work seamlessly with popular cutting machines like Cricut and Silhouette, making it easy to create high-quality, professional-looking designs. Whether you’re making a wallet from scratch, adding a decal, or laser engraving leather, an SVG file provides the precision and flexibility you need.
3. A Great Gift for Any Buffalo Bills Fan
Struggling to find the perfect gift for the Buffalo Bills fan in your life? A custom-made wallet featuring their favorite team’s logo or mascot is a thoughtful and practical option. With an SVG file, you can craft a one-of-a-kind item that stands out from generic, mass-produced merchandise. Whether it’s for a birthday, holiday, or special occasion, a Buffalo Bills wallet is a unique and meaningful gift idea.
How to Use a Buffalo Bills Wallet SVG Design
1. Creating a Custom Wallet Design
Using an SVG file, you can design a personalized wallet that reflects your love for the Buffalo Bills. Here’s how you can do it:
Choose Your Material: Leather, faux leather, or fabric can all be customized using SVG designs.
Use a Cutting Machine: Machines like Cricut or Silhouette allow you to cut precise designs effortlessly.
Apply Your Design: Whether you’re engraving, printing, or heat-pressing the design, the SVG file ensures accuracy and clean lines.
2. Engraving on Leather Wallets
Leather engraving is one of the most stylish ways to use the Buffalo Bills wallet SVG. If you have access to a laser engraving machine, you can imprint the team’s logo onto a high-quality leather wallet, creating a premium and durable fan accessory.
3. Vinyl Decals for Wallets and Phone Cases
Not ready to commit to engraving? Vinyl decals are another fantastic way to incorporate your Buffalo Bills wallet SVG design. You can cut out a team logo using adhesive vinyl and apply it to your wallet or even your phone case for a matching set of personalized gear.
4. Printing and Sublimation for a Full-Color Look
For fans who love bold, vibrant colors, sublimation printing is an excellent option. By using a high-quality Buffalo Bills SVG design, you can transfer the artwork onto a wallet with stunning detail and clarity. This technique works particularly well for fabric-based wallets and accessories.
Why Choose an SVG File from NFL SVG?
At NFL SVG, we specialize in providing high-quality, officially inspired SVG designs that cater to passionate football fans. Here’s why our Buffalo Bills wallet SVG is the best choice for your projects:
High-Resolution Graphics: Crisp and clear designs that look professional.
Easy Compatibility: Works with Cricut, Silhouette, Adobe Illustrator, and other design software.
Endless Customization: Modify, resize, and personalize your SVG files to fit your creative needs.
Instant Download: Get your files immediately and start crafting right away.
Looking for the best Buffalo Bills wallet SVG? Check out our exclusive collection at NFL SVG.
Get Your Buffalo Bills Wallet SVG Today!
Whether you’re a seasoned DIYer or just starting your crafting journey, a Buffalo Bills wallet SVG is an excellent way to express your team pride. With so many creative applications, from engraving and vinyl decals to sublimation printing, the possibilities are endless.
Don’t miss out on this must-have design! Explore and download your Buffalo Bills wallet SVG now at Buffalo Bills Wallet.
Final Thoughts
Buffalo Bills fans deserve to represent their team in style, and what better way than with a custom-designed wallet? Whether you’re making one for yourself or as a gift, this SVG file is a game-changer for DIY projects. Visit NFL SVG today and start crafting your perfect Buffalo Bills wallet!
Show your Bills pride in every detail—get your SVG design today!
0 notes
Text
How to Connect Cricut to Mac? (Complete Tutorial)
Let’s get into a step-by-step tutorial on “how to connect Cricut to Mac“. To do so, you need to have Cricut software downloaded to your device. If you haven’t done so, this blog will guide you through the process. Cricut Design Space is free crafting software that allows you to create personalized, unique projects, making something out of the ordinary. It is compatible with almost all devices, including Windows, Mac, iOS, and Android.
In this blog, we will focus on connecting with Mac only. However, before we proceed with the installation and connection process, it is essential to verify that your computer meets the system requirements listed below. Continue to create amazing projects with your Cricut machine.
Minimum System Requirements for Design Space
If you want to use Cricut Design Space on your Mac, you must meet these system requirements:
Operating system: macOS 12 or later
Hardware requirements
Internet connection: Broadband connection for downloading and signing in
How to Download & Install Cricut Design Space on Mac?
Before learning how to connect Cricut to Mac, you need to install Cricut Design Space on your device, regardless of whether it is Windows, Mac, iOS, or Android. To download, install, and launch Design Space for your Mac computer, follow the steps below:
Note: The display may vary during Download, depending on your browser.
How to Connect Cricut to Mac?: 3 Steps
Now that you have successfully installed Cricut Design Space, you must connect your machine to the computer. Follow these instructions to connect successfully.
Step 1: Open Cricut Design Space Settings
Step 2: Select Your Cricut Model
Step 3: Connect Your Machine
You can choose either of the following methods��to connect your Mac via Bluetooth or a USB cable.
Method 1: With Bluetooth
Before connecting via Bluetooth, ensure your machine and Mac are within 10-15 feet of each other, and follow the instructions given below:
Method 2: Through a USB Cable
You can connect your Cricut Maker, Explore, and Venture series machines to your Mac using the included USB cable. Follow the instructions given below:
Note: Cricut Joy and Cricut JoyXtra can only be connected via Bluetooth. If you face any issues, consider using the Cricut Help articles for troubleshooting steps, including those related to error codes and machine connectivity.
Frequently Asked Questions (FAQs)
Why Is My Cricut Not Working on My Mac?
If your machine isn’t working on your Mac, it could be due to various reasons:
How Do I Refresh Cricut Design Space on Mac?
If you want to refresh, especially after installing fonts or encountering issues, you can do so with the help of the following steps:
The Cricut Design Space will reload, potentially resolving any issues and making new fonts visible.
Can I save a design from Cricut Design Space to my Mac?
Yes, you can save designs from the software to your Mac with the help of these steps:
Visit: cricut.com/setup
Source: https://online-cricut.com/how-to-connect-cricut-to-mac-complete-tutorial/
#ConnectCricuttoMac#cricutcomsetup#cricutdesignspace#wwwcricutcomsetuplogin#cricutexploreair2setup#designcricutcomsetup#installcricutexploreair2#cricutsetup#cricutsetupforpc#cricutdesignspacesetup#designcricutcomdownload#cricutdesignspacedownload#cricutdesignspaceonline#cricutdesignspaceapp#cricutdesignspacedesktop#cricutaccountsubscription#cricutaccess#Cricutexploreair2setuppdf#cricutexploreair2download#howtousecricutexploreair2withphone#howtosetupcricutexploreair2oniphone#cricutexploreair2bluetooth#cricutcomsetupmac#cricutcomsetupforwindow#supportcricutcom#cricutnewmachinesetup#cricutaccountlogin#cricutdesignspacelogin#cricutsoftwareapp#cricutdesignspacefree
0 notes