#How to Use Cricut Maker
Explore tagged Tumblr posts
Visit Tumblr Blog
Explore Tumblr blogs with no restrictions, modern design and the best experience.
Last Seen Tumblr Blogs


Fun Fact
The Tumblr app for Google Glass was released on May 16, 2013.
Text
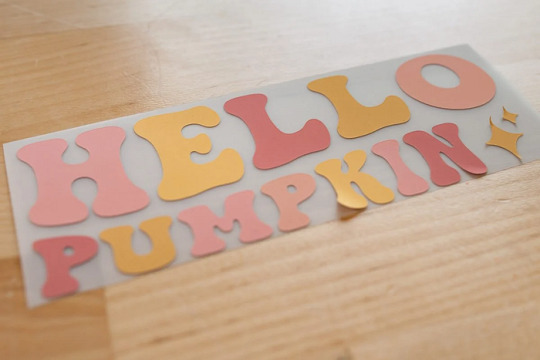
How to Use Cricut Maker: Create a Siser Easy Color DTV Project!
Have you just bought a new Cricut Maker and are wondering how to use Cricut Maker? This brilliant Cricut machine may be overwhelming for beginners, but it is simpler than you think. You get many amazing features with this crafting machine. Let’s get ready to use it and make creative DIY projects with it. I will tell you how to prepare a desired project using this Cricut cutting machine.
Cricut Maker offers various adaptive features that help you create unique and beautiful projects effortlessly. Plus, you get a slot for inserting pens and a number of Cricut tools and supplies. It will be all fun to create something with this ultimate machine. Here, I’ll tell you the best methods to prepare personalized apparel using Siser EasyColor DTV. You’ll learn more about it later in this blog. So, let’s get started.
Supplies and Tools You Will Need for Your Cricut Project
Before we get started to learn how to use Cricut Maker, you must gather some important accessories. I’m listing all of the best accessories here. Use them and follow my step-by-step instructions to create your own project. Check the steps below.
● Brand new Cricut Maker or Explore
● Siser EasyColor DTV
● Siser Easy Mask
● An inkjet printer
● Cricut StandardGrip mat
● A weeding tool
● A Cricut EasyPress
● A Cricut scraper tool
Let me tell you what a Siser EasyColor DTV is. It is an iron-on vinyl type that is typically used on lighter blanks such as garments, T-shirts, etc. This unique vinyl is very convenient and useful for creating better designs and sublimation projects. Let’s check the complete method to create the best project.
How to Use Cricut Maker to Make Personalized Apparel?
Finally, we are here to learn the process of creating personalized T-shirts. So, before we move on to the final steps, measure your blank so that you can create an appropriate design. So, let’s check how to use Cricut Maker for beginners.
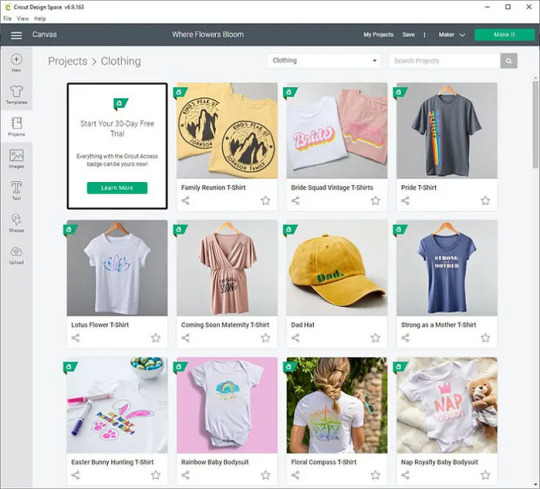
Step 1: Upload an SVG File to Cricut Design Space
In the first and foremost step, you’ll need to upload your SVG design file to the Cricut software. If you want, you can create a design manually as well. Once you’re ready, just resize your design and make it fit to your blank.
As you’ll have to print this image, ensure that your Cricut machine will recognize it as a printable file and not a file to be cut. To ensure this, choose your image and hit the Flatten option beneath the Layers Panel.
After that, your Cricut machine will show a preview of the image. When you’re ready, just click the Make It button. And now, this design will go through a Print Then Cut feature. To access it, hit the Continue button.
In the next step, you’re allowed to send that image to your inkjet printer and select the paper type you want to print on. I prefer specialty matte. You can select one based on your printer. Get ready with your printer and insert the Siser EasyColor DTV into it.
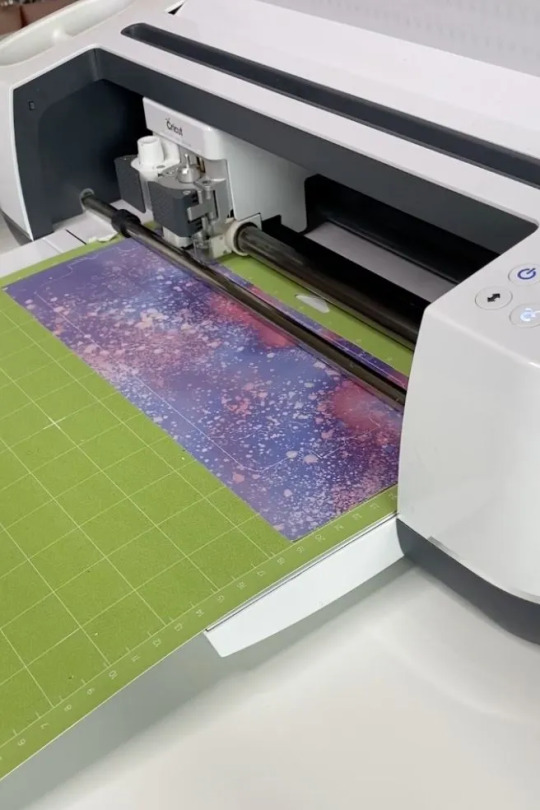
Step 2: Start Cutting the Siser EasyColor DTV
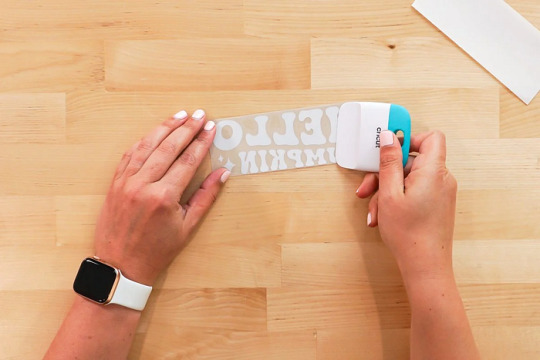
In the following step, you’ll need to cut your material. On your Cricut machine, select your material as Premium Vinyl Permanent Glossy and set the pressure to More using the drop-down menu.
Next, load your vinyl material on the Cricut mat at the left-side corner and make it stick to the mat using a brayer tool. Now, load the mat with vinyl into the Cricut machine and hit the Play button to allow your Cricut to cut the image. Continue with the steps to learn how to use Cricut Maker.
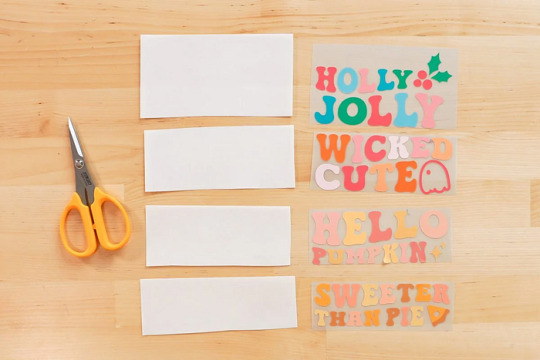
Once the cut is done, take off the paper sheet from your mat, turn the mat over, and take the mat away from your DTV. Please note that you don’t have to peel off the DTV from the mat. You can also use a pair of scissors to cut the design if necessary.
Step 3: Weed Out the Excess Vinyl
Once you cut your design, you should weed out the excess vinyl from your design. Do this carefully, so that your design doesn’t ruin. This step will add more detail to your project.
Step 4: Cover Your Image With a Mask
Moving forward, cut your mask to the size of your design. Now, take off the transparent film from the mask and then apply the mask alone to your DTV image. Moreover, ensure that the final design is flat and that there are no air gaps between the mask and the design.
Step 5: Transfer Your Design to Apparel
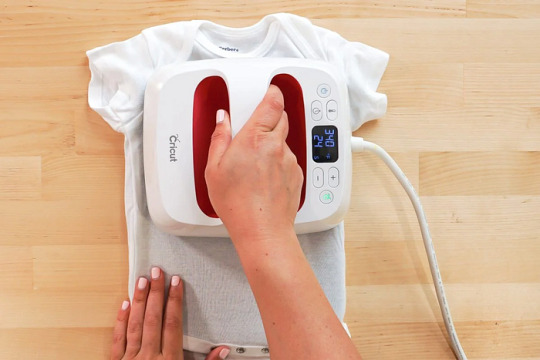

This design is so amazing; I love making it. This is how to use Cricut Maker to reap good results. All the best to all of you who are keen to make something unique and precise.
FAQs
How to Use a Cricut Maker to Make Shirts?
To create a shirt with your Cricut cutting machine, you’ll need to use the Cricut Design Space and a heating press to create a desired design. Get started with the Cricut software, make a design, resize it, and then print and cut it with your Cricut machine. Now, weed away the excess vinyl, and then preheat it with your Cricut heat press, and give a final heat to it.
Which Heat Press Is Suitable for Making an Iron-on Cricut Project?
As there are many options to create an iron-on Cricut project, you can use any of them depending on your requirements. So, the common machines are Cricut EasyPress, Cricut EasyPress 2 & 3, Cricut EasyPress Mini, etc. You can utilize a heat press to transfer the design to your apparel effortlessly.
Can You Use Regular Iron With a Cricut Machine?
Yes, you can. A regular iron is also effective for your minimalist iron-on projects. However, a regular iron may not deliver the results you want and not give a permanent design. Overall, we can say you can use a household iron for normal, sensitive projects but not for complex projects.
Read more: install cricut design space app
cricut.com/setup
cricut.com/setup mac
Source: How to Use Cricut Maker
#How to Use Cricut Maker#How to use cricut maker for beginners#how to use a cricut maker to make shirts#cricut.com/setup mac#cricut explore 3#www.cricut.com setup login#cricut design space#cricut explore air 2#cricut.com/setup#cricut new machine setup#cricut.com setup mac#cricut setup on computer
0 notes
Text
How to Use Cricut Maker for DIY Crafting Magic?
Again, I am ready with my new tool, Cricut Maker. Using this machine, I am going to teach you how to use Cricut Maker to create your own shirt in a couple of minutes. At one time, I was also a beginner, and it was not easy for me to learn it. Somehow, I learned it from the internet. However, it took me a lot of time to gain practical expertise on this tool but believe me, it was worth learning.
Moreover, the machine is very easy to use, and it has a simple setup process, which I have already covered in this blog. My intention in writing this blog is for beginner crafters who have just bought the machine and want to learn how to use it from the beginning. So, are you ready to join me on this journey of learning about the Cricut Maker from the ground up? If yes, let’s get started!
The Process to Setup a Cricut Maker Machine
When I got my new Maker machine, I was too excited to unbox it. But after unboxing, I had to set it up. In the beginning, I was nervous as hell! I really didn’t want to make any mistake that would cause a technical problem. But the Cricut’s guide finally helped me. In addition, the setup is also easy for different platforms like Windows, iOS, Mac, and Android.
To learn how to setup Cricut Maker on computer and mobile device, follow the instructions given below:
First of all, plug the power cable into the back of the machine and connect it to the power source.
Next, you have to connect the machine to the computer. Here, you can either use a USB cord or Bluetooth feature.
Now, open a browser such as Chrome and search for cricut.com/setup.
On the next page, you will need to download the Design Space and then install it.
Here, you can simply follow the instructions available to you on the screen and set up your account.
Finally, you will be notified about the completion of the Cricut setup.
As soon as we complete our setup, we are always prompted to perform a test cut. This is easy, and you can do it by following the steps given to you on the screen.
What Supplies Will I Need to Make a Custom Shirt?
Before I teach you how to use Cricut Maker, let’s discover some of the essential Cricut supplies needed for making a shirt. Here is what you need to make your own shirt on Maker:
Iron-on Vinyl Material
Cotton Blank T-shirt
Cricut Maker (or any other cutting machine)
LightGrip cutting mat (or Standard Grip mat)
Weeding tools
EasyPress
EasyPress Mat
I have specifically chosen the cotton shirt, which has smooth textured and high-quality cotton. It really works well with Iron-on vinyl.
Important Note: I would recommend pre-washing your blank shirt before applying the vinyl on it. In this way, your vinyl won’t crack if the shirt shrinks. In addition, pre-washing will help you remove the dirt or any impurity that can hinder the ability to adhere to vinyl on the shirt.
How to Use Cricut Maker for the First Time?
So, are you ready to learn the process of making a shirt on the Maker machine? If yes, follow the steps one by one:
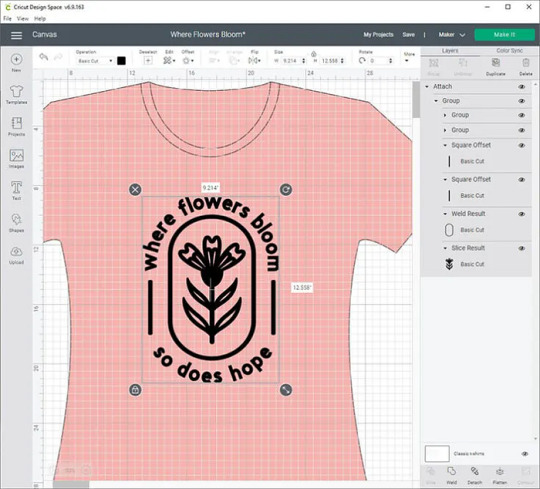
Step 1: Create a New Design or Upload
Step 2: Load the Vinyl and Cricut Mat
Now, you need to place the material on the mat for cutting. For this, you need to load the vinyl onto the mat. Make sure you are using the mat that has lost its stickiness a little bit. After that, you have to use the brayer tool to flatten and adhere the vinyl to the cutting mat.
Remember: The shiny side of the vinyl should be facing down. For patterned vinyl, the pattern side should be down.
Once done, you are ready to tap on the Load button to start the loading process of the cutting mat into the Maker machine. Next, you will need to send your design to the Cricut Maker.
Step 3: Send Your Design to the Cricut Machine
Navigate to the Cricut app and click on the Make It button in the top-right corner.
Next, select the toggle button to turn on the Mirror.
Afterward, you will be moved to the next screen, where you need to choose the base material. Choose the Everyday Iron-on from the list.
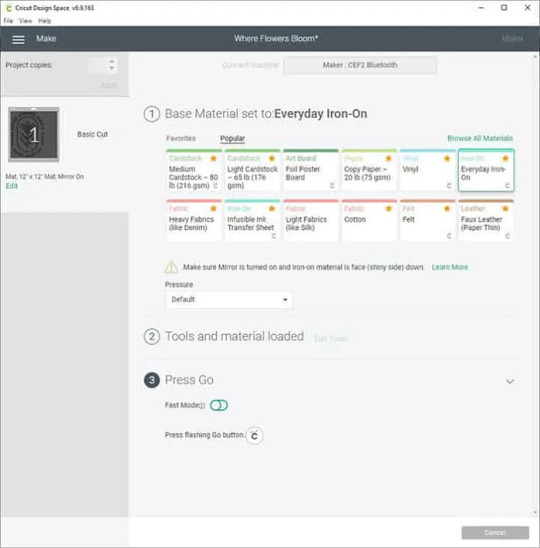
Step 4: Cut and Weed Out the Design
After choosing the material, you need to load the Fine-Point blade and the mat.
To start cutting, you need to press the Go button to cut the design.
Once cutting is done, unload the mat and weed the design using the weeding tools.
Step 5: Transfer Your Design
This is the step where your EasyPress comes into play. Preheat the blank shirt and then place your design on it. After that, set the recommended temperature and press gently on the design.
Wrapping Up
In this blog, I have explained to you how to use Cricut Maker along with the full setup process. This guide not only explores the setup process but also how to make a shirt using it. The process is easy for both setup and shirts. However, this guide can also help you if you want to add your design to a tote bag or any other fabric. The process will be almost the same for every project.
FAQs
Question 1: How to use smart vinyl with Cricut Maker?
Answer: Smart Materials doesn’t require you to use a cutting mat, making it easy to use. Below are the steps given that explain the usage of vinyl.
First, you need to load the material and ensure a 10-inch gap behind the machine.
Next, try to position the material. For example, keep the color side facing up.
Then, feed the material into the guides.
Now, you have to press the Load button and gently push the material forward.
Finally, it’s time to apply the vinyl on the clean, blank surface.
Question 2: How to use Cricut Maker for stickers?
Answer: Find the steps below to create amazing stickers using the Maker machine.
First, you need to create a sticker design on Design Space.
After that, print the image using a compatible printer.
Once you have printed the image, set the materials on the Cricut app.
Next, you should load the mat into the cutting machine.
After that, press the Go button to cut stickers.
Once the sticker is cut, unload the mat and remove the stickers.
Question 3: How to use pens with Cricut Maker?
Answer: In order to use the pens with Cricut Maker, you have to follow the instructions provided below:
First, you need to place the laser copy paper on a LightGrip mat and then load it.
On Design Space, create the design that fits your blank and assign a Cricut pen color.
Also, you must Mirror your design.
Then, browse all materials and then choose Copy Paper.
Insert your Infusible Ink Pen into Clamp A and hit the flashing Go button.
Once the design is done, you can unload the mat.
Read more: install cricut design space app
how to setup cricut maker
Cricut Design Space Login
Source: how to use Cricut Maker
#how to use Cricut Maker#Cricut Design Space Login#cricut design space#cricut.com/setup#cricut.com/create#how to setup cricut maker#install cricut design space app#cricut new machine setup#cricut.com sign in#www.cricut.com/setup login#cricut setup
0 notes
Text
How to Use a Cricut Maker to Create a DIY Project? (Easy Guide)
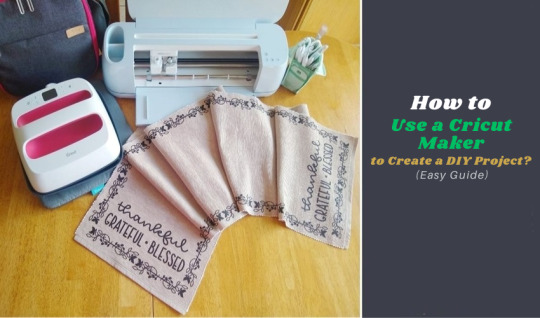
Are you thinking of buying a Cricut Maker? Or you have just got one and are not sure where to start? This guide will walk you through all the different ways to learn how to use a Cricut Maker without any previous experience.
This cutting machine is advanced and unique from other models, like Explore Air 2 and Joy machine. It delivers a wide range of features, tools, and accessories for crafting projects. With this machine, you can cut fabric, vinyl, cardstock, chipboard, and more precisely.
So, if you are a beginner and don’t know how to use this machine—don’t worry; we are here to help! Read this blog, and you will learn how to use it easily.
How to Use a Cricut Maker: Unboxing and Initial Setup
Once you have got your machine in your hands, it is time to check if you have all the necessary supplies and tools that come with the machine or not. So, in order to do that, you must follow these steps:
Step 1: Unbox Your Machine
Carefully remove the machine from the box, ensuring that all packaging materials are removed. Inside the box, you will find the machine, a power cable, a USB cable, a cutting mat, a fine-point blade, and a welcome guide.
Step 2: Positioning Your Machine
Place the machine on a flat surface, ensuring at least 10 inches of space in front and behind the machine. This space allows the cutting machine to move freely during operation.
Step 3: Connecting to Power
Now that you have unboxed your machine, it’s time to take the most important step: giving it life support. To do that, you must insert the power cable into the back of the machine and plug it into an electrical outlet. Once you finish the connection part, let us look into how to activate your machine.
How to Activate a Cricut Maker: Quick and Easy Steps
The first thing to do is activate the machine. To do so, from your Windows/Mac, you must head over to cricut.com/setup from any browser of your choice. Activating the machine is even easier if you have already used the Design Space app. To set up the machine from the app, go to the Menu icon and then select ‘Cricut New Product Setup.’ After that, follow the prompts that let you choose your machine.
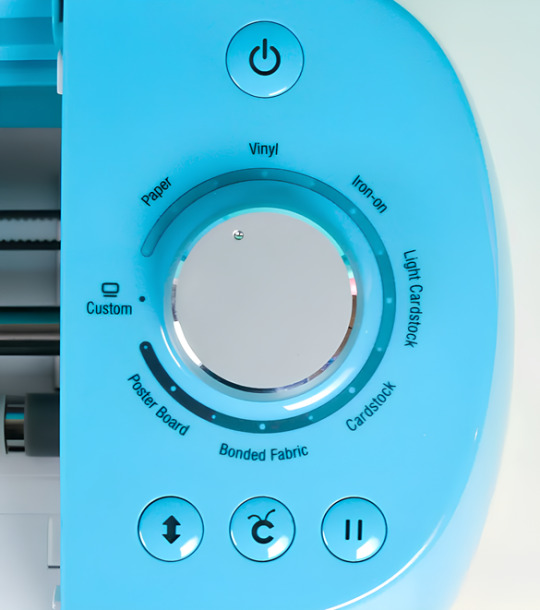
To open the machine, you must lift its lid. This will open the cover of the machine automatically.
Power button: With this button, you can turn the machine on and off.

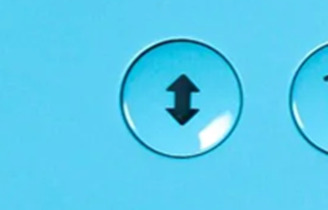
Feeding switch: This button lets you feed your mat into the machine.
Cricut switch: This is the button with the initial C. Press it when you want to start cutting (it is also called the confirm button).

Pause button: This button gives you the flexibility to pause your machine in between. It’s extremely handy if you’re in the middle of a cut and want to change something or for any other reason.

That’s all in terms of design. In the next section, we’ll look at the steps to create a project.
How to Use a Cricut Maker: 5 Easy-To-Follow Steps
To use a machine, follow these detailed steps from setup to your first project. As the Cricut Maker Setup is a versatile cutting machine, it can handle various materials, making it ideal for crafting projects.
Step 1: Connecting to Your Device
In order to get a hold of the machine, you must connect it to your desktop or computer. This is crucial because, without the connection, the machine cannot communicate with your device. Even though the Design Space app can work offline, you still need a connection at least once to save it on the app.
You can connect your machine to your device via a USB cable or Bluetooth. Connect the square end to the machine and the USB end to your PC via USB. To pair your device with the machine using Bluetooth, turn on the machine and then go to the Bluetooth settings.
Visit the official website or surf design.cricut.com and download the Design Space application. It is essential for project creation and supports various platforms, like Mac, iPad, and iPhone.
Step 2: Setting Up Design Space
This is the most important step after connecting the machine and your device (Mac/Windows). Once you have downloaded the app, you must do these things for a smooth experience:
Open the software and fill out the required fields to create an account. The account allows one to save their projects and access various design features.
In the software, select “New Machine Setup” from your profile. Finish the on-screen steps to choose your machine model and perform the setup process. The app will guide you in connecting your device to the machine.
Step 3: Designing Your DIY Project
Now that you have done all this, let’s start creating your first project. To do so, let’s look at these steps:
Start a New Project: Once your machine is connected, you can start a new project using the software. Select the type of project you want to create, such as a card, decal, or label.
Choose Your Materials: Design Space allows you to select the material. If you use cardstock, set the material type accordingly.
Prepare Your Cutting Mat: Place your chosen material onto the mat. Ensure it is aligned correctly and adheres well to avoid shifting during cutting.
Step 4: Start the Cutting Process
Now that you are familiar with downloading the app and activating the machine, let us look at its main purpose: the cutting process. It happens as described below; follow the steps carefully for a seamless cutting.
Load the Mat: Insert the mat into your crafting machine until it clicks into place. This will automatically feed the mat in for cutting.
Start Cutting: Press the “C” button on the machine to begin cutting. Your device will display a percentage of the cut completion and allow you to monitor the progress.
Completion: Once the cutting is finished, the machine will signal it is done. Carefully remove the mat and peel off your cut material.
Step 5: Post-Cutting Steps
It is equally important to know what to do after you are done with your cutting process.
Removing Your Cut Material: Gently lift the material from the machine mat. If you use delicate materials, such as intricate designs, use a spatula tool to help lift them without curling.
Assemble Your Project: Depending on your project, you may also need to assemble various pieces. Follow any additional steps to add embellishments or complete your design.
Conclusion
Don’t be discouraged if your first project isn’t perfect. The more you use your cutting machine, the more comfortable you will become with the process. Take time to explore the features of Design Space, like templates, images, and fonts. This exploration can inspire new project ideas. Using a crafting machine opens up a world of creative possibilities. Following these steps, you can confidently set up your machine, design your projects, and bring your creative ideas to life. Happy crafting!
FAQs
How do you use a Cricut for beginners?
To use a crafting machine as a beginner, unbox your machine and follow the setup steps. Download the Design Space software on your computer or mobile device for project creation. Familiarize yourself with basic operations like uploading images, selecting materials, and changing settings. Start with modest projects, such as stickers or paper cards, to build confidence. Use online resources and community forums to get more support and inspiration.
What do you use a Cricut Maker for?
A Cricut Maker is a versatile creative gadget that can cut materials like vinyl, paper, and fabric. It’s excellent for making unique designs for home decor, apparel, and more. The machine is capable of cutting a variety of materials, making it appropriate for both simple and intricate crafts. Beginners begin with projects such as greeting cards or decals, gradually discovering their full potential as they gain skills.
Do I need a computer to use a Cricut?
While a computer is not required to use a Cricut, it is suggested for maximum performance. The Design Space software can be accessible from a computer, tablet, or smartphone, making design management easier. Using a computer allows for a wider screen and more accurate control when making complex designs. However, several users have operated their machines using mobile apps, allowing them to create while on the road.
Source: How to Use a Cricut Maker
#how to use a cricut maker#cricut design space download#cricut design space app#cricut design space software#Cricut Maker Setup#cricut new product setup#how to setup cricut maker#cricut new machine setup
1 note
·
View note
Text
How to Use Cricut Mat: A Complete Guide for Perfect Cuts
Do you sometimes wonder how to use Cricut mat? What is a Cricut mat, and do you need it for all of your DIY projects? If you’ve had these questions before starting a craft—don’t worry. You can find the answers to all these questions here by reading this post till the end.
I have been using Cricut for more than five years now, and I have all the info about which Cricut machines and projects require a mat and which mat is suitable for each project. There are also materials that do not need a cutting mat and can be cut on the machine without one. Here, you will learn about all these things. So, let’s begin with the blog!
How Necessary Is a Cricut Mat?
It is important to know how necessary a mat is before learning how to use Cricut mat. A cutting mat is a crucial tool for Cricut machines, whether for cutting or design transfer. Cricut mats are especially important for older machines that don’t handle cut-on materials as smoothly.
A mat ensures smooth and precise cutting, and with the help of the Cricut machine, you get the best results. However, you don’t need a mat for all kinds of materials. For example, if you are using smart materials like infusible ink, you can cut them on your machine without a mat. These materials are best cut on newer machines like Cricut Maker 3, Explore 3, and Joy Xtra.
Different Types of Cricut Mat
When learning how to use Cricut mat, you must know that Cricut offers a variety of mats that you can use according to the requirements of your materials. You should be very sure about the mat you choose for your material. If you choose a thick mat, it will give you trouble in weeding the design. If you choose a thin mat, it will not hold the material properly and won’t give you a good cut. So you should choose the mat very carefully. Here are all those materials and their uses:
1. StandardGrip Mat
This is a basic mat and the most used for any Cricut project. You can use it for almost all kinds of iron-on vinyl materials. With a StandardGrip mat, you can use materials like cardstock, embossed cardstock, and patterned paper. It comes in four different types of sizes.
2. LightGrip Mat
This is a blue-colored cutting mat, which means it has the least adhesive on it and is much less sticky. A LightGrip mat is used for light materials such as tissue paper, printer paper, thin cardstock, washi tape, wrapping paper, and vellum.
3. StrongGrip Mat
For stronger materials, you should use a StrongGrip mat. You can also use it for fabric projects if you do not have a fabric mat. This cutting mat is good with heavy materials like thick cardstock, poster board, chipboard, magnet material, and basswood.
4. FabricGrip Mat
As the name suggests, it is specially designed for fabric materials. It has 2 different sizes: 12 x 12” and 12 x 24”. A FabricGrip mat is used with materials such as fabric, bonded fabric, felt, and crepe paper.
How to Use Cricut Mat: Quick and Easy Steps
To use your Cricut cutting mats, you should follow these steps:
Loading a Mat
Loading and unloading your Cricut mat takes steps to ensure that your materials remain intact:
After placing your material on the cutting mat, you should load it under the two guide tabs of the Cricut machine. Next, hold the mat and then press the Load button on the machine. As you press it, you will see the roller bar begin to move, loading the mat into your machine.
Unloading a Mat
Once the cutting is done, unload the material from the cutting mat. After that, take care not to tear or curl the material during this process. For materials like paper and vinyl, roll the mat over gently and weed from the back of the material. Also, avoid applying too much pressure to the mat to prevent damaging the design and the mat itself.
Conclusion
In the blog, you learned how to use Cricut mat and other important things. Now you know the significance of a mat and when it is essential for certain DIY projects. Some Cricut machines and materials don’t require a mat. Besides cutting materials, mats are also used to transfer designs onto fabrics or surfaces. Heat transfer mats are needed to use heat press machines.
FAQs
Why Do I Need a Cricut Mat?
A Cricut mat performs many essential functions with your Cricut machine. It provides a stable surface for placing materials before inserting them into the machine, ensuring precise and smooth cuts. By holding materials in place, the mat prevents shifting during cutting, which is crucial for achieving designs accurately. Also, the mat makes it easy to transfer materials onto various surfaces, improving versatility in project applications.
Can I Use Cricut Without a Mat?
In many cases, yes! A Cricut mat is necessary to hold materials with older Cricut machines lacking smooth surfaces or advanced features. Trying to cut materials without a mat can damage your design and compromise the quality of the final product. However, smart materials made for use with newer Cricut machines may not require a mat that offers flexibility depending on the material and machine’s abilities.
How Can I Use a Cricut Mat?
Using a Cricut mat is simple: start by selecting a design in the Cricut Design Space app. Next, place your chosen material on the mat, ensuring it stickers properly. After that, insert the loaded mat into the machine, following the machine’s steps. Start the cutting process using the Cricut software, and once the cutting is done, unload the mat from your machine. Lastly, remove your material from the cutting mat, taking care to maintain your cut designs.
Visit: cricut.com/setup
Source: https://cricricutdesigncut.wordpress.com/2024/07/18/how-to-use-cricut-mat-a-complete-guide-for-perfect-cuts/
#design space setup#cricut.com/setup#cricut design space#www.cricut.com/setup login#cricut easy press#cricut setup#digital design#cricut venture#cricut.com/setup mac#cricut design space online#cricut design space app#cricut design space setup#how to use Cricut mat#design.cricut.com download#cricut setup for pc#install cricut explore air 2#install cricut explore air 2 '#cricut setup explore air 2 setup#cricut setup on computer#cricut setup create account#cricut setup maker
0 notes
Text
Massive comic bookbinding progress post.
Making a massive bookbinding post with my progress and what resources and steps I use. I do not claim to be an expert and recommend if you want to get into bookbinding yourself you look into any linked tutorials (or find some yourself), because they are made by people with much more experience.
So. When I just got into bookbinding, I was following an instructables tutorial for (link) most of the book. the sewing part, I was following this (link) tutorial. The cover tutorial (instructables) wasn't great for what I currently do, and I changed a lot looking back on it, but it had the bonus of suggesting cheap materials (Cardboard for covers, elmer's glue for spine, any spare fabric for bookcloth) that helped lower the barrier to entry and let me decide if I wanted to buy nicer stuff.
This is the first book I ever bound, using the instructables tutorial.
It's not the prettiest construction wise, but I can still hold it and read it which is at least successful for a first book (tho I did test on comics I didn't care as much about, in case I messed up).
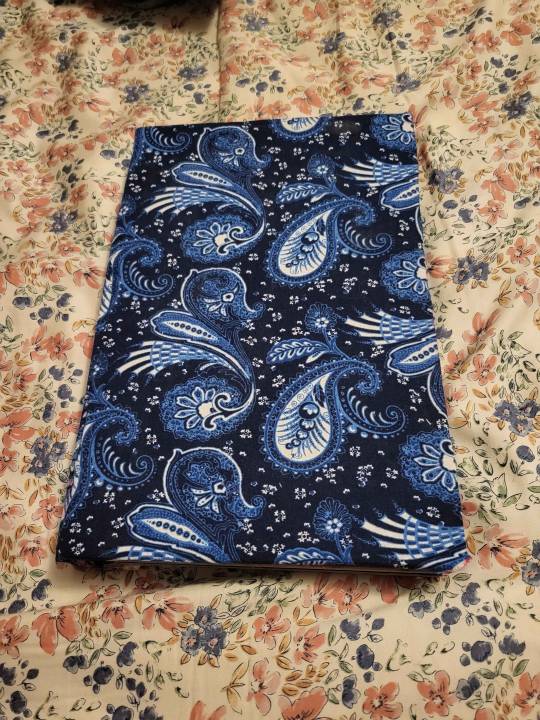
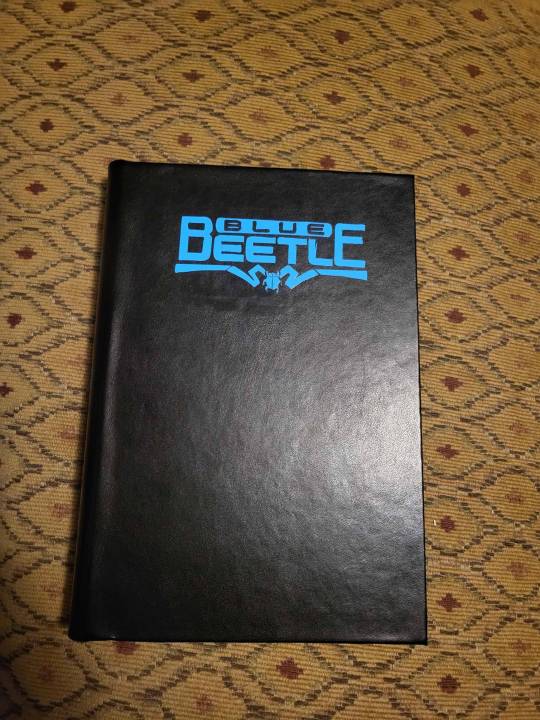
I did a couple more books like this, one being Blue Beetle: Graduation Day (in Spanish) and the other being Artemis: Requiem, and another being Knight Terrors.
Artemis Requiem I think was the last
Next, I found and started using Dave the Designer's tutorial (link) and also got some materials actually targeted at bookbinding. I got bookbinding needles and thread (much thicker and stronger, it's easier to pull the threat through and it feels stronger) and davey board -- though since then I have tried chipboard which is muuuuuuuuuuuuch cheaper and works just as well unless you have a giant comic. Sometimes you have to lay weights on chipboard after gluing it to make sure it doesn't bend though, it likes bending when it is wet a lot.
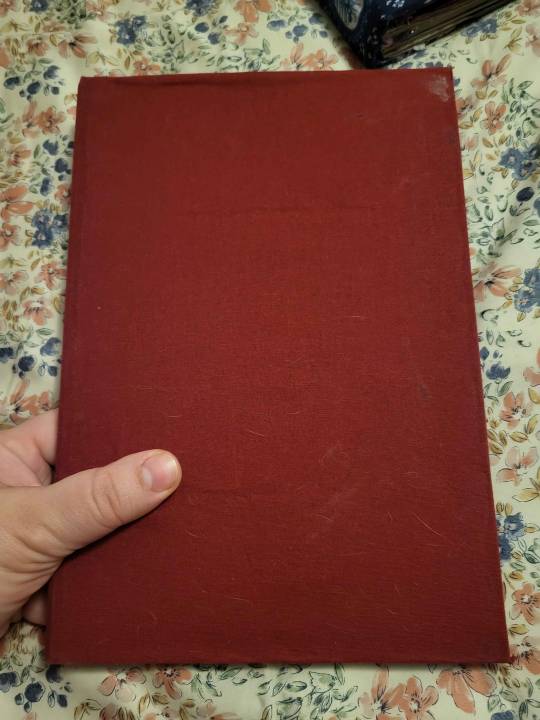
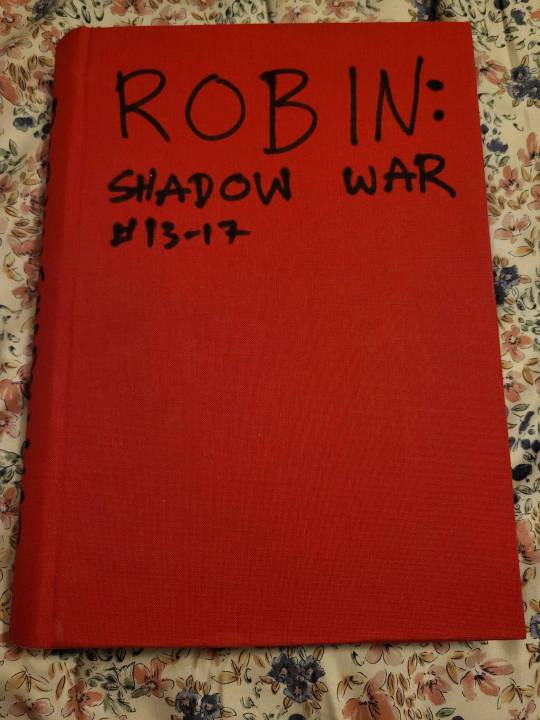
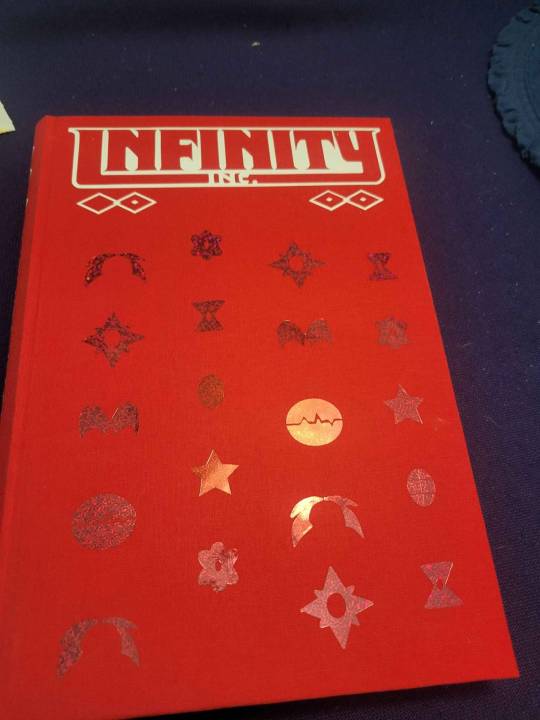
I did a ton of books in this period. I was mostly interested in making books that had good construction and were good for protecting the comics I sewed together and felt structurally sound. I did not care at all about what the covers looked like, and just wrote titles on them with sharpie. I used mostly linen cloth, buckram cloth, or occasionally spent money on book cloth
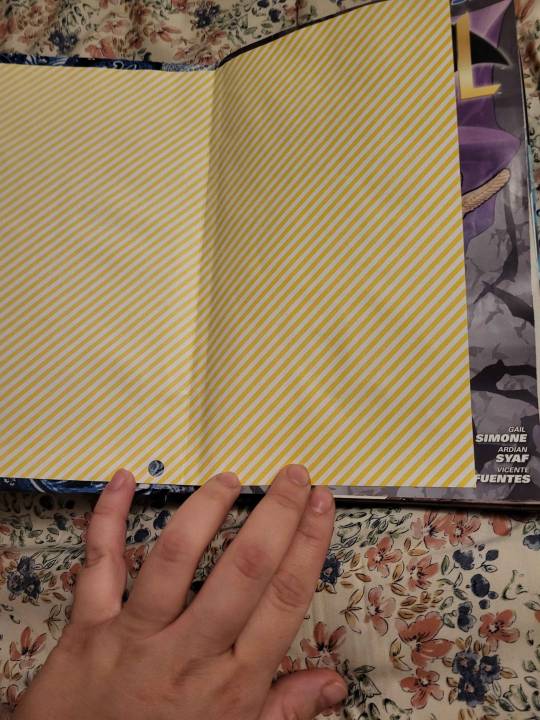
After this, my friend linked me this (link) youtube tutorial. It does not get into sewing, because the goal of that person's tutorial is not how to sew but how to rebind paperbacks as hardbacks with fancy covers. The main focus for what I watched is on covers. They use a cricut, I got the cheapest I could find (Joy xtra, not maker or any of the big kinds). It still is expensive (like 150 dollars), and in the linked playlist the youtuber includes how you can decorate without a cricut, though that does leave less freedom for what you can choose... UNLESS you are an artist already!
Shortly before I got the cricut, I did Eric Luke's WW Run
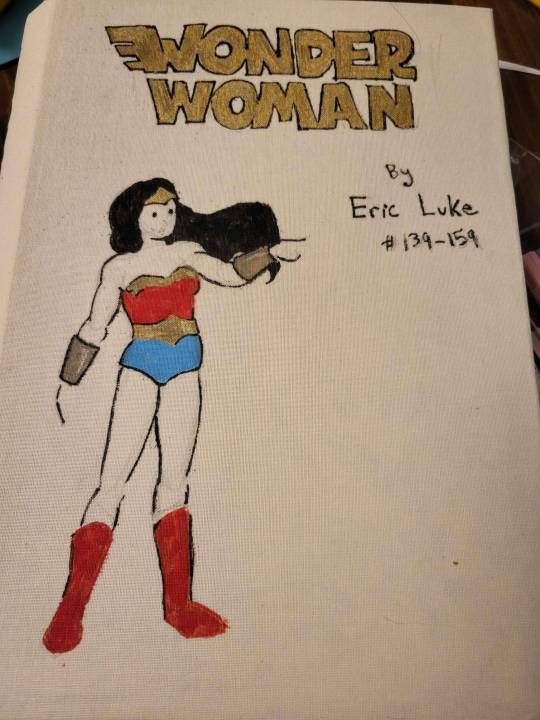
This was when I was getting frustrated I couldn't make the books look pretty on the outside, so I drew a sketch in pencil and colored in with paint pens i had bought for action figure modding (tho im sure any type of sharpies would work).
Anyway, after that I started using the Cricuts for covers. This is the first one:
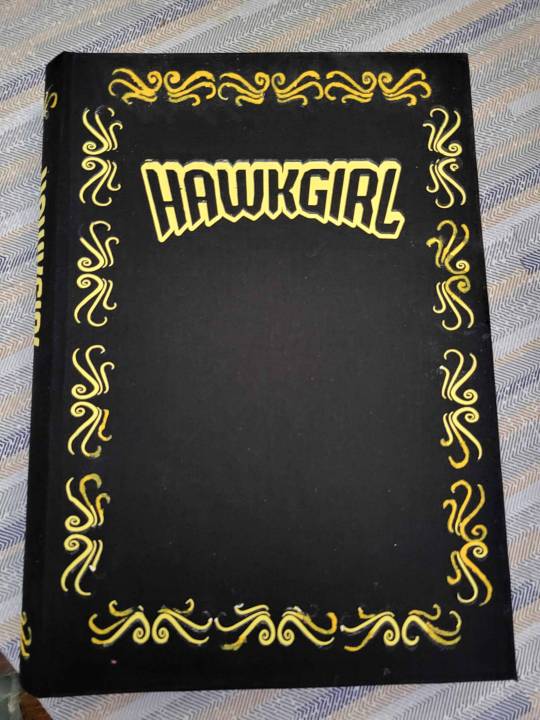
i messed up on the heat transfer vinyl stuff, so I had to repaint some parts with yellow paint. I haven't had these issues since I started using the bookcloth materials recommended by the cricut youtuber I linked earlier, which are also generally cheaper per unit than where I was getting bookcloth earlier (but shipping is expensive)
Now I do almost all my bookcovers with cricut because once you have the machine it's reasonably priced, the vinyl is pretty cheap, and it's easier on my spoons than hand drawing everything and lets you customize a lot
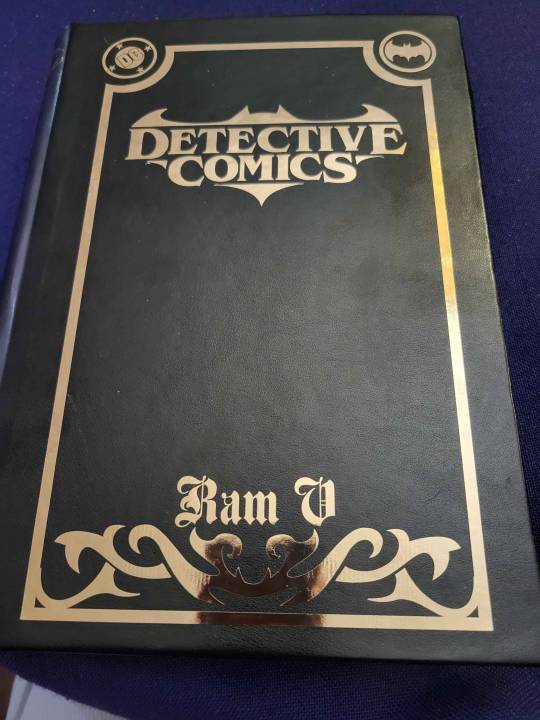
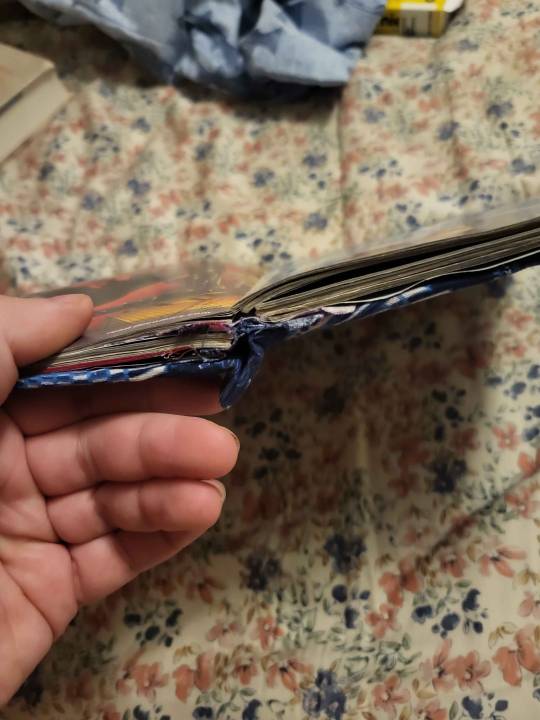
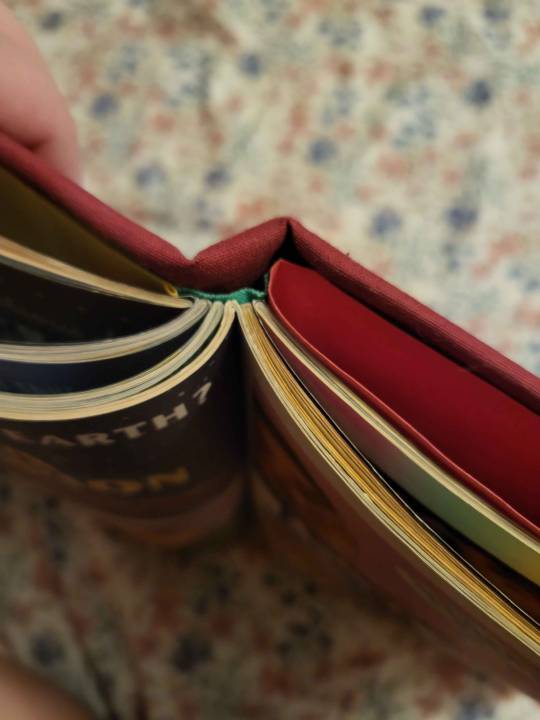
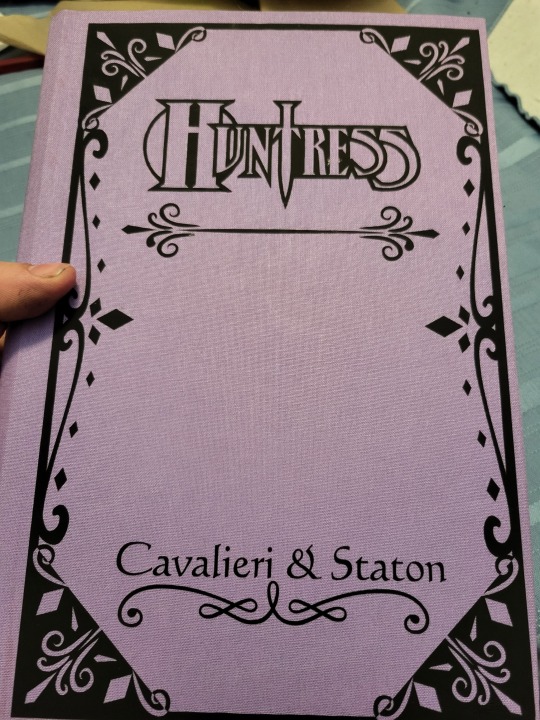
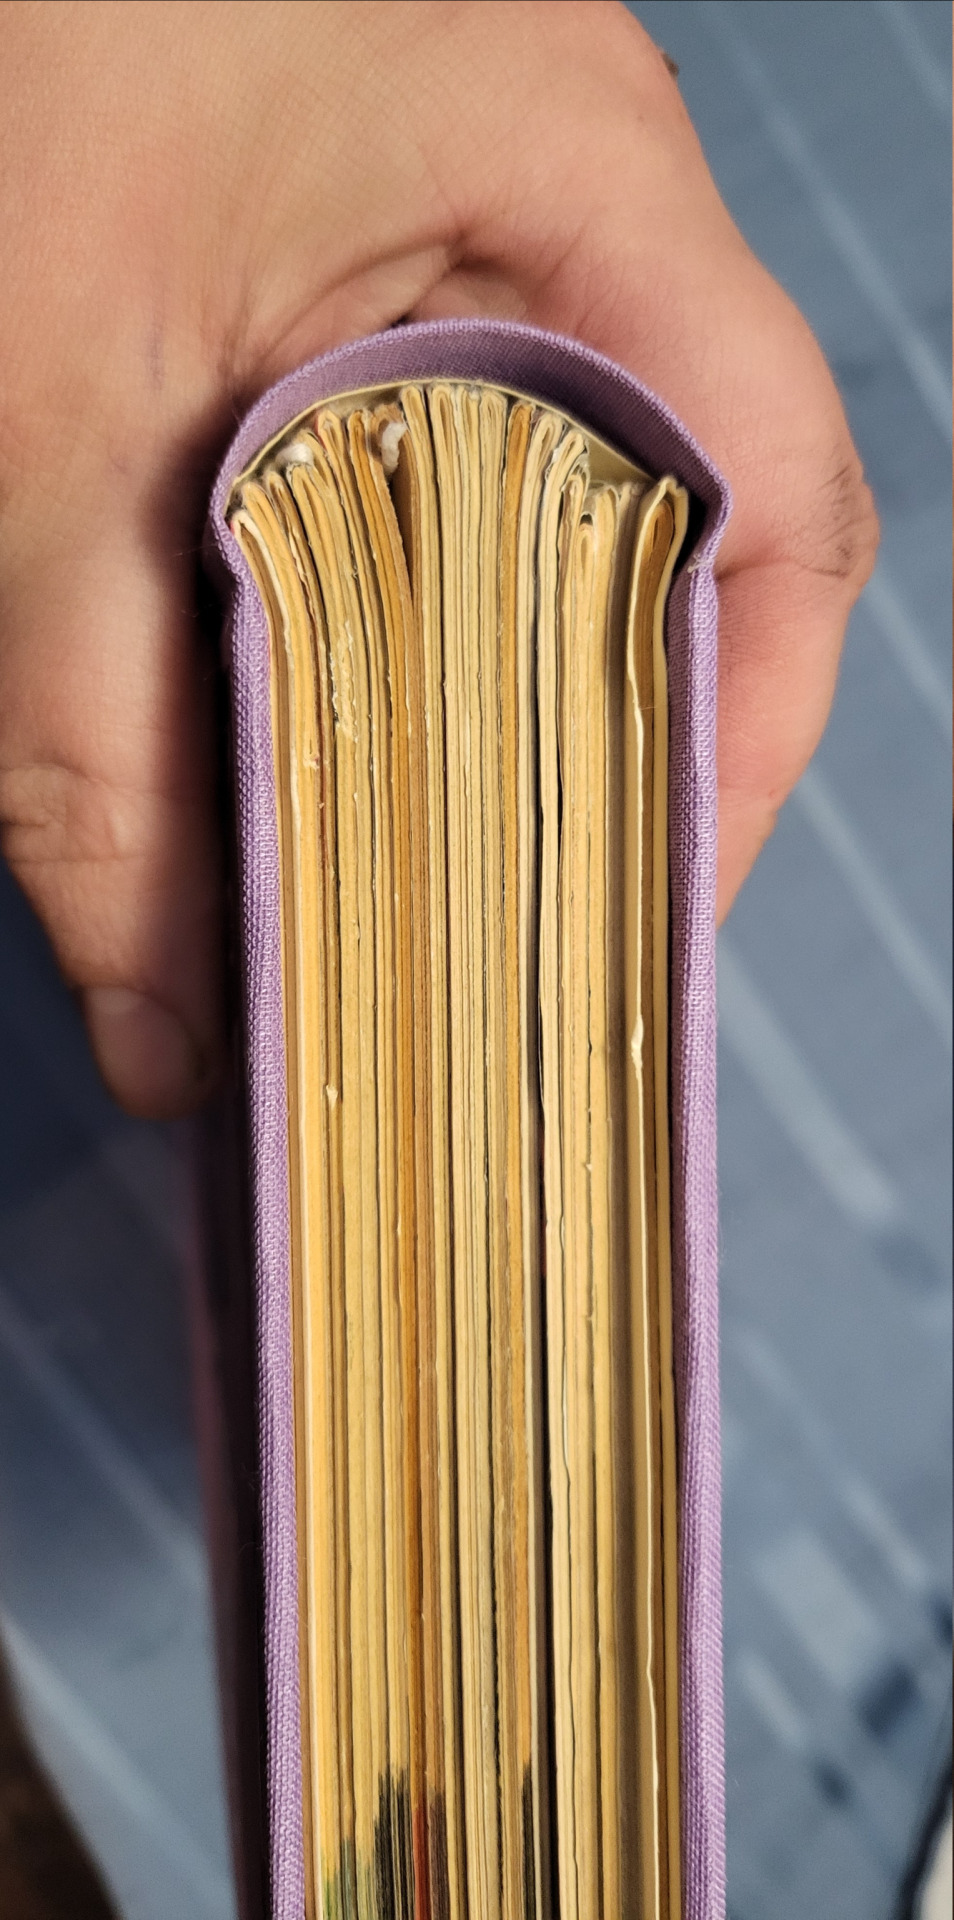
Lately, I've been trying to make my sewing/construction technique better, and I've been watching videos from DAS bookbinding (link). I tried to do my most recent Huntress comic with the rounded + backed spine with shoulders, not sure that I succeeded, but that's definitely on me because in the tutorial where he explains how to do it without the official material he's like "You should try this with proper equipment first, this is just for binders who took a course and could do the shouldering in a bookbinding course and want to try it on their own without having to buy the proper equipment" and. I have never done a real bookbinding course or used the proper equipment.
Hope this was informative/fun if you made it through!
69 notes
·
View notes
Text
2024 in Binding
I started bookbinding back in April, so it's been about nine months of learning. Here are the stats:
Fanbinds: 29 30 complete binds of 18 19 different typesets. (Mostly one typeset = one fic but I have a couple of compilations of shorter fics in there.) I might actually eke out one more before January 1, which would make the total a pleasingly round 30. Done!
Blank book binds: 21 blank books of various sizes, mostly gifted to friends.
Rebinds: Only 2! This is a great way to practice making cases, though. I will do more in the year to come.
Public Domain/Non-Fannish Binds: 8 books -- two public domain binds, two copies of a book of plays written by a friend's parent, and four copies of a book of stuff from a parent of mine.
Total binds: 60! 61! Whoa.
Some photos!
First book, feat. very ugly cover paper, scorch marks, and terrible hinges.

Fave book (that can currently be shared publicly):

Latest (fannish) book:

More rambling under the cut.
With my typical ADHD-style approach, I definitely didn't hone one style/technique at a time. Things I've learned/tried in binding include:
case binding (with and without bradel-style construction)
three-piece bradel binding
coptic binding (a journal, I didn't share it)
sewn-board binding
criss-cross binding (haven't shared yet!)
sewn pamphlet binding
stab binding
double fan/Lumbeck binding for paperbacks
many quirky small binding styles in my weekend course (matchbook, accordion, dos-a-dos, origami, and more)
In terms of finishing techniques, I've tried:
Endbands from bookcloth
Sewn endbands (French faux double-core) with cotton and silk
French link
Sewn on tapes
Made endpapers
Tete-beche binding (haven't shown y'all that one yet...)
Paper-covered boards
Homemade bookcloth
Hot foiling onto cloth (yet to be featured on a fanbind)
HTV on cloth (of course)
Toner-activated foiling
Wrap covers
Dust jackets
Box-making (for spouse - a card game needed a box)
I have acquired/made lots of equipment but my faves currently are:
Cricut Maker 3
HFS guillotine (love/hate relationship)
homemade book press out of cutting boards
Wrapped bricks for weights
Bone folders - real bone and teflon
Epson ET-15000 colour printer (still getting used to it but it's nice)
And of course I've honed and improved on typesetting and design skills using InDesign, Illustrator, Bookbinder.js, and (recently) Canva.
What do I want to do in 2025?
more gift binds!
thermal-bound paperbacks (binder acquired via Xmas!)
slipcases
a fanbind with foil-quilled covers
inlaid bookcloth covers
embroidered decoration
rounded spines
backed spines??? Maybe?
edge gilding/painting
bookmark charms
laser-cut insets on covers
a magnetic closure on a bind
get better at coptic binding
learn how to make straighter cuts with the stupid guillotine
learn how to marble papers (paper-marbling starter kit acquired via Xmas gifts!)
End of ramble.
#fanbinding#bookbinding#this is a niche bookbinding post#case binding#sewn endbands#handmade journal#drarry fanbinding#hp fanbinding
23 notes
·
View notes
Text
Binderary 2024 wrap-up
When Binderary started, I hadn't touched any bookbinding since August when I broke my foot. Step one was getting my crafting space cleaned up enough to let me walk through it with crutches.
So my original goal was to get one single book done in the month, with a stretch goal of 4 total books, aka peaceful mode of the challenge.
I finished with seven total books, if you include the leather cover I made for my dnd notebook (which I do, it was complicated.)
Here are all my full books from this month on my shelf

I'm obviously most proud of my two large projects: the 999 script and the Planescape: Torment novelization. They were both involved typesets, and Torment was an experiment in binding style.
This month was about learning new techniques. From the entire k118 binding style, which I learned mostly from a couple blog posts, @spockandawe's advice, and at the end from the fantastic Binderary workshop on it. Plus I was using a guillotine for the first time, which I'm still getting used to.
And I very impulsively bought a Cricut Maker which arrived halfway through the month (thanks to enabling from Renegade folks and finding a used one for a good price.) So I had to learn entirely from scratch how to use that. My experiences with HTV Foil were BAD, but regular HTV is much easier. I then started working with stencil vinyl and paint, which was its own learning process, but worked pretty well on my leather books.
Meanwhile, I was also going through physical therapy for my foot and went from crutches to being able to walk unsupported in my boot, which is huge progress and made working on books much easier as the month went on. So this Binderary was a big time of growth and progress for me personally.
I also really love that Binderary is February because I get in a real creative slump in winter, and after two months of no creative impulses, Binderary always shocks me into high speed creation in a really nice way.
Thanks and love to everyone involved in planning and running this great event and everyone hanging out in the discord and workshop chats.
85 notes
·
View notes
Text
🇲🇽 Mexico 2025 Gold Cup Font – Customize Your Jersey Like El Tri!

Get ready for the 2025 CONCACAF Gold Cup with the official Mexico Jersey Font. You can print your name or honor stars like Lozano, Santi Giménez, or Ochoa. This font pack has everything you need to make your own jersey at home.
👉 Get the Mexico 2025 Gold Cup Font on Etsy Here
🇲🇽 Adidas Mexico 2025 Gold Cup Kit + Font Collection
The Adidas Mexico 2025 Gold Cup Kit was released on March 14, 2025. It debuted in the Concacaf Nations League semi-final against Canada. This kit is a bold design that honors Mexican culture and tradition.

🔥 Design Features:
The kit is black with gold accents, inspired by Mariachi clothing
A special pixelated font mimics Aztec pyramids and architecture
The unique stepped and blocky numbers resemble historic pyramid structures like Teotihuacan and Chichen Itza
Green Trefoil keeper shirt provided by Adidas
A full merchandise collection was released alongside the jersey

This kit combines modern wear with ancient symbols, making it one of Mexico’s most stunning kits.
✍️ What’s Included in the Font Pack
✅ OTF & TTF Font Files (for easy installation)
✅ Perfect for Cricut, Silhouette, etc.)
✅ Numbers 0-9 & Full Alphabet
✅ Pixel-style font inspired by Aztec pyramids
✅ Perfect for fans, creators, and gift-makers
youtube
🖨️ How to Use and Print the Font
Want to customize a jersey with your own name or your favorite player’s number? Here's how:
How to Use the Font:
Download the font from Etsy after purchase
Install the OTF or TTF file on your computer
Use design tools like Canva, Cricut Design Space, or Illustrator
Choose your name + number layout
Print it using DTF paper or HTV (heat transfer vinyl)
Apply the print using a heat press
Done! You’ve created your custom Mexico jersey 🔥
💻 Best 5 Tools for Font Design
Here are our top picks to design with ease:
Canva – Easy-to-use and beginner-friendly
Cricut Design Space – Ideal for precise cutting
Adobe Illustrator – Pro-level vector editing
CorelDRAW – Another great option for advanced designers
Inkscape – Free, open-source alternative to Illustrator

🛍️ Why Buy from Etsy?
Etsy is a secure and trusted platform that supports independent creators. Buying from our official Etsy store guarantees:
Instant download after payment
Secure transactions
High-quality files
Personal use license
Fast customer support from real designers
👉 Get the Mexico 2025 Gold Cup Font on Etsy Here
❓ FAQ – Mexico Gold Cup Jersey Font
Can I use this with Cricut or Silhouette? Yes, the download includes SVG and AI files.
Is this the official font? It’s a fan-made version based on the 2025 Gold Cup jersey design.
Can I print my own name and number? Absolutely! The font is fully editable for any name or number.
Is it for personal or commercial use? This license is for personal use only.
How do I print it on a shirt? Use DTF or HTV paper and a heat press machine.
#Font Football#Font football jersey#Mexico 2025 Gold#Mexico 2025 Gold font#font#font design#fonts#fonts & typography#football#football jerseys#football numbers#jersey#soccer font#Soccer typography#TTF#OTF#script writing#Font script#mexico#Youtube
3 notes
·
View notes
Text

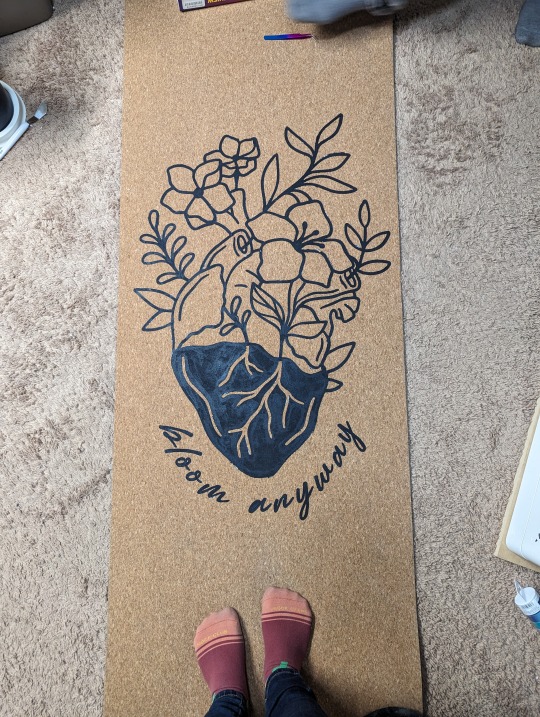
So I painted my yoga mat... I'm including the process and credits below the cut.
So, I have been wanting a cork yoga mat for a while. Do I need one? No. Will I pick up yoga again for a month and then quit? Hopefully not, but likely yes.
Every time I get back into yoga, I start looking at cork yoga mats because they're grippier and also very very pretty. The only problem is... they are friggin' expensive.

I first was attracted to cork yoga mats because of some of the really amazing designs, but I can't afford this shit. Instead, I settled for a cheaper cork yoga mat that is plain, and I thought that if I saved up enough money and still cared about yoga enough to buy a fancy one, I would.
But then I got to thinking... could I paint my yoga mat? And the answer is yes, yes I can.
I originally got the idea when I read online of other people doing this to their rubber and PVC mats, so you do not need a cork mat to do this!
Buying the Mat
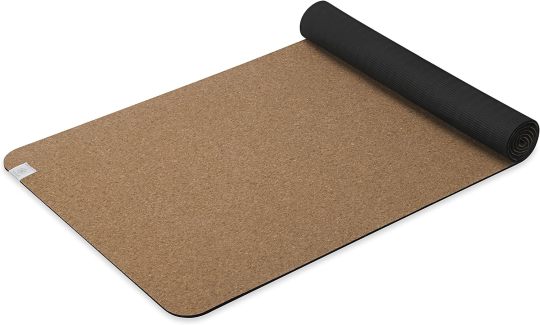
Even an inexpensive cork yoga mat is still far more than I've ever spent on one before, so I had to choose wisely. I ended up choosing the Gaiman cork yoga mat, which is about 5mm in thickness. It's roughly 68 x 24 inches. One thing I had read is that cork mats can get quite heavy, but this one is pretty lightweight while still being cushy. I was really tempted to use it right away, but I didn't want it to get dirty or oily before I painted it.
The Design
I am not an artist. I cannot draw well enough to freehand something confidently. What I do have is a Cricut Maker. If you don't know what a Cricut Maker is, it's an ill-advised purchase that I got secondhand and is actively ruining my budget. Depending on the model, it can cut out designs on a variety of materials, such as vinyl or infusible ink and can even tool leather. I used cardstock for this project to cut out stencils.
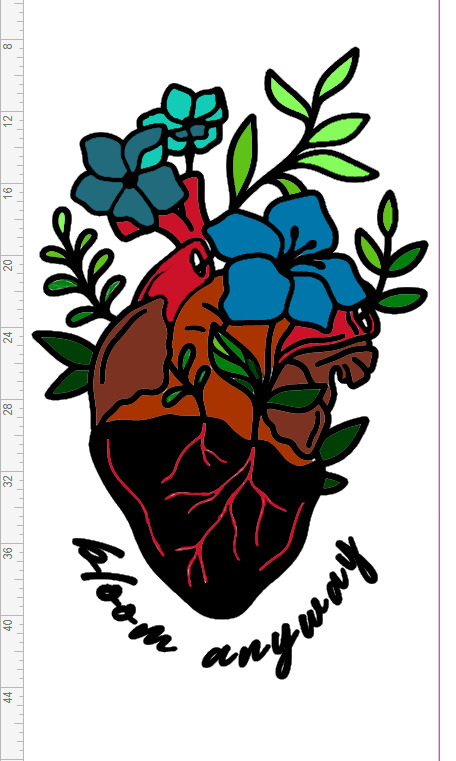
There are many free SVG templates out there as well as images created by other Cricut Makers that are only .99 each. There are many, many other places where you can purchase designs as well, or you can create your own! I am not talented enough to create my own design.
I tried several free SVGs, didn't like them, and then stumbled on this on Design Space, the Circut Maker program/shop. To quote Macklemore, "But shit, it was 99 cents!"
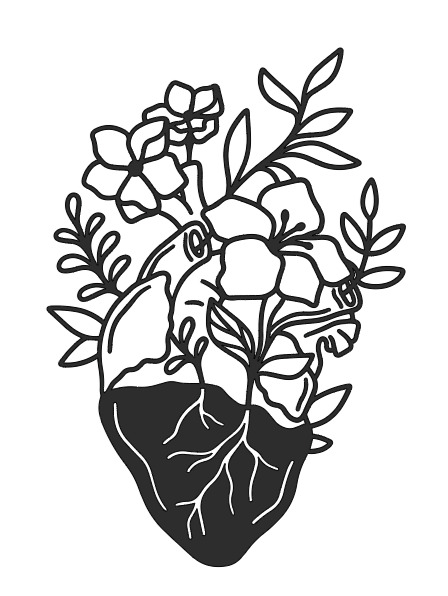
The image was designed by GlamSVG by Emylia and the inspiration came from an embroidery pattern by Emily June, which you can find HERE. I went through an embroidery phase during quarantine, and I have mine hung on the wall. I look at it daily.
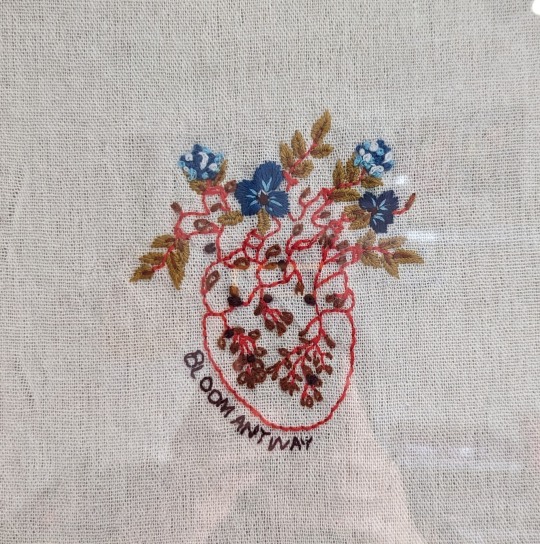
I had to resize this image to fit my yoga mat, which ended up being 24 x 36". Because I cut the stencil out of cardstock, I had to segment everything into 8.5x11 pieces, cut, weed, and then piece it all back together on the mat. Once I had all the pieces, I stuck them to transfer paper to keep the floating segments in place. I organized and labeled everything so I could put it back together again easily. It looked like this:
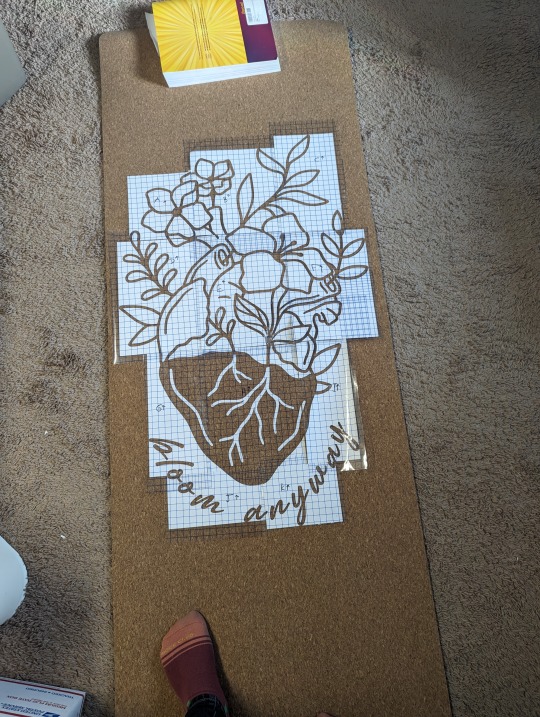
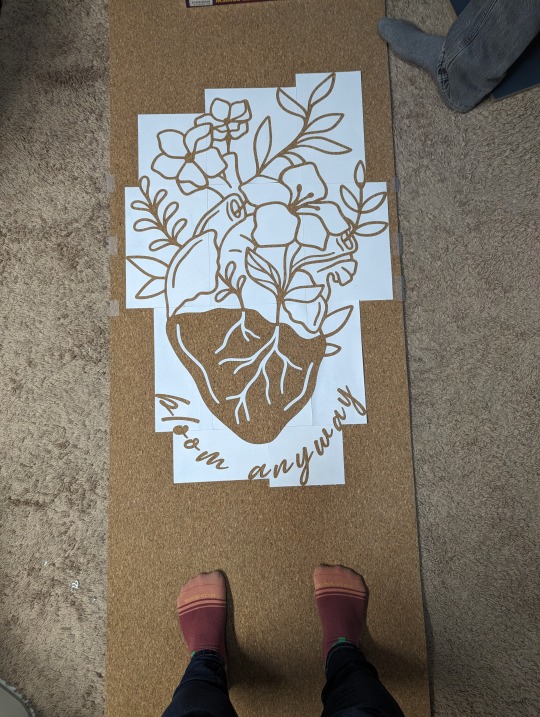
Once it was assembled, I sprayed the backs with temporary adhesive so the stencils would stay down. I removed the transfer paper and began painting the outline. I did end up losing a couple of the floating pieces (see the letter O and the leaf on the far right side), so I had to freehand some of it. Overall, the stencil turned out great!
I had a variety of success with the temporary adhesive. Because I bought a more inexpensive mat, I soon discovered how not durable it is. The 'temporary' adhesive pulled up small pieces of cork after I removed the stencil. This was partially my fault, since I didn't pull up the stencil as I went. Still, there were pieces that were going to lift anyway. This revealed that the cork is only one layer, but fortunately, each piece of cork that lifted was quite small and unnoticeable, and the thread behind it matched in color. It wasn't ideal, but I could live with it.
Some of the cardstock became permanent fixtures on the mat, which I then had to paint over. Also, some of the stencil didn't stick at all, so I had minor bleed through. Problems all around! But it still turned out nicely!
I need to preface that I have never painted anything before. Well, that's a lie. I've painted a wall, and six years ago I had a Bob Ross themed birthday party. The SO, however, is the son of an artist and taught me about mixing acrylic. His first tip was to test out colors. I used Paint.Net and came up with this mock-up:
I knew I wanted the heart anatomy to be shades of red, so that was easy. The flowers were harder. I tried my favorite colors, like yellow and purple, but it didn't sit right visually. I turned to Canva Color Wheel to help me find complementary colors to the shades of red I wanted to use. That's how I came up with the pretty blues. To mix the colors, I used ColorHexa to show me the percentage of CYMK I needed.
Here are some progress shots:
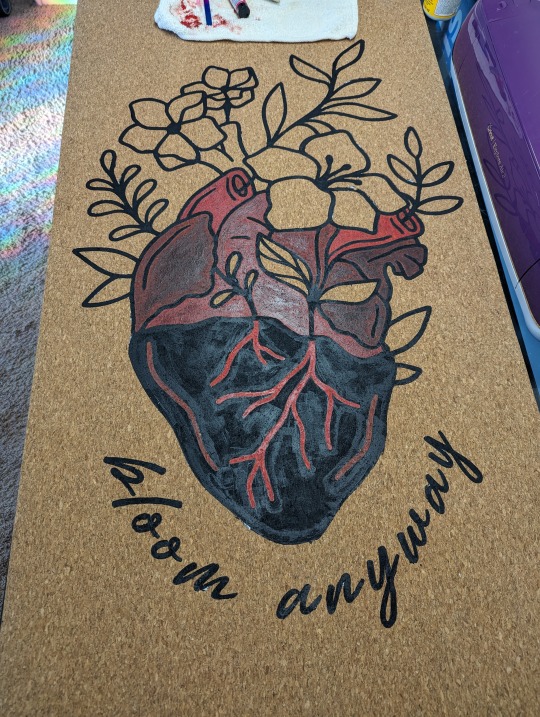
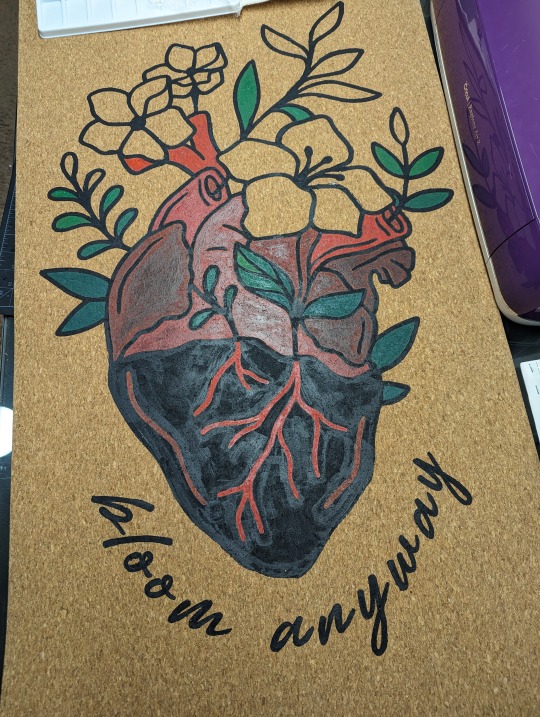
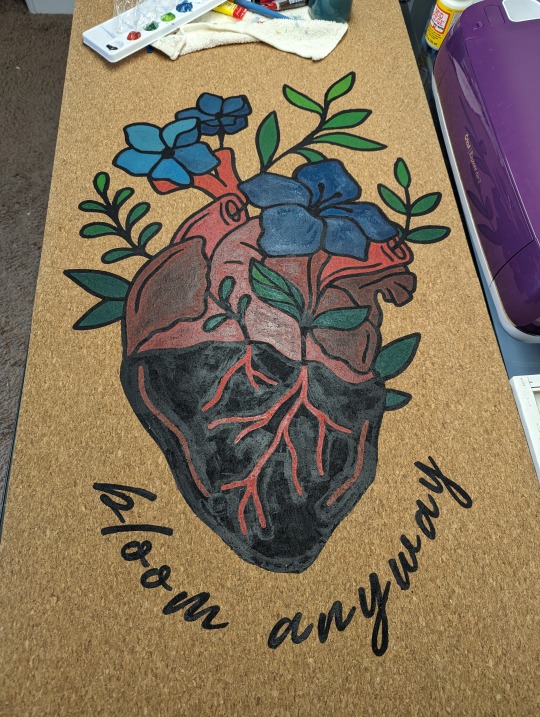
I'm super happy with how it turned out! My color mixing didn't turn out exactly like the mock up, but I love the results. The last step was to let it dry for at least 48 hours. Then I set it with Mod Podge Acrylic Sealer.
I chose Mod Podge since it's non-toxic, and I will be putting my face on it. Also, my dogs walk on it while I do yoga. They think it belongs to them. :) Knowing now that there is only 1 layer of cork, I do worry how it'll hold up to dog nails over time.
Lastly, the real test was to see if it would roll, and it does! So now I just need a yoga strap, and I'm good to go!
17 notes
·
View notes
Text
Tour time!
Welcome to my craft closet!

I used to have a whole room in my house dedicated to crafts but it had to be used for something else. Now I store all my stuff in this closet! Here’s what everything is:

The bottom left shelf holds all my cardstock paper. It’s sorted by color in these boxes! I’ve found this to be the easiest way to store them because it allows me to move them anywhere.
The bin to the right holds a bunch of duct tape.
Middle left is arts and crafts books like how to draw, coloring books, and a binder full of stickers.
Top left is paper! Copy paper, lined paper, construction paper; basically any random paper that isn’t cardstock.
The drawers on the right hold all kinds of things from glue to shape punchers to paper clips. I’d show you the inside but it’s truly super random

These top 2 (4) shelves are my favorite!
The left is all kinds of writing utensils (I have a ton more in my room) everything. From markers to pencils to pens to sharpies.
The bottom right is tools (like staplers, tape rolls) and some other random stuff. The top right is all kinds of fun craft supplies! (The kind you’d use as a kid) Things like pom-poms, sequins, feathers, and more.

These top shelves hold a lot of bigger items. I’ve got pads of cardstock, craft pints, and perler beads (my current hobby). Above that I have more sequins (color sorted) a sticker maker, funky scissors, my main stash of markers and colored pencils, more perler beads, and a button maker (that is sadly broken)
The top top shelf in the first picture has bins of all kinds of stuff like tissue paper, play-doh, ribbon, you name it.
Now onto my room! (The craft closet is in another room in my house)

This is my desk! It’s huge and I love it. If I’m not crafting in the other room I’m doing it in here! This is also where I play Minecraft and use my computer.
I’m not gonna go over the bulletin board in detail but I’ve been putting things on it since I was in middle school and it’s basically a giant collection of my life (think scrapbook junk journal but on my wall)
Here’s a few of the insides of my drawers:


The left one is for watercolor painting! I like to paint houses for people sometimes. The right holds some notebooks, my Bible, my church journal, and my church note taking stuff

I also have an art cart! I got this before transforming the closet as a way to hold my stuff so now it just holds a few things. (And yes, I am a beef loving Texan and proud)
The front holds tools like scissors and glue. I also have a few baskets on the side that hold paintbrushes and other tools.
Couldn’t get a good picture of the shelves but they hold my paper art tools (cricut machine, paper scraps, etc) alongside some extra pens and markers.

The top of my cart holds all my main writing utensils! I love it being right by my desk for easy access. If you ever want marker/pen recommendations, let me know! I’d love to go through them
And that’s that! If there’s anything you want me to talk more about if you have any questions lmk!
2 notes
·
View notes
Text
How to Use a Cricut Mug Press: A Step-by-Step Guide
When I first bought my Cricut Mug Press, I was quite nervous about learning how to use a Cricut Mug Press. It took some time to read many articles and gather all the essential information. Now that I have gained experience using it, I want to share all the basic instructions for using this Cricut machine. If you are uncertain about using it, make sure to read this post to the end.
The Cricut Mug Press is a small yet impressive tool that transforms plain mugs into stylish designer pieces. Despite its compact size, it is incredibly capable and essential for crafting custom mugs for personal use or as gifts for loved ones. So, let’s start with the materials you will need for your project.
Tools and Supplies You Need to Create a Personalized Mug
Before learning how to use a Cricut Mug Press, it is important to know the necessary materials you are going to need. Here is a detailed list:
Cricut cutting machine: You will have to use this machine to cut designs from the infusible ink sheet. Suitable Cricut models are Cricut Maker 3, Explore 3, or Joy.
Cricut Mug Press: This is the machine used to transfer the infusible ink design onto your mug.
Sublimation mug: Specific mugs made for the Mug Press machine are necessary because they fit perfectly and ensure the best results. Using other mugs of different shapes and sizes may not fit or work well with the machine.
Infusible ink sheet: This material is basic as it is where you will cut your designs, which will later be transferred onto the mug using heat in the machine.
Heat-resistant tape: It is essential for securing the infusible ink sheet onto the mug during the pressing process.
Lint roller: Used to ensure the surface of the mug is clean and free of debris before applying the infusible ink design.
Weeding tools: These are used to remove excess or unwanted material from the design before transferring it to the mug.
Once you have assembled all these supplies and tools, ensure your setup is ready. Connect your Cricut machine to power and turn it on. Establish a connection between the machine and your device using Bluetooth or USB. Download the Design Space app on your device and log in with your account. This setup is essential before proceeding with the Mug Press.
Before beginning to use the Mug Press, ensure it is on and heating up properly. Following these steps ensures you are ready to create custom mugs with your Cricut machine.
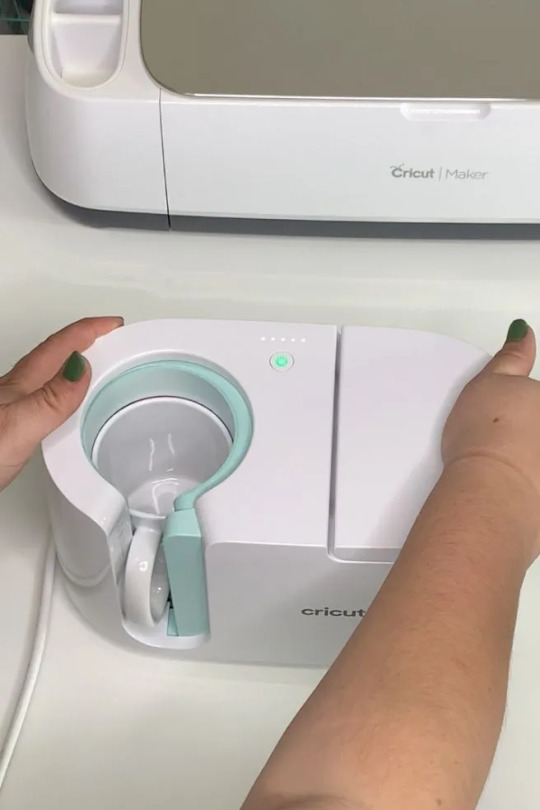
How to Use a Cricut Mug Press in 4 Simple Steps?
When you have assembled all the necessary tools and completed the setup, you can start working on your project. Here are the 4 steps you need to follow to use the Mug Press:
Step 1: Create a Design on Cricut Software

Step 2: Cut and Weed Out the Excess Material

After completing the design, insert the material into the machine and press the Load button. The design will be cut quickly. Once the cutting is done, unload the material and use a weeding tool to peel away any unwanted parts from the design.
Step 3: Transfer the Design to Your Mug

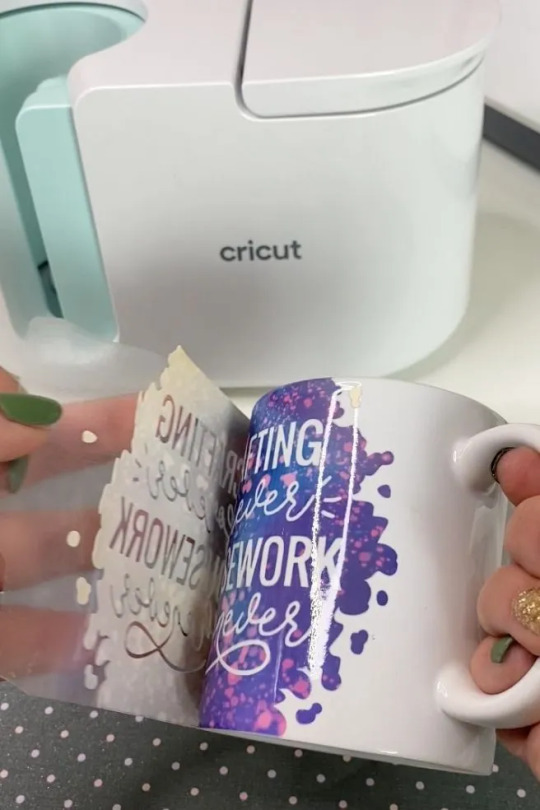
Step 4: Reveal the Final Result

When the pressing is complete, carefully remove the mug from the machine, handling it by the handle to avoid burns. Allow the mug to cool for 20–30 minutes. During this time, it’s important to avoid touching the heated areas to prevent injury. Once the mug has cooled down completely, it will be ready for use, showing your newly transferred design beautifully.
Conclusion
In short, learning how to use a Cricut Mug Press is quite easy. As you can see, the process is simple. First, gather all the necessary tools and accessories and set them up. Once the setup is done, create a design on the Design Space app, cut it on the Cricut cutting machine, and press the design onto the mug using the Mug Press machine. Once the pressing is finished, you will have a beautiful mug ready to use however you like.
FAQs
What Are the Supplies Required for Cricut Mug Press?
To work with a Cricut machine and create designer mugs, you will need some essential supplies:
Cricut cutting machine
Cricut Mug Press
Infusible Ink
Heat-resistant tape
Weeding tool
Lint roller
Sublimation Ink
These tools are important to prepare and execute projects with Cricut effectively.
Do I Need a Computer to Use Cricut Mug Press?
No, not necessarily! You can download the Cricut Design Space app on your computer or any device. If you don’t have a computer, you can use your Android or iOS mobile instead. However, using a computer for the app allows you to work on projects more effectively. Just ensure your computer runs on either Windows or macOS, as Chromebooks do not support the software.
Can I Use Any Mug in Cricut Mug Press?
No, you cannot! The mug used in the Cricut Mug Press must meet specific criteria. It should have a maximum height of 4.72 inches and a diameter between 3.2 to 3.4 inches, with a capacity of 10 to 16 ounces (295 to 450 ml). Also, the mug’s surface should be plain; textured or rough mug surfaces are not suitable for the machine. Ideally, the mug should be white for best results.
Source: how to use a Cricut Mug Press
Visit here to Know More: Cricut Easy Press
Pinterest
2 notes
·
View notes
Text
How to Use Cricut Pens? (Easy Steps!)
If you are a Cricut user, then surely you know that this brand makes some smart tools and machines. You know about its capabilities and how useful it is. But did you know that apart from cutting materials, you can use pens to simplify the crafting process significantly? But how to use Cricut pens? Cricut machines are not only used for cutting different shapes out of paper or vinyl. These machines use pens to create doodles, illustrations, and intricate designs. However, you need to know some basic steps you need to perform when you are designing your projects to make them better.
Using the pens is easy and straightforward, but the important thing is that you know the process. Read this blog to discover all about Cricut pens and what projects you can make with them.
What Types of Cricut Pens Are Available?
All of the current Cricut machines can use a pen, whether Maker, Explore, or Joy. The Maker and Explore machines have interchangeable pens, and Joy has a lineup of small pens. Joy pens are incompatible with other machines due to their unique, smaller size. Before you proceed with how to use Cricut pens, here is the list of pens that you can use with the machine:
Fine Point Pens
This has an F stamped on it for fine, has a 0.4mm tip, and comes in multiple colors.
Extra Fine Point Pens
These are finer, and the pens are just 0.3mm thick.
1.0 Pens and Markers
They have a thickness of 1.0mm and can be called markers, too.
Gel Pens
Gel Pens have a roller ball instead of a tip and are 0.8 mm in size.
Glitter Gel Pens
It has a roller ball and is 0.8 mm in size.
Calligraphy Pens
These pens have a gray barrel and have C stamped to denote calligraphy.
Infusible Ink Pens
It has a 1.0mm tip, and it is used for sublimation and infusing the ink on the surfaces.
How to Use Cricut Pens: Easy and Simple Steps
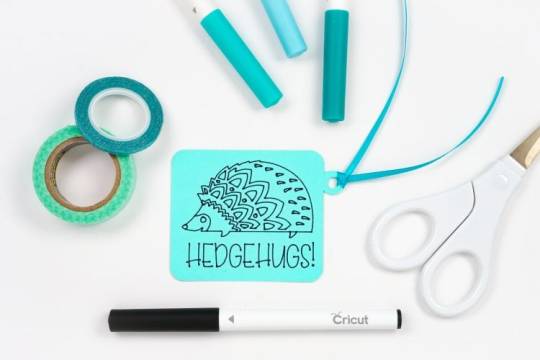
Placing or installing pens is easy, but if you are a beginner, then it will be a new thing for you. Always use the pens carefully, and pens should always be fitted to the clamp A of the cutting machine. Here, I am going to show you something different about using Cricut pens to create a simple gift tag. Now, let’s look at the below process to understand how to use it:
First, go to the Design Space and click on a new project to create a design.
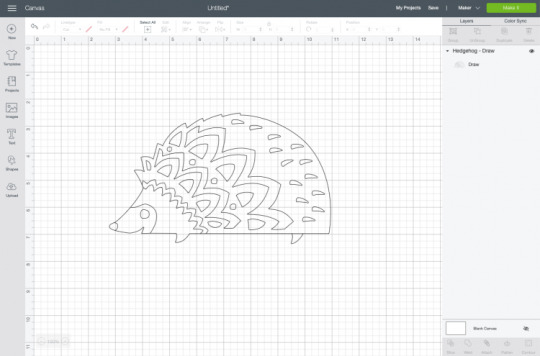
Then, create a design, or you can choose a text that you want to use with your pen. Cricut Design Space has its own vast library of images for your DIY projects.
Now, remember you have to draw, not cut the image. So, go to the Edit toolbar, and from there, select the Draw option in the Layers panel.

When you click the colored square box next to the line type dropdown, you can select the type of pen and choose the Fine Point pen.

After you have completed drawing your design, it is time to add text. In the Font menu, you can filter by Cricut Writing fonts. Choose the writing style font.
You can insert a shape into your Canvas. Then, using the Align tool, you can change its size and color and move it to the back of your Canvas.
Next, select your drawing and text layer and click Attach on the right-hand side of the Layers panel.
On the preview screen, your image will appear on the mat. Click Continue, and in the Make screen option, select the material you are using. Here, I am using cardstock. The Cricut Design Space app will prompt you to insert your pen, and you can use a fine-point blade.
In the last step, you have to insert your mat into the machine, and your machine will draw and cut the tag.
Conclusion
Now you know how simple it was to learn ‘how to use Cricut pens‘.? In this post, I have explained the types of pens and how you can craft your project with the pen. After reading this blog, you can choose a pen for your project, load it into the machine, and start crafting. Start crafting with your pen and unlock the full potential of the machine.
FAQs
How Do You Load the Pen Into Cricut Machine?
When you open the machine, you will see two clamps: Clamp A and Clamp B. To load the pen into your cutting machine, open Clamp A and insert the pen into it. Gently press the pen into the clamp until it fits properly, and you hear a click sound. Then, close the cover, and you are ready to use the machine.
What Are Cricut Pens?
Cricut makes different types of pens, which are great ways to add drawn or handwritten details to your projects. Cricut pens come in different sizes and can be easily loaded into the machine. This can be used for various creative projects, such as writing on gift tag cards or adding doodles.
What Is the Difference Between Cricut Pens and Markers?
A Cricut pen usually has a fine tip, which allows it to create a thinner line, compared to a marker, which has a thick tip and creates a thicker line. Pens are ideal for writing detailed text, signatures, or fine lines within a design, whereas markers are better for filling large areas with color.
Source: How to Use Cricut Pens
#how to use Cricut pens#cricut design space download#cricut design space app#cricut maker#cricut joy#cricut pens
4 notes
·
View notes
Text
How to Use a Cricut Mug Press? [A Comprehensive Guide]
Are you curious to learn how to use a Cricut Mug Press? Well, this guide explores everything you need to know about the use of this machine. With this ultimate guide, you will be ready to use the Cricut Mug Press easily without anyone’s help. However, the Cricut Mug Press is a perfect choice for people who want to create a customized mug with pro quality.
This fantastic tool is compatible with markers, pens, and Infusible Ink transfer sheets. You also need a Cricut Design Space to create a design that can be further cut on the Cricut cutting machine. Moreover, you will need different materials, such as HTV and Infusible ink, to get desirable designs on mugs. After that, we will learn the process of using the Mug Press with step-by-step instructions. Let’s dive into it.
Step 1: Supplies You Need to Use Cricut Mug Press
Before learning how to use a Cricut Mug Press, you first need to know the requirements of supplies. These supplies are essential for using the Cricut Mug Press.
A desktop or laptop for setting up your Mug Press.
You can use any Cricut machine (Maker series, Explore series, and Joy).
Cricut Blank Ceramic Mug
Lint Roller
Butcher Paper
EasyPress mat or heat-resistant surface.
Infusible Ink Transfer Sheets and Infusible Ink Markers/Pens.
Oven Glove
Heat Resistant Tape
Laser copy paper
Step 2: Set Up Your Cricut Mug Press
In order to learn how to use a Cricut Mug Press, you must know about the Cricut Mug Press setup.
Follow the steps carefully to set up the Cricut Mug Press:
Insert the power cable into the back of your Cricut Mug Press, followed by a USB cable. Insert one end into your machine and another end into the computer.
Open the Cricut Design Space on your computer or laptop.
Then, select New Product Setup from the right-side menu.
Afterward, select Heat Press, followed by Mug Press.
You can follow the displayed instructions on the screen to download any updates you need.
While following the instructions, you will need to continue the Activate button to activate your Mug Press.
After this, the update will be completed.
Then, you can unplug the USB cable.
Now, your Mug Press is ready to use. Let’s learn how to use a Cricut Mug Press.
Step 3: Use the Cricut Mug Press
The Mug Press is relatively easy to use. After setting up, you can easily create a pro-customized mug. You can choose the design from Cricut Design Space. Always ensure that you choose the design with the exact size that fits your mug.
Once you have selected the designs, start cutting them using your cutting machine. Make sure your design is mirrored before the cut. You can follow the design given below.
After cutting the material, weed the unwanted materials.
Ensure your mug is clean and there is no dust present on it.
Then, place the design around the mug.
Afterward, you have to place the Cricut Mug Press on an easy press mat or any other heat-resistant surface you have.
Press the power button in your Mug Press, and the button will light the green color.
After that, you will hear the beep sound, meaning it is ready to use. However, you don’t need to set any temperature as it is already smart enough to set the temperature automatically.
Then, put the mug into the press.
It will take 6 minutes to sublimate the design onto the mug.
Finally, it will beep when it is done.
Turn off the device and take out the mug using gloves.
Final Words
In short, you should understand that a Mug Press alone can’t help you customize your mug. For this, you need various types of supplies that we have already mentioned in this post. Once you have all these items, you can proceed with the setup process. For this setup, you need a laptop or computer with a Cricut Design Space. When you are done with your setup, your Mug Press will be ready to use. Finally, you can design your mug like a pro!
FAQs
Question 1: How much time does a Cricut Mug Press take to heat up?
Answer: The only time your Mug Press will take to heat up is 5 minutes. After placing your mug into the press, it will take approx 6 minutes to finish it. However, the Mug Press produces a beep sound when it has finished its task. When you finally take out the mug from the press, it takes 15 to 30 minutes to cool down. Therefore, you must be cautious while taking it outside.
Question 2: Do I need a computer to use the Cricut Mug Press?
Answer: Well, you don’t have to rely entirely on a computer to use the Mug Press. Still, a computer is needed when you want to set up or activate your Cricut Mug Press. Also, you can update your firmware using your computer or laptop. All this is done when you connect your computer to your Mug Press via a USB cable.
Question 3: Is a regular mug compatible with the Cricut Mug Press?
Answer: There is no issue using your regular mug until it is made up of ceramic. Other than this, no materials should be used, such as stainless steel, plastic, etc.). Plus, the mug must be coated with sublimation material, which is suitable for your printer’s sublimation ink and Infusible ink. In short, the regular you buy from a local store is not going to work with the Cricut Mug Press.
Visit - Cricut.com/setup
Cricut Design Space Login
Cricut maker setup
Cricut Mug Press
Cricut Maker Machine
#Cricut Maker Machine#Set Up Cricut Machine#Cricut Mug Press#How to Use a Cricut Mug Press?#How to Use a Cricut#How to Set Up Cricut Maker Machine
0 notes
Text
This is probably like. A weird thing to be concerned about, but like. The degree of polish and like. Quality in some of the recent entries to the V/H/S franchise sometimes is like… intimidating and feels like. I mean I don’t wanna tell people specifically to be worse at film making or anything, and it’s not like I think anyone broke rules making their entries I don’t think. But I think I mostly mean this to say towards audience members sometimes, ‘cause a lot of V/H/S is kinda *supposed* to be lower budget and experimental in comparison to blockbuster movies or whatever. That’s why the first one has that like “what the fuck?” Aspect to some of the shorts, they kinda feel like student films, because they were like… “gather some people up, get some relatively affordable equipment you can maybe rent, and go film on a rented set or out in the woods which is mostly free”
It feels cheap because it is cheap, and the cheapness makes it have that exact kind of horror vibe it was going for by being VHS. The more polished and high budget and impressive it gets, the less it feels like an experiment in cheapness.
I think there’s a really strong charm to the shorts that feel a little like “film makers create a student film” and I’m not using student film as an insult because I think there’s something really interesting and raw to the like. Sets and characters and costumes put together when you’ve got really really passionate, but broke and unpolished creators? When you’ve got like the cameras and equipment rented from the school and you’re filming it in the weird woods by your old house because you always thought they looked cool and wrote a lot of stories there anyway and now you’re trying to make one of them into a reality and the makeup person might just be your friend who spends too much money at Sephora so everyone voted them to be in charge of makeup and now they’re having a nervous breakdown because they only know how to do their own makeup and they’re looking up tutorials online for blood effects and actually really pulling it off and maybe figuring out something new about themselves.
One of the biggest personal expenses turns out to be a Cricut machine for the prop department but then the fact you don’t have to worry about carpal tunnel taking out your prop and costume department does make up for it eventually. Also someone made you a custom graphic T and you stop grumbling about the budget for a while.
Chances are also probably good you made a deal with the local produce shops to take the cabbage and melons that go bad for reduced price if you’re making a movie with violence, for all the free sound effects available online, it helps to have something live on the day. And head of cabbage or a melon works good on a low budget set.
It has been like two decades since I’ve been anywhere near even a low budget TV/Film set in Canada and I think some of these might be stage tricks instead. But still. There’s so much charm to them??? And it’s why I think a lot of horror fans love low budget horror.
(Also I should note, I was like. A youth working as an extra on a couple filming projects and took independent personal acting/filmmaking classes that taught me about aspects of the industry and tricks of the trade, but I never got super deep into anything. I saw how stuff was done and did some amateur filming projects which is how I learned how to fake things, but I never learned how big budget things were made. Everything I ever learned was cheap corner cutting for people making things on grants or for the passion of arts, not… uh. Millions or hundreds of thousands of dollars. I learned small Canadian Arts Film, not Hollywood Filmmaking. They were… not all encompassing and I am not positioning myself as an expert in anything… just… running my mouth like a know-it-all honestly.)
And like. I think most of V/H/S still accomplishes a lot of it. Praise Ratma.
It’s probably just a couple like… big sensational show stopping shorts by directors who really know how to work with their budgets more than like… any kind of change to the system. And the fact that I like it when it’s kinda messy and sloppy and shows the seams and the actors aren’t super great and the premise feels a little half baked? Not… fully bad because that “actually the cult was fake and the raid was a ploy by us, the sexy lady cops who are actually… big name sexy snuff film peddlers who’ve been profiting from all the sick twisted videos you’ve been watching and we’re gonna make out while killing you” was like. Running a full sprint into a wall, like they almost made it and then they just made a really bafflingly bad decision in the final moments to like. Completely derail that train at the station and I don’t think anyone was satisfied with how that ended.
I don’t think I have the most solid of a point, really, except that a lot of films are very big and polished and expensive lately. And horror is one of those last bastions of “no budget? No problem.” Mindsets. And I kinda love it for that. And I wanna see it continued. I wouldn’t mind it catching on to other genres again because too much of everything has to look and feel and seem high quality making the barrier to entry nearly impossible to pass. But, I hope V/H/S maintains its cheapness because it’s kinda integral to keeping horror accessible. It’s good, it’s fun, it’s experimental, it creates access to new voices.
Yeah going back to the early entries some of it is like “wow that’s pretty gross” but like. There’s a reason most of those characters died horrible deaths. They were shitty garbage trash people on purpose and you were supposed to hate them so when they were brutally murdered you didn’t feel too bad about being like “ohh my got holy shit” and probably doing the mix of laughing and wincing and screaming when the rapist gets his dick literally ripped off and thrown across the room you don’t really feel that terrible about your fear response also being kinda giddy and giggly.
I am overthinking this. Idk. I love this franchise. I hope it lives in cheap gritty gross weird glory forever. Anthology Horror is such a good genre.
#v/h/s#pointless navel gazing#I don’t know I just love weird shit#I wish more people were able to make more weird shit#I wish more people funded cheap horror anthologies and put them on large platforms#I need more small creators to get the chance to be experimental without huge risks#anthologies are perfect for that because you don’t have to have the whole thing riding on you
5 notes
·
View notes
Text
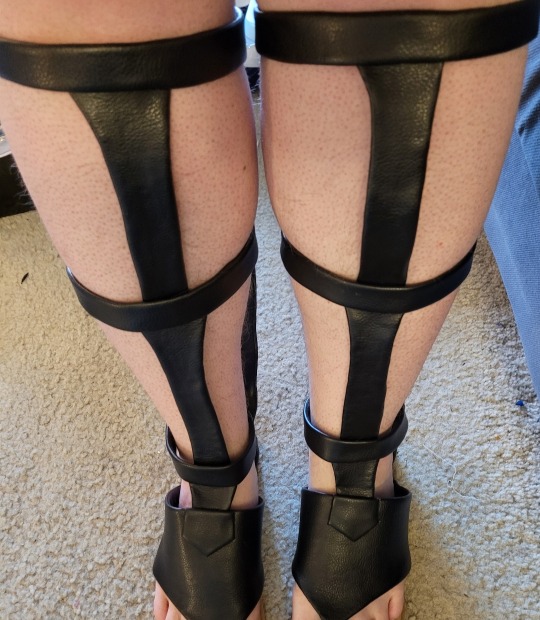
Lots of progress this weekend.
Firstly, the shoes are finished. I'd love it if I never have to make gladiator sandals again, personally. I had to redo the top of each one several times for fit, and I completely depleted the scrap fabric I was using to make these.
I also went ahead and finished the necklace. I've have the prism part done since about November or so but I was putting off doing the necklace because I hate foamwork. I really love the resin gem. I added glitter to the bottom when I cast it which creates a nice depth when the light hits it.
I managed to get it to work as a solid band around the back of the neck - not particularly important for Dimitri, who has hair that will cover that spot, but important for Felix, who my wife is cosplaying and who has a ponytail and will continue to have a ponytail as a genderbend.

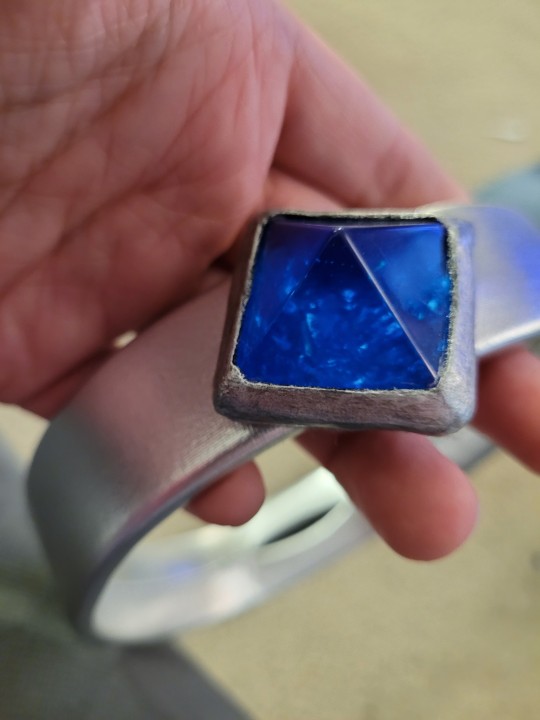
Ugly seam is ugly, but it can be because it's hidden. The closure is magnetic and nestles behind the gem. The 5 mm foam is thick enough to hold its shape when pressed together, so I didn't need another stabilization point. Ideally, I would have liked to match the color on this for the felt, but it's hidden anyway and that was the closest color I had on hand that wouldn't give me an allergic reaction (I have wool felt in that color, but it would cause me trouble on my neck).

I got a chunk of beading done on the tabard sides, and added the last of the trim that it needed. Hopefully I can finish the beading on the tabard today. I also want to go in on the silver part of the skirt and add some silver preciosa bicones at some point.
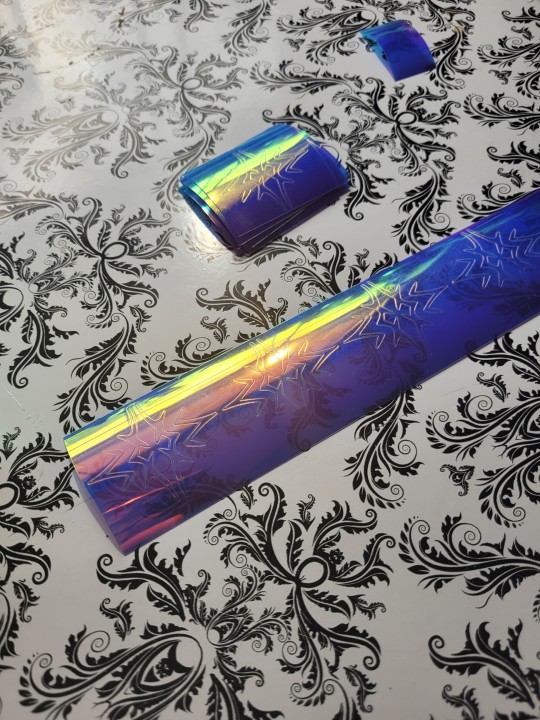
I think I finished everything that I wanted to do with my Cricut Maker as well. I cut 12+ crests for each of us in holographic vinyl (blue for me, transparent blue for her... they're both blue and transparent though). These will be on our dangles as an embellishment.
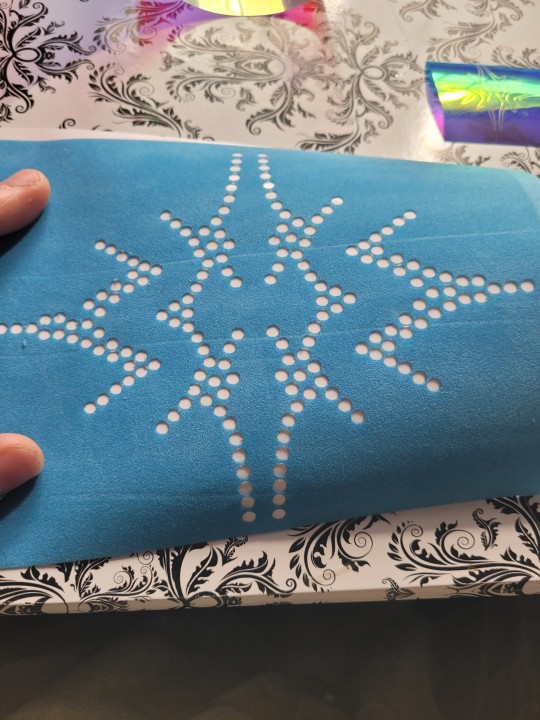
I also cut my rhinestone flock template. This will be used to add hotfix rhinestones to the bottom of the skirt. I'm planning to color match so it should be subtle.
In case you also have a Maker, I cut this flock without the paper backing, flock side up on a standard grip mat with the bonded wool felt setting, and ran it through twice. Once probably would have worked fine but I wanted to make sure it would work.
If you want to do anything with rhinestone templates, I can't recommend flock enough. It was pretty easy to design (I just went over the Blaiddyd Crest with dots the right size), mirrored and flipped pieces as needed, and cut it in my cricut. It worked on the first try with how I'd spaced everything. This is so much faster and precise than placing everything by hand would have been.
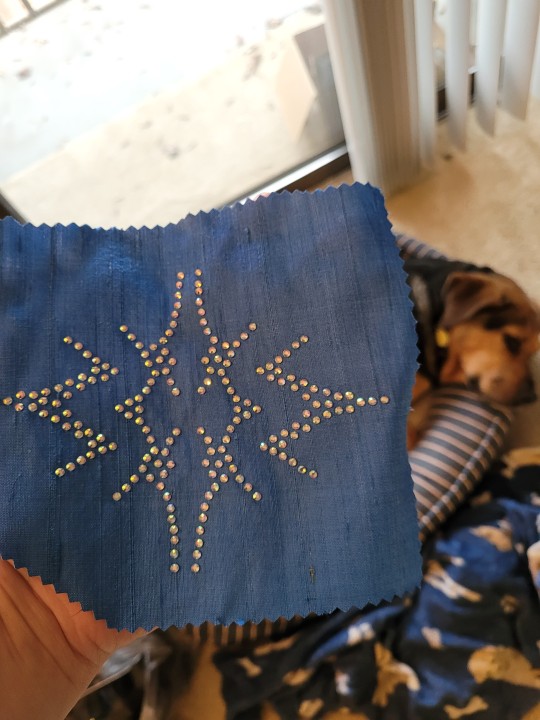
And here's the test on a scrap piece of dupioni with scrap rhinestones in the same size that came with my rhinestone brush. Unimpressed dog in background is unimpressed. 20 seconds at 320 F with my heat press at about 30 lbs of pressure did the job and caused no problem with the silk. Only one rhinestone of the entire design got displaced, which I adhered with gem tac (I didn't want to get my hotfix tool out).
👀 And not because I know from experience or anything, but don't use cricut transfer tape for rhinestone transfers. It isn't heat resistant and will try to melt on your heat press (I got it off in time).
Thankfully I figured out my rhinestone flock came with transfer tape so I'm all set tor doing this on my actual costume.
I won't be getting as much done this coming weekend because I'm going out of town Thursday night - Friday midday, then I have a friend coming in that afternoon from out of town, and on Saturday, I get my Byleth tattoo on my leg so I won't really feel like doing much after that.
2 notes
·
View notes
Note
Hi! Sorry if you've already done this, but could you maybe talk a little bit about how you do titles on covers/spines? They always look fantastic. Do you use something like a cricut machine for the letters?
thank you!! i'd be happy to talk about it especially bc it's been taking up a lot of room in my brain lately.
you're right, i use a cricut. i bought my Cricut Maker secondhand and it works quite well so far. up until now all my titles have been made with "premium vinyl", which requires no ironing and is supposedly permanent. however i've noticed that it comes off quite easily when applied to bookcloth, especially with thinner/smaller letters. i titled 90% of my books within a two-week time period so i didn't realize this would happen until after they were all done. for this reason i don't recommend the permanent vinyl for spines or cloth covers - i don't know how it would work on paper-covered boards. maybe it'd be better without those cloth fibers.
the one other titling method i've used was using a stencil (cut with the cricut) to paint with fabric markers. that worked really well and looks very dramatic (and there's nothing to be in danger of peeling off) but i don't think my hands are steady enough to do very detailed designs.
i have bought a couple sheets of heat-transfer vinyl to try out next - the idea of ironing my books is a little scary but i have heard that htv produces much longer-lasting results on bookcloth. i have some scrap boards covered in cloth that i will use as test pieces and i will post an update after i give it a shot!
maybe more information than you wanted to know, but thank you for asking!! <3
8 notes
·
View notes