#how to use a cricut maker to make shirts
Text
How to Use Cricut Maker: Create a Siser Easy Color DTV Project!
Have you just bought a new Cricut Maker and are wondering how to use Cricut Maker? This brilliant Cricut machine may be overwhelming for beginners, but it is simpler than you think. You get many amazing features with this crafting machine. Let’s get ready to use it and make creative DIY projects with it. I will tell you how to prepare a desired project using this Cricut cutting machine.
Cricut Maker offers various adaptive features that help you create unique and beautiful projects effortlessly. Plus, you get a slot for inserting pens and a number of Cricut tools and supplies. It will be all fun to create something with this ultimate machine. Here, I’ll tell you the best methods to prepare personalized apparel using Siser EasyColor DTV. You’ll learn more about it later in this blog. So, let’s get started.
Supplies and Tools You Will Need for Your Cricut Project
Before we get started to learn how to use Cricut Maker, you must gather some important accessories. I’m listing all of the best accessories here. Use them and follow my step-by-step instructions to create your own project. Check the steps below.
● Brand new Cricut Maker or Explore
● Siser EasyColor DTV
● Siser Easy Mask
● An inkjet printer
● Cricut StandardGrip mat
● A weeding tool
● A Cricut EasyPress
● A Cricut scraper tool
Let me tell you what a Siser EasyColor DTV is. It is an iron-on vinyl type that is typically used on lighter blanks such as garments, T-shirts, etc. This unique vinyl is very convenient and useful for creating better designs and sublimation projects. Let’s check the complete method to create the best project.
How to Use Cricut Maker to Make Personalized Apparel?
Finally, we are here to learn the process of creating personalized T-shirts. So, before we move on to the final steps, measure your blank so that you can create an appropriate design. So, let’s check how to use Cricut Maker for beginners.
Step 1: Upload an SVG File to Cricut Design Space
In the first and foremost step, you’ll need to upload your SVG design file to the Cricut software. If you want, you can create a design manually as well. Once you’re ready, just resize your design and make it fit to your blank.
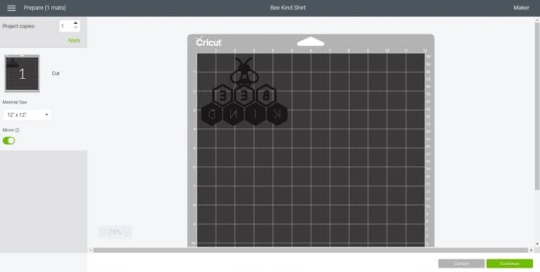
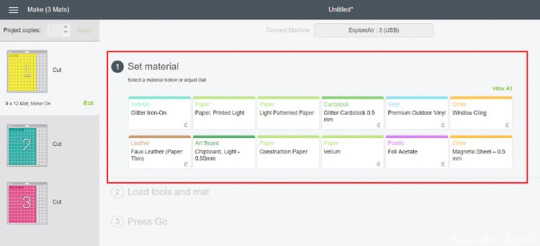
As you’ll have to print this image, ensure that your Cricut machine will recognize it as a printable file and not a file to be cut. To ensure this, choose your image and hit the Flatten option beneath the Layers Panel.
After that, your Cricut machine will show a preview of the image. When you’re ready, just click the Make It button. And now, this design will go through a Print Then Cut feature. To access it, hit the Continue button.
In the next step, you’re allowed to send that image to your inkjet printer and select the paper type you want to print on. I prefer specialty matte. You can select one based on your printer. Get ready with your printer and insert the Siser EasyColor DTV into it.
Step 2: Start Cutting the Siser EasyColor DTV
In the following step, you’ll need to cut your material. On your Cricut machine, select your material as Premium Vinyl Permanent Glossy and set the pressure to More using the drop-down menu.
Next, load your vinyl material on the Cricut mat at the left-side corner and make it stick to the mat using a brayer tool. Now, load the mat with vinyl into the Cricut machine and hit the Play button to allow your Cricut to cut the image. Continue with the steps to learn how to use Cricut Maker.
Once the cut is done, take off the paper sheet from your mat, turn the mat over, and take the mat away from your DTV. Please note that you don’t have to peel off the DTV from the mat. You can also use a pair of scissors to cut the design if necessary.
Step 3: Weed Out the Excess Vinyl
Once you cut your design, you should weed out the excess vinyl from your design. Do this carefully, so that your design doesn’t ruin. This step will add more detail to your project.
Step 4: Cover Your Image With a Mask
Moving forward, cut your mask to the size of your design. Now, take off the transparent film from the mask and then apply the mask alone to your DTV image. Moreover, ensure that the final design is flat and that there are no air gaps between the mask and the design.
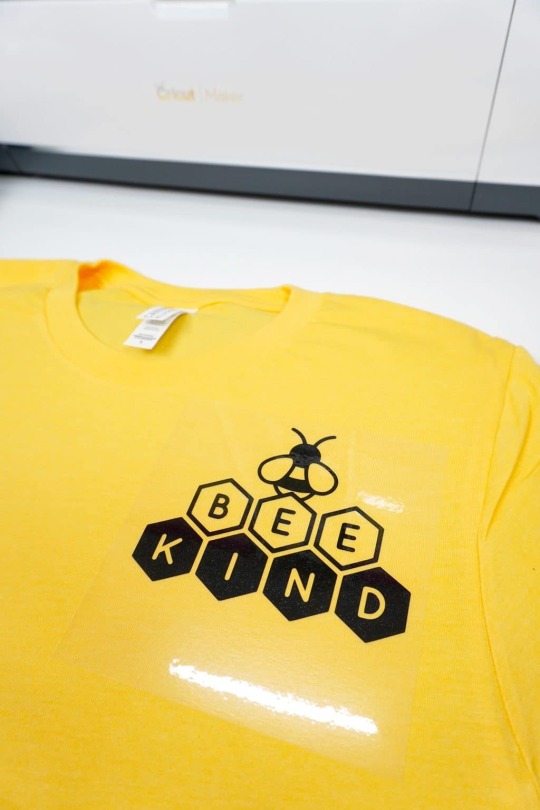
Step 5: Transfer Your Design to Apparel

This design is so amazing; I love making it. This is how to use Cricut Maker to reap good results. All the best to all of you who are keen to make something unique and precise.
FAQs
How to Use a Cricut Maker to Make Shirts?
To create a shirt with your Cricut cutting machine, you’ll need to use the Cricut Design Space and a heating press to create a desired design. Get started with the Cricut software, make a design, resize it, and then print and cut it with your Cricut machine. Now, weed away the excess vinyl, and then preheat it with your Cricut heat press, and give a final heat to it.
Which Heat Press Is Suitable for Making an Iron-on Cricut Project?
As there are many options to create an iron-on Cricut project, you can use any of them depending on your requirements. So, the common machines are Cricut EasyPress, Cricut EasyPress 2 & 3, Cricut EasyPress Mini, etc. You can utilize a heat press to transfer the design to your apparel effortlessly.
Can You Use Regular Iron With a Cricut Machine?
Yes, you can. A regular iron is also effective for your minimalist iron-on projects. However, a regular iron may not deliver the results you want and not give a permanent design. Overall, we can say you can use a household iron for normal, sensitive projects but not for complex projects.
Read more: install cricut design space app
cricut.com/setup
cricut.com/setup mac
Source: How to Use Cricut Maker
#How to Use Cricut Maker#How to use cricut maker for beginners#how to use a cricut maker to make shirts#cricut.com/setup mac#cricut explore 3#www.cricut.com setup login#cricut design space#cricut explore air 2#cricut.com/setup#cricut new machine setup#cricut.com setup mac#cricut setup on computer
0 notes
Text
What are Smart Materials for Cricut? [Top 5 DIY Craft Tools]
Since the latest versions of Maker & Explore have been launched, all the crafters are looking for one question, “what are smart materials for Cricut?” However, the answer to this question can be easily understood. These clever cutting materials are designed and are directly fed inside the Maker & Explore machine without requiring a mat. Various versions of these cutting machine materials exist, such as Smart Vinyl, Iron-On & Smart Paper Sticker Cardstock.

Apart from that, they have allowed the creators to dream outside by cutting a single image or repeated image up to 12 ft (3.6m) in one go. It means no slicing and dicing the extra-long banners, wall decals, etc. The Cricut roll holder also keeps these materials organized for precise cuts. Learn the best smart materials for creating customized projects from this blog.
1. Matte Metallic Smart Vinyl- Permanent (3 ft)
Equally important, you can add immediate sophistication to big or small projects through this metallic effect. In the presence of this permanent smart vinyl, it isn’t a big task to create some sort of fashion decal for a mug. As per the designers, this permanent smart vinyl is ideal for all outdoor projects.
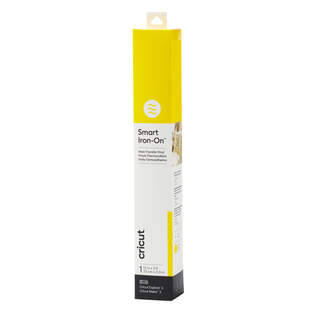
2. Smart Iron-On (3 ft)
Under the catalog of what are smart materials for Cricut, with the smart iron-on, you can carry your creativity along with you anywhere. This substance works perfectly on a wide array of materials and lasts up to 50+ washes. Moreover, the crafters prefer this material by giving little personality to T-shirts, jeans and other garments.
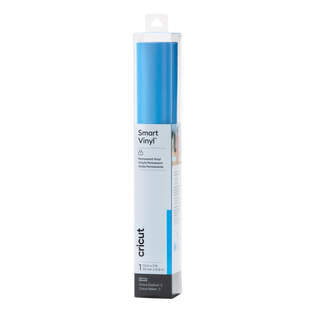
3. Smart Vinyl-Permanent (3 ft)
Furthermore, with smart vinyl, you can quickly make your personalized craft with the load & go button. Moreover, creating birthday banners or other labels has become quite easy, leaving a big impact. On the contrary, this vinyl comes with a matte finish look and a weather-resistant outdoor facility.
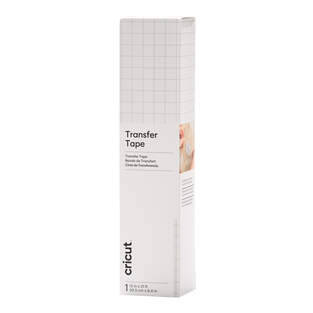
4. Transfer Tape (21 ft)
Among the smart materials for Cricut, the transfer tape has its individual importance. Through this, the user can shift the customized vinyl to various surfaces easily and precisely. Other than that, it is specially designed for some important materials for creating crafts, such as custom decals, labels, decor etc. Moreover, this isn’t recommended for glitter or shimmer vinyl.
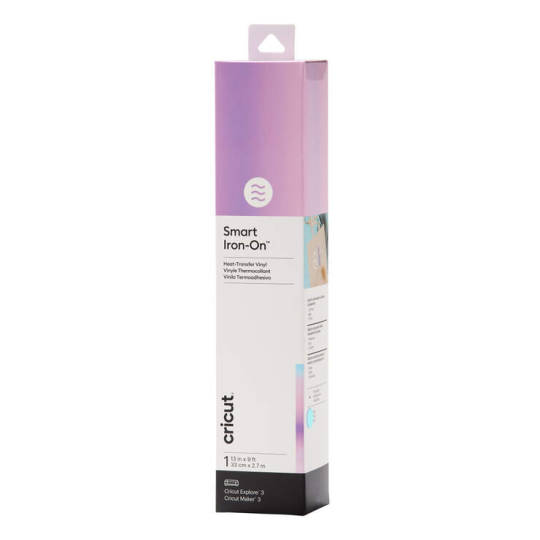
5. Smart Iron-On Holographic (9 ft)
Besides what are smart materials for Cricut, these holographic materials permit crafters to add glimmer and shine to the existing project. This material operates without the cutting mat during the cutting process. In addition, you can add more shine to projects compared to earlier times.
Frequently Asked Questions
Question: How to Prepare Smart Materials for Cutting?
Answer: Read the steps to know about the preparation process:
Align the loaded materials to the machine with the left material guide and slide under the mat guides and up against the rollers.
After that, press the Load button, trim the excess material and save it for future uses.
Try to trim the material straight across rather than at an angle if you plan to load it without the mat.
Question: How Do Cutting Machine Smart Materials Work?
Answer: The existing software will prompt you when it is time to load the respective materials and how much quantity. Followed by this, your machine will measure, ensuring the materials loaded are enough for the project. After that, the machine sensors will cross-check the materials fed inside it and will ask for the allowance. You’ve to wait till the trimming process comes to an end.
Question: What are Smart Vinyl and Its Types?
Answer: The brand-new smart vinyl comes in a huge range of colors, effects and material lengths from 3 ft to 75 ft. However, it has been categorized into two types: Permanent & Removable variables. If you want vinyl that lasts for many years indoors & outdoors, then choose permanent vinyl, as it has a longer time duration. However, if you love to display your creativity, then opt for removable vinyl, which can be easily removed and doesn’t damage the wall.
#What are smart materials for Cricut#Cricut.com/setup#design.cricut.com#cricut explore air 2#cricut design space login#cricut design space#cricut setup
2 notes
·
View notes
Text
How to Do Cricut Maker 3 Setup: Full Connection Guide
If you are looking for an ultimate crafting machine to make your DIY projects, then Cricut Maker 3 is definitely the one. Cricut machines are one of the best tools for crafting your DIY projects at home. If you are here, reading this blog, that means you are searching for the Cricut Maker 3 setup. You are new to the world of crafting and have bought your first cutting machine, or you have already been using Cricut machines and have updated to the latest machine. In either case, you are going to learn everything you need to know in this blog post.
All about Cricut Maker 3
Cricut Maker 3 is the latest cutting tool in the Cricut Maker series. It has the capability of cutting more than 300+ different materials, including paper, vinyl, cardstock, fabrics, leather, cardboard, balsa wood, and many more. Cricut Maker 3, like other cutting machines, is a good tool if you want to cut and create your designs and projects. With the help of this Cricut machine, you can design almost everything from greeting cards to wooden signs and tote bags. You can design your own T-shirts or other clothes as well.
Before looking for a Cricut Maker 3 setup, you will need stable internet and an operating system like a computer or mobile device to use the Design Space app. This machine is great for making your own projects, but if you want, you can use it for business purposes as well.
What Do I Get in the Cricut Maker 3 Box?
In the box, almost all the needed equipment is given. You can use them to craft your project. But if you want extra tools for your project, you can buy them online from Cricut’s official website or any third-party site. When you open the box, these are the items you get in it:
Cricut Maker 3
A USB cable
Power adapter
Fine point blade
Some sample materials
Free trial of the Cricut Access plan
Cricut Maker 3 Setup on Your Device
Setting up a Cricut cutting machine is simple and easy. All you have to do is follow the basic steps in the section below. Once you unpack your machine and have checked that all the necessary items are there, you are ready to go for setup. You should download the Cricut Design app from the device you are using. Carefully follow the instructions written below, and your machine will be setup:
Once you finish unboxing the machine, you must put it in a safe place; make sure the place’s surface is flat.
Next, plug the machine into the wall socket using the power adapter that comes in the box.
Now, you have to connect the machine to your computer or mobile using a USB cable or Bluetooth.
After that, download the Design Space app.
Then, you will see New Machine Setup in the app.
Moreover, select the Cricut model from the list.
Follow the instructions displayed on the screen.
Finally, you can use your Cricut cutting machine for crafting.
Download Cricut Design Space on Your Device
Downloading the Design Space is crucial for the Cricut Maker 3 setup. But you do not have to worry as it is easy. You can simply do it if you follow the instructions well. By this time, I am sure you have setup your machine and connected your phone/computer to the internet. Now, you should open any browser and go to the official website of Cricut. You can download the app from there.
If you are already a user of Cricut and have made an account, you just need to sign into the app. In case you are new, you will need to create a new account. This is also an easy task, and you can do it by following these easy steps:
First, go to the browser on your device and open design.cricut.com.
Next, click Download so that the app can be downloaded.
In the case of a computer, go to the Downloads folder.
Now, click twice on the file to initiate installation.
In the end, open the installed file and sign in.
In case you are a new user, go for the option of Sign Up for creating an account.
Conclusion
In short, the Cricut Maker 3 setup is not a difficult task. You just have to do a few things, and you are ready for your crafting. In the beginning, you open the box and check for all the equipment. Then, you begin to setup the Cricut machine, which you can do by following the steps written up there. In the end, you download the Design Space application and sign in to your Cricut ID. Once done, you are ready to start your crafting journey.
0 notes
Text
Fun and Easy Cricut Maker 3 Projects for Beginners [2024]
Cricut Maker 3 projects for beginners are not a big deal. You might be wondering why I am making this sentence with so much confidence. Well, it comes when you have done a lot of crafting over the years. And when you are an expert in a particular area, it is easy to say things like — “it’s not a big deal; it’s just a piece of cake!”
Yes, dear crafters, experience indeed speaks! However, gaining such an experience is not just a one-day process. I have created many projects, tried all the Cricut models, and know how to set up and use them. This is really a challenging learning process. I have spent days and nights on this valuable learning.
Today is the day I am writing this blog and telling you to try some crafts that I have made on Cricut Maker 3. Let’s delve into this guide to learn more.
1. Cake Topper
Every year, we celebrate a birthday, and decorating a cake is a very important task. But there are some Cricut Maker 3 projects for beginners that they can try to elevate this birthday celebration. Yes, you heard it right! It is a simple cake topper.
Yes, this is one of the easiest projects I have ever created using my Maker 3 machine. So, without any further delay, add this Cricut Maker 3 project ideas to your list.
2. T-shirts
Now, you can also make a personalized shirt using a robust machine like Cricut Maker 3. Creating a shirt on Cricut is a piece of cake. Just select a design on the Cricut Design Space app and start cutting it on your trusty Maker 3 machine. The machine is advanced enough to cut every inch very precisely, making it look like a professional design on your shirts.
3. Greeting Card
Although technology has changed drastically in recent years, people still prefer to try old things, such as greeting cards. I made this greeting card on Cricut Maker 3, especially for my lovely husband. The Cricut Maker 3 is a versatile machine that can make almost every type of craft.
So, whether you are looking for Cricut Maker 3 projects for beginners or experienced crafters, you can do it seamlessly.
4. Organizing Labels
Now, it’s time to organize your pantry or kitchen. For this, you can make some labels using permanent Smart Vinyl material. Start creating labels for each container in your kitchen. This will help your mom find the right container with the right ingredients.
The best part is that you can try multiple font styles with different sizes. Cricut Design Space has numerous font styles that are available for free. Just go and grab them.
5. 3D Paper Star Candy Box
Are you looking for 3D Cricut Maker 3 projects for beginners? If so, you will need to try this paper candy box. Given the shape of the star, it doesn’t only look beautiful but is also a useful thing for keeping all your sweetie candies.
Although I love paper crafts, they are easy to make and don’t cost too much. Also, when they are three-dimensional in shape, they attract more attention.
6. Wood Sign
In order to make this wood sign, I used a leftover scrap that I found in my husband’s carpentry shop. This silly signboard is perfect for your bathroom. Since I saw many such signs in other shops, I was eager to give it a try myself. Since I have my incredible Cricut Maker 3 machine, I made this bathroom sign.
7. Bookmarks
It is not the first time I made this bookmark; however, making it out of leather is something I have tried for the first time. Besides, I have used the same machine multiple times to make multiple things. Since this is a leather material, I have to use an Engraving tool to engrave the words. Also, to make the cut, I used a knife blade.
8. Coffee Mug
The coffee mug is one of the best Cricut Maker 3 projects for beginners, as it can be given as a gift. I love making this craft, and the result is quite satisfying. If you want to try this, you will also want a Cricut Mug Press so that you can transfer your infusible ink onto your mug.
However, the cutting design can be easily done on your Cricut Maker 3 machine. And trust me, Maker 3 will do its work nicely.
9. Ceramic Coasters
Coasters are an inseparable part of our lives. They are necessary to keep our dining tables clean. And who does not want to create something easy and creative, especially when your guests come to your home for dinner? With personalized crafters, you can make people feel more special and loved. So, what are you waiting for? It’s time to get started!
FAQs
Question 1: Can I make greeting cards on my Cricut Maker 3?
Answer: Yes, you can make greeting cards on your Cricut Maker 3 to make greeting cards using a Cricut card mat and cards. With its adaptive tool features, you can easily make cuts and engrave and emboss your materials. For Cricut, it is relatively easy; robust machines like Cricut Maker 3 are specially designed for it.
Question 2: Can Cricut Maker 3 cut wood?
Answer: Absolutely, yes! You can cut all types of wood materials made for crafting. Cricut Maker 3 is designed to cut delicate and tough materials easily in one go. All you need to do is use the right blade and wood. Speaking of the thickness of the wood, Maker 3 can cut up to 2.4mm thick wood in no time.
Question 3: Can I cut 3mm plywood on Cricut Maker 3?
Answer: 3mm thickness is too much for a Cricut Maker 3 machine. Hence, you can’t cut your plywood with this thickness. The suitable thickness that you can cut for wood is 2.4 mm. So ensure your wood thickness is within this range, not more than. Also, don’t try to cut without checking the compatibility of the machines; if it doesn’t support it, don’t cut it.
Source: Cricut Maker 3 projects for beginners
Visit here For More Information: Cricut.com/setup
You tube
Twitter
Pinterest
#Cricut Maker 3 projects for beginners#Cricut.com/setup#Cricut Explore AIr 2#Cricut maker 3#software technology
0 notes
Text
How to Use a Cricut for Shirts: Quick and Easy Guide
Hey crafters! If you are here to learn how to use a Cricut for shirts, this is the right blog for you. Recently, I finished creating a shirt, so I decided to include it in this blog. It might help crafters understand how to make shirts with Cricut, including Cricut’s use.
I created this shirt for my 8-year-old son, who needed a new T-shirt as a gift. He asked for it and wanted me to make it using my Cricut machine. Also, he is always around whenever I create some crafts on my Cricut. Seeing this, he asked me if I could make a shirt using a Cricut.
When I finally started creating shirts, I noticed that I had run out of many essential supplies. Hence, I needed to buy them. I have already mentioned the essential supplies in this blog for you to consider. Let’s delve into this blog to learn how to use a Cricut machine to create a shirt.
Step 1: Materials and Tools Required
Without essential supplies, you would not know how to use a Cricut for shirts. Therefore, I have mentioned the materials and tools below:
Materials
Tools
Tip: You should wash the shirt before applying vinyl on it.
Step 2: Add Your Shirt Design
In this second step, you need to add or upload the shirt design. From Cricut Design Space, you have to find the design that you like.
Didn’t find anything? Chillax! You can create some designs on Design Space. See, if you want to add some text, then I don’t think adding text will be a big deal for you!
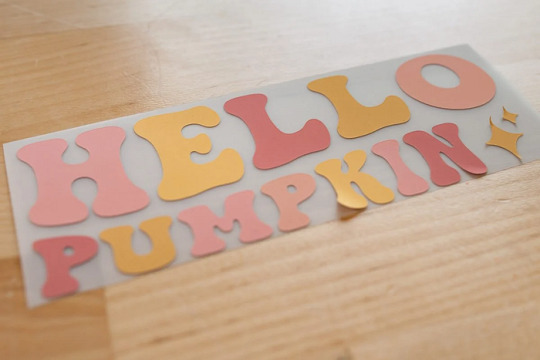
All you need to do is go to the Text option and type whatever you would want to add. Here is the design I created for my son’s shirt.
Step 3: Cut the Design on Iron-on Vinyl
Here, I am finally going to show you how to use a Cricut for shirts. Grab your machine and set it up if it is not set up. Afterward, you will need to follow the steps below.
1. Load the Iron-on Vinyl on the Cutting Mat
Here, you can use LightGrip (Blue) cutting mat or StandardGrip (green). Make sure you need a mat that has a little bit of stickiness.
2. Place the Vinyl on the Mat
Now, place the vinyl onto the mat using the brayer tool. Ensure it is adhered properly to the mat. But do you know which side of iron-on vinyl should be up? You need to put the shiny side down on your cutting mat.
3. Start Cutting Your Material
Now, you have to hit the Load button so that you can load the mat into the machine. Next, you can send the design file to your Cricut cutting machine.
To send the file to your machine, follow the steps below:
Afterward, you have to click the flashing Go button to begin cutting. Finally, when cutting is done, you have to weed it using a weeding tool or hand.
Once the design is weeded, you have to place it over the shirt.
Note: If using Cricut Explore Air 2, you need to rotate the wheel to Custom, and then you have to select the drop-down menu.
Step 4: Apply the Vinyl
Now, you need to use Cricut EasyPress to transfer the vinyl onto the shirt. For this, you have to setup your workplace. For this, you need to place the EasyPress mat on a flat surface and then place the shirt on it.
Preheat your shirt and then place the material on the shirt. Again, set the recommended temperature for your shirt and place it over it.
Finally, you did it!
This blog might have helped you learn how to use a Cricut for shirts. If yes, start creating it today in no time!
FAQs
Question 1: Why is my iron-on not sticking to my shirt?
Answer: Several reasons can interfere with iron-on’s ability to adhere to your shirts. However, you can easily remove those issues if you want your iron-on to stick properly to your shirt. Read the following reasons to eliminate the problem:
Question 2: Which Cricut machine is the best for shirts?
Answer: I would say Cricut Maker 3 is the ultimate cutting machine that will cut all types of vinyl easily to make shirts. Also, the incredible feature of Maker 3 allows users to create extraordinary shirts. This machine cuts things really fast, making your cutting process 2x faster than its predecessor. In a nutshell, a Cricut Maker 3 is the best machine for shirts.
Question 3: How do you get designs for shirts?
Answer: There are many pre-designed projects or templates available on Design Space. You can access them anytime for free. This is the best thing I love about my Design Space. You can just find some of the projects so that you can add them to the Canvas and create them in no time. In short, download the Cricut app and discover the various opinions or designs in one simple click.
Final Words
Through this blog, I have explained how to use a Cricut for shirts quickly. The blog explains two things in one. First, I learned how to make shirts with Cricut and how to use this machine to make extraordinary shirts. I am pretty sure that you can create your own shirts in less time than you think. The process is easy, and I have covered everything in 4 easy steps. So what are you waiting for? Create today and reveal your hidden talent.
Visit: cricut.com/setup
www.cricut.com setup login
install cricut design space app
cricut create connect to computer
setting up your cricut maker
cricut setup create account
cricut new product setup
cricut setup on computer
cricut install setup
cricut setup maker
create cricut account
Source: https://designspacecricut.wordpress.com/2024/03/04/how-to-use-a-cricut-for-shirts-quick-and-easy-guide/
#install cricut design space app#install cricut design space#cricut setup#cricut com setup#www.cricut.com/setup login#cricut.com/setup#cricut.com setup mac#cricut cut setup#cricut setup download#cricut install setup#cricut new product setup#cricut create connect to computer#cricut setup maker#cricut new machine setup#setting up your cricut maker#connecting cricut to computer#cricut device setup
0 notes
Text
How to Make a Cricut Harry Potter Shirt: Full Tutorial

My daughter loves fantasy characters, and she will celebrate her 18th birthday next weekend. I will throw a theme party to make her day more unique. Since she is a crazy fan of J.K. Rowling novels, I will be decorating the entire area with Cricut Harry Potter crafts. I know it would be hard for me to create so many items for her birthday, but with a Cricut machine, all my work will be completed quickly without any worries.
Tons of DIY projects can be easily made from any Cricut machine, but I will give each guest a customized shirt as a token of love. To do this project, I will use my Cricut Maker machine and other necessary supplies. They will help me choose the outfit according to my preference.
Step 1: Creating a Design on the Cricut Software
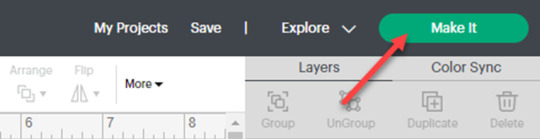
Initiate the process by signing to Design Space and opening your canvas. Now, choose the Text tool and write your text inside the box. After finishing the text, select it and edit its font, color, size, and style. Then, go to the Line Space dropbox and adjust the space between the lines. Following this, click the Ungroup, select the text, and move it to the palace where you exactly want it.
After ungrouping your Cricut Harry Potter text, you need to tick the Weld tool to finish the distance between the words. You will find this tool at the bottom right-hand side of your canvas. Next, tap the Make It option to arrive on the preview page instantly.
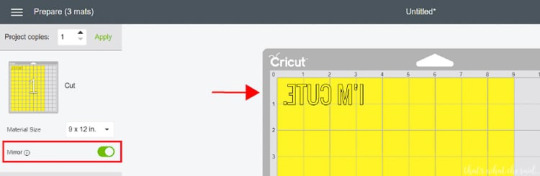
When you arrive at the preview page, enable the Mirror toggle on the screen’s left side. After enabling the toggle, you will notice that your text will flip horizontally and then hit the Continue tab.
Step 2: Cutting Your Shirt Design
Following this, you must tap the Browse All Materials option, select the compatible material, and tap the Done box. Remove the plastic sheet from your Cricut cutting mat to add to the process. Since we are using the Shimmer material, place the shiny side on the top of your mat. You must equally spread the material on the cutting mat with your hands or using the brayer tool.
Also, switch on your Cricut Maker and slide your Cricut mat inside it. After doing that, press the Go button, showing that the machine is ready to cut down the material. Now, unload the inserted mat and remove the Shimmer sheet from the mat.
To remove the Cricut Harry Potter design pieces, take your weeding tool and remove them one by one without any hurries. While using the tool, ensure that your hands don’t shake, and gently hold the item. Once you are done, remove all the pieces and keep them at the corner of a table.
Step 3: Preparing Your Cricut EasyPress Mini
At this time, set the temperature & timing on your Cricut Heat Press and let it pre-heat for a few seconds. Until then, take your shirt blank and clean it with a lint roller to remove any dirt or small materials. After that, place your blank on the EasyPress mat and run your EasyPress Mini on the shirt to remove any creases. You need to repeat the same steps till you’ve covered the blank.
Step 4: Showing Your Cricut Shirt
After properly ironing the blank, take the measurement of your shirt and place your design two inches down the collar. With the proper placement of the design, take your EasyPress Mini and move it all over the design with a little pressure. You are advised to perform the whole process again to place the Cricut Harry Potter design on the blank properly.
Then, you need to wait for a few minutes and let the design set properly in its respective place. After the time is over, slowly remove the transfer sheet, and you will get your favorite fictional character customized shirt.
Final Words
Creating such a fun, creative, and easy project within a few minutes was so much fun. I got the chance to teach you how creative you can be by utilizing basic Cricut crafting tools. You can also make other Cricut Harry Potter crafts for events or occasions. If you are looking forward to it, then give it a shot by starting your own business and selling those crafts with your neighbors.
Frequently Asked Questions
What Are Some Tips to Remember While Using Cricut EasyPress Mini?
Before using the EasyPress Mini, all the DIYers need to follow some guidelines:
Set the temperature & timing depending on the material type.
Place any blank on the EasyPress Mini mat so that it doesn’t burn.
Always hold the press with its handle, and don’t touch it until it is cool.
What Projects Can Be Done in Cricut Design Space?
The various customized Cricut Harry Potter projects that the Cricut Design Space app can make are as follows:
Deathly Hallows earrings
Slytherin bookmarks
Dobby, The Elf T-Shirt
Hogwarts mail holder
Accio coffee mug
Harry Potter coasters
Does Cricut App Offer Harry Potter Designs?
It’s good news for all those crafters who are big fans of Harry Potter: now they can find the franchise design on the Cricut app. From now on, they won’t have to convert the design from .svg files and then upload it into the gallery. The designs have been given different names:
Witty Witchcraft
Magical Mischief
Symbol Revival
For More Information Visit: www.cricut.com/setup login
design.cricut.com
Download Cricut Design Space
Source: cricut harry potter
#cricut harry potter#cricut design space download#cricut design space app#cricut design space login#cricut design space software#install cricut design space app#cricut machine setup#cricut maker setup
1 note
·
View note
Text
How to Make Custom Shirts With Cricut: A Step-by-Step Guide
I am obsessed with my Cricut machine and create projects on it every day. You can call it my hobby or my big passion for crafting. Recently, I have made dozens of custom shirts with my Cricut Maker machine, and you can create some on your own, too. Following this guide, your guesswork will be reduced to zero, as I will share some of the easiest steps on how to make custom shirts with Cricut.
If you are interested in my tutorial, I would recommend you continue it till the end so as not to miss anything important. I have been creating unique stuff with my Cricut for more than 6 years now; it has been a beautiful journey for me.
Whether you are a beginner or a well-trained Cricut user, this post will help you get some ideas for starting something new. I hope you found this blog helpful and that you will come back for more Cricut-related blogs like this one. Let’s start learning how to design shirts with Cricut for beginners.
Which Is the Best Cricut for Making Shirts?
When you are making a custom shirt, you will have this doubt about which machine to choose. My answer would be to choose anyone you have. Whether you have Cricut Maker, Joy, or Explore, you can choose anyone with your iron-on vinyl to make a perfect custom shirt.
However, you will need to insert the fine point blades to cut this type of vinyl. I hope you got an answer to it. Let’s move forward with this guide on making your custom shirt.
How to Make Custom Shirts With Cricut Machine?
When you are clear about which machine to use and what design you wanna make, let’s get started with my steps. Well, you will need a few things before you move your hands on the desktop. So, gather up all the listed things here.
Cricut Explore Air 2
EasyPress 2
EasyPress mat
Shirt apparel
Weeding tool
Brayer tool
Scissors
Standard mat
Premium vinyl
Are you ready with all these? So you’re good to go. When you are ready, head to your Cricut Design Space and show some of your creativity. And follow all the steps carefully.
Step 1: Go to the Cricut Design Space App
In the first step, you should go to your Design Space and pick a design to print on your shirt. As the Cricut app is full of ready-to-make designs, fonts, images, and templates, you won’t have to hustle to make a design. I am using my Explore Air 2 machine; you can use a machine you’re familiar with.
Step 2: Adjust Your Design
Once you are ready with your final design, you can take some time to make that fit for you. For example, you can change the design’s color. On the Cricut Design Space canvas, you will get a few options on the right-hand side, from where you can choose your favorite color for the shirt.
Step 3: Change Vinyl Color
Here, you need to change your vinyl color as your shirt’s color may not be a good match with the vinyl’s color. In order to keep the color vibrant and not blend them, you have an option to change the color of your iron-on vinyl. To do this, you should click on the Layers option on the canvas. After that, you can click on the white box with the Layer option and pick a color for your vinyl.
Step 4: Final Your Design
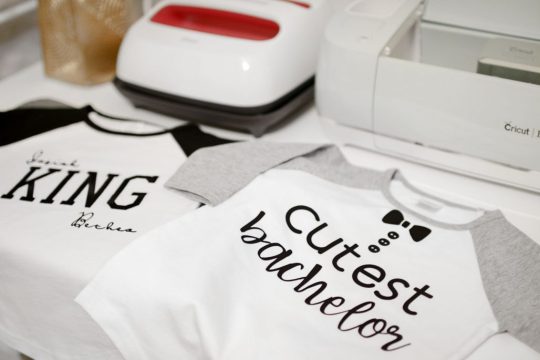
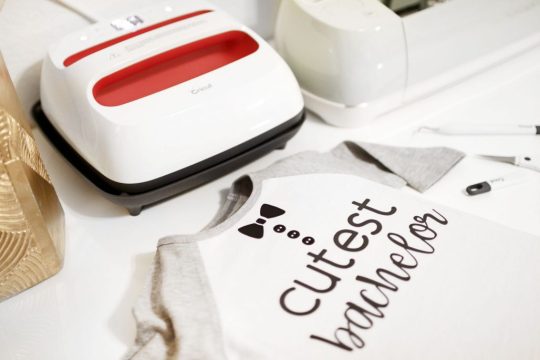
If you find the color combo not as expected, you can change it. Once you have done all the updates, you are ready to save your design. You need to hit the Save button along with the name of your project to remember what this design is about. I am making a design that says “Cutest Bachelor.” Let’s check more steps on how to make custom shirts with Cricut.
Step 5: Load Your Material (Iron-on Vinyl)
In this step, you are ready to cut your project with your special Cricut machine. Don’t forget to load your vinyl on a Cricut cutting mat and then into the Cricut machine. Once you are done, you can start the cutting. Also, select the correct size of your mat on your machine so that your design fits the cutting mat. And the most important thing is to align the iron-on vinyl correctly to get an expected cut.
Step 6: Cut Your Design
When your design is ready, and you have checked all the settings, you can allow your Cricut machine to perform a cut for you. Once you hit the Go button on your machine, it will show you a preview of your final design. If you are satisfied with it, click the Continue button to get a cut. Once the design is fully cut, unload your cutting mat.
Step 7: Weed Out the Excess Vinyl
When you have a cut in your hand, take a weeding tool and take out excess vinyl to make the design clear and ready to be ironed. You can use your hands too, but a weeding tool is more convenient. Now, you have finally come to the main part of how to make custom shirts with Cricut.
Step 8: Ready Your EasyPress
When your design is ready, you can set your Cricut EasyPress to cotton or linen to get the desired results. So, now you need to put your weeded design on the shirt apparel and use a Cricut EasyPress 2 to heat it. However, before that, you must use a brayer tool to remove lint and fibers from the shirt’s fabric. Once you do that, for the next steps.
Step 9: Preheat Your Shirt
When your apparel is ready, use your EasyPress to preheat it for 15 seconds with moderate pressure to remove the moisture and wrinkling. For the final heating, you should consider a Cricut Heat Guide that will help you find the best setting for your design. After that, use the temperature and pressure accordingly.
Step 10: Apply Heat to Your Shirt
And the last step is to just apply the heat as the Cricut guide suggests. Use a towel to place on your vinyl design, and apply heat for 30 seconds. Using a towel will prevent your iron-on from getting damaged. Viola, you have just designed a perfect custom shirt with your Cricut.
Conclusion
You were all wondering how to make custom shirts with Cricut. And with my blog, you might have found this process a bit easier than before, I guess. Don’t worry; if you follow the instructions carefully, I can bet you can make a fabulous shirt.
However, be mindful of the heating setting as it can ruin your project and waste everything. It’s always better to use a household iron while making your first project. When you get familiar with the process, you can take one step ahead with an EasyPress.
Source Url :- how to make custom shirts with Cricut
Visit here for more Information:- · cricut design space log in
· cricut machine
· cricut machine setup
· how to make custom shirts
· step-by-step guide
· install cricut design space
#how to make custom shirts with Cricut#CRICUT DESIGN SPACE LOG IN#CRICUT MACHINE#CRICUT MACHINE SETUP#STEP-BY-STEP GUIDE#INSTALL CRICUT DESIGN SPACE
0 notes
Text
How to Make Custom Shirts with Cricut: A Step-by-Step Guide
I am obsessed with my Cricut machine and create projects on it every day. You can call it my hobby or my big passion for crafting. Recently, I have made dozens of custom shirts with my Cricut Maker machine, and you can create some on your own, too. Following this guide, your guesswork will be reduced to zero, as I will share some of the easiest steps on how to make custom shirts with Cricut.
If you are interested in my tutorial, I would recommend you continue it till the end so as not to miss anything important. I have been creating unique stuff with my Cricut for more than 6 years now; it has been a beautiful journey for me.
Whether you are a beginner or a well-trained Cricut user, this post will help you get some ideas for starting something new. I hope you found this blog helpful and that you will come back for more Cricut-related blogs like this one. Let’s start learning how to design shirts with Cricut for beginners.
Which Is the Best Cricut for Making Shirts?
When you are making a custom shirt, you will have this doubt about which machine to choose. My answer would be to choose anyone you have. Whether you have Cricut Maker, Joy, or Explore, you can choose anyone with your iron-on vinyl to make a perfect custom shirt.
However, you will need to insert the fine point blades to cut this type of vinyl. I hope you got an answer to it. Let’s move forward with this guide on making your custom shirt.
How to Make Custom Shirts with Cricut Machine?
When you are clear about which machine to use and what design you wanna make, let’s get started with my steps. Well, you will need a few things before you move your hands on the desktop. So, gather up all the listed things here.
Cricut Explore Air 2
EasyPress 2
EasyPress mat
Shirt apparel
Weeding tool
Brayer tool
Scissors
Standard mat
Premium vinyl
Are you ready with all these? So you’re good to go. When you are ready, head to your Cricut Design Space and show some of your creativity. And follow all the steps carefully.
Step 1: Go to the Cricut Design Space App
In the first step, you should go to your Design Space and pick a design to print on your shirt. As the Cricut app is full of ready-to-make designs, fonts, images, and templates, you won’t have to hustle to make a design. I am using my Explore Air 2 machine; you can use a machine you’re familiar with.
Step 2: Adjust Your Design
Once you are ready with your final design, you can take some time to make that fit for you. For example, you can change the design’s color. On the Design Space canvas, you will get a few options on the right-hand side, from where you can choose your favorite color for the shirt.
Step 3: Change Vinyl Color
Here, you need to change your vinyl color as your shirt’s color may not be a good match with the vinyl’s color. In order to keep the color vibrant and not blend them, you have an option to change the color of your iron-on vinyl. To do this, you should click on the Layers option on the canvas. After that, you can click on the white box with the Layer option and pick a color for your vinyl.
Step 4: Final Your Design
If you find the color combo not as expected, you can change it. Once you have done all the updates, you are ready to save your design. You need to hit the Save button along with the name of your project to remember what this design is about. I am making a design that says “Cutest Bachelor.” Let’s check more steps on how to make custom shirts with Cricut.
Step 5: Load Your Material (Iron-on Vinyl)
In this step, you are ready to cut your project with your special Cricut machine. Don’t forget to load your vinyl on a Cricut cutting mat and then into the Cricut machine. Once you are done, you can start the cutting. Also, select the correct size of your mat on your machine so that your design fits the cutting mat. And the most important thing is to align the iron-on vinyl correctly to get an expected cut.
Step 6: Cut Your Design
When your design is ready, and you have checked all the settings, you can allow your Cricut machine to perform a cut for you. Once you hit the Go button on your machine, it will show you a preview of your final design. If you are satisfied with it, click the Continue button to get a cut. Once the design is fully cut, unload your cutting mat.
Step 7: Weed Out the Excess Vinyl
When you have a cut in your hand, take a weeding tool and take out excess vinyl to make the design clear and ready to be ironed. You can use your hands too, but a weeding tool is more convenient. Now, you have finally come to the main part of how to make custom shirts with Cricut.
Step 8: Ready Your EasyPress
When your design is ready, you can set your Cricut EasyPress to cotton or linen to get the desired results. So, now you need to put your weeded design on the shirt apparel and use a Cricut EasyPress 2 to heat it. However, before that, you must use a brayer tool to remove lint and fibers from the shirt’s fabric. Once you do that, for the next steps.
Step 9: Preheat Your Shirt
When your apparel is ready, use your EasyPress to preheat it for 15 seconds with moderate pressure to remove the moisture and wrinkling. For the final heating, you should consider a Cricut Heat Guide that will help you find the best setting for your design. After that, use the temperature and pressure accordingly.
Step 10: Apply Heat to Your Shirt
And the last step is to just apply the heat as the Cricut guide suggests. Use a towel to place on your vinyl design, and apply heat for 30 seconds. Using a towel will prevent your iron-on from getting damaged. Viola, you have just designed a perfect custom shirt with your Cricut.
Conclusion
You were all wondering how to make custom shirts with Cricut. And with my blog, you might have found this process a bit easier than before, I guess. Don’t worry; if you follow the instructions carefully, I can bet you can make a fabulous shirt.
However, be mindful of the heating setting as it can ruin your project and waste everything. It’s always better to use a household iron while making your first project. When you get familiar with the process, you can take one step ahead with an EasyPress.
#how to setup cricut maker#How to design shirts with cricut for beginners#Best cricut for making shirts#How to Make Custom Shirts with Cricut
0 notes
Text
How to Use Infusible Ink Pens With Cricut: A Complete Guide
Cricut infusible ink pens and markers are just awesome. I use them to create my iron-on projects like custom T-shirts for myself and my sweet little child. Well, you can make multiple things with these Cricut products. It’s very easy to use and gives a well-finished project in the end. Its color never fades and always provides shiny, vibrant, and colorful crafts. If you are also a crafter and want to learn how to use infusible ink pens with Cricut, then stay with me till the end of this blog to learn in depth.
I have done dozens of iron-on projects with my tiny Cricut Joy machine and infusible ink. The ink is so permanent that it won’t fade after washing. I am really excited to share my way of using infusible ink pens and creating lovely projects.
In this blog, you will get everything about Cricut’s infusible products, like how to use them, what type of projects you can make with them, and even some of my tips. So, let’s get started to learn everything.
What Are Infusible Ink Pens and Markers?
Basically, Cricut’s infusible ink pens and markers are simple pens with infusible ink intended to make various heat projects such as designing aT-shirt, tote bag, or any apparel where ink is necessary.
These products can be easily loaded into the clamp of your Cricut machine and draw your favorite designs. You can draw it with your hands, too.
How Do Cricut Infusible Ink Products Work?
Before learning how to use infusible ink pens with Cricut, you should know how it works. Infusible ink works on the principle of sublimation. It sounds a bit complex, but it’s so simple. When you use the infusible ink or marker on a paper, it’s in a solid state, which is its original state.
But, the moment you apply heat to it, it gets transformed into gas. During this process, it infuses your material, and when you remove the heat, it cools down again. And then, after cooling, it will again become solid.
One thing to note here is that these products only work on specific materials, such as poly-based materials, polyester fabric, coasters, and mugs with a poly-coated ceramic coating.
So, if you want to make such projects, Cricut infusible ink pens and markers will be a must-have. Luckily, these amazing accessories are compatible with all types of Cricut machines, including Cricut Maker, Explore, and Cricut Joy.
How to Use Infusible Ink Pens With Cricut Machine?
Here comes the final part of the blog, which I was excited about. You already understand why we use it. And now, you are going to learn the exact procedure through the steps that I am sharing with you now. Before moving to the final steps, let’s see the materials you will need while making your project.
Step 1: Tools and Supplies Required
Here are some of the essential materials and tools you will need for your project.
When you are done with all the materials, it’s time to start the project. So, let’s start the step-by-step guide and learn how to use infusible ink pens with Cricut.
Step 2: Create Your Design
In the first step, you need to put a sheet of laser copy on your cutting mat and then put it into the Cricut machine.
Now, move to your Design Space and choose the size of your design to fit onto your blank. After that, adjust your Linetype to draw and select a Cricut infusible pen or marker. Don’t forget to mirror the design before the cutting procedure.
Step 3: Load Infusible Ink Pens
Now, select your material. In the case of an older Cricut machine, set the Smart Set Dial to Custom. Once done, put your infusible Cricut pen or marker into Clamp A and then hit the Go button to load different colors.
Step 4: Unload the Cricut Cutting Mat
When your design is ready, you can unload your mat and then take out the design from the mat.
When your design is ready, you are ready to apply heat to your apparel using the Cricut EasyPress mat. To get started, first place the sheet of cardstock inside your apparel blank to keep it protected from wrinkles and damage.
Moreover, use a fresh and clean lint roller to remove the lint from the surface of your apparel blank. It will also remove the fiber particles to create a perfect apparel for heat transfer.
Step 5: Preheat Your T-shirt
Then, cover your apparel with the butcher paper. In the next step, you need to preheat your apparel to remove unwanted moisture from it. Also, you need to check the Cricut Heat Guide from time to time to follow the instructions correctly. Apply the heat with a light pressure.
After that, take off the butcher paper and let the apparel cool down. Now, put the design pieces on your apparel facing down. Then, apply the tape on each corner of your design with a Heat Resistant Tape, which will keep your design free from moving.
Step 6: Apply Heat to the Design
Next, put the butcher paper on top of your design. Afterward, select the correct temperature and time settings for your project from the Cricut Heat Guide. Once set, apply heat with the optimum pressure, and when you hear a beep sound, lift away the press and slowly remove the butcher paper.
In the end, let your project cool completely and enjoy it. Finally, you learned how to use infusible ink pens with Cricut, and hopefully, you will try it on your own.
Conclusion
The process was extremely easy, wasn’t it? All you need to do is to gather some accessories and get started with the project. I used an example of a T-shirt, but you can make use of any apparel like a tote bag or anything where ink pens can be used. You can make beautiful creations with your Cricut infusible ink pens and an EasyPress machine. So, get ready to create something and use the Design Space software to make things beautiful and unique.
Visit: cricut.com/setup
design.cricut.com/setup
install cricut design space app
cricut.com setup mac
www.cricut.com/setup login
Source: https://cricuthelp.wordpress.com/2024/02/21/how-to-use-infusible-ink-pens-with-cricut-a-complete-guide/
#cricut.com/setup#www.cricut.com/setup login#www.cricut.com/setup#cricut design space download#cricut project ideas#cricut explore air 2#cricut software app#cricut new machine setup#install cricut design space app#install cricut explore air 2#cricut new product setup#setting up your cricut maker#cricut create connect to computer
0 notes
Text
How to Use Heat Transfer Vinyl with Cricut: Full Guide
How’re you doing, crafters? I am passionate about DIY crafts, and I love making stuff for myself and my husband. Well, he is not into crafting, but whenever I create something for him, he gets super excited. Recently, I designed a shirt for him, and now he wears it everywhere. You can do the same with your Cricut machine. In this blog, I will tell you my way of using HTV. Be with me till the end to learn how to use heat transfer vinyl with Cricut.
I’ll show the exact steps that I use while making interesting DIY projects. I am confident you will understand through my words and all the photos that I am going to share with you here. Get ready with your Cricut machine – you can simply use any of your machines that can do the process cutting. I am using a Cricut Maker, which I really like and use in all my crafts. Here, we are going to create something interesting.
What Tools and Supplies Will You Need to Get Started?
As you know, you will need some materials and tools to get started with your project; I am giving you a list of a few of them to understand what exactly you need to arrange to make a fun project.
HTV
Apparel (I am using a blank T-shirt, you can use tote bags, onesies, etc.)
Cricut machine (I am using a Cricut Maker)
Cricut Easy Press 2 (You can use a household iron, too)
Weeding tool
Standard Grip mat
Easy Press mat
With all these tools and materials, you can create a beautiful project. I will explain the whole process in a step-by-step guide.
How to Use Heat Transfer Vinyl with Cricut Machine?
If you are wondering how I use Cricut heat transfer vinyl for Cricut, here comes the final part of the blog, where you will learn how you can use HTV to create a unique project. Look at the steps and learn my way of using HTV.
Step 1: Use Cricut Design Space
As the first step includes creating a design, you will have to use Cricut Design Space to make a unique shirt design. I am using a cute design which is in an SVG file format. You can choose the design for your craft.
To keep my design simple, I will go for a monochrome design. If you want, you can use multiple colors too. To use your own designs, you can simply upload them to the Cricut software.
Step 2: Modify Your Design for Cutting
When you upload your design or the SVG file on the Design Space canvas, there are a few things you need to modify, such as the colors, layers, and size, to make the design ready for cutting. If you want to check that the image is ready to be cut, click the Make It button in green. It will show you the preview screen.
The Cricut app can automatically adjust your graphics and the text size on the mat to take out the best cutting of the material. Once you are ready with the design, you can allow the machine to cut, and if not, you should hit the Cancel button to move back and modify your design a little more before taking the final design.
To keep your text in one place, you need to attach your shapes in Design Space. In order to change the color of the Layer, you need to select the image or select Layer on the Layers Panel and click on the Square below the Linotype menu on the top to choose a new color.
Step 3: Load the Material and Blades in Cricut
If you want to learn how to use heat transfer vinyl with Cricut, you need to follow all the steps carefully. Before ordering your machine to cut the design, you need to ensure that you mirror your design on the left side of your mat. While cutting the heat transfer vinyl, you will always need to mirror your designs. Once you are all set, hit the Continue button in green.

I prefer using Cricut iron-on vinyl for my projects; you can use any other brand, too. When the machine asks you to select the material, you should select the right one. After that, you will have to load all the blades and your cutting mat into your Cricut machine.
Before placing your mat into the machine, you need to place the HTV on the Standard Grip mat and slightly press down your vinyl to ensure that it sticks well to the mat without wrinkles.
Now, you need to load the fine point blades in Clamp B, and you won’t need any tool in Clamp A while cutting the HTV. After that, you can load your mat into the Cricut machine, align it on the guides, and hit the Load button.
When done, hit the Go button on the Cricut machine to start cutting the HTV material. Now, you are ready to finish up your project and learn how to use heat transfer vinyl with Cricut.
Step 4: Unload the Cricut Cutting Mat
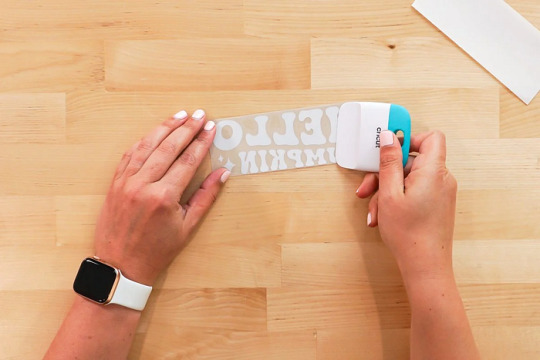
When your cut is finished, hit the Load/Unload button to take your mat off the machine. You can flip your mat and then peel away the HTV while holding the vinyl against the surface to avoid curling the vinyl. Next, weed off the excess of HTV from the design to remove the baby pieces from the design.

Step 5: Preheat Your Shirt
When your design is ready, you will need to preheat your apparel to make a wrinkle-free and lint-free project. A preheat prepares your apparel for the final heating. In the case of regular iron, just move the iron for 15 seconds.
If you are using Easy Press, you can consider the Cricut Heat app to get the right heat pressure and pressure settings for your project. So, I preheat my T-shirt with my Easy Press for about five seconds, and then I apply the HTV design onto the shirt apparel.
Also, the transfer sheet backing of the HTV is usually sticky and can hold your design while you are pressing it. However, if you want to make your design more stable while heating, you can apply heat-resistant tape before pressing it.
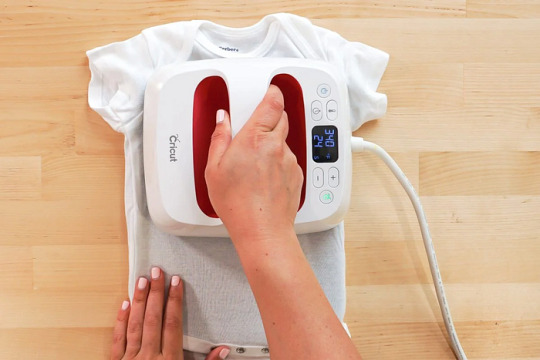
Step 6: Apply Heat to Your Shirt
When your design is finished, you can apply the Easy Press onto your blank apparel with light pressure for just 30 seconds. Then, let it stand for a few seconds until it cools down. When the shirt is cooled down, just slowly peel off the transfer sheet from the HTV.
Now, you have your final design on the shirt. It’s an awesome experience for everybody who wants to make something unique with their Cricut machine. Here is my guide on how to use heat transfer vinyl with Cricut ends, and I am pretty sure that you will try making anything simple and amazing with HTV and Cricut machines.
#Cricut iron-on vinyl#How to Use Heat Transfer Vinyl with Cricut#Cricut Design Space#cricut design space login#cricut design space download#cricut design space app#cricut design space for mac#cricut design space setup#cricut.com/setup#cricut explore 3#cricut accessories#cricut.com/setup mac#cricut.com/setup pc#cricut.com/setup windows#cricut explore air 2#cricut software app#cricut new machine setup
0 notes
Text
How to Use Cricut Iron On Vinyl: A Complete Tutorial
I’ve been using iron on vinyl for Cricut projects for a long time, and I love projects made with this material. For me, working with iron on is always an exciting task! I have created several projects, such as shirts, tote bags, and other personalized stuff. So, if you are here to learn how to use Cricut iron on vinyl, then you have chosen the right tutorial! In this blog, I’ll walk you through the entire process of using iron on vinyl to make a tote bag.
The reason why I chose this project is because it is easy to create, and anyone can grasp it faster. On the other hand, I needed a tote bag for my personal use for a long time. But I couldn’t make it as I was busy with work related to the renovation of my house.
Despite this, I am not sure whether you are familiar with the use of Cricut. Therefore, I will explain each step one by one, from creating a project to applying it to the blank tote bag. Let’s check out this blog to learn more.
Step 1: Collect All the Tools and Supplies
I can’t tell you how important it is to have the right materials or tools while working on this project. Ensure you have the same supplies mentioned below if working on the same projects.
Here’s what I am going to use in my project:
Cricut machine (I am using a Maker machine)
Iron on vinyl
EasyPress mat
Design Space software
Lightgrip or StandardGrip cutting mat
Choose any base materials, such as a T-shirt or tote bag.
Fine point blade
Weeding tool
EasyPress machine
After gathering these items, you can move to the first step towards learning how to use Cricut iron on vinyl. Let’s create a design on Cricut Design Space.
Step 2: Create a Project Design
To create a design, you will need Cricut software, known as Design Space. On this software, you can edit, create, and upload your design in the form of an SVG file. But I am adding a simple text; you can also try the same. Also, there are hundreds of fonts available on the software that you can get easily for free.
Advertisement
Here’s what my design looks like:
Since I wanted a typography-based design, I created it using a text tool from Design Space. In addition, I added a circle instead of a full stop because the size of the full stop with this font style was not appealing. Besides, I merged everything together after adding the circle. As a result, it will remain in one place.
Finally, don’t forget to mirror the text.
Step 3: Choose the Iron On Vinyl for Cricut
After creating the design, I move to the next screen, where I select the specific materials from the list. Here, you will notice the different pressure settings for various iron on vinyl. So, ensure you select the right option. Since I am using Everyday Iron On, I am going to choose Everyday Iron On from the list of materials.
For this project, I am using a Fine-Point blade in my Maker machine. Afterward, I will place my vinyl on the Cricut mat. While placing it, keep the shiny side downside on the mat.
Step 4: Cut and Weed Out Vinyl
Now, let’s shift to how to use Cricut iron on vinyl. For this, you have to first cut your design on vinyl material. To do this, I will load the mat into your Cricut Maker machine. Post this, and click on the Go button on Cricut Maker to start cutting the vinyl.
Once I finish cutting my design, I move on to the next step, i.e. Weeding the iron on vinyl. In weeding, we basically take off the extra material using a certain type of tool called a weeding tool.
Step 5: Apply Your Design on Project
Now, you’ve come to the last step, where I will show you how to use Cricut iron on vinyl. To learn the use of vinyl, I am providing you with the steps given below:
First, I will need to preheat the EasyPress. For this, I have to follow the Cricut Heat Guide to set the exact temp and tap on time as per your material.
Once my EasyPress is heated up, I use it to preheat my tote bag to remove the wrinkles. Here, I have already laid out my tote bag on the EasyPress mat.
Next, I place my design in the middle of my tote bag, ensuring the shiny surface faces up.
Now, I am ready to apply the heat to the iron on vinyl as per the Cricut app’s instructions.
Afterward, I will also apply the heat by flipping my bag over.
Last but not least, I will remove the transfer sheet when it cools down, and that’s done!
Now, my new tote bag is ready. Yay!!! I am excited to use it on my next shopping trip!
Conclusion
In short, I wrote this tutorial on how to use Cricut iron on vinyl, especially for beginners or someone who occasionally does crafting! I understand that working with vinyl material for the first time can be a little intimidating. Hence, I decided to add all the essential points like supply requirements and from start to finish process to use the vinyl. So, if you want to use iron on vinyl for shirts or other materials, then follow the instructions in the Cricut Heat Guide.
FAQs
Question 1: Which side of the iron on vinyl faces down?
Answer: After you have cut the design on an iron on vinyl, make sure the shiny side of your vinyl is facing down towards the blank. We call this shiny side a carrier as it covers the face of the HTV and keeps the cut design pieces in alignment when it is cut and applied to the project.
Question 2: Should I often mirror my iron on vinyl?
Answer: Not often, but in most cases, you need to mirror your vinyl. Especially when you have text, always confirm it by checking your design to see whether it is symmetrical or not. If it is a symmetrical or pattern type of design, then you will not need to mirror it. However, for asymmetrical designs, you must mirror it.
Question 3: Why is my iron on vinyl not sticking to my shirt?
Answer: There are many factors you need to ensure while using iron on vinyl, such as timing, heat temperature, pressure, etc. So, always be sure about these factors. In other words, the timing should not be too short or long. In case you didn’t apply the required pressure, heat, and time, then it may peel off anytime in the future.
Source :- https://newmachineprocess.wordpress.com/2024/01/17/how-to-use-cricut-iron-on-vinyl-a-complete-tutorial/
0 notes
Text
How to Use Cricut Maker for DIY Crafting Magic?
Again, I am ready with my new tool, Cricut Maker. Using this machine, I am going to teach you how to use Cricut Maker to create your own shirt in a couple of minutes. At one time, I was also a beginner, and it was not easy for me to learn it. Somehow, I learned it from the internet. However, it took me a lot of time to gain practical expertise on this tool but believe me, it was worth learning.
Moreover, the machine is very easy to use, and it has a simple setup process, which I have already covered in this blog. My intention in writing this blog is for beginner crafters who have just bought the machine and want to learn how to use it from the beginning. So, are you ready to join me on this journey of learning about the Cricut Maker from the ground up? If yes, let’s get started!
The Process to Setup a Cricut Maker Machine
When I got my new Maker machine, I was too excited to unbox it. But after unboxing, I had to set it up. In the beginning, I was nervous as hell! I really didn’t want to make any mistake that would cause a technical problem. But the Cricut’s guide finally helped me. In addition, the setup is also easy for different platforms like Windows, iOS, Mac, and Android.
To learn how to setup Cricut Maker on computer and mobile device, follow the instructions given below:
First of all, plug the power cable into the back of the machine and connect it to the power source.
Next, you have to connect the machine to the computer. Here, you can either use a USB cord or Bluetooth feature.
Now, open a browser such as Chrome and search for cricut.com/setup.
On the next page, you will need to download the Design Space and then install it.
Here, you can simply follow the instructions available to you on the screen and set up your account.
Finally, you will be notified about the completion of the Cricut setup.
As soon as we complete our setup, we are always prompted to perform a test cut. This is easy, and you can do it by following the steps given to you on the screen.
What Supplies Will I Need to Make a Custom Shirt?
Before I teach you how to use Cricut Maker, let’s discover some of the essential Cricut supplies needed for making a shirt. Here is what you need to make your own shirt on Maker:
Iron-on Vinyl Material
Cotton Blank T-shirt
Cricut Maker (or any other cutting machine)
LightGrip cutting mat (or Standard Grip mat)
Weeding tools
EasyPress
EasyPress Mat
I have specifically chosen the cotton shirt, which has smooth textured and high-quality cotton. It really works well with Iron-on vinyl.
Important Note: I would recommend pre-washing your blank shirt before applying the vinyl on it. In this way, your vinyl won’t crack if the shirt shrinks. In addition, pre-washing will help you remove the dirt or any impurity that can hinder the ability to adhere to vinyl on the shirt.
How to Use Cricut Maker for the First Time?
So, are you ready to learn the process of making a shirt on the Maker machine? If yes, follow the steps one by one:
Step 1: Create a New Design or Upload
Step 2: Load the Vinyl and Cricut Mat
Now, you need to place the material on the mat for cutting. For this, you need to load the vinyl onto the mat. Make sure you are using the mat that has lost its stickiness a little bit. After that, you have to use the brayer tool to flatten and adhere the vinyl to the cutting mat.
Remember: The shiny side of the vinyl should be facing down. For patterned vinyl, the pattern side should be down.
Once done, you are ready to tap on the Load button to start the loading process of the cutting mat into the Maker machine. Next, you will need to send your design to the Cricut Maker.
Step 3: Send Your Design to the Cricut Machine
Navigate to the Cricut app and click on the Make It button in the top-right corner.
Next, select the toggle button to turn on the Mirror.
Afterward, you will be moved to the next screen, where you need to choose the base material. Choose the Everyday Iron-on from the list.
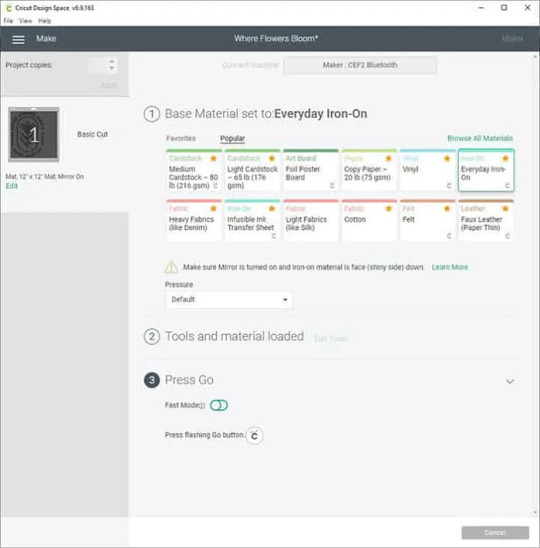
Step 4: Cut and Weed Out the Design
After choosing the material, you need to load the Fine-Point blade and the mat.
To start cutting, you need to press the Go button to cut the design.
Once cutting is done, unload the mat and weed the design using the weeding tools.
Step 5: Transfer Your Design
This is the step where your EasyPress comes into play. Preheat the blank shirt and then place your design on it. After that, set the recommended temperature and press gently on the design.
Wrapping Up
In this blog, I have explained to you how to use Cricut Maker along with the full setup process. This guide not only explores the setup process but also how to make a shirt using it. The process is easy for both setup and shirts. However, this guide can also help you if you want to add your design to a tote bag or any other fabric. The process will be almost the same for every project.
FAQs
Question 1: How to use smart vinyl with Cricut Maker?
Answer: Smart Materials doesn’t require you to use a cutting mat, making it easy to use. Below are the steps given that explain the usage of vinyl.
First, you need to load the material and ensure a 10-inch gap behind the machine.
Next, try to position the material. For example, keep the color side facing up.
Then, feed the material into the guides.
Now, you have to press the Load button and gently push the material forward.
Finally, it’s time to apply the vinyl on the clean, blank surface.
Question 2: How to use Cricut Maker for stickers?
Answer: Find the steps below to create amazing stickers using the Maker machine.
First, you need to create a sticker design on Design Space.
After that, print the image using a compatible printer.
Once you have printed the image, set the materials on the Cricut app.
Next, you should load the mat into the cutting machine.
After that, press the Go button to cut stickers.
Once the sticker is cut, unload the mat and remove the stickers.
Question 3: How to use pens with Cricut Maker?
Answer: In order to use the pens with Cricut Maker, you have to follow the instructions provided below:
First, you need to place the laser copy paper on a LightGrip mat and then load it.
On Design Space, create the design that fits your blank and assign a Cricut pen color.
Also, you must Mirror your design.
Then, browse all materials and then choose Copy Paper.
Insert your Infusible Ink Pen into Clamp A and hit the flashing Go button.
Once the design is done, you can unload the mat.
Read more: install cricut design space app
how to setup cricut maker
Cricut Design Space Login
Source: how to use Cricut Maker
#how to use Cricut Maker#Cricut Design Space Login#cricut design space#cricut.com/setup#cricut.com/create#how to setup cricut maker#install cricut design space app#cricut new machine setup#cricut.com sign in#www.cricut.com/setup login#cricut setup
0 notes
Text
How to Cut Heat Transfer Vinyl on Cricut Maker: Easy Guide
Hey crafters! Hope you are doing well! Today, I have come up with an interesting topic on how to cut heat transfer vinyl on Cricut Maker. If you are going to make your first project or just want some clarity on the use of HTV, you have come to the right blog!
A few years ago, when I was new to crafting, I was unable to figure out between vinyl and infusible ink sheets. Also, I used to think that I could use all types of materials on any project. But, I learned that the right material can really give an outstanding result. I learned everything about materials while making different types of projects. When I created the project myself, I could really see the difference, and I could decide which one to use in my project.
Besides, I will show you how to cut iron-on using Cricut Maker with step-by-step instructions. To learn more about this, let’s delve into this blog.
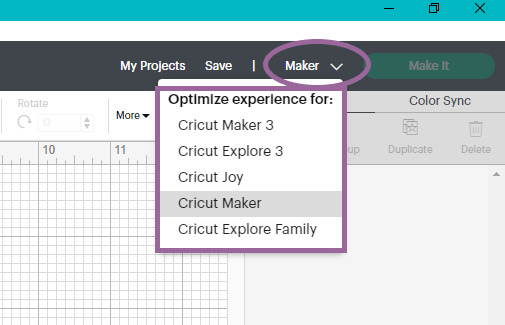
Step 1: Choose a Cricut Machine in the Design Space
As you already know, this blog is about how to cut heat transfer vinyl on Cricut Maker, so I am going to choose the Cricut Maker in the Design Space app. For this tutorial, the Cricut software is a must. Without this software, we can’t make a single cut on any materials.
To select this machine in your Cricut Design app, follow the instructions given below:
First, open the Design Space app.
Then, you need to go to Canvas.
Navigate to the upper right corner and click onthe Dropdown arrow.
Next, select the machine you want to use.
For example, here I am choosing Cricut Maker.
Step 2: Add the Design
There are many options available to add the design. You can either create one or upload an SVG file. You can easily get this file from Cricut Access. Once you are ready with your design, you can resize it according to your project.
Step 3: Preparation Before the Cutting Process
Now, we have to do some preparation; then, I will teach you how to cut heat transfer vinyl on Cricut Maker. So far, you might have created your design, and now it is ready to be cut. But there is one thing you should not forget, which is Mirroring the design. Yes, mirroring a HTV design is a must.
Once you have mirrored the image, you need to hit the Continue button.
After that, you will need to set the material. As you proceed ahead, you will see a list of custom materials. Select the materials you are going to use. For example, I am choosing iron-on vinyl, i.e., heat transfer vinyl.
After that, you have to place the material on the mat. While placing it on the mat, make sure the shiny side is facing down on the mat.
Finally, you need to load the mat by pressing the flashing arrow button. Once done, you are ready to learn how to cut heat transfer vinyl on Cricut Maker in the next section.
Step 4: Cut the Cricut Heat Transfer Vinyl
Here, you need to ensure that you have installed the fine-point blade in your Maker cutting machine. Once the tool is inserted, you can press the flashing C button on your Maker machine to begin cutting the heat transfer vinyl.
So, that’s how easy it is to cut the heat transfer vinyl on Cricut. After cutting it, you can easily place it on your blank shirt. But, you will need a Heat Press, such as a Cricut EasyPress. This tool will help you preheat the project and transfer the vinyl onto the project.
FAQs
Question 1: Can I cut the heat transfer vinyl using my hand?
Answer: Yes, you can cut the heat transfer vinyl with your hand, and you don’t need any type of cutting machine such as Cricut Maker, Explore, or Joy series. All you need to use is a pair of scissors or a craft knife. However, cutting it using your hands is only useful when your designs are not that intricate. For intricate designs, I would suggest you use a digital cutting machine.
Question 2: Should I mirror heat transfer vinyl?
Answer: Yes, you should always mirror your heat transfer vinyl whenever you are going to cut it on Cricut. In addition, you will need to place the materials facing the downside on the mat and cut it from the back with your design. After that, press it with the transfer sheet upside down on your blank shirt. As a result, it will adhere to your shirt or other blank properly.
Question 3: What is the advantage of using heat transfer vinyl?
Answer: There are numerous advantages of using these materials, as they provide a high degree of stretch and rebound. Due to this, it is suitable for apparel and other items that are flexible, such as clothes or sports jerseys. Also, there are multiple color options available so that you can customize your clothes or items accordingly.
Final Words
You might have cleared your concept of how to cut heat transfer vinyl on Cricut Maker. In this blog, I have included a total of 4 steps to explain the process of cutting iron-on vinyl, which is also known as heat transfer vinyl. Also, the HTV provides its own benefits and is very suitable for fabrics or sports jerseys. In addition, the Cricut Maker can easily cut the iron-on vinyl using the fine-point blade. So, follow easy steps and learn to cut heat transfer vinyl for Cricut.
#How to cut heat transfer vinyl on Cricut Maker#Cricut heat transfer vinyl#heat transfer vinyl for Cricut#Install cricut design space app#www.cricut.com/setup login#cricut.com/setup#cricut design space login#cricut explore air 2#cricut.com sign in
0 notes
Text
8 Christmas Crafts With Cricut to Brighten Your Holidays
Finally, it is December, and I can’t wait for the day when all of us will be celebrating Christmas day. I know you are here to find the top 8 Cricut crafts for Christmas ideas you can include in your decoration. And I am also ready with my popular crafts to provide you with some cool crafting ideas. These Christmas crafts with Cricut are easy and fun to make. With this blog, I am going to share the projects I made last year, including those I have made this year.
Whether it is an elegant ornament or a Christmas jar, I have made almost everything to elevate my Christmas holidays. For my Cricut projects, I used a Maker cutting machine, but you can use any of the cutting machines. Many craft ideas that I will share in this blog can be used as a gift as well. So, let’s dive further into this blog and get some craft ideas to celebrate our Christmas together with family and friends.
1. Tantalizing Paper Star
I made this white paper star using cardstock and my best buddy- the Cricut Maker machine. Just hang it anywhere in the home or on the Christmas tree. I used white cardstock paper because I wanted something that would shine every time. However, you are free to try any color that you feel is good according to your home sarroundings. Besides, you can also add a bulb that will make it a star lantern, which looks just fantastic!
2. Merry Christmas Socks
We celebrate Christmas when the winter is at its peak, so why not make something useful? These Merry Christmas socks are the perfect Cricut crafts for Christmas, and I personally loved them so much. My younger son loves clothes with designs or text. He told me to make something cute for him. So this is what I tried and finally gifted him last year. On these socks, I used a vinyl material, which gives pro results, and the Cricut machine helped me so much in making this beautiful Christmas project.
3. Mini Paper Town
Do you want to try this mini paper hometown? I would you must this mini town if you have children in your house. I made this using paper and cardstock material. Look at those Christmas trees and how intricately my Cricut Maker 3 has cut all those paper leaves. That looks amazing!
So, if you want to decorate a corner at your home or want to keep this town on the table, just give it a try! Since Cricut has made crafting easily possible, you can make any craft easily.
4. Christmas T-Shirt
Every year, I love giving T-shirts to my husband and children. Using Cricut vinyl, I made the T-shirt you can see in the above picture. This was for my dear husband who loves black color, so I decided to try something on a black colored t-shirt only. Finally, you can see what it looked like when it was done.
You are free to try different types of texts with beautiful fonts that you can find on Cricut Design Space. Despite this black T-shirt, I made two more shirts for my children. Here is what it looked like.
5. Jingle Ornament
When we are celebrating Christmas, how can we leave Xmas tree decorations? So, I made this jingle ornament for this year. See what it looks like? To me, this is one of the best Cricut crafts for Christmas Eve. In addition, you can easily personalize this Cricut ornament. To personalize it, just replace the word “Jingle” with the name of the person you are personalizing for. So what are you waiting for? Try this easy or straightforward Jingle ornament and brighten up your Christmas days.
6. Christmas Theme Coasters
I made this Christmas-themed coaster using my infusible ink. The seamless look of these coasters will attract everyone during the Christmas dinner. Thanks to Cricut Maker 3, which made my vinyl transfer so easy. Also, such crafting tools are always the best option for creating such pro-level coasters.
7. Personalized Cute Stockings
Making personalized stockings is made so easy with the Cricut machine. To make this personalized stocking, you can add the names of your loved ones. This stocking is so simple to make that you will not need to cut the tedious patterns using your hand. Take out your Cricut machine and cut the pattern that you want to see on your stockings.
8. Elegant Paper Lanterns
This alluring lantern is one of my favorite Cricut crafts for Christmas. Cut the cardstock using your Cricut cutting machine and fold it accordingly to give it the shape of a lantern. Add the LED lights inside the lantern and let it spread the spark of Christmas. However, I made this lantern last year, but this year, I will be trying something similar with different designs. So whether it is intricate design or beautiful colored cardstock, you can cut or make anything with Cricut.
Final Words
With Cricut, you have a wide range of possibilities to make any Cricut crafts for Christmas effortlessly. In addition, the Cricut provides professional and precise cuts on any materials that you are using. Be it harder materials like wood or software materials such as paper, everything can be cut in less time when you have a Cricut. You can also give these projects to your family, friends, and close ones. So what are you waiting for? Just delve into these 8 Cricut projects that are simple and elegant.
FAQs
Question 1: How to make Christmas crafts with Cricut?
Answer: Creating Christmas crafts on a Cricut machine has never been easier. However, if you want to make crafts, say ornaments with Cricut, then you need to follow the steps given below:
Question 2: What are the Cricut Christmas gift ideas for coworkers?
Answer: The most wonderful time is just a few weeks away, and it’s difficult for me not to think about my coworkers. Since they have helped me get through the workday, I have decided to make some Cricut Christmas gift crafts.
Question 3: What are the funny Christmas ideas I can make with a Cricut?
Answer: There are numerous options available to make your funny Christmas crafts. These crafts are easy to make on a Cricut cutting machine. Be it a Cricut Joy or Maker 3, all machines are capable of making such projects in less time. The funny Christmas ideas that you can try with Cricut are Funny Christmas Socks, shirts, and ornaments with funny images.
Visit: cricut.com/setup
Source: https://cricutdesignapp.wordpress.com/2023/12/26/8-christmas-crafts-with-cricut-to-brighten-your-holidays/
#digital design#design space setup#cricut.com/setup#cricut.com design space#cricut setup#cricut new machine setup#cricut.com sign in#cricut.com/create
0 notes
Text
10 Spooky Halloween Cricut Ideas to Try in 2023
If you are a Cricut crafter, then you will like these new Halloween Cricut ideas that you can try in 2023. Halloween is among the most popular festivals where we celebrate and throw parties. Also, we decorate and dress up in a spooky way for the celebration. However, if you try something new, then this blog is going to be beneficial for you. Here, we have gathered the most unique crafting ideas that will make your Halloween celebration more fun. So, keep reading this blog till the end to choose some of the ideas you like to try.\
1. Custom Halloween T-shirts
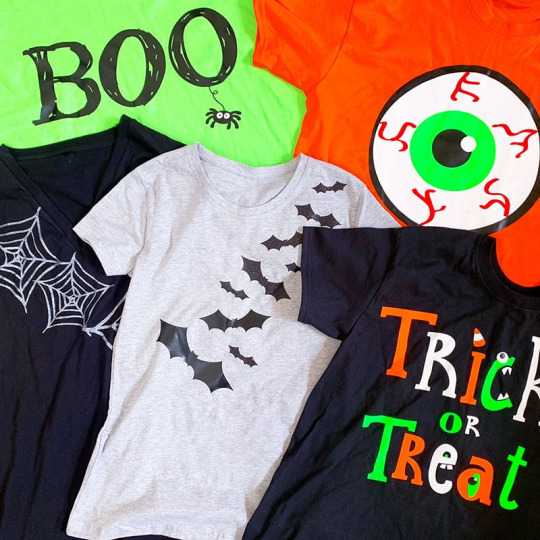
If you have a Cricut machine and want to do something for your family this Halloween, then nothing can be better than making DIY spooky t-shirts. You can create this project with any Cricut cutting and heat press machine. You can create the design as you like and write a catchy phrase on Halloween that will catch everyone’s eyes. Plus, it can be another way of making your bonds stronger with your family and friends.
2. Trick or Treat Doormat
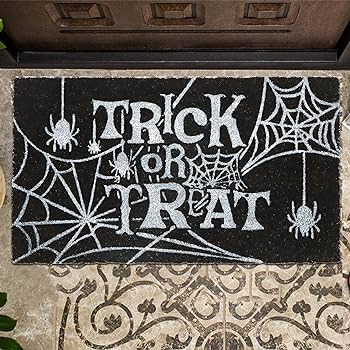
Trick or treat doormat is another great idea you can try on your Cricut machine to celebrate this Halloween. To make things more engaging and fun, you can invite your children or partner to work on this project. You just need a mat and sublimation materials to create the design. If you have already tried this design, then you can make changes in the design and write something else you like.
3. Decals for Halloween Decor Pumpkin
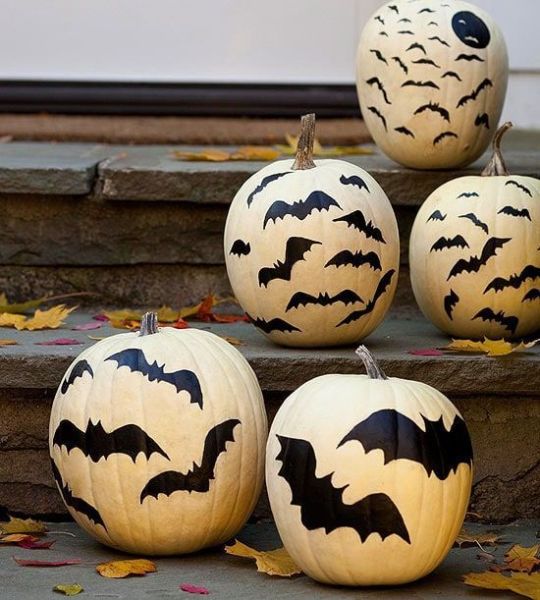
It’s a tradition to carve scary designs on a pumpkin for decoration. You can take the pumpkin decoration to the next level if you want. You can create many decals or stickers with the Cricut machines. It is one of the most creative and unique Halloween Cricut ideas that will turn the heads of your neighbors. In order to create this project, you need vinyl sticker materials, cutting cutting, and heat press. Also, this project is quite easy, and a crafter can make it in a short time.
4. Halloween Themed DIY Coasters
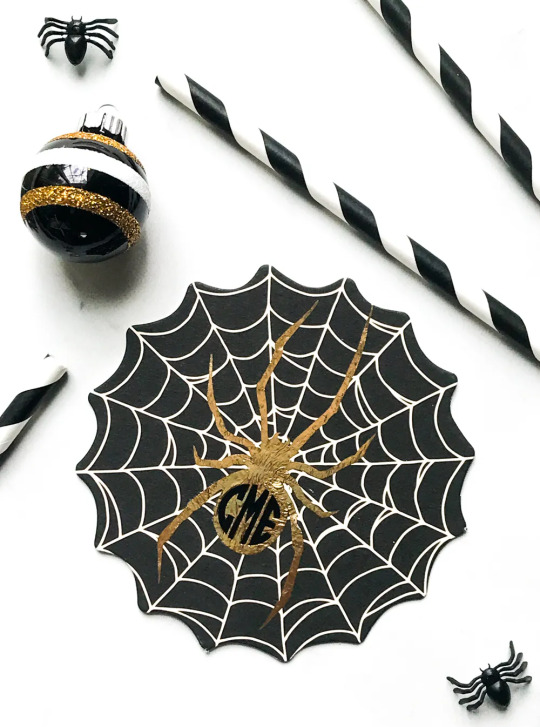
You must include it in your Halloween Cricut ideas list if you have not tried it yet. These DIY coasters are useful and awesome
to decorate the table when you are throwing a Halloween party. Plus, these are new and are hard to find in any online or offline stores. Plus, this coaster can be a good idea to show your friends your crafting skills. You can try this or any other design based on your creativity and preference.
5. Trick or Treat Tote Bags
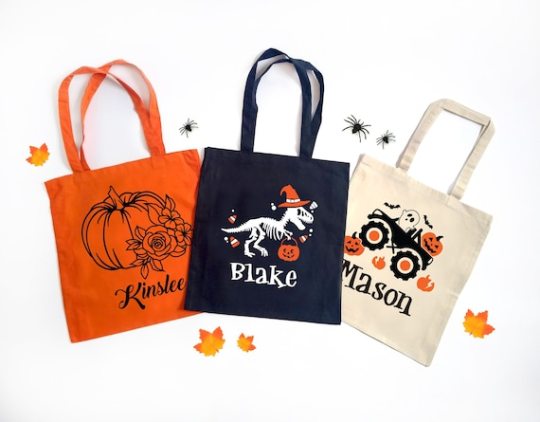
No doubt kids love collecting candies during Halloween. It can be a very cute surprise for them to create a dedicated Halloween trick-or-treat tote bag with their name on it. You can choose from various spooky clip art from the Cricut Design Space app and create various designs. After that, cut them with the Cricut cutting machine and stick them on tote bags with a heat press machine.
6. Easy Halloween Hoop Art

Halloween hoop art can be a great idea for gifts or decorations. Also, it can be very fun and exciting to create this as you can try various designs as you like. You can easily create this project if you are using any Cricut Maker or Explore machine. This is one of the most adorable Halloween Cricut ideas. Also, it is something that can be used even after the festival. So, give it a try if you find it unique or new.
7. Halloween Witch Signs With SVG Files
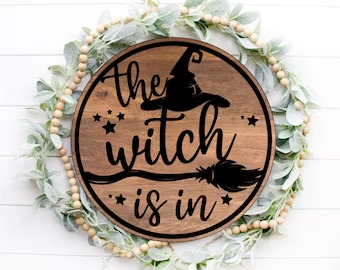
You may have tried various Halloween signs, but this cool free witch SVG cut file is something else. It will help you bring the true Halloween spirit and take your decoration to the next level. You can cut these SVG files on your Cricut machines and then make a frame to hang on your home walls. Also, you can take it as inspiration to create various other projects. Plus, this is another easy project that will not take much time to complete, even if you are a beginner.
8. Graveyard Halloween Cake Toppers
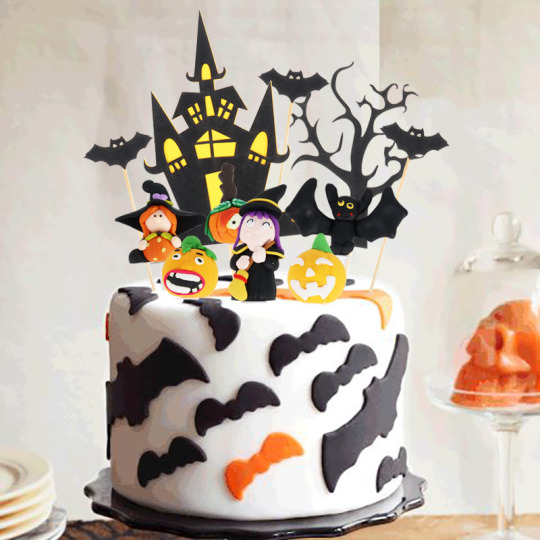
How can Halloween be celebrated when there is no cake? And for that, this one can be added to your Halloween Cricut ideas. You can create different types of cake toppers as you like and decorate them on cakes. Plus, it is best to try if you do not have much time and use beginner-level Cricut machines like Cricut Joy or the newly launched Cricut Joy Extra. Not only for cakes, why not make toppers for various other items?
9. Halloween Themed Ghost Pillows
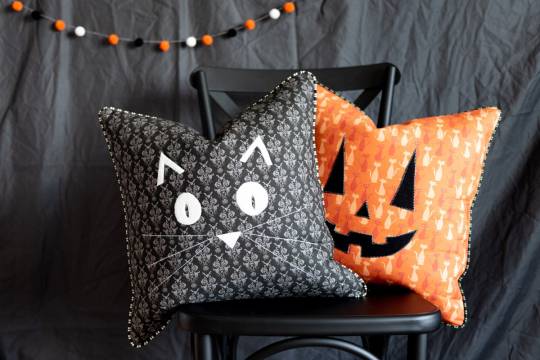
If you are a Cricut crafter, then you may like to make some ghost pillows for this Halloween. These pillows are so adorable that your kids are going to love them as a gift. You just need some materials and Cricut machines to complete this project. You can choose to make ghosts write something scary that shows the Halloween spirit.
10. DIY Halloween Candy Treat Poppers
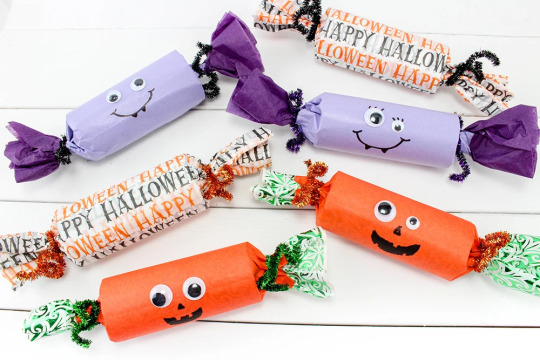
Candies are the most important thing for the children on Halloween. You can do something special for them by creating DIY Halloween candy treat poppers. Plus, it is one of the easiest Halloween Cricut ideas you can try. In addition, you just need Cricut Joy machines and some Cricut vinyl, a scoring wheel, glue, transfer tape, and others.
Frequently Asked Questions
Can I Make Halloween Projects With Cricut Machines?
You have a plethora of options to create Halloween projects if you are using Cricut crafting machines. These machines will help you create projects like DIY customized coasters, pillow covers, cake toppers, decals, stickers, and many others. Also, Cricut machines allow you to create handmade projects using your creativity and crafting skills. Besides that, many projects are easy and get completed in just a few minutes.
What are Some Unique Halloween Cricut Ideas to Try?
You can try some unique Cricut ideas for this Halloween.
Halloween Themed Ghost pillows
Graveyard Halloween Cake Topper
Easy Halloween Hoop Art
Decoration decals for Halloween decoration pumpkin
Customize Halloween T-shirt
DIY Halloween Signs with Free Witch SVG Cut Files, and others.
Is Making Halloween Projects With Cricut Expensive?
If you are something that may have to spend huge bucks to create Halloween projects, then you are wrong. Making the Cricut project on a Cricut machine is very easy and cost-efficient. Plus, it is better to create decorations and gift products as your own than spending your time & energy searching for an ideal product on the internet. Also, Cricut machines offer a vast collection of design ideas and help you use your imagination to bring unique crafting ideas to reality.
Source: Halloween Cricut ideas
#Halloween Cricut Ideas#10 SPOOKY HALLOWEEN CRICUT IDEAS#CRICUT IDEAS#CRICUT MACHINE DESIGN#SPOOKY HALLOWEEN
1 note
·
View note
Text
Top 5 DIY Cricut Garden Projects for a Lively Outdoor Space
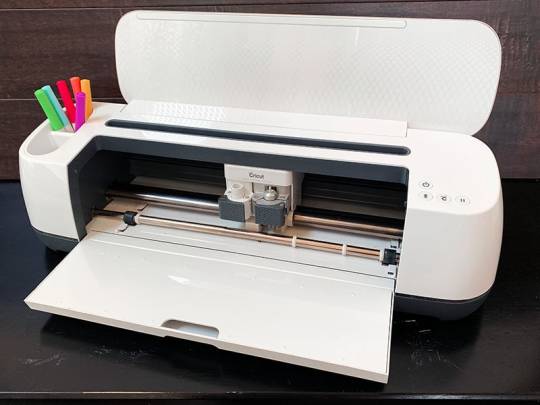
Cricut cutting machines are used to make all sorts of DIY projects. It includes projects for personal use like water bottles, mugs, and t-shirts. Also, you can make projects for home purposes, such as wall decals, labels, and stickers. Further, projects are also used to sell and improve the crafting business. A user can make any craft of their wish with a single Cricut machine. However, this blog focuses on easy Cricut garden projects. These projects will surely make your garden look more lively for you to sit and enjoy the silence.
1. Designing Pot
Usually, Plan pots look plain and simple, or in other words, boring. Since you have a Cricut machine, why not use it to add style and personality to your garden? If you love bold prints or subtle designs, use permanent vinyl to customize the look of your pot. It is because permanent vinyl is best for outdoor use as it is UV- and water-resistant. Further, it can stay the same for up to three years.
You only need to design whatever you want on Cricut Design Space and print the same on vinyl using a Cricut machine. After that, attach the design to the surface of the pot. Now, you have left with a beautiful pot that increases your garden’s aesthetic.
2. Gardeners Paradise
A garden box is a place where a gardener stores tools. However, you can also make it more interesting to look at with your Cricut machine. Here too, use permanent vinyl for its durability and water-resistant ability.
Further, you can even design a garden box and give it to someone fond of gardening. So, you can personalize anything with a Cricut machine and the right project.
3. Garden Gloves
If you have never thought of it, this one among all the Cricut garden projects can be interesting. That is to personalize garden gloves. Please add your initials or name for this project. Further, you can add a leaf or small plant design on the glove.
To make a personalized garden glove, you need an Easy press Cricut machine. You need to press the vinyl onto the globe’s surface. You can also use Infusible Ink, which directly fuses to the glove’s fabric. Both the materials are good to use, and you can choose depending on your likes.
4. Garden Entry Sign Board
Making a custom vinyl signboard is an easy way to decorate your garden. The Cricut machines are known to make crafting projects quicker and easier. These boards will be an addition to your beautiful garden.
Further, Permanent vinyl is a perfect material to use for this project. It is an attractive material that makes the garden board a more inviting place. You can attach the vinyl onto cardboard, chipboard, or wooden board.
5. Labeling the Herbs or Plants
Do you want others to know which herbs or plants you have planted in your garden? Also, if you are a person who can forget names easily, then this project will be best for you.
With a Cricut machine, you can design the names of plants and herbs in attractive fonts. Next, cut the names on vinyl. You can even use Cricut pens and markers and write the names on the material.
Conclusion
Cricut machines are designed to help you craft anything you wish for. Along with its Design Space from where you can design, upload, or download the project. This blog focusing on Cricut Garden Projects will help you improve your garden’s look. We have covered five essential ideas: making gloves, a signboard, and designs and labels for pots and plants. However, you can do any other project to make the garden look more beautiful.
FAQs
What is a Cricut Machine?
Cricut is a company that makes smart cutting machines. There are many models of Cricut machines, such as Maker, Maker 3, Explore 3, Air 2, and Joy. All these machines are different from each other, but they can cut many different materials so that you can make many types of Cricut garden projects. You can custom-make cards, t-shirts, and other everyday items.
How to make labels with Cricut Joy?
To make labels with your Cricut Joy machine, design your labels on Design Space by selecting either text or images. Next, create as many labels as you need for your project and select the Make it an option. Now, load the material into the machine, and it will cut the designed labels. Finally, apply Transfer Tape and attach the labels to your product.
What is Cricut Everyday Iron-On?
The Everyday Iron-On by Cricut is a heat-transfer material that can outlast 50 or more washes. It can work with the widest base materials, even wood. You can make projects such as customized t-shirts, tote bags, home decors, wall decals, and more. You can even use one color layer or up to four colors to create unique designs.
Source URL: Cricut garden projects
For more information:
Cricut cutting machines
Cricut Design Space.
Cricut Joy machine,
0 notes
Last Seen Blogs

acxdty
Beverly Steele

juliss
Chencha :V

diaockimquang
Địa ốc Kim Quang

thegoldenboutique
thegoldenboutique

figplants
the female gaze.