#Importance Of Using WebP
Explore tagged Tumblr posts
Visit Tumblr Blog
Explore Tumblr blogs with no restrictions, modern design and the best experience.
Last Seen Tumblr Blogs


Fun Fact
The KCSC sent more than 20K requests to delete posts related to prostitution and porn to Tumblr from January to June 2017.
Text
Oh, you know, just the usual internet browsing experience in the year of 2024

Some links and explanations since I figured it might be useful to some people, and writing down stuff is nice.
First of all, get Firefox. Yes, it has apps for Android/iOS too. It allows more extensions and customization (except the iOS version), it tracks less, the company has a less shitty attitude about things. Currently all the other alternatives are variations of Chromium, which means no matter how degoogled they supposedly are, Google has almost a monopoly on web browsing and that's not great. Basically they can introduce extremely user unfriendly updates and there's nothing forcing them to not do it, and nowhere for people to escape to. Current examples of their suggested updates are disabling/severly limiting adblocks in June 2024, and this great suggestion to force sites to verify "web environment integrity" ("oh you don't run a version of chromium we approve, such as the one that runs working adblocks? no web for you.").
uBlockOrigin - barely needs any explanation but yes, it works. You can whitelist whatever you want to support through displaying ads. You can also easily "adblock" site elements that annoy you. "Please log in" notice that won't go away? Important news tm sidebar that gives you sensory overload? Bye.
Dark Reader - a site you use has no dark mode? Now it has. Fairly customizable, also has some basic options for visually impaired people.
SponsorBlock for YouTube - highlights/skips (you choose) sponsored bits in the videos based on user submissions, and a few other things people often skip ("pls like and subscribe!"). A bit more controversial than normal adblock since the creators get some decent money from this, but also a lot of the big sponsors are kinda scummy and offer inferior product for superior price (or try to sell you a star jpg land ownership in Scotland to become a lord), so hearing an ad for that for the 20th time is kinda annoying. But also some creators make their sponsored segments hilarious.
Privacy Badger (and Ghostery I suppose) - I'm not actually sure how needed these are with uBlock and Firefox set to block any tracking it can, but that's basically what it does. Find someone more educated on this topic than me for more info.
Https Everywhere - I... can't actually find the extension anymore, also Firefox has this as an option in its settings now, so this is probably obsolete, whoops.
Facebook Container - also comes with Firefox by default I think. Keeps FB from snooping around outside of FB. It does that a lot, even if you don't have an account.
WebP / Avif image converter - have you ever saved an image and then discovered you can't view it, because it's WebP/Avif? You can now save it as a jpg.
YouTube Search Fixer - have you noticed that youtube search has been even worse than usual lately, with inserting all those unrelated videos into your search results? This fixes that. Also has an option to force shorts to play in the normal video window.
Consent-O-Matic - automatically rejects cookies/gdpr consent forms. While automated, you might still get a second or two of flashing popups being yeeted.
XKit Rewritten - current most up to date "variation "fork" of XKit I think? Has settings in extension settings instead of an extra tumblr button. As long as you get over the new dash layout current tumblr is kinda fine tbh, so this isn't as important as in the past, but still nice. I mostly use it to hide some visual bloat and mark posts on the dash I've already seen.
YouTube NonStop - do you want to punch youtube every time it pauses a video to check if you're still there? This saves your fists.
uBlacklist - blacklists sites from your search results. Obviously has a lot of different uses, but I use it to hide ai generated stuff from image search results. Here's a site list for that.
Redirect AMP to HTML - redirects links from their amp version to the normal version. Amp link is a version of a site made faster and more accessible for phones by Bing/Google. Good in theory, but lets search engines prefer some pages to others (that don't have an amp version), and afaik takes traffic from the original page too. Here's some more reading about why it's an issue, I don't think I can make a good tl;dr on this.
Also since I used this in the tags, here's some reading about enshittification and why the current mainstream internet/services kinda suck.
#modern internet is great#enshittification#internet browsing#idk how to tag this#but i hope it will help someone#personal#question mark
1K notes
·
View notes
Text

I couldn't fit the tutorial on a reply lmao, here's a full post explaining my process :]]
STAMP TUTORIAL (TF2 edition, but works for everything)
99% of the process is done on the website ezgif. Ezgif carries the stamp-making process lmao
1. Get your GIF
Tenor: Ok place to grab your GIFs. Average quality of the GIFs is good enough, and looks ok when resized to the size of the stamp. You'll find like 1 normal GIF every 4 buff characters GIF tho.
GIPHY: Average quality of the GIF is better (I don't think the web compresses the GIFs that are uploaded)… If you find what you're looking for. You'll have to SCROLL before finding what you're looking for because there are always non-related GIFs on the top of your searches or the same GIF multiple times, it's crazy.
makeagif: You will find cool GIFs, but the quality is pretty low (I think the web itself compresses the GIFs a lot). It looks bad even when resized down. And it has a watermark, which I recommend cropping because it's not even visible when resized, it just looks like a gray blob on the corner.
Google: Best option by far, quality is pretty good and the ratio of “things I was looking for/things I actually find” is SLIGHTLY in favor of “things I was looking for” (and most of “things I actually find” are just the characters rotating, not NSFW, so that's only a nice change from Tenor). You won't have to scroll much to see different and interesting GIFs. JUST REMEMBER TO FILTER BY GIFS.

You search whatever > Images > Tools > Type > GIF
Make it on your own: Aka, you download your video, go to ezgif's “Video to GIF” (then you can crop it, CUT IT. THIS IS IMPORTANT, YOU DON'T NEED TO GO ANYWHERE ELSE TO CUT YOUR CLIP, YOU CAN DO IT ON EZGIF ITSELF). Ok, I lied, it wasn't Google, this is the best oftion by far. You get exactly what you want, the best quality if you don't compress it much until after the GIF has been resized into the size of a stamp… It's just super time-consuming, and you'll have to spend like an entire hour just watching a video to find the clips.
OK, I HAVE MY GIF NOW
Hehe, his legs go pipupipu
2. Resize
Go to ezgif, this is where the fun begins (if you weren't on ezgif already). You download your GIF, or copy the link and insert it, or you'll have it there if you made it yourself.
A STAMP MAKES 99px × 56px
THE INNER PART OF THE STAMP MAKES 91px × 47px
I RECOMMEND MAKING YOUR GIF 92px × 48px
BTW, THESE MEASURES ARE FOR THE TEMPLATE I'LL GIVE YOU LATER. If you use another template, just go to an image editor and see what the inner size of the stamp is.
So, you set your GIF's width to 92px.

Then crop it, so your height is 48px.

Or you can resize it so it's directly 92px × 48px, but the crop will be in the center, and SOMETIMES YOU DON'T WANT THAT.
For example:

It's a vertical GIF whose area of interest is not in the center, so if we resize it directly-

oops-
ANYWAY
Once you have your GIF resized:
IMPORTANT: BEFORE THE NEXT STEP, REMEMBER TO CONVERT TO GIF IF THE FILE YOU'RE WORKING ON ISN'T A GIF ALREADY
Sometimes you'll be working with a webp without even noticing (EW, I hate webp) and transparencies don't work particularly well with that extension.
3. Overlay

Click on this icon.
Ok, now that that's fixed:

Extend the size of the canvas.

Select your template and Upload image!

This is the template, btw.

Then move the overlay around until it contains the GIF nicely, or just set Left to 43, Top to 20 and Generate image! (I have these numbers memorized, it saves you like 20 seconds lmao)
Also, again, these numbers work on MY template, if you use another one, you'll have to figure it out yourself.
4. Crop

THIS OPTION IS A TIME-SAVER FR
5. Optimize (optional, highly recommend)

I always set my optimization method to Lossy GIF and level 10 because I find that there is no quality loss, and the file size might drop by 30%-70% (actually crazy). These percentages don't change much in higher compressions, even though you'll start seeing a drop in quality around level 35 of compression (the default).
6. Save

YIPPE!!! Your stamp is done :D
You can save it and look at it and place it on your profile or website.


Here it is btw, in case someone wanted it :]] The Sniper GIF but correctly cropped and made into a stamp as well.
Now do that another… eleven times, and you'll have a stamp pack to make into a Tumblr post... Oof TT
There's no website that lets you make stamps faster lmao (I wish)
@sir-broken-bones (I'm @ them so they actually see it, I made this tutorial for them after all lol)
#team fortress 2#tf2#tf2 scout#tf2 sniper#stamps#da stamps#tutorial#graphics#old graphics#neocities#old web graphics#old web
195 notes
·
View notes
Note
Hello there! this isn't a request, But I was wondering how you make your graphics Is there any specific sites you use or stuff like that?
Hey! I already made a vague tutorial on my blinkie making process.
For userbars and shiny buttons, I have a .kra template and simply edit the text and colors and whatever to whatever is requested. The shiny button template was mostly original but the userbar template was made with the help of this tutorial.
EASY PEASY STAMP MAKING TUTORIAL BELOW VVVV
For stamps, I use an edited version of this template.
While for most of my original stamps I use a method similar to my blinkie-making method, I also like to convert GIFs I find online into stamp format! This is a really easy streamlined process and I wanna show it off.
1. Import your GIF of choice into Ezgif, whatever selection works.
MAKE SURE IT IS .GIF AND NOT .WEBP OR OTHER, AS THEN IT WILL NOT WORK!

2. Depending on what size your image is, you will either want to crop first or go to Resize immediately. If your image is 4:3/16:9 and focused the way you want, go to step 3.
Crop your image in the editor the way you want it to display. Try to leave a little room for the focus of the image so it isn't cropped out later.

Once you're done with that, you can proceed to the Resize menu from the bottom selector.
3. Resize your GIF to 99 by 56 pixels. That is 99 in width, 56 in height. Try not to tweak with any of the other settings.

Once you're done with that, go into the overlay option from the bottom selector:

3. Overlay
Upload one of these as your overlay, or make your own with the same format. Make sure it has a greenscreen/removable background around the parts you want to be transparent. The 1st one is newer and the one I typically use.


It's the same resolution so you don't have to move anything around. Once you generate that, go into the effects menu from the bottom selector.

4. Remove the greenscreen and you're done!

In the "Replace color with transparency" tab, set it to custom (HEX) with the value #00ff00 or whatever color you chose to replace transparency. This part is the reason you can't use webps, for some reason this part doesn't work very well with those.

YOU JUST MADE A STAMP CONGRATULATIONS! You can also do this manually but this method is easier if you're just compressing down a gif.
49 notes
·
View notes
Note
Hello, this is not a request it's question because I really want to learn how to make graphics with gifs and idk how to do it 😭😭😭
Like your agar agar cookie layouts, I really like your work and would like to learn how you make it
Thank you for reading this, if you don't want reply it's okay, have a very nice day

Haiii!! It's no problem!! Unfortunately, I'm VERY bad at explaining stuff LOL, so here's the best I can do!! (Also, have a sneak-peak to another post :3)
How to make a gif edit.
How I decorate my edits.
How I make my PSDs.
VERY LONG POST BELOW. MASU LOVES TO HEAR HIMSELF TALK.
Okay so step one is to use photopea. I used to be an avid ibispaintx user until I realized that photopea can make gif edits and suddenly I'm photopea's #1 fan (and hater). Photopea is a website, BTW, here's the link!
First, open up a project. Good job! We're 1/4 of the way there! You can import a PSD if you want (Here's a different tutorial for that), but let's just say you DON'T have a PSD, for the simplicity of this tutorial.

Next, find the animation you want! For this example, we'll be using the Wind Archer sprite below (I took this from the CRK wiki). It can be anything - but preferably nothing too big, because Tumblr for SOME REASON HATES high quality gifs. Siiiigh...

From here, you want to go to FILE > OPEN & PLACE. It'll show a window of all your downloaded items. Click on the animation we just downloaded.


Wam-bam! We're almost there!! Okay, if your image is a WEBP file, it will not animate if you export as a GIF. But! That's okay! Because with trial and error, I found out how to fix this!
On the downloaded layer, double click on the layer. After this, go to SMART OBJECT > CONVERT TO LAYERS...

Now, if your photopea tries to explode and pretend it don't know nobody, that's okay! Just let it load a bit. The file is very. very big. It should turn into a folder! You have nothing else to do from this.

After this, you can do, well, whatever ya need!! Slap a stroke on, put a gradient map on this bad boy, anything else! Once you're finished, go to FILE > EXPORT AS... > GIF. Your photopea might try to explode again, for like, a few minutes. Just give it some time. It's a lot of trial and error!! Don't feel bad if you didn't get it the first time!!
Now, before I talk about my edits, I want to make it clear that you should FIND YOUR OWN STYLE! Don't try to copy off of someone else, or try to replicate another style. Every editor is different!! While I overuse overlays and gradient maps like I won't see tomorrow, you may like a more simple style, or something less over and out there ~ ! That's alright! Don't be afraid to branch out.
Now, as we said - we love to use overlays + gradient maps. I am an artist, so a LOT of what I do correlates to that as well (having an interesting silhouette, making a focal point, color theory, color contrast, composition). It'll be WAY, WAY too much to explain in one single post, so I'd just say to go with the flow! If something looks off, try something else! There's no shame in scrapping an entire project - especially if you're unsatisfied with the result. Do what you need to do!! It's your edits.
For making PSDs, our process is actually pretty simple. We just use a gradient map and adjusts it till it works LOL. We add a few others things too - but that's mostly what I do. If you want to learn how to make your own, my word of advice is to dissect from others. Take inspiration!! If you don't feel like doing that, there's no harm in just using a F2U PSD floating out there. Feel free to look at our Squid Ink post and use that as an example of our PSDs! (If you don't feel like going to go get it, yeah I understand, here it is right here.)
All in all, my biggest tip (besides to have fun), is to edit until you like it. Don't try to compare yourself to big editors - they've had TONS, AND TONS, of experience and editing. Experiment with your style, put yourself out there, edit some new media you've never edited before, find resources to help you out, find tutorials, ETC. It takes time to learn, so make sure to take that time!! You got this, don't feel discouraged by other people's work!!!
That's all from us folks!! Peace out!! ^_^


#໒꒰ྀི ․ ․⸝⸝⸝ ꒱აㅤ﹑﹫ㅤtalks.#໒꒰ྀི 𖦹 ˕ × ꒱ྀིაㅤ﹑﹫ㅤasks.#editblr#edit tutorial#editing#edit blog#psds#photopea tutorial#tutorial
36 notes
·
View notes
Text

◟⸝⸝₊ Inkcomposer 220 Followers Event ᐟᐟ◞

First of all I wanna thank everyone so much for this big achievement, I never thought I could get this far this soon and I'm very happy to see that people like my work!
Now, thanks to this I made a poll, the decision was made and my followers decided an event would be, so here it is! Please take your time and read this post if you're interested in participating :D

⟡ ݁₊ Event Rules + Info ⸝⸝⸝𓃦
You can make any kind of edit you want, graphics, buttons, stimboards, moodboards, decor, layouts, psd, whatever you feel like making, is totally up to you what type of edit you'll do
Make sure to tag me and use the tag #zrespevent220, if you don't do it your entry won't be counting for the event and there's a chance I won't see your edit
The event will start on February 25th and ends on March 12th so you have a good amount of days to do it, I'm posting it now so others are prepared to start the event
There would be 7 prompts in total, but I'm giving 15 days so no one feels rushed!
If you want me to count you as a participant for the participation prize you need to do at least 4 prompts, anyone that does all the prompts gets an entry to the full prizes roulette, plus anyone that makes all prompts using my whitelist gets an extra entry!
If you have a question regarding the event send an ask!
⟡ ݁₊ Prompts ⸝⸝⸝𓃦
Prompt 1: Something space related or Something fox related
Prompt 2: A non human /humanoid like character or An animal character
Prompt 3: Your favorite aesthetic or Your anti-aesthetic
Prompt 4: Pokemon caffeine club related or Something food related
Prompt 5: A crossover of medias or A mix of different aesthetics
Prompt 6: A character you think I'd love or A character you think I'd hate
Prompt 7: One of my favorites in my whitelist or Free day
⟡ ݁₊ Prizes ⸝⸝⸝𓃦
Everyone that participates (at least 4 prompts done) get to claim a rentry graphic or frame with priority! Note: If you won one of the 3 big prizes you don't get this gift
First place: Tumblr blog pack + Theme pack or Rentry decor 2 + Theme pack
Second place: Theme pack or a Rentry decor 2 + 3 blinkies
Third place: Decor set or Page decor + 2 userbars
Important to note that because these are prizes they're not attached to the "only whitelist" rule I have in my normal requests info, but I won't be taking anything from my blacklist
Thank you sm for reading and I hope to see the edits of everyone!! Please have fun with this event :D
Tag list: @cat-webp @skeletonenthusiass (idk who else to tag, reblog if you want ig)


26 notes
·
View notes
Text
📣 clip studio paint is having a 60% off sale from now until june 23rd 11:59pm pst (deadline is actually june 24 1am pst but whatever)
that means perpetual v4.0 is $23.40 and ex is $180.60. updates from 3.0->4.0 is pro->pro 17.49 and ex->ex 50.39
question and answer segment ⬇
is clip studio paint good i do not like adobe so i use this instead of photoshop. i like it and i like drawing in it
whats the difference between pro and ex ex doesn't have the 24 frames animation limit that pro has and it also has a lot more comic page and comic printing features. if you dont do multi-page comics or animation just get pro
should i buy now? i think if you wait until november or december for their last sale of the year you can get 5.0 also. so if you dont really need it now you could just wait i guess
is upgrading to csp 4.0 worth it compared to the csp version im using right now??? look at the features comparison list here and see if there is anything that strikes your fancy. features that i cared for off the top of my head: 2.0 added liquify across multiple layers, align/distribute tools, and proper word wrap for text. 3.0 added better mesh transformation controls, made timelapse more efficient, and webp import/export support (lol). 4.0 added better snapping and you can now select multiple brushes at once in the menu to move or delete them (HUGE)
how do i upgrade to 4.0 from 2.0. or 1.0 youd have to upgrade twice, once up to 3.0 and then again to 4.0, so honestly id just buy a new license. you should buy a new license if you have 1.0 regardless so you can continue to have access to 1.0 imo cuz thats the only one that doesnt have the online checks
aw does it still have the online checks yes but its not every day. its like, either every 3 days or 14 days, something like that. they changed it from being every 24 hours after everyone got mad when 2.0 came out
im a time traveller from the future. the 4.1 feature update in october or whatever added something lifechanging incredible why cant i use it! perpetual license only gives you up to 4.0 features. which includes 4.0 and 3.2, 3.1, 3.0 etc etc. you dont get 4.1 or 4.2 stuff. you have to wait for 5.0 perpetual for those. if youre impatient you can pay 11 dollars for an update pass that lasts 1 year and is functionally the same as a 1 year subscription. the update pass is only available if u have perpetual license and never goes on sale so its always 11 dollars which is coincidentally about the same price as an on-sale 1 year sub.
i use ipad tablet or android phone perpetual license is only for desktops. mobile devices can only have subscription. 1 year sub is on sale for $10.79 though (its usually $27)
#pivstuff#clip studio paint#i miss the more esoteric shit i could do in photoshop but eh. c'est la vie
4 notes
·
View notes
Text
Have you ever wished you could use Discord emojis in your AO3 comments? Here's a guide on how to do just that:
Unfortunately, part of this is for desktop only, but ultimately once you have the link to the emoji, you can use it in comments on mobile too!
Saving The Emoji:
First: pick the one you want
For this example, I'm going to use one called :chinhands_pleading: , that looks like this:

This process will let us add emojis without the dark background, and bigger.
Second: right click the emoji, then choose 'open link'
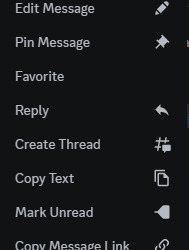
Third: when you open it, you'll get a link like this:

We want to delete the highlighted part, in this case the part that says "?size=96&quality=lossless", then hit enter.
Fourth: right-click and save
Right click, choose 'Save Image As...', and then give your emoji a name. You should be able to save it as a png (even though it's a webp image) by just adding '.png' to the end, i.e. 'chinhands_pleading.png'
If you can't, you can use online converters or sites like photopea to change the image to a png
Using Emojis In AO3 Comments:
First: upload the emoji online
I use a private Discord server for this personally, but where they're uploaded isn't that important, just that they have a link
On Discord:
Upload it like a normal file
Right-click the image and choose 'Copy Link'
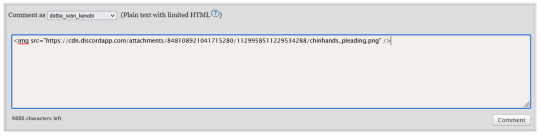
Second: use a little bit of html code

(I would type it out, but I'm not sure how Tumblr will react to code, sorry. If you can't see the image, it does have an image description with the code typed out.)
Once you have that, simply replace the word link with the actual link. You need to keep the quotation marks, they are important!!
If you would like to adjust the size of your emoji, you can also add a height or width value. I've found that 30px is close to the right size, but a bit bigger
Example:

Third: copy the code and paste it in the comment box
At this stage, all you have to do is copy it -- from < to > -- then paste it in!!
And voila!! Here's what it looks like:
This also works with gif emojis and gifs from other websites such as Tenor. Happy commenting <3
#ao3 comments#ao3 community#comment guide#fanfiction comments#comments#commenting#mod post#not fic rec#i tried to add image descriptions but.. i havent before so they aren't the best#also hello im not dead lmao
115 notes
·
View notes
Text
How to optimize images for beter AIO, (AI Search) Google AI overview, Perplexity, ChatGPT
(1) Research the mechanisms by which AI search engines like Google AI Overview, Perplexity, and ChatGPT analyze and interpret image content, including their use of computer vision and contextual understanding from surrounding text. (2) Identify general best practices for image SEO that are beneficial for AI search, focusing on elements such as descriptive alt text, meaningful file names, image captions, and the relevance of on-page textual content to the image. (3) Investigate specific recommendations or documented guidelines from Google on how images are selected and utilized within its AI Overviews, and how to optimize for this feature. (4) Explore how Perplexity AI incorporates and ranks images in its responses, and search for any specific advice or patterns related to image optimization for its platform. (5) Research how ChatGPT (especially versions with browsing capabilities or image understanding features) processes visual information and what factors might influence image visibility or interpretation by the model. (6) Analyze the role and benefits of using structured data (e.g., Schema.org markup for images) in enhancing the discoverability and comprehension of images by AI search algorithms. (7) Evaluate the importance of technical image attributes such as resolution, compression, file formats (e.g., WebP, AVIF), and mobile responsiveness for AI search performance and user experience. (8) Synthesize the findings to provide a comprehensive guide on optimizing images effectively for improved visibility and understanding by AI-driven search systems, including Google AI Overview, Perplexity, and ChatGPT.
#seo expert#ai#seo srbija#seo#AIO#AI SEARCH#perplexity#perplexity pages#SEO EXPERT PREDRAG#SEO EXPERT PREDRAG PETROVIC#SEO EMEA#SEO FOR PERPLEXITY#SEO FOR GEMINI#SEO FOR IMAGES#SEO FOR IMAGES VOICE SEARCH
3 notes
·
View notes
Text
The Twitter Investigators Are All Over the NYPD Letter Used in the Judical Review by u/Von_und_zu_
The Twitter Investigators Are All Over the NYPD Letter Used in the Judical Review There are FOIA requests to the NYPD and the UK equivalent to the Met. There are comparisons of the letter to other letters from the NYPD to assess authenticity. There are claims that it is forged based on blurry print. Lady C says she has something to add on this. Neal Sean has a video entitled "I called the NYPD" or something. It is wild out there.As an American lawyer of many years, I will say that I cannot believe their reputable UK lawyers would have participated in submitting a fake document. That would be absolutely shocking behavior and I cannot believe any reputable lawyer would willingly take that on, even for a Prince. I have been involved in instances, however, where a client provides a dodgy document to his lawyer without informing the lawyer of the dodginess. That does not go well for the client when it is discovered. And sometimes it does not go well for the "innocent" lawyer either.I can believe that the NYPD may have "accomodated" a request from someone sufficiently important by sending a letter over to London. If the letter did not reflect the actual results of the investigation, however, as the NY Post article suggested, that would be very serious as it would appear that a major police department misrepresented facts to a Court.Stay tuned. This may turn out to be a genuine letter that accurately reflects the outcome of a NYPD investigation. But they are well-established liars, so maybe not. At the very least though, they managed to get a letter from the NYPD to use in the judical review, and it will be interesting to see how that happened. It feels a bit like Harold may have used his "specialness" again and brings to mind his Visa controversy.Also, I will edit/update this post with some other materials on the twitter investigation.https://preview.redd.it/f3d503s6trlc1.png?width=900&format=png&auto=webp&s=95444981c9e9f9ff7cd65d8d40530cf50f78daebhttps://preview.redd.it/7mc53nlu2slc1.png?width=682&format=png&auto=webp&s=c665cc9449c1bcf2e85d0007d8cbcc2457e1f69fhttps://twitter.com/Tamarindos9/status/1763631886679654538https://preview.redd.it/hgzxfvp53slc1.png?width=865&format=png&auto=webp&s=c8c2d4836c00da499360ec9fa6c41975cf9a2756https://preview.redd.it/o071akih4slc1.png?width=838&format=png&auto=webp&s=cf1c06a65e38e00b2fc96df2faef19db8a46dae4https://preview.redd.it/anvokwnz3slc1.png?width=700&format=png&auto=webp&s=03a24c2acd7cc56d26ffb457962a43832a7e8575 post link: https://ift.tt/yBI8xbg author: Von_und_zu_ submitted: March 01, 2024 at 08:20PM via SaintMeghanMarkle on Reddit
#SaintMeghanMarkle#harry and meghan#meghan markle#prince harry#fucking grifters#Worldwide Privacy Tour#Instagram loving bitch wife#Backgrid#voetsek meghan#walmart wallis#markled#archewell#archewell foundation#megxit#duke and duchess of sussex#duke of sussex#duchess of sussex#doria ragland#rent a royal#clevr#clevr blends#lemonada media#archetypes#archetypes with meghan#invictus#invictus games#Sussex#Von_und_zu_
18 notes
·
View notes
Note
How do you make your gifs in BG3?
As a disclaimer, my giffing knowledge comes from Ye Olde Tutorials back in 2010s so I don't know if there's a more effective way now 😭
Generally speaking, I record the scene in-game using Xbox Game Capture (or any other screen recording software) with the game UI toggled off (F10 key).
I use ffmpeg to create frames from the video recording. Then, I import those frames in Photoshop via File > Scripts > Load Files into Stack. (You can also import the video directly in Photoshop and extract the frames from there but... the way I do it is more reliable and way faster...!)
After resizing and cropping, I use a Photoshop Action I made to automate creating the GIF from the imported frames:
And then the usual editing with Adjustment Layers and such! When I'm done, Timeline > Convert to Video Timeline for a smoother animation.
To export as GIF, File > Export > Save as Web (Legacy). Then I process it further in ezgif.com to compress it or slow down/speed up the GIF, and sometimes, I convert it to WebP to compress the size further ;_;
#ask#Anonymous#who remembers when the maximum GIF size was 3 MB and we had to make do with 5-10 frame GIFs#how i make my GIFs now is probably different than others but I seriously don't know how ppl do it nowadays ;_;
11 notes
·
View notes
Text
How to install and use IrfanView in Linux - Tutorial
How to install and use IrfanView in Linux - Tutorial
Updated: May 30, 2022
My Windows to Linux migration saga continues. We're still a long way off from finishing it, but it has begun, and I've also outlined a basic list of different programs I will need to try and test in Linux, to make sure when the final switch cometh that I have the required functionality. You can find a fresh bouquet of detailed tutorials on how to get SketchUp, Kerkythea, KompoZer, as well as Notepad++ running in Linux, all of them using WINE and successfully too, in my Linux category.
Today, my focus will be on IrfanView, a small, elegant image viewer for Windows, which I've been using with delight for decades now. It's got everything one needs, and often more than the competitors, hence this bold foray of using it in Linux despite the fact there are tons of native programs available. But let's proceed slowly and not get too far ahead of ourselves. After me.
As I said, it's majestic. A tiny program that does everything. It's fast and extremely efficient. When I posted my software checklist article, a lot of Linux folks said, well, you should try XnView instead. And I did, honest, several times, including just recently, which we will talk about in a separate article, but the endeavor reminded me of why I'd chosen IrfanView all those years back. And those reasons remain.
Then, I did play with pretty much every Linux image viewer out there. None is as good as IrfanView. It comes down to small but important things. For instance, in IrfanView, S will save a file, O will trigger the open dialog. Esc quits the program. Very fast. Most other programs use Ctrl + or Shift + modifiers, and that simply means more actions. I did once try to make GwenView use the full range of Irfan's shortcuts, but then I hit a problem of an ambiguous shortcut, wut. I really don't like the fact that hitting Esc takes you to a thumbnail overview mode. But that's what most programs do.
WINE configuration
The first step is to have WINE installed on your system. I am going to use the exact same method outlined in the SketchUp Make 2017 tutorial. I have the WINE repositories added, and I installed the 6.X branch on my system (at the time of writing).
IrfanView installation
Download the desired 32/64-bit version of the program and then install it. The process should be fast and straightforward. You will be asked to make file type association. You can do this, or simply skip the step, because it doesn't make any difference. You need to associate IrfanView as the default image viewer, if this is your choice, through your distros' file type management utility, whatever it may be.
And the program now works! In Plasma, on top of that, you can also easily pin the icon to the task manager.
Plugins and existing configuration(s)
Much like with Notepad++, you can import your existing workspace from a Windows machine. You can copy plugins into the plugins folder, and the IrfanView INI files into the AppData/Roaming folder. If you don't have any plugins, but you'd like to use some, then you will need to download the IrfanView plugins bundle, extract it, and then selectively, manually copy the plugins into the WINE installation folder. For instance, for the 64-bit version of the program, this is the path:
~/.wine/drive_c/Program Files/IrfanView/Plugins
As a crude example, you may want to make IrfanView be able to open WebP files. In that case, you will need to copy the WebP.dll file into the folder above, and relaunch the program. Or you can copy the entire set of IrfanView plugins. Your choice, of course.
Conclusion
And thus, IrfanView is now part of our growing awesome collection of dependable tools that will make the Windows to Linux migration easier. I am quite sure the Linux purists will be angry by this article, as well as the other tutorials. But the real solution is to develop programs with equivalent if not superior functionality, and then, there will be no reason for any WINE hacks.
If you're an IrfanView user, and you're pondering a move to Linux, then you should be happy with this guide. It shows how to get the program running, and even import old settings and plugins. I've been using IrfanView in Linux for many years, and there have been no problems. That doesn't say anything about the future, of course, but then, if you look at what Windows was 10 years ago, and what it is now, it doesn't really matter. Well, that's the end of our mini-project for today. See you around. More tutorials on the way!
Cheers.
3 notes
·
View notes
Text
How to Create Mobile-Friendly Websites with Responsive Design
In today’s digital era, where mobile devices dominate web traffic, creating mobile-friendly websites has become more important than ever. As users increasingly access the internet through smartphones and tablets, businesses must ensure their websites are optimized for a seamless mobile experience. This is where responsive design comes into play. At Nividaweb, a leading responsive web design agency in Vadodara, we specialize in crafting websites that look and perform flawlessly on any device.

Here is a comprehensive guide on how to create mobile-friendly websites with responsive design:
What is Responsive Design?
Responsive web design is a design approach that ensures a website's layout and content adapt dynamically to different screen sizes and resolutions. Whether your users are browsing on a desktop, tablet, or smartphone, a responsive website delivers a consistent and user-friendly experience. This adaptability is essential for improving user engagement, reducing bounce rates, and enhancing overall website performance.
Why Responsive Design Matters?
Before diving into the how-to, let us understand why responsive design is crucial:
Improved User Experience: A responsive website ensures that users can navigate and interact with your site effortlessly, regardless of their device.
Higher Search Engine Rankings: Search engines like Google prioritize mobile-friendly websites in their rankings, making responsive design a key factor in SEO.
Increased Conversion Rates: With a user-friendly interface, responsive websites encourage visitors to stay longer and take action, boosting conversions.
Cost-Effective Maintenance: Instead of maintaining separate websites for desktop and mobile users, a responsive design simplifies updates and reduces costs.
Steps to Create a Mobile-Friendly Website with Responsive Design
1. Start with a Mobile-First Approach
The mobile-first approach involves designing the website for smaller screens first and then scaling up for larger devices. This method ensures that the core elements are optimized for mobile users. A responsive web design company in Vadodara like Nividaweb emphasizes this approach to ensure a seamless user experience on all devices.
2. Use a Flexible Grid Layout
A flexible grid layout is the foundation of responsive design. It allows website elements to adjust proportionally based on the screen size. Instead of fixed-width layouts, use percentages and relative units like ems or rems to define dimensions. This ensures that your website adapts smoothly to different screen resolutions.
3. Optimize Images and Media
Large images and media files can slow down your website, especially on mobile devices. To enhance performance:
Use responsive images that scale according to screen size.
Implement modern image formats like WebP for better compression.
Use CSS media queries to serve appropriate image sizes based on the user’s device.
At Nividaweb, a trusted responsive website design company in Gujarat, we leverage advanced tools to optimize images and improve loading times.
4. Implement CSS Media Queries
CSS media queries are essential for responsive design. They enable you to apply specific styles based on the device’s characteristics, such as screen width, height, or resolution.
5. Prioritize Touch-Friendly Navigation
Mobile users interact with websites using touch gestures, so it is essential to design navigation that is easy to use. Key considerations include:
Larger buttons and clickable areas.
Simplified menus with collapsible options for smaller screens.
Avoiding hover-dependent features, as they do not work well on touch devices.
6. Test on Multiple Devices and Browsers
Testing is a critical step in creating a mobile-friendly website. Use tools like Google’s Mobile-Friendly Test and browser developer tools to simulate various devices and screen sizes. Additionally, test your website on physical devices to identify and resolve any usability issues.
7. Ensure Fast Loading Times
Mobile users expect websites to load quickly. A slow-loading site can lead to higher bounce rates and lost opportunities. To optimize loading times:
Minimize HTTP requests by combining CSS and JavaScript files.
Enable browser caching and compression.
Use a Content Delivery Network (CDN) to deliver content faster.
As a responsive web design company in Vadodara, Nividaweb employs performance optimization techniques to ensure your website loads swiftly across all devices.
8. Leverage Responsive Typography
Typography plays a crucial role in readability and user experience. Use scalable fonts that adapt to screen sizes and maintain legibility on smaller devices. Tools like CSS’s viewport units (e.g., vw, vh) can help create fluid typography that adjusts dynamically.
9. Incorporate Mobile-Friendly Features
Enhance your website's usability by integrating features tailored for mobile users:
Click-to-call buttons for quick communication.
Location-based services like maps.
Fast and secure payment options for e-commerce websites.
10. Work with Experts in Responsive Design
Creating a truly responsive and mobile-friendly website requires expertise and experience. Partnering with a reputable responsive web design agency in Vadodara, like Nividaweb, ensures that your website meets the highest standards of design and functionality.
Why Choose Nividaweb for Responsive Website Design
Nividaweb is a leading responsive website design company in Gujarat, dedicated to transforming your online presence. Here is why businesses trust us:
Tailored Solutions: We understand that every business is unique. Our team works closely with clients to deliver customized designs that align with their brand identity and goals.
Cutting-Edge Technologies: We stay ahead of industry trends and utilize the latest tools and techniques to create responsive websites.
Experienced Team: Our skilled designers and developers have extensive experience in crafting mobile-friendly websites across diverse industries.
End-to-End Services: From design and development to testing and optimization, we provide comprehensive solutions for all your web design needs.
The Future of Mobile-Friendly Websites
As technology evolves, so do user expectations. Emerging trends like voice search, augmented reality, and progressive web apps are reshaping the way users interact with websites. At Nividaweb, we are committed to staying at the forefront of these developments, ensuring our clients remain ahead of the curve.
Conclusion
Creating a mobile-friendly website with responsive design is no longer optional; it is a necessity. By following the steps outlined in this guide and partnering with a reliable responsive web design agency in Vadodara, you can create a website that delivers exceptional user experiences, drives engagement, and boosts conversions.
Ready to take your website to the next level? Contact Nividaweb, the trusted responsive website design company in Gujarat, and let us help you create a website that stands out in today’s competitive digital landscape.
#Responsive web design agency in Vadodara#Responsive web design company in Vadodara#Gujarat#Responsive website design company in Gujarat#Vadodara#Website design and development company in Gujarat#India#Web design and development agency in Gujarat#Website design and development company in Vadodara#eCommerce web design in Vadodara#eCommerce website developer in Gujarat#eCommerce website developer in Vadodara#Best web design agencies in Vadodara#Web design company in Vadodara#Best website design company in Vadodara
5 notes
·
View notes
Text
I wrote out this list of instructions/recommendations for making Firefox your default browser, and setting up some extensions I recommend. This is all my personal preference - I’m no expert, but I made these instructions for some friends and family, so I figured I’d share here, too! All the extensions are linked for convenience.
1. Download Firefox, pin to dock of computer, set as default browser
Why Firefox? Mozilla is a non-profit organization, so unlike Google, they aren’t looking to continually turn a profit, and is an open-source project, meaning you can check the code at any time. Firefox and Safari are independent browsers, but others like Chrome, Brave, and Microsoft Edge all run on Chromium - meaning they’re essentially all Google. The downside to using them is that if your entire internet access is connected to Google, then Google is going to collect data on everything (and then turn around and sell it all over the place).
2. Add DuckDuckGo, set as default search engine for Firefox
Why DuckDuckGo? Unlike Google, DuckDuckGo doesn't collect data from users, and allows IP addresses to remain hidden/protected. Doesn’t use cookies to track activity. Doesn’t share IP address, search terms, etc. with sites you visit (Google, Yahoo, and Bing all share this data). I find that the search results are more “clean” and I usually find what I’m looking for faster, and with fewer “listicles”/bullshit SEO-filled nonsense.
Downsides: Some complex searches may not work (niche content can be missed, but pretty much everything else is good) - so if searching for academic sources, I recommend using Google Scholar instead. Also uses Apple Maps instead of Google, which I don’t like as much, but isn’t a huge problem on the desktop. I have some privacy-centric extensions listed below, which help protect me when I do need to turn to Google.
3. Import browser data from old browser.
4. Set homepage/new tab defaults → Settings.
5. Download Firefox on phone, follow instructions to sync to computer desktop.
6. Install extensions! Improve internet browsing experience! Check out my list of recommendations below.
7. When installing extensions, take a look at the “themes” and customize the look of your browser.
Ad Blockers
Adblocker Ultimate (blocks ads)
uBlock Origin (also blocks ads)
AdGuard Adblocker (guess what this is.)
AdBlock for Firefox (I just really hate ads and want to cover my bases)
Privacy extensions
Privacy Possum (interferes with data collection by sites, helps prevent tracking)
Don’t track me Google (speeds up search results, removes Google tracking feature)
I still don’t care about cookies (allows cookies for sites/prevents pop ups - use with cookie auto delete for privacy)
Cookie autodelete (automatically deletes cookie info from sites, pairs well with above)
Youtube extensions
Return Youtube Dislike (shows the number of dislikes on Youtube - Youtube removed this feature in 2021 for no good reason)
DeRound Youtube (personal preference - makes Youtube thumbnails “sharp”. I think it looks nicer like this.)
Youtube NonStop (prevents “are you still watching” prompts)
SponsorBlock (removes embedded sponsor promotions within Youtube videos)
Other helpful stuff
Unpaywall (checks database of 16 million legal, open-access articles when you view a paywalled scholarly article to see if there’s an open version available)
Don’t Accept image/webp (lets Firefox tell sites webp formats don’t work - enables easier access to downloadable jpeg/png formats on search results)
Absolute Enable Right Click and Copy (some sites block the right click copy/paste option, this extension restores that ability - this seemed to interfere with my use of Google Docs so I disabled it for the site, but it may be coincidental. Need to investigate - this extension is newer to me.)
Facebook Container (prevents Facebook/Meta from tracking all your web activity)
LeechBlock NG (can be enabled to prevent you from using certain sites in a certain timeframe - good for productivity)
Recommended extensions for Tumblr users
Shinigami Eyes (works on other sites too, but highlights trans-friendly people/orgs/etcs green, highlights anti-trans in red. Very useful for Tumblr - makes identifying and blocking hateful users easier)
XKit Rewritten (Tumblr XKit! OG XKit doesn’t work anymore, but I’ve had success with this one. Helps customize the site, sometimes can be used to get rid of/override stupid UI updates)
My personal XKit recommendations:
Toggle on:
Anti-Capitalism (hides ads)
Mutual Checker (notes who your mutuals are, useful if you follow a lot of people/have a lot of followers and want to know who your “friends” are - especially helpful if you have friends who often change icons/urls)
No Recommended (gets rid of recommended stuff - I clicked “hide” for all the options - I only want to see things posted/reblogged by the people I follow, or things I search for specifically. Clears up the homepage, too.)
Quick Reblog (I personally love this feature - I have it set up “above the reblog button” and checked “yes” for showing the blog selector (useful if you have multiple blogs on the same account), and the “show tags” field. With Quick Reblog, when you hover over the “reblog” button, it pops up a little box that lets me quickly select what blog (defaults to main), add tags, then reblog, queue, or save the post as a draft. I don’t usually add a comment, and never using Quick Reblog, so I didn’t enable that field. You can add more settings, but this is how I like to use it!)
Tweaks (I clicked “Restore links to individual posts in the post header”, “Remove the coloured shadow from focused posts”, “Hide the ‘blaze’ and ‘tip’ button labels”, “Hide my follower count where possible”, “Hide the ‘’Now, where were we?’ button”, and “Hide the Tumblr Live carousel” (I also “snooze” Tumblr Live weekly, but still). Again, these are all personal preferences! This is just how I like the site set up).
22 notes
·
View notes
Text
Best Material for Your Outdoor Gazebo - Types of Gazebo

In this guide, we’ll walk you through everything you need to know about choosing the best material for your outdoor gazebo. We’ll compare popular options like wood and vinyl, explore the pros and cons of different gazebo roof materials, and provide maintenance tips to help you make the most informed decision.
Types of Gazebos
Portable Gazebos
Portable gazebos are designed for ease of assembly and transport. These typically withstand wind speeds of 20-40 mph (Beaufort scale 4 to 5). They are best used in mild weather conditions and should be secured with anchors and weights.
Hardtop Gazebos
Hardtop gazebos, made with more robust materials like metal or polycarbonate, offer better wind resistance. They can withstand wind speeds of 50-80 mph (Beaufort scale 6 to 9). These are suitable for areas with moderate to high wind exposure.
Heavy-Duty Gazebos
Heavy-duty gazebos are designed for long-term use and can withstand wind speeds up to 100 mph (Beaufort scale 10). These structures often use industrial-grade materials and are ideal for commercial events or areas with frequent strong winds.
Understanding the Importance of Choosing the Right Gazebo Material
The material of your gazebo plays a significant role in determining its longevity, appearance, and maintenance needs. Your choice should align with your aesthetic preferences, climate conditions, and budget. Whether you want a classic wooden gazebo that blends seamlessly with nature or a low-maintenance vinyl gazebo option, understanding the characteristics of each material is key.
Wood Gazebos: Timeless Beauty and Natural Appeal
https://gazebohouse.com/wp-content/uploads/2024/08/Untitled-design-2024-08-23T081859.474.webp
Pros:
Aesthetic Appeal: Wood gazebos are celebrated for their natural beauty. They blend harmoniously with outdoor surroundings and can be customized with various stains or paints to match your style.
Customizability: Wood is easy to work with, allowing for intricate designs and custom features that can make your gazebo truly unique.
Cons:
Maintenance: Wood requires regular upkeep to prevent warping, rotting, or insect damage. This includes sealing, staining, and occasionally replacing damaged parts.
Weather Susceptibility: Without proper maintenance, wood can deteriorate quickly due to exposure to the elements.
Cost: Medium to High – Wood gazebos tend to be more expensive initially and over time due to maintenance costs.
Vinyl Gazebos: Low Maintenance and Modern Design
Pros:
Durability: Vinyl gazebos is resistant to rot, insects, and weather-related damage, making it a long-lasting option for outdoor structures.
Low Maintenance: Unlike wood, vinyl does not require regular painting or staining. It can be easily cleaned with soap and water.
Consistent Appearance: Vinyl maintains its color and appearance over time, with minimal fading or wear.
Cons:
Limited Customization: Vinyl gazebos offer fewer customization options compared to wood. They come in pre-designed styles and colors.
Aesthetic: While vinyl can mimic the look of wood, it may not have the same natural feel, which could be a drawback for those seeking a rustic appearance.
Cost: Medium – While the upfront cost of a vinyl gazebo can be higher, the lack of maintenance costs makes it a cost-effective choice in the long run.
Wood vs. Vinyl Gazebos: Which Is Better?
Choosing between a wood and vinyl gazebo depends on your priorities. If you value aesthetics and don’t mind the upkeep, a wood gazebo offers timeless beauty. However, if you’re looking for a low-maintenance, durable option, a vinyl gazebo might be the better choice. Both materials have their own advantages, and the decision should be based on your specific needs and the climate in your area.
Cost-Effective Gazebo Materials: What to Consider
When selecting the material for your gazebo, cost is a significant factor. While wood gazebos may have a higher initial cost and ongoing maintenance expenses, their natural beauty can be worth the investment. Vinyl gazebos, on the other hand, offer a lower maintenance solution with a potentially lower lifetime cost.
Maintenance Tips for Wood and Vinyl Gazebos
Wood Gazebo Maintenance:
Regular Cleaning: Clean your wood gazebo regularly to remove dirt, debris, and mildew. Use a mild detergent and water solution.
Sealing and Staining: Apply a wood sealant or stain every 1-2 years to protect the wood from moisture and UV rays.
Inspect for Damage: Periodically inspect the gazebo for signs of rot, insect damage, or warping. Address issues promptly to prevent further deterioration.
Vinyl Gazebo Maintenance:
Cleaning: Simply wash your vinyl gazebo with soap and water as needed. This will remove dirt and keep it looking new.
Inspect Joints: Occasionally check the joints and connections to ensure everything is secure.
Avoid Harsh Cleaners: Use non-abrasive cleaners to avoid scratching or damaging the vinyl surface.
Factors to Consider When Choosing Gazebo Materials
Before making your final decision, consider the following factors:
Climate: If you live in an area with extreme weather conditions, you’ll want a material that can withstand those elements.
Aesthetic Preference: Choose a material that complements your outdoor space and personal style.
Budget: Factor in both initial costs and long-term maintenance expenses.
Durability: Consider how long you want your gazebo to last and how much effort you’re willing to put into maintaining it.
Types of Gazebo Roof Materials: Pros and Cons
Your choice of roof material can significantly impact the overall look and functionality of your gazebo. Here are some common options:
Asphalt Shingles:
Pros: Affordable, available in various colors, and easy to install. They provide good protection against the elements.
Cons: May not last as long as other materials and can be susceptible to wind damage.
Metal Roofing (Aluminum, Steel):
Pros: Extremely durable, low maintenance, and resistant to weather damage. Metal roofs can last for decades.
Cons: More expensive than other materials and may not suit all aesthetic preferences.
Wood Shingles:
Pros: Provides a natural, rustic look that complements wood gazebos. Offers good insulation.
Cons: Requires regular maintenance and can be prone to rot or insect damage.
Polycarbonate Panels:
Pros: Lightweight, durable, and allows light to filter through, creating a bright, airy space.
Cons: Can be more expensive and may yellow over time if exposed to UV rays.
Thatch Roofing:
Pros: Provides a tropical, resort-like feel. It’s environmentally friendly and offers good insulation.
Cons: Requires more maintenance and may need to be replaced more frequently.
Final Thoughts
Selecting the best material for your outdoor gazebo involves weighing the pros and cons of each option against your needs, budget, and aesthetic preferences. Whether you choose the natural beauty of wood or the low-maintenance appeal of vinyl, both materials offer unique benefits. By considering the climate, your long-term plans, and the level of maintenance you’re willing to commit to, you can choose the perfect gazebo material that will enhance your outdoor space for years to come.
2 notes
·
View notes
Text
THIS HAS BEEN PATCHED BECAUSE STAFF HATE FUN 💔
Guide on making a GIF your profile picture on Tumblr!
I found out recently it is possible to add a GIF as a profile picture on here, but it takes a few extra steps. So I made this guide to help everyone :]
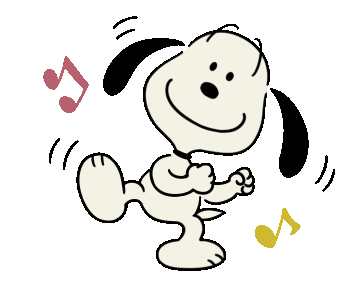
Step 1: Get a GIF
For this example I'm going to use this Snoopy sticker I found on LINE:
Step 2: Turn your GIF into a WebP
A necessary evil, unfortunately. This can be done super easily via the amazing ezgif.com. Just pop your GIF into the WebP converter and It'll work It's magic ✨
IMPORTANT NOTE: IF YOU WANT A TRANSPARENT IMAGE, MAKE SURE YOU HAVE "don't stack frames" ENABLED UNDER EFFECTS -- OTHERWISE IT WILL LOOK LIKE THIS.
Step 3: Add it as a profile picture!
As far as I know, you can't do this on mobile yet (at least, I can't do it on iOS on v30.0.2). So you have to do it on Web. (I did test and it does work on Tumblr Web as long as you do it via, say, Safari or Chrome on your phone). So use tumblr on your computer
ALL DONE!
please use this responsibly. keep in mind that as of right now (July 10) these are NOT affected by “disable GIF animation” in dashboard settings, so please be extra careful to not use any gifs that could cause seizures.
14 notes
·
View notes
Text
Best Image Sizes for Your Website
Introduction
In the rapidly evolving digital landscape, optimizing images for both mobile and desktop users has become crucial. As of January 2024, mobile devices account for 59.01% of all website traffic, underscoring the importance of this practice. A well-optimized image not only enhances the visual appeal of your website but also significantly improves loading times, user engagement, and SEO performance. This comprehensive guide delves into the details of image optimization, including pixel dimensions, file sizes, and essential tools, to ensure your website images are perfectly tailored for an optimal online experience.
Best Practices for Website Image Sizes
Background Images
Background images are often the first visual contact a visitor has with your site. Their size and quality set the tone for your website, making it crucial to use high-quality images that are visually striking yet optimized for fast loading.
Optimal dimensions: 2500x1406 pixels
Aspect ratio: 16:9
File size: Up to 20 MB
Hero Images
Hero images are central to capturing user attention. They need to be large enough to be engaging but not so heavy as to slow down your site. Balancing these factors is key to creating an impactful first impression.
Ideal width: 1280-2500 pixels
Height: 720-900 pixels
Aspect ratio: 16:9
File size: Up to 10 MB
Website Banners
Banners, whether for advertising or site navigation, must be sized appropriately for effectiveness and speed. They should be visually appealing without compromising website performance.
Varied sizes: e.g., 300x200, 970x90 pixels
File size: Up to 5 MB
Blog Images
Consistency in blog image dimensions is essential for a cohesive look. It enhances the reader's experience by providing visually appealing and relevant imagery without distracting from the content.
Maximum width: 2240 pixels
Height: 1260 pixels
Aspect ratio: 16:9
File size: Up to 3 MB
Logos
Logos, though small, are a vital part of your brand identity. They should be clear and distinct, adaptable to different platforms while maintaining consistency in appearance.
Width and height: Up to 250 pixels
Aspect ratios: 1:1, 2:3, 4:1
File size: Up to 1 MB
Mobile Image Optimization: Catering to a Mobile-First Audience
Choosing the Right Dimensions and File Size
Mobile optimization focuses on balancing size and quality. Images should be large enough to be clear and detailed, especially for product photos, but small enough to maintain fast loading times on mobile devices.
Resizing for Mobile Screens
Adapting image dimensions for mobile screens is crucial. This includes using square or vertical images that fit well on smaller screens, ensuring a visually appealing and user-friendly mobile browsing experience.
Balancing Quality and Performance
Different image formats offer various benefits, such as JPG for a good balance of quality and file size, PNG for transparency, and WebP for superior compression. Choosing the right format is crucial for optimizing image performance on your website.
Determining Image Sizes: Tools and Techniques
Browser tools like 'Inspect Element' allow you to check image dimensions directly on your website, offering a practical way to assess and adjust image sizes as needed.
Tools for Image Optimization
Tools like Squirai Image Optimizer and LoyaltyHarbour Image Optimizer automate the optimization process, making it easier to manage image sizes and quality across your website.
Conclusion
Optimizing images is not merely a technical task but a strategic imperative in today's digital world. By following the guidelines and practices outlined in this guide, you can ensure that your website images are perfectly optimized, leading to enhanced user experience, faster page loading times, and improved SEO rankings. Remember, in the visual landscape of the web, the right image size and quality can make a substantial difference in your website's performance and appeal.
4 notes
·
View notes