#Synology monitoring setup
Explore tagged Tumblr posts
Visit Tumblr Blog
Explore Tumblr blogs with no restrictions, modern design and the best experience.
Last Seen Tumblr Blogs


Fun Fact
The “We are the 99%” Tumblr blog became the slogan for the Occupy Wall Street movement.
Text
Cybersecurity Tips to Secure Synology NAS against Ransomware
This month signifies the Cybersecurity Awareness Month. Therefore, I will be discussing some security best practices and offering “Cybersecurity Tips to Secure Synology NAS against Ransomware”. Please see How to disable Ads in Windows 11, How to Backup MacOS to Synology NAS via Time Machine, and how to Turn Off Windows 11 Tips and Suggestions Notifications. Many organisations struggle to manage…
#3-2-1 Backup Rule#configure Synology monitoring#Join Synology to the Domain#Offsite Backup#Synology#Synology Active Insights#Synology Configuration#Synology DS923+ NAS#Synology DSM 7.2#Synology Monitoring#Synology monitoring setup#Synology NAS#Synology NAS backup#Synology NAS monitoring#Synology Time Machine#Tips for Advanced Data Protection#VPN on Synology NAS
0 notes
Text
Choosing the Best Network Video Recorder for Your Security Needs — Hi Focus
In today’s digital era, selecting the best network video recorder (NVR) is crucial for maintaining a robust and reliable security system. An NVR not only stores video footage from IP cameras but also offers advanced features like remote access, motion detection, and analytics. Let’s explore what makes an NVR stand out and review some of the best network video recorders available in the market.
What to Look for in the Best Network Video Recorder
When searching for the best network video recorder, consider the following features:
Camera Compatibility: The best network video recorder should support various IP camera brands and models to ensure flexibility.
Storage Options: Look for an NVR with expandable storage options to accommodate your video footage.
Remote Monitoring: The best network video recorder offers seamless remote access via mobile apps or web interfaces.
AI and Analytics: Advanced features like face recognition and object detection are essential in the best network video recorder for enhanced security.
Ease of Setup: Plug-and-play functionality is a hallmark of the best network video recorder, ensuring a hassle-free installation process.
Benefits of Using the Best Network Video Recorder
Enhanced Security: The best network video recorder ensures uninterrupted monitoring and recording.
Cost Efficiency: With expandable storage and multi-channel support, the best network video recorder saves money over time.
User-Friendly Interfaces: Many of the best network video recorder provides intuitive dashboards for easy navigation and management.
Future-Proofing: Advanced features like AI and remote access ensure the best network video recorder remains relevant as technology evolves.
Conclusion
Choosing the best network video recorder involves understanding your specific needs and budget. Models like the Hikvision DS-7608NI-K2/8P and Synology DVA3221 excel in their respective categories, offering unparalleled performance and features. Whether for home or enterprise use, the best network video recorder can make all the difference in maintaining a secure environment. Explore your options and invest in a system that guarantees reliability and peace of mind.
0 notes
Text
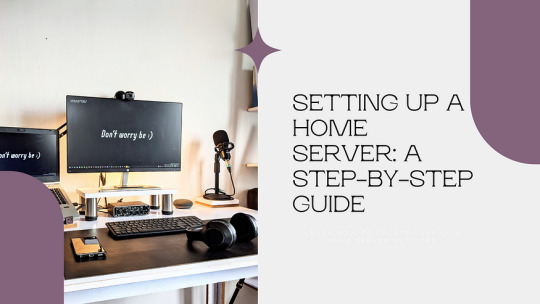
Setting Up a Home Server: A Comprehensive Guide
In today’s digital age, having a home server can be a game-changer. It allows you to centralize your data, stream media, and even host your own websites or applications. Setting up a home server may seem daunting, but with the right guidance, it can be a rewarding and empowering experience. In this blog post, we’ll walk you through the steps to set up your very own home server.
Choosing the Right Hardware
The first step in setting up a home server is to select the appropriate hardware. The hardware you choose will depend on your specific needs and budget. Here are some factors to consider:
Processor: The processor, or CPU, is the heart of your server. Look for a processor with multiple cores and a decent clock speed to ensure smooth performance.
RAM: The amount of RAM you need will depend on the tasks you plan to perform on your server. As a general rule, aim for at least 4GB of RAM, but 8GB or more is recommended for more demanding applications.
Storage: The storage capacity of your server will determine how much data you can store. Consider using a high-capacity hard drive or a combination of hard drives in a RAID configuration for redundancy and improved performance.
Operating System: Choose an operating system that suits your needs. Popular options include Windows Server, Linux (e.g., Ubuntu Server, CentOS), or even a NAS (Network Attached Storage) operating system like FreeNAS or Synology DSM.
Setting Up the Server Hardware
Once you’ve selected your hardware, it’s time to set up the physical server. Follow these steps:
Assemble the Hardware: Carefully follow the instructions provided with your server components to assemble the hardware. This may involve installing the CPU, RAM, and storage drives.
Connect the Cables: Connect the necessary cables, such as the power cable, network cable, and any additional cables required for your specific setup.
Install the Operating System: Follow the installation instructions for your chosen operating system. This may involve creating bootable media, partitioning the storage, and configuring the initial settings.
Configuring the Server Software
With the hardware set up, it’s time to configure the server software. The specific steps will vary depending on the operating system you’ve chosen, but here are some general guidelines:
Update the Operating System: Ensure that your operating system is up-to-date by installing the latest security patches and updates.
Set Up Network Settings: Configure the network settings, such as the server’s IP address, subnet mask, and default gateway, to ensure it can communicate with your home network.
Install and Configure Services: Depending on your needs, you may want to install and configure various services, such as a web server (e.g., Apache or Nginx), a file server (e.g., Samba or NFS), a media server (e.g., Plex or Emby), or a database server (e.g., MySQL or PostgreSQL).
Secure the Server: Implement security measures, such as setting up a firewall, enabling two-factor authentication, and regularly updating your server’s software to protect against potential threats.
Accessing and Managing the Server
Once your server is set up and configured, you’ll need to learn how to access and manage it. Here are some tips:
Remote Access: Depending on your server’s operating system, you may be able to access it remotely using a web-based interface, a desktop client, or a command-line tool. This allows you to manage your server from anywhere.
Backup and Restore: Implement a reliable backup strategy to protect your data. This may involve using a cloud-based backup service or setting up a local backup solution.
Monitoring and Maintenance: Monitor your server’s performance, logs, and resource usage to ensure it’s running smoothly. Regularly maintain your server by applying updates, managing user accounts, and addressing any issues that arise.
Practical Applications for a Home Server
A home server can be used for a variety of purposes, including:
File Storage and Sharing: Use your home server as a central storage location for your files, documents, and media, making them accessible to all devices on your home network.
Media Streaming: Turn your home server into a media hub by hosting your personal media library and streaming it to various devices throughout your home.
Web Hosting: Host your own websites, web applications, or even a personal blog on your home server, giving you full control over your online presence.
Backup and Disaster Recovery: Utilize your home server as a backup solution, ensuring your important data is safe and secure in the event of a hardware failure or other disaster.
Home Automation: Integrate your home server with smart home devices and services, allowing you to centralize and automate various aspects of your home.
0 notes
Text
can sonology use a vpn client
🔒🌍✨ Get 3 Months FREE VPN - Secure & Private Internet Access Worldwide! Click Here ✨🌍🔒
can sonology use a vpn client
VPN client for sonology
Title: Choosing the Best VPN Client for Synology NAS Devices
In the digital age, ensuring the security and privacy of your data is paramount, especially when it comes to network-attached storage (NAS) devices like Synology. With the increasing threat of cyber-attacks and surveillance, using a Virtual Private Network (VPN) client for your Synology NAS is essential for safeguarding your sensitive information.
When selecting a VPN client for your Synology NAS, several factors should be considered to ensure optimal performance and security. Here are some key points to keep in mind:
Compatibility: Choose a VPN client that is compatible with Synology's operating system, DiskStation Manager (DSM). Look for VPN providers that offer dedicated apps or setup guides specifically for Synology devices.
Security Features: Opt for a VPN client that prioritizes security features such as strong encryption protocols (e.g., OpenVPN, IKEv2/IPSec), DNS leak protection, and a kill switch. These features will help protect your data from unauthorized access and ensure your online activities remain private.
Server Network: Consider the VPN provider's server network and locations. A VPN with a diverse range of servers across the globe will offer better connectivity and the ability to bypass geo-restrictions, allowing you to access content from different regions securely.
Speed and Performance: Look for a VPN client that offers high-speed connections and minimal latency. Since NAS devices are used for file storage and sharing, a VPN that maintains fast upload and download speeds is crucial for seamless data transfer.
User-Friendly Interface: Choose a VPN client with an intuitive interface that makes it easy to set up and manage on your Synology NAS. A user-friendly interface will streamline the configuration process and allow you to monitor your VPN connection effortlessly.
In conclusion, selecting the right VPN client for your Synology NAS is essential for maintaining the security and privacy of your data. By considering factors such as compatibility, security features, server network, speed, and usability, you can ensure that your Synology NAS remains protected against cyber threats while enjoying seamless connectivity.
Sonology security with VPN
Sonology security with VPN Sonology security is crucial for maintaining the integrity and confidentiality of sensitive data within an organization. With the increasing number of cyber threats targeting businesses, implementing robust security measures is essential to safeguard valuable information. One effective way to enhance Sonology security is by using a Virtual Private Network (VPN).
A VPN creates a secure and encrypted connection between devices, ensuring that data transmitted over the network remains private and protected from unauthorized access. By routing Sonology traffic through a VPN server, organizations can prevent cybercriminals from intercepting communication and gaining access to confidential information.
In addition to encrypting data, VPNs can also help organizations bypass geo-restrictions and censorship, allowing Sonologists to access restricted content and online resources from anywhere in the world. This can be especially beneficial for Sonologists who travel frequently or work remotely, as it enables them to stay connected and productive without compromising security.
Furthermore, using a VPN for Sonology security can enhance overall network performance by reducing latency and improving connection speeds. By optimizing network traffic and providing a secure tunnel for data transmission, VPNs help Sonologists work more efficiently and effectively without worrying about potential security risks.
In conclusion, leveraging a VPN for Sonology security is a proactive and effective measure to protect sensitive data and ensure a secure working environment for Sonologists. By encrypting data, bypassing restrictions, and optimizing network performance, VPNs play a vital role in safeguarding valuable information and mitigating cybersecurity threats within the Sonology field.
VPN benefits for sonology
VPN, or Virtual Private Network, offers a range of benefits for Sonology enthusiasts. Sonology is the study of sound and its applications, which often involves accessing and sharing sensitive audio files. Using a VPN while engaging in Sonology activities can enhance security and privacy.
One of the primary benefits of utilizing a VPN for Sonology is data encryption. VPNs encrypt internet traffic, making it difficult for third parties to intercept and view sensitive audio files being transmitted. This encryption is crucial when sharing proprietary sound recordings or research data related to Sonology.
Moreover, VPNs provide users with anonymity by masking their IP addresses. This feature is particularly useful for Sonology experts who want to maintain privacy while conducting research online or accessing region-restricted content. By hiding their IP addresses, Sonology enthusiasts can protect their identities and avoid potential surveillance.
Additionally, VPNs enable users to bypass geo-blocks and access Sonology-related content from anywhere in the world. This is advantageous for individuals who travel frequently or live in regions where certain audio resources are restricted. With a VPN, Sonology researchers can connect to servers in different countries and explore a broader range of sound studies materials.
In conclusion, VPNs offer a secure and versatile solution for Sonology enthusiasts looking to safeguard their data, maintain anonymity, and access unrestricted audio resources. By incorporating a VPN into their online activities, Sonology experts can enhance their digital privacy and expand their research capabilities.
Sonology VPN protocols
Sonology VPN protocols refer to the different methods used by Sonology VPN services to establish secure and encrypted connections between a user's device and the VPN server. These protocols play a crucial role in ensuring the privacy and security of users' data transmitted over the internet.
One of the most common VPN protocols used by Sonology is OpenVPN, known for its robust security features and reliability. OpenVPN utilizes open-source technology and implements secure socket layer (SSL) encryption to create a secure tunnel for data transmission. It is compatible with a wide range of devices and operating systems, making it a versatile choice for Sonology users.
Another popular protocol used by Sonology is IKEv2/IPsec. This protocol is known for its fast connection speeds and stability, making it ideal for users looking for a balance between security and performance. IKEv2/IPsec is particularly well-suited for mobile devices, as it can quickly re-establish connections in case of network changes.
Sonology VPN services also commonly support protocols such as L2TP/IPsec and PPTP. While these protocols may not offer the same level of security as OpenVPN or IKEv2/IPsec, they are still widely used for their compatibility with a variety of devices.
In conclusion, Sonology VPN protocols play a crucial role in ensuring the security and privacy of users' internet connections. By offering a range of protocols to choose from, Sonology enables users to select the best option based on their specific needs for security, speed, and device compatibility.
Implementing VPN in sonology
Implementing a Virtual Private Network (VPN) in Synology can enhance the security and privacy of your network and data. Synology offers built-in VPN Server and VPN Client features that allow users to establish secure connections remotely.
To implement a VPN in Synology, users can start by setting up the VPN Server on their Synology NAS device. This can be done by configuring the VPN Server settings in the DiskStation Manager (DSM) interface. Users can choose from various VPN protocols such as OpenVPN, L2TP/IPSec, or PPTP based on their preferences and security requirements.
Once the VPN Server is set up, users can create accounts for remote access and configure connection settings. They can also set up port forwarding on their router to allow external connections to the VPN Server.
On the client side, users can configure VPN Client settings on their devices to connect to the Synology VPN Server securely. By using the Synology VPN Client application or configuring native VPN client settings on their devices, users can establish encrypted connections to their Synology NAS and access resources securely over the internet.
Implementing a VPN in Synology provides a secure way to access the network remotely, protect sensitive data from unauthorized access, and ensure privacy while browsing the internet. By following the steps to set up the VPN Server and Client features, users can enjoy a safer and more private online experience with their Synology NAS.
1 note
·
View note
Text
[Media] Wi-Fi 6 mesh router WRX560
Wi-Fi 6 mesh router WRX560 High performance mesh-ready router in a space-saving design! WRX560 is engineered for demanding networks where connectivity is essential. Wi-Fi 6 technology combined with six MIMO high-performance internal antennas, four dedicated to 5GHz and two for 2.4GHz. Together, they bring higher speeds to more devices at greater ranges, all in a compact form factor. Wi-Fi 6 technology: combined with high-performance internal antennas bring higher speeds to more devices at greater ranges, all in a compact design. Signal booster for large homes: combine multiple Synology routers (WRX560 or other) for consistent and high-speed whole-home coverage under a single Wi-Fi name. Network segmentation and security: Isolate networks, for example, between home and work, or set access rules to limit connectivity to and from vulnerable devices. Use intuitive controls to separate Wi-Fi and cabled networks for your PCs and entertainment, camera surveillance, and smart devices. Then create access rules between networks to prevent horizontal attacks. ▫️ Synology VPN Plus included ▫️ Comprehensive parental controls customizable to your needs ▫️ Monitor network and device usage in real-time, even while away ▫️ Quick and easy setup with free mobile app for iOS or Android Buy online: 🛒 https://amzn.to/3A3hJyB #router #mesh

2 notes
·
View notes
Text
Synology netatalk snmp

#Synology netatalk snmp install
#Synology netatalk snmp software
#Synology netatalk snmp code
Update for SkyNAS is now available in Affected Products. Synology-SA-22:06 Netatalk (Severity: Critical). Why isn't the synology reporting via SNMP. and set the IP address and MIB as APCC but am not sure where to find the SNMP version or community. The SMART status is reporting good on both the Synology and my monitoring software.
#Synology netatalk snmp software
The issue is, the software I am using to monitor the device over SNMP says everything is A-OK. Synology has warned customers that some of its network-attached storage (NAS) appliances are exposed to attacks exploiting multiple critical Netatalk vulnerabilities. Both firms are developing patches to address the issues. Update for DSM 6.1 and DSM 5.2 are now available in Affected Products. It is being reported that it has bad sectors. Users of Synology and QNAP NAS equipment are being warned about major Netatalk vulnerabilities in their operating systems. Update for SRM 1.2 is now available in Affected Products. Update for VS960HD is now available in Affected Products. Users of Synology and QNAP network-attached storage (NAS) devices are advised to be on the lookout for patches for several critical vulnerabilities affecting Netatalk, an open-source implemention. Update for DSM 6.2 is now available in Affected Products.
#Synology netatalk snmp code
A remote unauthenticated attacker can leverage this vulnerability to achieve arbitrary code execution. This is due to lack of bounds checking on attacker controlled data. Network UPS Support - DiskStation now supports connecting to SNMP (Simple Network Management Protocol) UPS devices or network management cards, allowing your. Netatalk before 3.1.12 is vulnerable to an out of bounds write in dsi_opensess.c.If it is successful, you will see a bunch of numbers. snmpwalk -v 2c -c your-community-passphrase 192.168.1.20. CVSS3 Vector: CVSS:3.0/AV:N/AC:L/PR:N/UI:N/S:U/C:H/I:H/A:H Ensure device SNMP is enabled, check community passphrase, check which snmp protocol, v1, v2c, v3 is in use, and perform a snmpwalk on it.In addition, entering Name for Controller A and Controller B, Location, and Contact helps you identify your Synology Unified. A vulnerability allows remote attackers to execute arbitrary code via a susceptible version of Synology Diskstation Manager (DSM) and Synology Router Manager (SRM). Habilitar servicio SNMP Marque Habilitar servicio SNMP y siga estos pasos. En la actualidad, se admiten los protocolos SNMPv1, SNMPv2c y SNMPv3. If you need immediate assistance, please contact Synology technical support via. To enable SNMP privacy: Tick Enable SNMP privacy. El servicio SNMP (en Panel de control > Terminal y SNMP > SNMP) que permite a los usuarios controlar Synology NAS con el software de administración de red.
#Synology netatalk snmp install
Please manually download and install version 6.1.7-15284-3. Update for DSM 6.2 is now available in Affected Products.A vulnerability allows remote attackers to execute arbitrary code via a susceptible version of Synology Diskstation Manager (DSM) and Synology Router Manager (SRM). Update for SRM 1.3 is now available in Affected Products. Update for DSM 7.0 is now available in Affected Products. In environments where AFP is still needed, setting up firewall rules to only allow trusted clients to connect over AFP (port 548) can be used as temporary mitigation. We recommend using SMB protocol instead when connecting from macOS.įor Synology systems not yet upgraded to DSM 7.1-42661-1 or newer, administrators can disable "AFP service" to mitigate this specific vulnerability. This service has been disabled by default since DSM 7.0. I was able to turn on SNMP on the main device, but I'm unclear if the other one automatically gets the same settings change (doesn't really make sense as it's located somewhere else, so the Location field needs to be set differently). We've just setup HA on our Synology devices, and are wondering how SNMP is going to work. Netatalk provides file access through AFP (Apple Filing Protocol) on DSM. It's sad that this thread has no responses. Multiple vulnerabilities allow remote attackers to obtain sensitive information and possibly execute arbitrary code via a susceptible version of Synology DiskStation Manager (DSM) and Synology Router Manager (SRM).
0 notes
Text
Synology drive review

#Synology drive review install
#Synology drive review Pc
#Synology drive review download
You just have to put it in every device along with the login credentials for each user. Using the feature anywhere makes it more trouble-free by creating customized sharing links. You can allocate how much storage you want a single user to have or just use all the storage capacity all at once. It is also your own storage, and that means privacy is secured.Įach user will input credentials of their own storage space by accessing the web portal or mobile app. The feature is similar to other cloud services, but you don’t need to pay monthly recurring fees. READ: 2022 Kia Sorento now in the Philippines, price starts at PHP 2,398,000 Private cloud space for each user and shared team foldersīy creating multiple users and groups in “Control Panel> User&Group> Create”, they can have access to the storage with their own Synology Drive space. If your company has multiple PCs to sync, this application can help Admin easily monitor all sync tasks on different PCs’ Synology Drive Clients. This application is automatically installed along with Synology Drive. Here’s the significant part of using the Synology Drive, you can monitor all your properties and resources at once, build team folders to all users on Synology NAS, and setup sharing rules by using the Synology Drive Admin Console. Centralized console of all your properties We have been using this feature for a while now on our “must-have files” for extra backup protection, while our resource files are directly synced to the NAS only to save storage on our local computer. On-demand sync is proper when you need to save up computer storage, and it is a practical feature for limited file syncing. It is also useful when there are two or more devices, and you can access the other files by using a shared folder and syncing them to your device and vice versa. It’s the safest and easiest way to backup as it will detect what kind of file has changed with an extra feature that stores previous versions and easily restores files. It’s like you have access to the NAS and local storage at the same time.
#Synology drive review download
On the top of the left navigation bar, t here’s also Sync Task where you can choose Sync Rules such as Two-way sync, Download data from Synology D rive only, or Upload to Synology D rive only. It is a beneficial tool to make life easier without thinking about whether the backup is running or not as it runs underlying in the PC. The two options (continuous backup and scheduled backup) will automate backup whether it is simultaneous or how often the backup will run in a specific given time. For Backup Task, you can choose a specific folder or drive to backup, choose how backup will progress, such as continuous, manual, and scheduled backup.
#Synology drive review install
Now that you know what Synology Drive does, you can download the Synology Drive Client and install it to Windows or macOS to automate backup and sync the PC’s storage to the Synology NAS. READ: Logitech G launches G435 LIGHTSPEED Wireless Gaming Headset in the Philippines Backup and Sync on Synology Drive Client You can also create users and give the user’s credentials to people you want to share the storage.
#Synology drive review Pc
It automates backup from PC while the mobile app allows you to access all data such as upload and share files, etc. In contrast, Synology Drive is on the simpler side. It is on the comprehensive side of backup as it can operate different devices that most businesses use, such as Virtual Machines, PC, File Servers, and Physical Servers. But ABB focuses more on the extensive whole-device backup. Synology Drive Client’s Backup Task and ABB quite resemble the same functions-backing up essential files in a centralized space. Synology Active Backup for Business ( ABB ) vs Synology Drive Client’s Backup T askįor those who are familiar with Synology, some may confused about when to use Synology Drive Client Backup Task and when to use Synology’s well-known business backup application, Synology Active Backup for Business (ABB). Once installed on a specific device, it will allow you to store files in the Synology NAS device directly. They have different interfaces depending on the device. There’s also a Smartphone App and a portal link to access the WebGUI. Speaking of, on the client-side, you must install the Synology Drive Client to PC or macOS to do backup and sync.
0 notes
Text
Wd security for mac

WD SECURITY FOR MAC MOD
WD SECURITY FOR MAC FULL
WD SECURITY FOR MAC SOFTWARE
WD SECURITY FOR MAC PASSWORD
WD SECURITY FOR MAC PC
There is very little information available online regarding this model but so far the drives seem very nice, are quiet, and perform excellently in my Synology NAS. However, when tested with smartmontools I can confirm TLER is NOT enabled by default, so I don't know what else is different or altered with this model number. The R/N was US7SAL080 which matches up with an Ultrastar He10-8 (a fantastic drive btw). Overall Review: If you plan to shuck, I've bought 5 of these over the last few months and all of them contained a drive with model number WD80EZAZ. No problem with overheating after the drive was removed and in my NAS. If you use any drive monitoring software, it will report your disk is overheating anytime data is read or written. **Possibly** a great drive inside.Ĭons: Extremely poor case ventilation for normal use. I noticed the design of it is a similar style to my son's Xbox one, so if you are needing something to match that, it could work well. It is exFAT formatted, so just be aware of that if it is a problem for you (it was not for me). It took several hours to transfer the 6+ gigs of data, but it all went smoothly. I remember setting up my windows home server with several 2tb drives, and now there is more than that in 1 drive that I can stick in a bag. Overall Review: This is just staggering how much storage is now available in a single drive unit. After a long file transfer, it is hot to the touch, but if sitting there, barely warm. Annoying if you are wanting to turn it off and on for occasional use. There are 2 different style plugs for this apparently, 1 will only take up 1 slot on a power strip (cord at bottom, outlet plugs are in a "I I" position), the other takes up 2 due to mounting sideways (cord at bottom, plug is in a = position), unless it is mounted on the first plug of the strip. I cannot hear it from 4 feet away.Ĭons: "sideways" power plug. No bright LED (some say a con, I say a pro).Įasy setup (just plug it an and my computer recognized it)
WD SECURITY FOR MAC MOD
** In addition, you can even re-use the enclosure (with hardware encryption) to accept a different hard drive you just have to mod the enclosure PCB. ** So I am giving this hard drive 5-stars still simply because, while it does have mandatory hardware encryption, you CAN remove the internal drive without damaging the enclosure (but will void warranty), and you can use the internal WD Blue (WD60EZRZ) in another computer.
WD SECURITY FOR MAC FULL
Drive came back with no bad sectors after a full drive scan using WD's Disk Diagnostic tool. Overall Review: - Only time will tell how reliable this little external enclosure and the drive inside is. This doesn't seem to have any indicator LED. There are no indicator LED lights to inform the user if the drive is in use or on. If the enclosure dies, it is unlikely you will be able to recover your data because it was encrypted. This is Western Digital quality, so the drive should be reliable.Ĭons: - This thing DOES have mandatory hardware encryption on the enclosure PCB.
WD SECURITY FOR MAC SOFTWARE
There IS software & hardware encryption IF you purposefully want it. Unless you are a ninja, this will VOID your warranty.**
WD SECURITY FOR MAC PC
Meaning you can remove the bare internal hard drive from the enclosure and put the hard drive into your PC for use (no encryption). Despite what people say this hard drive enclosure CAN be shucked. Power brick isn't too large, points downwards. Pros: - Sleek looking external hard drive.
WD SECURITY FOR MAC PASSWORD
Software for device management and backup with password protectionĪdditional Information Date First Available Note: Compatibility may vary depending on user's hardware configuration and operating system and requires reformatting for Time Machine May require reformatting for other operating systems It comes with all the software you need to help protect your data, and is compatible with Time Machine.įormatted exFAT for out-of-the-box compatibility with Windows and Mac My Book desktop hard drive is ready to use out of the box so you can start transferring files, saving your memories and backing up right away. My Book desktop storage has massive storage capacity so you can confidently back up the files that make up your digital life. We live hectic lives and generate tons of digital content. Just activate password protection and set your own personalized password using our downloadable software. The My Book desktop computer hard drive's built-in 256-bit AES hardware encryption with password protection helps keep your content private and safe. Learn more about the Western Digital WDBBGB0120HBK-NESN Best Seller RankingĮquipped with backup software for Windows and Apple Time Machine compatibility for Mac, the My Book desktop hard drive can back up your photos, videos, music, and documents.
1 note
·
View note
Text
Razer App For Mac
Razer Mac Software
Best App For Mac Computer
Razer Mamba 1.01 - Driver for gaming mouse. Download the latest versions of the best Mac apps at safe and trusted MacUpdate Download, install, or update Razer Mamba for Mac from MacUpdate. ITunes is the world's easiest way to organize and add to your digital media collection. We are unable to find iTunes on your computer. To buy and download apps by (?), get iTunes now.
Now that new quad-core and hexa-core MacBook Pro models are here, I’ve been eager to see how they pair up with an AMD Vega 64-powered eGPU setup. Specifically, I’d like to see how such a setup compares with the recently released Blackmagic eGPU.
Using the Razer Core X, an enclosure I rated as the best overall external graphics chassis for Mac users, I ran a variety of benchmark tests with both the 13-inch and 15-inch 2018 MacBook Pro. What did I learn? Watch the video for the details.
Synology RT2600ac: The AirPort Extreme replacement.
First and foremost, you get more upfront and longterm value for your money by opting for the Razer Core X over a Blackmagic eGPU with a non-upgradable Radeon Pro 580 inside. There are only two reasons why you might seriously consider the Blackmagic eGPU over the Razer Core X, or similar enclosure like the Sonnet eGFX Breakaway Box.
This allows for synced streaming into both ears from your compatible iOS device -- you just need one of Cochlear's ReSound hearing aids. After that, the volume control on the iPhone will control the implant's settings. Cochlear also is selling the Made for iPhone Bimodal Solution, which consists of a cochlear implant in one ear and a hearing aid in the other ear. You can do even more by downloading the Nucleus Smart App, including location tracking to figure out the last place the Nucleus 7 was connected (handy for lost devices). Interested consumers have to wait until September 2017 for the Nucleus 7, and it will only be available in the US and Canada. Nucleus app for mac.
Your environment must remain as quiet as possible. If this is the case, then no other eGPU on the market can compete with the Blackmagic chassis in this regard; it’s impressively quiet, even when pushed.
You wish to connect your LG UltraFine 5K Display to external graphics via Thunderbolt 3.

Unless you meet at least one of the two aforementioned scenarios, then you should probably choose to go the custom route with an external chassis like the Razer Core X. It provides you with the flexibility that comes from being able to choose your own graphics card. If you choose a high-end card like the RX Vega 64, it’s performance will nearly double the performance of the RX 580-equipped Blackmagic eGPU.
My second takeaway is this: External GPUs are equalizers when it comes to graphics performance.
Torrent app for mac. The 13-inch MacBook Pro may be inferior to the discrete graphics capability included with 15-inch models, but that changes when you throw an eGPU into the mix.
As you can see from the results, an eGPU puts the 13-inch base model 2018 MacBook Pro on even ground (from a graphics perspective) with the souped-up 15-inch MacBook Pro. Even my 2017 entry-level MacBook Pro performs comparably to the high-end 15-inch 2018 model while both are using an eGPU.
Of course, this is for graphics performance only, not CPU power. If your primary application is gaming or other graphics-intensive work, then an eGPU will go a long way towards improving your performance, especially in a laptop form factor where things like CPU throttling may come into play.
For all of my testing, I ran both machines in closed display (clamshell) mode while connected to the eGPU and external monitor running at 4K resolution scaled to 1080p (pixel doubled “Retina”).
The first test that I ran was an Unigine Valley and Heaven comparison.
• Tap, then tap Delete Message. Message app for mac download. To delete a message: • In a message conversation, touch and hold the message bubble that you want to delete, then tap More. If you want to delete all messages in the thread, tap Delete All in the upper-left corner.
You can see them by choosing Go to Folder from the Go menu in the Finder and pasting in ~/Library/Containers/com.apple.Notes/Data/Library/CoreData/ExternalRecords. Then open the “Note” folder and then the “_records” folder. You’ll find yourself looking at a folder with a 32-character hyphenated name, which you can open. Even the notes that you choose to save “On my Mac” end up sandboxed in places like ~/Library/Containers/com.apple.Notes/Data/Library/CoreData/ExternalRecords/AA97DB8E-73B4-4C75-B54F-B39E5BC7521F/Note/_records/0/p6.notesexternalrecord, where ~/Library means the (usually invisible) “Library” folder that sits alongside your “Documents”, “Music” and “Pictures” folders. Mac app for netflix.
Sponsored Links Now, select your favorite theme. Let’s dive ahead to create and edit slideshows in Photos for macOS Sierra on Mac. Besides, you also have the option to reorder the photos as desired and decide how long each slide should appear. Picture slide show app for mac mini.
Settings for Ungine Heaven are as follows:
Quality: Ultra
Resolution: 1080
Tessellation: Moderate
Anti-aliasing: 2X
Settings for Valley were the same, minus the Tessellation.
As you can see, the Vega 64-equipped Razer Core X handily outperforms the RX 580 inside the Blackmagic eGPU on both machines, coming close to double the FPS. Also notice how close the 13-inch and 15-inch machines compare in FPS for each test.
The second test was a Geekbench 4 Metal compute comparison. In this test, you can see that the 13- and 15-inch MacBook Pro performed the same while using the Blackmagic eGPU. There is a little more separation when comparing the 13- and 15-inch machines when driven by the Razer Core X, but not much. This again shows how an eGPU can help level out graphics performance between these two machines. It also, again, reiterates how much better the Vega 64 is.
Next, I ran an OpenCL benchmark using LuxMark. Again, a similar picture is painted. 13- and 15-inch models put forth like performances when using the same eGPU, but the Vega 64 graphics are far and away more capable than what’s found in the Blackmagic eGPU.
Lastly, I ran a benchmark test using the Metal-powered F1 2017, a game available for purchase on the Mac App Store. I configured the game to use ultra high settings at 1080p with full anti-aliasing. FPS trended close to 60 FPS when running the Razer X Core, while staying close to 40 FPS with the Blackmagic eGPU. 40 FPS is still playable, but obviously 60 FPS and higher is what most gamers want to shoot for.
Apple is taking the concept of pairing an eGPU with a Mac very seriously, and the fact that an external chassis like the Blackmagic eGPU is being sold in the Apple store is a testament to this. As time goes on, and as this concept becomes more familiar among consumers, I suspect that support for eGPUs in macOS will continue to improve. Already, we’re seeing improvements in the macOS Mojave beta, which now lets users target specific apps for eGPU acceleration, even on a MacBook Pro or iMac’s built-in display.
Razer Mac Software
Looking at the test results, its easy to recommend an external chassis with an upgradable GPU over an all-in-one solution like the Blackmagic eGPU. Unless you require the type of silence offered by Blackmagic, or if you’re using an LG UltraFine 5K Display, then it’s hard to recommend its chassis.
An eGPU box like the Razer Core X can accommodate much faster graphics cards, and is considerably more future-proof than the Blackmagic box. The only other reason I could see someone opting for the Blackmagic eGPU is if they absolutely don’t want to fool with installing an eGPU. Yet, I think most people who would consider an eGPU would be technically savvy enough to install a PCIe card inside of an empty chassis.
Best App For Mac Computer
What do you think about the performance results? Sound off in the comments with your thoughts and opinions!
0 notes
Text
How to use a Raspberry Pi 4 as a Minecraft Java Server
My 14 year old got tired of paying $7.99 for Minecraft Realm so he could host his friends in their world. He was just hosting on his laptop and then forwarding a port but that means his friends can't connect unless he's actively running. I was running a Minecraft Server in a Docker container on my Synology NAS but I thought teaching him how to run Minecraft Server on a Raspberry Pi 4 we had lying around would be a good learning moment.
First, set up your Raspberry Pi. I like NOOBS as it's super easy to setup. If you want to make things faster for setup and possibly set up your Pi without having to connect a monitor, mouse, or keyboard, mount your SSD card and create a new empty file named ssh, without any extension, inside the boot directory to enable ssh on boot. Remember the default user name is pi and the password is raspberry.
SSH over to your Raspberry Pi. You can use Putty, but I like using Windows 10's built-in SSH. Do your standard update stuff, and also install a JDK:
sudo apt update sudo apt upgrade sudo apt install default-jdk
There are other Minecraft 3rd party Java Servers you can use, the most popular being Spigot, but the easiest server you can run is the one from Minecraft themselves.
Go to https://www.minecraft.net/en-us/download/server in a browser. It'll say something like "Download minecraft_server.1.16.2.jar and run it with the following command." That version number and URL will change in the future. Right-click and copy link into your clipboard We are going to PASTE it (right click with your mouse) after the "wget" below. So we'll make a folder, download the server.jar, then run it.
cd ~ mkdir MinecraftServer cd MinecraftServer wget https://launcher.mojang.com/v1/objects/c5f6fb23c3876461d46ec380421e42b289789530/server.jar java -Xmx2500M -Xms2500M -jar server.jar nogui
You'll get a warning that you didn't accept the EULA, so now open "pico eula.txt" and set eula=true, then hit Ctrl-X and Yes to save the new file. Press the up key and run your command again.
java -Xmx2500M -Xms2500M -jar server.jar nogui
You could also make a start.sh text file with pico then chmod +x to make it an easier single command way to start your server. Since I have a Raspberry Pi 4 with 4g gigs of RAM and it'll be doing just this one server, I felt 2500 megs of RAM was a sweet spot. Java ran out of memory at 3 gigs.
You can then run ifconfig at and command line and get your Pi's IP address, or type hostname to get its name. Then you can connect to your world with that name or ip.
Performance Issues with Complex Worlds
With very large Minecraft worlds or worlds like my son's with 500+ Iron Golems and Chickens, you may get an error like
[Server Watchdog/FATAL]: A single server tick took 60.00 seconds (should be max 0.05)
You can workaround this in a few ways. You can gently overclock your Pi4 if it has a fan by adding this to the end of your /boot/config.txt (read articles on overclocking a Pi to be safe)
over_voltage=3 arm_freq=1850
And/or you can disable the Minecraft internal watchdog for ticks by setting max-tick-time to -1 in your server's server.properties file.
We solved our issue by killing about 480+ Iron Golems with
/kill @e[type=minecraft:iron_golem]
but that's up to you. Just be aware that the Pi is fast but not thousands of moving entities in Minecraft fast. For us this works great though and is teaching my kids about the command line, editing text files, and ssh'ing into things.
Sponsor: Never miss a beat with Seq. Live application logs and health checks. Download the Windows installer or pull the Docker image now.
© 2020 Scott Hanselman. All rights reserved.


Bron: Scott Hanselman's Computer Zen https://www.hanselman.com/blog/HowToUseARaspberryPi4AsAMinecraftJavaServer.aspx
0 notes
Text
Docker Setup: Monitoring Synology with Prometheus and Grafana
In this article, we will discuss “Docker Setup: Monitoring Synology with Prometheus and Grafana”. We will be utilizing Portainer which is a lightweight/open-source management solution designed to simplify working with Docker containers instead of working with the Container Manager on Synology. Please see How to use Prometheus for Monitoring, how to Install Grafana on Windows and Windows Server,…
#Accessing Grafana and Prometheus#Add Portainer Registries#Configure and Run Prometheus Container#docker#Docker Containers on Synology#Enter5yourownpasswordhere123456#Enter5yourownpasswordhere2345#Grafana monitoring#Grafana/Prometheus Monitoring#How To Install Prometheus And Grafana On Docker#install portainer#Modify Synology Firewall Rules#monitoring solutions for Docker#portainer#portainer server#Prometheus Grafana integration#Prometheus metrics#Pull Docker Images for Grafana and Prometheus#Set Up Grafana Data Source#Synology monitoring setup#Your Portainer instance timed out for Security Purposes
0 notes
Text
Choosing the Best Network Video Recorder for Your Security Needs
In today’s digital era, selecting the best network video recorder (NVR) is crucial for maintaining a robust and reliable security system. An NVR not only stores video footage from IP cameras but also offers advanced features like remote access, motion detection, and analytics. Let’s explore what makes an NVR stand out and review some of the best network video recorders available in the market.
What to Look for in the Best Network Video Recorder
When searching for the best network video recorder, consider the following features:
Camera Compatibility: The best network video recorder should support various IP camera brands and models to ensure flexibility.
Storage Options: Look for an NVR with expandable storage options to accommodate your video footage.
Remote Monitoring: The best network video recorder offers seamless remote access via mobile apps or web interfaces.
AI and Analytics: Advanced features like face recognition and object detection are essential in the best network video recorder for enhanced security.
Ease of Setup: Plug-and-play functionality is a hallmark of the best network video recorder, ensuring a hassle-free installation process.
Benefits of Using the Best Network Video Recorder
Enhanced Security: The best network video recorder ensures uninterrupted monitoring and recording.
Cost Efficiency: With expandable storage and multi-channel support, the best network video recorder saves money over time.
User-Friendly Interfaces: Many of the best network video recorder provides intuitive dashboards for easy navigation and management.
Future-Proofing: Advanced features like AI and remote access ensure the best network video recorder remains relevant as technology evolves.
Conclusion
Choosing the best network video recorder involves understanding your specific needs and budget. Models like the Hikvision DS-7608NI-K2/8P and Synology DVA3221 excel in their respective categories, offering unparalleled performance and features. Whether for home or enterprise use, the best network video recorder can make all the difference in maintaining a secure environment. Explore your options and invest in a system that guarantees reliability and peace of mind.
0 notes
Text
How to use a Raspberry Pi 4 as a Minecraft Java Server
My 14 year old got tired of paying $7.99 for Minecraft Realm so he could host his friends in their world. He was just hosting on his laptop and then forwarding a port but that means his friends can't connect unless he's actively running. I was running a Minecraft Server in a Docker container on my Synology NAS but I thought teaching him how to run Minecraft Server on a Raspberry Pi 4 we had lying around would be a good learning moment.
First, set up your Raspberry Pi. I like NOOBS as it's super easy to setup. If you want to make things faster for setup and possibly set up your Pi without having to connect a monitor, mouse, or keyboard, mount your SSD card and create a new empty file named ssh, without any extension, inside the boot directory to enable ssh on boot. Remember the default user name is pi and the password is raspberry.
SSH over to your Raspberry Pi. You can use Putty, but I like using Windows 10's built-in SSH. Do your standard update stuff, and also install a JDK:
sudo apt update sudo apt upgrade sudo apt install default-jdk
There are other Minecraft 3rd party Java Servers you can use, the most popular being Spigot, but the easiest server you can run is the one from Minecraft themselves.
Go to https://www.minecraft.net/en-us/download/server in a browser. It'll say something like "Download minecraft_server.1.16.2.jar and run it with the following command." That version number and URL will change in the future. Right-click and copy link into your clipboard We are going to PASTE it (right click with your mouse) after the "wget" below. So we'll make a folder, download the server.jar, then run it.
cd ~ mkdir MinecraftServer cd MinecraftServer wget https://launcher.mojang.com/v1/objects/c5f6fb23c3876461d46ec380421e42b289789530/server.jar java -Xmx2500M -Xms2500M -jar server.jar nogui
You'll get a warning that you didn't accept the EULA, so now open "pico eula.txt" and set eula=true, then hit Ctrl-X and Yes to save the new file. Press the up key and run your command again.
java -Xmx2500M -Xms2500M -jar server.jar nogui
You could also make a start.sh text file with pico then chmod +x to make it an easier single command way to start your server. Since I have a Raspberry Pi 4 with 4g gigs of RAM and it'll be doing just this one server, I felt 2500 megs of RAM was a sweet spot. Java ran out of memory at 3 gigs.
You can then run ifconfig at and command line and get your Pi's IP address, or type hostname to get its name. Then you can connect to your world with that name or ip.
Performance Issues with Complex Worlds
With very large Minecraft worlds or worlds like my son's with 500+ Iron Golems and Chickens, you may get an error like
[Server Watchdog/FATAL]: A single server tick took 60.00 seconds (should be max 0.05)
You can workaround this in a few ways. You can gently overclock your Pi4 if it has a fan by adding this to the end of your /boot/config.txt (read articles on overclocking a Pi to be safe)
over_voltage=3 arm_freq=1850
And/or you can disable the Minecraft internal watchdog for ticks by setting max-tick-time to -1 in your server's server.properties file.
We solved our issue by killing about 480+ Iron Golems with
/kill @e[type=minecraft:iron_golem]
but that's up to you. Just be aware that the Pi is fast but not thousands of moving entities in Minecraft fast. For us this works great though and is teaching my kids about the command line, editing text files, and ssh'ing into things.
Sponsor: Never miss a beat with Seq. Live application logs and health checks. Download the Windows installer or pull the Docker image now.
© 2020 Scott Hanselman. All rights reserved.


How to use a Raspberry Pi 4 as a Minecraft Java Server published first on https://deskbysnafu.tumblr.com/
0 notes
Text
How to use a Raspberry Pi 4 as a Minecraft Java Server
My 14 year old got tired of paying $7.99 for Minecraft Realm so he could host his friends in their world. He was just hosting on his laptop and then forwarding a port but that means his friends can't connect unless he's actively running. I was running a Minecraft Server in a Docker container on my Synology NAS but I thought teaching him how to run Minecraft Server on a Raspberry Pi 4 we had lying around would be a good learning moment.
First, set up your Raspberry Pi. I like NOOBS as it's super easy to setup. If you want to make things faster for setup and possibly set up your Pi without having to connect a monitor, mouse, or keyboard, mount your SSD card and create a new empty file named ssh, without any extension, inside the boot directory to enable ssh on boot. Remember the default user name is pi and the password is raspberry.
SSH over to your Raspberry Pi. You can use Putty, but I like using Windows 10's built-in SSH. Do your standard update stuff, and also install a JDK:
sudo apt update sudo apt upgrade sudo apt install default-jdk
There are other Minecraft 3rd party Java Servers you can use, the most popular being Spigot, but the easiest server you can run is the one from Minecraft themselves.
Go to https://www.minecraft.net/en-us/download/server in a browser. It'll say something like "Download minecraft_server.1.16.2.jar and run it with the following command." That version number and URL will change in the future. Right-click and copy link into your clipboard We are going to PASTE it (right click with your mouse) after the "wget" below. So we'll make a folder, download the server.jar, then run it.
cd ~ mkdir MinecraftServer cd MinecraftServer wget https://launcher.mojang.com/v1/objects/c5f6fb23c3876461d46ec380421e42b289789530/server.jar java -Xmx2500M -Xms2500M -jar server.jar nogui
You'll get a warning that you didn't accept the EULA, so now open "pico eula.txt" and set eula=true, then hit Ctrl-X and Yes to save the new file. Press the up key and run your command again.
java -Xmx2500M -Xms2500M -jar server.jar nogui
You could also make a start.sh text file with pico then chmod +x to make it an easier single command way to start your server. Since I have a Raspberry Pi 4 with 4g gigs of RAM and it'll be doing just this one server, I felt 2500 megs of RAM was a sweet spot. Java ran out of memory at 3 gigs.
You can then run ifconfig at and command line and get your Pi's IP address, or type hostname to get its name. Then you can connect to your world with that name or ip.
Performance Issues with Complex Worlds
With very large Minecraft worlds or worlds like my son's with 500+ Iron Golems and Chickens, you may get an error like
[Server Watchdog/FATAL]: A single server tick took 60.00 seconds (should be max 0.05)
You can workaround this in a few ways. You can gently overclock your Pi4 if it has a fan by adding this to the end of your /boot/config.txt (read articles on overclocking a Pi to be safe)
over_voltage=3 arm_freq=1850
And/or you can disable the Minecraft internal watchdog for ticks by setting max-tick-time to -1 in your server's server.properties file.
We solved our issue by killing about 480+ Iron Golems with
/kill @e[type=minecraft:iron_golem]
but that's up to you. Just be aware that the Pi is fast but not thousands of moving entities in Minecraft fast. For us this works great though and is teaching my kids about the command line, editing text files, and ssh'ing into things.
Sponsor: Never miss a beat with Seq. Live application logs and health checks. Download the Windows installer or pull the Docker image now.
© 2020 Scott Hanselman. All rights reserved.


How to use a Raspberry Pi 4 as a Minecraft Java Server published first on http://7elementswd.tumblr.com/
0 notes
Text
Best Tech Gear for Working From Home
If you’re headed home to work and haven’t done it much previously, there are some tech items worth thinking about. Here are some that we at ExtremeTech find particularly worth considering, in addition to a couple of obvious items like an external monitor if you’re working with a laptop.
Quality Conferencing Speaker
While your office may have a good setup for participating in conference calls, your home office probably doesn’t. Speaking as a journalist who listens in on several virtual press conferences a month, I can easily tell when one of the presenters is trying to make do with their laptop’s built-in microphone, their phone, or a cheap webcam. In my case, I have both a nice Logitech 1080p webcam perched on my monitor and use a speakerphone for audio-only calls.
Currently, I’m testing a review unit of eMeet’s M2 conference-friendly speaker ($199.99).

It is a UFO-shaped design, with a solid build featuring a machined-aluminum chassis. Playback is a definite step above any smartphone I’ve used, but the unit’s real strength is a set of microphones surrounding its edge that give it a 360-degree sound field, coupled with audio processing that allows for speaking at various distances and helps filter out background noise. You can use it via Bluetooth, via the supplied audio cable, or using the included wireless USB dongle. I’ve had good success with it for both voice calls and with Skype. Especially if you have more than one person at your location on a call, it is a lot better solution than having everyone hunched over the same smartphone trying to be heard. It isn’t a true speakerphone, though, so if you need a model that is also a phone on its own, you need to look elsewhere.
If you don’t want to shell out for a dedicated conference speaker, remember that in a pinch you can use a Google Home or Mini or some other voice-assistant appliances as a speakerphone. I’ve kept a Google Mini next to my home office machine for just that reason. Speaking of Google, I’ve been experimenting with leaving my Pixel 3 on Record while I’m dialed in. That gives me a decent transcription of the call that I can use to backstop my notes. There are also specialized call recording options for various applications. I’ve used Amalto Call Recorder with Skype successfully. The free version has a time limit on call length, though. (Also remember that different states have different laws about recording phone calls.)
Audio Headset
A speakerphone isn’t always the best solution. For starters, unless your keyboard is really quiet, if you type during calls you’ll be really unpopular (this is another thing that happens on a surprising number of press calls). Or, if you aren’t the only one working from home, you may not have the option of blaring your calls out of a speaker. Finally, with a quality headset, the microphone can do a better job than most speakerphones. Particularly when on a call with non-native English speakers, I find using a good headset especially helpful. In my case, I own a Jabra Evolve 40 ($115)
that I’ve found a reasonable compromise between a decent price and good quality audio.
Monitor Light
Particularly if you need to work in the same space as other family members, lighting your work area effectively without disturbing them can be a problem. Simply sticking a desk lamp next to your computer typically spills the wrong amount of light in the wrong places. Fortunately, a dedicated monitor light is a great solution.
My favorite is the ScreenBar
family from Benq ($99-$129). I’ve been using the original for several years. It provides a targeted, dimmable, light source from its location on top of your monitor. I use it to light my keyboard and any documents I need while I’m working. Their newer Plus model adds a desktop control, which I find more convenient than using the touch controls on the bar itself. It also has a very cool feature where its ambient light sensor adjusts its output to provide you with a constant level of overall illumination.
Fail-Over Plan for Your Internet Connection
The internet is an amazing thing — when you can get to it. At the office, your company probably has a system of fallbacks to keep everyone connected if an ISP has an issue. At home, you probably don’t. Depending on your location and budget, there are a few possibilities for setting one up. The simplest might be to get a phone plan that allows you to use your device as a hotspot and comes with enough bandwidth that you can work over it. Or get a dedicated hot spot device with a data plan.
If you’re likely to be working from home long-term, though, it might be worth investing in a second ISP connection. In our case, we have a fairly-fast primary connection over Comcast, with a slower backup over AT&T. The two are plugged into a Synology RT2600ac Router ($199.99)
that supports automatic failover. Most of the time I second-guess whether we need to pay for two ISPs, but once every month or two it pays for itself when we can work even when our primary connection is down for a few hours.
Exercise Gear
It’s really easy when working from home to become something of a couch potato. Going for walks is great, but it isn’t always to make enough time. Going to a gym is traditional advice, but if you’re staying home to avoid excessive contact, it may not be the best option.
Obviously there is a nearly unlimited selection of home exercise equipment, but one I have found particularly compatible with working at my home desk is an under-desk “cycle.” With a decent one, you can dial in the resistance. More expensive models will also keep track of your distance. I have a relatively inexpensive model — a Stamina InMotion E1000 (I paid $89.99, now it’s $104.99)
that so far has worked well. Keep in mind that you’ll need a high-enough desk to allow you to cycle under it.
Cooking Tech
I read an article recently from a journalist who found himself confined to home and bemoaned how much he was spending on food delivery services like Postmates and Doordash. For me, that totally misses out on one of the biggest advantages of working from home — it is much easier to cook for yourself and your family. For starters, you can probably cook dinner in the same time you usually spend commuting. Plus, you can get a head start on meal prep during the day, and even experiment with meals that require a long time to cook.
Assuming you’ve already got some type of stove and oven, for me the most valuable “next” cooking appliance is an Instant Pot. The newest versions, like the Duo Evo Plus ($109)
that I own, can slow cook, sous-vide, pressure cook, and more. If you want to get a little more exotic and have the budget, check out our reviews of the Brava Oven and Cinder Grill.
Keep Your Receipts
You may be able to expense your work-from-home gear costs. Expense report processor AppZen reports that around 6 percent of COVID-19 expense reports filed so far have been for work-from-home expenses. Even if your employer doesn’t cover them, you may be able to file them as deductions on your income as Employee Business Expenses. Of course, if you are a freelancer or run your own business, then there is a good chance they are deductions you can take directly against your business income.
We’ve only scratched the surface here, so please let us know in the comments any tech items you find helpful for working from home.
[Image Credit: David Cardinal]
Now Read:
ExtremeTech’s Top Tips for Working From Home
COVID-19 Pushes Steam to Record Number of Active Users
AT&T, Comcast Offer Improved Internet Access in Wake of COVID-19
from ExtremeTechExtremeTech https://www.extremetech.com/computing/307436-best-tech-gear-for-working-from-home from Blogger http://componentplanet.blogspot.com/2020/03/best-tech-gear-for-working-from-home.html
0 notes
Text
Reolink Baby Monitor WiFi Camera 2.4G/5G 2MP Full HD 1080P


NOTE: AliExpress Standard_BE = AliExpress China Warehouse

CUSTOMS Buyers are responsible for VAT and Custom Taxes. Any problems, please contact us. IMPORTANT Orders over 2pcs from China, please separate into several orders due to Aliexpress Shipping Limitation. If any extra fee caused by this, please contact us for solution. Thanks. Ship from China: only EU/UK plug avaliable

Reolink C1 Baby Monitor WiFi Camera 2.4G/5G 1080P Full HD Pan/Tilt Video Surveillance Indoor Home Security IP Camera (5V2A Power Adapter, EU/UK plug available) Baby Monitor C1 Specifications *1080P super HD videos *Dual Band WiFi 2.4/5.8GHz Makes Stronger Network Signals. Never worry about network off-line. *Real-time motion detection alerts, protect your home and business. *8pcs LED lights result in a night vision range as long as 12 meters in the dark. *Built-in Micro SD card Slot, support up to 64GB *Lens: f= 4.0 mm, F=2.0, with IR-CUT *Viewing Angle: HA: 90°, VA: 45° *Pan/Tilt Angle: HA: 355°, VA: 105° *Frame Rate: 25fps/30fps *Support upload video to ftp serve *Operating Power: 5V2A, US/EU/UK/AU Plug *Network Connectivity: Plug and play, QR Code *OS Supported: PC: Windows, Mac OS; Smart Phone: iOS, Android; Tablets *3rd party software support list: Blue Iris, iSpy, Synology Nas, Qnap Nas. For other software client which not list here, please contact Reolink Service Team to confirm.

See Your Live Videos in Sharp 1080p HD The new Reolink C1 1080p security camera allows you to experience Full HD videos and images in resolution of 1920 x 1080 (much clearer and sharper than 720p). With up to 105-degree wide viewing angle, and advanced night vision, you can see whatever is happening at home.

High Quality Infrared Night Vision Technology 8pcs LED lights result in a night vision range as long as 12 meters in the dark, giving you 24/7 surveillance. Feel free to turn off the IR LEDs, if you don’t feel comfortable with them at night. Meanwhile, turning infrared LED lights off may also prevent your night vision camera from being damaged by thieves at night.

Flexible 355° Pan & 105° Tilt: Every Angle Covered C1 HD Pan/Tilt WiFi camera comes with a wide rotating angle — 355° horizontally and 105° vertically. So you see every part of your home with easy pan and tilt control.

Dual Band WiFi Makes Stronger Network Signals Our goal is to do the best wireless surveillance camera, with easier Internet connection and no network off-line. · You can finish the quick and easy setup within several minutes. No messy cabling. · With 2.4 GHz/5 GHz dual band WiFi available, and 2T2R MIMO antennas, C1 1080p WiFi surveillance camera enables no signal loss and interference.

Listen and Talk to Your Loved Ones Reolink C1 indoor security camera features two-way audio stream through built-in microphone and speaker. So you can speak to your elders, kids, babysitters, and pets, to make sure they are doing well at home.

Easy Storage on SD Card, Phone app&Windows/Mac PC This baby monitor has a built-in SD Card slot, and support up to 64GB. It can do motion detection recording with the card. If you want 24hrs recording, you may connect it to your Windows/Mac PC and keep it running on the Reolink Client.

Smart Motion Detection for Alerts Send you alert e-mails and push notifications to your device when a danger is detected. Upload and save captured images/videos to an FTP server. Record and save motion-detected videos to your inserted Micro SD card (can be up to 64GB), or your Reolink wireless NVR. Choose specific motion detecting zones to monitor any area you want, and setup motion detection sensitivity to reduce false alarms.

Remote Viewing, Anytime, from Anywhere No matter where you are, you can remotely access the camera to see live streaming and stay connected. Remotely view the camera via: free Reolink App on your mobile device, free Reolink Client on your computer, web browsers (IE, Google Chrome, Microsoft Edge, Safari, Firefox, etc.).


Home Surveillance Cam C2 window.adminAccountId=200508591; Read the full article
0 notes