#adobe capture
Explore tagged Tumblr posts
Visit Tumblr Blog
Explore Tumblr blogs with no restrictions, modern design and the best experience.
Last Seen Tumblr Blogs


Fun Fact
The most popular pages on Tumblr are about Minecraft, GIFs, and David J. Peterson.
Text

6 notes
·
View notes
Text
Vectorize with Adobe Capture
How to vectorize Procreate jpg images with Adobe Capture to export as svg to Affinity Designer #warmup4art #arttips #art #procreate #affinitydesigner #vector
Vectorize Procreate Files With a solid black or textured black image in Procreate that is saved as a .jpg to your camera roll, Adobe Capture will vectorize the image as an .svg to export to Affinity Designer where you can group your motifs for further coloring and arranging as a vector image. Here’s what that looks like: Let me know if you have any questions. This came up as a question in a…
0 notes
Text


0 notes
Text

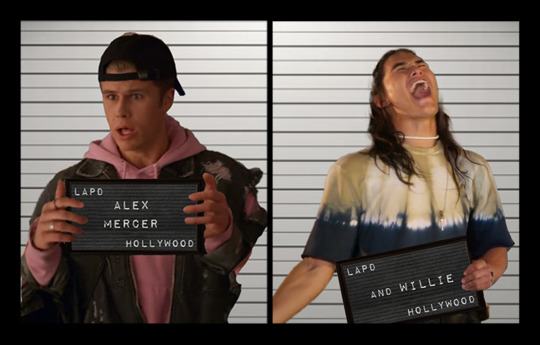
#adobe is the bane of my existence#i hate them#but have a willex barbie meme#willex#i was working on it forever ago#completely scraped it#started over after adobe forced an update and moved everything on me#dealt with one crash that took me back to like 40% done#after i had just put the finishing touches on it#and despite using the same screen captures#willie still looks different?#idk#joolee attempts other fan works#alex mercer#willie jatp#jatp#julie and the phantoms#alex x willie#barbie meme#fan edit#jatp fan edit
456 notes
·
View notes
Text
today I messed around in vocaloid 2 (vocaloid 2 Miku dark is my FAVORITE) and made Miku sing rudimentary Japanese phrases I learned in school and it was tiny but I did it and I'm proud of myself. making music in any capacity is my biggest dream but I don't ever take steps towards that goal because I don't know where to start and I'm scared. but today showed me I can do it and it's more accessible than I thought!!!
#i was thinking about how when you're ten and learning to play the recorder in school the first song you learn is hot cross buns#so. i went and made miku sing hot cross buns (hatto kurasu bansu) just to like. interface w the software#because id never opened it until now. because i was scared and didn't know how to use it#but i was always be scared and i will NEVER know how to use it if i never open it!! so i did! and it was fine#then i had miku sing wastashi no namae wa miku desu~ and then ongaku wa suki desu and i actually ended up really liking the melody#i made up for the second line. and i was like I CAN WRITE MUSIC! ANYONE CAN WRITE MUSIC! YOU CAN DO IT BUG!!!!#just gotta try!!!! try is how you learn!!!!! ahhh!!!!#anyways. my first project is making a cover of aegen and my big goal project is to make a cover of the entirety of three cheers#buggie sounds#tuning is not as scary as i thought! idk if im doing it all the way right but it was fun :-)#i really am going to have to redownload a DAW though......#DAWs are fucking scary i dont like them. i used to (try to) make beats in FL studio a decade ago and. idk#daws are strange beasts that bite. not like my kind and simple video editor (side eyes adobe after effects)#i am nervois about doing an actual cover bc i am not sure how capturing a song's vocals will go but.... I'll cross that bridge later#just glad i opened it and tried :-) yippee!#maybe for my first song itll just be japanese 101 and thats like. the schtick.#where is the train station? it is 3pm now. today is sunday. will we go to the ocean tomorrow? i drank coffee this morning. etc
5 notes
·
View notes
Text


The Puebloans captured Santa Fe from the Spanish during the Pueblo Revolt on August 21, 1680.
#Puebloans#Native Americans#captured#Pueblo Revolt#21 August 1680#anniversary#US history#Santa Fe#New Mexico#summer 2014#original photography#architecture#cityscape#Cathedral Basilica of Saint Francis of Assisi#La Fonda#New Mexico Museum of Art#New Mexico State Capitol#San Miguel Chapel#De Vargas Street House#Palace of the Governors#adobe#travel#vacation#USA#tourist attraction
9 notes
·
View notes
Text
the issue is that sometimes you work really hard on a gif and finish and realize its appallingly ugly
#i should just learn after effects but the adobe creative suite is hell on earth#so im gonna keep on trying to capture the vibe in a gifset exactly 10 people will reblog#char.txt
4 notes
·
View notes
Text
The Science of Climate Change and Technology Solutions
Introduction
Climate change, of all the challenges, is among the most critical in the modern day. With such unpredictability from variable weather patterns and global average temperature increases, the need for implementable solutions has perhaps never been so extreme. By exploring the intriguing intersection of climate-change science and innovative technology solutions, TechtoIO goes to the bottom of this global issue. Read to continue
#Science Explained#Tagsafforestation#biodiversity loss#carbon capture#climate change adaptation#climate change science#climate resilience#electric vehicles#energy efficiency#extreme weather#global warming#greenhouse effect#impacts of climate change#melting polar ice#precision farming#reforestation#renewable energy#rising sea levels#smart grids#sustainable agriculture#technology solutions for climate change#Technology#Science#business tech#Adobe cloud#Trends#Nvidia Drive#Analysis#Tech news#Science updates
1 note
·
View note
Text
C'mon Adobe: Just Give Us A Photography Plan Without AI
I’ve had an Adobe subscription for over 10 years now, possibly close to 15. Even though I’ve been more of a Capture One user for the last 3 years for my photography editing, I still maintain my Adobe Photography Plan to use Lightroom mobile and Adobe Photoshop. While I’ve been fairly impressed with the additions and improvements they’ve brought to the table for the most part of the last decade, I…
#adobe#Adobe Creative Cloud#adobe lightroom#adobe photoshop#capture one#creative cloud#editing software#lightroom#photoshop#post processing software#software
0 notes
Text
Photo retouching services
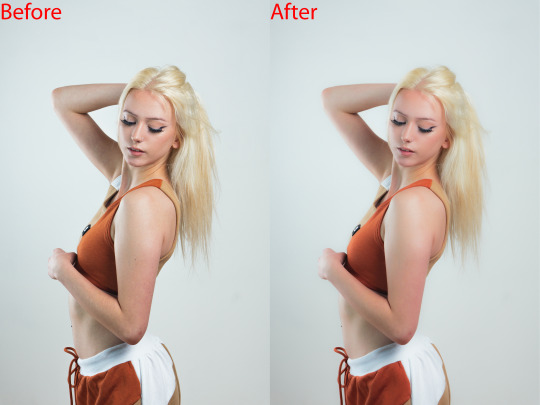
Photo retouching services are offered by many companies and freelancers, and they involve editing digital images to improve their appearance or fix any flaws. These services can range from basic adjustments like color correction and exposure balancing to more advanced techniques such as removing blemishes, reshaping the body, or even adding or removing objects from the image. That's correct! Photo retouching services encompass a wide range of editing techniques to enhance the visual appeal of digital images. These services are commonly used in various industries, including fashion, advertising, e-commerce, and photography. Basic adjustments typically involve correcting exposure, color balance, contrast, and sharpness to improve the overall appearance of the image. More advanced techniques may include skin retouching to remove blemishes, wrinkles, or scars, as well as body reshaping to slim or enhance body contours. Other advanced retouching services may include background removal, adding or removing objects or people from the image, and composite image creation. These services are often used to create visually stunning images for advertising, marketing campaigns, or personal projects. It's important to note that photo retouching services should be done with care and attention to detail to maintain the integrity of the original image while enhancing its visual appeal.
#affinity photo high end retouching#skin smoothing capture one#skin retouching and color grading in photoshop#pixelmator pro skin retouching#face retouching in photoshop cc plugins#one click skin retouching free photoshop action#affinity photo face retouch#capture one skin smoothing#capture one portrait retouching#capture one pro skin retouching#capture one skin retouching#capture one face retouching#masking photo editing lightroom#masking in adobe camera raw#skin smoothing plugin photoshop#skin retouching camera raw#skin retouching capture one#skin retouching and photo masking service
1 note
·
View note
Text
Visual Alchemy: Exploring the Magic of AI in Modern Photography
By: Joseph Correa
Follow @Frontproofmedia!function(d,s,id){var js,fjs=d.getElementsByTagName(s)[0],p=/^http:/.test(d.location)?'http':'https';if(!d.getElementById(id))(document, 'script', 'twitter-wjs');
In the ever-evolving landscape of technology, one realm that has undergone a transformative journey is photography. From the early days of cumbersome equipment to today's sleek and sophisticated cameras, the integration of artificial intelligence (AI) has played a pivotal role in redefining how we capture moments. In this article, we delve into the fascinating intersection of AI and modern photography, exploring how advancements in AI technology are reshaping the creative process and pushing the boundaries of what is possible.
The Role of AI in Autofocus Systems:
One of the remarkable areas where AI has significantly impacted is in the realm of autofocus systems. Camera manufacturers, such as Sony, have been at the forefront of incorporating AI to enhance autofocus capabilities. Sony's latest cameras leverage AI algorithms to intelligently track and focus on subjects, even in challenging conditions. This technology ensures photographers can achieve sharp and precise focus, capturing moments with unparalleled clarity.
AI-driven autofocus systems go beyond conventional methods by analyzing scenes in real-time, identifying subjects, and adapting focus accordingly. This simplifies the photography process for professionals and empowers amateur photographers to capture professional-grade images effortlessly. The fusion of AI with autofocus technology marks a paradigm shift, making cameras more intuitive and user-friendly.
Generative Features in Adobe Photoshop:
As we transition from capturing images to the post-processing phase, the role of AI becomes even more pronounced. Adobe Photoshop, a staple in the toolkit of photographers and graphic designers alike, has embraced generative features powered by AI. These features enable the software to assist users in various creative tasks intelligently.
For instance, the "Neural Filters" in Adobe Photoshop leverage AI to manipulate facial expression and age progression, transforming a daytime scene into a mesmerizing sunset. These generative features save time and open new creative possibilities for photographers. The ability to experiment with different effects and styles becomes more accessible, thanks to the intuitive power of AI.
Revolutionizing Photo Editing with AI-Powered Software:
Beyond Photoshop, an array of specialized AI-powered software has emerged, transforming how photographers approach photo editing. Software like Retouch4Me, Evoto AI, Capture One, and Topaz Labs leverage AI algorithms to automate and enhance various aspects of the editing process.
Retouch4Me, for example, specializes in automating portrait retouching, using AI to identify and enhance facial features precisely. Evoto AI employs machine learning to analyze and suggest edits based on a photographer's style, streamlining the editing workflow. Capture One integrates AI for tasks like noise reduction and color grading, contributing to producing high-quality images. Topaz Labs' AI-driven tools, on the other hand, provide photographers with the ability to enhance details and upscale images without compromising quality.
The Collective Impact on the Photography Ecosystem:
Integrating AI into various facets of photography, from capturing images to post-processing, has elevated the quality of work and democratized the creative process. Professionals and enthusiasts can now leverage AI to overcome technical challenges, experiment with new ideas, and push the boundaries of their creativity.
However, the increasing reliance on AI in photography also raises questions about the role of human intuition and creativity in the artistic process. As machines become more adept at replicating certain aspects of the creative process, photographers must strike a balance between harnessing AI's power and preserving their craft's authenticity.
Conclusion:
In the era of AI-driven photography, the synergy between technology and creativity has reached unprecedented heights. From intelligent autofocus systems to generative features in editing software, AI has become an indispensable tool for photographers seeking to push the boundaries of their craft. As we continue to witness rapid advancements in this field, one cannot help but ponder the future of photography. How will the relationship between human creativity and AI evolve? Only time will tell, but one thing is sure—the marriage of AI and photography has ushered in a new era of endless possibilities.
Feature Photo: Sony Alpha
#Sony Alpha#Autofocus#AI#Evoto AI#Capture One#Adobe Photoshop#Adobe Lightroom#Topaz Labs#Artificial Intelligence#Photography
1 note
·
View note
Text
I am so sorry adobe but this ai generated jaguar is so bad why are you using it to advertise your product

#why is it so smooth#is it not a mammal#does it not have fur#and what happened to the ear on the right#its just smudges#and why is its front paw moving#the more you look the worst it gets#every time i see it i notice something else wrong with it#if i created a program that generated something this bad i would never tell anyone ever#the only thing it actually got right that im impressed with is that blue sheen on the back#it actually captures the reflective quality of their coat well#adobe stop focusing on ai and actually run a good image editing program challenge#i am kind of salty because i feel like photoshop has gotten worse as it focuses more and more on ai generation#like all the features i use to edit my photos have noticeably dropped in quality#but the ai isnt even good
1 note
·
View note


Text
My GIF Making process: Screen capturing using MPV player, Organizing files, 3 Sharpening settings, Basic Coloring PSD + Actions set

This is a very long post so heads up.
I’ll try to be as thorough and true as much as possible to the way I make my gifs (I already use Photoshop Actions which I’ve long since set up but now for this tutorial I’m reviewing them to show you the exact steps I’ve learned to create my gifs 😃) and present them to you in a semi-coherent way. Also, please bear with me since English is my second language.
First things first. Below are the things and tools we need to do this:
Downloaded 4K or 1080p quality videos (let’s all assume we know where to get these—especially for high definition movies and tv series—so this post doesn’t get removed, okay? 😛)
Adobe Photoshop CC or the CS versions can work as well, but full disclosure I haven’t created gifs using the CS versions since 2020. I’m currently using Adobe Photoshop 2024.
mpv player. Use mpv player to get those frames/screenshots or any other video player that has a screen grabber feature. I’ve used adapter for the longest time but I’ve switched to mpv because the press to screenshot feature while the video is playing has been a game changer not to mention ultimate time saver for me. For adapter you need to play it in another video player (like VLC player), to get the start and end timestamps of the scene you want to gif which takes me ages before I can even open Photoshop.
Anyway! Please stop reading this post for a moment and head over to this amazing tutorial by kylos. She perfectly tells you how to install and use mpv player, both for Mac and Windows users.
One thing I have to share though, I had a tough time when I updated my MacOS to Sonoma since MPV is suddenly either duplicating frames or when I delete the duplicates the player seems to be skipping frames :/ I searched and found a solution here, though it didn’t work for me lol. My workaround for this in the meantime is decreasing the speed down to 0.70 then start screenshotting—it’s not the same pre Sonoma update but it works so I’ll have to accept it rather than have jumpy looking gifs.
Now, after this part of kylos’ tutorial:

you can continue reading the following sections of my gif tutorial below.
I want to share this little tip (sorry, this will only cater to Mac users) that I hope will be helpful for organizing the screenshots that MPV saved to the folder you have selected. Because believe me you don’t want to go through 1k+ of screenshots to select just 42-50 frames for your gif.
The Control + Command + N shortcut
This shortcut allows you to create a new folder from files you have pre-selected. As you can see below I have already created a couple of folders, and inside each folder I have selected screenshots that I want to include in one single gif. It's up to you how you want to divide yours, assuming you intend to create and post a Tumblr gifset rather than just one gif.

Another tip is making use of tags. Most of, if not all the time, I make supercorp gifs so I tag blue for Kara and red (or green) for Lena—just being ridiculously on brand and all that.
Before we finally open Photoshop, there's one more thing I want to say—I know, please bear with me for the third? fourth? time 😅
It's helpful to organize everything into their respective folders so you know the total number of items/frames you have. This way, you can add or delete excess or unnecessary shots before uploading them in Photoshop.
For example below there are 80 screenshots of Kara inside this folder and for a 1:1 (540 x 540 px) Tumblr gif, Photoshop can just work around with 42-50 max number of frames with color adjustments applied before it exceeds the 10 MB file size limit of Tumblr.

Sometimes I skip this step because it can be exhausting (haha) and include everything so I can decide visually which frames to keep later on. You'll understand what I mean later on. But it's important to keep the Tumblr 10 MB file size limit in mind. Fewer frames, or just the right amount of frames, is better.
So, with the screenshot organization out of the way, let's finally head over to Photoshop.
Giffing in Photoshop, yay!
Let’s begin by navigating to File > Scripts > Load Files into Stack…

The Load Layers window will appear. Click the Browse button next.
Find your chosen screenshots folder, press Command + A to select all files from that folder then click Open. Then click OK.
After importing and stacking your files, Photoshop should display the following view:

By the way, I'll be providing the clip I've used in this tutorial so if want to use them to follow along be my guest :)
If you haven't already opened your Timeline panel, navigate to Windows > Timeline.
Now, let's focus on the Timeline panel for the next couple of steps.
Click Create Video Timeline, then you’ll have this:

Now click the menu icon on the top right corner then go to Convert Frames > Make Frames from Clips

Still working on the Timeline panel, click the bottom left icon this time—the icon with the three tiny boxes—to Convert to Frame Animation
Select Make Frames From Layers from the top right corner menu button.
So now you have this:

Go and click the top right menu icon again to Select All Frames
Then click the small dropdown icon to set another value for Frame Delay. Select Other…

The best for me and for most is 0.05 but you can always play around and see what you think works for you.
Click the top right menu icon again to Reverse Frames.
I think Photoshop has long since fixed this issue but usually the first animation frame is empty so I just delete it but now going through all these steps there seems to be none of that but anyways, the delete icon is the last one among the line of feature buttons at the bottom part of the Timeline panel.
Yay, now we can have our first proper GIF preview of a thirsty Lena 😜

Press spacebar to watch your gif play for the very first time! After an hour and half of selecting and cutting off screenshots! 😛 Play it some more. No really, I’m serious. I do this so even as early (lol) as this part in the gif making process, I can see which frames I can/should delete to be within the 10 MB file size limit. You can also do it at the end of course 🙂
Now, let’s go to the next important steps of this tutorial post which I’ve numbered below.
Crop and resize to meet Tumblr's required dimensions. The width value should be either 540px, 268px, or 177px.
Convert the gif to a Smart Object for sharpening.
Apply lighting and basic color adjustments before the heavy coloring. I will be sharing the base adjustments layers I use for my gifs 😃.
1. Crop and Resize
Click on the Crop tool (shortcut: the C key)

I like my GIFs big so I always set this to 1:1 ratio if the scene allows it. Press the Enter key after selecting the area of the frame that you want to keep.
Side note: If you find that after cropping, you want to adjust the image to the left or another direction, simply unselect the Delete Cropped Pixels option. This way, you will still have the whole frame area available to crop again as needed and as you prefer.
Now we need to resize our gif and the shortcut for that is Command + Opt + I. Type in 540 as the width measurement, then the height will automatically change to follow the ratio you’ve set while cropping.
540 x 540 px for 1:1
540 x 405 px for 4:3
540 x 304 px for 16:9
For the Resample value I prefer Bilinear—but you can always select the other options to see what you like best.
Click OK. Then Command + 0 and Command + - to properly view the those 540 pixels.

Now we get to the exciting part :) the sharpen settings!
2. Sharpen
First we need to have all these layers “compressed” intro a single smart object from which we can apply filters to.
Select this little button on the the bottom left corner of the Timeline panel.


Select > All Layers
Then go to Filter > Convert for Smart Filters
Just click OK when a pop-up shows up.
Now you should have this view on the Layers panel:

Now I have 3 sharpen settings to share but I’ll have download links to the Action packs at the end of this long ass tutorial so if you want to skip ahead, feel free to do so.
Sharpen v1
Go to Filter > Sharpen > Smart Sharpen…
Below are my settings. I don’t adjust anything under Shadows/Highlights.
Amount: 500
Radius: 0.4
Click OK then do another Smart Sharpen but this time with the below adjustments.
Amount: 12
Radius: 10.0

As you can see Lena’s beautiful eyes are “popping out” now with these filters applied. Click OK.
Now we need to Convert to Frame Animation. Follow the steps below.
Click on the menu icon at the top right corner of the Timeline panel, then click Convert Frames > Flatten Frames into Clips
Then Convert Frames > Convert to Frame Animation
One more click to Make Frames From Layers
Delete the first frame then Select All then Set Frame Delay to 0.05

and there you have it! Play your GIF and make sure it’s just around 42-50 frames. This is the time to select and delete.
To preview and save your GIF go to File > Export > Save for Web (Legacy)…
Below are my Export settings. Make sure to have the file size around 9.2 MB to 9.4 MB max and not exactly 10 MB.

This time I got away with 55 frames but this is because I haven’t applied lighting and color adjustments yet and not to mention the smart sharpen settings aren't to heavy so let’s take that into consideration.
Sharpen v1 preview:

Sharpen v2
Go back to this part of the tutorial and apply the v2 settings.
Smart Sharpen 1:
Amount: 500
Radius: 0.3
Smart Sharpen 2:
Amount: 20
Radius: 0.5
We’re adding a new type of Filter which is Reduce Noise (Filter > Noise > Reduce Noise...) with the below settings.

Then one last Smart Sharpen:
Amount: 500
Radius: 0.3
Your Layers panel should look like this:

Then do the Convert to Frames Animation section again and see below preview.
Sharpen v2 preview:

Sharpen v3:
Smart Sharpen 1:
Amount: 500
Radius: 0.4
Smart Sharpen 2:
Amount: 12
Radius: 10.0
Reduce Noise:
Strength: 5
Preserve Details: 50%
Reduce Color Noise: 0%
Sharpen Details: 50%
Sharpen v3 preview:

And here they are next to each other with coloring applied:
v1

v2

v3

Congratulations, you've made it to the end of the post 😂
As promised, here is the download link to all the files I used in this tutorial which include:
supercorp 2.05 Crossfire clip
3 PSD files with sharpen settings and basic coloring PSD
Actions set
As always, if you're feeling generous here's my Ko-fi link :) Thank you guys and I hope this tutorial will help you and make you love gif making.
P.S. In the next post I'll be sharing more references I found helpful especially with coloring. I just have to search and gather them all.
-Jill
#tutorial#gif tutorial#photoshop tutorial#gif making#sharpening#sharpening tutorial#photoshop#photoshop resources#psd#psd coloring#gif coloring#supercorp#supercorpedit#lena luthor#supergirl#my tutorial#this has been a long time coming#guys. i'm BEGGING you. use the actions set - it was a pain doing all this manually again ngl LMAO#i've been so used to just playing the actions#so this has been a wild refresher course for me too 😆
772 notes
·
View notes
Note
On that recent Disney Vs Midjourney court thing wrt AI, how strong do you think their case is in a purely legal sense, what do you think MJ's best defenses are, how likely is Disney to win, and how bad would the outcome be if they do win?
Oh sure, ask an easy one.
In a purely legal sense, this case is very questionable.
Scraping as fair use has already been established when it comes to text in legal cases, and infringement is based on publication, not inspiration. There's also the question of if Midjourney would be responsible for their users' creations under safe harbor provisions, or even basic understanding of what an art tool is. Adobe isn't responsible for the many, many illegal images its software is used to make, after all.
The best defense, I would say, is the fair use nature of dataset training and the very nature of transformative work, which is protected, requires the work-to-be-transformed is involved. Disney's basic approach of 'your AI knows who our characters are, so that proves you stole from us' would render fair use impossible.
I don't think its likely for Disney to win, but the problem with civil action is proof isn't needed, just convincing. Bad civil cases happen all the time, and produce case law. Which is what Disney is trying to do here.
If Disney wins, they'll have pulled off a coup of regulatory capture, basically ensuring that large media corporations can replace their staff with robots but that small creators will be limited to underpowered models to compete with them.
Worse, everything that is a 'smoking gun' when it comes to copyright infringement on Midjourney? That's fan art. All that "look how many copyrighted characters they're using-" applies to the frontpage of Deviantart or any given person's Tumblr feed more than to the featured page of Midjourney.
Every single website with user-generated content it chock full of copyright infringement because of fan art and fanfic, and fair use arguments are far harder to pull out for fan-works. The law won't distinguish between a human with a digital art package and a human with an AI art package, and any win Disney makes against MJ is a win against Artstation, Deviantart, Rule34.xxx, AO3, and basically everyone else.
"We get a slice of your cheese if enough of your users post our mouse" is not a rule you want in law.
And the rules won't be enforced by a court 9/10 times. Even if your individual work is plainly fair use, it's not going to matter to whatever image-based version of youtube's copyreich bots gets applied to Artstation and RedBubble to keep the site owners safe.
Even if you're right, you won't have the money to fight.
Heck, Adobe already spies on what you make to report you to the feds if you're doing a naughty, imagine it's internal watchdogs throwing up warnings when it detects you drawing Princess Jasmine and Ariel making out. That may sound nuts, but it's entirely viable.
And that's just one level of possible nightmare. If the judgement is broad enough, it could provide a legal pretext for pursuing copyright lawsuits over style and inspiration. Given how consolidated IP is, this means you're going to have several large cabals that can crush any new work that seems threatening, as there's bound to be something they can draw a connection to.
If you want to see how utterly stupid inspiration=theft is, check out when Harlan Ellison sued James Cameron over Terminator because Cameron was dumb enough to say he was inspired by Demon with a Glass Hand and Soldier from the Outer Limits.
Harlan was wrong on the merits, wrong ethically, and the case shouldn't have been entertained in the first place, but like I said, civil law isn't about facts. Cameron was honest about how two episodes of a show he saw as a kid gave him this completely different idea (the similarities are 'robot that looks like a guy with hand reveal' and 'time traveling soldier goes into a gun store and tries to buy future guns'), and he got unjustly sued for it.
If you ever wonder why writers only talk about their inspirations that are dead, that's why. Anything that strengthens the "what goes in" rather than the "what goes out" approach to IP is good for corps, bad for culture.
147 notes
·
View notes
Text
Bound: First Watch of Night by @tackytigerfic


When you decide to bind a book using black on black, it's not going to be easy to photograph. Just in case you were wondering.
@toomuchplor and I decided to do a little exchange of this fantastic fic, and this was the one I sent to her.
It's a long, long, long fic (274k) (and yet, I still didn't want it to end) and I couldn't decide if I wanted to bind it all in one volume and attempt to round it, or just leave it flat, even though it would be very thick, but then it occurred to me (or a friend suggested) that I could split it into two volumes!
So that's what I did. You know what was really cool? I divided it at the halfway point, after chapter 10, which worked out well. The page count was very similar, and the second volume had 11 chapters, so it was all very even.
But what I discovered was that the last line of chapter 10 is the same as the very last chapter of the book! I don't know if it was a coincidence or on purpose, but I thought it was neat. (I suppose that could be considered a spoiler which is why I'm not specifying what the actual sentence is, so please put this out of your mind if you haven't read this yet and you find yourself at the end of chapter 10.)
So anyway. Okay. I now had two volumes and had to decide how I wanted to differentiate them. I was going to do one white and one black, and while that would have looked cool, I fear it would have insinuated some kind of meaning (light vs dark) that isn't necessarily like, the first half vs the second half. And one of the ideas that had been knocking around my head was "searchlights". So that's where I went with the covers. I wanted all black, and I found a great sparkly black HTV (sorta starry nightish, you know) and went from there. I'm quite happy with how it came out!
Except I meant for the two searchlights to be facing away from each other when you put both volumes next to each other, but if that's the only mistake I made, I can live with that.

I'm especially proud of the silhouettes on the spine, they both started as photographs that I pulled into Adobe Capture and was able to turn into SVGs so they could be cut by my silhouette. And I'm extra proud of my Silhouette for keeping Harry's glasses intact. (I tried just finding clip art of silhouettes (too many uses of that word here) but for whatever reason, most silhouettes are of businessmen?!? Anyway. It all worked out.
The title pages for each volume are slightly different too. The first has one figure, the second has two. Just a little thing.
The bookmark charms are a little 1 and 2 I made with shrinky dink material.
More details:
This is the HTV I used The body font is Arno Pro (my beloved) The cover font is Montserrat The chapter and drop caps are in various forms of Lulo The small caps at chapter starts is Rig Shaded Images came from Pixabay
113 notes
·
View notes