#also my program is clip studio paint
Explore tagged Tumblr posts
Visit Tumblr Blog
Explore Tumblr blogs with no restrictions, modern design and the best experience.
Last Seen Tumblr Blogs


Fun Fact
28.6 is the average number of monthly visits per US mobile user.
Note
I can't remember if I ever asked this before, but how do you exactly draw the blush on your characters? I want to do it for my own characters and figured I might as well ask you for tips.


I hope this is comprehensive enough, this is how i personall do it. Feel free to ask for clarifications ^^'
77 notes
·
View notes
Text

iii. high priestess
"O souls of the Kings, give me strength!"
#procrastinated on this for too long and finally edited it and posted it#i want to do a whole series like this#it will probably take a gorillion years though#also the animation is 10fps and i wanted it 8fps#but the program i had wouldnt let me do 8fps#and CSP nerfs the gif quality if its too high res#my art#animation#gif#metaphor refantazio#artists on tumblr#eupha metaphor#eupha etoreika#euphasia etroeika#tarot cards#metaphor tarot#procreate#clip studio paint
199 notes
·
View notes
Text


mom said it's my turn to do a WCI AU
#my art#one piece#zosan#non-local guy goes where he is very much not supposed to go; things happen because of this#this year i would like to make a second cake for the table#pun unintended but welcome#also went back to CSP wholly. procreate just ain't it for me#i spent 8+ years pummeling CSP into compliance and i don't want to give up all the stupid granular control it gives me#even though i acknowledge that procreate is actually a quite sensible program compared to clip studio 'no normal crop function' paint#one piece tag
105 notes
·
View notes
Text


honestly i’ve always been quite attached to the idea of kuwabara getting afflicted with a love potion within the context of kuwameshi. just bc kuwabara’s such a hopeless romantic that him actually turning that energy onto yusuke for once could yield the Funniest interactions.
also bonus funni


#it could also be cute and like emotional to an extent for yusuke on the receiving end#but mostly funny#idk i miss them forever#yyh#fanart#art#yu yu hakusho#my art#kazuma kuwabara#yusuke urameshi#kuwameshi#also peep the new art program 🙌 goodbye ibis paint hello clip studio#it JUST FUCKING HIT ME THEY ONLY HAVE FOUR FINGERS WHAT IF I 💥💥💥💥💥💥#sighhh i hate it here
64 notes
·
View notes
Text

I purchased an iPad so be ready for the webcomic to suddenly shift styles
#pmatga#my art#pacman and the ghostly adventures#betrayus#fanart#sketch#art#illustration#digital#clip studio paint#clip studio art#clip studio illustration#I also got accepted into my master’s program at SCAD so it’s an investment
66 notes
·
View notes
Text
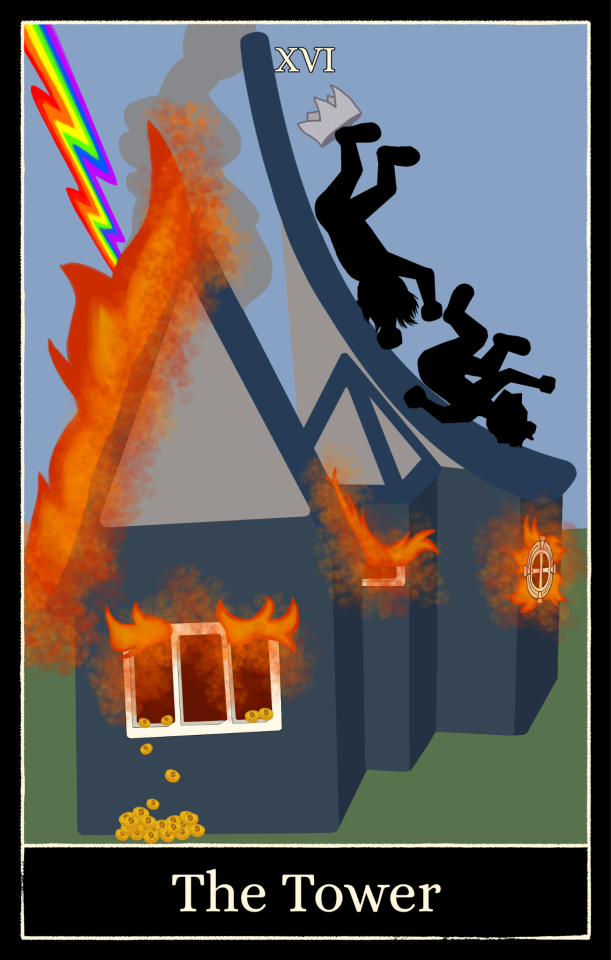
Hiiii it's my very late submission for The Tower. It is silly but I had fun with it, I wanted to convey gaming channel revival/Sims season 2- chaos, destruction, upheaval and all.
Thank u @dnptarot for organizing this and being kind to me about my latency <3
#dnptarot#phan#this is later than expected even bc i got a migraine yesterday and couldn't look at a screen for hours smfh#and sometime later i think ill have to post a screenshot comp of the glitches my art program was putting me thru 😭#had to learn how to operate clip studio paint to finish it#(also i know the dnpgames victory crown looks bad but like. isnt that in the spirit of the thing)#anyway page of wands sooooon#youve all been so nice to me about this piece 😭😭 phannies r too cool
58 notes
·
View notes
Note
forever thinking that whenever something goes wrong, Kip, arc, and twig in this order just goes “aw, heck!” “oh dear..” “FUC”
Have I ever got a surprise for you, Aimz.

#Twig very specifically hates swearing because of shenanigans in her human childhood#and has learned that it is a great way to confuse pokemon around her by simply saying “AW HECK” when bad stuff happens#(heck isn't said by anyone ever in the pmd world because it's a human term)#and by bewildering people with what sounds like fluent gibberish#Twig is able to frequently startle them out of their worry / sadness / fear#so she is constantly using minced oaths and making herself laugh by how shocked everyone is by it#They think she swears like a sailor#but really she's just saying “CHEESE AND CRACKERS” 24/7#Also: Made a drawing in clip studio paint for once!!!#Trying to learn that program bc my iPad is dying slowly#Hopefully this turned out okay#the present is a gift au#stuff by sofie#pmd2#pmd eos#pmd explorers#pmd sky#pmd#pokémon mystery dungeon#pokemon mystery dungeon#pmd2 partner#pmd partner#pmd darkrai#swear warning#(kinda)#sofie answers asks
49 notes
·
View notes
Text
SUCKERRRRRRRRRRRRR
#maya's art tag#GOT THE DRIVERS GOT MY MAIN ART PROGRAM#GOT OLD MSPAINT BACK BECAUSE WINDOWS 11 PAINT IS ACTUAL HOT GARBAGE#but heres the kicker.#im thinking of moving from firealpaca to clip studio#its on sale for 20 rn#and honestly with the way my arts been going i really cant rely on rebelle for my painty stuff considering i love using clipping layers#plus its super heavy and prone to crashing#firealpacas brushes are also only good for doing like hard shading stuff#otherwise its brushes SUCK#so im hoping i can switch over soonish#still. firelpaca. youve treated me so well. ily. based art program
10 notes
·
View notes
Text
trying clip studio paint and man i should have done this so much sooner?? I so often have issues with pressure sensitivity in photoshop and krita wasn't much better but in clip studio paint it literally just works and is unobstructive it's such a relief??
#also yay for perpetual liscence#will have to keep photoshop for now bc i need to still have access to those files lol#also i suspect there are some things i do in photoshop that clip studio paint isn't suited for#but yeah this is the first time a new program i've tried has immediately felt like a viable alternative for a substantial amount of my work
1 note
·
View note
Note
hey @pukicho i saw your art and i thought it was super cool! you improved so quickly (really impressive btw), and i was wondering what resources used to study art? and what app/website you digitally draw on? and your brushes if your okay with sharing them? and literally ANY other information you had because i would love to learn how to draw?
i feel like a victorian street rat asking for more bread
I use an XP-Pen Pen Tablet and Clip Studio Paint as my program of choice, but any pencil and notebook will suffice for learning, and may even be better. As for learning, I use books, baby!!! BOOKS! I'll even be nice and tell u which ones, because I am a lover of shared knowledge:
How To Draw by Scott Robtertson - deceptively complex book on perspective. It tells you how to draw a box, I then suggest you draw a fuck-load of boxes in correct perspective before moving forward. Having a strong grasp on planes and perspective allows you to properly grasp the volumes and shape of almost anything. It's the baseline principle to visualizing what u wanna draw. Without simple forms understood in perspective, you merely lack the skills necessary to draw from imagination.
Carlson's guide to landscape Painting - A good book, even if u don't intend to draw landscapes. Tons of clever explanations on lighting and value. Tons of useful relational shortcuts to understand complex scenery in smarter ways. I like the way he explains things, it makes me go ohhhh.
TACO point character drawing 1 & 2 - Two NEAT anatomy reference books. It's mostly just a collection of simplified, anime-esque proportional figure drawings. They're a great reference, but I absolutely wouldn't use it as my only set of books on anatomy. It's still useful to use and learn, but in a more general way - and I can't currently apply everything the book tells me yet, because I haven't learned the forms in more detail first.
The Human Figure by Jon H Vanderpoel - this is a short, but VERY useful anatomy reference book. The Author is from the early 1900s - real oldschool, which is good. He has a very useful, matter-of-fact writing style. This is the better starter book to use in order to remember the proportional relationships of the human body (even then, it's still not enough)
The Practice of Oil Painting & Drawing by Solomon J. Solomon - I'll be honest, this one makes sense to me conceptually, but I cannot fucking execute some of his practices. This dude is from the victorian era, his paintings are in museums and they're too good. It only makes sense that his views and approach to art are headier than some of the other suggestions on this list. The book is still useful, and I presume will only grow in usefulness as I learn. It does still have some cool ideas in the first-half of the book that you can easily apply to your art studies! But the second half is a series of master-derived schools of learning that I have yet to dare touch.
(also check out loomis books. I hear they are good)
ENJOY
1K notes
·
View notes
Text
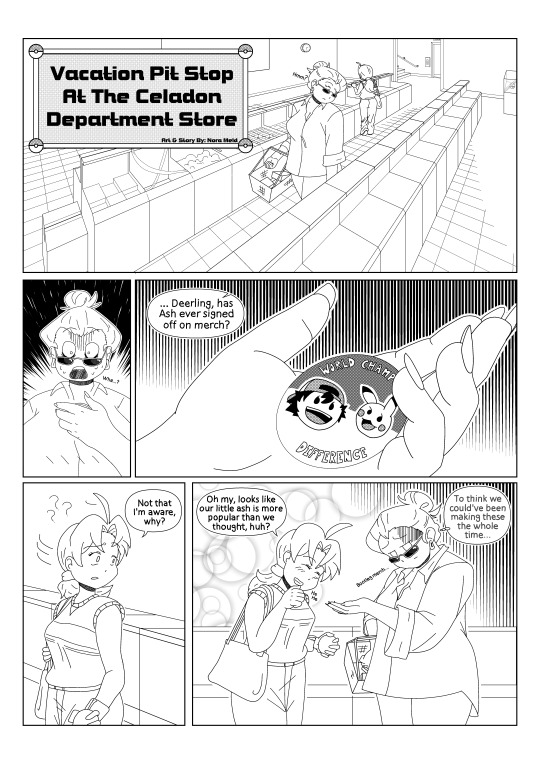
Vacation Pit Stop At The Celadon Department Store Art & Story by: Nora Meld (me!) Full Size Image Here!
| Next This was inspired by @yamujiburo 's wonderful series of comics that can be found here. The outfits are from the mom fashion post.
I'm not usually someone who draws in an anime style, but I wanted to stay as faithful to the source material as I could so I was using reference from the comic series constantly. My actual style is far closer to the art on the bootleg button lol.
This took me like 18 hours total. If you're going to do a massive perspective image in your first panel, I highly recommend finding one of those programs that helps with it because doing it manually was hell and took most of the time I spent on this as a whole. I do think this turned out fantastic though and I got to learn a lot about the tools in clip studio paint.
Also, Kiana I demand more chubby Jessie! As a chubby girl myself, I love it more than anything.
(also shoutout to wolfeyvgc, who has the original world champ difference)
5K notes
·
View notes
Text

✨My FREE online workshop on INTRO TO STYLIZED ANATOMY is BACK!✨
If you missed it the first time then this is your chance!
What we’ll do:
realistic human anatomy vs cartoon anatomy
proportions for cartoon characters
breaking downp characters anatomy
What you’ll need:
a drawing tablet + PC or a tablet +stylus (you can also print the PDF and follow with paper and pencils!)
1 hour of your time
a drawing program (Procreate, Photoshop, Ibis Pain, Clip Studio Paint,etc…)
pdf files you’ll receive a couple of days before the workshop
The lesson will be RECORDED! So as long as you are registered, you can watch it later during the week in case you miss it :)
#art tutorials#art course#art tips#art advice#artist support#asexual artist#drawing course#drawing workshop#drawing tips#drawing advice#kyri45#my art#art workshop
664 notes
·
View notes
Text
My Favorite Cheap Art Trick: Gradient Maps and Blending Modes
i get questions on occasion regarding my coloring process, so i thought i would do a bit of a write up on my "secret technique." i don't think it really is that much of a secret, but i hope it can be helpful to someone. to that end:

this is one of my favorite tags ive ever gotten on my art. i think of it often. the pieces in question are all monochrome - sort of.

the left version is the final version, the right version is technically the original. in the final version, to me, the blues are pretty stark, while the greens and magentas are less so. there is some color theory thing going on here that i dont have a good cerebral understanding of and i wont pretend otherwise. i think i watched a youtube video on it once but it went in one ear and out the other. i just pick whatever colors look nicest based on whatever vibe im going for.

this one is more subtle, i think. can you tell the difference? there's nothing wrong with 100% greyscale art, but i like the depth that adding just a hint of color can bring.
i'll note that the examples i'll be using in this post all began as purely greyscale, but this is a process i use for just about every piece of art i make, including the full color ones. i'll use the recent mithrun art i made to demonstrate. additionally, i use clip studio paint, but the general concept should be transferable to other art programs.


for fun let's just start with Making The Picture. i've been thinking of making this writeup for a while and had it in mind while drawing this piece. beyond that, i didn't really have much of a plan for this outside of "mithrun looks down and hair goes woosh." i also really like all of the vertical lines in the canary uniform so i wanted to include those too but like. gone a little hog wild. that is the extent of my "concept." i do not remember why i had the thought of integrating a shattered mirror type of theme. i think i wanted to distract a bit from the awkward pose and cover it up some LOL but anyway. this lack of planning or thought will come into play later.
note 1: the textured marker brush i specifically use is the "bordered light marker" from daub. it is one of my favorite brushes in the history of forever and the daub mega brush pack is one of the best purchases ive ever made. highly recommend!!!
note 2: "what do you mean by exclusion and difference?" they are layer blending modes and not important to the overall lesson of this post but for transparency i wanted to say how i got these "effects." anyway!
with the background figured out, this is the point at which i generally merge all of my layers, duplicate said merged layer, and Then i begin experimenting with gradient maps. what are gradient maps?
the basic gist is that gradient maps replace the colors of an image based on their value.

so, with this particular gradient map, black will be replaced with that orangey red tone, white will be replaced with the seafoamy green tone, etc. this particular gradient map i'm using as an example is very bright and saturated, but the colors can be literally anything.

these two sets are the ones i use most. they can be downloaded for free here and here if you have csp. there are many gradient map sets out there. and you can make your own!
you can apply a gradient map directly onto a specific layer in csp by going to edit>tonal correction>gradient map. to apply one indirectly, you can use a correction layer through layer>new correction layer>gradient map. honestly, correction layers are probably the better way to go, because you can adjust your gradient map whenever you want after creating the layer, whereas if you directly apply a gradient map to a layer thats like. it. it's done. if you want to make changes to the applied gradient map, you have to undo it and then reapply it. i don't use correction layers because i am old and stuck in my ways, but it's good to know what your options are.

this is what a correction layer looks like. it sits on top and applies the gradient map to the layers underneath it, so you can also change the layers beneath however and whenever you want. you can adjust the gradient map by double clicking the layer. there are also correction layers for tone curves, brightness/contrast, etc. many such useful things in this program.
let's see how mithrun looks when we apply that first gradient map we looked at.

gadzooks. apologies for eyestrain. we have turned mithrun into a neon hellscape, which might work for some pieces, but not this one. we can fix that by changing the layer blending mode, aka this laundry list of words:

some of them are self explanatory, like darken and lighten, while some of them i genuinely don't understand how they are meant to work and couldn't explain them to you, even if i do use them. i'm sure someone out there has written out an explanation for each and every one of them, but i've learned primarily by clicking on them to see what they do.
for the topic of this post, the blending mode of interest is soft light. so let's take hotline miamithrun and change the layer blending mode to soft light.

here it is at 100% opacity. this is the point at which i'd like to explain why i like using textured brushes so much - it makes it very easy to get subtle color variation when i use this Secret Technique. look at the striation in the upper right background! so tasty. however, to me, these colors are still a bit "much." so let's lower the opacity.

i think thats a lot nicer to look at, personally, but i dont really like these colors together. how about we try some other ones?

i like both of these a lot more. the palettes give the piece different vibes, at which point i have to ask myself: What Are The Vibes, Actually? well, to be honest i didn't really have a great answer because again, i didn't plan this out very much at all. however. i knew in my heart that there was too much color contrast going on and it was detracting from the two other contrasts in here: the light and dark values and the sharp and soft shapes. i wanted mithrun's head to be the main focal point. for a different illustration, colors like this might work great, but this is not that hypothetical illustration, so let's bring the opacity down again.

yippee!! that's getting closer to what my heart wants. for fun, let's see what this looks like if we change the blending mode to color.

i do like how these look but in the end they do not align with my heart. oh well. fun to experiment with though! good to keep in mind for a different piece, maybe! i often change blending modes just to see what happens, and sometimes it works, sometimes it doesn't. i very much cannot stress enough that much of my artistic process is clicking buttons i only sort of understand. for fun.
i ended up choosing the gradient map on the right because i liked that it was close to the actual canary uniform colors (sorta). it's at an even lower opacity though because there was Still too much color for my dear heart.

the actual process for this looks like me setting my merged layer to soft light at around 20% opacity and then clicking every single gradient map in my collection and seeing which one Works. sometimes i will do this multiple times and have multiple soft light and/or color layers combined.
typically at this point i merge everything again and do minor contrast adjustments using tone curves, which is another tool i find very fun to play around with. then for this piece in particular i did some finishing touches and decided that the white border was distracting so i cropped it. and then it's done!!! yay!!!!!
this process is a very simple and "fast" way to add more depth and visual interest to a piece without being overbearing. well, it's fast if you aren't indecisive like me, or if you are better at planning.

let's do another comparison. personally i feel that the hint of color on the left version makes mithrun look just a bit more unwell (this is a positive thing) and it makes the contrast on his arm a lot more pleasing to look at. someone who understands color theory better than i do might have more to say on the specifics, but that's honestly all i got.

just dont look at my layers too hard. ok?
2K notes
·
View notes
Note
What kind of brushes would you recommend to use when trying to mimic isat's artstyle?
Oooh! Oooh!!
I'd love to answer this one, cause it actually took me a while to get it down!!
The program I use (Medi Bang Paint Pro) is pretty limited in terms of brush functions. If you use something like Clip Studio, I'm sure you can find a brush that suits your needs.
However, through trial and error, I ended up making my own.
The main key is anti-aliasing.
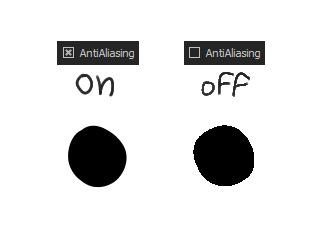
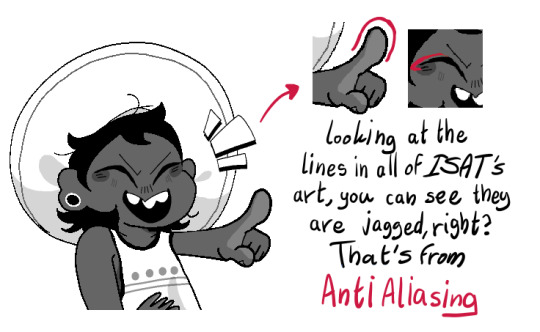


QUICK NOTES I DIDN'T DRAW:
1. NO PEN PRESSURE SENSITIVITY, TURN THAT SHIT OFF, The ISAT artstyle majorly uses round flat brushes (and maybe changes the size for detail accordingly.) 2. The sprites in game experience some corruption (if it's from program corruption or intentional choice on the dev's part is up for debate) 3. There in minor inconsistencies in the style and shapes. You're not gonna get Isa's face shape right, Sif's eye is probably gonna look off, Odile's hair is gonna be too poofy- that's okay. And even if your brush of colors aren't perfect that's okay. 4. The main important thing for ISAT's artstyle is the vibes, and there is no formula to that. Just try to find your own place within those vibes. My last comic, I actually halfway through just stopped trying to imitate the artstyle, as much as I was just trying to express myself within that style's minor guidelines. 5. I also HEAVILY RECOMMEND looking at Tawny's guide on expressions, it's super helpful for GETTING those said vibes

#I feel like I'm forgetting something- but oh well#I might remember later#in stars and time#isat#sharky asks
639 notes
·
View notes
Text

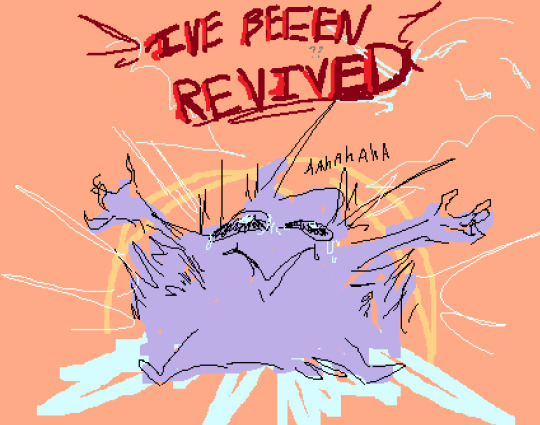
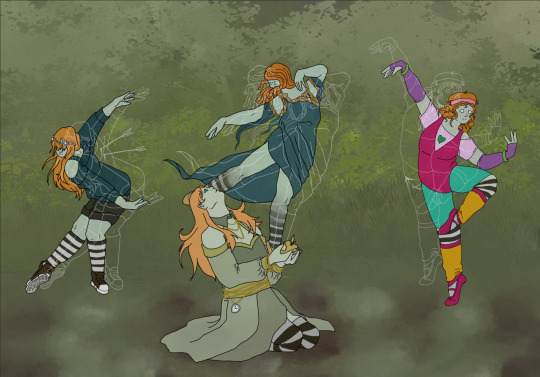
Hoping and praying Tumblr doesn't kill the quality
I have had this idea floating in my head ever since I watched ZombieCleo's pov on Witchcraft SMP a year late. I loved the story of the Time Witch and all the references to their other games, series, and timelines from non-story-based servers that Cleo also played on. The grand finale using the in-game resurrection to cure Cleo's zombie-ism and tie together all the timelines was a really neat video segment, and I thought it was a nice end to their series.
I am curious to know how things would have gone if they won the title of Supreme Witch.
This was also a big test in me using different layer effects in Clip Studio Paint since I am always trying to learn how to more effectively use the program. I know the glow isn't perfect, but I still love how it turned out. I had fun looking at different dancer refs for the poses and trying to translate Minecraft skins onto something that's Not Blocks.
In case you're curious how it looks without the overlaying layers, here it is.
forgive me I don't know what all tags to use
#witchcraft smp#zombiecleo#mcyt fanart#mcytblr#hermitcraft#empires s2#wildlife smp#life smp#trafficblr#clip studio paint#csp#my art#fan art#digital art
538 notes
·
View notes
Text
How cutiesai made 14 Days With You
I've received quite a few requests in the past asking how I made 14DWY, what resources I used, how I organised my lore, etc. — so I figured I'd make one big post and share it with everyone else as well! It features a buuunch of helpful stuff I wish I'd known when I first made 14DWY, so hopefully this will help others too!
⚠ This is all copied & pasted from a Discord post I made back in early 2024! I'll also be adding to it over time, so feel free to check back every so often! ^^

What engine do I use?
14DWY uses the Ren'Py engine!
There are two preinstalled games (called "Tutorial" and "The Question") that give you a basic rundown on how to use the program!!
Zeil Learning's video called "Ren'py Tutorial For Beginners" is also a good place to start for those who have no idea where to begin with Ren'Py!
I also really recommend these Ren'Py resources:
Lemma Soft Forums
Ren'Py Discord server
Ren'Py subreddit
Zeil Learnings, ElaineDoesCoding, Visual Novel Design, and Ess Ren'Py Tutorials on YouTube
Searching through the "Ren'Py" tag on itch.io for community-made assets and resources (make sure to give credit if you use someone's asset(s))!
Feniks and Wattson offer some really helpful stuff!!
Not Ren'Py related, but helpful for creating a VN:
Obsidian and Notion for planning and worldbuilding
Visual Studio Code and Atom (comes preinstalled with Ren'Py iirc?) for scripting/coding
Pixabay and Pexels for royalty-free images and stock photos
DOVA-SYNDROME for music
Clip Studio Paint (paid) and Krita (free) for drawing
Toyhou.se to store your littol guys (If you need an invite code, I have over 300 to give away lmao ^^ Send in an ask to @cutiesigh if you'd like one!)
An itch.io account to upload your game for free and share it with others
General tips to keep in mind:
Make games for fun, not for fame. Too often, I see new developers create VNs with "trending tropes" because they see how successful it is and want the same level of popularity. As harsh as it sounds, this only makes your game feel hollow and superficial, and players will notice.
When using Ren'Py, it's better to have multiple .rpy files rather than putting everything into one large file!! It makes organising and finding things easier, and if something gets corrupted... at least you won't lose everything!
Plan everything beforehand, but give yourself room to expand and implement new ideas.
Start small and slowly expand over time. Don't start off with an overly ambitious project, as it can be disheartening when you put all this effort into something just for it not to gain any traction. Also, be grateful for your earliest supporters, as they're the ones who will lift your project off the ground!!
This is a personal preference, but I recommend starting off with itch.io as your main distribution platform. Most storefronts take a cut from your donations and revenue, and sites like Steam require a $100 fee just to publish your game on their platform. Itch is free, and you can even toggle off revenue sharing in your profile settings! (I like to keep it at 10% though, because I'm grateful for everything the site provides ♡)
If you ever need help with Ren'Py, you're always welcome to join the 14DWY Discord server and ping me in the help channel!
453 notes
·
View notes