#beginners guide to setup kubernetes
Explore tagged Tumblr posts
Visit Tumblr Blog
Explore Tumblr blogs with no restrictions, modern design and the best experience.
Last Seen Tumblr Blogs


Fun Fact
In Q3 of 2020, 31% of US users access the Tumblr app daily.
Text
SRE Roadmap: Your Complete Guide to Becoming a Site Reliability Engineer in 2025
In today’s rapidly evolving tech landscape, Site Reliability Engineering (SRE) has become one of the most in-demand roles across industries. As organizations scale and systems become more complex, the need for professionals who can bridge the gap between development and operations is critical. If you’re looking to start or transition into a career in SRE, this comprehensive SRE roadmap will guide you step by step in 2025.

Why Follow an SRE Roadmap?
The field of SRE is broad, encompassing skills from DevOps, software engineering, cloud computing, and system administration. A well-structured SRE roadmap helps you:
Understand what skills are essential at each stage.
Avoid wasting time on non-relevant tools or technologies.
Stay up to date with industry standards and best practices.
Get job-ready with the right certifications and hands-on experience.
SRE Roadmap: Step-by-Step Guide
🔹 Phase 1: Foundation (Beginner Level)
Key Focus Areas:
Linux Fundamentals – Learn the command line, shell scripting, and process management.
Networking Basics – Understand DNS, HTTP/HTTPS, TCP/IP, firewalls, and load balancing.
Version Control – Master Git and GitHub for collaboration.
Programming Languages – Start with Python or Go for scripting and automation tasks.
Tools to Learn:
Git
Visual Studio Code
Postman (for APIs)
Recommended Resources:
"The Linux Command Line" by William Shotts
GitHub Learning Lab
🔹 Phase 2: Core SRE Skills (Intermediate Level)
Key Focus Areas:
Configuration Management – Learn tools like Ansible, Puppet, or Chef.
Containers & Orchestration – Understand Docker and Kubernetes.
CI/CD Pipelines – Use Jenkins, GitLab CI, or GitHub Actions.
Monitoring & Logging – Get familiar with Prometheus, Grafana, ELK Stack, or Datadog.
Cloud Platforms – Gain hands-on experience with AWS, GCP, or Azure.
Certifications to Consider:
AWS Certified SysOps Administrator
Certified Kubernetes Administrator (CKA)
Google Cloud Professional SRE
🔹 Phase 3: Advanced Practices (Expert Level)
Key Focus Areas:
Site Reliability Principles – Learn about SLIs, SLOs, SLAs, and Error Budgets.
Incident Management – Practice runbooks, on-call rotations, and postmortems.
Infrastructure as Code (IaC) – Master Terraform or Pulumi.
Scalability and Resilience Engineering – Understand fault tolerance, redundancy, and chaos engineering.
Tools to Explore:
Terraform
Chaos Monkey (for chaos testing)
PagerDuty / OpsGenie
Real-World Experience Matters
While theory is important, hands-on experience is what truly sets you apart. Here are some tips:
Set up your own Kubernetes cluster.
Contribute to open-source SRE tools.
Create a portfolio of automation scripts and dashboards.
Simulate incidents to test your monitoring setup.
Final Thoughts
Following this SRE roadmap will provide you with a clear and structured path to break into or grow in the field of Site Reliability Engineering. With the right mix of foundational skills, real-world projects, and continuous learning, you'll be ready to take on the challenges of building reliable, scalable systems.
Ready to Get Certified?
Take your next step with our SRE Certification Course and fast-track your career with expert training, real-world projects, and globally recognized credentials.
0 notes
Text
Price: [price_with_discount] (as of [price_update_date] - Details) [ad_1] Description This book is a comprehensive guide by expert Luca Berton that equips readers with the skills to proficiently automate configuration management, deployment, and orchestration tasks. Starting with Ansible basics, the book covers workflow, architecture, and environment setup, progressing to executing core tasks such as provisioning, configuration management, application deployment, automation, and orchestration. Advanced topics include Ansible Automation Platform, Morpheus, cloud computing (with an emphasis on Amazon Web Services), and Kubernetes container orchestration. The book addresses common challenges, offers best practices for successful automation implementation, and guides readers in developing a beginner-friendly playbook using Ansible code. With Ansible's widespread adoption and market demand, this guide positions readers as sought-after experts in infrastructure automation. What you will learn ● Gain a comprehensive knowledge of Ansible and its practical applications in Linux and Windows environments. ● Set up and configure Ansible environments, execute automation tasks, and manage configurations. ● Learn advanced techniques such as utilizing the Ansible Automation Platform for improved performance. ● Acquire troubleshooting skills, implement best practices, and design efficient playbooks to streamline operations. Who this book is for This book is targeted towards beginners as well as developers who wish to learn and extract the best out of Ansible for automating their tasks. Whether you are a system administrator, network administrator, developer, or manager, this book caters to all audiences involved in IT operations. No prior knowledge of Ansible is required as the book starts with the basics and gradually progresses to advanced topics. However, familiarity with Linux, command-line interfaces, and basic system administration concepts would be beneficial. Publisher : BPB Publications (20 July 2023) Language : English Paperback : 364 pages ISBN-10 : 9355515596 ISBN-13 : 978-9355515599 Reading age : 15 years and up Item Weight : 690 g Dimensions : 19.05 x 2.13 x 23.5 cm Country of Origin : India Net Quantity : 1.0 Count Generic Name : Book [ad_2]
0 notes
Text
DevOps with Multi-Cloud:
A Beginner’s Guide Introduction In today’s fast-paced digital world, businesses need agility, reliability, and scalability. This is where DevOps with Multi-Cloud comes in.
By integrating DevOps practices across multiple cloud platforms, companies can optimize workloads, enhance security, and reduce vendor dependency.
If you’re looking for DevOps with Multi-Cloud Training in KPHB, this guide will help you understand the essentials.

What is DevOps with Multi-Cloud?
DevOps is a methodology that combines development (Dev) and operations (Ops) to streamline software delivery.
When paired with a multi-cloud approach—using multiple cloud providers like AWS, Azure, and Google Cloud—it brings flexibility and resilience to IT infrastructure.
Benefits of DevOps in a Multi-Cloud Environment Avoids Vendor Lock-in – Businesses can distribute workloads across different cloud providers.
Improved Disaster Recovery – If one cloud fails, another can handle operations. Cost Optimization – Companies can choose the most cost-effective cloud services.
Enhanced Performance – Running applications closer to users reduces latency.
Security & Compliance – Spreading workloads minimizes risks and ensures compliance with industry regulations. Key Components of DevOps with Multi-Cloud
CI/CD Pipelines – Automate code building, testing, and deployment. Infrastructure as Code (IaC) – Manage cloud resources using tools like Terraform or AWS CloudFormation.
Containerization & Orchestration – Docker and Kubernetes help maintain consistency across cloud environments. Monitoring & Logging – Tools like Prometheus and ELK Stack ensure system health.
Security & Compliance Automation – Integrate security into development workflows with DevSecOps. Challenges in Multi-Cloud DevOps
Complexity in Management – Handling multiple cloud platforms requires expertise.
Data Governance & Compliance – Managing regulations across different clouds is challenging.
Interoperability Issues – Ensuring seamless communication between cloud environments can be difficult. How to Overcome These Challenges?
Use multi-cloud management tools like HashiCorp Consul or Google Anthos. Implement automation to reduce manual configuration.
Follow best security practices to protect data across cloud platforms. DevOps with Multi-Cloud Training in KPHB If you’re in KPHB, Hyderabad, and want to master DevOps with Multi-Cloud, look for training programs that cover:
✔️ Hands-on experience with AWS, Azure, and Google Cloud
✔️ Real-world CI/CD pipeline implementation
✔️ Kubernetes & Docker container orchestration
✔️ Infrastructure as Code (IaC) with Terraform
✔️ Security best practices in a multi-cloud setup
FAQs
1. Why should I learn DevOps with Multi-Cloud?
DevOps with Multi-Cloud enhances career opportunities and helps businesses stay competitive in an evolving digital landscape.
2. Which cloud platforms are covered in multi-cloud training?
Popular platforms include AWS, Microsoft Azure, and Google Cloud Platform (GCP). Some courses also cover Oracle Cloud, IBM Cloud, and Alibaba Cloud.
3. What are the prerequisites for learning DevOps with Multi-Cloud?
Basic knowledge of cloud computing, Linux, and scripting languages like Python or Bash is helpful. However, beginner-friendly courses are available.
4. How long does it take to become proficient?
Depending on prior experience, 3-6 months of dedicated learning can help you gain proficiency in DevOps with Multi-Cloud.
5. Is certification necessary?
While not mandatory, certifications from AWS, Azure, or Google Cloud can boost your job prospects.
Conclusion
DevOps with Multi-Cloud is the future of IT infrastructure, offering flexibility, efficiency, and resilience.
If you're looking for DevOps with Multi-Cloud Training in KPHB,
start your journey today to gain the skills needed for a high-demand career.
#DevOps#MultiCloud#CloudComputing#AWS#Azure#GoogleCloud#Kubernetes#Docker#CICD#InfrastructureAsCode#Terraform#DevSecOps#HybridCloud#TechTraining#ITCareers#KPHB#Hyderabad#CloudSecurity#Automation#DevOpsEngineer#TechSkills#CloudNative#SoftwareDevelopment#ITTraining#CareerGrowth#CloudTechnology
0 notes
Text
How to Deploy Your Full Stack Application: A Beginner’s Guide
Deploying a full stack application involves setting up your frontend, backend, and database on a live server so users can access it over the internet. This guide covers deployment strategies, hosting services, and best practices.
1. Choosing a Deployment Platform
Popular options include:
Cloud Platforms: AWS, Google Cloud, Azure
PaaS Providers: Heroku, Vercel, Netlify
Containerized Deployment: Docker, Kubernetes
Traditional Hosting: VPS (DigitalOcean, Linode)
2. Deploying the Backend
Option 1: Deploy with a Cloud Server (e.g., AWS EC2, DigitalOcean)
Set Up a Virtual Machine (VM)
bash
ssh user@your-server-ip
Install Dependencies
Node.js (sudo apt install nodejs npm)
Python (sudo apt install python3-pip)
Database (MySQL, PostgreSQL, MongoDB)
Run the Server
bash
nohup node server.js & # For Node.js apps gunicorn app:app --daemon # For Python Flask/Django apps
Option 2: Serverless Deployment (AWS Lambda, Firebase Functions)
Pros: No server maintenance, auto-scaling
Cons: Limited control over infrastructure
3. Deploying the Frontend
Option 1: Static Site Hosting (Vercel, Netlify, GitHub Pages)
Push Code to GitHub
Connect GitHub Repo to Netlify/Vercel
Set Build Command (e.g., npm run build)
Deploy and Get Live URL
Option 2: Deploy with Nginx on a Cloud Server
Install Nginx
bash
sudo apt install nginx
Configure Nginx for React/Vue/Angular
nginx
server { listen 80; root /var/www/html; index index.html; location / { try_files $uri /index.html; } }
Restart Nginx
bash
sudo systemctl restart nginx
4. Connecting Frontend and Backend
Use CORS middleware to allow cross-origin requests
Set up reverse proxy with Nginx
Secure API with authentication tokens (JWT, OAuth)
5. Database Setup
Cloud Databases: AWS RDS, Firebase, MongoDB Atlas
Self-Hosted Databases: PostgreSQL, MySQL on a VPS
bash# Example: Run PostgreSQL on DigitalOcean sudo apt install postgresql sudo systemctl start postgresql
6. Security & Optimization
✅ SSL Certificate: Secure site with HTTPS (Let’s Encrypt) ✅ Load Balancing: Use AWS ALB, Nginx reverse proxy ✅ Scaling: Auto-scale with Kubernetes or cloud functions ✅ Logging & Monitoring: Use Datadog, New Relic, AWS CloudWatch
7. CI/CD for Automated Deployment
GitHub Actions: Automate builds and deployment
Jenkins/GitLab CI/CD: Custom pipelines for complex deployments
Docker & Kubernetes: Containerized deployment for scalability
Final Thoughts
Deploying a full stack app requires setting up hosting, configuring the backend, deploying the frontend, and securing the application.
Cloud platforms like AWS, Heroku, and Vercel simplify the process, while advanced setups use Kubernetes and Docker for scalability.
WEBSITE: https://www.ficusoft.in/full-stack-developer-course-in-chennai/
0 notes
Text
The Complete Terraform IAC Development Bootcamp: Master Infrastructure as Code with Ease

In today's fast-paced world of technology, managing infrastructure efficiently is a top priority for businesses and developers alike. As cloud computing continues to evolve, so does the need for streamlined, automated solutions. Enter Terraform, the powerful open-source tool that allows you to manage and provision cloud infrastructure as code (IAC). If you're eager to learn the ins and outs of Terraform, you've landed in the right place. The Complete Terraform IAC Development Bootcamp is designed to guide you from a complete beginner to a pro in no time, helping you unlock the full potential of Infrastructure as Code.
Why Terraform and Infrastructure as Code (IAC) Matter
The traditional approach to managing infrastructure involved manual configurations, which was time-consuming and prone to human error. With Infrastructure as Code (IAC), you can manage, monitor, and update infrastructure using machine-readable configuration files. This revolutionizes the process by ensuring consistency, speed, and flexibility.
Terraform stands out in the IAC world because of its cloud-agnostic nature. Whether you’re working with AWS, Azure, Google Cloud, or even on-premises systems, Terraform allows you to use a single language to manage your infrastructure across platforms. With The Complete Terraform IAC Development Bootcamp, you'll learn how to simplify complex cloud environments, version your infrastructure, and apply changes swiftly and safely.
What is Terraform?
Before diving deeper into The Complete Terraform IAC Development Bootcamp, let’s first grasp what Terraform really is. Terraform, created by HashiCorp, is an open-source IAC tool that allows you to define your infrastructure in declarative configuration files. This means that rather than manually setting up cloud services, databases, and other resources, you can simply write them in code and apply them using Terraform. The tool will take care of the rest—provisioning, managing, and scaling the infrastructure.
Unlike other IAC tools, Terraform is multi-cloud, meaning it works across various cloud providers without needing to adjust the core tool itself. This feature makes it an excellent choice for companies or individuals looking to maintain flexibility in their cloud environments.
The Benefits of Learning Terraform
Learning Terraform opens up a world of opportunities. The demand for IAC skills is rapidly growing in the tech industry, and professionals proficient in tools like Terraform are in high demand. Here are a few benefits you'll gain from The Complete Terraform IAC Development Bootcamp:
Increased Efficiency: Automating infrastructure setup allows you to save countless hours.
Scalability: Terraform allows you to scale infrastructure automatically to meet the growing needs of your application or service.
Error Reduction: Writing infrastructure as code ensures that every environment is consistent, reducing the risk of manual configuration errors.
Cost Control: Terraform allows you to monitor and manage your cloud resources, helping you stay within budget by shutting down unused infrastructure.
What You'll Learn in The Complete Terraform IAC Development Bootcamp
This bootcamp is perfect for individuals at all skill levels, whether you're completely new to Terraform or have some basic knowledge of cloud infrastructure. The course will walk you through everything from the fundamental concepts of Terraform to more advanced topics, such as deploying multi-cloud environments and integrating with popular services like Docker and Kubernetes.
Here’s what you can expect to learn:
Terraform Basics: Understand the core principles of Infrastructure as Code (IAC) and the Terraform workflow.
Modules and Providers: Dive into Terraform modules, how to structure them, and why they are essential for scaling.
State Management: Learn the importance of managing state in Terraform and how it ensures consistent deployments.
Multi-Cloud Deployments: Use Terraform to manage cloud services on AWS, Azure, and Google Cloud.
Version Control: Learn how to manage infrastructure changes using Terraform in combination with Git.
Advanced Features: Explore workspaces, remote state, and best practices for collaborating on infrastructure projects.
By the end of The Complete Terraform IAC Development Bootcamp, you'll be fully equipped to manage complex infrastructures with ease and confidence.
Highlighting Key Trending Technologies
Now let’s highlight some of the key tools and technologies that are trending in the realm of Terraform and Infrastructure as Code:
Kubernetes: Integrating Terraform with Kubernetes allows you to manage containerized applications at scale, an essential skill for modern DevOps practices.
CI/CD Pipelines: Continuous Integration and Continuous Deployment (CI/CD) ensure that your infrastructure is always up-to-date and functioning properly. Terraform works seamlessly with popular CI/CD tools like Jenkins, GitLab CI, and GitHub Actions.
Cloud Platforms: AWS, Google Cloud, and Microsoft Azure continue to dominate the cloud industry, and Terraform is perfectly aligned with all three, giving you the flexibility to switch providers as needed.
Free AI Tools: Incorporating AI into your infrastructure management is becoming increasingly popular. There are free AI-powered tools that can help optimize your Terraform scripts, forecast resource usage, and even automate basic tasks.
Speaking of free AI, wouldn’t it be great to incorporate artificial intelligence into your IAC workflows? There are various free AI tools out there, like OpenAI’s GPT models or Google’s Vertex AI, that can analyze your Terraform scripts, suggest optimizations, and automate tedious tasks. Integrating AI with Terraform can lead to faster, smarter infrastructure deployments, allowing you to focus on more strategic tasks.
How Terraform Can Help You in a Real-World Scenario
Imagine you're part of a development team working on a web application. You need a database, a load balancer, and several virtual machines to run the backend. Without Terraform, each of these resources would need to be configured manually, which could take hours or even days.
With Terraform, however, you can define all these resources in a few lines of code. Once the configuration is set, you can apply the plan and watch as Terraform provisions all the necessary infrastructure within minutes. Not only that, but Terraform also ensures that every environment—whether it’s development, testing, or production—is identical, reducing the chances of “it works on my machine” issues.
Now, imagine scaling that infrastructure. As your app gains more users, Terraform makes it incredibly simple to add new servers, update configurations, or even switch to a different cloud provider, all while maintaining consistency across your environments.
Best Practices for Using Terraform
As with any tool, there are certain best practices you should follow when working with Terraform:
Use Version Control: Store your Terraform code in a Git repository to keep track of changes and collaborate with your team.
Organize Your Code: As your infrastructure grows, so will your Terraform scripts. Make sure to break your infrastructure into modules for better organization and reusability.
Use Remote State Storage: Store your state files in a remote location like an S3 bucket to avoid conflicts and ensure everyone is working with the same state.
Automate Your Workflows: Incorporate Terraform into your CI/CD pipelines to automatically provision infrastructure when new code is pushed to your repository.
Implement Security Best Practices: Use tools like HashiCorp Vault to manage sensitive information, such as API keys and passwords.
Conclusion: Master Terraform and Unlock New Possibilities
Whether you're an individual looking to upskill or a company aiming to streamline cloud operations, The Complete Terraform IAC Development Bootcamp is your gateway to mastering Infrastructure as Code. Terraform’s cloud-agnostic approach, combined with its scalability, makes it the go-to tool for managing cloud environments efficiently.
With the skills you'll gain from this bootcamp, you'll be able to provision complex cloud environments with ease, minimize human errors, and manage resources cost-effectively. Embrace the power of IAC, and get ready to automate, scale, and optimize your infrastructure like never before.
0 notes
Text
AIOps and automation for beginners

You’ve come to the proper spot if you’re prepared to develop or even begin your automation and AIOps plan. This article is filled with doable next actions that you can utilize to comprehend AIOps better, influence others to adopt it, and start implementing it at your company. With measurable advantages and practical use cases, integrating artificial intelligence (AI) into your IT operations makes sense.
Let’s begin with a fundamental premise: automation is the most important tool you have at your disposal as IT systems get more sophisticated and interwoven. The use of technology, software, robots, or procedures that enable you to achieve results with little or no human involvement and at a scale beyond human capacity is what we refer to as automation.
Let’s now examine how, when applied to IT, automation helps you improve three critical business outcomes, along with what any novice needs know to get started.
1. Observability improves application and system performance
Advanced monitoring is delivered through AI-powered observability solutions, giving you the information you need to handle situations more quickly. Traditional monitoring technologies may offer metrics and statistics, but they often are unable to present a comprehensive view of the system’s activity. On the other hand, Observability focuses on gathering real-time data, logs, and traces to provide a comprehensive picture of your IT environment.
What are the fundamentals of observability?
The development of application performance monitoring (APM) is not observability. APM provides application debugging, while observability provides application understanding. APM vs. Observability in a video.
Observability uses sophisticated AI algorithms to swiftly scan enormous volumes of data and spot patterns and abnormalities.
Observability tools find circumstances you may not be aware of or think to search for, then follow their connections to particular performance problems for faster root cause investigation. Look through the Enterprise Guide.
It is advantageous to employ observability early in the development process because it enables DevOps teams to find and address problems in new code before they have an effect on the end user.
Observability enables automated scaling. As an example, you can include instrumentation and data aggregation in the setup of a Kubernetes cluster and begin capturing telemetry as soon as it powers up until it shuts down.
By continually monitoring crucial components and enabling early anomaly identification, observability helps systems of all sizes. Examine the observability myths.
2. Cost reduction and optimization via automated processes
Despite the complexity of contemporary apps and IT systems, many cloud users continue to revert to a tried-and-true practice of overprovisioning resources to reduce performance risk. However, according to over a third of businesses, their cloud investment was a waste. Your IT infrastructure, resource allocation, and cloud consumption may all be optimized with the aid of automated operations driven by AIOps. AIOps may assist you in making wise choices about resource provisioning by examining historical data and real-time indicators, ensuring that you scale up or down in accordance with demand requirements. As a consequence, you can guarantee application performance at the most affordable price.
What novices in automated processes should know:
By identifying unused resources and suggesting their optimization or termination, AIOps may assist in lowering wasteful infrastructure expenses. Rethink your cloud operations first.
You can prevent human mistakes and improve the overall efficiency of your IT systems by automating resource provisioning.
Using a cloud cost optimization platform, you can continually automate crucial tasks in real-time at a scale that no amount of skillful human labor can equal.
An developing financial management paradigm called FinOps (Finance + Operations) may be included into automated operations to assist bring about cost savings and quicker innovation. Watch the video: Reliable cloud automation with FinOps.
By minimizing waste, AI-powered solutions that automate management of operations may also assist you in developing more sustainable IT. The manual, Accelerating FinOps and Sustainable IT, may be read.
3. Rapider incident response and management
An essential component of IT operations is incident management. The mean time to resolution (MTTR), often known as the speed at which problems may be found and resolved, frequently makes the difference between IT fire drills and satisfied clients. AIOps automates issue identification, analysis, and resolution using AI algorithms and data analytics.
For every firm, implementing an AIOps platform is a great beginning step. AIOps solutions, for instance, may continuously monitor server logs and network data, automatically spot patterns suggestive of a crisis, and inform the IT staff. IT staff can react quickly thanks to this proactive strategy, reducing interruptions and enhancing customer satisfaction.
What newcomers to incident management and AIOps systems should be aware of:
The manual time and effort-intensive nature of traditional incident management is increasingly being replaced by AI-powered AIOps platforms. Read the incident management article on AIThority.
With the use of artificial intelligence, incident management may now be proactive and even preemptive. The Gartner Market Guide is available.
A holistic picture of the whole IT ecosystem may be obtained using AIOps systems, which can ingest and correlate data from diverse sources.
Users may collaborate on a single piece of glass by sharing this entire picture, which means operational silos and conventional (and time-consuming) war rooms are out and collaboration is in. “Smarter IT operations management with IBM AIOps Insights” is a blog worth reading.
AIOps systems may be used either as a self-hosted solution or as a SaaS offering. This makes it possible for businesses of any size to discover the best solution for their needs.
While SaaS-based AIOps platforms offer ease of implementation and scalability, allowing organizations to concentrate on using the platform’s capabilities rather than managing the underlying infrastructure, self-hosted AIOps platforms offer more control and customization options and are a good option for complex operations.
Start using AIOps for your business
IBM is available to assist you at any point in your digital transformation journey. In order to help you create excellent customer experiences, ensure application performance, save costs, and address the myriad problems of a contemporary IT environment, we offer solutions that assist you in transitioning from the outdated “break-fix” methodology to an AI-powered approach.
0 notes
Text
How do I start learning DevOps?

A Beginner’s Guide to Entering the World of DevOps
In today’s fast-paced tech world, the lines between development and operations are becoming increasingly blurred. Companies are constantly seeking professionals who can bridge the gap between writing code and deploying it smoothly into production. This is where DevOps comes into play. But if you’re new to it, you might wonder: “How do I start learning DevOps?”
This guide is designed for absolute beginners who want to enter the DevOps space with clarity, structure, and confidence. No fluff—just a clear roadmap to get you started.
What is DevOps, Really?
Before jumping into tools and techniques, it’s important to understand what DevOps actually is.
DevOps is not a tool or a programming language. It’s a culture, a mindset, and a set of practices that aim to bridge the gap between software development (Dev) and IT operations (Ops). The goal is to enable faster delivery of software with fewer bugs, more reliability, and continuous improvement.
In short, DevOps is about collaboration, automation, and continuous feedback.
Step 1: Understand the Basics of Software Development and Operations
Before learning DevOps itself, you need a foundational understanding of the environments DevOps operates in.
Learn the Basics of:
Operating Systems: Start with Linux. It’s the backbone of most DevOps tools.
Networking Concepts: Understand IPs, DNS, ports, firewalls, and how servers communicate.
Programming/Scripting: Python, Bash, or even simple shell scripting will go a long way.
If you're a complete beginner, you can spend a month brushing up on these essentials. You don’t have to be an expert—but you should feel comfortable navigating a terminal and writing simple scripts.
Step 2: Learn Version Control Systems (Git)
Git is the first hands-on DevOps tool you should learn. It's used by developers and operations teams alike to manage code changes, collaborate on projects, and track revisions.
Key Concepts to Learn:
Git repositories
Branching and merging
GitHub/GitLab/Bitbucket basics
Pull requests and code reviews
There are plenty of interactive Git tutorials available online where you can experiment in a sandbox environment.
Step 3: Dive Into Continuous Integration/Continuous Deployment (CI/CD)
Once you’ve learned Git, it’s time to explore CI/CD, the heart of DevOps automation.
Start with tools like:
Jenkins (most popular for beginners)
GitHub Actions
GitLab CI/CD
Understand how code can automatically be tested, built, and deployed after each commit. Even a simple pipeline (e.g., compiling code → running tests → deploying to a test server) will give you real-world context.
Step 4: Learn Infrastructure as Code (IaC)
DevOps isn’t just about pushing code—it’s also about managing infrastructure through code.
Popular IaC Tools:
Terraform: Used to provision servers and networks on cloud providers.
Ansible: Used for configuration management and automation.
These tools allow you to automate server provisioning, install software, and manage configuration using code, rather than manual setup.
Step 5: Get Comfortable With Containers and Orchestration
Containers are a huge part of modern DevOps workflows.
Start With:
Docker: Learn how to containerize applications and run them consistently on any environment.
Docker Compose: Manage multi-container setups.
Kubernetes: When you’re comfortable with Docker, move on to Kubernetes, which is used to manage and scale containerized applications.
Step 6: Learn About Monitoring and Logging
DevOps is not just about automation; it’s also about ensuring that systems are reliable and observable.
Get Familiar With:
Prometheus + Grafana: For monitoring system metrics and visualizing data.
ELK Stack (Elasticsearch, Logstash, Kibana): For centralized logging and log analysis.
Step 7: Practice With Real Projects
Theory and tutorials are great—but DevOps is best learned by doing.
Practical Ideas:
Build a CI/CD pipeline for a sample application
Containerize a web app with Docker
Deploy your app to AWS or any cloud provider using Terraform
Monitor your app’s health using Grafana
Don’t aim for perfection; aim for experience. The more problems you face, the better you'll get.
Step 8: Learn About Cloud Platforms
Almost all DevOps jobs require familiarity with cloud services.
Popular Cloud Providers:
AWS (most recommended for beginners)
Google Cloud Platform
Microsoft Azure
You don’t need to learn every service—just focus on compute (like EC2), storage (S3), networking (VPC), and managed Kubernetes (EKS, GKE).
Final Thoughts: DevOps Is a Journey, Not a Sprint
DevOps isn’t a destination—it’s an evolving practice that gets better the more you experiment and adapt. Whether you're from a development background, system administration, or starting from scratch, you can learn DevOps by taking consistent steps.
Don’t worry about mastering every tool at once. Instead, focus on building a strong foundation, gaining hands-on experience, and gradually expanding your skills. With time, you’ll not only learn DevOps—you’ll live it.
And remember: Start small, stay curious, and keep building.
0 notes
Text
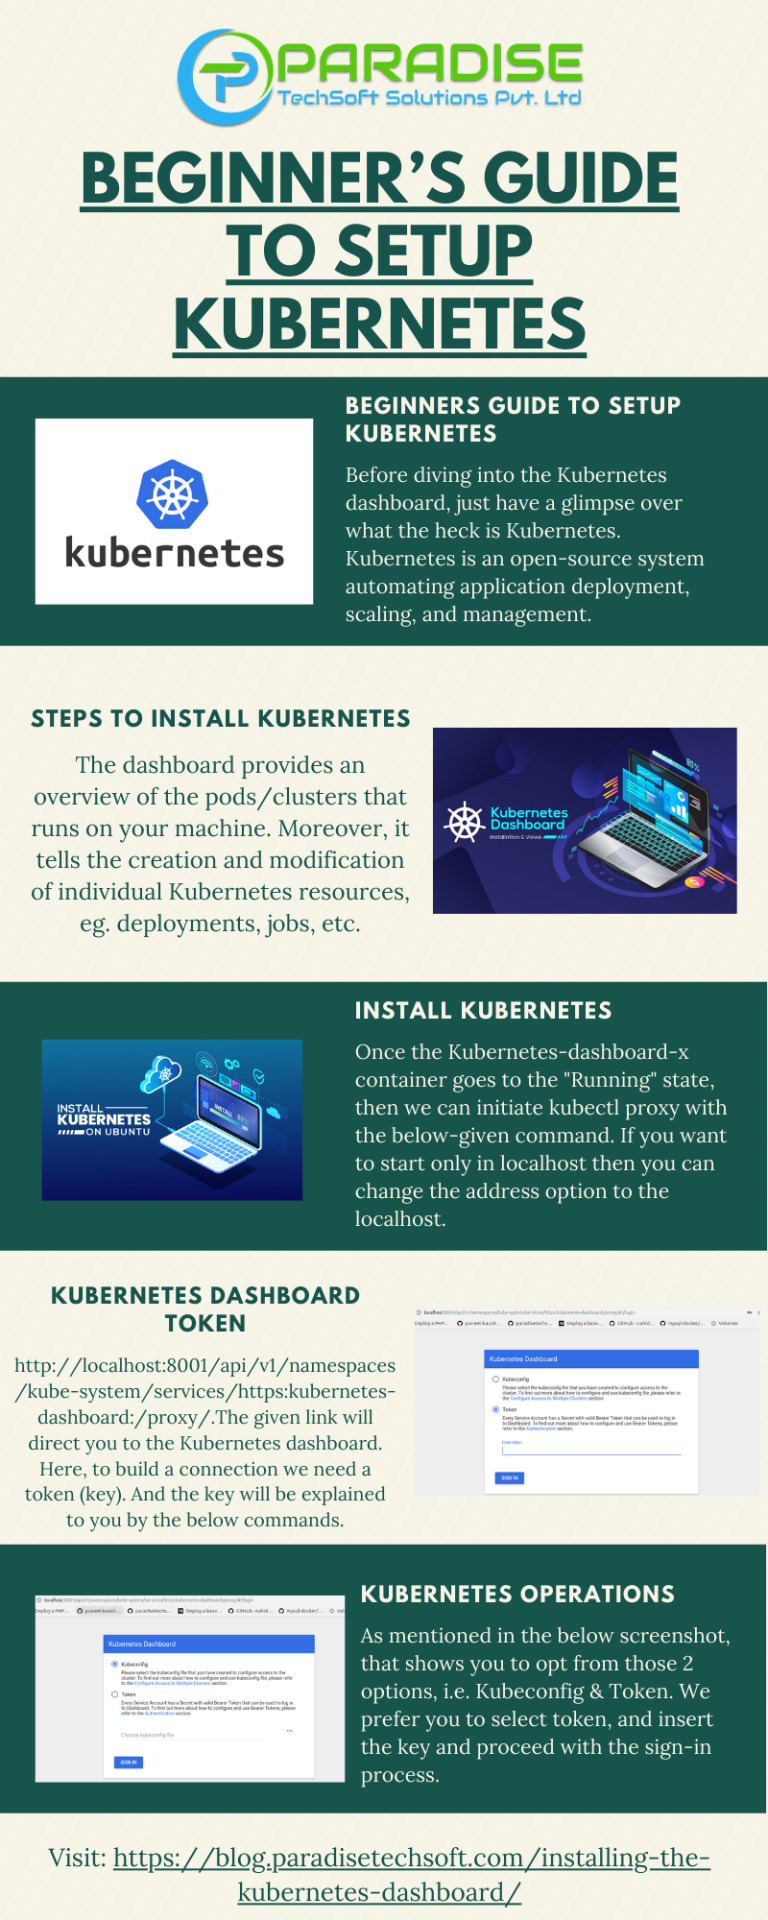
Beginner’s Guide To Setup Kubernetes
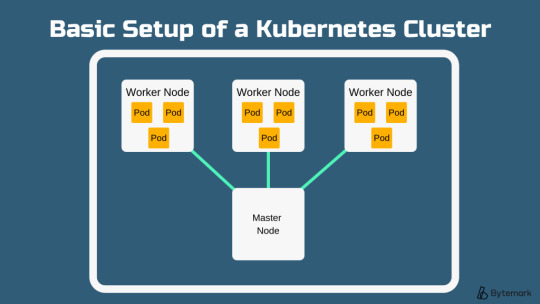
Steps to install Kubernetes Cluster
Requirements
The major requirements are stated below regarding the setup process.
Master: 2 GB RAM 2 Cores of CPU Slave/ Node: 1 GB RAM 1 Core of CPU
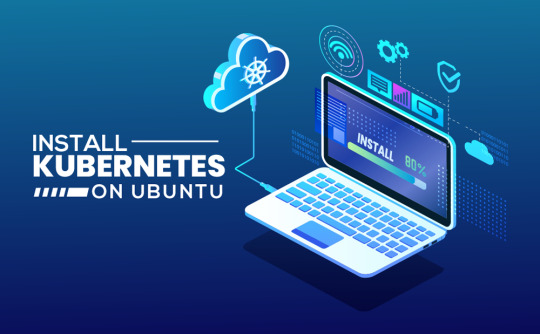
1.Install Kubernetes
The below steps mentioned to be executed on both the master and node machines. Let’s call the master as ‘kmaster‘ and node as ‘knode‘.
1.1 Change to root:
Here, the changing root has been applied because the sudo provides permission to set up Kubernetes, and to avoid the permission process we have changed the root.
$ sudo su
# apt-get update
This command used to update a system.
1.2 Turn Off Swap Space:
Kubernetes doesn't support "swap". So we have to apply the below command to turn off the swap space.
# swapoff -a
1.3 Fstab action
After that, you need to open the ‘fstab’ file and comment out the line which has mention of swap partition.
# nano /etc/fstab
Press ‘Ctrl+X’, after that press ‘Y’ and then press ‘Enter’ to Save the file.
1.4 Update The Hostnames
To change the hostname of both machines, run the below command to open the file and subsequently rename the master machine to ‘kmaster’ and your node machine to ‘knode��.
# nano /etc/hostname
Press ‘Ctrl+X’, after that press ‘Y’ and then press ‘Enter’ to Save the file.
1.5 Update The Hosts File With IPs Of Master & Node
Run the following command on both machines to note the IP addresses of each.
# ifconfig
Now go to the ‘hosts’ file by moving over the both master and node and add an Entry by just specifying their respective IP addresses along with their names i.e. ‘kmaster’ and ‘knode’.
# nano /etc/hosts
Press ‘Ctrl+X’, after that press ‘Y’ and then press ‘Enter’ to Save the file.
1.6 Setting Static IP Addresses
We will make the IP addresses used as above, static for the VMs. We can do, by just modifying/changing the network interfaces file. Then, run the following command to open the file:
# nano /etc/network/interfaces
Now enter the following lines in the file.
auto enp0s8 iface enp0s8 inet static address
Press ‘Ctrl+X’, after that press ‘Y’ and then press ‘Enter’ to Save the file.
After this, restart your machine.
1.7 Install Open SSH-Server
Now we have to install openshh-server. Run the following command:
# sudo apt-get install openssh-server
2. Install Docker
Now we need to install Docker as docker images will be utilized for managing the containers in the cluster. Run with the following commands:
# sudo su # apt-get update # apt-get install -y docker.io
We’ve just explained about how to docker in your own system instead the process of how to add a $user in a docker or how to install docker-compose, for the basics of kubernetes you can follow by just tapping over this link:
3. Install kubeadm, Kubelet And Kubectl
To move further, we’ve to Install these 3 essential components for just setting up the environment of Kubernetes: kubeadm, kubectl, and kubelet.
Run the following commands before installing the Kubernetes environment.
# apt-get update && apt-get install -y apt-transport-https curl # curl -s https://packages.cloud.google.com/apt/doc/apt-key.gpg | apt-key add - # cat <<EOF >/etc/apt/sources.list.d/kubernetes.list deb http://apt.kubernetes.io/ kubernetes-xenial main EOF # apt-get update
Kubelet is the lowest level component in Kubernetes. It’s reliable for what’s running on an individual or specific machine.
Kubeadm is used for administrating the Kubernetes cluster.
Kubectl is used for controlling the configurations on various nodes inside the cluster.
# apt-get install -y kubelet kubeadm kubectl
3.1 Updating Kubernetes Configuration
Next, we will change the configuration file of Kubernetes. Run the following command:
#nano /etc/systemd/system/kubelet.service.d/10-kubeadm.conf
This will open a text editor, enter the following line after the last “Environment Variable”:
Environment="cgroup-driver=systemd/cgroup-driver=cgroupfs"
Press ‘Ctrl+X’, after that press ‘Y’ and then press ‘Enter’ to Save the file.
4. Steps Only For Kubernetes Master VM (kmaster)
All the required packages were installed on both servers till now. But, the further steps will work upon the Master Node only. Now, run the following command to initialize the Kubernetes Master.
4.1 Initialize Kubernetes Master with ‘kubeadm init’
Run the beneath command to initialize and setup kubernetes master.
# kubeadm init (or) # kubeadm init --apiserver-advertise-address=<ip-address-of-kmaster-vm> --pod-network-cidr=192.168.0.0/16 # kubeadm init --apiserver-advertise-address 192.168.1.206 --pod-network-cidr=172.16.0.0/16
In the selected part 1, when we initialize Kubeadm with the command then it will show you the kubernetes control-panel has initialized successfully. The three commands as shown in the images’ part 1 should be run to create .kube folder.
As mentioned before, run the commands from the above output as a non-root user
$ mkdir -p $HOME/.kube $ sudo cp -i /etc/kubernetes/admin.conf $HOME/.kube/config $ sudo chown $(id -u):$(id -g) $HOME/.kube/config
In the selected part 2, signifies about the “kubeadm join token”. The kubeadm token need to store somewhere in notepad and wherever you want to. After storing, you need to run that specific key token in a node terminal so that it can maintain the communication between the master and node.
You will notice from the previous command, that all the pods are running except one: ‘kube-dns’. For resolving this we will install a pod network. To install the CALICO pod network, run the following command:
$ kubectl apply -f https://docs.projectcalico.org/v3.0/getting-started/kubernetes/installation/hosted/kubeadm/1.7/calico.yaml
Install network add-on to enable the communication between the pods only on master nodes. Flannel is a network fabric for the containers, that are designed for the kubernetes.
$ kubectl apply -f https://raw.githubusercontent.com/coreos/flannel/master/Documentation/kube-flannel.yml
To verify, if kubectl is working or not, run the following command.s
$ kubectl get pods -o wide --all-namespaces
use "kubectl get nodes" command to ensure the kubernetes master node status is ready.
$ kubectl get nodes
4.2 To reset kubernetes
Now, if you are done with the process of initiating the command and requiring a fresh start, then you can make changes by just following the below command.
$ kubeadm reset
5. Steps For Only Kubernetes Node VM (knode)
For trial purpose, we can create nodes in the same system with the help of virtual machine.
Prerequisites
1.3GHz or faster 64-bit processor 2 GB RAM minimum/ 4GB RAM or more recommended
install vmware workstation player on ubuntu
5.1 Install required packages
$ sudo apt update $ sudo apt install build-essential</strong> $ sudo apt install linux-headers-$(uname -r)
5.2 Download vmware workstation player
$ wget https://www.vmware.com/go/getplayer-linux
Once the download is completed make the installation file executable using the following command:
$ chmod +x getplayer-linux
5.3 install vmware workstation player
Start the Installation wizard by typing:
$ sudo ./getplayer-linux
1. Just accept the terms and conditions in the license agreement and click on the Next button.
2. Next, you will be asked whether you like to check for product updates on startup. Make your selection and click on the Next button.
3. VMware’s Customer Experience Improvement Program (“CEIP”) helps VMware to improve their products and services by sending anonymous system data and usage information to VMware. If you prefer not to participate in the program select No and click on the Next button
4. In the next step , if you don’t have a license key, vacate the field empty and click on the next button.
5. Next, you will see the following page informing you that the VMware Workstation Player is ready to be installed. Click on the Install button.
6. Start VMware Workstation Player
Create a new virtual machine
Open terminal in virtual system and follow the step to create user (knode) and enter command to make connection between master and node.
$ sudo su
Now we are in the ‘knode terminal’ and we need to run kubeadm init. token key in this terminal as we have described above to save the specific key so that it make connection between master( kmaster) and node(knode).
# kubeadm join 192.168.1.206:6443 --token 02p54b.p8oe045cpj3zmz2b --discovery-token-ca-cert-hash sha256:50ba20a59c9f8bc0559d4635f1ac6bb480230e173a0c08b338372d8b81fcd061
once worker node is joined with kubernetes master, then verify the list of nodes within the kubernetes cluster.
$ kubectl get nodes
we have successfully configured the kubernetes cluster.
kubernetes master and worker node is ready to deploy the application.
Bottom Line
Now that we have explained about kubernetes setup, and further we will move onto something more technical with the other parts of this kubernetes series. Our next tutorial would explain to you how to make a connection with dashboard. Till then enjoy learning and try something new.
#beginners guide to setup kubernetes#Steps to install Kubernetes#Install Kubernetes#Installing the Kubernetes Dashboard#Master and Node#Kubernetes Dashboard Token
0 notes
Text
One year using Kubernetes in production: Lessons learned
Starting out with containers and container orchestration tools
I now believe containers are the deployment format of the future. They make it much easier to package an application with its required infrastructure. While tools such as Docker provide the actual containers, we also need tools to take care of things such as replication and failovers, as well as APIs to automate deployments to multiple machines.
The state of clustering tools such as Kubernetes and Docker Swarm was very immature in early 2015, with only early alpha versions available. We still tried using them and started with Docker Swarm.
At first we used it to handle networking on our own with the ambassador pattern and a bunch of scripts to automate the deployments. How hard could it possibly be? That was our first hard lesson: Container clustering, networking, and deployment automation are actually very hard problems to solve.
We realized this quickly enough and decided to bet on another one of the available tools. Kubernetes seemed to be the best choice, since it was being backed by Google, Red Hat, Core OS, and other groups that clearly know about running large-scale deployments.
Load balancing with Kubernetes
When working with Kubernetes, you have to become familiar with concepts such as pods, services, and replication controllers. If you're not already familiar with these concepts, there are some excellent resources available to get up to speed. The Kubernetes documentation is a great place to start, since it has several guides for beginners.
Once we had a Kubernetes cluster up and running, we could deploy an application using kubectl, the Kubernetes CLI, but we quickly found that kubectl wasn't sufficient when we wanted to automate deployments. But first, we had another problem to solve: How to access the deployed application from the Internet?
The service in front of the deployment has an IP address, but this address only exists within the Kubernetes cluster. This means the service isn’t available to the Internet at all! When running on Google Cloud Engine, Kubernetes can automatically configure a load balancer to access the application. If you’re not on GCE (like us), you need to do a little extra legwork to get load balancing working.
It’s possible to expose a service directly on a host machine port—and this is how a lot of people get started—but we found that it voids a lot of Kubernetes' benefits. If we rely on ports in our host machines, we will get into port conflicts when deploying multiple applications. It also makes it much harder to scale the cluster or replace host machines.
A two-step load-balancer setup
We found that a much better approach is to configure a load balancer such as HAProxy or NGINX in front of the Kubernetes cluster. We started running our Kubernetes clusters inside a VPN on AWS and using an AWS Elastic Load Balancer to route external web traffic to an internal HAProxy cluster. HAProxy is configured with a “back end” for each Kubernetes service, which proxies traffic to individual pods.
This two-step load-balancer setup is mostly in response AWS ELB's fairly limited configuration options. One of the limitations is that it can’t handle multiple vhosts. This is the reason we’re using HAProxy as well. Just using HAProxy (without an ELB) could also work, but you would have to work around dynamic AWS IP addresses on the DNS level.
In any case, we needed a mechanism to dynamically reconfigure the load balancer (HAProxy, in our case) when new Kubernetes services are created.
The Kubernetes community is currently working on a feature called ingress. It will make it possible to configure an external load balancer directly from Kubernetes. Currently, this feature isn’t really usable yet because it’s simply not finished. Last year, we used the API and a small open-source tool to configure load balancing instead.
Configuring load balancing
First, we needed a place to store load-balancer configurations. They could be stored anywhere, but because we already had etcd available, we decided to store the load-balancer configurations there. We use a tool called confd to watch configuration changes in etcd and generate a new HAProxy configuration file based on a template. When a new service is added to Kubernetes, we add a new configuration to etcd, which results in a new configuration file for HAProxy.
Kubernetes: Maturing the right way
There are still plenty of unsolved problems in Kubernetes, just as there are in load balancing generally. Many of these issues are recognized by the community, and there are design documents that discuss new features that can solve some of them. But coming up with solutions that work for everyone requires time, which means some of these features can take quite a while before they land in a release. This is a good thing, because it would be harmful in the long term to take shortcuts when designing new functionality.
This doesn’t mean Kubernetes is limited today. Using the API, it’s possible to make Kubernetes do pretty much everything you need it to if you want to start using it today. Once more features land in Kubernetes itself, we can replace custom solutions with standard ones.
After we developed our custom solution for load balancing, our next challenge was implementing an essential deployment technique for us: Blue-green deployments.
Blue-green deployments in Kubernetes
A blue-green deployment is one without any downtime. In contrast to rolling updates, a blue-green deployment works by starting a cluster of replicas running the new version while all the old replicas are still serving all the live requests. Only when the new set of replicas is completely up and running is the load-balancer configuration changed to switch the load to the new version. A benefit of this approach is that there’s always only one version of the application running, reducing the complexity of handling multiple concurrent versions. Blue-green deployments also work better when the number of replicas is fairly small.
Figure 2 shows a component “Deployer” that orchestrates the deployment. This component can easily be created by your own team because we open-sourced our implementation under the Apache License as part of the Amdatu umbrella project. It also comes with a web UI to configure deployments.
An important aspect of this mechanism is the health checking it performs on the pods before reconfiguring the load balancer. We wanted each component that was deployed to provide a health check. Now we typically add a health check that's available on HTTP to each application component.
Making the deployments automatic
With the Deployer in place, we were able to hook up deployments to a build pipeline. Our build server can, after a successful build, push a new Docker image to a registry such as Docker Hub. Then the build server can invoke the Deployer to automatically deploy the new version to a test environment. The same image can be promoted to production by triggering the Deployer on the production environment.
Know your resource constraints
Knowing our resource constraints was critical when we started using Kubernetes. You can configure resource requests and CPU/memory limits on each pod. You can also control resource guarantees and bursting limits.
These settings are extremely important for running multiple containers together efficiently. If we didn't set these settings correctly, containers would often crash because they couldn't allocate enough memory.
Start early with setting and testing constraints. Without constraints, everything will still run fine, but you'll get a big, unpleasant surprise when you put any serious load on one of the containers.
How we monitored Kubernetes
When we had Kubernetes mostly set up, we quickly realized that monitoring and logging would be crucial in this new dynamic environment. Logging into a server to look a log files just doesn’t work anymore when you're dealing with a large number of replicas and nodes. As soon as you start using Kubernetes, you should also have a plan to build centralized logging and monitoring.
Logging
There are plenty of open-source tools available for logging. We decided to use Graylog—an excellent tool for logging—and Apache Kafka, a messaging system to collect and digest logs from our containers. The containers send logs to Kafka, and Kafka hands them off to Graylog for indexing. We chose to make the application components send logs to Kafka themselves so that we could stream logs in an easy-to-index format. Alternatively, there are tools that retrieve logs from outside the container and forward them to a logging solution.
Monitoring
Kubernetes does an excellent job of recovering when there's an error. When pods crash for any reason, Kubernetes will restart them. When Kubernetes is running replicated, end users probably won't even notice a problem. Kubernetes recovery works so well that we have had situations where our containers would crash multiple times a day because of a memory leak, without anyone (including ourselves) noticing it.
Although this is great from the perspective of Kubernetes, you probably still want to know whenever there’s a problem. We use a custom health-check dashboard that monitors the Kubernetes nodes, individual pods—using application-specific health checks—and other services such as data stores. To implement a dashboard such as this, the Kubernetes API proves to be extremely valuable again.
We also thought it was important to measure load, throughput, application errors, and other stats. Again, the open-source space has a lot to offer. Our application components post metrics to an InfluxDB time-series store. We also use Heapster to gather Kubernetes metrics. The metrics stored in InfluxDB are visualized in Grafana, an open-source dashboard tool. There are a lot of alternatives to the InfluxDB/Grafana stack, and any one of them will provide a lot of value toward keeping track of how things are running.
Data stores and Kubernetes
A question that many new Kubernetes users ask is “How should I handle my data stores with Kubernetes?”
When running a data store such as MongoDB or MySQL, you most likely want the data to be persistent. Out of the box, containers lose their data when they restart. This is fine for stateless components, but not for a persistent data store. Kubernetes has the concept of volumes to work with persistent data.
A volume can be backed by a variety of implementations, including files on the host machines, AWS Elastic Block Store (EBS), and nfs. When we were researching the question of persistent data, this provided a good answer, but it wasn't an answer for our running data stores yet.
Replication issues
In most deployments, the data stores also run replicated. Mongo typically runs in a Replica Set, and MySQL could be running in primary/replica mode. This introduces a few problems. First of all, it’s important that each node in the data store’s cluster is backed by a different volume. Writing to the same volume will lead to data corruption. Another issue is that most data stores require precise configuration to get the clustering up and running; auto discovery and configuration of nodes is not common.
At the same time, a machine that runs a data store is often specifically tuned for that type of workload. Higher IOPS could be one example. Scaling (adding/removing nodes) is an expensive operation for most data stores as well. All these things don’t match very well with the dynamic nature of Kubernetes deployments.
The decision not to use Kubernetes for running data stores in production
This brings us to a situation where we found that the benefits of running a data store inside Kubernetes are limited. The dynamics that Kubernetes give us can’t really be used. The setup is also much more complex than most Kubernetes deployments.
Because of this, we are not running our production data stores inside Kubernetes. Instead, we set up these clusters manually on different hosts, with all the tuning necessary to optimize the data store in question. Our applications running inside Kubernetes just connect to the data store cluster like normal. The important lesson is that you don’t have to run everything in Kubernetes once you have Kubernetes. Besides data stores and our HAProxy servers, everything else does run in Kubernetes, though, including our monitoring and logging solutions.
Why we're excited about our next year with Kubernetes
Looking at our deployments today, Kubernetes is absolutely fantastic. The Kubernetes API is a great tool when it comes to automating a deployment pipeline. Deployments are not only more reliable, but also much faster, because we’re no longer dealing with VMs. Our builds and deployments have become more reliable because it’s easier to test and ship containers.
We see now that this new way of deployment was necessary to keep up with other development teams around the industry that are pushing out deployments much more often and lowering their overhead for doing so.
Cost calculation
Looking at costs, there are two sides to the story. To run Kubernetes, an etcd cluster is required, as well as a master node. While these are not necessarily expensive components to run, this overhead can be relatively expensive when it comes to very small deployments. For these types of deployments, it’s probably best to use a hosted solution such as Google's Container Service.
For larger deployments, it’s easy to save a lot on server costs. The overhead of running etcd and a master node aren’t significant in these deployments. Kubernetes makes it very easy to run many containers on the same hosts, making maximum use of the available resources. This reduces the number of required servers, which directly saves you money. When running Kubernetes sounds great, but the ops side of running such a cluster seems less attractive, there are a number of hosted services to look at, including Cloud RTI, which is what my team is working on.
A bright future for Kubernetes
Running Kubernetes in a pre-released version was challenging, and keeping up with (breaking) new releases was almost impossible at times. Development of Kubernetes has been happening at light-speed in the past year, and the community has grown into a legitimate powerhouse of dev talent. It’s hard to believe how much progress has been made in just over a year.[Source]-https://techbeacon.com/devops/one-year-using-kubernetes-production-lessons-learned
Basic & Advanced Kubernetes Course using cloud computing, AWS, Docker etc. in Mumbai. Advanced Containers Domain is used for 25 hours Kubernetes Training.
0 notes
Text
Adoption: Developing for containers
Red Hat Container Development Kit (CDK) is a pre-assembled holder advancement condition in view of Red Hat Enterprise Linux to enable you to begin creating compartment based applications rapidly. The compartments you fabricate can be effectively conveyed on any Red Hat holder host or stage, including: Red Hat Enterprise Linux, Red Hat Enterprise Linux Atomic Host, and our stage as-an administration arrangement, OpenShift Enterprise 3.
Begin with holders on Mac OS X, Microsoft Windows, or Linux
To spare you from assembling a holder advancement condition starting with no outside help, CDK conveys the most recent compartment apparatuses in a Red Hat Enterprise Linux virtual machine that you can use on your Mac OS X, Microsoft Windows, RHEL or Fedora Linux framework. What's more, you have your decision of virtualization stages (VirtualBox, VMware, and the Linux KVM/libvirt hypervisors are altogether bolstered). The greater part of the VM design subtle elements on your framework are dealt with for you by Vagrant, an open-source device for making and appropriating compact and reproducible improvement conditions.
Red Hat Container Development Kit 2 beta is accessible now to clients and accomplices with Red Hat Enterprise Linux Developer memberships and to accomplices who join the Container Zone by means of the Red Hat Connect for Technology Partners program. To figure out how to introduce the Red Hat CDK, allude to the Red Hat CDK Installation Guide.
Something for all levels of compartment experience
The CDK is for you whether you are attempting Docker-organized holders surprisingly, or need to see the most recent advancements in compartment instruments from Red Hat. In the event that you are simply beginning, attempt some compartment cases from the Getting Started with Container Development Kit manage.
On the off chance that you are prepared to give scaling a shot and organizing multi-compartment arrangements, CDK has OpenShift Enterprise 3 and Kubernetes introduced. You can pick between multi-compartment conditions that are overseen by OpenShift Enterprise or by just Kubernetes itself.
Need to attempt OpenShift Enterprise 3 Platform-as-a-Service?
The CDK gives a prebuilt, single-machine OpenShift Enterprise 3 condition, so you can attempt the most recent adaptation of the OpenShift stage as-an administration that incorporates bolster for docker-organized holders and Kubernetes. When you raise the rhel-ose Vagrantfile, OpenShift is begun and provisioned.
To enable you to begin building applications, various OpenShift layouts are incorporated. You can get to the OpenShift Web support from your program or work from the CLI utilizing the oc charge to convey holder applications. OpenShift is pre-designed with a neighborhood Docker registry accessible and a nearby form of Kubernetes running, so you can test the full involvement in an independent domain.
Organize applications utilizing Kubernetes
Kubernetes is an organization and administration stage for programmed sending, scaling and operation of use compartments on a group of machines. Conveying compartments utilizing Kubernetes requires metadata data as antiquities documents. So an engineer needs a straightforward setup of Kubernetes to have the capacity to test application holders and the antiques before moving the organization to different situations, for example, testing and generation conditions.
The CDK gives a rhel-k8s-singlenode-setup Vagrantfile that can start up a solitary hub Kubernetes arrangement (a solitary ace and hub setup) on a similar host just with a "vagrant up" summon. A designer could then utilize the kubectl summon to make units, administrations, replication controllers and different components to oversee and scale containerized applications.
Change over VM pictures to Containers with v2c
Virtual-to-Container (v2c) is a device for bringing in and changing over circle pictures (like virtual machine pictures) into docker-organized compartment pictures, finish with the suitable metadata. The v2c apparatus makes it easy to take a working VM that has a solitary application and create a dockerfile that runs a similar application in a holder.
A run of the mill v2c client is an association with a current gathering of VM pictures that insert huge association particular programming or setup. The subsequent base pictures give a beginning stage that you can expand on with extra dockerfile(s) and arrangement.
In the event that you might want to attempt this ability out please connect with us on the mailing list provided underneath.
Nuclear App and the Nulecule Specification
Those keen on the advancement of compartment tooling will need to attempt Atomic App, which is Red Hat's reference usage of the Nulecule particular. The Nulecule detail empowers complex containerized applications to be characterized, bundled and circulated utilizing standard holder advances. The subsequent holder incorporates conditions, bolsters numerous coordination suppliers, and can determine asset necessities. The Nulecule determination additionally bolsters the total of different composite applications.
For a review of Atomic App, see this blog entry: Running Nulecules in OpenShift by means of oc new-application.
Getting the CDK
Red Hat Container Development Kit 2 beta is accessible now to clients and accomplices with Red Hat Enterprise Linux Developer memberships and to accomplices who join the Container Zone by means of the Red Hat Connect for Technology Partners program.
Holder pictures
Regardless of whether changing over existing applications into basic, one-holder organizations or creating microservices design based multi-compartment applications without any preparation, the CDK gives the instruments and documentation that engineers need to begin. This incorporates access to these pictures by means of the Red Hat Container Registry:
Programming dialects (Python, Ruby, Node.js, PHP, Perl - see Red Hat Software Collections)
Databases (MySQL, MariaDB, PostgreSQL, MongoDB - see Red Hat Software Collections)
Web servers (Apache httpd, Passenger - see Red Hat Software Collections), JBoss Web Server (Tomcat)
Endeavor middleware items additionally accessible in picture organize incorporate JBoss Enterprise Application Platform (EAP), AMQ, Data Grid, and so on.
Red Hat Developer Toolset picture for engineers looking to make holder based applications constructed by means of the GNU Compiler Collection (GCC) instruments.
Give us your criticism and join the exchange
We need your criticism, join the exchange. Get included. The Red Hat Container Tools mailing rundown is interested in all. Kindly attempt the beta, and send us your criticism on the compartment [email protected] mailing list.
Improvement apparatuses for holders
The Red Hat Enterprise Linux engineer apparatuses makes it simple to get to industry-driving designer devices, instructional assets, and a biological system of specialists to enable designers to expand efficiency in building awesome Linux applications. If it's not too much trouble audit this segment as the choices have significantly extended as of late.
Red Hat Developer Toolset The Red Hat Developer Toolset empowers designers to exploit the most recent adaptations of GNU Compiler Collection (GCC), Eclipse, and more as they fabricate, test, and convey applications for RHEL 7.
Find out about the GNU Compiler Collection (GCC) toolchains accessible in Red Hat Developer Toolset.
Red Hat Developer Toolset 3.0
Introducing and Using Red Hat Developer Toolset
Red Hat Software Collections Red Hat Software Collections (RHSCL) incorporates every now and again refreshed arrangements of scripting dialects, databases, web servers and that's just the beginning. These give you regular improvement stacks for supporting both RHEL 6 and 7.
A nitty gritty depiction of the Software Collections for RHEL 7
A prologue to application advancement devices in Red Hat Enterprise Linux 7
SystemTap Beginners Guide
We now have dockerfiles for Red Hat Software Collections (RHSCL), helping designers to quickly assemble and convey containerized applications. Accessible for both Red Hat Enterprise Linux 6 and Red Hat Enterprise Linux 7, there are even a couple that consolidate Apache HTTP Server and your most loved scripting dialect. These are likewise now included as you introduce RHSCL parts.
0 notes
Photo
This blog is beneficial for you if you're still striving to install into the Kubernetes Dashboard or confronting any obstacle in signing-up.
#beginners guide to setup kubernetes#Steps to install Kubernetes#Install Kubernetes#Installing the Kubernetes Dashboard#Master and Node#Kubernetes Dashboard Token#Kubernetes Commands#How to Get Started Kubernetes#Kubernetes Operations
0 notes
Link
#kubernetes-docker#beginners guide to setup kubernetes#Steps to install Kubernetes#Install Kubernetes#Installing the Kubernetes Dashboard#Master and Node#Kubernetes Dashboard Token
0 notes
Link
#kubernetes-docker#beginners guide to setup kubernetes#Steps to install Kubernetes#Install Kubernetes#Installing the Kubernetes Dashboard#Master and Node#Kubernetes Dashboard Token
0 notes
Link
#beginners guide to setup kubernetes#steps to install kubernetes#Install Kubernetes#Installing the Kubernetes Dashboard#Master and Node#Kubernetes Dashboard Token
0 notes
Photo
In this blog, we are going to provide you with how to make a connection between Local Systems and Kubernetes(k8s) and Steps to install Kubernetes .
#beginners guide to setup kubernetes#Steps to install Kubernetes#Install Kubernetes#Installing the Kubernetes Dashboard
0 notes
Link
Besides connection, our major focus would be on how to set up Kubernetes on the Linux system. Steps to install Kubernetes Cluster Requirements The major requirements are stated below regarding the setup process. Master: 2 GB RAM 2 Cores of CPU Slave/ Node: 1 GB RAM 1 Core of CPU 1.Install Kubernetes The below steps mentioned to be executed on both the master and node machines.
0 notes