#bokeh-photography-tutorial
Explore tagged Tumblr posts
Visit Tumblr Blog
Explore Tumblr blogs with no restrictions, modern design and the best experience.
Last Seen Tumblr Blogs


Fun Fact
Post activity is at the highest at 4:00 pm EDT; notes peak at 10:00 pm EDT.
Text
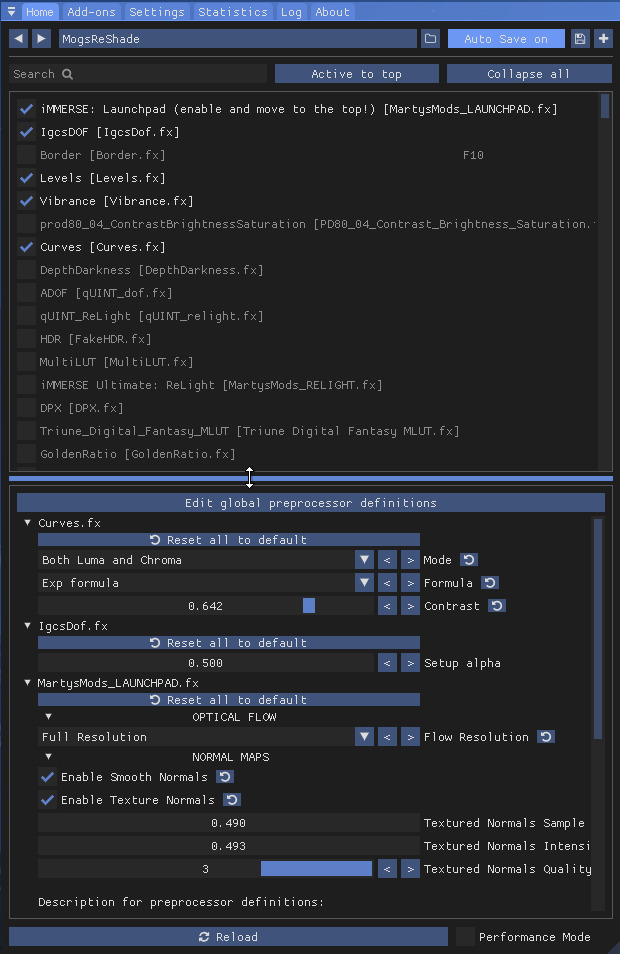
BG3 Virtual Photography Supplement: Mods and Resources
Here's some popular and useful mods I use for virtual photography! I will try to update this as I find more. You may find these useful with the rest of my tutorial:
Chapter 0: Overview
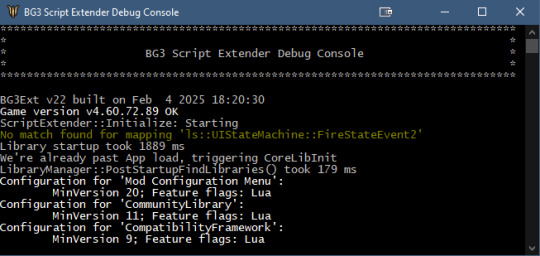
Chapter 1: Script Extender Debug Console
Chapter 2: Scene Manipulation
Chapter 2.5: More Scene Manipulation
Chapter 3: Otis_Inf Camera Tools
Supplement: Mods and Resources
Tools
EasyCheat - Teleport to locations near and far, summon armor and items for your characters, clean the dirt off. All at the press of a button!
Lighty Lights - An incredible tool but terribly finicky. Actively being worked on.
Native Camera Tweaks - A Native Mod that allows you to unlock the camera pitch and zoom in and out of combat. It's handy for photo stuff but generally useful.
WASD Character Movement - another Native mod for WASD movement. More precise placement of characters in the field.
Remove Broken Objects - can help clean up sets.
Scribe Object Inspector and Event Logging - sometimes you need to find the IDs of objects in the game. This is an easy way to do it.
Polyamory Mod - can be useful for flag checking but I haven't used it recently. But it may have use for some.
Characters
Full Custom Companions (Hirelings) - have full custom control over hirelings. Great if you wanna add more Tavs to your shots! Have done family portraits for my Tav's family this way, it's so fun!
Recruit any NPC - Make an NPC a playable character. Can be really handy sometimes if you don't wanna do code transformations.
Appearance Edit Enhanced - if you're not using this already, you should be. Modify your characters at any time. Works great with the Custom Hirelings mod.
Transmogs and Spelltheft - identity theft! Another mod that lets you copy the appearance of characters. There was some special case scenario that I used an old version of this but I don't recall what that is anymore. Listing it here anyway.
Ring of Metamorphosis - Another mod for changing your character into several known characters and also INVISIBLE. Being invisible is extremely useful when you start conversations for facial expressions but you don't want another character in the way of a shot.
Effects
Pretty Particles - I've only used this once but if you combine it with Depth of Field, you can use it to get some really pretty bokeh effects. Also, blood and sweat in varying degrees/combinations.
No Annoying VFX - a series of mods that will remove the effects that you may not want for a shot. Like casting glows, glowing armor, UI indicators, among other things.
Posing
Hugs - Hug your companions!! Great for a quick and cute hug that doesn't require any coding.
Kisses - Kiss your companions using anybody animations! For best results cast the spells on a body type that matches up.
Replayable Romance Scenes - what it says on the tin. Romance scenes playable through casting a spell. These cutscenes play in new locations.
Stay Still In Camp and Play Idle Animations Everywhere - basically what it says. Once you switch from a companion to Tav, they won't run back to their tent. They also have some idle animations that are new.
Sit Happens - spawn chairs to sit!
Emotes - Poses and Toggle Walk - TONS of poses to use in the open world. Extremely useful for non-cinematic shots.
Cutscenes
Cut Scene Edits for Better Screenshots - A mod by Moxi that allows for cutscenes to be modified slightly - including forced clothing when you want something custom (shirtless Astarion, for example), removing Karlach's glow from her cutscene, among other things. Take a read through.
Musical Instrument Yeet - Sometimes the instruments pop up in a kiss cutscene and it is really distracting. Remove them with this!
Resources
Moxi's Research Directory - TONS of resources for finding character UUIDs, some copy-pastes ready to modify for scenes, cool locations like Private Camp Rooms and how to get there, Teleport commands. HANDY!
Google Spreadsheet of Tags - for scripting purposes.
Google Spreadsheet of Dialogue Lines - for finding cutscenes you want to script and play.
A few useful ScriptExtender commands.
An In Depth list of Osiris Commands - for advanced use.
LaughingLeader's list of Osiris Commands - another resource for commands.
#mog's bg3 virtual photography tutorial#bg3#bg3 virtual photography#baldur's gate iii#baldur's gate 3#bg3 photomode#bg3 photography
104 notes
·
View notes
Text
A Scam... Tutorial?
I was watching Photoshop tutorials and YouTube recommended this video to me.

And I was already skeptical. Clarity is an extremely powerful and useful adjustment in Lightroom and Photoshop and I could not think of a reason why anyone would recommend *not* using it to the extent they were using ALL CAPS.
But I was curious if there was a new technique I was unaware of. It's impossible to know everything regarding Photoshop and I learn new stuff all the time.
So I gave the video a chance.
youtube
To quote my late father... what a crock of shit.
I have seen a few scam videos in my time, but I cannot think of ever seeing a digital art tutorial scam. I found myself angry and a strongly worded comment just flew out of my brain.

I continued...
"First, no one should use clarity and texture at 100%. And I think showing the effects at 100%, as if that is a normal workflow, is highly misleading. You are creating a problem that does not exist and then offering a solution to it. And then you are using a provocative title to attract clicks. Not to mention you may be convincing beginners to abandon clarity and texture altogether when it is one of Camera Raw/Lightroom's most powerful tools. People should absolutely use clarity and texture. That is a crazy thing to tell people.
Second, high pass sharpening is… old school. It works but it can create a lot of nasty artifacts if overdone. (Personally I find it too crunchy and prefer smart sharpen on a smart object so it is non destructive). Clarity and texture are much more modern approaches to help bring out detail and I find they actually produce *fewer* artifacts than typical sharpening filters/techniques. And if you have trouble with clarity or texture adjustments in the bokeh areas, then use a local adjustment that doesn't affect those areas. You can even do a separate clarity and texture layer and use the opacity slider and the blend if and masking just like you did with the high pass. Why are you acting like you can only make a global clarity adjustment?
Essentially you are giving a worst case scenario of a clarity/texture adjustment just so you can make your technique seem like it is orders of magnitude better.
And what is even more infuriating is that you can do clarity/texture AND you can do high pass sharpening *together*. Why are you acting like it is one or the other?
I'm so confused by your motivations. Did you invent this clarity problem just so you could make a click bait-y title so you can then sell your little panel thing? And then you used an old school sharpening technique that many have abandoned so it seems like you have secret knowledge that was lost? And I could argue it isn't even a better solution. It's just a different way to achieve similar, if not worse results.
This is like if you put a pound of sugar in lemonade and then said, "Wow, this is way too sweet! You should try my superior lemonade that has a normal amount of high fructose corn syrup."
Lastly, if clarity and texture (set at a reasonable amount) aren't enough to produce sharp, detailed results, then it might be worth considering your actual photography techniques. Modern photography with modern sensors and lenses should be able to produce extremely sharp results without having to juice the hell out of sharpening filters in software. 20% clarity and texture (if that) plus a little bit of smart sharpen is usually more than enough to bring out detail in almost all of my photos and I have never been accused of having soft images.
So, if you are getting soft results, you might need to adjust how you are capturing your images. Are you using a very small aperture like f/22 on that macro image? That could be a diffraction issue. Perhaps it would be better to use a larger aperture at the lens's sweet spot and then do a focus stack.
I mean, I can't think of any other reason a person would need to do 100% clarity and texture unless they completely bungled the actual photography or were still using a kit lens.
I'm sorry but this video is a mess."
Let's look a little closer at what he did to his example.
He started with this.

Then he applied clarity & texture to MAXIMUM. Which, again, is like adding a pound of sugar to lemonade.
And by golly, it looks pretty bad!
Then he used his secret ancient high pass technique to get this.
Which looks a hell of a lot like the unsharpened image to me. And the high pass sharpening is probably only visible when zoomed in to 100% on the full resolution image.
Which is one of the issues with this technique. It isn't even noticeable on social media—the place where the majority of photos are viewed these days.
And then after showing you this groundbreaking effect that does almost nothing, he tries to sell you his Photoshop panel.

Yes, that' looks intuitive. Just hit the blue checkmark to do... something?
And what is this green eyeball with a crescent moon inside?


Only $50!

And if you want to know what the purple X button does, you need to pay another $15 for the tutorial on how to use it.

Neat.
Just to prove this is all a scam I'd like to show you an example of my own.
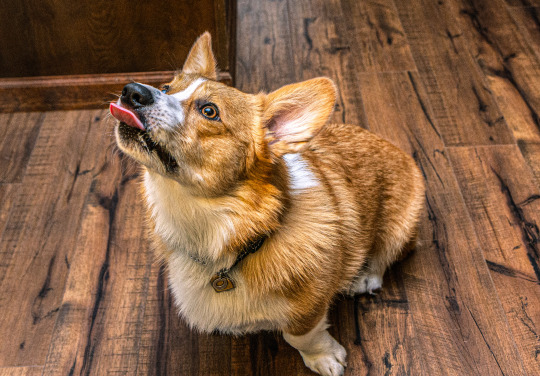
Here is a picture of Otis with no clarity, texture, or sharpening applied.

And here is a reasonable amount of sugar. I set the clarity and texture to where I felt they looked best.

Wow, that looks better. Not only that, you can actually see the difference at social media resolutions!
Now let's add a pound of sugar. MAXIMUM CLARITY GO!
Yep, that looks a bit rough. Because no one does this ever.
And now let's see his high pass sharpening technique.

Barely a difference on social media.
Okay, let's try zooming in 200%. Maybe that will give the high pass sharpening the victory.
Normal...

Reasonable clarity & texture...

FULL BEANS CLARITY & TEXTURE!
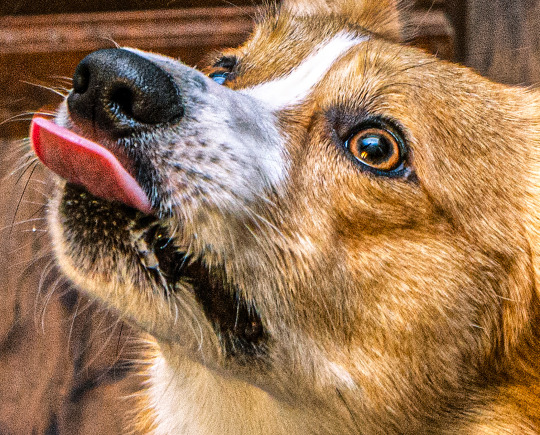
High pass...

Just as I said, the high pass introduces crunchy sharpening artifacts.
I can't speak for anyone else, but I much prefer the subtle clarity and texture. Perhaps the details in the eyeballs aren't quite as crispy, but in the version that isn't zoomed in, I don't think you feel like the image is soft and the normal clarity and texture adjustment added contrast and actually noticeable detail to the image.
In the end, except for the pound of sugar, these are all subtle adjustments and other photographers might be the only ones who would ever notice. The original Otis picture was probably fine to most people. So disparaging the clarity slider was even more unnecessary.
Why does this matter?
Being a beginner at photography is frustrating. There are so many resources to choose from and it's very difficult to know who is competent and who you can trust. If someone just starting out was recommended this video they could be easily be convinced it is legit. And it could set them back in their progress because they think useful tools will actually make their photos worse. They will waste a lot of time doing a time consuming old school technique in Photoshop when they probably never needed to even leave Lightroom in the first place. They could move two sliders to get similar or better results and it would only take literal seconds.
Time is valuable to a lot of people. And he seems intent on wasting everyone's time. And what sucks is that I have no real way of exposing this dude on a scale that would do anything.
I also just really hate the idea that educational content is being used to scam people.
This is some PragerU shit right here.
68 notes
·
View notes
Text
LensCraft Mastery: Elevate Your Photography Skills to the Next Level

Photography is more than just pressing a button; it’s an art, a science, and a means of storytelling. LensCraft Mastery is a comprehensive guide designed to help photographers—whether beginners or seasoned professionals—unlock their full creative potential. This tutorial series delves into the intricate aspects of photography, from mastering the fundamentals of exposure and composition to exploring advanced techniques in lighting, post-processing, and storytelling through imagery.
Why LensCraft Mastery?
The name LensCraft Mastery symbolizes the fusion of technical expertise (Lens) with artistic craftsmanship (Craft). Photography is both a technical discipline and an expressive medium, requiring a balance between understanding camera mechanics and developing an artistic vision. This tutorial series aims to bridge that gap by offering structured, easy-to-follow lessons that cater to all levels of experience.
1. Mastering the Basics of Photography
For those new to photography, LensCraft Mastery begins with the fundamental concepts that form the backbone of great photography:
Exposure Triangle: The Key to Perfectly Lit Photos
Aperture: Understanding how f-stops affect depth of field and light intake.
Shutter Speed: Capturing motion creatively, from freezing action to long exposures.
ISO: Controlling sensor sensitivity for optimal brightness without excessive noise.
Composition Techniques: Crafting Visually Stunning Images
Rule of Thirds: Placing subjects strategically for balanced compositions.
Leading Lines: Drawing the viewer’s eye to the subject.
Framing & Negative Space: Enhancing depth and focus in a photograph.
2. Advanced Photography Techniques
Once the basics are mastered, LensCraft Mastery delves into techniques that can take your photography to a professional level.
Understanding Light & Shadows
The role of natural light vs. artificial lighting in photography.
How to use soft light for flattering portraits and harsh light for dramatic effects.
Mastering golden hour and blue hour photography.
Camera Settings & Manual Mode
How to use manual focus for precision.
Customizing white balance for accurate color reproduction.
Shooting in RAW vs. JPEG and when to use each format.
3. Specialized Photography Genres
Photography is a vast field, and LensCraft Mastery explores different genres, allowing photographers to find their niche.
Portrait Photography
How to pose subjects naturally for candid and professional shots.
Best lenses for portrait photography (prime vs. zoom).
Background blur (bokeh) techniques for dreamy aesthetics.
Landscape Photography
Composition techniques for breathtaking vistas.
Use of ND (neutral density) filters for long exposures.
How to capture the perfect sunrise and sunset.
Street Photography
Capturing the essence of everyday life.
Ethical considerations in photographing strangers.
How to blend into the scene for natural compositions.
Wildlife & Macro Photography
Tips for photographing animals in motion.
Choosing the best gear for close-up macro shots.
Patience and planning for capturing rare moments.
4. The Power of Post-Processing
A great photo doesn’t always end with the camera—post-processing is essential for refining images. LensCraft Mastery provides in-depth tutorials on:
Adobe Lightroom & Photoshop Editing
Adjusting exposure, contrast, and white balance for balanced images.
Retouching techniques for portraits and landscapes.
Removing unwanted elements and enhancing details.
Mobile Editing for On-the-Go Photography
Best apps for editing (Snapseed, VSCO, Lightroom Mobile).
Color grading techniques for a unique aesthetic.
Quick retouching methods for social media-ready images.
5. Developing a Photographer’s Mindset
Photography is more than just technical skill—it requires creativity, patience, and an eye for detail. LensCraft Mastery helps photographers develop a storytelling approach, teaching how to:
Capture emotions and narratives within a single frame.
Use minimalism and abstract photography to create intriguing images.
Experiment with angles and perspectives to bring a fresh outlook to everyday scenes.
6. Monetizing Your Photography Skills
For those looking to turn their passion into a profession, LensCraft Mastery includes insights on:
How to start a photography business and build a portfolio.
Selling photos online (stock photography, prints, NFTs).
Social media strategies to grow an audience and attract clients.
Final Thoughts
Whether you’re just starting or looking to refine your craft, LensCraft Mastery offers a structured, engaging, and practical way to enhance your photography skills. By blending technical knowledge, artistic creativity, and real-world applications, this tutorial series is designed to empower photographers at every stage of their journey.
Start mastering your craft today and turn your vision into reality—one frame at a time. 📸✨
2 notes
·
View notes
Text
30 Tutorials for Creating Stunning Photo Effects in Photoshop – Speckyboy
New Post has been published on https://thedigitalinsider.com/30-tutorials-for-creating-stunning-photo-effects-in-photoshop-speckyboy/
30 Tutorials for Creating Stunning Photo Effects in Photoshop – Speckyboy
Photoshop is a powerful tool for creating a range of stunning photo effects that can take your images to the next level. With the help of these tutorials, you will learn how to recreate various effects, including glitch, sepia tone, watercolor, tilt-shift, HDR, cinematic, bokeh, sketch, and many more.
By mastering these techniques, you can add an artistic touch to your photos and make them truly memorable. Whether you’re a professional photographer, graphic designer, or just someone looking to improve their photo editing skills, learning how to create these photo effects in Photoshop can be a valuable asset.
Exploring the world of Photoshops and experimenting with different photo effects can be a lot of fun. With a bit of practice and creativity, you will soon be creating stunning results that are sure to impress.
So why not start learning to recreate these photo effects in Photoshop today? With dedication and a little time, you can become a master of photo editing in Photoshop in no time.
If you prefer a different application, we also have collections of tutorials for Lightroom, Procreate, and Figma.
The Top Photo Effect Photoshop Tutorials
Analog Effect in Photoshop
The analog photography effect mimics the look and feel of old film photographs. This aesthetic can be achieved by adding grain, light leaks, and desaturated colors in Photoshop. This tutorial takes you through the steps to re-create the effect, giving your photos a nostalgic charm and artistic touch.
Analog Effect Photoshop Action
Black & White Conversion Effect in Photoshop
The black and white photography effect is a classic style that emphasizes contrast and texture, creating a timeless and elegant look. This Photoshop video tutorial will teach you how to create stunning black and white images in Photoshop.
Black & White Effect Photoshop Actions
Bokeh Effect in Photoshop
Bokeh is a photography technique that creates a blur in the background of a photo, emphasizing the subject and adding a dreamy, romantic feel. This Photoshop tutorial will guide you through the steps to add the bokeh effect to your photos.
Bokeh Effect Photoshop Actions
Cinematic Effect in Photoshop
The cinematic photography effect is a dramatic and moody style that mimics the look and feel of movie stills, with deep shadows, rich colors, and a cinematic aspect ratio. This tutorial will show you how to re-create the cinematic effect, giving your photos a professional and cinematic flair.
Cinematic Effect Photoshop Actions
Color Grading Effect in Photoshop
Color grading involves adjusting the colors in a photo to create a specific mood or atmosphere. Using Curves and Hue/Saturation adjustments, this Photoshop tutorial takes you through the steps of adding stunning color grading effects to your photos.
Color Grading Effect Photoshop Actions
Comic Effect in Photoshop
The comic effect is a fun and playful style that mimics the look and feel of comic book illustrations, with bold outlines, vibrant colors, and halftone patterns. This Photoshop video tutorial will teach you how to create stunning comic effects, giving your photos a creative and whimsical vibe.
Comic Effect Photoshop Actions
Cross-Processing Effect in Photoshop
Cross-Processing is a photography technique that involves developing film in the wrong chemicals to create unexpected and artistic color shifts. This Photoshop tutorial will take you through the steps to add cross-processing effects to your photos, giving them a retro feel.
Cross-Processing Photoshop Actions
Dispersion Effect in Photoshop
The Dispersion effect is a creative and dynamic style that creates the illusion of a shattered or fragmented subject, with particles or fragments dispersed across the photo. This effect can be achieved in Photoshop using various tools, such as the Liquify filter and layer masks. This tutorial will show you how.
Dispersion Effect Photoshop Actions
Double Exposure Effect in Photoshop
The Double Exposure effect blends two or more images together, creating a dreamy and surreal composition. Using layer masks and blend modes, this tutorial guides you through the process of creating stunning double exposure effects in Photoshop.
Double Exposure Effect Photoshop Actions
Duotone Effect in Photoshop
The Duotone effect is a creative technique that uses two contrasting colors to create a bold and striking final image. It is often created using gradient maps, curves, and color balance in Photoshop. This tutorial will show you how to add this unique effect to your photos.
Duotone Effect Photoshop Actions
Glitch Effect in Photoshop
The Glitch effect mimics the look of digital errors and glitches, creating a distorted and fragmented image. This Photoshop video tutorial will show you how to create fantastic glitch effects, allowing you to add an edgy vibe to your photos.
Glitch Effect Photoshop Actions
Grain Effect in Photoshop
The Grain effect is a timeless technique that adds a film-like texture and grain to digital images, creating a vintage and nostalgic look. This Photoshop tutorial will take you through the steps to re-create the effect in your photos.
Grain Effect Photoshop Actions
Grunge Effect in Photoshop
The Grunge effect is an edgy style that creates a raw and distressed look in photos, often with scratches, stains, and grungy textures. This effect can be easily achieved in Photoshop, using various techniques like brushes, textures, and blend modes.
Grunge Effect Photoshop Actions
HDR Effect in Photoshop
The HDR (High Dynamic Range) photography effect is a popular technique that combines multiple exposures to create a more detailed and dynamic image. This tutorial guides you through the steps to create the HDR effect using Photoshop tools like merging and tone mapping.
HDR Effect Photoshop Actions
High Contrast Effect in Photoshop
The High Contrast effect is a striking style that emphasizes the difference between dark and light areas in a photo. Photoshop can achieve this effect using various adjustments, such as levels and curves, and this tutorial will show you how.
High Contrast Effect Photoshop Actions
Infrared Effect in Photoshop
Infrared photography is a surreal style that creates a false-color effect in photos. Using channel swapping and color balance, this Photoshop tutorial guides you through the process of re-creating the effect.
Infrared Effect Photoshop Actions
Lens Flare Effect in Photoshop
The Lens Flare effect is a dynamic technique that adds a burst of light to an image, often simulating the look of the sun or other light sources. Learn how to add lens flares to your photos in this Photoshop tutorial, giving you a dramatic and cinematic touch.
Lens Flare Effect Photoshop Overlays
Light Leak Effect in Photoshop
The light leak effect simulates the look of light leaking into a camera, creating a dreamy and, at times, nostalgic look. This easy-to-follow Photoshop tutorial will show you how to add stunning light leaks to your photos.
Light Leak Effect Photoshop Overlays
Lomo Effect in Photoshop
The Lomo (Lomography) effect is a creative photography technique that mimics the look of photos taken with a Lomo camera, with bold colors, high contrast, and vignetting. This Photoshop tutorial will guide you through creating your own Lomo effects.
Lomo Effect Photoshop Actions
Motion Blur Effect in Photoshop
The Motion Blur effect is a popular technique used to convey motion and speed by blurring moving objects. This Photoshop video tutorial will show you how to create stunning motion blur effects in your photos, adding a sense of dynamism and energy.
Motion Blur Effect Photoshop Actions
Oil Painting Effect in Photoshop
The oil painting effect is an artistic photography style that mimics oil paintings by applying filters to a photo giving it a textured, brushstroke look and feel. This Photoshop video tutorial will show you how to do it yourself.
Oil Painting Effect Photoshop Actions
Posterize Effect in Photoshop
Posterize is a photography effect that reduces the number of colors in an image, creating a bold and simplified look to create a poster-like appearance. Learn how to create stunning posterize effects in this Photoshop tutorial.
Posterize Effect Photoshop Actions
Selective Color Effect in Photoshop
The selective color effect allows you to highlight or change the colors of specific parts of an image and convert the rest to black and white (or desaturated). This Photoshop video tutorial will show you how to create your own selective color effects.
Selective Color Effect Photoshop Actions
Sepia Tone Effect in Photoshop
The sepia tone effect is a photography technique that adds a warm and vintage look to digital images, giving them an aged, antique look. This Photoshop tutorial will take you through the steps to add sepia tones to your own shots.
Sepia Tone Effect Photoshop Actions
Sketch Effect in Photoshop
The Sketch effect is an artistic technique that mimics the look of a hand-drawn sketch, with lines, strokes, and shading. Following this sketch effect Photoshop tutorial, you can add a personal touch to your photos.
Sketch Effect Photoshop Actions
Solarize Effect in Photoshop
The Solarize effect converts the colors in a photo to create a high-contrast, surreal effect. This video tutorial will show you how to add this unique and bold effect to your photos.
Solarize Effect Photoshop Actions
Tilt-Shift Effect in Photoshop
The tilt-shift effect is a creative photography style that simulates the look of a miniature world by blurring parts of an image. This easy-to-follow Photoshop tutorial will show you how to add the effect to your photos.
Tilt-Shift Effect Photoshop Actions
Vintage & Retro Effects in Photoshop
Vintage and retro effects are a timeless photography style that adds a nostalgic and old-fashioned look to digital images. This Photoshop video tutorial will guide you through the steps so that you can add your own vintage and retro style to your photos.
Vintage & Retro Effect Photoshop Actions
Vignette Effect in Photoshop
The Vignette effect is a versatile technique that’s achieved by darkening the edges of a photo to draw attention to the center. This Photoshop tutorial will take you through the steps to create your own vignettes.
Vignette Effect Photoshop Actions
Watercolor Effect in Photoshop
The watercolor effect is an artistic technique that mimics the look and feel of watercolor paintings, with soft colors, blurred edges, and brush strokes. This Photoshop tutorial will guide you through creating your own watercolor effects.
Watercolor Effect Photoshop Actions
Photo Effect Tutorial FAQs
What are photo effect Photoshop tutorials?
These tutorials guide you through various techniques to apply creative and artistic effects to photos using Photoshop. They range from basic editing to advanced manipulation.
Can beginners use these photo effect tutorials effectively?
Absolutely! Most tutorials are tailored for beginners, breaking down complex effects into simple steps. As skills develop, more advanced tutorials can be tackled.
What kinds of effects can I learn from these tutorials?
You can learn a wide array of effects, like turning photos into paintings, creating vintage looks, adding dramatic lighting effects, and much more.
Do I need the newest version of Photoshop to follow these tutorials?
While some may use newer features, many tutorials are applicable to older versions of Photoshop as they rely on fundamental tools and techniques.
How long does it usually take to complete one of these tutorials?
It varies based on the complexity of the photo effect. Some can be completed in minutes, while others might take longer to fully grasp and apply.
Can practicing these tutorials improve my overall Photoshop skills?
Yes, working through these tutorials not only teaches specific effects but also improves your overall understanding and proficiency in Photoshop.
Learning New Photo Effects
Learning new effects in Photoshop is not only fun but can also be a valuable skill. By mastering the art of photo editing, you can offer your clients unique and visually stunning imagery that will set you apart from the competition.
By diving into these photo effect tutorials, you will, of course, learn valuable new skills, but you will undoubtedly unleash your creativity as well!
More Photoshop Tutorial Collections
Related Topics
#ADD#amp#analog#Art#atmosphere#attention#background#blur#Bokeh Effect#book#change#channel#chemicals#Collections#Color#colors#competition#complexity#Composition#course#creativity#Dark#Design#Difference Between#diving#do it yourself#double#Duotone Effect#easy#Editing
0 notes
Text
Photography Course in Sonipat.
https://picklesanimation.in/sonipat/
Here's a comprehensive course outline for a Photography course offered by Pickles Animation. This course is designed to cover the fundamental principles, technical skills, and creative techniques needed for photography, catering to both beginners and advanced learners.
Course Outline for Photography
Module 1: Introduction to Photography
Overview of Photography
History and evolution of photography
Understanding different genres of photography (portrait, landscape, street, etc.)
The role of a photographer in various industries
Basic Photography Concepts
Understanding exposure: aperture, shutter speed, and ISO
The exposure triangle and its impact on photos
Basic composition rules (rule of thirds, leading lines, etc.)
Module 2: Camera and Equipment
Camera Basics
Different types of cameras (DSLR, mirrorless, point-and-shoot)
Camera parts and functions
Choosing the right camera for your needs
Lenses and Accessories
Types of lenses and their uses
Understanding focal length and aperture
Essential accessories (tripods, filters, flashes, etc.)
Module 3: Technical Skills and Manual Settings
Manual Mode Mastery
Using manual mode on your camera
Adjusting aperture, shutter speed, and ISO for different scenarios
Understanding depth of field and motion blur
Focusing Techniques
Autofocus vs. manual focus
Focus modes and points
Techniques for achieving sharp focus
Lighting and Exposure
Understanding natural light and artificial light
Using reflectors and diffusers
Balancing exposure in challenging lighting conditions
Module 4: Composition and Creativity
Advanced Composition Techniques
Framing and perspective
Leading lines, symmetry, and patterns
Using negative space effectively
Creative Photography
Experimenting with long exposures and motion
Using bokeh and shallow depth of field
Creative use of color and black-and-white photography
Module 5: Post-Processing and Editing
Introduction to Post-Processing
Importance of post-processing in photography
Overview of editing software (Adobe Lightroom, Photoshop)
Basic photo corrections (cropping, straightening, exposure adjustment)
Advanced Editing Techniques
Color correction and grading
Retouching and enhancing portraits
Creating HDR images and panoramas
Workflow and File Management
Organizing and managing your photo library
Understanding file formats (RAW vs. JPEG)
Exporting and printing your photos
Module 6: Specialized Photography Techniques
Portrait Photography
Lighting setups for portraits
Posing and directing subjects
Capturing candid and environmental portraits
Landscape Photography
Planning and scouting locations
Capturing landscapes in different weather conditions
Using filters (ND, polarizing) for landscapes
Street and Documentary Photography
Capturing candid moments in public places
Telling stories through images
Ethics and legal considerations in street photography
Module 7: Building a Photography Portfolio
Creating a Cohesive Portfolio
Selecting and curating your best work
Creating themes and stories through your portfolio
Designing an online portfolio and website
Marketing and Promoting Your Work
Social media strategies for photographers
Networking and building relationships in the industry
Approaching galleries and publications
Module 8: Industry Insights and Career Development
Understanding the Photography Industry
Different career paths in photography
Freelancing vs. working for an agency or studio
Building a personal brand and style
Business Skills for Photographers
Pricing your work and creating contracts
Managing client relationships
Continuing education and professional development
Additional Features
Guest Lectures and Workshops: Sessions by industry experts on various topics.
Hands-On Projects: Real-world projects to apply learned skills.
Feedback and Critique Sessions: Regular feedback from instructors and peers.
Online Resources and Community: Access to tutorials, forums, and networking opportunities.
This course structure ensures that students gain a solid foundation in photography, practical experience with essential tools and techniques, and preparation for a successful career in the photography industry.
0 notes
Link
best tools for Photoshop
Bokeh Photography Tutorial. Bokeh is an amazing photography effect and gives the image a very unique look. Capturing Bokeh is easy and fun but there are ...
youtube
Bokeh Photography Tutorial. Bokeh is an amazing photography effect and gives the image a very unique look. Capturing Bokeh is easy and fun but there are certain Photography related things that you should use while photographing bokeh. Prime lenses are generally better for Bokeh Photography but you can capture Bokeh with kit lenses too. This Bokeh Photography Tutorial covers all the Photography settings and techniques you need to capture amazing Bokeh. Hope you enjoyed the Bokeh Photography Tutorial video and it helped you. Aperture Tutorial: www.youtube... Don't forget to leave a thumbs up and subscribe to my channel: http://bit.l..Follow me on instagram: instagram.com/sauravus Gears I use: My Camera: http://amzn...My 50mm Prime Lens: http://amzn...My Wide Angle Lens: http://amzn...My Lav Mic: http://amzn...My Main Tripod: http://amzn...My Mini Tripod: http://amzn...My Editing Laptop: www.amazon.c.. Music Credits: Boost by Joakim Karud http://sound..Music promoted by Audio Library https://yout..
best tools for Photoshop
#bokeh-effect#bokeh-photography#bokeh-photography-tutorial#bokeh-photography-tutorial-canon#bokeh-photography-tutorial-for-beginners#bokeh-photography-tutorial-nikon#bokeh-photography-with-18-55mm#bokeh-wedding-photography#photography-tutorial#photography-tutorials-for-beginners
0 notes
Text
HOW TO CREATE BOKEH IN STUDIO
BOKEH Bokeh is a very popular photographic effect referring to the aesthetic quality of an out of focus area in the image. Bokeh can have different appearances. Smooth round dots as Robert used in his sample. Multi‐sided geometric shapes like hexagons, caused by the number of blades in the lens, and everything in between. BOKEH PHOTOGRAPHY TRIAL AND ERROR TIPS: 1. Set up (or find) a background…

View On WordPress
#beauty products#bokeh#bokeh photography#difficult background#ecommerce photography#photoshop tutorials#professional photographer#professional photography
2 notes
·
View notes
Video
youtube
This month’s abstract-challenge is about “lights”


I saw a lot of “Bokeh” photos already. And I will post some more, too. And I remembered that there is a way to actually shape the Bokeh.
“Custom shaped Bokeh?”, you ask? “Yeah!”, is my answer.
Also, it’s almost Christmas (and I LOVE Christmas), and so I thought: “Why not make a video about "Star Wars?” Because Christmas time means STAR WARS time, right?
This is a wacky video. You have been warned!
Music from https://filmmusic.io “We Wish you a Merry Christmas” by Kevin MacLeod (https://incompetech.com) License: CC BY (http://creativecommons.org/licenses/by/4.0/)
#abstract challenge#photographers on tumblr#original photographers#artists on tumblr#diy#tutorial#bokeh#photography
81 notes
·
View notes
Text
Creative Photography Ideas for the Budding Photographer in You
Creative Photography Ideas for the Budding Photographer in You
Life is beautiful! And if you want to make it amazing, fun & inspiring – focus on nurturing & developing your creative hobbies (photography could be one). It will help you creatively express and share your experiences with others and thereby increase your happiness quotient. Photography is an art; using creative photography ideas – props and composition techniques will help you take your…

View On WordPress
#a photographer#amazing photographs#basic photography#best photography#best photography tutorials#Bokeh#composition techniques#creative photography#creative photography at home#digital photography#digital photography tutorials#dslr camera tutorial#dslr photo#dslr photography tutorial#dslr tutorial for beginners#free online photography tutorials#free photography tutorials#Landscape Photography#learn photography#Nature Photography#outdoor photo#Photography#photography business#photography for beginners#photography lessons#Photography Skills#Photography Tips#photography tutorials#photography tutorials for beginners#photography tutorials online
1 note
·
View note
Text
Super Easy DIY Trick for Shooting Bokeh Photos Anywhere
Shoot bokeh-licious photos anywhere with this simple DIY trick!
Bet you didn’t think you can shoot bokeh anywhere with this. The bubbly and dreamy look of bokeh remains a coveted effect in photography, especially when it comes to portraits. A typical way to achieve this is to shoot in a location with lots of bright lights in varying sizes and colors. But with this simple trick, you can shoot bokeh-licious portrait anywhere, even in the comfort of your own…
View On WordPress
#Bokeh#Bokehlicious#dewdrop lights#diy#DIy Lighting#fairy lights#photography tip#tutorial#video tutorial
5 notes
·
View notes
Link
In this Photoshop Tutorial you will see how to Add Bokeh Effect to your photos
#photoshop#photoshop tutorial#photoshop tips#photoshop cc#photo#photos#photography#video tutorials#bokeh#bokehphotography#intagram
0 notes
Text
BG3 Virtual Photography Tutorial #0: Brief Overview
Chapter 0: Overview
Chapter 1: Script Extender Debug Console
Chapter 2: Scene Manipulation
Chapter 2.5: More Scene Manipulation
Chapter 3: Otis_Inf Camera Tools
Supplement: Mods and Resources
At least a couple people seemed interested in how this process works, so... here's to you folks!
So first, I want to lay out how my process generally works without getting too bogged down in the tools just so readers can see if this is something they want to spend their time doing.
Just for giggles, here's one of the very first few shots I took with Otis Inf Camer Tools - the focus is off and there's framing issues, but honestly as a scrub, it's not bad! You can get there too!

Keep in mind, you won't necessarily need ALL these tools I mention, but they're all pretty good tools, so try to get what you can.
First, I use a tool called Otis Inf Camera Tools. I inject it into the game and that enables me to move the camera around, zoom in, change FoV, rotate, etc. among other things.

I combine it with ReShade to change some visual aspects: color, warmth, sharpness, blur, etc. The IGCS addon also allow you to create a custom Depth of Field, which can add bokeh, softness to hair, soften the background, etc.
Next, I pick a scene that I want to shoot. I will take existing scenes and replace their actors. To do this, I modify and copy-paste some code into the Script Extender Debug Console.
Today I learned that Wyll's romance scene in Act 3 can end in a cuddle and I wanted to see that but with my couple (sorry Wyll, I can't help it - I didn't get a romance scene with Minthara as a good Tav so I must steal others!)
Here's what those commands look like, color coded in my note-taking software to highlight the components that I must modify before I stick it into the Script Extender Debug Console.

Green is boilerplate
Red is Wyll's Act 3 cutscene name and ID
Blue is my Tav (taking Wyll's place in the cutscene because they have the same bodytype)
Purple is Minthara's name and ID.
There's some more green boilerplate throughout and after that.
I will go into how you find the names and IDs another day. Once you paste this into the console, the cutscene will play. There's certain "rules" to get it to play right but I'll get into that another day.
I play the scene, get a pose that I like, and then use the Camera Tools to pause the game, move the camera and set up a shot. I use ReShade and an Add On to add Depth of Field to make the stars nice soft round bubbles (sadly the moon as well - that can be edited to be sharp in post)

The end result is a cutscene that was originally meant to have Wyll being replaced with my Tav and Minthara instead of Tav in Wyll's scene.
I hope that gives you some idea of how the process works before I start getting into the tools and their details. It may be a little intimidating to see all these tools together, but we'll tackle them one at a time.
Tagging @graciescribbles @arach-tinilith and @lutethebodies for their interest in my post getting feelers for this.
#bg3 photomode#bg3 photography#mog's bg3 virtual photography tutorial#bg3#bg3 virtual photography#baldur's gate iii#baldur's gate 3
69 notes
·
View notes
Text
Home photography ideas
If you believe that pictures shot at home are boring, a simple object may make all the difference. Accessories may not only make your photographs more interesting, but they can also provide context to your photos and help you tell a narrative. There are several props that are inexpensive, simple to obtain, and may be extremely beneficial for home photoshoots. Here are some ideas for home photoshoots using props.
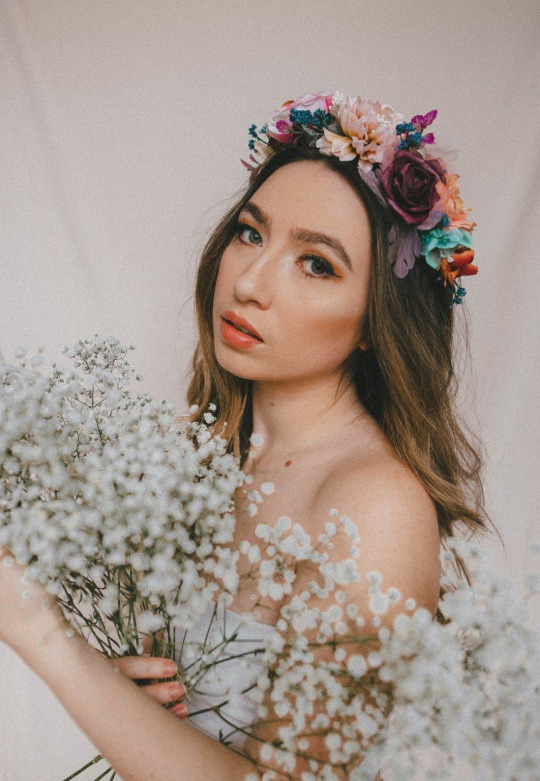
1. ADD SOME FLOWERS
When shooting photographs at home, flowers are one of the greatest accessories to utilise (and pretty much in every other situation). Adding flowers as a prop to a lifeless shot or a plain background is a fantastic way to add a splash of colour. Flowers look beautiful in photographs, whether you're holding a bouquet, filling a bathtub with them, scattering flowers about you, or taping them together to make a flower wall.
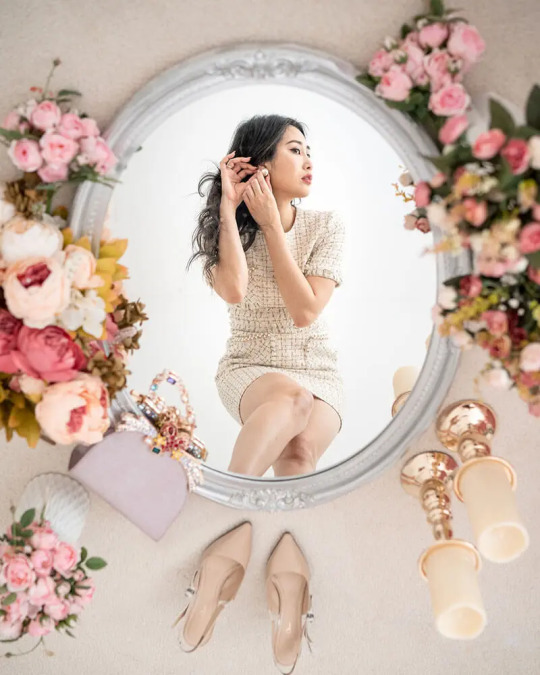
2. USE A MIRROR TO BE CREATIVE
Using a mirror as a prop, you may create some interesting photographs at home. To get an intriguing angle, simply play about with a mirror. It may also be used to make some interesting reflections. Even the most basic mirror may help you elevate your house photography to new heights.
It serves more than just checking cosmetics, at least for photographers. A pocket-sized mirror gives a snapshot a different viewpoint, making the arrangement appear conflicted but still fascinating. It's a unique method to include oneself in the photo alongside your chosen backdrop.
3. EXPERIMENT WITH LIGHTS
When filming indoors, Xmas lights are a great accessory to employ.
To create a contrast between the natural chilly light of the space and the warm artificial lighting behind your model, hang some lights behind her. Take a few of the light bulbs and place them near the camera.
Fairy lights, especially battery-powered portable ones, are excellent photography props! When working with a wide aperture (small F/number, i.e. F/2.8), use them as a fast addition to the back or foreground of a photo to produce some gorgeous spheres of bokeh surrounding your subject.
Request that your model hold some of the lights near to her face to produce a lovely warm glow.

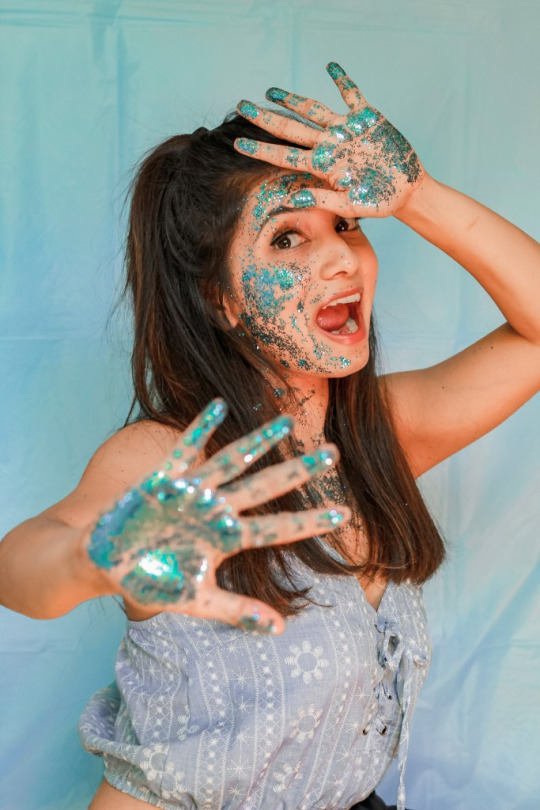
4. USE GLITTER OR PAINT
Using glitter or paint as another method to get creative when shooting at home is another option (for the sake of your skin I suggest using face pain). It's a simple and enjoyable method to transform a plain portrait into a work of art. You may blow glitter in the direction of the camera or cover your face and body with it when shooting with it. Although, once you've finished, this house photography concept may require some tidying up.
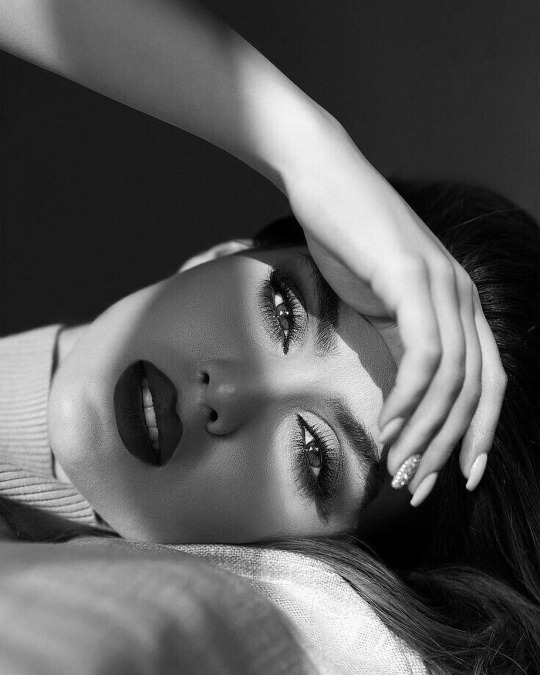
5. LOOK FOR SHADOWS
Look around your home for lovely shadows cast by commonplace items. Examine the light that enters your home at various times of the day for this. You may picture the item as well as its shadow, or you can only shoot the shadow on its own.
6....OR Create YOUR OWN SHADOWS
Another home photography idea: if you can't locate any shadows, make your own. Simply cut different shapes out of paper and shine a phone flashlight or natural light through them. You may also utilise other household items to cast fascinating shadows on your face.

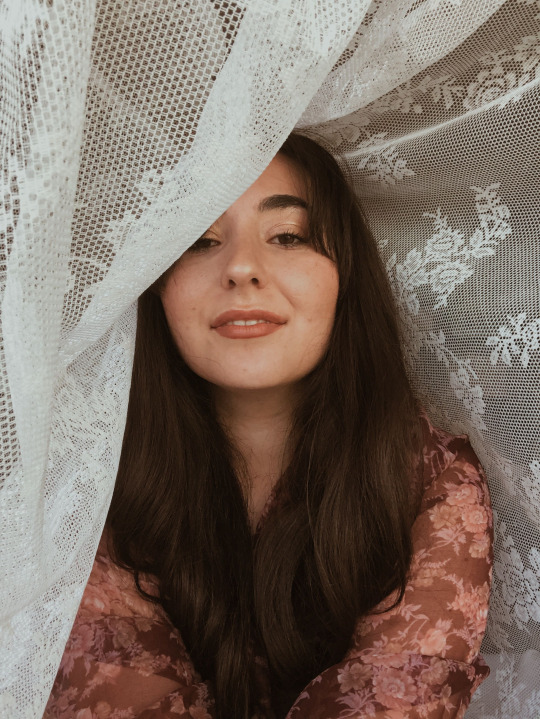
7. TAKE A PHOTO THROUGH LACE
Lace may also be used to produce lovely and distinctive shadows on your skin. Find a location with natural warm light and allow the lace shine through; it will make lovely patterns on your skin. Check out this lovely and reasonably priced lace tablecloth, which is ideal for this photograph.
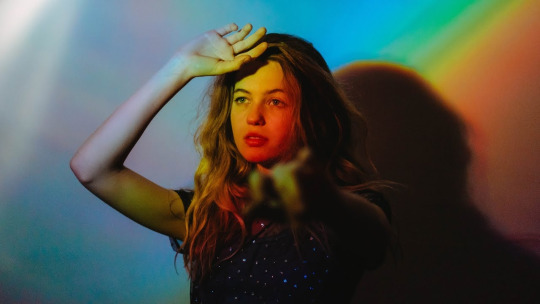
8. BUILD A RAINBOW
Use a disc or a glass prism to produce stunning rainbow-like shadows. To generate multicolored flare and reflections, catch some light and reflect it towards your figure. You'll almost certainly have a spare CD lying around the home; just make sure it's not your favorite. The iridescent characteristics of the disc's underside make it an ideal photography prop for reflecting or distorting light as foreground bokeh.
If you add a little water, it may even be used as a stand-alone subject. The iridescent characteristics of the disc's underside make it an ideal photography prop for reflecting or distorting light as foreground bokeh.
If you add a little water, it may even be used as a stand-alone subject.
9. CREATE A NEW BACKGROUND
You don't have any Instagrammable walls in your house? Don't worry, you can always make some unique backdrops out of everyday items. For an interior photography, use white bedsheets, newspapers, or colourful posters as a backdrop.
To make an intriguing backdrop, you may utilise Photoshop or several phone editing applications. Simply snap a picture in front of a simple wall and then alter the colour afterwards. Here's a brief tutorial on how to alter the backdrop of a photo in Photoshop.

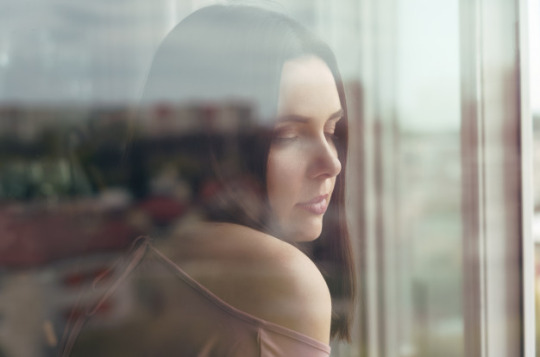
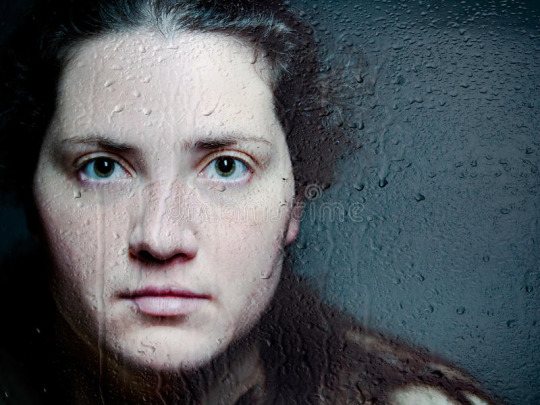
10. TAKE A PHOTO THROUGH A WINDOW
Shoot through a glass window or door to add depth to your interior photographs. It's yet another method to get the dreamy romantic appearance. Focus manually while shooting through glass, and try to adjust your angle to eliminate reflections. When shooting through glass, employing a polarizing filter is the best approach to reduce reflections.
11. SPRAY BOTTLE
We discussed it previously in conjunction with the CD, but this isn't a one-trick pony! A spray bottle packed with 90% water and 10% baby oil can give any topic a natural moist appearance that won't evaporate right away.
It's cool to use to make water drops on flowers, metals, glass, and mirrors. For varying consistency levels, adjust the water-to-oil ratio.
12. CHOOSE YOUR FAVORITE BOOK
This one is more customizable depending on your hobbies, but the goal is the same - choose something that reflects you. Most of us have a prized object, and if it isn't too large, why not use it as inspiration for your photography?
It might be a hidden detail that your viewers must discover, or a sequence of photos showing the object in various settings. In any case, it's all about injecting your individuality into your picture and making it truly one-of-a-kind. A favorite book, hat, jacket, badge, drink, or scarf may be the item. Find out how intelligent and cunning you are.

#hpmephotographyideas#photography#art#photoshoot#photoart#edit#ideas#pic#creative#photooftheday#picoftheweek#pictures#happy#travel#bueaty#portrait#nature#bueatiful
2 notes
·
View notes
Note
Can you make a tutorial on how you do your iconic hexagon landscape drawings? They’re just so beautiful!!
Thank you and I really hope this lives up to your expectations. I’m kind of bad at explaining how I do stuff and my thought process but I’ll do my best.
I draw my landscapes first and the add the hexagons after.
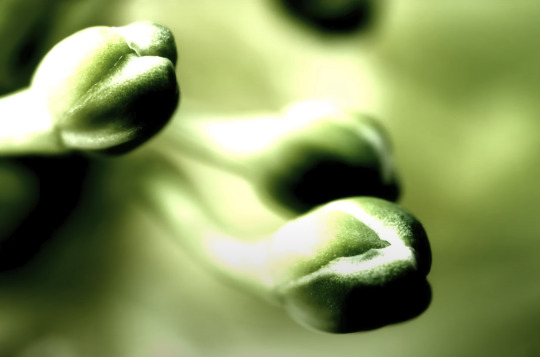
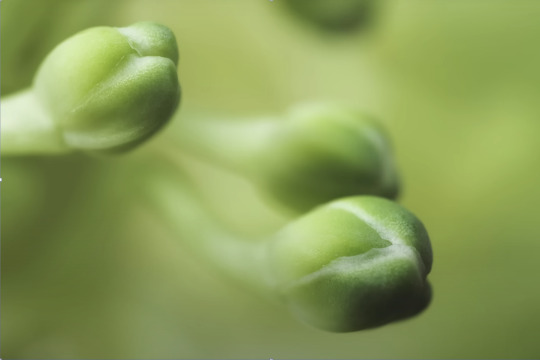
It’s based on a photography effect called Bokeh combined with a sort of anime magic glitter effect. You’ve probably seen it without knowing what it is called here are some examples of what Bokeh looks like.

Image Source
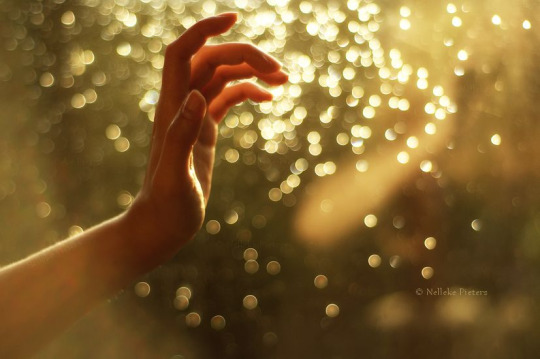
Image Source
So the hexagons are actually a pressure-sensitive stamp brush I made in Procreate (the hexagon shape comes free with their brush creation engine) on a Linear Dodge or “Add” blending mode layer. Each different size of hexagons has its own layer plus a blurred version to give it a glowing effect.
Some basic tips for making the effect look good:
Keep the layer opacity on bigger hexagons below 50% to avoid washing out your details.
Pastels don’t work well with this effect, unfortunately. You can have them but if you aren’t careful your piece will look like an overexposed photo keep your colors intense and saturated. (You can switch from add to color dodge to help a bit though)
Try to line up your edges of the hexagons with your sightlines and composition (it will definitely look like you just slapped on an Instagram filter if you don’t think about placement, trust me my first few attempts at replicating the bokeh effect look like that).
Try alternating between having the effect behind and in front of your subject (will help it blend into the piece rather than a filter)
Try to make sure that some of the hexagons are halfway off the screen
Here are some helpful video tutorials that explain all the technical stuff that goes into it. I just use Procreate which will mean you will want to seek out resources for your personal programs if you use something else.
A Blending Mode Overview and a more in-depth version specifically for photoshop
Creating a Stamp Brush in Procreate
How to Gaussian Blur in Procreate
Composition (will help with placement of the hexagons) also check out Andrew Loomis’s Illustration books. I believe you can find scans and pdfs of the books easily.
Bokeh Photography Effect (this is a tutorial/explanation for the photography effect my hexagons are based on this may help with placement and ideas)
I also recommend if you can, taking a digital photography class. Even if it’s not your thing it helped me with composition and understanding editing tools
I’m really bad at explaining things so please let me know if there is anything I can clarify for you.
29 notes
·
View notes
Text
Best photo focus app

#BEST PHOTO FOCUS APP PATCH#
#BEST PHOTO FOCUS APP PROFESSIONAL#
Once you’ve figured it all out, it’s up to YOU to just set the scene. Literally add new lighting sources (like a light bulb) to your photos as if they were there when the photo was taken, even allowing photos taken in the dark to spring to life with light and color squeeze in blurring or glowing effects behind your photo subject that simulate motion or weather heck, add in a completely different background. The possibilities are nearly endless when it comes to your 3D/portrait photos. It’s an app for the photo enthusiast who wants to win the photo contest every time. Once you learn the basics, this app will completely blow your mind. The most amazing photo editing app you’ve ever seen An essential tool for all iPhones and iPads.ĭo you have questions or suggestions? Contact us via support focos. Intuitive and easy to use, with built-in video tutorials.
#BEST PHOTO FOCUS APP PATCH#
It is possible to patch the depth map precisely on iPad with Apple Pencil. Check the portrait picture in the real world with augmented reality technique. Add multiple lights in a 3D space, and adjust the color, brightness and so on for each light. Visualize the depth of areas within your portrait photos in a 3D view, and intuitively add depth filters.
#BEST PHOTO FOCUS APP PROFESSIONAL#
Professional options to simulate lens characteristics, such as creamy, bilinear, swirly, and reflex effects, and more. Choose from various simulated aperture diaphragms to generate different bokeh spot effects. Re-focus portrait photos that have already been taken, with a simple tap. Import all existing photos and customize the bokeh effect. Simulate large apertures to create real bokeh effects normally only possible with DSLR cameras and expensive lenses. The AI engine can calculate depth of field automatically for all photos. Take photos with shallow depth of field, without manually painting or making selections. "Focos has long been one of the most ambitious photo-editing apps on iOS, turning any photo into a 'portrait mode'-style image with fully adjustable depth of field, no matter what kind of camera you took it with." The creative potential unleashed by Focos is endless. With the technology of computational photography, you can make unlimited changes to your photos, focus after the fact, change the aperture repeatedly, and add multiple lights in 3D space, exceeding the limits of any editing tools you’ve known before. Focos is a big step into the future of computational photography and light-field camera, bringing DSLR-like photography to your iPhone and iPad Pro, with beautiful bokeh effects usually achievable only with professional large aperture cameras.
1 note
·
View note