Text


Binding My Own Fanfiction - The Final Result!
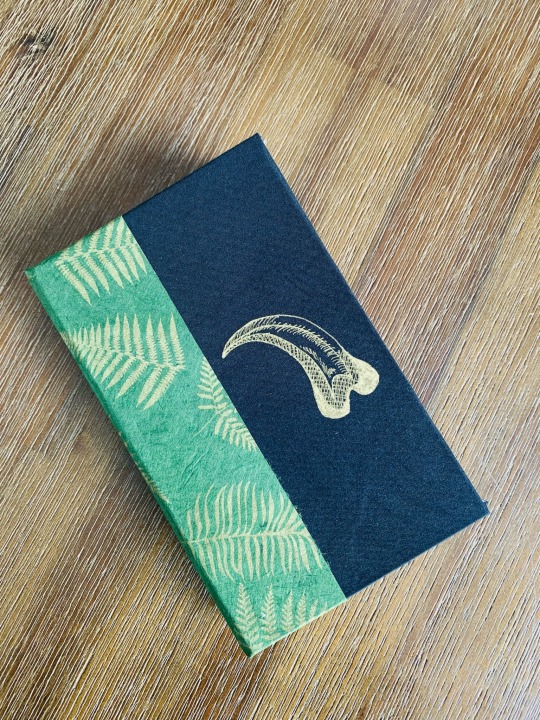
It's done. After about a week or so, the process is complete! (This excludes typsetting.) While it may not be perfect because I made so many mistakes, I'm really happy with the way it turned out considering it's my second bind ever.
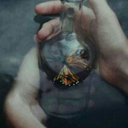
I also wanted to show a little picture of the headband I added. It looks red in the picture, but it's actually magenta to match the flower on the cover.
Final lessons:
Stop dicking around with the cover before you're done!! I brought it with around with me to my parents place where I do the spray painting and strained it just playing around.
Less is more for spray painting too
For the love of everything, leave more room on the bookboard when trimming. It's shorter than the actual book content!!
Anyway, this was super fun and I am trying to figure out what my next project will be. None of my other writing is complete yet, so I won't bind until they're complete and edited.
If and when I get my printer, I'll be back with dustjackets!
#bookbinding#bookbinding for beginners#fanbinding#binding fanfiction#fanfiction#my binds#tamlin#books#bookblr#writerblr
55 notes
·
View notes
Text
Bookbinding for Beginners by a Beginner
All of the stuff I've written thus far. [October 28th 2023]
Part One
Part Two
Part Three
Part Four
Part Five
Part Five and A Half
Part Six [Added October 31st 2023]
Trouble Shooting Aside [Added November 11th 2023]
Part Seven [Added November 16th 2023]
Part Eight- and Final Post (Until I ultimately write more, cause lets face it, I've already started tweaking how I do things) [Added November 29th 2023]
#I would have a part six out today#but since it's my birthday on the day of writing this#I went and did absolutely nothing#save for this#cause I like y'all#bookbinding#book binding help#DIY#fan binding#a beginner doing their best to explain all the things
309 notes
·
View notes
Text
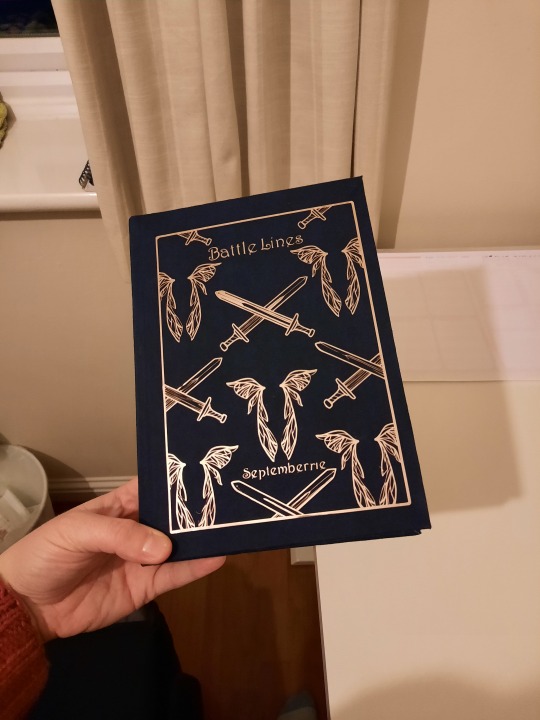
Fanbinding Battle Lines!
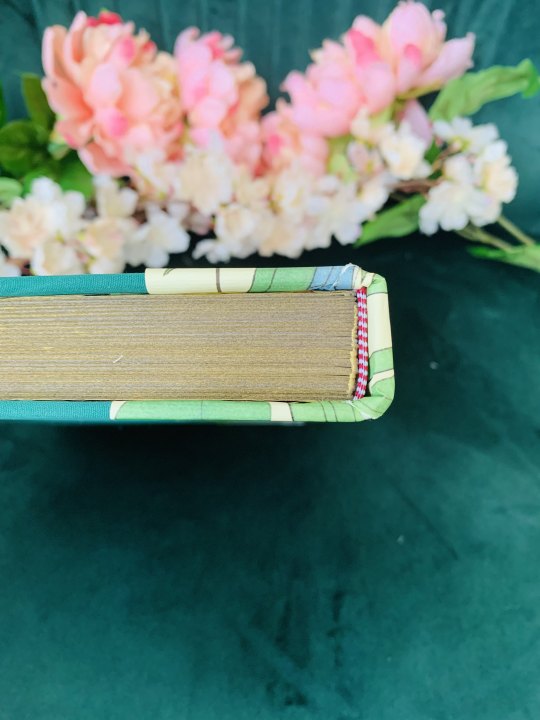
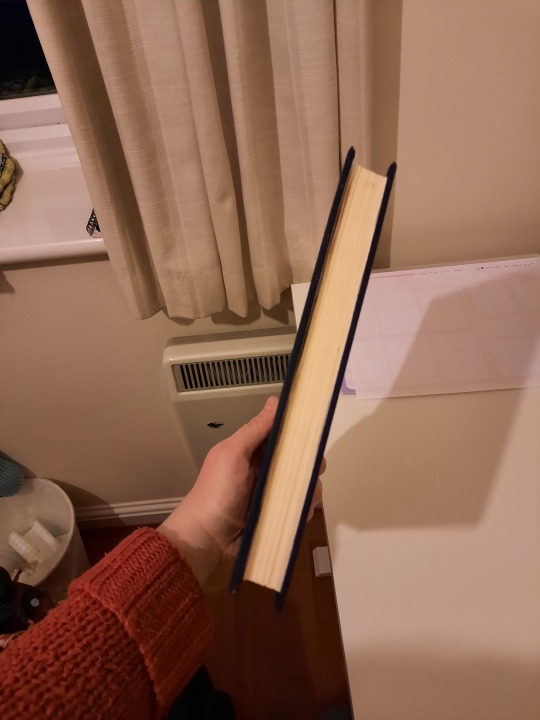
I finished the fanbinding for @septemberrie 's Silrah bodyguard AU, Battle Lines, earlier this week and I forgot (of course) to take photos of the process but here is the end result! This has been a learning experience and there are definitely things I want to change for the next binding (the level of detail in the foil for example! Took me d a y s) and I am excited to try again but I am incredibly proud of this first ever full pdf to hardcover book bind!
Disclaimer that the wings and crossed swords were from a Google png search so I did not design but as this is for fully personal use its OK. Unexpectedly it was the swords that caused more problems at foil weeding! Wild. And there are paired birds on the endpapers!


This was so much fun, and I am now going to be a menace turning all my favourite longfics into glitzy hardback books!
#Battle lines#Silrah AU#Silrah#Farah x Saul#Fanbinding#Beginner bookbinding#Clothbound classic style#Bookbinding#diy bookbinding#The winx saga#Happy dance it's done#I was going to t
87 notes
·
View notes
Text

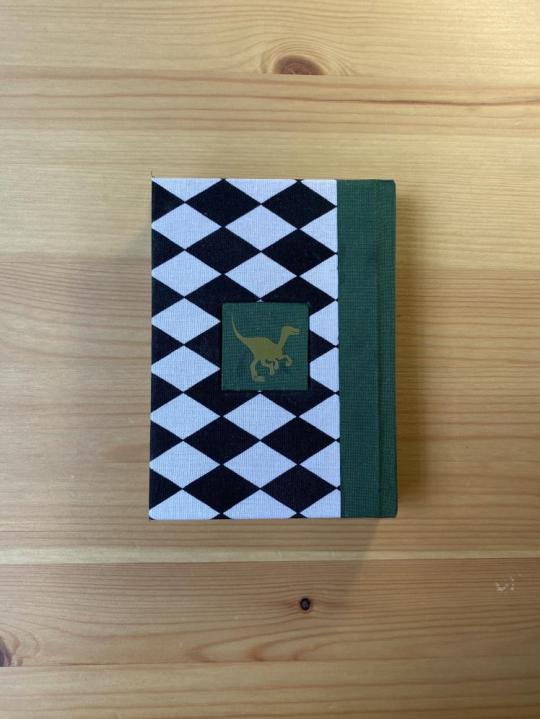
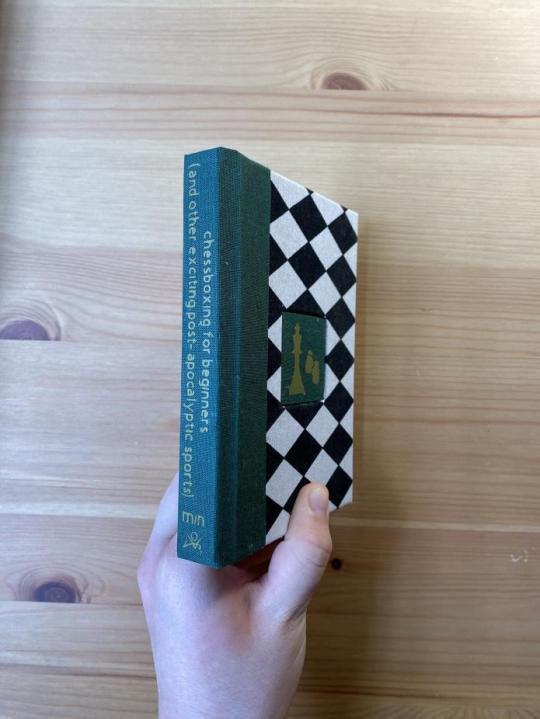


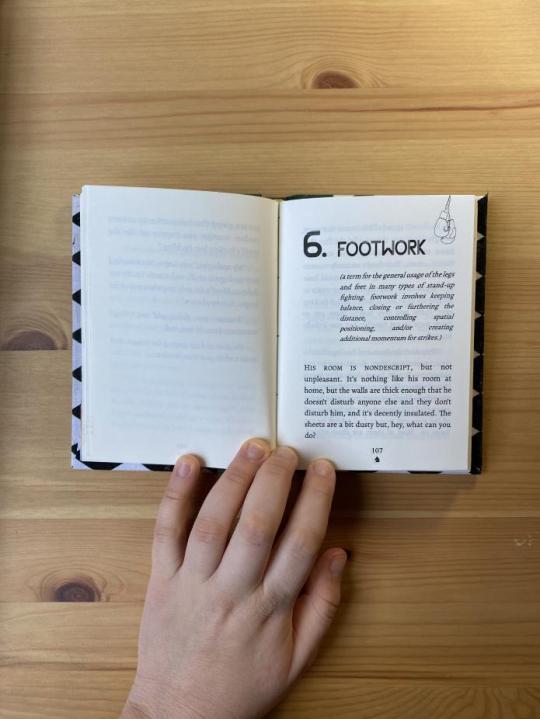
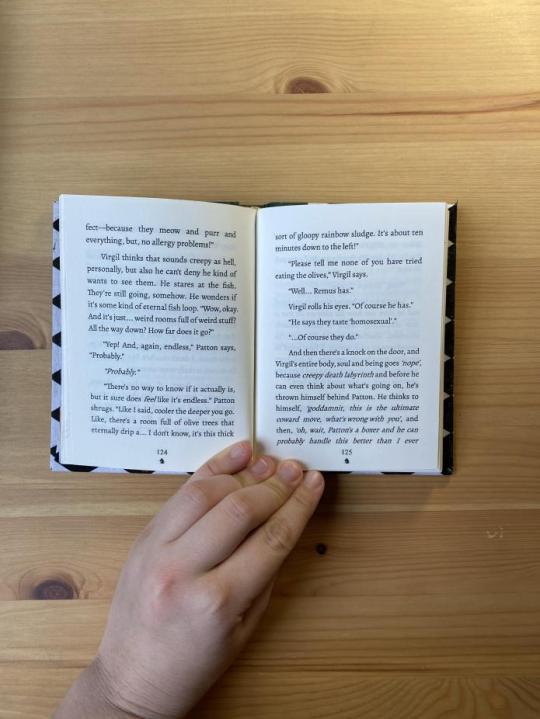

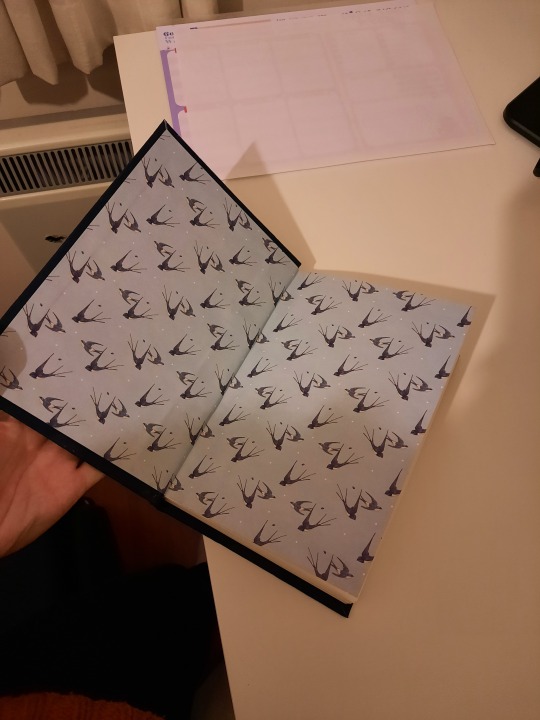
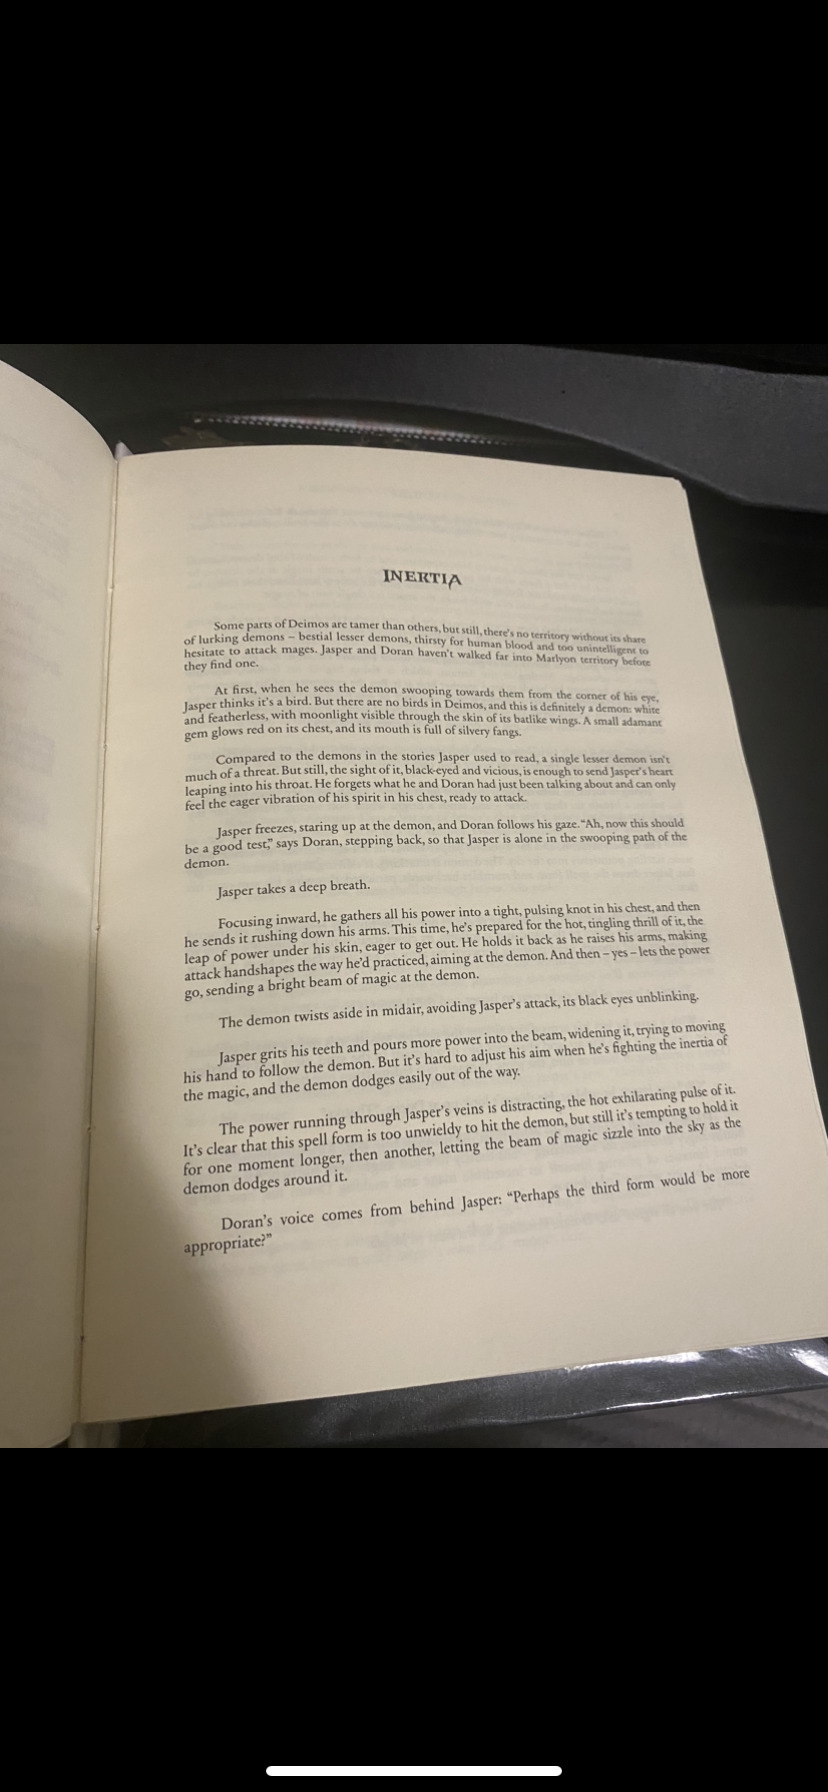
chessboxing for beginners (and other exciting post-apocalyptic sports) by arealsword, a surreal post-apocalyptic sports anime Sanders Sides AU. 27k words, bound at quarto size.
Typeset in Alegreya with Heltavasha Demo used for the chapter headers. The little chapter doodles are stock, and there's a different chess piece used under the page numbers in each chapter! The squares on the cover are inset slightly, and overall the book has a nice chunky feel to it.
118 notes
·
View notes
Text


This finally arrived (curse you international post!) so I can post photos!
I typeset and bound this for leo7066 for the the 2023 Renegade Bindery Bound Book Exchange.
It was tons of fun, especially doing the rips on the cover!
26 notes
·
View notes
Text


It's finally complete 🐟 As soon as @thenightpool said they were considering doing a collection of the works from Unleashed Blue this summer, I knew I wanted to make a hardcover copy to commemorate the event.
I've never tried any bookbinding before but I'm pretty content with the results, and it's so satisfying to see all the participants' hard work in a physical, over-2-inch-thick form!
If you'd like to read this yourself, you can download a copy from this post 🌊 (The art looks much more impressive in digital high res!)
#unleashed blue#rinharu#fanfic bookbinding#it has a lot of beginner mistakes as a result of. me being a beginner#but for the most part I'm happy with how it turned out! Doing the Pool proud#also to be clear I did not do any of the typesetting or design for this book‚ that was all @museaway#I just stuck the text on the spine and the future fish on the back
26 notes
·
View notes
Text
Hiii so since my little book binding project for crimson rivers is kinda going around, I just wanted to say again please please do not print fanfiction illegally!! By doing so you put not only the fandom but the authors who have put a lot of hard work and effort into providing us with free, accessible works. If you want to learn how to bookbind I can link some helpful tutorials and accounts I’ve followed to help me, and you can message/ask me anything. Please respect the authors and the fandom and don’t print these fics illegally!! <3
#it’s not as hard as it looks I promise!#please don’t message me asking to buy crimson rivers#please don’t sell fanfiction either!!!#respect the authors and the privilege to read these wonderful works for free#i am still a beginner so I’m not going to be perfect#but if you need any help I can do my best#fic: crimson rivers#marauders#fanfic binding#fanfiction#bookbinding
43 notes
·
View notes
Text


Todays progress before work!
Things ive learned:
1. Fusible interfacing on the back of your cover fabric is a life saver if you don’t have actual book cloth
2. One chipboard is enough for a whole book if you’re using 8.5x11 paper as long as you aren’t t making a book thats like…500+ pages
3. Cover the thing in glue but not so much glue that theres puddles or it’ll seep through to the outside fabric. Use your fingers to spread that shit out and then wipe off the excess. (This took three attempts to learn)
4. Use your ruler to cut uniform width edges around your project, its so satisfying!!!
Whats remaining of the book project:
1. Add book mark
2. Add head and tail bands
3. Add end pages
4. Attach to cover
5. Write title on cover
Im really happy with how its coming out.
11 notes
·
View notes
Text


I made a thing. It's only got a paper cover as it's my first foray into bookbinding since I was small and stitching stuff together with yarn. 10/10 will do again.
3 notes
·
View notes
Text
Looking for advice on restorative bookbinding!
I recently learned about fanbinding and custom bookbinding, and I've decided it would be a super neat thing to learn how to do. Since i've never done anything like it before besides like, those little books we'd make in elementary school with folded printer paper and a staple gun, I'm looking for outside advice!
I got a very nice sci-fi book from my dad, but calling it well-loved is an understatement.
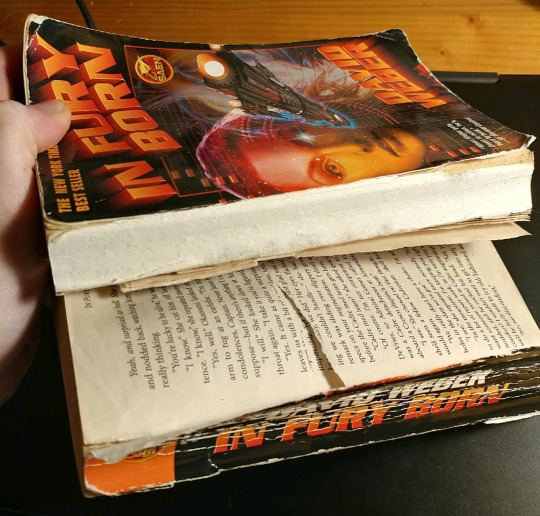
It's torn completely in half, but in my (limited) experience it's still salvageable. Like, as a book, it's still usable, i can and do read it i'm just careful with the outermost pages of each chunk.
I'd like to try my hand at rebinding this book, just as a beginner side project, since it's here and I already own it and nobody will read it except me, so who cares if the binding job is sloppy or crooked?
Each half is mostly solid, although the cover pieces and outer pages are only hanging on by threads.
The paper of the spine is pretty cracked, but the two cover pieces are in pretty good condition except for nicks and fraying around the edges.
the second chunk has a hole in the top page, but it only takes out like two words and i'm ninety percent sure i can extrapolate the blanks from the context if/when i patch that page.
It's about 860 pages long not counting the non-story ones like title pages, about the author, etc. I know there's a limit for how many pages certain binding styles can handle.
it's also printed on like, i don't know the name for it but it's that really thin yellowish paper that a ton of those old paperbacks are printed in (is pulp fiction the right word?)
Since it's a paperback, it doesn't have endpapers per se. Whatever cover I made and attached, would I need endpapers to glue to the inner cover? Would it be better to sacrifice the existing first and last pages to be endpapers (which i don't mind doing since the first has a story snippet and the last is blank), or better to glue dedicated endpapers to the text block at the same time I glue the two chunks together?
I don't really have a preference on hardback or paperback cover, I think hardbacks are easier for beginners to make?
I'd like to preserve the cover or at least the design of it somehow, so one of my ideas is to scan the cover and spine and print them out bigger onto a larger piece of paper if I decide to go with a hardback cover.
The second chunk has the paper of the spine on it (also hanging on by a thread). I'm not sure if I should scrape off the leftover spine paper/glue that's on the spines of the text blocks before I glue on a cover, or if it'll be fine to glue a fresh cover on top of it (after separating the graphic paper of the spine).
In terms of materials, I actually own a bottle of acid free archival quality book glue (I bought it ages ago in hopes of patching another book that tore in half from use), I have plenty of scrapbooking paper and cotton fabric left over from other projects, and I think my local makerspace has a dedicated bookbinding press!
It's a neat story, but the physical book itself has no sentimental value to me or my dad, so if I can't fix it I'll just buy a fresh copy and sacrifice this one as material for other paper crafts. I just thought it'd be a fun place to start learning how to bookbind, rather than trying to format and print and shape a fresh text block from scratch.
If you need more info about this project, please ask and I'm happy to share it. Any advice is appreciated, and thank you in advance!
#I actually have another book that *also* tore in half from being loved too much#but I was much younger and didn't know enough so I just put it back together with packing tape and kept reading.#Now that i'm older and smarter I'd like to do better with this book since i recently learned packing tape isn't good for books long-term.#(and also In Fury Born is too beat-up to just be saved by tape.)#bookbinding#restorative bookbinding#hand bookbinding#(does this count as fanbinding? hmmm I don't wanna mistag)#advice#beginner bookbinding#bookbinding advice#val rambles
6 notes
·
View notes
Text
okay so getting into book binding bc I love my mutuals' jugpea fics and tbh hate scroll reading on ao3.
mostly worried about two things - 1. the sewing and 2. the gluing. I'm a knitter and the permanence of glue especially freaks me out.
so I gave the hole punching and sewing a go today. it was easy. anticlimactic actually.
attempt 1: I want the manual of book binding (the one by @armoredsuperheavy seems definitive) so I typeset it any which way then did a super basic 4 hole stitch job.


attempt 2: so the 4 hole stitch works OK but not good enough for my ocd soul so I tried more holes from a test print of one of my favorite jugpea fics (by @taratantsi ) (I'm trying to figure out how to be a better typesetter too).


much better.
11 notes
·
View notes
Text
Current Binding Project - Re-Binding Jurassic Park // FINAL

The raptor claw turned out pretty nice! I won’t be doing a dust jacket for this one. I’d like to make a collection of re-binds in this aesthetic.
And for reference, here are the old pics of the book I picked up at the thrift store.


40 notes
·
View notes
Text
Covers Bookbinding for beginners by a beginner- The Home Stretch
*drinks half a gallon of coffee*
COVERS!
You've gotten your typeset done for the fic, you've battled the demon that is your printer, folded pages, stitched pages, glued pages, glued end pages, and end bands. Made the cover, covered the cover in potentially homemade book cloth.
Now it's time to design a cover.
It's time to make this thing into a fully functioning book and slide it on your shelf and have a nice bout of "Laying on the Floor while Questioning the Human Condition (TM)".
There are a few options.
It depends on what you want.
I can only take you so far with Cricut/vinyl applications. But I researched enough to maybe, MAYBE give you the run down on at least how to get your cover from Canva to the software to cut out your vinyl. I'll start there since this is what I know the least.
Open up your version of Canva.
Make a document, I've seen some fanbinders make all this in the cricut software but I can only smile and nod along. But for me- this is the best I've figured:

go to the search bar and type in book cover (or use the drop down menu) click on a random template.
Fiddle and fart your way into a design you like. Text and Font Options are available in drop down menus and find some designs that are "Easy to Weed" which I understand as "Getting rid of all the stuff that's not going on the cover".
For Example:

Do you like it? It took me 40 seconds, I'm very proud of it. But this isn't to impress you really I just need to show you how to save your file so you can make the leap from one software application to the next.
Hit "Share", Hit "Download", File Type- Hit the down arrow, Hit "PNG" I missed this for the first few times--- BUT!

Click the "Transparent Background"
If you're doing more than one colour Vinyl you're going to duplicate the page that is located right next to the lock icon above the document. Hit that. Delete the stuff that you want to be different colours. Otherwise it will just cut everything out as one colour and I've seen some vinyl covers that get damn fancy.
You can also build a title cover just measure the spine and height of your spine and rotate your text to horizontal if you please.
Now for how I do mine. I use Printable Iron On Vinyl. Keynote there is a difference, there is stuff for light fabrics, and stuff for dark. Choose for what your primary book cloth will be but the paper itself will be white.
Make your design.
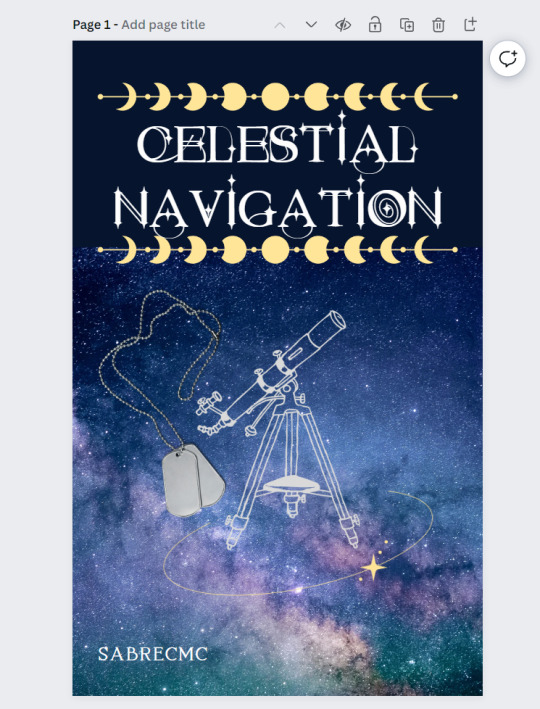
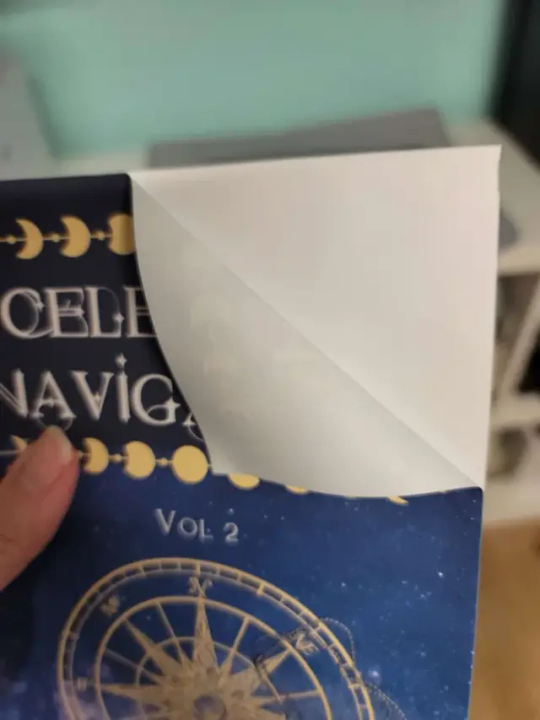
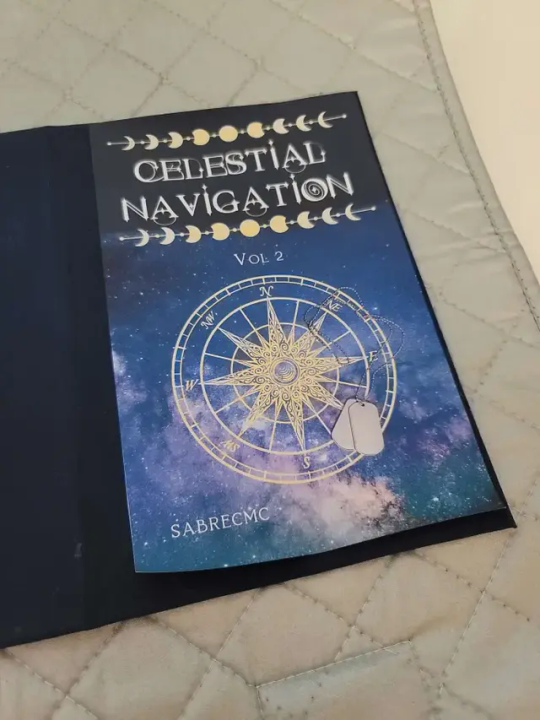
I have 3 different covers for Celestial Navigation by Sabrecmc just because of how LARGE the fic itself is. I had to split the text block up for ease of handling.
I saved as a PNG, and loaded up my fancy printable vinyl into my printer and went through the software for printing, I had to do some fiddling but for my purposes I had to get the whole cover in the right size on the page- it took some fiddling yours might be simpler it might be more complex. But once I got it printed I trimmed off the white and was left with a peel-able rather velvety feeling thing.
Remove the backing. Get the iron on and go low and slow with the provided barrier material to prevent melting and damage to the print you've just done.
I made spines as well and made an 11 x 8.5 (Or brochure template)

And lined up my spines accordingly as to not waste materials. There will be grids that pop up automatically to let you know if things line up.
Print them out on the "highest quality" out put for your photo software.
It peels like a sticker. It may take a bit to get it going.
Line it up as nicely as you can on the cover (double check on the still exposed board).
There is a protective sheet that comes with it USE IT. Set your iron to a low heat and move it around frequently.
If you're in a relatively humid area (I live in a coastal town so the humidity is pretty high all year). Have a heavy book to squish your covers down with to try and get out any bends that may happen post ironing (also why we want low and slow).
Leave to cool.
Now you have a text block and a cover.
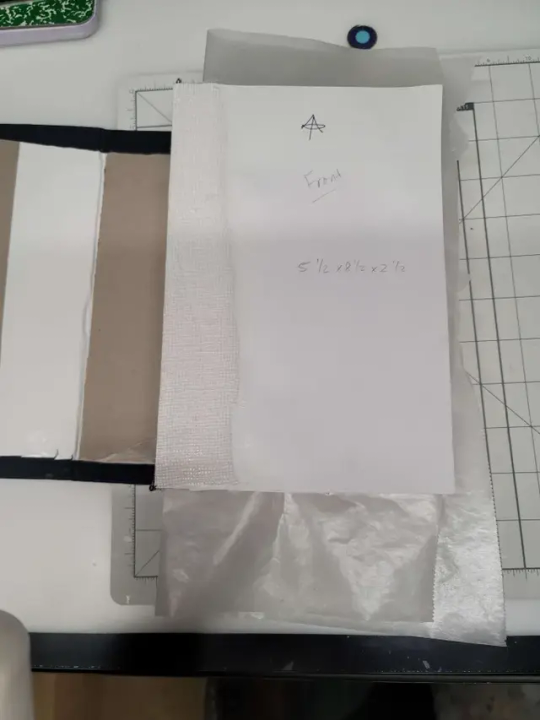
For all intents and purposes for my demonstration I'm leaving the spine off and am redoing everything with this fic from the ground up. There are aspects and mistakes that I have made that have irked my brain. So I will be leaving the spines off for this round. This is the learning curve and since a lot have things have clicked into place since beginning this series that have given me the "AH HA! CLARITY!" moment. I have completely reworked EVERYTHING in my text block of Celestial Navigation. Plus I've a perfectionist issue that is a lot milder than what it was.
But these two text blocks will work as my "Ground Zero" and will be the books I compare all potential future binds too.
As a note that I said in the beginning of this endeavor:
THIS IS FOR PERSONAL USE ONLY. FOR THE LOVE OF FUCK DO NOT SELL WORK THAT DOES NOT BELONG TO YOU!!!! YOU HAVE ASKED PERMISSION (I dearly hope) TO DO THIS DO NOT BREAK TRUST WITH THE AUTHOR.
IF You want to offer a copy to the author- GO FOR IT. Close friend that is showing interest in the fic?? Sure ok.
But if you sell it for monetary gain? I hope you stub your toe, and just before it finally heals you stub your toe again and may all your breakfast cereal turn to slugs.
DO NOT BE A DICK. I am writing this whole 'How To' Series as an experiment of Good Faith that you, the potential binder, will do right by the community and not compound an issue that has been cropping up. Etsy sellers, and this horrible Facebook community that will steal other's typesets, and begin selling them.
Like I said- this is a breech in Fair Use.
Now with that lecture, again, out of the way lets settle the rest of this series.
You will need:
Glue
Book Press
glue brush
Wax Paper.
Your Cover.
Your Text block.
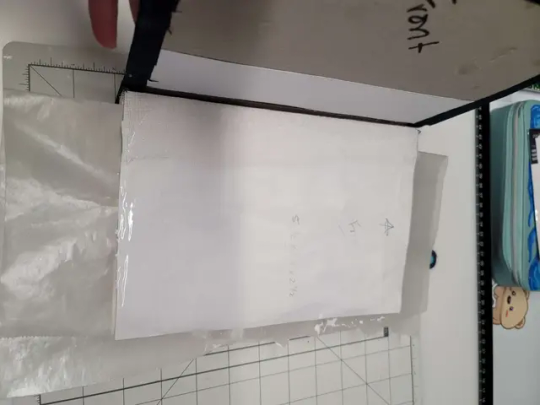
Get your textblock and cover lined up with some wax paper in the middle of the decorative pages (if you're doing them other wise the page you glue down to the cover and the rest of the text block.
Fiddle, fart and dry fit until you are satisfied.
Lay down a layer of glue on the page NOT THE COVER ITSELF.
DON'T BE ME. I FUCKED UP HARDCORE AND DID THE COVER WITH THE GLUE. HOOOOO NELLY LET ME TELL YOU HOW BADLY THAT FUCKED SHIT UP.
HOW BAD WAS IT? BAD. VERY BAD. DON'T BE LIKE ME THAT FIRST ROUND, BE LIKE ME ON THE SECOND ROUND AND PUT GLUE ON THE END PAGE.
Line up the textblock for a final time and then apply the paper to the cover open the textblock and smooth what you just glued down. Flip over and repeat.
Then add weight to the text block put it back in your press, or if you're like me and have a reprint in the press just throw books atop the block.
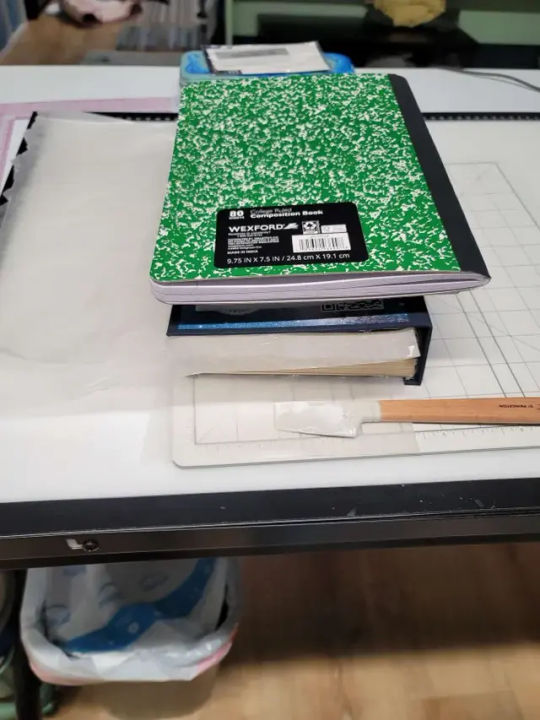
Allow glue to cure over night.
Shiver, shudder, and lay on the floor. Your fic is now a book that you can put on your shelf.
Welcome to the wild wild world of bookbinding.
I've been your host trying their best to explain all the things.
I will likely continue this series with "OK SO I LEARNED SOME SHIT ALL THAT SHIT I WROTE BEFORE FEEL FREE TO LISTEN BUT I'VE GOT BETTER SOLUTIONS NOW" time stuff.
#bookbinding#ficbinding#diy#bookbinding for beginners by a beginner#oh my god I'm done for now#I've done it#I wrote out all of the things#and i likely have to go back and FIX some shit cause.... whooooooooooo I learned a LOOOOOOOOOT#mistakes are great learning tools don't get me wrong but hoooooo I learned a lot
43 notes
·
View notes
Text
Have tried my hand at a budget rebind of a duplicate paperback I have and Holy shit the amount of happy is making me dizzy!
I decided to do a linen bound hardback and I have painted it blue so currently waiting for the text block and the hardback itself to dry so I can put them together!
#Bookbinding#Bookbinding on a budget#Rebinding#Rebinding paperback#Beginner Bookbinding#actually audhd#Following the dopamine
9 notes
·
View notes
Text


Beginner Bookbinding
15 notes
·
View notes
Text
I made a book!!!

It's a cased in binding that I sewed together with chain stitches. I made the cover cloth out of quilting cotton, Heat N Bond, and acid-free white tissue paper. All I had for end papers was some card stock that's definitely not thick enough, but it worked okay for a first attempt. I trimmed the text block foredge with a utility knife, which was a giant pain in the ass but I think I know how to do that a little better for next time.
Actually this whole project could be *titled* "I Think I Know How To Do That A Little Better For Next Time". This was only my third total attempt at anything bookbinding related, and it feels like the first one that actually "counts".
#I am generally really hard on myself if I don't get a new craft perfectly right away#so I'm glad this came out at least decent#even if it won't lay all the way flat and is a little wonky lol#crafts#bookbinding#beginner#scribbles' knots
13 notes
·
View notes
Last Seen Blogs