#border-radius
Explore tagged Tumblr posts
Visit Tumblr Blog
Explore Tumblr blogs with no restrictions, modern design and the best experience.
Last Seen Tumblr Blogs


Fun Fact
Forty percent of Tumblr users are between the ages of 18 to 25.
Text
How to Create Multi-Step Forms With Vanilla JavaScript and CSS
New Post has been published on https://thedigitalinsider.com/how-to-create-multi-step-forms-with-vanilla-javascript-and-css/
How to Create Multi-Step Forms With Vanilla JavaScript and CSS
Multi-step forms are a good choice when your form is large and has many controls. No one wants to scroll through a super-long form on a mobile device. By grouping controls on a screen-by-screen basis, we can improve the experience of filling out long, complex forms.
But when was the last time you developed a multi-step form? Does that even sound fun to you? There’s so much to think about and so many moving pieces that need to be managed that I wouldn’t blame you for resorting to a form library or even some type of form widget that handles it all for you.
But doing it by hand can be a good exercise and a great way to polish the basics. I’ll show you how I built my first multi-step form, and I hope you’ll not only see how approachable it can be but maybe even spot areas to make my work even better.
We’ll walk through the structure together. We’ll build a job application, which I think many of us can relate to these recent days. I’ll scaffold the baseline HTML, CSS, and JavaScript first, and then we’ll look at considerations for accessibility and validation.
I’ve created a GitHub repo for the final code if you want to refer to it along the way.
The structure of a multi-step form
Our job application form has four sections, the last of which is a summary view, where we show the user all their answers before they submit them. To achieve this, we divide the HTML into four sections, each identified with an ID, and add navigation at the bottom of the page. I’ll give you that baseline HTML in the next section.
Navigating the user to move through sections means we’ll also include a visual indicator for what step they are at and how many steps are left. This indicator can be a simple dynamic text that updates according to the active step or a fancier progress bar type of indicator. We’ll do the former to keep things simple and focused on the multi-step nature of the form.,
The structure and basic styles
We’ll focus more on the logic, but I will provide the code snippets and a link to the complete code at the end.
Let’s start by creating a folder to hold our pages. Then, create an index.html file and paste the following into it:
Open HTML
<form id="myForm"> <section class="group-one" id="one"> <div class="form-group"> <div class="form-control"> <label for="name">Name <span style="color: red;">*</span></label> <input type="text" id="name" name="name" placeholder="Enter your name"> </div> <div class="form-control"> <label for="idNum">ID number <span style="color: red;">*</span></label> <input type="number" id="idNum" name="idNum" placeholder="Enter your ID number"> </div> </div> <div class="form-group"> <div class="form-control"> <label for="email">Email <span style="color: red;">*</span></label> <input type="email" id="email" name="email" placeholder="Enter your email"> </div> <div class="form-control"> <label for="birthdate">Date of Birth <span style="color: red;">*</span></label> <input type="date" id="birthdate" name="birthdate" max="2006-10-01" min="1924-01-01"> </div> </div> </section> <section class="group-two" id="two"> <div class="form-control"> <label for="document">Upload CV <span style="color: red;">*</span></label> <input type="file" name="document" id="document"> </div> <div class="form-control"> <label for="department">Department <span style="color: red;">*</span></label> <select id="department" name="department"> <option value="">Select a department</option> <option value="hr">Human Resources</option> <option value="it">Information Technology</option> <option value="finance">Finance</option> </select> </div> </section> <section class="group-three" id="three"> <div class="form-control"> <label for="skills">Skills (Optional)</label> <textarea id="skills" name="skills" rows="4" placeholder="Enter your skills"></textarea> </div> <div class="form-control"> <input type="checkbox" name="terms" id="terms"> <label for="terms">I agree to the terms and conditions <span style="color: red;">*</span></label> </div> <button id="btn" type="submit">Confirm and Submit</button> </section> <div class="arrows"> <button type="button" id="navLeft">Previous</button> <span id="stepInfo"></span> <button type="button" id="navRight">Next</button> </div> </form> <script src="script.js"></script>
Looking at the code, you can see three sections and the navigation group. The sections contain form inputs and no native form validation. This is to give us better control of displaying the error messages because native form validation is only triggered when you click the submit button.
Next, create a styles.css file and paste this into it:
Open base styles
:root --primary-color: #8c852a; --secondary-color: #858034; body font-family: sans-serif; line-height: 1.4; margin: 0 auto; padding: 20px; background-color: #f4f4f4; max-width: 600px; h1 text-align: center; form background: #fff; padding: 40px; border-radius: 5px; box-shadow: 0 0 10px rgba(0, 0, 0, 0.1); display: flex; flex-direction: column; .form-group display: flex; gap: 7%; .form-group > div width: 100%; input:not([type="checkbox"]), select, textarea width: 100%; padding: 8px; border: 1px solid #ddd; border-radius: 4px; .form-control margin-bottom: 15px; button display: block; width: 100%; padding: 10px; color: white; background-color: var(--primary-color); border: none; border-radius: 4px; cursor: pointer; font-size: 16px; button:hover background-color: var(--secondary-color); .group-two, .group-three display: none; .arrows display: flex; justify-content: space-between align-items: center; margin-top: 10px; #navLeft, #navRight width: fit-content; @media screen and (max-width: 600px) .form-group flex-direction: column;
Open up the HTML file in the browser, and you should get something like the two-column layout in the following screenshot, complete with the current page indicator and navigation.
Adding functionality with vanilla JavaScript
Now, create a script.js file in the same directory as the HTML and CSS files and paste the following JavaScript into it:
Open base scripts
const stepInfo = document.getElementById("stepInfo"); const navLeft = document.getElementById("navLeft"); const navRight = document.getElementById("navRight"); const form = document.getElementById("myForm"); const formSteps = ["one", "two", "three"]; let currentStep = 0; function updateStepVisibility() formSteps.forEach((step) => document.getElementById(step).style.display = "none"; ); document.getElementById(formSteps[currentStep]).style.display = "block"; stepInfo.textContent = `Step $currentStep + 1 of $formSteps.length`; navLeft.style.display = currentStep === 0 ? "none" : "block"; navRight.style.display = currentStep === formSteps.length - 1 ? "none" : "block"; document.addEventListener("DOMContentLoaded", () => navLeft.style.display = "none"; updateStepVisibility(); navRight.addEventListener("click", () => if (currentStep < formSteps.length - 1) currentStep++; updateStepVisibility(); ); navLeft.addEventListener("click", () => if (currentStep > 0) currentStep--; updateStepVisibility(); ); );
This script defines a method that shows and hides the section depending on the formStep values that correspond to the IDs of the form sections. It updates stepInfo with the current active section of the form. This dynamic text acts as a progress indicator to the user.
It then adds logic that waits for the page to load and click events to the navigation buttons to enable cycling through the different form sections. If you refresh your page, you will see that the multi-step form works as expected.
Multi-step form navigation
Let’s dive deeper into what the Javascript code above is doing. In the updateStepVisibility() function, we first hide all the sections to have a clean slate:
formSteps.forEach((step) => document.getElementById(step).style.display = "none"; );
Then, we show the currently active section:
document.getElementById(formSteps[currentStep]).style.display = "block";`
Next, we update the text that indicators progress through the form:
stepInfo.textContent = `Step $currentStep + 1 of $formSteps.length`;
Finally, we hide the Previous button if we are at the first step and hide the Next button if we are at the last section:
navLeft.style.display = currentStep === 0 ? "none" : "block"; navRight.style.display = currentStep === formSteps.length - 1 ? "none" : "block";
Let’s look at what happens when the page loads. We first hide the Previous button as the form loads on the first section:
document.addEventListener("DOMContentLoaded", () => navLeft.style.display = "none"; updateStepVisibility();
Then we grab the Next button and add a click event that conditionally increments the current step count and then calls the updateStepVisibility() function, which then updates the new section to be displayed:
navRight.addEventListener("click", () => if (currentStep < formSteps.length - 1) currentStep++; updateStepVisibility(); );
Finally, we grab the Previous button and do the same thing but in reverse. Here, we are conditionally decrementing the step count and calling the updateStepVisibility():
navLeft.addEventListener("click", () => if (currentStep > 0) currentStep--; updateStepVisibility(); );
Handling errors
Have you ever spent a good 10+ minutes filling out a form only to submit it and get vague errors telling you to correct this and that? I prefer it when a form tells me right away that something’s amiss so that I can correct it before I ever get to the Submit button. That’s what we’ll do in our form.
Our principle is to clearly indicate which controls have errors and give meaningful error messages. Clear errors as the user takes necessary actions. Let’s add some validation to our form. First, let’s grab the necessary input elements and add this to the existing ones:
const nameInput = document.getElementById("name"); const idNumInput = document.getElementById("idNum"); const emailInput = document.getElementById("email"); const birthdateInput = document.getElementById("birthdate") const documentInput = document.getElementById("document"); const departmentInput = document.getElementById("department"); const termsCheckbox = document.getElementById("terms"); const skillsInput = document.getElementById("skills");
Then, add a function to validate the steps:
Open validation script
function validateStep(step)
Here, we check if each required input has some value and if the email input has a valid input. Then, we set the isValid boolean accordingly. We also call a showError() function, which we haven’t defined yet.
Paste this code above the validateStep() function:
function showError(input, message) const formControl = input.parentElement; const errorSpan = formControl.querySelector(".error-message"); input.classList.add("error"); errorSpan.textContent = message;
Now, add the following styles to the stylesheet:
Open validation styles
input:focus, select:focus, textarea:focus outline: .5px solid var(--primary-color); input.error, select.error, textarea.error outline: .5px solid red; .error-message font-size: x-small; color: red; display: block; margin-top: 2px; .arrows color: var(--primary-color); font-size: 18px; font-weight: 900; #navLeft, #navRight display: flex; align-items: center; gap: 10px; #stepInfo color: var(--primary-color);
If you refresh the form, you will see that the buttons do not take you to the next section till the inputs are considered valid:
Finally, we want to add real-time error handling so that the errors go away when the user starts inputting the correct information. Add this function below the validateStep() function:
Open real-time validation script
function setupRealtimeValidation() nameInput.addEventListener("input", () => if (nameInput.value.trim() !== "") clearError(nameInput); ); idNumInput.addEventListener("input", () => if (idNumInput.value.trim() !== "") clearError(idNumInput); ); emailInput.addEventListener("input", () => if (emailInput.validity.valid) clearError(emailInput); ); birthdateInput.addEventListener("change", () => if (birthdateInput.value !== "") clearError(birthdateInput); ); documentInput.addEventListener("change", () => if (documentInput.files[0]) clearError(documentInput); ); departmentInput.addEventListener("change", () => if (departmentInput.value !== "") clearError(departmentInput); ); termsCheckbox.addEventListener("change", () => if (termsCheckbox.checked) clearError(termsCheckbox); );
This function clears the errors if the input is no longer invalid by listening to input and change events then calling a function to clear the errors. Paste the clearError() function below the showError() one:
function clearError(input) const formControl = input.parentElement; const errorSpan = formControl.querySelector(".error-message"); input.classList.remove("error"); errorSpan.textContent = "";
And now the errors clear when the user types in the correct value:
The multi-step form now handles errors gracefully. If you do decide to keep the errors till the end of the form, then at the very least, jump the user back to the erroring form control and show some indication of how many errors they need to fix.
Handling form submission
In a multi-step form, it is valuable to show the user a summary of all their answers at the end before they submit and to offer them an option to edit their answers if necessary. The person can’t see the previous steps without navigating backward, so showing a summary at the last step gives assurance and a chance to correct any mistakes.
Let’s add a fourth section to the markup to hold this summary view and move the submit button within it. Paste this just below the third section in index.html:
Open HTML
<section class="group-four" id="four"> <div class="summary-section"> <p>Name: </p> <p id="name-val"></p> <button type="button" class="edit-btn" id="name-edit"> <span>✎</span> <span>Edit</span> </button> </div> <div class="summary-section"> <p>ID Number: </p> <p id="id-val"></p> <button type="button" class="edit-btn" id="id-edit"> <span>✎</span> <span>Edit</span> </button> </div> <div class="summary-section"> <p>Email: </p> <p id="email-val"></p> <button type="button" class="edit-btn" id="email-edit"> <span>✎</span> <span>Edit</span> </button> </div> <div class="summary-section"> <p>Date of Birth: </p> <p id="bd-val"></p> <button type="button" class="edit-btn" id="bd-edit"> <span>✎</span> <span>Edit</span> </button> </div> <div class="summary-section"> <p>CV/Resume: </p> <p id="cv-val"></p> <button type="button" class="edit-btn" id="cv-edit"> <span>✎</span> <span>Edit</span> </button> </div> <div class="summary-section"> <p>Department: </p> <p id="dept-val"></p> <button type="button" class="edit-btn" id="dept-edit"> <span>✎</span> <span>Edit</span> </button> </div> <div class="summary-section"> <p>Skills: </p> <p id="skills-val"></p> <button type="button" class="edit-btn" id="skills-edit"> <span>✎</span> <span>Edit</span> </button> </div> <button id="btn" type="submit">Confirm and Submit</button> </section>
Then update the formStep in your Javascript to read:
const formSteps = ["one", "two", "three", "four"];
Finally, add the following classes to styles.css:
.summary-section display: flex; align-items: center; gap: 10px; .summary-section p:first-child width: 30%; flex-shrink: 0; border-right: 1px solid var(--secondary-color); .summary-section p:nth-child(2) width: 45%; flex-shrink: 0; padding-left: 10px; .edit-btn width: 25%; margin-left: auto; background-color: transparent; color: var(--primary-color); border: .7px solid var(--primary-color); border-radius: 5px; padding: 5px; .edit-btn:hover border: 2px solid var(--primary-color); font-weight: bolder; background-color: transparent;
Now, add the following to the top of the script.js file where the other consts are:
const nameVal = document.getElementById("name-val"); const idVal = document.getElementById("id-val"); const emailVal = document.getElementById("email-val"); const bdVal = document.getElementById("bd-val") const cvVal = document.getElementById("cv-val"); const deptVal = document.getElementById("dept-val"); const skillsVal = document.getElementById("skills-val"); const editButtons = "name-edit": 0, "id-edit": 0, "email-edit": 0, "bd-edit": 0, "cv-edit": 1, "dept-edit": 1, "skills-edit": 2 ;
Then add this function in scripts.js:
function updateSummaryValues() nameVal.textContent = nameInput.value; idVal.textContent = idNumInput.value; emailVal.textContent = emailInput.value; bdVal.textContent = birthdateInput.value; const fileName = documentInput.files[0]?.name; if (fileName) const extension = fileName.split(".").pop(); const baseName = fileName.split(".")[0]; const truncatedName = baseName.length > 10 ? baseName.substring(0, 10) + "..." : baseName; cvVal.textContent = `$truncatedName.$extension`; else cvVal.textContent = "No file selected"; deptVal.textContent = departmentInput.value; skillsVal.textContent = skillsInput.value || "No skills submitted"; }
This dynamically inserts the input values into the summary section of the form, truncates the file names, and offers a fallback text for the input that was not required.
Then update the updateStepVisibility() function to call the new function:
function updateStepVisibility() formSteps.forEach((step) => document.getElementById(step).style.display = "none"; ); document.getElementById(formSteps[currentStep]).style.display = "block"; stepInfo.textContent = `Step $currentStep + 1 of $formSteps.length`; if (currentStep === 3) updateSummaryValues(); navLeft.style.display = currentStep === 0 ? "none" : "block"; navRight.style.display = currentStep === formSteps.length - 1 ? "none" : "block";
Finally, add this to the DOMContentLoaded event listener:
Object.keys(editButtons).forEach((buttonId) => const button = document.getElementById(buttonId); button.addEventListener("click", (e) => currentStep = editButtons[buttonId]; updateStepVisibility(); ); );
Running the form, you should see that the summary section shows all the inputted values and allows the user to edit any before submitting the information:
And now, we can submit our form:
form.addEventListener("submit", (e) => e.preventDefault(); if (validateStep(2)) alert("Form submitted successfully!"); form.reset(); currentFormStep = 0; updateStepVisibility(); );
Our multi-step form now allows the user to edit and see all the information they provide before submitting it.
Accessibility tips
Making multi-step forms accessible starts with the basics: using semantic HTML. This is half the battle. It is closely followed by using appropriate form labels.
Other ways to make forms more accessible include giving enough room to elements that must be clicked on small screens and giving meaningful descriptions to the form navigation and progress indicators.
Offering feedback to the user is an important part of it; it’s not great to auto-dismiss user feedback after a certain amount of time but to allow the user to dismiss it themselves. Paying attention to contrast and font choice is important, too, as they both affect how readable your form is.
Let’s make the following adjustments to the markup for more technical accessibility:
Add aria-required="true" to all inputs except the skills one. This lets screen readers know the fields are required without relying on native validation.
Add role="alert" to the error spans. This helps screen readers know to give it importance when the input is in an error state.
Add role="status" aria-live="polite" to the .stepInfo. This will help screen readers understand that the step info keeps tabs on a state, and the aria-live being set to polite indicates that should the value change, it does not need to immediately announce it.
In the script file, replace the showError() and clearError() functions with the following:
function showError(input, message) const formControl = input.parentElement; const errorSpan = formControl.querySelector(".error-message"); input.classList.add("error"); input.setAttribute("aria-invalid", "true"); input.setAttribute("aria-describedby", errorSpan.id); errorSpan.textContent = message; function clearError(input) const formControl = input.parentElement; const errorSpan = formControl.querySelector(".error-message"); input.classList.remove("error"); input.removeAttribute("aria-invalid"); input.removeAttribute("aria-describedby"); errorSpan.textContent = "";
Here, we programmatically add and remove attributes that explicitly tie the input with its error span and show that it is in an invalid state.
Finally, let’s add focus on the first input of every section; add the following code to the end of the updateStepVisibility() function:
const currentStepElement = document.getElementById(formSteps[currentStep]); const firstInput = currentStepElement.querySelector( "input, select, textarea" ); if (firstInput) firstInput.focus();
And with that, the multi-step form is much more accessible.
Conclusion
There we go, a four-part multi-step form for a job application! As I said at the top of this article, there’s a lot to juggle — so much so that I wouldn’t fault you for looking for an out-of-the-box solution.
But if you have to hand-roll a multi-step form, hopefully now you see it’s not a death sentence. There’s a happy path that gets you there, complete with navigation and validation, without turning away from good, accessible practices.
And this is just how I approached it! Again, I took this on as a personal challenge to see how far I could get, and I’m pretty happy with it. But I’d love to know if you see additional opportunities to make this even more mindful of the user experience and considerate of accessibility.
References
Here are some relevant links I referred to when writing this article:
How to Structure a Web Form (MDN)
Multi-page Forms (W3C.org)
Create accessible forms (A11y Project)
#:not#Accessibility#ADD#aria#Article#Articles#attention#attributes#background#border-radius#box#box-shadow#browser#buttons#challenge#change#classes#code#Color#content#CSS#CV#dept#direction#display#email#error handling#event#Events#Exercise
3 notes
·
View notes
Text
CSS3: Revolucionando el Diseño Web en Alicante y la Comunidad Valenciana
Las Nuevas Reglas: CSS3 se Vuelve Loco CSS3 ha traído consigo una serie de propiedades y características que han revolucionado la forma en que diseñamos y animamos nuestras páginas web. Estas nuevas herramientas nos permiten crear interfaces de usuario más atractivas, interactivas y personalizadas. Exploremos algunas de las propiedades CSS3 más populares y cómo se están utilizando en Alicante y…
#@font-face#border-image#border-radius#box-shadow#gradient#hsla#outline#rgba#rotate#scale#skew#text-shadow#transform#transition#translate
0 notes
Note
For Wen!WWX AU: is A-Yao still a spy that (at the very end) brings Wen Ruohan down? And whatever is happening with all the Jins in general?
Wen Ruohan dies via spiritual backlash from the compulsion sigils that force Wei Wuxian to obey his wishes. Re: the Jins, they were conquered a few weeks after Wen Zhuliu died and aren't a big part of this AU.
#asks#reference#wrh raises wwx au#jgy is...still in yunmeng afaik#the wens never touched the cloud Recesses because lxc laid a protective array around the gusu border#it can't be breached as long as lxc remains within a 20-mile radius of the mingshi (aka where the array is anchored)#and so jgy never had the opportunity to rescue lxc
22 notes
·
View notes
Text
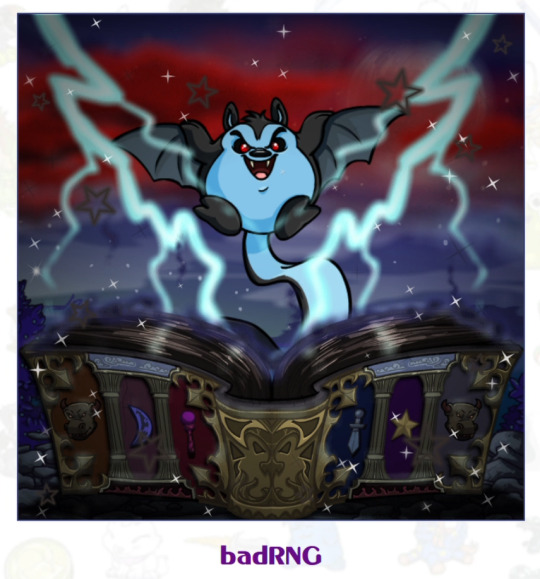
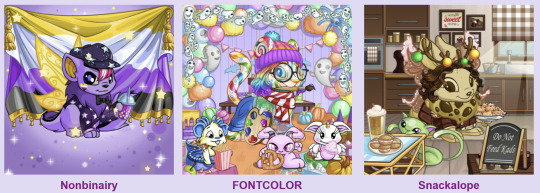

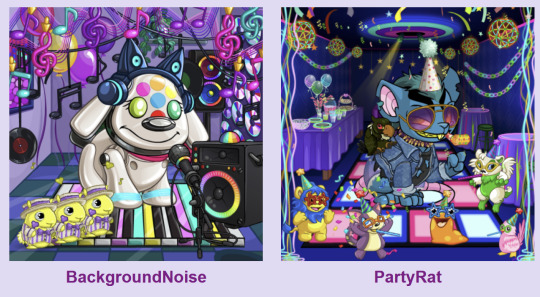
new round of you have to look at my neopets
#i was going to add the ones i have gif'd too but tumblr is a baby who can't handle images that big i guess#sorry this one is kinda lazy i wanted to include their names so i just screencapped my lookup with the border-radius removed#ok i did already post PartyRat technically bc of the deciding what they'd look like poll but#also Nothing gets included again bc i keep changing his customization all the time#i have another meerca named speedyrunner who is going to be badRNG's nemesis. i just haven't done anything with them yet.#*new creative post tag here*#i should like. make a tag for my neopets or something#wait i should have added a poll so i can know if people looked#but they don't have to like it.#because people are too intimidated by my neopets' amazingness to publicly like the post. i get it.
3 notes
·
View notes
Text
Fuck you *LCARSs your Art Fight*
#not art#artfight#star trek#I don't want to talk about how much time I've spent on this#Art Fight please give me border radius perms so I can make better stupid CSS themes
5 notes
·
View notes
Text
i follow a news acct on ig that reports from/about my hometown, and since there's a mexican consulate there theyve been posting about the mexican election since the consulate was overwhelmed with how many people showed up to vote. and usamericans in the comments are really struggling with the idea of expats/dual citizenship.
3 notes
·
View notes
Text
trying to make a stylus filter to fix the awful profile picture change, and I ended up making a few pixels of every image in posts disappear.
#css#the images don't even have the class I'm editing#its also a border-radius rule I'm setting#so it shouldn't even affect this.
0 notes
Text
ewwww just opened tumblr on desktop. why is everything so round and big it's ugly as hell
#hoping there'll be an xkit option for this because. yuck#why is every fucking website doing this why are they afraid of squares and straight edges#border-radius i am killing you with my bare hands#yapping
1 note
·
View note
Text


[회원수5만명 검증된 밤문화골프여행 현지여행사]
[ 여행문의 카톡 : rentno1 ]
[필리핀관광청선정 8년연속 BEST AGENCY]
↓↓더 많은 필리핀 정보가 필요하시면 클릭해 주세요↓↓ 필맨스토리 필리핀골프여행
#font-family: 'Arial'#FFB6C1#87CEFA); padding: 30px; border-radius: 15px; box-shadow: 0 4px 8px rgba(0#0#0.1);#color:#FF4500; font-size: 24px; font-weight: bold; text-shadow: 2px 2px 4px rgba(0#0.2);#1E90FF; text-decoration: underline; font-weight: bold;#background: linear-gradient(135deg#FFD700#FF8C00); color: white; font-size: 22px; padding: 15px 30px; border: none; border-radius: 50px; cursor: pointer; font-weight: bold; box-shad#0.2); transition: all 0.3s ease;#<div style=>#<p style=>#[회원수5만명 검증된 밤문화골프여행 현지여행사]#</p>#32CD32; font-size: 20px; font-weight: bold; text-shadow: 1px 1px 3px rgba(0#[ 여행문의 카톡 : <span style=>rentno1</span> ]#FF6347; font-size: 20px; font-weight: bold; text-shadow: 1px 1px 3px rgba(0#[필리핀관광청선정 8년연속 BEST AGENCY]#FF1493; font-size: 22px; font-weight: bold; margin-top: 20px; text-shadow: 2px 2px 4px rgba(0#↓↓더 많은 필리핀 정보가 필���하시면 클릭해 주세요↓↓#<a href=“https://cafe.naver.com/philmanlove” target=“_blank” style=“text-decoration: none;”>#<button style=>#필맨스토리 필리핀골프여행#</button>#</a>#</div>
0 notes
Note
omg wait i love ur neocities !! i think ive been following you from even b4 i followed ur tumblr.. my neocities is lambbones if u wanna be net neighbors !! :D
FREAK YEAH!!!! omg :DDDD i put ur button on my draft n it'll be there in my next update :)))))
#my asks#thats so cool.................. crying#ALSO UR WEBSITE KICKS ASS WTF!!!!!!!#SO COOL IM STEALING UR BORDER RADIUS >:)))))
1 note
·
View note
Text
0 notes
Text
chris sturniolo smut


little, lacy set
warnings: unprotected sex, established relationship, kinda rough ( just a little ), not proofread.
inspired by this thing that he said.

chris’s posture stiff but he is laid back against the couch, manspreading as he watched you laugh and giggle with nick right in front of him.
that wasn’t the issue at all though, it was the way your pyjamas slid off your waist to your hip bone with every small move your body made, giving him limited view of your dainty, pretty, lacy panties.
his eyes shamelessly drop to where the thin fabric sat on your skin, he gulps taking the sight in.
his mind immediately going places, thoughts invaded by imagination of just how perfect your pussy must look in those. he wonders if you have the whole set on or just the panties, either way he’d like to confirm. he’d like to see you in that little, lacy set.
as nick grows tired and eventually yawns his way out of the living room, leaving chris alone with you. finally- he thinks.
a smirk grows on chris’s face, his eyes darkening as watches you get up from your spot to come sit beside him.
“why’d you come here? go sit all the way there, so far away from me giggling and shit” he stops you mid way, chris’s tone remains serious but his expression gives away the playfulness of his words.
“baby we were in the same room” you justify your actions, your actions of not being in his one meter radius for a small moment.
chris rolls his eyes at you, his body turning to face you now. he stretches his hand forward, tugging one of his fingers in the waistband of your pyjamas, pulling you close in a swift motion, his face right in front of your belly.
he looks up at you with a small smile before nuzzling his face into the exposed skin your crop top gives him access to in front of him. your hands habitually tangle in his hair, as he rubs his nose in your stomach and groans loudly.
“whats the issue?” a small yet prominent frown displayed on your face when he looks up at you with hooded eyes and shakes his head before putting his face back in your tummy.
his hands grip your sides as he continues to groan and pull you closer into his face. you can feel his breath settle when he leaves his mouth open, slowly kissing and sucking on the skin right above your hipbone, right above the waistband of your panties.
you can feel his sharp teeth slowly take the fabric in his mouth, pulling it down just a little, a soft gasp leaves your lips as his mouth leaves sloppy and messy kisses beneath the small piece of cloth he just pulled down.
“you know you’ve been torturing me this whole time?” his words muffled against your soft skin. your grip tightens in his hair.
he looks up at you, his bottom lip jutted out and rested on your skin. his eyes dark with desire.
he moves his hands to the border of pyjamas, pulling them down just enough to give him the full view of your underwear, chris’s lets out a sound-something between a whine and a groan.
his head tilts and he presses his face right on your core, his nose nudging your folds through the lace. his eyes shut as he breaths you in, slowly opening his mouth and pecking your clothed centre. his tongue pokes out with each one of the kisses, he can already feel the wetness seep through the panties onto his taste buds.
your thighs quivering and a shiver runs down your spine with each one of his actions. his hand slowly makes its way up from you hip and roams around the rest of your body. in a fleet motion he swings your body onto the couch, your head flops down with no warning-making you yelp.
“stay quite” his words almost unheard between his hasty moves, one of his his hands grip your hip and the other pulls on your shirt. his kisses get sloppier by the second, your pants pooling around your knees, falling down unnoticed.
he pulls away to quickly get rid of your shirt, your face and hair disheveling in the process.
he props his head to get a good look, you are wearing the whole set.
“fuck.” chris’s mouth slightly agape taking in the sight of you in a lacy lingerie set sprawled out on the couch, he’d seen you in one before but it’ll never have less of an effect on him.
“y’knew what you were doing wearing this huh?” his voice husky, huskier than when he wakes up.
“now you gotta stay quite for me ma, okay?” you nod, your heart racing and breathing ragged.
he settles between your knees, his hands fiddling with his belt and zipper.
the rate at which he is moving shows you just how much he wants you right now, your breathing gets caught in your throat when he successfully pulls down both his pants and boxers in 0.2 seconds.
his hard cock springs free, bobbing around in air before he props himself on one elbow above you, his fingers sliding your panties off to the side, picking up some residue of your wetness in the process.
he aligns himself with your entrance, pushing in at once with a deep thrust, an involuntary whimper passes through his mouth. bottom lip caught between his teeth.
your mouth forms an “o” with the way its open, holding back screams and moans.
“get this off” chris’s eyes land on your bra.
you try your best to unbuckle it in the position you are in right now.
“just—fucking do it!” chris’s hands fly to your bra straps pulling them down as he whisper shouts in your face, his spit landing on your cheek.
once he can see your tits in front-he starts moving, thrusting slowly at first making sure they don’t make too much noise.
the couch creaks and shifts a little as chris increases his pace, your eyes roll back and his hand flies to your mouth.
“you like getting fucked like this huh? like wearing slutty lace for me?” his nose pushing into yours as he moves, thats how close his face is.
“answer me” he looks at you in the eyes, wanting you to nod.
and you do. your face scrunched up in pleasure as he increases the speed of his thrusts, plunging into you with everything in him, not caring about the sounds created by the skin contact.
“god i could fuck you all day…” his eyes drop to the way your tits bounces with every thrust, trailing back to your fucked out features and the lower half of your face that’s covered with his hand, he presses on to your mouth even more feeling his stomach curl at the way your your tight walls take him in every time he bottoms out.
you can feel the pressure building in your lower belly rapidly, he pulls his propped elbow up to wrap your legs around his waist. your eyes shut in pleasure, a deep frown on your face.
“fuck -you feel so good ma, so fucking good” he can feel you clench around him at his words, his eyes fluttering at the sensation.
“gonna cum already? cum for me ma, look at me” breathless words flow out of his mouth, his hips snapping into yours with force.
he can feel you tightly pucker your lips under his palm, holding back the loud screech he knows you let out when you cum.
your legs shake around his torso, and you cum around his dick. head thrown back, back arched and hips bucked.
“fu-fuck fuc-” his voice low as he tries to contain himself, following right behind you with his orgasm and filling you up.
he pants through the last few thrusts to get rid of both of your highs.
“fuck..” he exhales pulling out of you slowly, watching his cum spill over your panties and thighs, making sort of a mess on the couch he shares with his brothers but he could care less about that right now.
he finally pulls his hand off your mouth, and you let out a deep breath from your drool covered mouth, chest heaving.
“i have definitely had a dream about this before” he chuckles softly looking at you in awe.

taglist: @espressqe @ginswife @sturnsburna @carolina454 @hope2244 @hotgirlbl0gger @violetstxrniolo777 @riggysworld @verycoolmiyah @fadedstvrn @purpledreamertyphoon @mattsplaything @whore4chris @chris-halleluja @annsx03 @mattsdemi @chrislittleslut @poolover123 @luvvnai @chrissturniolossidehoe @pompomprrin @harmonysturniolo @sofia-is-a-sturniolo-triplet-fan @soph-loren @ccsturns @lovesturni0l0s @chriss-slutt @wysmols @sturniolosluttt @mattsdillion @alyssa-sturn @bilssturns @sturnobessed @mxnsonn @izzylovesmatt @sturniolosymphony @chrissturnioloswife88 @sxphiee3 @purpledreamertyphoon @whoreforchrissturnniolo @slutformatt17 @realuvrrr @sweetxcheeryx @sturnl0ve @estellesdoll @glitterybtch @courta13 @mattsbitchh @slvtf0rchr1s @trevorsgodmother
#chris sturniolo#christopher sturniolo#matt sturniolo#chris sturiolo fanfic#chris x reader#chris sturniolo smut#chris imagine#nick sturniolo#chris smut#matt sturniolo texts#matt sturniolo x reader#matt stuniolo fanfic#matthew sturniolo#matt x reader#sturniolo#sturniolo x reader#sturniolo smut#sturniolo triplets#nicolas sturniolo#sturniolo fanfic
1K notes
·
View notes
Text
i'll say this again: i fucking despise border radius where it's the most unnecessary crap 194230849083204032 times
for the love of god. why
#sy.txt#something inside me dies every time i see border radius specifically where it's not desired whatsoever
0 notes
Note
Hewwo; just know your awesome sauce. Thank you for existing
💜
ty, nonnie! thank you for existing, too
#asks#love to see people spreading kindness in the world#in a world full of common cruelty to be kind is punk#or however that quote goes#im on desktop rn and damnnn tumblr ux team really said border radius on these tags huh
0 notes
Text
beneath the surface


Summary: when going alone after the potential unsub doesn't end up too well on readers behalf. Spencer is a worried wreck.
Spencer Reid x gn!reader
Genre: angst, comfort
Warnings: near death experience
WC: 2377
The fluorescent lighting in the briefing room cast a pale-yellow hue over the case files, giving the photographs and evidence a sickly glow. You leaned over the table, fingers smudged with ink from your notes, brows furrowed in thought. The unsub was meticulous, brilliant, even. His kills were cold and calculated, each more daring than the last. He left behind riddles, like breadcrumbs scattered for whoever was clever enough to follow.
Spencer stood across from you, arms crossed tight, eyes flicking between the crime scene photos and the string of coded notes the unsub had left behind. You caught him watching you once, a second too long, and he quickly looked away, pretending to focus on the board.
“He's getting bolder,” you said softly, your voice cutting through the silence. “Every kill is a step closer to..something. Like he's building toward something final.”
He nodded, his voice quiet but sharp. “He's escalating because he wants us to see him. Not just catch him, understand him. He's daring us to keep up.”
You glanced back at the board. “Then let's catch up.”
A soft chime broke the moment. Garcia's voice came through the speakerphone, brisk and focused. “Sweethearts, I've got a blip for you. One of the attendants just called in a guy matching our unsub, paranoid, jumpy, drove off fast. Matches the car type from the last scene.”
Hotch pointed at the map. “That's well outside our current radius.”
You stepped forward, already grabbing your jacket. “I'll go check it out.”
Spencer's head snapped toward you. “You shouldn't go alone.”
You gave him a tight smile. “I'll radio in every five minutes. It's probably nothing.”
Morgan was already shrugging on his vest. “I'll head out with-”
Hotch cut in. “No, Morgan, I need you here in case he circles back. Y/N, take a vest. We’ll stay in touch.”
Spencer didn't speak, he looked like he wanted to argue, but he didn't. You just gave him a quick, confident smile, your heart beating just a little faster. You had not been able to shake the tension of this case, it had gotten under your skin. And now, with a potential lead, the chance to move, to act, was too tempting to ignore.
You felt the weight of his stare as you walked out the door. You didn't see the way his jaw clenched when you turned away, you didn't know that he stood frozen for a moment after, torn between duty and something he didn't yet know how to name. You didn't hear him whisper under his breath, “Be careful.”
The road out to creek ridge was long and winding, bordered on both sides by towering pines and brush so dense It swallowed sound. Your phone rested in the passenger seat, screen glowing softly with the GPS map. The gas station blip had disappeared, but the road was still fresh with tire marks, and your gut told you this was right.
A sliver of pink burned across the horizon as the sun dipped lower, casting long shadows across the pavement, you clicked the radio mic.
“Unit 12, heading east on creek road. Still no visual, but the road looks recently traveled. Will report back in five.”
Emilys voice crackled back. “Copy that. Stay alert.”
Your fingers tapped the wheel as you drove, trying to calm the jittery feeling climbing up your spine. Something about this guy.. It wasn't just that he was smart. He was strategic. Precise. And worse, he was watching them. Every move you made felt like it was being shadowed.
You slowed your vehicle as the road narrowed, curving alongside a wooded ravine, the creek was visible to your left, water glinting in the fading light. Itt was quiet, eerily so. No birds. No wind. Just the crunch of gravel under your tires.
A flicker in the rearview mirror caught your attention.
Headlights.
Far too close.
You frowned, adjusting the mirror. The car had come out of nowhere. No sign of it before. No sound.
You reached for your radio. “Possible tail. One vehicle, dark sedan, no plates visible. Keeping distance for now.”
You waited for a response, but the radio buzzed with static.
You tried again.
Nothing.
The hairs on your arms stood up.
Then the headlights surged forward, and slammed into your bumper with a sickening jolt.
You screamed, jerking the wheel, tires skidding as the sudden impact sent you veering toward the shoulder. The gravel gave way beneath the weight of your car. You tried to correct, but another impact sent you sideways. Your body snapped forward, hitting the seatbelt hard.
The world tilted.
The metal guardrail shattered with a shriek of bending steel, and the front of your vehicle pitched over the edge. The sensation of falling, weightless, breathless, gripped your chest.
Then, again.
Crash
Water erupted around you like shattered glass, slamming into the undercarriage with a bone-jarring crash. The world spun in a dizzying spiral as the front of your car smashed through the surface and plunged beneath. The initial shock of the cold was so violent it stole the air from your lungs. The scream died in your throat as your seat belt snapped you back against the seat. Your head whipped forward, Crack. Pain lanced through your skull. Everything blurred.
You blinked slowly. Lights flickered on the dash, dim and failing. Water hissed in though the floorboards, ice-cold and fast. Within seconds, it was up to your ankles. The cabin creaked under the pressure, metal groaning as the car settled deeper into the riverbed, rocked gently by the current like a cradle.
You tried to breathe. Your chest was tight. Too tight.
You reached for the seat belt but your arm trembled uncontrollably, numb fingers slick with blood from the gash on your forehead. Your vision tunneled, black creeping in at the corners. The radio beside you sparked, then died.
You weren't sure how long it had been. A minute? Less?
You were tilted at an angle, the care nose first in the water. The back remained just barely above the surface, you were lucky- or unlucky. You weren't fully submerged. Not yet.
The water climbed to your knees.
Your breath caught. A shiver racked your body.
You didn't feel brave. You didn't feel like an agent.
You felt small. Helpless.
Cold.
Alone.
Then everything slowed.
Your heartbeat thudded in your ears, dull and distant. You slumped to the side, your temple resting against the driver's side window. Your eyes fluttered. Blood trickled down your cheek, mixing with the rising water. You could hear it now, lapping gently, like a lullaby.
And then-
Darkness.
Reid had never run so fast in his life.
By the time the SUV skidded to a stop near the broken guardrail, his hands were already fumbling with the door. Gravel flew under his boots as he sprinted forward. Trees whipped past him. Morgan was close behind, calling something, but Spencer barely heard him over the pounding in his chest.
Then he saw it.
Your car, sunk halfway into the river, roof just visible, back end barely afloat. A silver glint beneath the trees.
He nearly tripped down the embankment, heart in his throat.
“Y/N!” he shouted, splashing into the frigid water without hesitation. “She's in there! She's in the car!”
Morgan caught up, eyes wide with horror. “We need extraction- fast!”
But Reid was already at the window.
You were inside.
Slumped. Still.
Your head tilted against the glass, lips slightly parted, face ghost- pale beneath a smear of blood.
“No,” he breathed, the word ripped from somewhere deep. “No, no, no- Y/N!”
He slammed his hands against the window, fists thudding against the glass so hard his knuckles burned. The cold didn't register, only the sight of you inside the car, motionless, your face half-submerged in the rising, frigid water.
“Y/N-” his voice broke.
Your head looked slightly to the side, the cut on your temple still bleeding into the flood inside the car. The water had risen past your chest. Your mouth was just above the line, barely breathing space left.
Panic surged like fire in his throat.
“Reid, we've gotta move, this things going under,” Morgan barked behind him, already grabbing a rock from the shoreline.
The river snarled around them, cold and black, lapping against the windows as the car shifted, creaked, tilted.
His heart slammed against his ribs. The windshield was already glazed with fog. He dropped to his knees in the water, hands clawing at the driver's side door, yanking the handle with all the strength he had. Locked.
“Come on, come on- please,” he whispered, as if begging for the car itself.
Morgan appeared beside him again, raising the rock high. “Back up!”
Reid flinched as the window exploded inward in a shower of glass. A wave of water crashed into the cabin.
And then he was moving, reaching in, hands plunging into the freezing dark. It hit his chest like a wall of ice. He ignored it.
He found your shoulder first. Then your face. Cold. still.
“No-no, no come on,” he muttered, fumbling blindly for the seatbelt. The current inside the car was swirling violently now, yanking at his arms, dragging you deeper. His fingers slipped, twice, then finally latched onto the buckled.
It clicked free.
You collapsed into his arms.
He pulled you from the wreckage with a choked breath, wrapping both arms around your torso, cradling your head against his chest. Your limbs were heavy. No resistance.
Morgan was there, hauling the two of you back with sheer force, dragging you up the muddy bank as the car groaned one last time and slid fully beneath the surface.
Spencer laid you down on the gravel, dropping beside you on his knees.
“Y/N?” he gasped.
Nothing.
Your lips were blue. Chest still. Water clung to your lashes like frost.
“No, no- don't-” he pressed his ear to your chest. No rhythm. Just silence.
He started compression without thinking.
“One, two, three, four…” he counted under his breath, voice raw and breaking. “Don't do this..don't-”
Your body jerked under his hands.
Still nothing.
“Come on, you stubborn- please.” he begged, titling your head back and forcing a breath into your lungs.
The second time,
You gasped.
Water burst from your lips as you turned your head and coughed violently, choking on air and river water and pain. Spencer caught you before you could slump again, his hand behind your neck, the other grasping your shoulder like he was afraid you’d slip away.
“I've got you,” he breathed, voice hoarse and shaking. “You're okay. You're safe now.”
Your eyes fluttered open, unfocused. “S’cold…”
“I know. I know. Just hold on.”
The sirens grew louder in the distance. Flashing red cut through the trees. But he didn't look up.
All he saw was you.
Alive.
And still in his arms.
Two hours later- St. Joseph’s Trauma Unit
The fluorescent lights hummed quietly above your bed, casting everything in a pale, washed out glow. You lay beneath a tangle of warm hospital blankets, an oxygen cannula thread gently under your nose, a heart monitor beeping steadily to your right.
You weren’t awake yet. Not fully. But your fingers twitched now and then, just enough to keep Spencer from falling apart.
He sat beside you in the narrow chair, soaked clothes long replaced with scrubs someone had handed him without asking. His hands still shook faintly. They were clasped in his lap now, his finger interlocked so tightly the joints ached, but he didn't loosen them.
He hasn't moved since they brought you in.
The doctors said you'd be okay. A concussion. Mild hypothermia. Laceration to your temple. You were lucky, they said.
But Spencer didn't feel lucky.
He kept replaying the moment your lungs stutterd back to life in his arms, the way your head lolled before you gasped, the second where you'd stopped being a person and started to feel like a memory. He hadn't known terror like that. Not even close.
He reached out now, gently brushing a damp strand of hair from your cheek. His fingers hovered over your skin for a moment longer than they should've .He dropped his hand before he could think too hard about it.
“You scared the hell out of me,” he whispered, voice too low for anyone but you to hear. “You always run toward danger. You never stop to think if anyone would care.”
His throat tightened.
“Well, I would.”
There was a long silence.
Then,
A soft inhale. Shallow, but steady.
Your lashes twitched. Brows furrowed. You blinked slowly, eyes glassy and unfocused as the world came back to you in pieces. The sterile air. The beep of machines. The dull ache pulsing at your temple.
And then,
Spencer.
Sitting beside you, soaked to the bone in memory, but still here.
Your mouth moved dry. “Spence..?”
He leaned in immediately, eyes wide with relief. “Hey. Hey, you're okay. You're at the hospital. You're safe.”
You tried to sit up, winced, and sank back with a quiet groan. “What happened..?”
“You were run off the road. Into the river.” his voice dipped, rough at the edges. “We got you out. You.. you stopped breathing for a minute. But you came back.”
You stared at him, confused. “You were there?”
“I never left.” his voice broke slightly. “I couldn't.”
You were silent for a moment. And then, barely audible-
“You saved my life.”
He let out a breath, shaking his head slowly. “You don't need to thank me.”
“I do.” your hand shifted weekly beneath the blanket, reaching toward him.
He took it.
Your fingers were still cool, but they curled around his like they belonged there.
“I thought I was going to die in that car,” you whispered.
His grip tightened. “Not on my watch.”
And for a long time, neither of you spoke. The beeping filled the space between words that didn't need to be said yet, but hung there, quietly, waiting.
#spencer reid x reader#spencer reid#spencer reid x you#spencer reid fanfiction#criminal minds fanfiction#criminal minds#mgg#matthew gray gubler#fanfic#angst#spencer reid angst#vampiilure
357 notes
·
View notes
Text
till dawn || eyeless jack || part three

SMUT. MINORS DNI. 18+. TW: LOTS OF PLOT, being chased teehee scary, unrealistic demon sex bc be so honest w yourself that’s why you’re here, breeding kink, bondage/choking kink. there will be one more part, a finale to this lil series :’) i think for my next series for the creeps im gonna go with either jeff or masky, haven’t decided yet. ANYWAYS, enjoy!!
the finale to till dawn is here
You could feel your heart pounding in your chest, threatening to burst through your rib cage.
The sound of crunching leafs echoed behind you, one set of footsteps in particular on your heels. Eerie laughter filled your ears as you threw one foot in front of the other, desperate to get away.
You had decided to follow Jack once he left your house. It wasn’t a logical thing to do, knowing that from what Jack talked about other beings like him existed. You knew Jack was a one of one and so were the others he told you stories about. He promised to introduce you to them someday, but not today.
Curiosity got a hold of your better judgment, causing you to slowly trail behind him. Curiosity was about to kill the cat. You could feel your lungs burning, a whooshing sound flying past your ear. You gasped as a rusty axe had been thrown into the tree beside your head. It had nearly nipped you, your ear millimeters from the blade.
What you didn’t realize, was that the moment you walked into these predators territory, you’d become the prey.
Jack knew you had followed him. He was fine with you doing so. Up until now, he had assumed the Supernatural borders prevented any human from entering. As an animalistic growl escaped his throat, weaving through the trees, he realized he had never been more wrong.
Toby was close behind you, Jack could hear his mouth twitching with pride as he got closer to you. Your presence had alerted every creep within a five mile radius, none of them aware of who you were. It was Jacks job to stop them from getting to you, ignoring the loud drum of your heartbeat. Thankfully Jack was the fastest, his killing style driven by animalistic primal hunger. He was gaining distance on Toby, reaching one hand out and grabbing him by his hair.
You forced yourself to not look back, to not question the sudden silence of your purser. Typically you thought of yourself to be a decent runner, now realizing track in high school could’ve never prepared you for a situation like this. Once all you heard was silence, you allowed yourself to slow down. Panting, you leaned against the sharp forest bark of one of the trees. Everything around you looked the exact same, like a never ending loop.
It was official. You were lost.
The sound of rushing water intrigued you, your eyes darting in each direction to find the source. Despite the eerie feeling of being alone in such a dark forest, you felt like multiple sets of eyes were watching you. Stalking you. Hunting you. The moonlight dimly lit the forest floor, your feet carrying you in what you believed to be the direction of the river. You had been camping before, the sounds of bugs or owls having previously been a comfort.
But here, in this forest, there were neither of those things. You trudged towards the river, a large river bank coming into view. The water was harsh as it crashed against the rocks below it. Murkiness and darkness prevented you from seeing the bottom of the river, unaware of how deep it was. Or from seeing what creatures lurked below.
Jack was close to catching up with you, his focus on Jeff and Jane as they slowly closed in on you. Jane was nimble, using her small frame and agility to swing through the trees. As Jack watched them both close in on you, it occurred to him neither of them realized the other was present. If the situation wasn’t so dire of your safety he’d watch in amusement just to see what happened next. Jeff went for the kill first, Jacks body flying forward to stop him. But Jane had beat him to it.
The loud crashing sound behind you caused you to jump, instantly turning around. A man and woman, whom you could almost think to be siblings, were visibly fighting in front of you. “What the fuck Jane? Can you not see i’m doing something here?” The man growled. Unsettling crimson blood dripped down the carvings on the side of his face. His cheeks were mutilated beyond belief, his eyes nearly popping out of his skull.
Fight or flight was not crossing your mind, your body frozen in fear. “I found her long before you did dipshit,” Jane snarled. Knives occupied both of their hands, her unsettling, soulless black abyss for eyes glancing at you. “She’s a cute one, I can see why you wanted the kill. Sadly she’s mine Jeffrey, all mine,” She smirked. Jack went to intervene, the overwhelming sound of two more heartbeats stopping him. Shit, Masky and Hoody. Surely Slender had sent the proxies to check on the situation, Toby beating them due to his speed.
Jack felt conflicted, trying to rationalize what to do. If he intervened Jeff and Jane now, he would have to take both of them on as well as the proxies. His gaze landed on the two pale killers, both of them still bickering. But, if he managed to stop the proxies fast enough, he could come back and retrieve you. The proxies wouldn’t be hard to find, their heartbeats and smell practically giving Jack a map. He felt awful leaving you, the petrified look of horror written across your face as you watched the fight in front of you.
As the sound of the proxies grew closer, Jack turned around, chasing after the sound of pounding hearts.
“You always do this! I find a good kill and here comes Jane!” Jeff argued. Jane rolled her eyes. “It’s not my fault we have the same type,” She debated. Slowly you tried to back away, hoping they’d be so involved in their debate they’d forget about your presence. “You’re such a bitch, always copying me and my shit, find another hobby will ya?”Jeff spat harshly.You swallowed as you kept your eyes on them, trying to figure out if you could out run them.
Snap.
Both sets of eyes landed on you, your blood running cold. You could feel the hairs stand up on the back of your neck, everything in you screaming to run. Their eyes contained a certain unnatural hunger, the kind that would only be satisfied by watching you bleed. “You know, the more I think about it, maybe we can call it even just this once, since it’s a special occasion,” Jeff said softly, glancing at Jane. As his eyes moved you noticed that he didn’t blink, his never ending gaze shifting back and forth. His eye sockets were hollow, your mind struggling to make sense of his rancid appearance. He had no eyelids?
“Maybe we should, how often do humans stumble through our forest like this?” Jane replied, chuckling. The two had seemed to come to a decision, moving in unison. They seemed to be patiently waiting for a chase, waiting for you to run. As you turned your back you heard an animalistic growl, one that you could only assume came from one of the pale killers.
What you didn’t realize, was that Jack was ready to rip Jeff apart limb by limb. The two pale killers were blindsided, Jane gasping as she fell to the ground. The demon had Jeff pinned to the ground, snarling above him. It was forbidden to kill another creep, especially on Slender’s grounds. “EJ what-” Jeff began babbling, the animalistic snarl from Jacks throat silencing him. Jane scoffed as she stood up, brushing off her dress.
“If you wanted the kill yourself there’s no sense in being so dramatic, just say so,” She quipped. Jacks gaze stranded from Jeff, settling on Jane as she fully regained her confidence. Jack was never one to hurt a lady, so instead he came up with a different solution. Standing up fully he picked her up, harshly gripping her arms as he tossed her into the nearby river.
You could hear her screams of despair as you continued running into the forest. Whipping your head around to look behind you, for the first time since you had entered the land of terror no one was following you. Your legs burned, your mind spinning. You felt dizzy, your vision beginning to be clouded with stars. The only thing you had on you was your phone. Shakily you took it out of your pocket, thumbing in the password.
Who would you even call? Jack didn’t have a phone, you had no service. You sighed, blankly scrolling between the apps you couldn’t use. Your eyes widened as your screen went black. Did it die? On seventy nine percent? You tilted your head to the side as a camera came into focus, a young blonde man with black and red eyes staring back at you. “Oh wow, hello there gorgeous! EJ sure does know how to pick em huh?” He asked. His pointy ears twitched. That was the final straw. You tossed your phone onto the ground, stomping on it with your boot. The glass shattered, your once prized possession now garbage.
Tilting your head back you let out a pained sigh. How long was it before these maniacs caught up with you? Looking around you found a decent stick. In comparison to the knives and axes the others were equipped with it would be nothing, but you’d go down fighting.
Snap.
You quickly turned around, gripping your stick tightly. Wincing as the wood cut the palm of your hand, you braced yourself. Swallowing, you tried to find the noises creator. A gush of wind breezed past you from a different direction, your eyes darting to your left. What if they were all circling you? Like a pack of wolves? What if this was in the end?
In the dull moonlight you were able to make out a tall figure, your fight or flight kicking in. Hastily you rose your stick, slamming it down on the shadow in front of you. A large hand grabbed your stick, snapping it half, before sending you on the ground. Your collision with the ground knocked the air out of your lungs, your back hitting the dirt below. Instinctively you began thrashing, a strong set of hands pinning you down.
“Hey, hey, HEY, calm down! Look at me!” Jacks voice was firm, filled with worry. Were you going insane? Seeing Jeff was definitely enough to make someone do so. He didn’t want you to end up like Nina. You blinked a few times, Jacks mask long discarded. Blood dripped down his nose, staining his upper lip. A gash sliced across his cheek, the same crimson paint dripping down his gray skin. “Jack?” You panted.
Your heart was beating a mile a minute, Jacks attention temporarily preoccupied as you attempted to catch your breath. His mind returned to normal the moment you began rambling.
“Holy shit there was a guy with an axe who sounded literally like a ticking time bomb and then this like mutilated albino couple wanted to kill me as well and then this dwarf-”
Jack gripped your shoulders, shaking you.
“Why would you come here? Do you understand how difficult it is for me to protect you here?” He panted. His body was becoming tired. Sprinting across Slender forest and fighting off all of his friends was exhausting, even for him. Your eyes were widened as his hands gripped you harder unintentionally. “You single handedly alerted every monster in the goddamn area that there was fresh meat on the market,” Jack continued. You winced in pain as his grip tightened.
“Jack, you’re hurting me.”
His eye sockets widened, the demon releasing you. He stayed on top of you, the two of you blankly staring at one another. “You’re bleeding,” Jack commented. The deeper he inhaled the stronger the scent became, electric cravings crawling across his skin. You didn’t have a chance to tell him where it was coming from, the demon grabbing your wrist to examine your palm.
The blood wasn’t bad, a small stream dripping down the precious little lines of your palm. To think that when he wanted to, he could hunt down whoever he wanted. That truly, you belonged to him. No matter the danger that he created or that others around you did, he was able to restrain himself. To protect you. The scent of your blood made his stomach flip, his body flooding with desire. Your legs shifted under him, your body becoming warmer as he touched you.
Your voice was low, a desperate whisper, “Jack…”
The worry that clouded Jacks mind was washed away by the sound of your soft voice. The only sound that could calm him down and make him feel at ease,was the enchanting sound of you saying his name. You yanked his hoodie, desperately bringing his lips to yours. Your blood soaked into the clothing, a groan escaping Jacks throat.
The delicious sound of your heart beginning to race flooded his ears, his hips slowly grinding on yours. You whimpered, pawing at his hoodie to bring him impossibly closer. Your lips melted against his, submitting to his rougher desperate kisses. His large hands slithered up your shirt, squeezing and kneading at your breast. You groaned into his mouth, the demon trying to be careful as to not nip you with his teeth.
“Here?” You panted, whimpering as he pushed up your bra. Jack kissed down the side of your neck gently, the throbbing pulse of your throat almost too much for him to handle. “I’ll make it quick love, I just need to let everyone in a five mile radius know who you belong to,” Jack huffed, bringing your right nipple into his mouth. You felt his multiple tongues attack the bud, his name spilling from your lips. With a pop he released your nipple, kissing down your stomach.
“How long until they come looking for us again?” You asked nervously, Jacks nimble fingers quickly unbuttoning and sliding down your jeans. He looked up at the sky. “I’d say till dawn,” He guessed. You giggled as he repositioned himself between your legs, your jeans shoved down to your ankles. “Guess you better hurry up then,” You say. His slender fingers began teasingly rubbing your slick through your panties, the thin cloth drenched.
“Let’s make sure you can take me first you troublemaker,” Jack teased, grinning at the sound of you moaning for him. He slid two of his slender fingers in front of you, your walls squeezing him as he curled them inside of you. Desperately you bucked your hips upwards, throwing your head back as he hit your g spot. “All that running made you awfully sensitive, huh?” Jack joked, relishing in the sight of you grabbing at his wrist, the one that was connected to the hand inside of you.
“Jack, fuck, please,” You whined. Jacks eye sockets widened.
He hesitated, “Please what?”
Your cheeks flushed red with embarrassment, the humiliation of him making you say what you needed settling in. “Please fuck me,” You pleaded, your voice cracking. Jacks hands were quick to work on his belt, the sound of the metal clinking sending a chill down your spine. You bit your lip as you eyed the leather, Jack noticing. A devilish sadistic thought entered his mind, his lips curling upwards.
“You want to try something new?” Jack asked, slightly guessing. You nodded, meeting his gaze. You vocalized a plea, Jack quick to flip you over. Your bare knees hit the dirt of the forest, the smell of the earth flooding your nostrils. Instinctively you went to arch your back, Jack stopping you by yanking you back by your shirt. “You might want to stay on all fours,” He purred in your ear, kissing your earlobe. He wrapped his belt around your neck, holding the metal buckle in his hand.
It cut off a decent portion of your airway, a groan escaping your lips at the sensation of being choked. “You’re into bondage now? Such a whore for me,” Jack chuckled darkly, stroking his cock. He rubbed his tip up and down your folds, trying to lubricate his cock as best as possible. Despite how drenched you got every time he was around, you always struggled to accommodate his size. And every single time it sent Jack into a frenzy, determination to make it fit ensuing.
He glanced up at the sky, the sun rising very faintly in the distance. “We don’t have very long, be a good girl and take it,” Jack snarled, shoving himself inside of you. You felt your body being split in two, his spare hand snaking down to your clit. He rubbed circles around the sensitive bud, trying to relax your body as much as possible. “You wanna be good for me don’t you slut? Relax for me,” He huffed, bottoming out inside of you. You were tense, grabbing handfuls of leafs and dirt.
He could feel you spasm around him as you struggled to accommodate to his size, whimpering as your vision became hazy. After what felt like forever to Jack, he could feel your body relax. “There we go, such a good girl for me aren’t you?” Jack purred in satisfaction. He pulled back his hips, taking himself out of you. He then brought himself back inside, pleased to hear the sound of you letting out a choked out moan. He continued to swirl around your clit, his thrust becoming faster.
You felt light headed as the leather pressed against your throat, choking on the sinful noises that echoed through out the forest. “Fuck, if I had known letting you into Slender’s forest would’ve gotten you so hot and bothered, I would’ve done it a long time ago,” Jack panted, his cock abusing your g spot. You were seeing stars, each thrust sending you into orbit. “Taking me so well, just like a good mate should,” He growled. His grip on the belt tightened, your airway temporarily cut off.
His thrust became more animalistic, the gears in his head turning. The savage and primal instinct washed over him, his coherent thoughts now vanished. Instead they were replaced with one thought and one thought only:
Breed breed breed.
“Fuck, you’re going to look so pretty with my cum leaking from that pretty cunt of yours,” Jack snarled. He released the belt, the leather flying forward and onto the ground. His large hands instead grabbed your waist, squeezing the flesh so harshly you swore you’d have bruise in the shape of his fingers. “Jack, fucking shit,” You moaned, his thrust merciless and brutal. He showed no sign of stopping, no sign of slowing. You could feel a familiar knot form in your stomach, one that Jack had made more times than you could count.
“I can feel you getting close for me. Need you to cum for me, need to fill you,” Jack huffed, holding back his own orgasm. Your back arched as you fell further forward, the side of your face pressed against the dirt. The sun was beginning to rise, your thighs trembling. “Jack I-,” You mewled, your orgasm washing over you like a ton of bricks. Jack couldn’t resist himself, fucking you through your orgasm. His hips began to stutter, the demon screwing his eyes shut as he came deep inside of you.
Dazed, you continued to hold your ass up in the air as Jack pulled out of you. The sight of his cum seeping out of your cunt was divine. With two fingers he scooped up the dripping cum, pushing it back inside of you, ignoring your whimpers. Gently he guided you onto his lap, wiping the dirt off of your face with his thumb. The sun began rising, the beams of sunlight dancing in between the trees as they hit the forest floor.
Jack could hear your heart rate begin to turn to normal as you inhaled deeper breaths. “Cmon, gotta get you dressed before the others get back from their hunt,” Jack murmured encouraging, readjusting your bra to fit you correctly. Still in a daze, you leaned your head against Jacks shoulder, allowing him to redress you. A small breeze blew past the two of you, the faint smell of blood hitting Jacks nose. He was sure the other creeps would be back any moment now, their kills fresh blood still staining their skin and clothes.
Quickly he dressed himself, scooping you into his arms. You had never been picked up bridal style before, instinctively you nuzzled your head against Jacks chest. Making sure you both had everything, Jack quickly looked around, noticing your shattered phone. He began walking towards the mansion, taking note you were beginning to drift off.
“Yeah, I think it’s time you met Ben. He owes you a new phone anyways.”
#eyeless jack x y/n#eyeless jack x you#eyeless jack smut#eyeless jack x reader#jeff the killer x eyeless jack#eyeless jack x jeff the killer#eyeless jack#creepypasta x y/n#creepypasta x female reader#creepypasta x you#creepypasta lemon#creepypasta x reader#creepypasta smut#creepypasta
1K notes
·
View notes