#clothes tutorial
Explore tagged Tumblr posts
Visit Tumblr Blog
Explore Tumblr blogs with no restrictions, modern design and the best experience.
Last Seen Tumblr Blogs


Fun Fact
In 2020, 27% of US Tumblr users had an annual household income of over $100,000.
Text


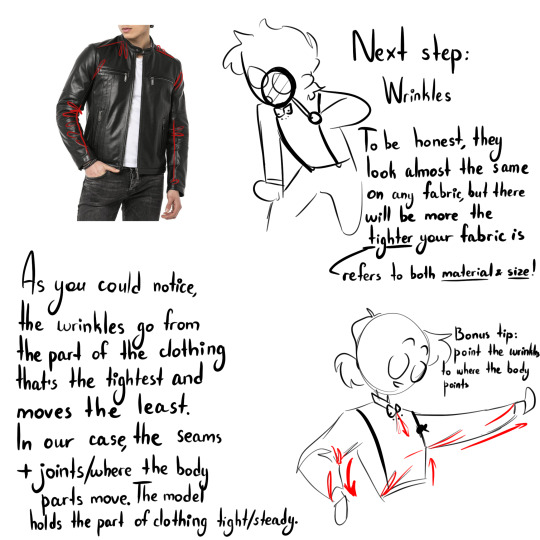

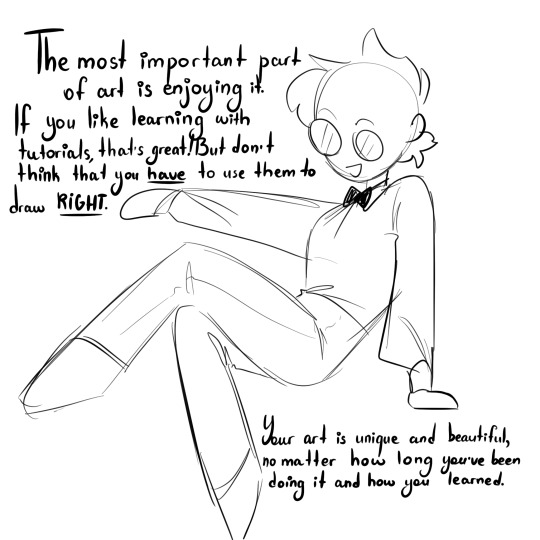

You asked and I delivered!
EDIT: Forgot to mention - if you’re drawing in color with lighting, the lighting will be different depending on fabric, so look it up if you want (or do whatever you want to be honest, who the hell cares, it’s not a competition. I don’t even follow this rule, I’m saying as a fact XD)
171 notes
·
View notes
Text
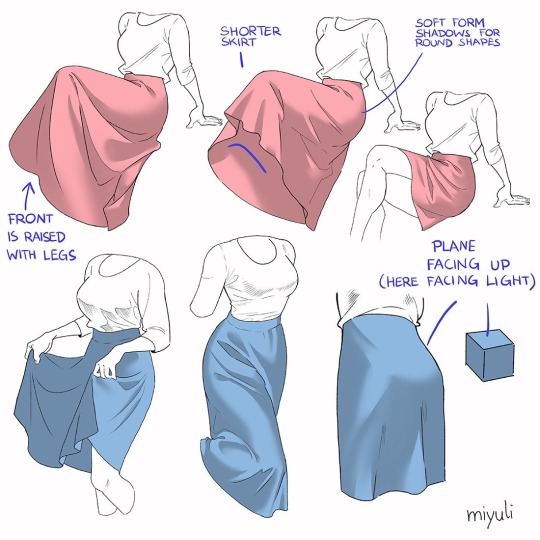
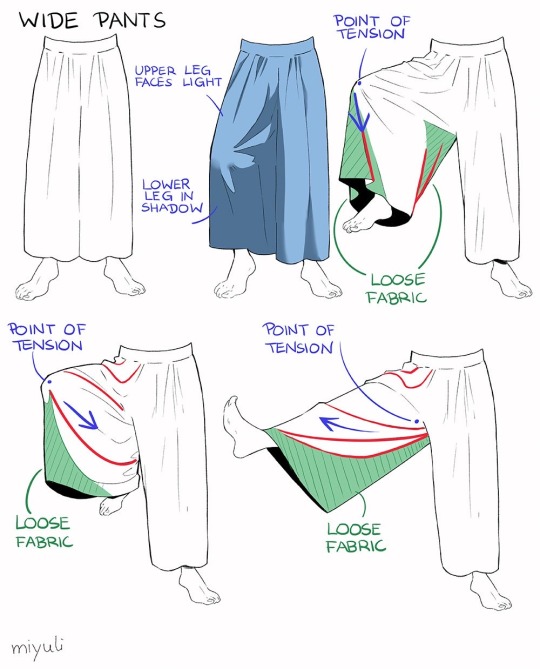
“Notes on skirts and pants”
Source: miyuli on twitter
#art tutorial#digital art#art reference#tutorial#art tips#drawing tips#drawing clothes#drawing pants#drawing skirts#drawing cloth#clothes#pants#skirts#clothing folds#clothing tutorial
63K notes
·
View notes
Text
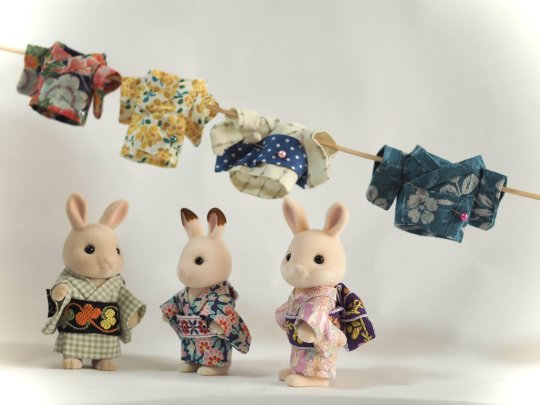
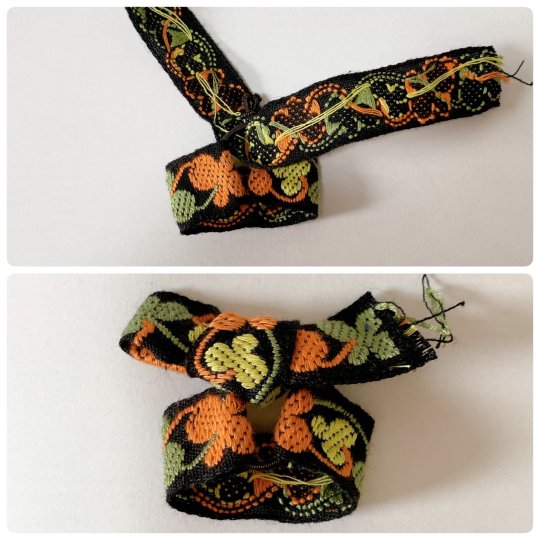
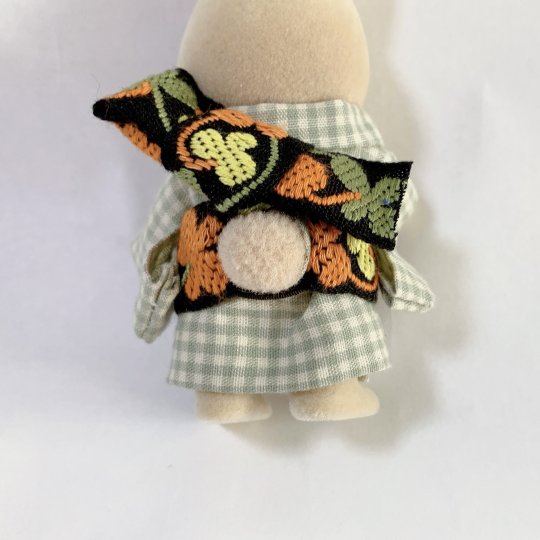
To complete past diy kimono dressing for Sylvanians Families/Calico Critters I shared before (see 1 / 2), here is a new step by step by @haluchobin to create cute easy to put on obi :
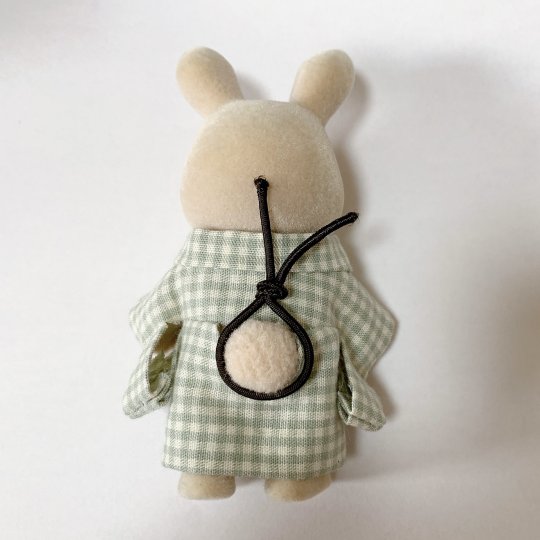
Tie a thin elastic into a loose loop around the tail
Slip both ends of a ribbon through the loop and sew into place
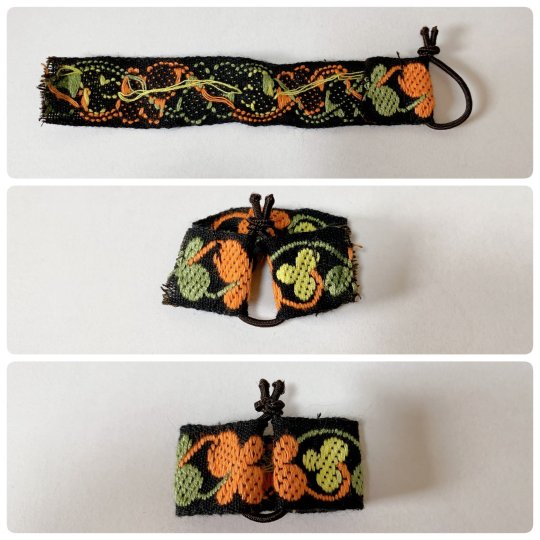
Tie another ribbon around the elastic covering the knot. Style it into a bow, you can try to mimic real musubi if you want
Put on the finished obi and enjoy!
#japan#art#craft#sylvanian families#doll#figurine#doll clothes#sylvanian family clothes#diy#step by step#tutorial#kimono#obi#着物#帯
1K notes
·
View notes
Text
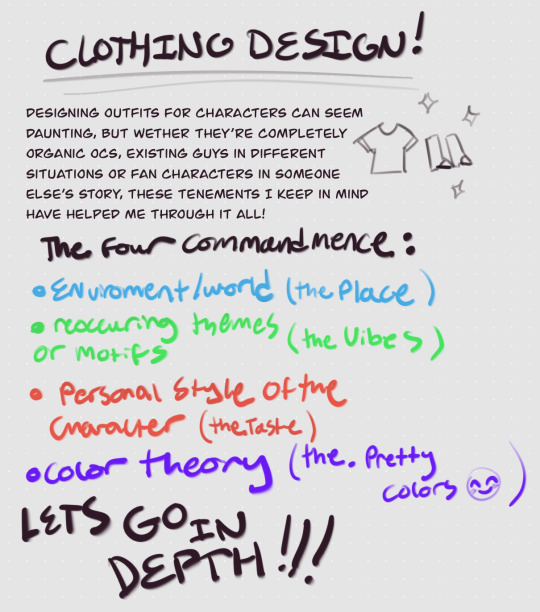
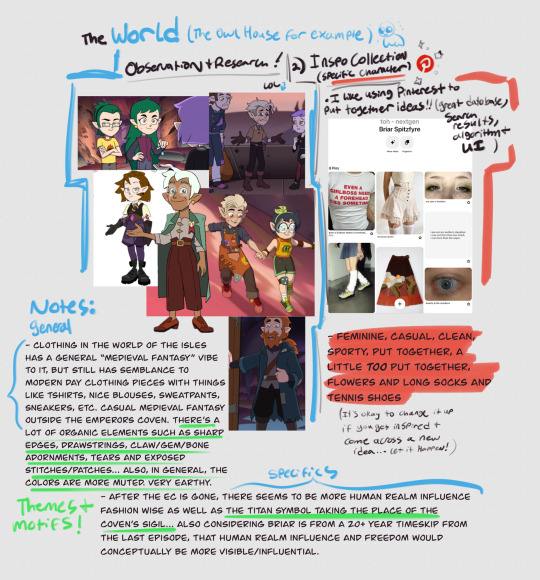

I’m really not sure why this took me a week but here’s a little tutorial on how I design clothes for characters ??? I hope it’s somewhat comprehensive, making tutorials can be hard for me because I have so much to say LOL
While I used a preexisting show in this example, this method can really be applied to any oc universe or story as long as you establish the basics :]
#my art#art tutorial#character design#clothing design#the owl house#toh#color theory#toh nextgen#Briar Spitzfyre#brischa
1K notes
·
View notes
Text
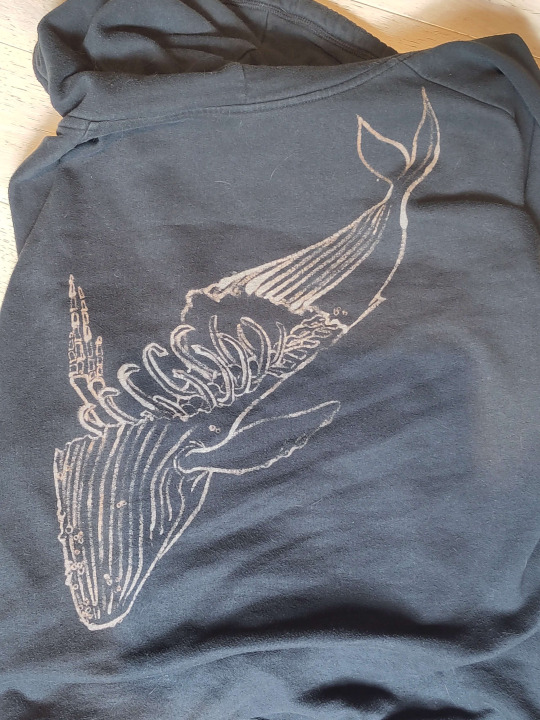
cheapskate bleach tutorial

Sticking it under a readmore but this is how i make my shirts etc for like a fiver's worth of materials. I am far from being an expert btw im just playing with chemicals. also probably do this in a ventilated area or something
You will need:
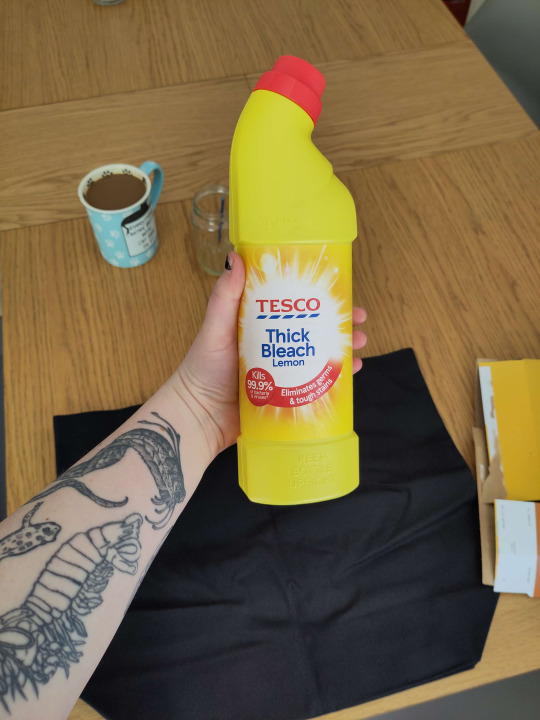
Bleach (I use thick toilet bleach it's like 80p)
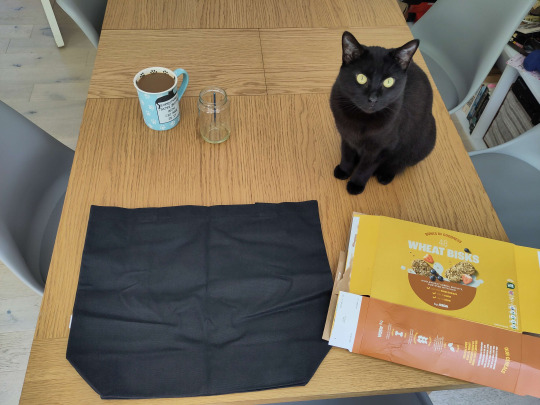
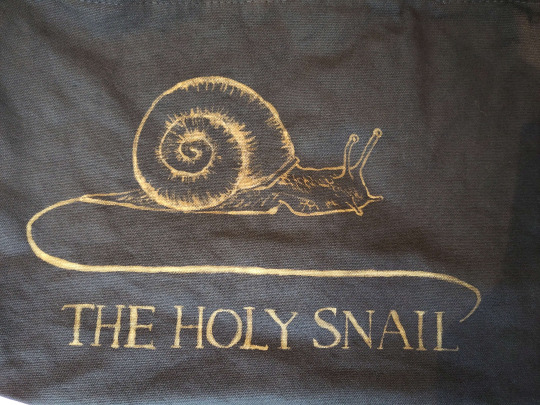
The thing you want to bleach onto (In this case, a tote bag for a friend. usually i thrift old black shirts.) You should do a patch test before any real bleaching -- dab a tiny bit on the inside of a hem somewhere before you commit. I don't show that below because i forgot to do it but you should. You should ALSO iron the thing before you bleach it. So it's flat. Do as I say not as I do etc.
Something to put inside / between your garment and the table (Asda brand weetabix box babyyy)
Paintbrush (Mine is from a multipack from Poundland. I also accidentally left it in bleach last time and it kind of dissolved so I had to cut off the most egregious of the stray bristles.)
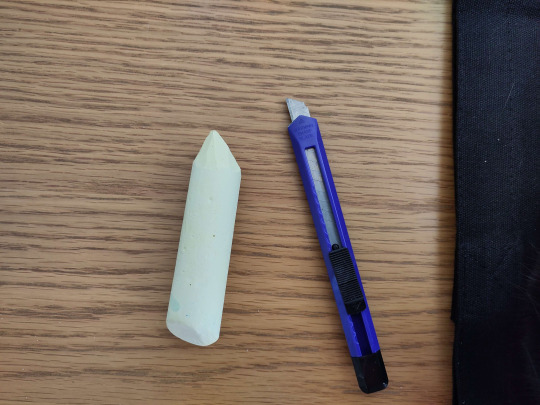
Chalk (For snacking) (I'm joking please don't eat the chalk) (I only have big pavement chalk, again, from Poundland, but you can get a good point with a craft knife)
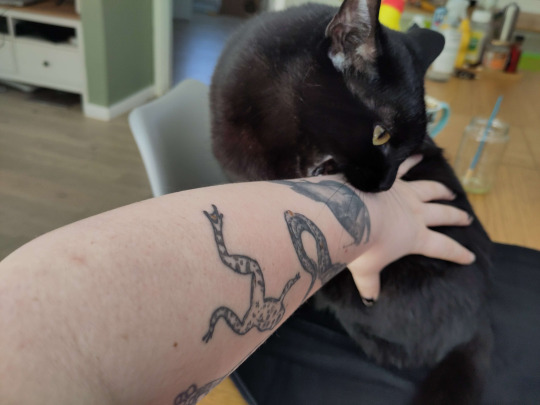
Step one: move the cat
Step two: insert cereal box into / behind the thing you are bleaching.
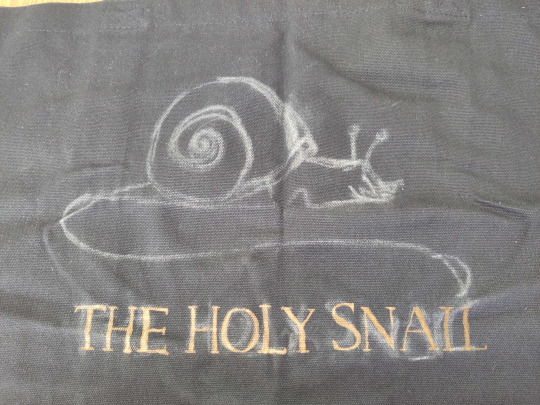
Step three: chalk on your design. this is the logo of a wine brand i have never tried but i like the snail. It can be super rough or very precise, whichever helps you know where to put your lines.
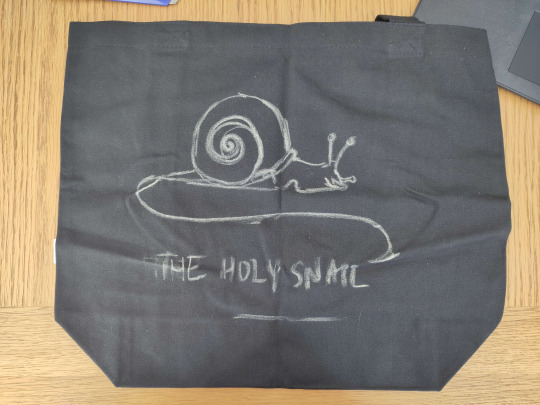
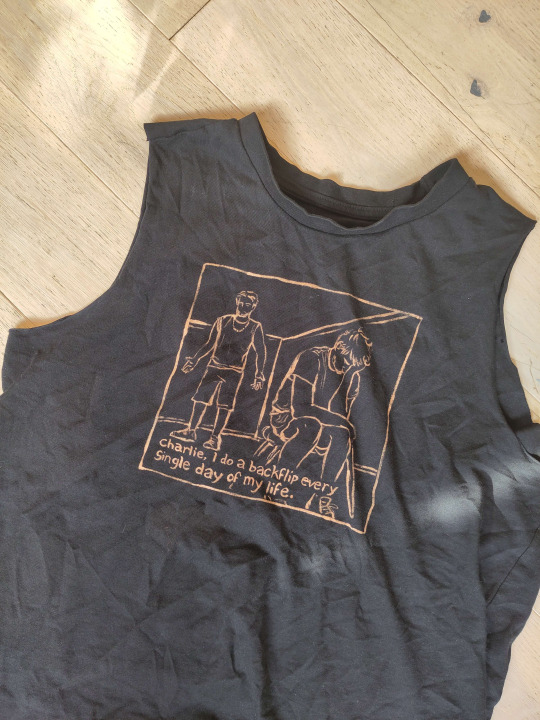
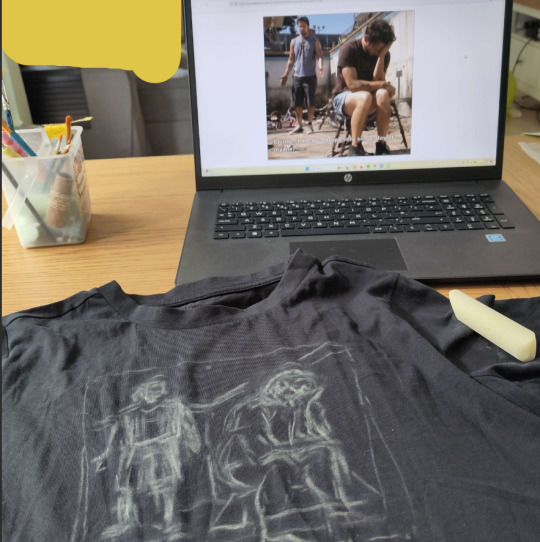
As you can tell it's easy to move stuff and redo it by just smudging the chalk away, or, worst case scenario, giving it a wash. Though that sucks if you're impatient like me bc you do NOT want to bleach this while it's wet. Once you're happy with your design, smack it around a bunch to take off most of the chalk, so you wind up with a vague outline. I didn't get a pic of this stage but here's what the iasip one looked like:
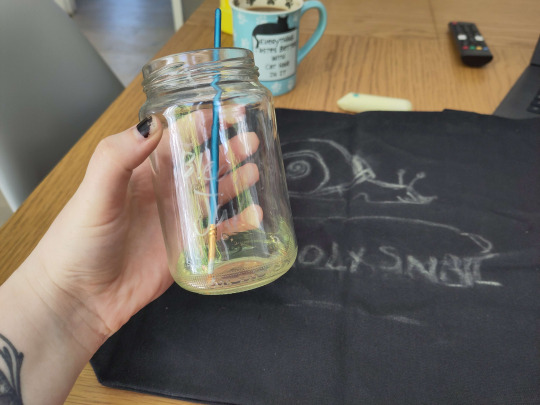
Step four: Acquire your bleach and put it in the special bleach jar your hosuemates labelled so you would stop drinking normal water out of it. Accept that Nyx hates you for not letting her drink it.

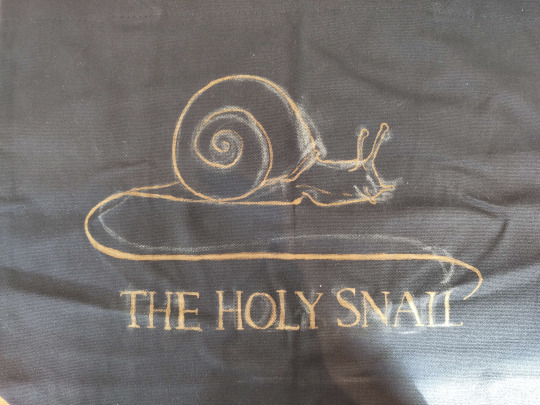
Step five: Go for it man. The bleach is kinda goopy so don't expect it to come out like paint, but it does mean that you can control the line crispness and width quite easily depending on how hard you press the brush down. I find it really helps for stuff like serif fonts.
You can dilute your bleach with water, which can help it get into all the little crevices esp if your fabric is a little bumpy, but do another small patch test before committing to anything on the main piece, because some fabrics absolutely suck up water and your lovely crispy lines will blow out like an old tattoo. don't do it. Unless you want that look, in which case get silly with it
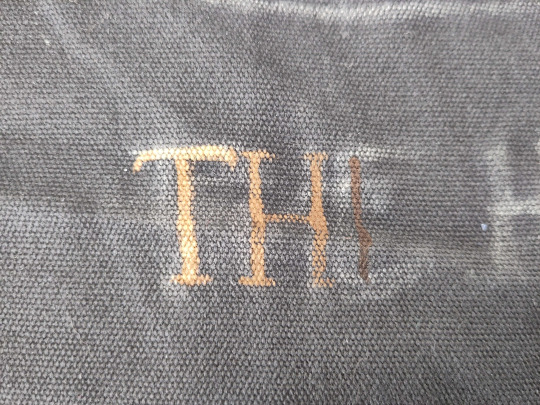
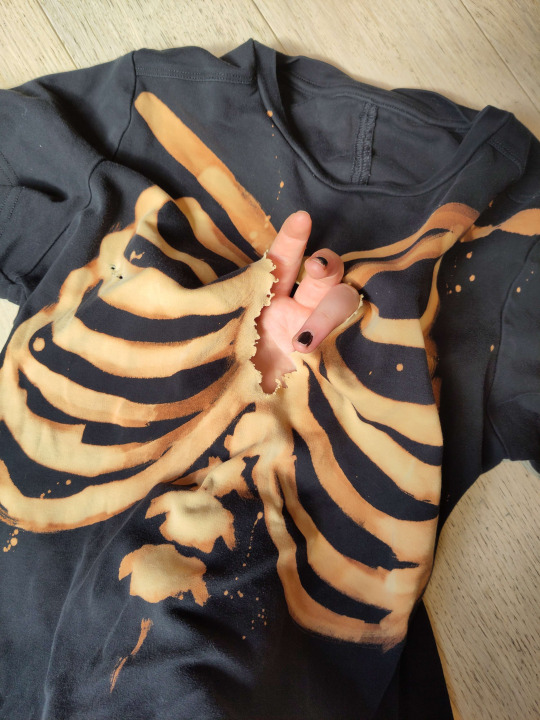
The other weird thing abt it is obviously that you can't see what you painted right away, it takes a couple seconds to show up, so it's a pretty slow process. The fabric will first go darker where you painted, then lighten from orange to a pale yellow over about 30 seconds. DON'T go "this bleach aint shit" and paint over it to make it lighten faster -- overbleaching it can weaken the fabric and make it tear.
Tragic.
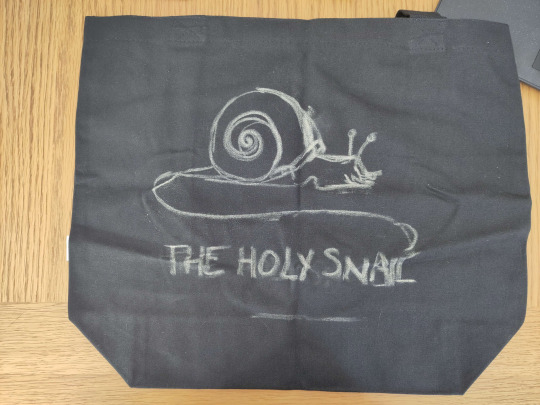
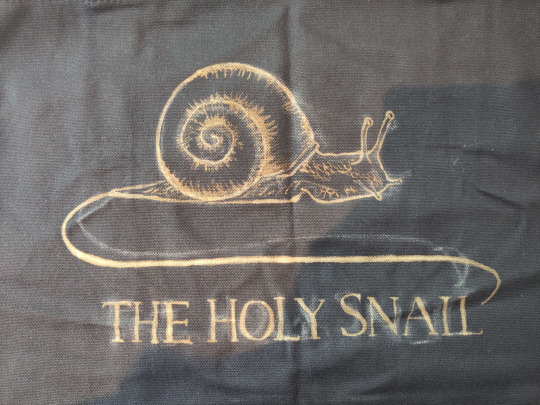
Here are some progress shots of the snail! When you're finished, you should wait for it to develop properly, but it depends how light you want it to be. I let the lines sit for a while before doing the details, and then washed it a bit prematurely so they'll stay a little darker. For nice pale yellow you want to wait around an hour.
Step six: drown her
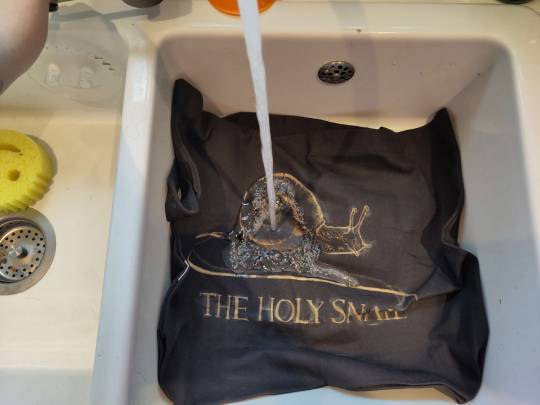

Nice cold water, wash out all the remaining bleach and chalk. I chucked it in the wash for ten minutes because it's a weird shape and size to wash in the sink and I'm a lazy bastard. but handwashing works just as well.
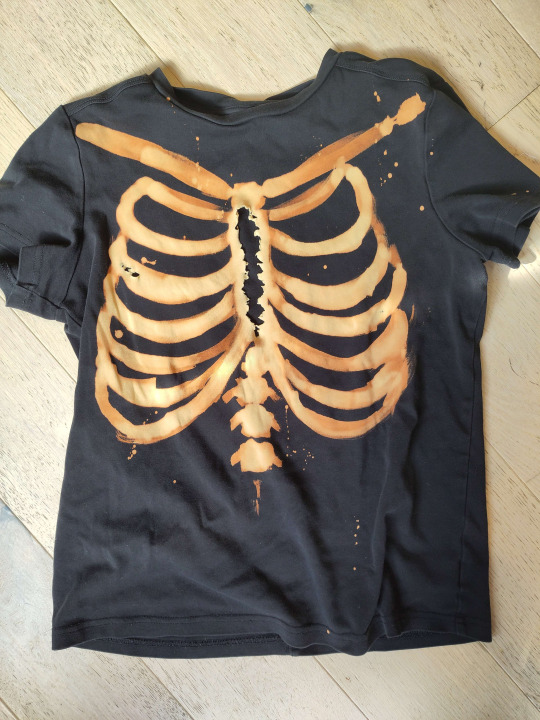
Step seven: revel in your new bootleg merch. You made that. You did that. thrive. go forth and make weird shit.
#bleach#art tutorial#clothes#diy#i've never done a tutorial before so hopefully this is coherent lol#img descriptions are all in alt text#it got dark while i was making this so pls excuse the varying image quality loll
211 notes
·
View notes
Text


The furry jacket tutorial
Hello to make this jacket you’ll need scissors, a sewing machine, sewing needle, thread, a zipper, drawstring elastic measuring tape, a marker, paper, and three fabrics(I picked two cottons and a kinky fabric for the fur but feel free to use any kind)

I’ll be referring to my fabrics as 1, 2, and 3


We’ll start by drawing and cutting out our pattern, pattern piece one is 3.5 inches wide and 3 inches tall, piece two is 7 inches wide and 3 inches tall, and piece 3 is is 14 inches wide and in the middle at 7 inches it’s 6 inches tall

The sizes were picked by measuring my adult furby(model) Buck so feel free to change it for different sized furbies

Put all there pieces on there fabric and cut you’ll need 2 cuts of pattern piece one from fabrics one, two and three, you’ll need one cut of pattern piece two from fabrics one and two, lastly you’ll need 2 cuts of pattern piece three from fabric 3 DON’T FORGET SEAM ALLOWANCE IT WILL FUCK YOU OVER (🫶🏾I did around 1 inch of seam allowance)

Layer fabric from pattern piece one in the order of one, two, three, just like the picture it’s important( also if it’s heard to tell fabrics one and two have their good sides facing each other)

Then sew all pieces like this
Ok and that’s it’s for step one I’ll make another post for what’s nexts
210 notes
·
View notes
Note
Patch making tutorials?
and here i am once again, with a patch making tutorial
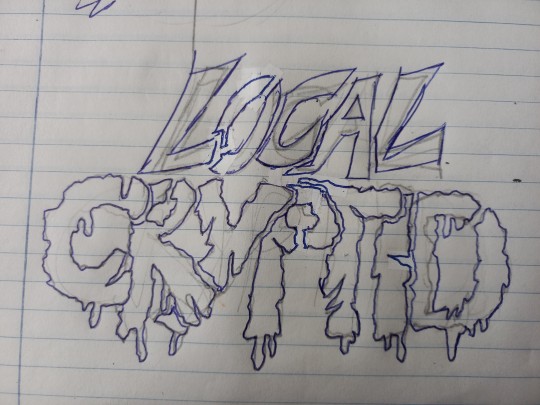
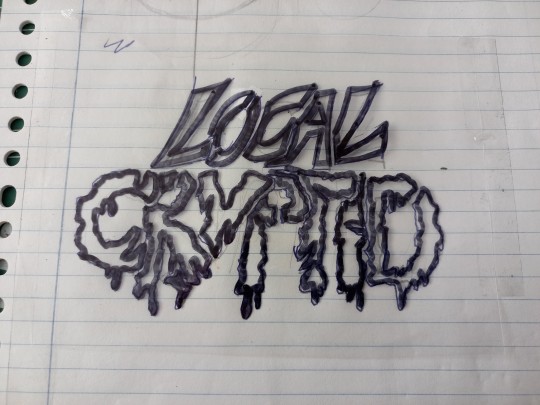
how to make stenciled patches:
i'll post a part two in the future which will cover freehanding and stamping ur patches
-
first some general info that might be useful:
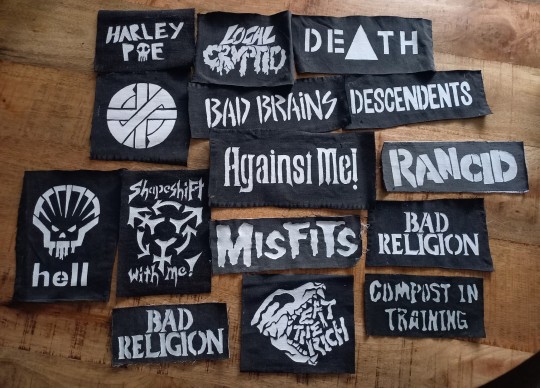
i get my patch design inspo from pinterest, etsy, and tumblr. if sell your patches make sure you arent ripping off another artists patch design when using etsy for inspo. anarchostencilism also has tons of stencils both on deviantart and reddit which are free to use.
i use acrylic paint for my patches, but if you can afford it id advise fabric paint. to seal paint into the fabric iron the patches, it helps em last longer. some acrylic paint survives very well in the washing machine, but wash your stuff by hand the first time to see how well it holds up.
if you make your patches multiple colors, dont first make the whole patch one color and then paint over it with the other colors. if the paint starts cracking the base color will show through. (if you like that however then dont mind this)
i paint my patches on jean fabric, cause it makes the patches sturdy yet flexible. but shirt fabric or canvas both work very well too. anything except really plasticy/slippery or textured fabric can be used
i pin my patches down with pins onto multiple layers of taped together cartboard, to prevent the fabric from moving around and distorting the print
-
there's two ways in which i make my stencils
1. with paper covered in tape
2. with the plastic folder you put in your binders
-
option 1:
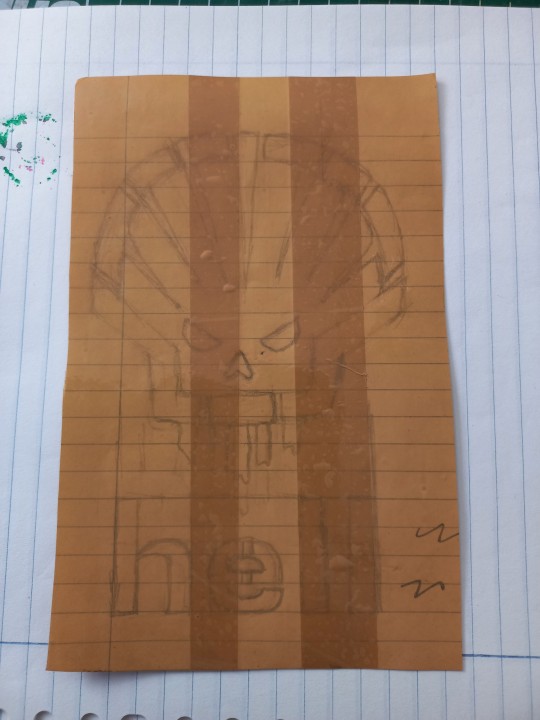
draw out your design onto some paper, make sure there arent any "loose" parts in the design that will get lost when cutting out the stencil

cover the paper in tape front and back, make sure you can still see your design through the tape
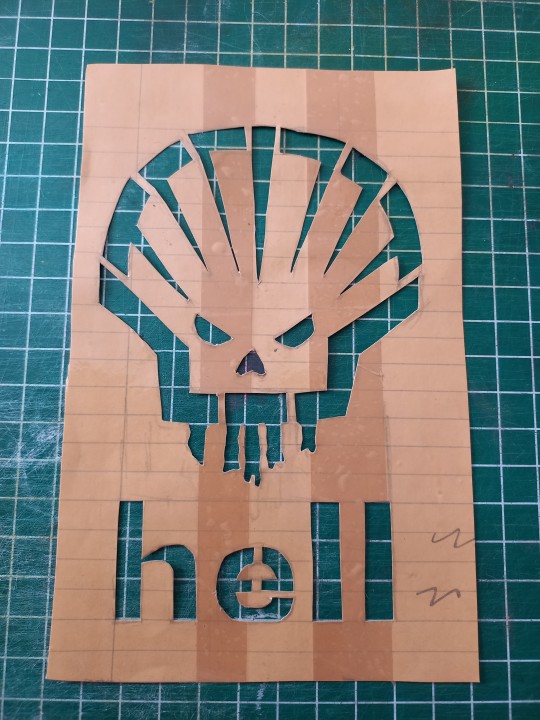
cut out your design, i use scissors and an exacto knife
-
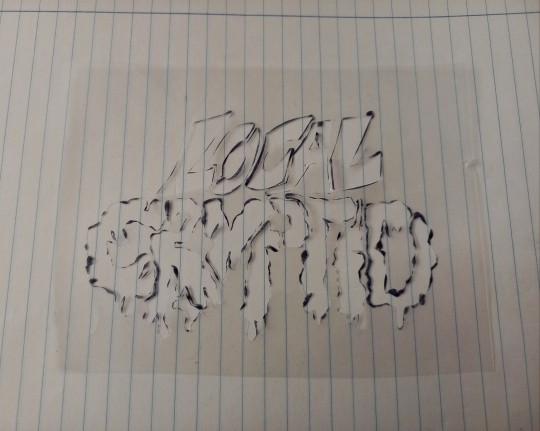
option 2:
draw out your design (you can also draw the design directly onto the plastic folder)
cut a piece of plastic out of the folder big enough to cover your drawing and tape it down.
trace the design onto the plastic with pen or marker (any mistakes can be wiped out)
cut out your stencil
-
continuation from both option 1 and 2
after finishing your stencil you can pin them down on some fabric
dap on your paint with the point of a big brush or a sponge, depending on the paint it'll take 2-3 layers.
make sure your previous layer dried completely before adding the next one

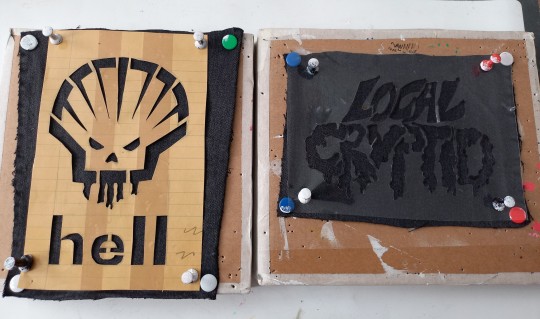
after the paint has fully dried you can carefully take off your stencil.
!!dont unpin the patch before it fully dried, or the drying paint may cause the fabric to warp!!

thats it, questions are always welcome, now go and make stuff!!
#punk diy#diy fashion#punk#queer punk#diy punk#punk clothes#punk style#punk patches#patches#tutorial#my stuff
2K notes
·
View notes
Text


Reversible Knot Mesh Top, a free crochet pattern and video tutorial designed by Marina Russo on Ravelry.
"The top has a unique reversible design, giving you the flexibility to switch up your look. You’ll love the texture, the breathability, and how comfortable it feels to wear!"
#crochet#full pattern#crochet pattern#free crochet pattern#fiber art#fiber crafts#mesh top#tops#sleeveless#clothing#modular#video tutorial
103 notes
·
View notes
Text
here's some punk diy tips and ideas
[other than crusty pants and battle jacket, although we still love those greatly.]
why should you diy, when you can just find decorated items everywhere, you can ask. what if you are clumsy at painting or anything?
firstly, good questions. we diy so we don't give credit to the big companies who rule the world. we diy to get more independent from the system we dislike. we diy so to save money. to express uniqueness, recognize eachother and be recognized. and especially to have fun and feel cool. diy is not only about clothing, but anything you can set your mind on. of course, one cannot make EVERYTHING for themselves, there isn't enough time and energy. but making at least small steps are already a statement and more than nothing. also, helping small artists by buying their products is also pretty punk.
that being said, i provide you with some tips of mine, all gained from experience:
anything you drew/painted on, you will WANT TO protect. acrylic paint/markers + acrylic paint varnish/transparent nail polish/textile medium are your best friends. read after anything that's new to you.
i highly recommend working with old clothing or thrift shop finds when it comes to textiles, as it is environmentally friendly and you will stay in budget. Anyways, always make sure that the material you use isn't gonna be problematic. for example, if you want to do some patchwork, the material shouldn't decay easily (if it does, it will come off so quickly.). if you want to paint on it, it shouldn't be rugged.
you can not only draw/paint on your canvas shoes, but can also sew, embroidery (just make sure to use a thimble, plus floss instead of thread could make your work more durable), and add beads and trinkets to your shoelaces. in the case of shoes, never use glue (neither hot nor instant glue) – it will come off quickly. for some inspiration, i'll show you my shoes!
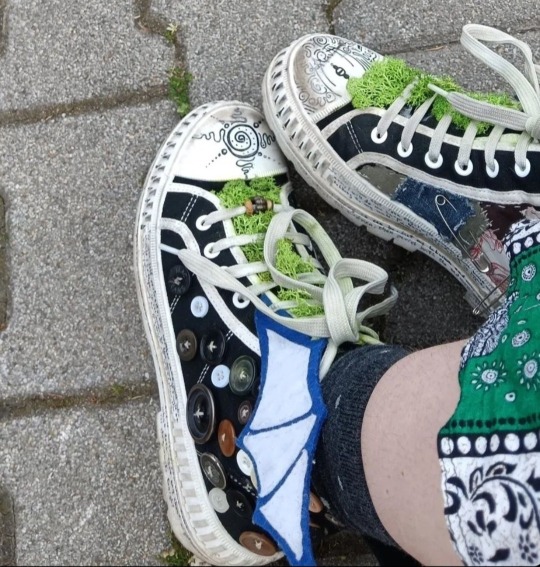
(the fake moss is literally unstoppable from falling off or getting dirty. risky idea.)
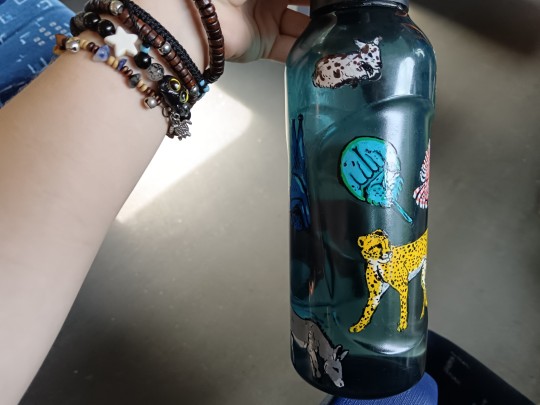
it's good to carry around water and food!! you don't even have to pay for decorative water bottles and food boxes, as you can draw on glass and plastic just fine with acrylic markers. just don't forget to paint transparent nail polish all over your drawing. in at least two layers. don't be lazy or laid-back. even posca comes off while washing the dishes. and you WANT TO save your reference pictures/final designs, as the case of emergency is likely. but after all, my water bottle is exactly fine after six months, with no accuring problem.
if your current best option to get stickers from is aliexpress or overpriced decor stores, search for local artists and shops on instagram and tiktok, as it may be their most efficent way of getting you to know them. if it seems like you have no chance, you may can still find a print shop with the option of printing on self-adhesive sheets (at least in hungary, those are pretty cheap). and if you want drawings to print out as stickers, you may use your own or –ONLY IF YOU GET PERMISSION– other artist's work. not only good for decorations for like, headphones, but for vandalism too. WAIT WAIT who said that. who said it. not me. no never
(in case that's also impossible, you can create stickers by printing out/drawing a picture, cover it up in transparent adhesive tape, and then put some two-sided adhesive tape on the white side of the pic. it won't be that durable, but it functions.)
if you want to bleach-paint clothing, get some plastic brushes!! any other brush dissolves. draw your design first with chalk!! never forget to put cardboard inside the clothing, and to wash the finished work in a washing machine before you'd put it on. prepare to be patient with the process. and it's not dangerous to touch 5%-9% household bleach, just wash your hands soon after.
if you want your crusty pants to last veryyy long, wax them. look up on youtube jeans waxing.
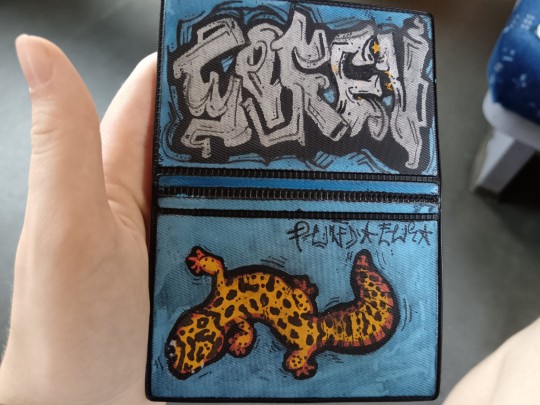
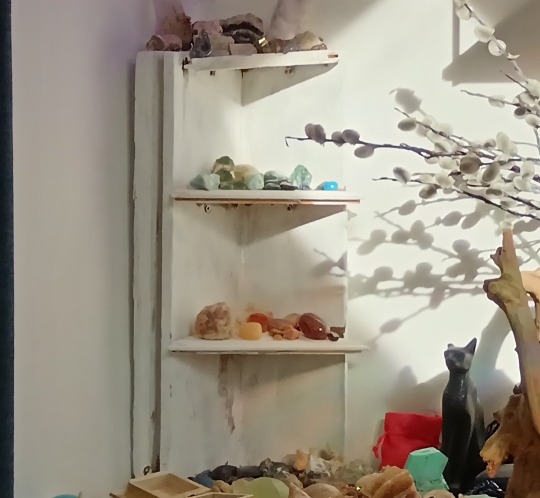
some more things i made for myself so to give you some inspiration: totebag with pockets, a small crystal holder cabinet, badges, and i decorated some t-shirts, button-ups, an id card case, phonecase, laptop.
theoretically speaking, there is nothing that an individual would be unable to learn how to make, when it comes to diy. you can't imagine how easy it is to bake bread at home. consuming-focused media makes people believe that it's hard to make anything. of course, everyone has to decide about their own priorities, i don't want to convince or change anyone in here. and if you have any questions, send an ask!! i hope i had been helpful.
#punk diy#tips#tutorial#clothes painting#do it yourself#bleaching#alternative clothing#soren's hoard of words#i hope you'll have fun with this#stay safe and drink water
218 notes
·
View notes
Text
Nucrest Cocoa Hoodie V2 for teenagers
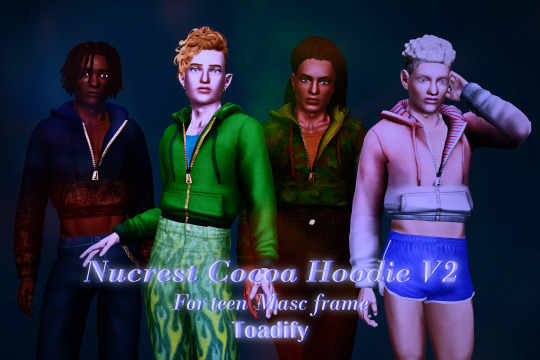
The @nucrests cocoa hoodie version 2 for teenagers, previously made for adults which was recently updated.
It doesn't have any of the original swatches because I made the original as a sort-of collab with @geminipixels , who did the TS4 presets while I did a castable version, and to give it presets I would need to reconvert it from scratch. Though I do have ideas - I would make them hue-recolorable for example.
Download simblr.cc / SFS (acted up, will be added) / Mediafire

About the hoodie
For teen male sims
Sensible specular map (near-black with shiny zipper), blank normal map.
4 presets with 4 combo's of multiplier-mask, 4 channels each.
Enabled for everyday, sleepwear, athletic, outerwear (with accessory tops) and career
Fat, fit, thin morphs
All LODS: 4537 F - 3374 V / 2098 - 1428 / 891 - 698
Custom Thumbnails


Made with
Blender 3.6
Affinity photo
Adobe photoshop
TSRW
S3PE
Meshing tool kit.
I wrote down my whole work progress, right here! Hopefully it can function a bit as a tutorial ♥
@katsujiiccfinds @eternalccfinds @wanderingsimsfinds @pis3update
#florian pistache#andres bardem#sims 3#ts3cc#downloads: me#downloads: cas#downloads: clothing#ts3#sims 3 cc#s3cc#clothing TM#ts3 cc tutorial#cc tutorial
69 notes
·
View notes
Text

“Sneaker and ankle drawing techniques”
Source: Twitter at takuya_kakikata
#art tutorial#digital art#art reference#drawing tips#drawing shoes#shoes#sneakers#drawing sneakers#drawing clothes#tutorial#art tips
16K notes
·
View notes
Note
Howwww do you even begin to figure out folds no matter how hard I try they never look right
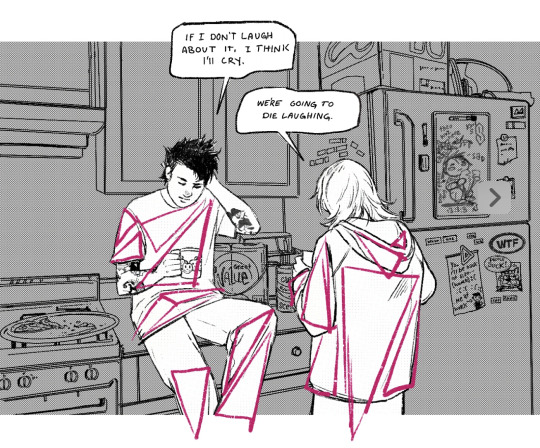
It's all triangles. References and a mirror/camera are your best friend. If you can't find the perfect angle on google images, make your own ref! Think in physics! I like to pretend I'm a 3d modeling program cloth simulation on a model. (Somehow this is how I made a breakthrough and figured it out. gif below of what i imagine in my noggin)
352 notes
·
View notes
Text
@bottleofchaos your "girl of your dreams" au is so so lovely, I had to draw him.

#rip his beard tho#I /still/ do not know how to color I really need to look at a tutorial#my art#dreamwastaken#it is kind of funny to think that Sylvee created clothes for her fashion design class that fits a 6 ft tall person
102 notes
·
View notes
Text
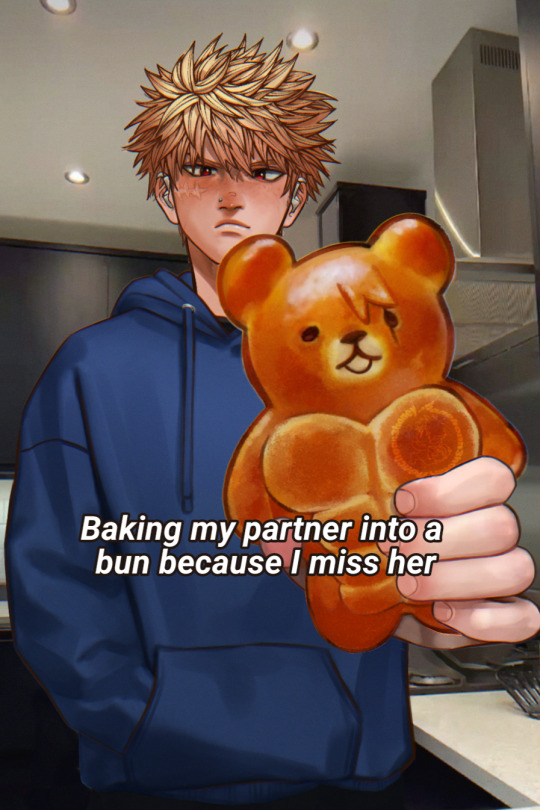
6 months old meme 👍
#I could not resist drawing it with my own hoodie#I used a tutorial to draw this hoodie in specific. I think the result is very good#He’s a loser since he will bark at how much he hates this but at home he’ll wear your clothes if he can#He loves his autonomy#I think it does not often but is present. Fortunately I can quench he's thirst#I thought and took advantage that I had drawn my sona before and could use it in this place#This is pretty silly but love is like that#selfship art#selfship#katsuki bakugou#bakugou katsuki#art#baking my long distance bf into a cookie because i miss him#katsunney 🌶️🍒
93 notes
·
View notes
Text


Hello everyone! I finally finished the swimsuit tutorial for the adult sized critters :D As always, i tried my best to explain the process but, if needed, i will still answer any questions to the best of my ability :3 Thank you to @quin-weasel for checking if its written clearly too!
The pattern:

#sylvanian families#calico critters#custom clothes#doll clothes#tutorial#doll pattern#ternurines#ansof
49 notes
·
View notes
Text

Super long post! Let me know if this is too much words (for future reference)! 💝
💋 Taglisters: @2543jj @cottoncandywhispers @lou007sstuff
#ariana grande#ariana grande makeup#2015 ariana grande aesthetic#2015 ariana grande#ariana#arianator#2013 ariana grande outfit#2014 ariana grande#rosy blog#2014 aesthetic#2013 aesthetic#i miss 2013#2014#2013#2014 tumblr#2013 tumblr#2015#girly outfit#2015 blog#2015 clothes#2015 aesthetic#2015 tumblr#summer 2015#2015 nostalgia#2015 makeup#makeup#makeup routine#2015 makeup routine#2015 makeup tutorial#makeup tumblr
176 notes
·
View notes