#docker cli
Explore tagged Tumblr posts
Visit Tumblr Blog
Explore Tumblr blogs with no restrictions, modern design and the best experience.
Last Seen Tumblr Blogs


Fun Fact
Tumblr was the first site to host the blog for President Barack Obama in 2011.
Text
Kill Containers and remove unused images from Docker Correctly
In this article, we shall discuss how to destroy, that is “Kill Containers and remove unused images from Docker Correctly”. We will be doing this over Portainer and Container Manager. Containers and images that are no longer in use can create clutter, making it harder to manage Docker environments. By removing them, you can streamline the system, keeping only essential resources running. Please…
#container lifecycle#container management#Container Manager#delete images#Docker best practices#Docker cleanup#docker cli#Docker commands#Docker maintenance#Docker system prune#efficient Docker management#Exited Code 137#image management#kill containers#portainer#remove unused images#resource optimization#stop containers#system resources
0 notes
Text
Docker Development Environment: Test your Containers with Docker Desktop
Docker Development Environment: Test your Containers with Docker Desktop #homelab #docker #DockerDesktopDevelopment #SelfHostedContainerTesting #DockerDevEnvironment #ConfigurableDevelopmentEnvironment #DockerContainerManagement #DockerDesktopGUI
One of the benefits of a Docker container is it allows you to have quick and easy test/dev environments on your local machine that are easy to set up. Let’s see how we can set up a Docker development environment with Docker Desktop. Table of contentsQuick overview of Docker Development EnvironmentSetting Up Your Docker Development Environment with Docker Desktop1. Install Docker Desktop2. Create…

View On WordPress
#Configurable Development Environment#Docker and Visual Studio Code#Docker Container Management#Docker Desktop Development#Docker Desktop Extensions#Docker Desktop GUI#docker dev CLI Plugin#Docker Dev Environment#Docker Git Integration#Self-Hosted Container Testing
0 notes
Text
2023 Wordpress開発
Docker + Gulp + browser-sync + wp-env + wp-cli
--
★wp-envの使い方
npm run wp-env [option] npx wp-env [option]
★wp-cliの使い方(wp-envにインストールされているwp-cli)
npm run wp-env run cli wp [option]
npx wp-env run cli wp [option]
0 notes
Text
Man goes to the doctor. Says he's frustrated. Says his Python experience seems complicated and confusing. Says he feels there are too many environment and package management system options and he doesn't know what to do.
Doctor says, "Treatment is simple. Just use Poetry + pyenv, which combines the benefits of conda, venv, pip, and virtualenv. But remember, after setting up your environment, you'll need to install build essentials, which aren't included out-of-the-box. So, upgrade pip, setuptools, and wheel immediately. Then, you'll want to manage your dependencies with a pyproject.toml file.
"Of course, Poetry handles dependencies, but you may need to adjust your PATH and activate pyenv every time you start a new session. And don't forget about locking your versions to avoid conflicts! And for data science, you might still need conda for some specific packages.
"Also, make sure to use pipx for installing CLI tools globally, but isolate them from your project's environment. And if you're deploying, Dockerize your app to ensure consistency across different machines. Just be cautious about Docker’s compatibility with M1 chips.
"Oh, and when working with Jupyter Notebooks, remember to install ipykernel within your virtual environment to register your kernel. But for automated testing, you should...
76 notes
·
View notes
Text
OpenSUSE Linux 15.6 is here, packed with exciting updates to the kernel, Docker, PHP, Perl, Python, Apache/Nginx, MariaDB/PostgreSQL, and more!

Ready to upgrade from 15.5? Learn how with our easy-to-follow guides for both GUI and CLI methods.
7 notes
·
View notes
Text
Unleashing Efficiency: Containerization with Docker
Introduction: In the fast-paced world of modern IT, agility and efficiency reign supreme. Enter Docker - a revolutionary tool that has transformed the way applications are developed, deployed, and managed. Containerization with Docker has become a cornerstone of contemporary software development, offering unparalleled flexibility, scalability, and portability. In this blog, we'll explore the fundamentals of Docker containerization, its benefits, and practical insights into leveraging Docker for streamlining your development workflow.
Understanding Docker Containerization: At its core, Docker is an open-source platform that enables developers to package applications and their dependencies into lightweight, self-contained units known as containers. Unlike traditional virtualization, where each application runs on its own guest operating system, Docker containers share the host operating system's kernel, resulting in significant resource savings and improved performance.
Key Benefits of Docker Containerization:
Portability: Docker containers encapsulate the application code, runtime, libraries, and dependencies, making them portable across different environments, from development to production.
Isolation: Containers provide a high degree of isolation, ensuring that applications run independently of each other without interference, thus enhancing security and stability.
Scalability: Docker's architecture facilitates effortless scaling by allowing applications to be deployed and replicated across multiple containers, enabling seamless horizontal scaling as demand fluctuates.
Consistency: With Docker, developers can create standardized environments using Dockerfiles and Docker Compose, ensuring consistency between development, testing, and production environments.
Speed: Docker accelerates the development lifecycle by reducing the time spent on setting up development environments, debugging compatibility issues, and deploying applications.
Getting Started with Docker: To embark on your Docker journey, begin by installing Docker Desktop or Docker Engine on your development machine. Docker Desktop provides a user-friendly interface for managing containers, while Docker Engine offers a command-line interface for advanced users.
Once Docker is installed, you can start building and running containers using Docker's command-line interface (CLI). The basic workflow involves:
Writing a Dockerfile: A text file that contains instructions for building a Docker image, specifying the base image, dependencies, environment variables, and commands to run.
Building Docker Images: Use the docker build command to build a Docker image from the Dockerfile.
Running Containers: Utilize the docker run command to create and run containers based on the Docker images.
Managing Containers: Docker provides a range of commands for managing containers, including starting, stopping, restarting, and removing containers.
Best Practices for Docker Containerization: To maximize the benefits of Docker containerization, consider the following best practices:
Keep Containers Lightweight: Minimize the size of Docker images by removing unnecessary dependencies and optimizing Dockerfiles.
Use Multi-Stage Builds: Employ multi-stage builds to reduce the size of Docker images and improve build times.
Utilize Docker Compose: Docker Compose simplifies the management of multi-container applications by defining them in a single YAML file.
Implement Health Checks: Define health checks in Dockerfiles to ensure that containers are functioning correctly and automatically restart them if they fail.
Secure Containers: Follow security best practices, such as running containers with non-root users, limiting container privileges, and regularly updating base images to patch vulnerabilities.
Conclusion: Docker containerization has revolutionized the way applications are developed, deployed, and managed, offering unparalleled agility, efficiency, and scalability. By embracing Docker, developers can streamline their development workflow, accelerate the deployment process, and improve the consistency and reliability of their applications. Whether you're a seasoned developer or just getting started, Docker opens up a world of possibilities, empowering you to build and deploy applications with ease in today's fast-paced digital landscape.
For more details visit www.qcsdclabs.com
#redhat#linux#docker#aws#agile#agiledevelopment#container#redhatcourses#information technology#ContainerSecurity#ContainerDeployment#DockerSwarm#Kubernetes#ContainerOrchestration#DevOps
5 notes
·
View notes
Text
Docker Tutorial for Beginners: Learn Docker Step by Step
What is Docker?
Docker is an open-source platform that enables developers to automate the deployment of applications inside lightweight, portable containers. These containers include everything the application needs to run—code, runtime, system tools, libraries, and settings—so that it can work reliably in any environment.
Before Docker, developers faced the age-old problem: “It works on my machine!” Docker solves this by providing a consistent runtime environment across development, testing, and production.
Why Learn Docker?
Docker is used by organizations of all sizes to simplify software delivery and improve scalability. As more companies shift to microservices, cloud computing, and DevOps practices, Docker has become a must-have skill. Learning Docker helps you:
Package applications quickly and consistently
Deploy apps across different environments with confidence
Reduce system conflicts and configuration issues
Improve collaboration between development and operations teams
Work more effectively with modern cloud platforms like AWS, Azure, and GCP
Who Is This Docker Tutorial For?
This Docker tutorial is designed for absolute beginners. Whether you're a developer, system administrator, QA engineer, or DevOps enthusiast, you’ll find step-by-step instructions to help you:
Understand the basics of Docker
Install Docker on your machine
Create and manage Docker containers
Build custom Docker images
Use Docker commands and best practices
No prior knowledge of containers is required, but basic familiarity with the command line and a programming language (like Python, Java, or Node.js) will be helpful.
What You Will Learn: Step-by-Step Breakdown
1. Introduction to Docker
We start with the fundamentals. You’ll learn:
What Docker is and why it’s useful
The difference between containers and virtual machines
Key Docker components: Docker Engine, Docker Hub, Dockerfile, Docker Compose
2. Installing Docker
Next, we guide you through installing Docker on:
Windows
macOS
Linux
You’ll set up Docker Desktop or Docker CLI and run your first container using the hello-world image.
3. Working with Docker Images and Containers
You’ll explore:
How to pull images from Docker Hub
How to run containers using docker run
Inspecting containers with docker ps, docker inspect, and docker logs
Stopping and removing containers
4. Building Custom Docker Images
You’ll learn how to:
Write a Dockerfile
Use docker build to create a custom image
Add dependencies and environment variables
Optimize Docker images for performance
5. Docker Volumes and Networking
Understand how to:
Use volumes to persist data outside containers
Create custom networks for container communication
Link multiple containers (e.g., a Node.js app with a MongoDB container)
6. Docker Compose (Bonus Section)
Docker Compose lets you define multi-container applications. You’ll learn how to:
Write a docker-compose.yml file
Start multiple services with a single command
Manage application stacks easily
Real-World Examples Included
Throughout the tutorial, we use real-world examples to reinforce each concept. You’ll deploy a simple web application using Docker, connect it to a database, and scale services with Docker Compose.
Example Projects:
Dockerizing a static HTML website
Creating a REST API with Node.js and Express inside a container
Running a MySQL or MongoDB database container
Building a full-stack web app with Docker Compose
Best Practices and Tips
As you progress, you’ll also learn:
Naming conventions for containers and images
How to clean up unused images and containers
Tagging and pushing images to Docker Hub
Security basics when using Docker in production
What’s Next After This Tutorial?
After completing this Docker tutorial, you’ll be well-equipped to:
Use Docker in personal or professional projects
Learn Kubernetes and container orchestration
Apply Docker in CI/CD pipelines
Deploy containers to cloud platforms
Conclusion
Docker is an essential tool in the modern developer's toolbox. By learning Docker step by step in this beginner-friendly tutorial, you’ll gain the skills and confidence to build, deploy, and manage applications efficiently and consistently across different environments.
Whether you’re building simple web apps or complex microservices, Docker provides the flexibility, speed, and scalability needed for success. So dive in, follow along with the hands-on examples, and start your journey to mastering containerization with Docker tpoint-tech!
0 notes
Text
Spring AI 1.0 and Google Cloud to Build Intelligent Apps

Spring AI 1.0
After extensive development, Spring AI 1.0 provides a robust and dependable AI engineering solution for your Java ecosystem. This is calculated to position Java and Spring at the forefront of the AI revolution, not just another library.
Spring Boot is used by so many enterprises that integrating AI into business logic and data has never been easier. Spring AI 1.0 lets developers effortlessly integrate cutting-edge AI models into their apps, bringing up new possibilities. Prepare to implement smart JVM app features!
Spring AI 1.0 is a powerful and comprehensive Java AI engineering solution. Its goal is to lead the AI revolution with Java and Spring. Spring AI 1.0 integrates AI into business logic and data without the integration issues many Spring Boot-using enterprises confront. It lets developers use cutting-edge AI models in their apps, expanding possibilities.
Spring AI supports multiple AI models:
Images produced by text-command image models.
Audio-to-text transcription models.
Vectors are formed by embedding models that transform random data into them for semantic similarity search.
Chat models can edit documents and write poetry, but they are tolerant and easily sidetracked.
The following elements in Spring AI 1.0 enable conversation models overcome their limits and improve:
Use system prompts to set and manage model behaviour.
Memory is added to the model to capture conversational context and memory.
Making tool calling feasible for AI models to access external features.
Including confidential information in the request with rapid filling.
Retrieval Augmented Generation (RAG) uses vector stores to retrieve and use business data to inform the model's solution.
Evaluation to ensure output accuracy employs a different model.
Linking AI apps to other services using the Model Context Protocol (MCP), which works with all programming languages, to develop agentic workflows for complex tasks.
Spring AI integrates seamlessly with Spring Boot and follows Spring developers' convention-over-configuration setup by providing well-known abstractions and startup dependencies via Spring Initialisation. This lets Spring Boot app developers quickly integrate AI models utilising their logic and data.
When using Gemini models in Vertex AI, Google Cloud connectivity is required. A Google Cloud environment must be created by establishing or selecting a project, enabling the Vertex AI API in the console, billing, and the gcloud CLI.
Use gcloud init, config set project, and auth application-default login to configure local development authentication.
The Spring Initialiser must generate GraalVM Native Support, Spring Web, Spring Boot Actuator, Spring Data JDBC, Vertex AI Gemini, Vertex AI Embeddings, PGvector Vector Database, MCP Client, and Docker Compose Support to build a Spring AI and Google Cloud application. The site recommends using the latest Java version, especially GraalVM, which compiles code into native images instead of JRE-based apps to save RAM and speed up startup. Set application properties during configuration.characteristics for application name, database connection options, Vertex AI project ID and location for chat and embedding models (gemini-2.5-pro-preview-05-06), actuator endpoints, Docker Compose administration, and PGvector schema initialisation.
PostgreSQL database with a vector type plugin that stores data with Spring AI's VectorStore abstraction? Database schema and data can be initialised on startup using schema.sql and data.sql files, and Spring Boot's Docker Compose can start the database container automatically. Spring Data JDBC creates database interaction and data access entities.
The ChatClient manages chat model interactions and is a one-stop shop. ChatClients need autoconfigured ChatModels like Google's Gemini. Developers can create several ChatClients with different parameters and conditions using ChatClient.Builder. ChatClients can be used with PromptChatMemoryAdvisor or QuestionAnswerAdvisor to handle chat memory or VectorStore data for RAG.
Spring AI simplifies tool calls by annotating methods and arguments with @Tool and @ToolParam. The model evaluates tool relevance using annotation descriptions and structure. New default tools can be added to ChatClient.
Spring AI also integrates with the Model Context Protocol (MCP), which separates tools into services and makes them available to LLMs in any language.
For Google Cloud production deployments, Spring AI apps work with pgVector-supporting databases like Google Cloud SQL or AlloyDB. AlloyDB is built for AI applications with its high performance, availability (99.99% SLA including maintenance), and scalability.
FAQ
How is spring AI?
The Spring AI application framework simplifies Spring ecosystem AI application development. It allows Java developers to easily integrate AI models and APIs without retraining, inspired by LangChain and LlamaIndex.
Essentials and Ideas:
AI integration:
Spring AI integrates AI models with enterprise data and APIs.
Abstraction and Portability:
Its portable APIs work across vector database and AI model manufacturers.
Spring Boot compatibility:
It integrates with Spring Boot and provides observability tools, starters, and autoconfiguration.
Support the Model:
It supports text-to-image, embedding, chat completion, and other AI models.
Quick Templates:
Template engines let Spring AI manage and produce AI model prompts.
Vector databases:
It uses popular vector database providers to store and retrieve embeddings.
Tools and Function Calling:
Models can call real-time data access functions and tools.
Observability:
It tracks AI activity with observability solutions.
Assessing and Preventing Hallucinations:
Spring AI helps evaluate content and reduce hallucinations.
#SpringAI10#SpringAI#javaSpringAI#SpringBoot#AISpring#VertexAI#SpringAIandGoogleCloud#technology#technews#technologynews#news#govindhtech
0 notes
Text
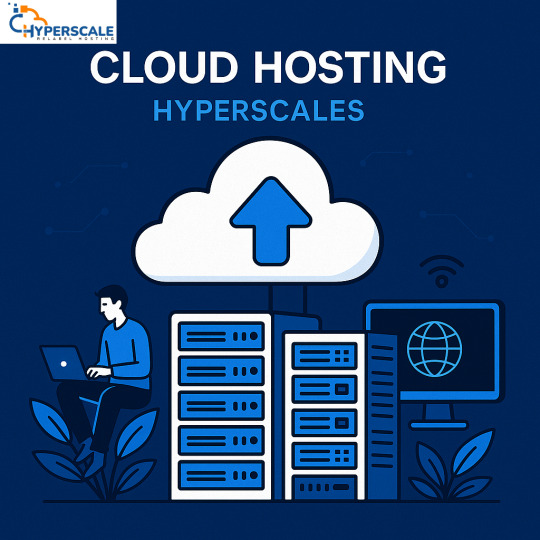
Best Cloud Hosting Services in India
In the rapidly evolving digital landscape, choosing the right cloud hosting service can make or break your online presence. Whether you're a growing startup, an enterprise, or a freelance developer, performance, scalability, and security are non-negotiables. When it comes to cloud hosting services in India, the market is booming — but not all solutions are created equal.
At Hyperscales, we believe businesses deserve infrastructure that grows with them, without compromising on speed, uptime, or support. Here's a closer look at the best cloud hosting services available in India and why Hyperscales stands out as a future-ready platform for innovators.
Why Cloud Hosting Matters in 2025
Cloud hosting has evolved from a “nice-to-have” to a mission-critical backbone for digital operations. Key reasons why businesses are shifting to cloud-based environments include:
🚀 High Performance & Speed
🔒 Advanced Security
📈 Scalable Infrastructure
🕒 99.99% Uptime
💡 Cost Efficiency
Top Cloud Hosting Providers in India
Here are some of the leading cloud hosting platforms in India:
1. Hyperscales – India’s Smart Cloud Partner
Hyperscales is revolutionizing the cloud hosting space with its India-centric infrastructure, ultra-low latency, and seamless deployment capabilities. From high-performance compute instances to fully managed Kubernetes and container services, Hyperscales is built for modern businesses.
Key Features:
SSD-based NVMe storage for lightning-fast speeds
Tier IV data centers across India
Auto-scaling, load balancing, and DDoS protection
Fully managed support for Linux, Windows, and container workloads
24/7 real-time technical assistance
Ideal for: Startups, SaaS providers, enterprises, developers, and eCommerce platforms looking for India-first cloud hosting.
🔗 Explore Hyperscales Cloud Hosting »
2. Amazon Web Services (AWS India)
AWS is a global leader, offering a wide range of services. With local availability zones in Mumbai, it offers solid performance for Indian users. However, the pricing can be complex and support comes at a premium.
Pros: Global reach, extensive service range Cons: Higher costs, complex setup for beginners
3. Microsoft Azure India
Azure offers enterprise-grade infrastructure and is preferred by businesses deeply integrated into the Microsoft ecosystem. With regions in India, latency is not an issue — but again, support and pricing can be challenging for small businesses.
Pros: Enterprise integration, strong security Cons: Steep learning curve, pay-per-feature model
4. Google Cloud Platform (GCP India)
GCP is gaining popularity among developers, especially in AI/ML-based workloads. It offers powerful APIs and tools, but data locality and pricing are concerns for some Indian businesses.
Pros: Cutting-edge tech stack, data analytics tools Cons: Limited regional availability, complex billing
5. DigitalOcean India
DigitalOcean is loved by startups for its simplicity and transparent pricing. It’s a great choice for developers looking for quick deployments, though it may lack the enterprise-grade features of bigger players.
Pros: Easy to use, developer-friendly Cons: Limited managed services compared to others
Why Hyperscales is the Best Choice for Indian Businesses
At Hyperscales, we're not just offering infrastructure — we're delivering cloud confidence. Built in India, for India, our cloud platform ensures that your workloads stay close to your users with maximum speed and compliance.
🛠️ Developer-First Tools
Deploy faster with APIs, CLI, Docker, and full DevOps integration.
🌐 Ultra-Low Latency
Our edge infrastructure ensures blazing speed for users across the subcontinent.
💼 Enterprise Reliability
Backed by industry-standard SLAs and continuous monitoring.
💬 Localized Support
Unlike global providers, we offer India-based support with human response — not chatbots.
Final Thoughts
Cloud hosting in India is no longer a luxury — it’s the backbone of innovation. While AWS, Azure, and GCP dominate globally, businesses in India need a platform that understands local needs, regulatory compliance, and regional performance — and Hyperscales delivers on all fronts.
Ready to scale your cloud infrastructure with peace of mind? 👉 Get Started with Hyperscales Today
At Hyperscales, we're not just offering infrastructure — we're delivering cloud confidence. Built in India, for India, our cloud platform ensures that your workloads stay close to your users with maximum speed and compliance.
#cloud services#vps hosting#content delivery network#cloud hosting provider#cybersecurity#vpn service#vps for startups
0 notes
Link
#Automation#cloud#configuration#containerization#deploy#DevOps#Docker#feedaggregator#FreshRSS#Linux#Monitoring#news#open-source#Performance#Privacy#RSSreader#self-hosted#Server#systemadministration#updates#webapplication
0 notes
Text
Nerdctl: Docker compatible containerd command line tool
Nerdctl: Docker compatible containerd command line tool @vexpert #vmwarecommunities #100daysofhomelab #homelab #nerdctl #Docker-compatibleCLI #containermanagement #efficientcontainerruntime #lazypulling #encryptedimages #rootlessmode #DockerCompose
Most know and use the Docker command line tool working with Docker containers. However, let’s get familiar with the defacto tool working with containerd containers, nerdctl, a robust docker compatible cli. Nerdctl works in tandem with containerd, serving as a compatible cli for containerd and offering support for many docker cli commands. This makes it a viable option when looking to replace…
View On WordPress
#Container Management#Docker Compose support#Docker-compatible CLI#efficient container runtime#encrypted images#installing nerdctl#lazy pulling#nerdctl#replace Docker#rootless mode
0 notes
Text
Proses Update Docker
1. apt update
2. apt install -y ca-certificates curl gnupg
3. install -m 0755 -d /etc/apt/keyrings
4. sudo install -m 0755 -d /etc/apt/keyrings
5. curl -fsSL https://download.docker.com/linux/ubuntu/gpg | sudo tee /etc/apt/keyrings/docker.asc > /dev/null
6. apt update
7. apt install -y docker-ce docker-ce-cli containerd.io
8. docker -v
0 notes
Photo

New Post has been published on https://codebriefly.com/building-and-deploying-angular-19-apps/
Building and Deploying Angular 19 Apps
Efficiently building and deploying Angular 19 applications is crucial for delivering high-performance, production-ready web applications. In this blog, we will cover the complete process of building and deploying Angular 19 apps, including best practices and optimization tips.
Table of Contents
Toggle
Why Building and Deploying Matters
Preparing Your Angular 19 App for Production
Building Angular 19 App
Key Optimizations in Production Build:
Configuration Example:
Deploying Angular 19 App
Deploying on Firebase Hosting
Deploying on AWS S3 and CloudFront
Automating Deployment with CI/CD
Example with GitHub Actions
Best Practices for Building and Deploying Angular 19 Apps
Final Thoughts
Why Building and Deploying Matters
Building and deploying are the final steps of the development lifecycle. Building compiles your Angular project into static files, while deploying makes it accessible to users on a server. Proper optimization and configuration ensure faster load times and better performance.
Preparing Your Angular 19 App for Production
Before building the application, make sure to:
Update Angular CLI: Keep your Angular CLI up to date.
npm install -g @angular/cli
Optimize Production Build: Enable AOT compilation and minification.
Environment Configuration: Use the correct environment variables for production.
Building Angular 19 App
To create a production build, run the following command:
ng build --configuration=production
This command generates optimized files in the dist/ folder.
Key Optimizations in Production Build:
AOT Compilation: Reduces bundle size by compiling templates during the build.
Tree Shaking: Removes unused modules and functions.
Minification: Compresses HTML, CSS, and JavaScript files.
Source Map Exclusion: Disables source maps for production builds to improve security and reduce file size.
Configuration Example:
Modify the angular.json file to customize production settings:
"configurations": "production": "optimization": true, "outputHashing": "all", "sourceMap": false, "namedChunks": false, "extractCss": true, "aot": true, "fileReplacements": [ "replace": "src/environments/environment.ts", "with": "src/environments/environment.prod.ts" ]
Deploying Angular 19 App
Deployment options for Angular apps include:
Static Web Servers (e.g., NGINX, Apache)
Cloud Platforms (e.g., AWS S3, Firebase Hosting)
Docker Containers
Serverless Platforms (e.g., AWS Lambda)
Deploying on Firebase Hosting
Install Firebase CLI:
npm install -g firebase-tools
Login to Firebase:
firebase login
Initialize Firebase Project:
firebase init hosting
Deploy the App:
firebase deploy
Deploying on AWS S3 and CloudFront
Build the Project:
ng build --configuration=production
Upload to S3:
aws s3 sync ./dist/my-app s3://my-angular-app
Configure CloudFront Distribution: Set the S3 bucket as the origin.
Automating Deployment with CI/CD
Setting up a CI/CD pipeline ensures seamless updates and faster deployments.
Example with GitHub Actions
Create a .github/workflows/deploy.yml file:
name: Deploy Angular App on: [push] jobs: build-and-deploy: runs-on: ubuntu-latest steps: - uses: actions/checkout@v2 - name: Set up Node.js uses: actions/setup-node@v2 with: node-version: '18' - run: npm install - run: npm run build -- --configuration=production - name: Deploy to S3 run: aws s3 sync ./dist/my-app s3://my-angular-app --delete
Best Practices for Building and Deploying Angular 19 Apps
Optimize for Production: Always use AOT and minification.
Use CI/CD Pipelines: Automate the build and deployment process.
Monitor Performance: Utilize tools like Lighthouse to analyze performance.
Secure the Application: Enable HTTPS and configure secure headers.
Cache Busting: Use hashed filenames to avoid caching issues.
Containerize with Docker: Simplifies deployments and scales easily.
Final Thoughts
Building and deploying Angular 19 applications efficiently can significantly enhance performance and maintainability. Following best practices and leveraging cloud hosting services ensure that your app is robust, scalable, and fast. Start building your next Angular project with confidence!
Keep learning & stay safe 😉
You may like:
Testing and Debugging Angular 19 Apps
Performance Optimization and Best Practices in Angular 19
UI/UX with Angular Material in Angular 19
0 notes
Text
Postal SMTP install and setup on a virtual server

Postal is a full suite for mail delivery with robust features suited for running a bulk email sending SMTP server. Postal is open source and free. Some of its features are: - UI for maintaining different aspects of your mail server - Runs on containers, hence allows for up and down horizontal scaling - Email security features such as spam and antivirus - IP pools to help you maintain a good sending reputation by sending via multiple IPs - Multitenant support - multiple users, domains and organizations - Monitoring queue for outgoing and incoming mail - Built in DNS setup and monitoring to ensure mail domains are set up correctly List of full postal features
Possible cloud providers to use with Postal
You can use Postal with any VPS or Linux server providers of your choice, however here are some we recommend: Vultr Cloud (Get free $300 credit) - In case your SMTP port is blocked, you can contact Vultr support, and they will open it for you after providing a personal identification method. DigitalOcean (Get free $200 Credit) - You will also need to contact DigitalOcean support for SMTP port to be open for you. Hetzner ( Get free €20) - SMTP port is open for most accounts, if yours isn't, contact the Hetzner support and request for it to be unblocked for you Contabo (Cheapest VPS) - Contabo doesn't block SMTP ports. In case you are unable to send mail, contact support. Interserver
Postal Minimum requirements
- At least 4GB of RAM - At least 2 CPU cores - At least 25GB disk space - You can use docker or any Container runtime app. Ensure Docker Compose plugin is also installed. - Port 25 outbound should be open (A lot of cloud providers block it)
Postal Installation
Should be installed on its own server, meaning, no other items should be running on the server. A fresh server install is recommended. Broad overview of the installation procedure - Install Docker and the other needed apps - Configuration of postal and add DNS entries - Start Postal - Make your first user - Login to the web interface to create virtual mail servers Step by step install Postal Step 1 : Install docker and additional system utilities In this guide, I will use Debian 12 . Feel free to follow along with Ubuntu. The OS to be used does not matter, provided you can install docker or any docker alternative for running container images. Commands for installing Docker on Debian 12 (Read the comments to understand what each command does): #Uninstall any previously installed conflicting software . If you have none of them installed it's ok for pkg in docker.io docker-doc docker-compose podman-docker containerd runc; do sudo apt-get remove $pkg; done #Add Docker's official GPG key: sudo apt-get update sudo apt-get install ca-certificates curl -y sudo install -m 0755 -d /etc/apt/keyrings sudo curl -fsSL https://download.docker.com/linux/debian/gpg -o /etc/apt/keyrings/docker.asc sudo chmod a+r /etc/apt/keyrings/docker.asc #Add the Docker repository to Apt sources: echo "deb https://download.docker.com/linux/debian $(. /etc/os-release && echo "$VERSION_CODENAME") stable" | sudo tee /etc/apt/sources.list.d/docker.list > /dev/null sudo apt-get update #Install the docker packages sudo apt-get install docker-ce docker-ce-cli containerd.io docker-buildx-plugin docker-compose-plugin -y #You can verify that the installation is successful by running the hello-world image sudo docker run hello-world Add the current user to the docker group so that you don't have to use sudo when not logged in as the root user. ##Add your current user to the docker group. sudo usermod -aG docker $USER #Reboot the server sudo reboot Finally test if you can run docker without sudo ##Test that you don't need sudo to run docker docker run hello-world Step 2 : Get the postal installation helper repository The Postal installation helper has all the docker compose files and the important bootstrapping tools needed for generating configuration files. Install various needed tools #Install additional system utlities apt install git vim htop curl jq -y Then clone the helper repository. sudo git clone https://github.com/postalserver/install /opt/postal/install sudo ln -s /opt/postal/install/bin/postal /usr/bin/postal Step 3 : Install MariaDB database Here is a sample MariaDB container from the postal docs. But you can use the docker compose file below it. docker run -d --name postal-mariadb -p 127.0.0.1:3306:3306 --restart always -e MARIADB_DATABASE=postal -e MARIADB_ROOT_PASSWORD=postal mariadb Here is a tested mariadb compose file to run a secure MariaDB 11.4 container. You can change the version to any image you prefer. vi docker-compose.yaml services: mariadb: image: mariadb:11.4 container_name: postal-mariadb restart: unless-stopped environment: MYSQL_ROOT_PASSWORD: ${DB_ROOT_PASSWORD} volumes: - mariadb_data:/var/lib/mysql network_mode: host # Set to use the host's network mode security_opt: - no-new-privileges:true read_only: true tmpfs: - /tmp - /run/mysqld healthcheck: test: interval: 30s timeout: 10s retries: 5 volumes: mariadb_data: You need to create an environment file with the Database password . To simplify things, postal will use the root user to access the Database.env file example is below. Place it in the same location as the compose file. DB_ROOT_PASSWORD=ExtremelyStrongPasswordHere Run docker compose up -d and ensure the database is healthy. Step 4 : Bootstrap the domain for your Postal web interface & Database configs First add DNS records for your postal domain. The most significant records at this stage are the A and/or AAAA records. This is the domain where you'll be accessing the postal UI and for simplicity will also act as the SMTP server. If using Cloudflare, turn off the Cloudflare proxy. sudo postal bootstrap postal.yourdomain.com The above will generate three files in /opt/postal/config. - postal.yml is the main postal configuration file - signing.key is the private key used to sign various things in Postal - Caddyfile is the configuration for the Caddy web server Open /opt/postal/config/postal.yml and add all the values for DB and other settings. Go through the file and see what else you can edit. At the very least, enter the correct DB details for postal message_db and main_db. Step 5 : Initialize the Postal database and create an admin user postal initialize postal make-user If everything goes well with postal initialize, then celebrate. This is the part where you may face some issues due to DB connection failures. Step 6 : Start running postal # run postal postal start #checking postal status postal status # If you make any config changes in future you can restart postal like so # postal restart Step 7 : Proxy for web traffic To handle web traffic and ensure TLS termination you can use any proxy server of your choice, nginx, traefik , caddy etc. Based on Postal documentation, the following will start up caddy. You can use the compose file below it. Caddy is easy to use and does a lot for you out of the box. Ensure your A records are pointing to your server before running Caddy. docker run -d --name postal-caddy --restart always --network host -v /opt/postal/config/Caddyfile:/etc/caddy/Caddyfile -v /opt/postal/caddy-data:/data caddy Here is a compose file you can use instead of the above docker run command. Name it something like caddy-compose.yaml services: postal-caddy: image: caddy container_name: postal-caddy restart: always network_mode: host volumes: - /opt/postal/config/Caddyfile:/etc/caddy/Caddyfile - /opt/postal/caddy-data:/data You can run it by doing docker compose -f caddy-compose.yaml up -d Now it's time to go to the browser and login. Use the domain, bootstrapped earlier. Add an organization, create server and add a domain. This is done via the UI and it is very straight forward. For every domain you add, ensure to add the DNS records you are provided.
Enable IP Pools
One of the reasons why Postal is great for bulk email sending, is because it allows for sending emails using multiple IPs in a round-robin fashion. Pre-requisites - Ensure the IPs you want to add as part of the pool, are already added to your VPS/server. Every cloud provider has a documentation for adding additional IPs, make sure you follow their guide to add all the IPs to the network. When you run ip a , you should see the IP addresses you intend to use in the pool. Enabling IP pools in the Postal config First step is to enable IP pools settings in the postal configuration, then restart postal. Add the following configuration in the postal.yaml (/opt/postal/config/postal.yml) file to enable pools. If the section postal: , exists, then just add use_ip_pools: true under it. postal: use_ip_pools: true Then restart postal. postal stop && postal start The next step is to go to the postal interface on your browser. A new IP pools link is now visible at the top right corner of your postal dashboard. You can use the IP pools link to add a pool, then assign IP addresses in the pools. A pool could be something like marketing, transactions, billing, general etc. Once the pools are created and IPs assigned to them, you can attach a pool to an organization. This organization can now use the provided IP addresses to send emails. Open up an organization and assign a pool to it. Organizations → choose IPs → choose pools . You can then assign the IP pool to servers from the server's Settings page. You can also use the IP pool to configure IP rules for the organization or server. At any point, if you are lost, look at the Postal documentation. Read the full article
0 notes
Text
Cloud Computing for Programmers

Cloud computing has revolutionized how software is built, deployed, and scaled. As a programmer, understanding cloud services and infrastructure is essential to creating efficient, modern applications. In this guide, we’ll explore the basics and benefits of cloud computing for developers.
What is Cloud Computing?
Cloud computing allows you to access computing resources (servers, databases, storage, etc.) over the internet instead of owning physical hardware. Major cloud providers include Amazon Web Services (AWS), Microsoft Azure, and Google Cloud Platform (GCP).
Key Cloud Computing Models
IaaS (Infrastructure as a Service): Provides virtual servers, storage, and networking (e.g., AWS EC2, Azure VMs)
PaaS (Platform as a Service): Offers tools and frameworks to build applications without managing servers (e.g., Heroku, Google App Engine)
SaaS (Software as a Service): Cloud-hosted apps accessible via browser (e.g., Gmail, Dropbox)
Why Programmers Should Learn Cloud
Deploy apps quickly and globally
Scale applications with demand
Use managed databases and storage
Integrate with AI, ML, and big data tools
Automate infrastructure with DevOps tools
Popular Cloud Services for Developers
AWS: EC2, Lambda, S3, RDS, DynamoDB
Azure: App Services, Functions, Cosmos DB, Blob Storage
Google Cloud: Compute Engine, Cloud Run, Firebase, BigQuery
Common Use Cases
Hosting web and mobile applications
Serverless computing for microservices
Real-time data analytics and dashboards
Cloud-based CI/CD pipelines
Machine learning model deployment
Getting Started with the Cloud
Create an account with a cloud provider (AWS, Azure, GCP)
Start with a free tier or sandbox environment
Launch your first VM or web app
Use the provider’s CLI or SDK to deploy code
Monitor usage and set up billing alerts
Example: Deploying a Node.js App on Heroku (PaaS)
# Step 1: Install Heroku CLI heroku login # Step 2: Create a new Heroku app heroku create my-node-app # Step 3: Deploy your code git push heroku main # Step 4: Open your app heroku open
Tools and Frameworks
Docker: Containerize your apps for portability
Kubernetes: Orchestrate containers at scale
Terraform: Automate cloud infrastructure with code
CI/CD tools: GitHub Actions, Jenkins, GitLab CI
Security Best Practices
Use IAM roles and permissions
Encrypt data at rest and in transit
Enable firewalls and VPCs
Regularly update dependencies and monitor threats
Conclusion
Cloud computing enables developers to build powerful, scalable, and reliable software with ease. Whether you’re developing web apps, APIs, or machine learning services, cloud platforms provide the tools you need to succeed in today’s tech-driven world.
0 notes