#document.getelementbyid get value
Explore tagged Tumblr posts
Visit Tumblr Blog
Explore Tumblr blogs with no restrictions, modern design and the best experience.
Last Seen Tumblr Blogs


Fun Fact
1,644 Tumblr posts in 1 second.
Text
JavaScript Fundamentals
I have recently completed a course that extensively covered the foundational principles of JavaScript, and I'm here to provide you with a concise overview. This post will enable you to grasp the fundamental concepts without the need to enroll in the course.
Prerequisites: Fundamental HTML Comprehension
Before delving into JavaScript, it is imperative to possess a basic understanding of HTML. Knowledge of CSS, while beneficial, is not mandatory, as it primarily pertains to the visual aspects of web pages.
Manipulating HTML Text with JavaScript
When it comes to modifying text using JavaScript, the innerHTML function is the go-to tool. Let's break down the process step by step:
Initiate the process by selecting the HTML element whose text you intend to modify. This selection can be accomplished by employing various DOM (Document Object Model) element selection methods offered by JavaScript ( I'll talk about them in a second )
Optionally, you can store the selected element in a variable (we'll get into variables shortly).
Employ the innerHTML function to substitute the existing text with your desired content.
Element Selection: IDs or Classes
You have the opportunity to enhance your element selection by assigning either an ID or a class:
Assigning an ID:
To uniquely identify an element, the .getElementById() function is your go-to choice. Here's an example in HTML and JavaScript:
HTML:
<button id="btnSearch">Search</button>
JavaScript:
document.getElementById("btnSearch").innerHTML = "Not working";
This code snippet will alter the text within the button from "Search" to "Not working."
Assigning a Class:
For broader selections of elements, you can assign a class and use the .querySelector() function. Keep in mind that this method can select multiple elements, in contrast to .getElementById(), which typically focuses on a single element and is more commonly used.
Variables
Let's keep it simple: What's a variable? Well, think of it as a container where you can put different things—these things could be numbers, words, characters, or even true/false values. These various types of stuff that you can store in a variable are called DATA TYPES.
Now, some programming languages are pretty strict about mentioning these data types. Take C and C++, for instance; they're what we call "Typed" languages, and they really care about knowing the data type.
But here's where JavaScript stands out: When you create a variable in JavaScript, you don't have to specify its data type or anything like that. JavaScript is pretty laid-back when it comes to data types.
So, how do you make a variable in JavaScript?
There are three main keywords you need to know: var, let, and const.
But if you're just starting out, here's what you need to know :
const: Use this when you want your variable to stay the same, not change. It's like a constant, as the name suggests.
var and let: These are the ones you use when you're planning to change the value stored in the variable as your program runs.
Note that var is rarely used nowadays
Check this out:
let Variable1 = 3; var Variable2 = "This is a string"; const Variable3 = true;
Notice how we can store all sorts of stuff without worrying about declaring their types in JavaScript. It's one of the reasons JavaScript is a popular choice for beginners.
Arrays
Arrays are a basically just a group of variables stored in one container ( A container is what ? a variable , So an array is also just a variable ) , now again since JavaScript is easy with datatypes it is not considered an error to store variables of different datatypeslet
for example :
myArray = [1 , 2, 4 , "Name"];
Objects in JavaScript
Objects play a significant role, especially in the world of OOP : object-oriented programming (which we'll talk about in another post). For now, let's focus on understanding what objects are and how they mirror real-world objects.
In our everyday world, objects possess characteristics or properties. Take a car, for instance; it boasts attributes like its color, speed rate, and make.
So, how do we represent a car in JavaScript? A regular variable won't quite cut it, and neither will an array. The answer lies in using an object.
const Car = { color: "red", speedRate: "200km", make: "Range Rover" };
In this example, we've encapsulated the car's properties within an object called Car. This structure is not only intuitive but also aligns with how real-world objects are conceptualized and represented in JavaScript.
Variable Scope
There are three variable scopes : global scope, local scope, and function scope. Let's break it down in plain terms.
Global Scope: Think of global scope as the wild west of variables. When you declare a variable here, it's like planting a flag that says, "I'm available everywhere in the code!" No need for any special enclosures or curly braces.
Local Scope: Picture local scope as a cozy room with its own rules. When you create a variable inside a pair of curly braces, like this:
//Not here { const Variable1 = true; //Variable1 can only be used here } //Neither here
Variable1 becomes a room-bound secret. You can't use it anywhere else in the code
Function Scope: When you declare a variable inside a function (don't worry, we'll cover functions soon), it's a member of an exclusive group. This means you can only name-drop it within that function. .
So, variable scope is all about where you place your variables and where they're allowed to be used.
Adding in user input
To capture user input in JavaScript, you can use various methods and techniques depending on the context, such as web forms, text fields, or command-line interfaces.We’ll only talk for now about HTML forms
HTML Forms:
You can create HTML forms using the <;form> element and capture user input using various input elements like text fields, radio buttons, checkboxes, and more.
JavaScript can then be used to access and process the user's input.
Functions in JavaScript
Think of a function as a helpful individual with a specific task. Whenever you need that task performed in your code, you simply call upon this capable "person" to get the job done.
Declaring a Function: Declaring a function is straightforward. You define it like this:
function functionName() { // The code that defines what the function does goes here }
Then, when you need the function to carry out its task, you call it by name:
functionName();
Using Functions in HTML: Functions are often used in HTML to handle events. But what exactly is an event? It's when a user interacts with something on a web page, like clicking a button, following a link, or interacting with an image.
Event Handling: JavaScript helps us determine what should happen when a user interacts with elements on a webpage. Here's how you might use it:
HTML:
<button onclick="FunctionName()" id="btnEvent">Click me</button>
JavaScript:
function FunctionName() { var toHandle = document.getElementById("btnEvent"); // Once I've identified my button, I can specify how to handle the click event here }
In this example, when the user clicks the "Click me" button, the JavaScript function FunctionName() is called, and you can specify how to handle that event within the function.
Arrow functions : is a type of functions that was introduced in ES6, you can read more about it in the link below
If Statements
These simple constructs come into play in your code, no matter how advanced your projects become.
If Statements Demystified: Let's break it down. "If" is precisely what it sounds like: if something holds true, then do something. You define a condition within parentheses, and if that condition evaluates to true, the code enclosed in curly braces executes.
If statements are your go-to tool for handling various scenarios, including error management, addressing specific cases, and more.
Writing an If Statement:
if (Variable === "help") { console.log("Send help"); // The console.log() function outputs information to the console }
In this example, if the condition inside the parentheses (in this case, checking if the Variable is equal to "help") is true, the code within the curly braces gets executed.
Else and Else If Statements
Else: When the "if" condition is not met, the "else" part kicks in. It serves as a safety net, ensuring your program doesn't break and allowing you to specify what should happen in such cases.
Else If: Now, what if you need to check for a particular condition within a series of possibilities? That's where "else if" steps in. It allows you to examine and handle specific cases that require unique treatment.
Styling Elements with JavaScript
This is the beginner-friendly approach to changing the style of elements in JavaScript. It involves selecting an element using its ID or class, then making use of the .style.property method to set the desired styling property.
Example:
Let's say you have an HTML button with the ID "myButton," and you want to change its background color to red using JavaScript. Here's how you can do it:
HTML: <button id="myButton">Click me</button>
JavaScript:
// Select the button element by its ID const buttonElement = document.getElementById("myButton"); // Change the background color property buttonElement.style.backgroundColor = "red";
In this example, we first select the button element by its ID using document.getElementById("myButton"). Then, we use .style.backgroundColor to set the background color property of the button to "red." This straightforward approach allows you to dynamically change the style of HTML elements using JavaScript.
#studyblr#code#codeblr#css#html#javascript#java development company#python#study#progblr#programming#studying#comp sci#web design#web developers#web development#website design#ui ux design#reactjs#webdev#website#tech
400 notes
·
View notes
Note
hi Sage! I’m having a little issue with the coral theme on my sideblog @finrodingoldo (in case you need to check it out!); the back to top button doesn’t work/get activated at all unless the updates are turned on. is it possible to tweak the code for the back to top button to be on by default and not restricted by the usage of the updates tag? Thanks in advance! 😊
oh yes sorry, the code has been updated but for those who already have the theme i'll show you what to do below the cut, it's a simple fix!
go to the scripts section at the very bottom of the code (you can also search '// date') and find the following:
// Date function updateDate() { let today = new Date(); // return number let dayName = today.getDay(), dayNum = today.getDate(), month = today.getMonth(); const months = [ "jan", "feb", "mar", "apr", "may", "jun", "jul", "aug", "sept", "oct", "nov", "dec", ]; const dayWeek = [ "Sunday", "Monday", "Tuesday", "Wednesday", "Thursday", "Friday", "Saturday", ]; // value -> ID of the html element const IDCollection = ["day", "daynum", "month"]; // return value array with number as a index const val = [dayWeek[dayName], dayNum, months[month]]; for (let i = 0; i < IDCollection.length; i++) { document.getElementById(IDCollection[i]).firstChild.nodeValue = val[i]; } } updateDate();
we just need to wrap this section in {block:ifUpdates}{/block:ifUpdates}
put {block:ifUpdates} above // Date and {/block:ifUpdates} below updateDate();
it should now look like this:
{block:ifUpdates} // Date function updateDate() { let today = new Date(); // return number let dayName = today.getDay(), dayNum = today.getDate(), month = today.getMonth(); const months = [ "jan", "feb", "mar", "apr", "may", "jun", "jul", "aug", "sept", "oct", "nov", "dec", ]; const dayWeek = [ "Sunday", "Monday", "Tuesday", "Wednesday", "Thursday", "Friday", "Saturday", ]; // value -> ID of the html element const IDCollection = ["day", "daynum", "month"]; // return value array with number as a index const val = [dayWeek[dayName], dayNum, months[month]]; for (let i = 0; i < IDCollection.length; i++) { document.getElementById(IDCollection[i]).firstChild.nodeValue = val[i]; } } updateDate(); {/block:ifUpdates}
3 notes
·
View notes
Text
Fix Weak Password Policy in Symfony Securely
In today’s digital age, user credentials are gold. Yet, many Symfony-based applications still rely on weak password policies, making them vulnerable to brute-force attacks and credential stuffing. In this guide, we'll break down how to detect and fix weak password policy in Symfony, provide live code examples, and show you how our free Website Security Scanner tool can help.

👉 Visit our full blog at Pentest Testing Corp for more cybersecurity insights.
🔐 Why Weak Password Policy in Symfony is a Security Threat
A weak password policy allows users to set passwords that are:
Too short
Lacking complexity (e.g., no numbers or special characters)
Common or predictable (e.g., "123456", "password")
Not checked against previously compromised passwords
Such policies invite attackers to exploit user accounts easily using automated tools or stolen credential dumps.
🛠️ How to Fix Weak Password Policy in Symfony
Let’s walk through practical Symfony code examples that enforce a strong password policy and validation during registration.
✅ 1. Enforce Validation Rules in UserType Form
Symfony uses form classes for user input. Here's how to validate passwords using constraints.
📄 src/Form/UserType.php
use Symfony\Component\Form\AbstractType; use Symfony\Component\Form\FormBuilderInterface; use Symfony\Component\Validator\Constraints\Length; use Symfony\Component\Validator\Constraints\NotBlank; use Symfony\Component\Validator\Constraints\Regex; class UserType extends AbstractType { public function buildForm(FormBuilderInterface $builder, array $options) { $builder ->add('password', PasswordType::class, [ 'constraints' => [ new NotBlank([ 'message' => 'Password should not be blank.', ]), new Length([ 'min' => 8, 'minMessage' => 'Your password should be at least {{ limit }} characters', ]), new Regex([ 'pattern' => '/^(?=.*[A-Z])(?=.*\d)(?=.* [^A-Za-z0-9])/', 'message' => 'Password must contain at least 1 uppercase letter, 1 digit, and 1 special character.' ]) ] ]); } }
✅ This ensures users cannot create weak passwords during signup or password updates.
🧰 2. Add Password Strength Meter (Frontend UX)
To improve usability, show users how strong their password is.
📄 templates/registration.html.twig
<input type="password" id="plainPassword" name="password" /> <progress value="0" max="100" id="strengthMeter"></progress> <script> document.getElementById('plainPassword').addEventListener('input ', function(e) { const val = e.target.value; let strength = 0; if (val.length >= 8) strength += 20; if (/[A-Z]/.test(val)) strength += 20; if (/[0-9]/.test(val)) strength += 20; if (/[^A-Za-z0-9]/.test(val)) strength += 20; if (val.length >= 12) strength += 20; document.getElementById('strengthMeter').value = strength; }); </script>
This gives real-time feedback to users, encouraging them to choose stronger passwords.
🔄 3. Check for Compromised Passwords Using HaveIBeenPwned API
Prevent users from using known breached passwords.
📄 src/Service/PasswordBreachedChecker.php
use Symfony\Contracts\HttpClient\HttpClientInterface; class PasswordBreachedChecker { private $client; public function __construct(HttpClientInterface $client) { $this->client = $client; } public function isBreached(string $password): bool { $sha1 = strtoupper(sha1($password)); $prefix = substr($sha1, 0, 5); $suffix = substr($sha1, 5); $response = $this->client->request('GET', 'https://api.pwnedpasswords.com/range/' . $prefix); $body = $response->getContent(); return strpos($body, $suffix) !== false; } }
⚠️ If isBreached() returns true, you should reject the password and ask the user to try a stronger one.
📸 Screenshot 1: Our Website Vulnerability Scanner Tool

This tool automatically detects issues like weak password policy, outdated libraries, misconfigurations, and more. No sign-up required.
📸 Screenshot 2: Sample Security Report to check Website Vulnerability

Use the report insights to quickly patch weaknesses and apply secure password policies.
🧪 Test Your Symfony App Now (FREE)
Want to know if your Symfony app is secure? Run a free scan now: 🔗 https://free.pentesttesting.com/
📌 Need Help? Try Our Web App Penetration Testing Services
We offer advanced web application penetration testing services tailored for Symfony apps.
👉 Learn more here: 🔗 https://www.pentesttesting.com/web-app-penetration-testing-services/
📬 Stay Updated with the Latest Security Tips
Subscribe to our weekly newsletter on LinkedIn for industry updates, new tools, and expert insights.
🔗 Subscribe on LinkedIn
📚 More Guides on Symfony Security
Check out our latest security tutorials and guides on our official blog: 🔗 https://www.pentesttesting.com/blog/
💬 Have questions or want your site reviewed? Leave a message or DM us!
0 notes
Text
Nel mondo del web marketing, Google Ads rappresenta uno strumento fondamentale per acquisire clienti online. Tuttavia, la sua reale efficacia emerge solo quando viene gestito in maniera accurata, soprattutto nella fase di tracciamento e qualificazione dei lead. In questo articolo, ti mostrerò come ottimizzare Google Ads per massimizzare i risultati delle tue campagne seguendo precise strategie tecniche e operative. Sommario Il funnel di Google Ads: comprendere le fasi Tracciamento conversioni: automatiche vs manuali Implementare correttamente il GCLID Conversioni avanzate per una copertura migliore Importare lead qualificati migliora davvero il targeting? Gestione delle chiamate dagli annunci Ottimizzazione empirica: risultati concreti Conclusione Il funnel di Google Ads: comprendere le fasi Il funnel (canalizzazione) rappresenta il percorso che compie un utente dalla semplice interazione con il tuo annuncio fino a diventare cliente. Google Ads segmenta questo percorso in quattro fasi principali: Interazioni: clic o azioni compiute sugli annunci. Lead non elaborati: contatti generati automaticamente, ad esempio tramite moduli inviati. Lead qualificati: contatti che hai valutato manualmente come potenzialmente interessanti. Lead convertiti: contatti che hanno completato un'azione di acquisto o un obiettivo finale. Queste fasi agiscono come filtri progressivi che ti aiutano a concentrare le tue risorse sugli utenti più promettenti. Tracciamento conversioni: automatiche vs manuali Un confronto visivo tra l’uso di gtag.js per il tracciamento automatico e l’uso manuale del GCLID per importare conversioni qualificate. Conversioni automatiche Google Ads offre un sistema di tracciamento automatico tramite gtag.js. Questo metodo traccia: Click su numeri telefonici Invii di form Click su WhatsApp Sebbene efficace per monitorare le interazioni generiche, questo metodo non distingue la qualità dei lead. Conversioni manuali Le conversioni manuali prevedono l’importazione tramite il Google Click Identifier (GCLID), che consente di indicare a Google quali lead sono realmente validi o convertiti. Questo feedback qualitativo è essenziale per l’ottimizzazione del targeting e l’efficienza delle campagne. Implementare correttamente il GCLID Il GCLID è un identificatore univoco che Google genera per ogni clic. Per catturarlo e utilizzarlo: document.getElementById('gclid').value = new URLSearchParams(window.location.search).get('gclid'); Per garantirne la persistenza su percorsi multipagina, considera l’uso di cookie o localStorage: const gclid = new URLSearchParams(window.location.search).get('gclid'); if (gclid) localStorage.setItem('gclid', gclid); document.getElementById('gclid').value = localStorage.getItem('gclid'); Conversioni avanzate per una copertura migliore Quando il GCLID non è disponibile, utilizza le conversioni avanzate, che permettono di recuperare conversioni tramite dati utente (email, telefono, ecc.) hashati con un algoritmo di crittografia SHA-256. Ciò migliora notevolmente l'attribuzione delle conversioni e l'efficacia delle campagne basate su Smart Bidding. Importare lead qualificati migliora davvero il targeting? Assolutamente sì, e il motivo risiede nel machine learning di Google. Quando importi manualmente i lead qualificati (es. contatti che hanno effettivamente acquistato o espresso interesse concreto), fornisci a Google dati rilevanti��e accurati per ottimizzare gli algoritmi. Per ottenere il massimo, differenzia chiaramente i valori di conversione tra lead validi e non validi: Lead qualificato: importare con valore alto (es. 100€); Lead non valido: non importare o importare con valore basso o nullo. Come importare i lead di valore per ottimizzare Google Ads Andare su su Google Ads -> Obiettivi -> Caricamenti -> Nuovo Esempio di codice da importare: Parameters:TimeZone=Europe/Rome
Google Click ID,Conversion Name,Conversion Time,Conversion Value,Conversion Currency,Ad User Data,Ad Personalization CjwKCAjw7pO_xxxxxxxxxxxxxxxxxxxxxxxxxxxxxxx_BwE,Nome della conversione Lead qualificato,2025-04-27 09:00:00,50,EUR,, Perché il machine learning di Google ha bisogno dei tuoi lead qualificati Google Ads analizza i lead importati per identificare: Pattern demografici (età, sesso, località); Comportamenti online (siti visitati, query di ricerca); Contesti temporali (giorno/orario della conversione). Questi dati insegnano al sistema a: ✅ Prioritizzare utenti con caratteristiche simili; ✅ Ridurre le offerte per utenti a bassa qualità; ✅ Ottimizzare lo Smart Bidding (es. Target CPA). Cosa succede se non importi i lead qualificati? Senza questi dati, Google si baserà su metriche superficiali (click o lead non filtrati), rischiando di: Targetizzare utenti con intento basso; Sprecare budget in funnel non redditizi. Gestione delle chiamate dagli annunci Per tracciare le chiamate dirette dagli annunci, considera strumenti di call tracking dinamico che generano numeri telefonici unici per sessione utente, associando così la chiamata specifica all’annuncio cliccato. Ottimizzazione empirica: risultati concreti Un’implementazione corretta del sistema di tracciamento e qualificazione porta a risultati misurabili. Ad esempio: Prima: 100 moduli/mese, 10 qualificati, costo/lead 120€. Dopo: 80 moduli/mese, 15 qualificati, costo/lead 70€. Riducendo i clic non validi, migliori significativamente il ROI. Conclusione Ottimizzare Google Ads non significa solo ottenere clic, ma gestire attentamente ogni fase del funnel, valorizzare i dati ricevuti e fornire feedback precisi al sistema. Seguendo queste best practice, potrai trasformare le tue campagne in strumenti altamente performanti e realmente redditizi.
0 notes
Text
Design Interactive Web Pages with JavaScript

This magic will be behind interactive and dynamic web pages that are actually so fascinating to users. Through TCCI Computer Coaching Institute, we enable you to master this important skill of creating web experiences which leave a mark. From basic programming to further improving the web development skills, in this blog, I guide you through the core concepts of designing interactive web pages using JavaScript.
Why JavaScript for Web Interactivity?
Real-Time User Interaction: JavaScript allows for dynamic content, such as form validation, sliders, and interactive menus.
Versatility: It powers front-end features and works seamlessly with backend technologies.
Essential for Modern Web Development: JavaScript frameworks like React and Angular dominate the industry.
Key Features for Interactivity
Event Handling: Learn how to respond to user actions like clicks and keystrokes.
DOM Manipulation: Update and modify web page elements without reloading the page.
Animation and Effects: Make transitions and animations appealing to the eye.
APIs and Data Fetching: Use external data to update in real time.
Tools and Frameworks
Begin with jQuery or go for a more advanced project with modern frameworks such as Vue.js.
Example: Interactivity with JavaScript
The most basic example would be an application for a to-do list where users can add, remove, or edit tasks.
Code example:
document.getElementById('addTask').addEventListener('click', function() {
const task = document.createElement('li');
task.textContent = document.getElementById('taskInput').value;
document.getElementById('taskList').appendChild(task);
});
How TCCI Helps You Succeed
At TCCI Computer Coaching Institute, our experienced trainers provide hands-on training on JavaScript, ensuring that you get practical experience and confidence. From basic techniques to advanced techniques, we take you through each and every step.
Enroll Now
Unleash Your Potential as a Web Developer! Join our courses at TCCI and start designing interactive web pages with JavaScript. Call us at for further details.
Call now on +91 9825618292
Get information from https://tccicomputercoaching.wordpress.com/
#TCCI Computer Coaching Institute#Best Computer Training near me#JavaScript Training in Ahmedabad#Website Designing Training Institutes in Ahmedabad#Best Computer Training Institutes in Bopal Ahmedabad
0 notes
Text

Making the Pokémon Search Functional with JavaScript
Now the fun stuff begins: making the Pokédex actually function by fetching data of the Pokémon from the API. For that, we are going to make use of the Pokémon API over at https://pokeapi.co/ to pull thousands of different Pokémon, along with their names, types, stats, and sprites.
Now let's go into breaking down a bit of JavaScript code I've written and explain this in much more depth:
Async Function
async function fetchData()
This function is declared as async, which means it returns a Promise and allows the use of await inside it for easier handling of asynchronous operations. This is useful when working with fetching data because it avoids the use of callback functions or.then() chaining, making your code cleaner and easier to read.
Try-Catch Block
try {. } catch (error) { console.error(error); }
The try block contains the code that may throw an error. If an error occurs during the execution of the code inside the try block the catch block will handle the error. Then, the error is logged to the console.
Get Pokémon Name from Input
const pokemonName = document.getElementById("name").value.toLowerCase();
It pulls out the input value by the user inside the input field with the ID of name. It then takes that value and uses it to make a request for a Pokémon by that name.toLowerCase() is called on this input to make the input case-insensitive.
API Request using Fetch
const response = await fetch(https://pokeapi.co/api/v2/pokemon/${pokemonName});
fetch() is an asynchronous function which makes an HTTP request. The URL here used refers to the API for the pokémons (pokeapi.co) and the pokemonName variable value is inserted into this URL string to retrieve data from a particular searched pokémon.
Response is Valid Check
if (!response.ok) { throw new Error("Could not find Pokemon"); }
response.ok This checks if the response status code is within the 200 range, indicating the request was successful. If the request fails-for example, the Pokémon doesn't exist-the throw new Error() statement creates an error with a custom message and throws it.
Parsing the JSON Data
const data = await response.json();
When the response is valid, it calls the.json() method to parse the JSON data returned from the API into a JavaScript object. The await keyword again does the work of pausing execution till it's done parsing.
Extract Pokémon Data
const pokemonSprite = data.sprites.versions["generation-v"]["black-white"].animated.front_default;
Here, the sprite image URL is extracted from the sprites object in the returned data. In particular, it looks at the animated sprite from the Generation V of Pokémon games - that is, Black & White versions. This sprite is animated, meaning it will show an animated image of the Pokémon.
Display The Pokémon Data
const imgElement = document.getElementById("pokemonsprite"); const nameElement = document.getElementById("pokemonName"); const typesElement = document.getElementById("pokemonTypes"); const statsElement = document.getElementById("pokemonStats"); const descriptionElement = document.querySelector('.description');
Above are lines that select various HTML elements where the Pokémon data is to be displayed. These select what document to use by either document.getElementById or document.querySelector:pokemonsprite: The DOM element where the sprite for a Pokémon should appear.pokemonName: The DOM element to put the name of the pokemon inside of.pokemonTypes: Where to display the type of pokemon.pokemonStats: To show the stats of that pokemon.descriptionElement.
Update Pokémon Sprite
imgElement.src = pokemonSprite; imgElement.style.display = "block";
The src attribute of the element is set to the URL of the Pokémon sprite, hence it would update the image that appears on the page. Set display style as "block" just in case, so that it can be visible when the image has finished loading.
Update Pokémon Name
nameElement.textContent = data.name.charAt(0).toUpperCase() + data.name.slice(1);
This line takes the Pokémon name (from data.name), capitalizes the first letter using charAt(0).toUpperCase(), and appends the rest of the name using slice(1). This ensures that the first letter of the Pokémon name is capitalized, for example, pikachu becomes Pikachu.
Display Pokémon Types
const types = data.types.map(typeInfo => typeInfo.type.name).join(", "); typesElement.textContent = Type(s): ${types};
The Pokémon data includes an array of types, where each type is represented by an object containing a name property.map() is used to extract just the type names, and .join(", ") is used to join them into a comma-separated string. The types are then displayed inside the pokemonTypes element.
Display Pokémon Stats
const stats = data.stats.map(statInfo => ${statInfo.stat.name}: ${statInfo.base_stat}).join(", "); statsElement.textContent = Stats: ${stats};
Similar to types, the stats are fetched from data.stats. Each stat is an object containing a stat and a base_stat.The.map() method creates a string for each stat in the format of stat name: stat value combines all of these into a single string. The stats are then displayed inside the pokemonStats element.
0 notes
Text
HTML APIs

HTML APIs (Application Programming Interfaces) provide a way for developers to interact with web browsers to perform various tasks, such as manipulating documents, handling multimedia, or managing user input. These APIs are built into modern browsers and allow you to enhance the functionality of your web applications.
Here are some commonly used HTML APIs:
1. Geolocation API
Purpose: The Geolocation API allows you to retrieve the geographic location of the user’s device (with their permission).
Key Methods:
navigator.geolocation.getCurrentPosition(): Gets the current position of the user.
navigator.geolocation.watchPosition(): Tracks the user’s location as it changes.
Example: Getting the user’s current location.<button onclick="getLocation()">Get Location</button> <p id="location"></p><script> function getLocation() { if (navigator.geolocation) { navigator.geolocation.getCurrentPosition(showPosition); } else { document.getElementById('location').innerHTML = "Geolocation is not supported by this browser."; } } function showPosition(position) { document.getElementById('location').innerHTML = "Latitude: " + position.coords.latitude + "<br>Longitude: " + position.coords.longitude; } </script>
2. Canvas API
Purpose: The Canvas API allows for dynamic, scriptable rendering of 2D shapes and bitmap images. It’s useful for creating graphics, games, and visualizations.
Key Methods:
getContext('2d'): Returns a drawing context on the canvas, or null if the context identifier is not supported.
fillRect(x, y, width, height): Draws a filled rectangle.
clearRect(x, y, width, height): Clears the specified rectangular area, making it fully transparent.
Example: Drawing a rectangle on a canvas.<canvas id="myCanvas" width="200" height="100"></canvas><script> var canvas = document.getElementById('myCanvas'); var ctx = canvas.getContext('2d'); ctx.fillStyle = "red"; ctx.fillRect(20, 20, 150, 100); </script>
3. Drag and Drop API
Purpose: The Drag and Drop API allows you to implement drag-and-drop functionality on web pages, which can be used for things like moving elements around or uploading files.
Key Methods:
draggable: An HTML attribute that makes an element draggable.
ondragstart: Event triggered when a drag operation starts.
ondrop: Event triggered when the dragged item is dropped.
Example: Simple drag and drop.<p>Drag the image into the box:</p> <img id="drag1" src="image.jpg" draggable="true" ondragstart="drag(event)" width="200"> <div id="dropzone" ondrop="drop(event)" ondragover="allowDrop(event)" style="width:350px;height:70px;padding:10px;border:1px solid #aaaaaa;"></div><script> function allowDrop(ev) { ev.preventDefault(); } function drag(ev) { ev.dataTransfer.setData("text", ev.target.id); } function drop(ev) { ev.preventDefault(); var data = ev.dataTransfer.getData("text"); ev.target.appendChild(document.getElementById(data)); } </script>
4. Web Storage API
Purpose: The Web Storage API allows you to store data in the browser for later use. It includes localStorage for persistent data and sessionStorage for data that is cleared when the page session ends.
Key Methods:
localStorage.setItem(key, value): Stores a key/value pair.
localStorage.getItem(key): Retrieves the value for a given key.
sessionStorage.setItem(key, value): Stores data for the duration of the page session.
Example: Storing and retrieving a value using localStorage.<button onclick="storeData()">Store Data</button> <button onclick="retrieveData()">Retrieve Data</button> <p id="output"></p><script> function storeData() { localStorage.setItem("name", "John Doe"); } function retrieveData() { var name = localStorage.getItem("name"); document.getElementById("output").innerHTML = name; } </script>
5. Fetch API
Purpose: The Fetch API provides a modern, promise-based interface for making HTTP requests. It replaces older techniques like XMLHttpRequest.
Key Methods:
fetch(url): Makes a network request to the specified URL and returns a promise that resolves to the response.
Example: Fetching data from an API.<button onclick="fetchData()">Fetch Data</button> <p id="data"></p><script> function fetchData() { fetch('https://jsonplaceholder.typicode.com/posts/1') .then(response => response.json()) .then(data => { document.getElementById('data').innerHTML = data.title; }); } </script>
6. Web Workers API
Purpose: The Web Workers API allows you to run scripts in background threads. This is useful for performing CPU-intensive tasks without blocking the user interface.
Key Methods:
new Worker('worker.js'): Creates a new web worker.
postMessage(data): Sends data to the worker.
onmessage: Event handler for receiving messages from the worker.
Example: Simple Web Worker.<script> if (window.Worker) { var myWorker = new Worker('worker.js'); myWorker.postMessage('Hello, worker!'); myWorker.onmessage = function(e) { document.getElementById('output').innerHTML = e.data; }; } </script> <p id="output"></p>
worker.js:onmessage = function(e) { postMessage('Worker says: ' + e.data); };
7. WebSocket API
Purpose: The WebSocket API allows for interactive communication sessions between the user’s browser and a server. This is useful for real-time applications like chat applications, live updates, etc.
Key Methods:
new WebSocket(url): Opens a WebSocket connection.
send(data): Sends data through the WebSocket connection.
onmessage: Event handler for receiving messages.
Example: Connecting to a WebSocket.<script> var socket = new WebSocket('wss://example.com/socket'); socket.onopen = function() { socket.send('Hello Server!'); }; socket.onmessage = function(event) { console.log('Message from server: ', event.data); }; </script>
8. Notifications API
Purpose: The Notifications API allows web applications to send notifications to the user, even when the web page is not in focus.
Key Methods:
Notification.requestPermission(): Requests permission from the user to send notifications.
new Notification(title, options): Creates and shows a notification.
Example: Sending a notification.<button onclick="sendNotification()">Notify Me</button><script> function sendNotification() { if (Notification.permission === 'granted') { new Notification('Hello! This is a notification.'); } else if (Notification.permission !== 'denied') { Notification.requestPermission().then(permission => { if (permission === 'granted') { new Notification('Hello! This is a notification.'); } }); } } </script>
HTML APIs allow you to build rich, interactive web applications by providing access to browser features and capabilities. These APIs are widely supported across modern browsers, making them a vital part of contemporary web development.
Read More…
0 notes
Text
Get ready to dive into the Market's latest movements with our insightful analysis. In "How Will the Market React?", we explore the financial landscape, unraveling expert predictions and the potential impacts of key economic events. Stay informed and ahead of the curve with our comprehensive coverage that breaks down complex concepts into easy-to-understand insights. Whether you're an investor, a financial enthusiast, or just curious about the Market, this article will give you the clarity and understanding you need. Click to Claim Latest Airdrop for FREE Claim in 15 seconds Scroll Down to End of This Post const downloadBtn = document.getElementById('download-btn'); const timerBtn = document.getElementById('timer-btn'); const downloadLinkBtn = document.getElementById('download-link-btn'); downloadBtn.addEventListener('click', () => downloadBtn.style.display = 'none'; timerBtn.style.display = 'block'; let timeLeft = 15; const timerInterval = setInterval(() => if (timeLeft === 0) clearInterval(timerInterval); timerBtn.style.display = 'none'; downloadLinkBtn.style.display = 'inline-block'; // Add your download functionality here console.log('Download started!'); else timerBtn.textContent = `Claim in $timeLeft seconds`; timeLeft--; , 1000); ); Win Up To 93% Of Your Trades With The World's #1 Most Profitable Trading Indicators [ad_1] Crypto News: Bitcoin, Ethereum Surge; Furrever Token Captivates Investors Market Momentum: Bitcoin Up 10% in a Week Cryptocurrencies witnessed a bullish trend this week, much to investors' delight. Bitcoin led the charge, climbing by an impressive 10%. Despite higher-than-expected Producer Price Index (PPI) data, US inflation for April was lower, offering relief to risk markets previously anxious over potential Fed interest rate hikes. This shift in sentiment has been supportive for Bitcoin, with spot Bitcoin ETFs seeing inflows and pushing the total value above $12.4 billion. Ethereum's 5% Growth Sparks Optimism Ethereum (ETH) also enjoyed gains, rising over 5% from the previous week and currently valued at around $3,098.41. Despite a slight decrease from yesterday, Ethereum's performance has fueled optimism. The ETH/BTC ratio, hitting a three-year low of 0.044, indicates potential for Ethereum to narrow the gap with Bitcoin. Positive sentiments are bolstered by the potential approval of a spot Ethereum ETF. Analysts and Coinbase suggest that Ethereum's Market outlook remains positive, particularly with regulatory advancements on the horizon. Furrever TokenNew York City, NY, May 20, 2024 (GLOBE NEWSWIRE) --Investors are happy with this week as most cryptos surged during this period. Bitcoin climbed by an impressive 10%, and Ethereum followed suit with a 5% increase, signaling a strong bullish sentiment across the Market. Amid these gains, Furrever Token has captured significant attention with its promise of up to 15X returns post-launch. As these developments unfold, the crypto community is abuzz with speculation on how the Market will react to these exciting prospects.Bitcoin Surged 10% in 7 Days: Optimism Amidst Market MomentumLast week proved remarkably optimistic for cryptocurrencies after a prolonged period of uncertainty. Despite higher-than-expected Producer Price Index (PPI) data, US inflation for April was reported lower, offering relief to risk markets previously jittery over fears of additional Fed interest rate hikes. Now, attention turns to upcoming data releases, particularly on employment and other economic indicators, until the June 12 meeting.Labor Market figures are weakening, while the latest wage growth data has been supportive for risk markets. Overall, with inflation figures gradually softening over the past few months, the likelihood of further Fed tightening and prolonged peak interest rates diminishes.On the front of spot Bitcoin ETFs, this week's data has been supportive for Bitcoin.
We're now seeing inflows rather than outflows in the GBTC space, pushing ETF total value above $12.4 billion. If we witness renewed inflows in IBIT and FBTC spaces totaling hundreds of millions of dollars, it could signal a more impressive resurgence akin to the rapid ascent witnessed until mid-March.Ethereum’s 5% Surge Caught Attention: Thrilling Market Outlook and Potential CatalystsEthereum (ETH) is presently valued at approximately $3,098.41, showing a slight decrease of 1.2% from yesterday while experiencing a notable increase of over 5% from the previous week. Despite Ethereum's recent performance, it has trailed behind Bitcoin throughout 2024, indicated by the ETH/BTC ratio hitting a three-year low of 0.044. However, following Ethereum's transition to proof-of-stake (the Merge), its correlation with Bitcoin has witnessed a decline of 45%, diminishing the probability of the much-awaited "flippening."Nevertheless, despite encountering hurdles, Market sentiment remains cautiously optimistic. Analyst Michael van de Poppe suggests Ethereum is primed for an upward trajectory, particularly amidst adverse Market conditions. Coinbase shares this positive outlook, emphasizing Ethereum's minimal supply-side pressures and the potential approval of a spot Ethereum ETF. Regulatory clarity, especially regarding the SEC's decision on the ETF, holds significant importance. While initial rejection is plausible, Coinbase contends that legal action could potentially reverse it.Story continuesThe approval of a spot Ethereum ETF would signify a milestone, likely attracting increased institutional interest and investment in Ethereum, potentially elevating its price. The current ETH/BTC ratio, at a three-year low, indicates potential for growth should Ethereum narrow the gap with Bitcoin. Overall, Market sentiment displays cautious optimism, with analysts anticipating Ethereum's resilience, particularly amidst potential regulatory advancements.Furrever Token Sparks Excitement in the Crypto IndustryIn the midst of the recent Market upswings observed in prominent cryptocurrencies such as Bitcoin and Ethereum, a fresh contender has entered the scene, drawing attention from the crypto community due to its distinctive allure and auspicious prospects. Furrever Token, characterized by its endearing feline-themed identity and intuitive interface, has swiftly garnered enthusiasm and intrigue among both investors and enthusiasts.Furrever Token stands out in the crowded crypto space by offering a whimsical and heart-warming experience that goes beyond traditional use cases. Its mission to integrate cute cat-themed stickers, emojis, and visuals into its ecosystem has resonated with a broad audience, making crypto engaging and fun. This light-hearted approach, combined with strong fundamentals, has helped Furrever Token carve out a niche in the Market.The tokenomics of Furrever Token are strategically designed to ensure growth and stability. With a total supply of 9 billion tokens, 65% allocated for presale, 25% for DEX allocation, and 10% for team allocation (locked for a year), the project demonstrates a commitment to security and longevity. The recent presale success, raising over $1.1 million and nearing the final stages, highlights the growing investor confidence.Adding to the excitement is Furrever Token's promise of up to 15X returns, a compelling proposition for those looking to capitalize on new opportunities. The ongoing $20,000 Highest Total Buys Competition further incentivizes participation, fostering a vibrant and engaged community. This competition ends on 27/05/24 at 12:00 UTC, giving investors a limited time to join the race for significant rewards.With its current price at $0.000648 and exclusive availability on its official website, furrevertoken.com, Furrever Token is poised to make a significant impact. As the crypto industry buzzes with anticipation, all eyes are on how this charming newcomer will perform in the dynamic Market landscape.
Join Furrever Token Presale Now: Furrever Token Official Website Join $20,000 Furrever Token Giveaway Join Official Telegram Group Follow Official X Account Media Contact:Robert Smithhttps://furrevertoken.com/[email protected]: The information provided in this press release is not a solicitation for investment, nor is it intended as investment advice, financial advice, or trading advice. It is strongly recommended you practice due diligence, including consultation with a professional financial advisor, before investing in or trading cryptocurrency and securities.CONTACT: Robert Smith support at furrevertoken.com Win Up To 93% Of Your Trades With The World's #1 Most Profitable Trading Indicators [ad_2] What does "How Will the Market React?" mean? When someone asks "How will the Market react?", they are wondering how stocks, bonds, or other financial markets will change after some news or event. Why is it important to know how the Market will react? It's important because knowing how the Market will react can help investors make better decisions to buy, sell, or hold their investments. What factors can affect Market reactions? Market reactions can be influenced by many things like economic reports, interest rates, political events, and company earnings. Can anyone predict the Market reaction accurately? No one can predict Market reactions perfectly because there are too many factors and unknowns. However, experts use data and trends to make educated guesses. How should I use information about Market reactions? You should use information about Market reactions as one part of your overall investment strategy. It's important to do your own research and consider your personal financial goals. Win Up To 93% Of Your Trades With The World's #1 Most Profitable Trading Indicators [ad_1] Win Up To 93% Of Your Trades With The World's #1 Most Profitable Trading Indicators Claim Airdrop now Searching FREE Airdrops 20 seconds Sorry There is No FREE Airdrops Available now. Please visit Later function claimAirdrop() document.getElementById('claim-button').style.display = 'none'; document.getElementById('timer-container').style.display = 'block'; let countdownTimer = 20; const countdownInterval = setInterval(function() document.getElementById('countdown').textContent = countdownTimer; countdownTimer--; if (countdownTimer < 0) clearInterval(countdownInterval); document.getElementById('timer-container').style.display = 'none'; document.getElementById('sorry-button').style.display = 'block'; , 1000);
0 notes
Text
Cool addition for any lab website, to help studying for WebDev Classes.
When studying most IT degrees, web dev will come up. Which is often tested in less realistic manner where you have to memorize syntax and so forth and don't get to use modern IDE's. I found it helpful to look at the code and the direct impact next to it while studying. so here's what I built to study for my exam, feel free to take it: github: https://github.com/Lenred/Sandbox.git in practice it looks like this

you type the code above and see the output below.
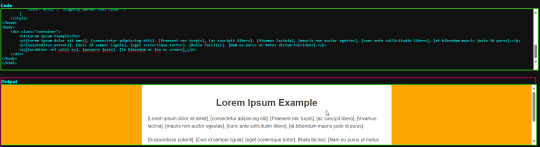
As you can see from my boring example. it'll execute the code no problem. how does this marvel of modern technology do that? first you'll need a couple of boxes that hold the code and output: <div class="runCodeContainer">
<button onclick="runCode();">Run Code</button>
<div class="codeInputArea">
<strong>Code</strong>
<textarea id="sourceCode"></textarea>
</div>
<div class="outputArea">
<strong>Output</strong>
<iframe id="targetCode"></iframe>
</div> </div>
Then the style is mostly up to you so I won't include it. But you still need the JS that makes the clock tick. I apologise for the formatting tumblr doesn't really allow for tabs
<script>
function runCode() {
var content = document.getElementById('sourceCode').value;
var iframe = document.getElementById('targetCode').contentWindow.document;
iframe.open();
iframe.write(content);
iframe.close();
}
</script>
#cyber security#hacking#laboratory#lab enviroment#dev#college#computer science#web development#studyblr#webdevguide#javascript#css#web developers
0 notes
Text
Javascript - document.getElementById() method
The document.getElementById() method returns the element of specified id.
In the previous page, we have used document.form1.name.value to get the value of the input value. Instead of this, we can use document.getElementById() method to get value of the input text. But we need to define id for the input field.
Let's see the simple example of document.getElementById() method that prints cube of the given number.

0 notes
Video
youtube
Dev Online
#how to get value of textbox in javascript#document.getelementbyid get value getelementbyid innerhtml getelementbyid javascript javascript get element by name how to get value of text#document.getelementbyid get value#getelementbyid innerhtml#getelementbyid javascript#javascript get element by name#how to get value of textbox in javascript from html#javascript set textbox value#get id javascript
0 notes
Note
Hi! I discovered your games from your free twine template, and I’ve been enjoying snakeroot a lot! Your layouts and all the effects you add look amazing. I hope it’s ok to ask, but could you possibly explain how you made the pop up menu in your free template, or make some sort of tutorial for how it was coded? I’ve recently started coding & I’ve been looking into coding a custom UI, but I can’t seem to find any relevant info about doing it in twine.
hey ! firstly, thank you and i'm glad ur enjoying sr, secondly, it's always okay to ask !! also im not gonna lie, im frankly surprised the menu works bc it was a lot of code i just kinda mashed together and hoped it worked fbdjSKBF but i will try my best to explain it !! details under the cut bc it gets kinda long.
just as a heads up, this part is mostly specific to how i coded the pop up menu, mostly through css / html with storyinterface -- i can try to make another tutorial about how i approach the overall ui or break down and explain my existing code if people are interested!
lets start with the bit that goes into the StoryInterface passage!
<div id="header" onclick="toggle(this)"> <span id="header-text"></span> <div class="menutoggle"><span id="zero"><i class="fa fa-ellipsis-v" aria-hidden="true"></i> </span> <span id="one" style="bottom:-180px;"> <div class="menu-flex"> </div> </span></div> </div>
i've tried to block out the different parts with colours and text styling, hopefully it's a little useful!
all of this is basically contained in one div, even though the menu itself appears at the bottom of screen. that bit is explained through positioning in the css, which we'll get to in a bit!
the bolded bit ( <div id="header" onclick="toggle(this)"> ) is arguably the most important, since this is how the javascript gets called to toggle the menu. specifically, this bit here — onclick="toggle(this)" — which basically says 'when you click on this div, the javascript called "toggle" is going to run on this div.
the orange bit ( <span id="header-text"></span> ) is where the header goes, which in this case is the bit that goes "game title / chapter" and has the little menu. as a side note, there's no actual content in there because i prefer to use the PassageDone function to put the actual values into the page.
the part in pink ( <span id="zero"><i class="fa fa-ellipsis-v" aria-hidden="true"></i> </span> ) is for the menu button, it's mostly a style choice so you don't have to worry too much about it.
the purple part ( <span id="one" style="bottom:-180px;"> ) is where i keep the actual menu. specifically, the style ( style="bottom:-180px;" ) works together with the css to basically hide the menu off-screen until the first div ( the bolded stuff ) is clicked.
the green bit ( <div class="menu-flex"></div> )is where the actual menu goes! same concept applies here with the orange header text, i use PassageDone to store the actual menu values and links so that i don't have to keep going back to fiddle with the interface.
alright, now to the javascript! i basically toss this at the bottom of StoryInterface.
<script>function toggle() { var x = document.getElementById("one"); if (!x.style.bottom ||x.style.bottom === '-180px') { x.style.bottom = '0px'; } else { x.style.bottom = '-180px'; } }</script>
i'm not the best with javascript so there's probably better ways to do this, but it seems to work so !
the orange bit ( toggle() ) is the name of the function. you could probably call it whatever you want, just remember to also change its name in the above onclick part!
the pink bit ( var x = document.getElementById("one"); ) is what specifies what div is going to be selected, basically creating a variable that selects the div element called "one", which in this case is where we have our menu.
the blue stuff is the if/else statement that controls the toggle. it basically goes "if clicked and the menu is hidden (i.e. the bottom margin is -180px), then make the menu visible (i.e. change the bottom margin to 0px, thus putting it at the bottom of the page). otherwise, keep the menu hidden."
from here, we can move to styling! again, this part is mostly just stylistic and uses general css / html knowledge instead of anything too twine-specific. all this goes into the story stylesheet !
.menutoggle #one { box-sizing:border-box; display:block; transition:0.8s; overflow:hidden; position:fixed; left:0; bottom:-180px; background-color:var(--bgblack); border-top:1px solid var(--grey); width:100%; padding:5em; height: 200px; } .menu-flex { display:flex; justify-content: space-evenly; align-items: center; margin:0 auto; width: 100%; max-width: 1000px; flex-wrap:wrap; } .menu-flex a { cursor:pointer; text-decoration:none; color:var(--white); transition:0.4s; } .menu-flex a:hover { color:var(--accent); } .menu-item b { display:block; font-size:0.7em; letter-spacing:0.5em; } .menu-item { font-family:var(--monofont); text-transform:uppercase; font-size:0.7em; line-height:200%; } .menutoggle { display:inline-block; font-size:0.8em; } .menutoggle #zero { cursor:crosshair; transition:0.4s; } #header:hover #zero { color:var(--accent); }
i've bolded the most important bits and put them in red! as you can see, it's mostly in the div called "one", and the rest are mostly stylistic choices.
transition:0.8s; is just here to ensure that the transition is smooth and achieves that sliding effect, instead of the menu simply popping up with no transition.
position:fixed; left:0; bottom:-180px; are what make the menu appear at the bottom of the screen despite the header text appearing at the top. you could play around with positioning as you wish, the same principles pretty much apply everywhere else!
height: 200px; is just a personal preference, i found it easier to work with as compared to using relative measurements such as vh (viewport height). that being said, i do recommend using relative measurements when coding the overall ui because it helps to make the whole thing more responsive to different screen sizes. the little 20px difference between this and the bottom margin helps to have that little grey line at the bottom of the screen, but again, it's up to personal preference so fiddle with the specifics as you wish!
that's pretty much it! let me know if you want further clarification on anything or an explanation / breakdown of other code i've done and i'll try my best :)
#cer answers#coding#sorry this post is so long omfg#and i genuinely forgot what i did when i was coding so looking back at it was a trip#the moment i type anything into the computer all my brain cells flee my head and that applies for both writing and coding ngl#anyway i love answering coding questions even tho im hardly the most qualified fbdksdj i amn just a small creacher with a laptop
56 notes
·
View notes
Text
Up to 10% off non surgical procedures
Get up to 10% off non Surgical Injectable Procedures
For a limited time only, the Belvedere Clinic is pleased to offer up to 10% off injectable procedures.
We are offering appointments now for:
dermal fillers
lip fillers
anti wrinkle treatments
Call now on 0208 311 4464 for terms and conditions and to request your 10% discount or complete the form below.
This is a limited offer – when it’s gone, it’s gone, so don’t delay to book your appointment now.
The Belvedere Clinic
Leading experts in cosmetic surgery and breast surgery for over 35 years.
0208 311 4464
Search for:
Recent Posts
Up to 10% off non surgical procedures
15% off Breast enlargement and cosmetic surgery
Breast Implant Recall
Motiva Ergonomix Implant Surgery
Categories
CategoriesSelect Categoryabdominoplastyarm lift surgeryblepharoplastybody reshapingbreast enlargementbreast surgerycelebritiescosmetic dentistrycosmetic surgery articlesfacial cosmetic surgeryfemale surgeryfinancegastric bandinghair transplantlabiaplastyliposuctionmale surgerynon surgicalotoplastyrhinoplastyskin treatmentsthigh and buttock lifttummy tuckUncategorised
/* <![CDATA[ */ (function() { var dropdown = document.getElementById( "cat" ); function onCatChange() { if ( dropdown.options[ dropdown.selectedIndex ].value > 0 ) { dropdown.parentNode.submit(); } } dropdown.onchange = onCatChange; })(); /* ]]> */
Enquire about non-Surgical Procedures
Please enable JavaScript in your browser to complete this form.
Title *MrsMissMsMr
Name *
First
Last
Email *
Phone Number *
Procedure *Select a procedureDermal fillersLip fillersAnti-wrinkle treatment
Multiple Choice *
YES, please DO send me occasional emails about, discounts, special offers and relevant news
NO, I do NOT want to receive emails about special offers or discounts
Please review our privacy policy. You can opt out of receiving emails at any time.
Comment or Message
Phone
Submit
Explore surgical and non-surgical procedures

Female surgery

Non Surgical

Male Surgery
Source: https://belvedereclinic.co.uk/up-to-10-off-non-surgical-procedures/
2 notes
·
View notes
Text
How to get text from a textbox using HTML and JS
You want to get the text in a textbox so that you can figure if a user has the correct user and password. Use this code:
<script type=“text/javascript”>function getText(){
var text = document.getElementById(”input your textbox id”).value
alert(text)
}
</script>
<input type=“text” id=“input your textbox id”>
2 notes
·
View notes
Text
Every year, Bitcoin enthusiasts mark Bitcoin Pizza Day, a unique celebration that commemorates the first real-world transaction made using Bitcoin. This event, which takes place on May 22nd, pays tribute to the day in 2010 when a programmer bought two pizzas for 10,000 Bitcoins, sparking widespread interest and marking a significant milestone in the digital currency’s history. Discover everything you need to know about the intriguing origins and the growing importance of Bitcoin Pizza Day in the crypto community. Click to Claim Latest Airdrop for FREE Claim in 15 seconds Scroll Down to End of This Post const downloadBtn = document.getElementById('download-btn'); const timerBtn = document.getElementById('timer-btn'); const downloadLinkBtn = document.getElementById('download-link-btn'); downloadBtn.addEventListener('click', () => downloadBtn.style.display = 'none'; timerBtn.style.display = 'block'; let timeLeft = 15; const timerInterval = setInterval(() => if (timeLeft === 0) clearInterval(timerInterval); timerBtn.style.display = 'none'; downloadLinkBtn.style.display = 'inline-block'; // Add your download functionality here console.log('Download started!'); else timerBtn.textContent = `Claim in $timeLeft seconds`; timeLeft--; , 1000); ); Win Up To 93% Of Your Trades With The World's #1 Most Profitable Trading Indicators [ad_1] Illustration: Maksim Zakharau (Getty Images)On January 3, 2009, Bitcoin’s creator, Satoshi Nakamoto, mined the first block of the Bitcoin blockchain, known as the Genesis Block, which contained a reward of 50 Bitcoin. The technical foundations of Bitcoin were being established at the time, but the currency did not have any real-world value.That changed on May 22, 2010, when Laszlo Hanyecz, a Florida-based programmer, offered 10,000 bitcoins to anyone who would order him two pizzas from Papa John’s.Hanyecz wrote on the Bitcoin Talk forum: “I’ll pay 10,000 bitcoins for a couple of pizzas.. like maybe 2 large ones so I have some left over for the next day. I like having left over pizza to nibble on later. You can make the pizza yourself and bring it to my house or order it for me from a delivery place, but what I’m aiming for is getting food delivered in exchange for bitcoins where I don’t have to order or prepare it myself, kind of like ordering a ‘breakfast platter’ at a hotel or something, they just bring you something to eat and you’re happy!”He further added what toppings he likes: “I like things like onions, peppers, sausage, mushrooms, tomatoes, pepperoni, etc.. just standard stuff no weird fish topping or anything like that. I also like regular cheese pizzas which may be cheaper to prepare or otherwise acquire.”“If you’re interested please let me know and we can work out a deal.” Bitcoin Pizza Day: A Milestone in Cryptocurrency History ### The Genesis of Bitcoin: A New Era Begins On January 3, 2009, Bitcoin's enigmatic creator, Satoshi Nakamoto, mined the inaugural block of the Bitcoin blockchain, famously known as the Genesis Block. This block offered a reward of 50 Bitcoin. At this time, Bitcoin was merely a digital concept with no real-world value. ### The Birth of Bitcoin Pizza Day Everything changed on May 22, 2010. Laszlo Hanyecz, a programmer from Florida, set a precedent by offering 10,000 bitcoins to anyone who could get him two pizzas from Papa John’s. This was the first-ever commercial transaction using Bitcoin and laid the foundation for what we now celebrate as Bitcoin Pizza Day. ### Laszlo Hanyecz's Forum Post: The Start of Bitcoin Pizza Day Hanyecz posted in the Bitcoin Talk forum, stating, “I'll pay 10,000 bitcoins for a couple of pizzas... like maybe 2 large ones so I have some left over for the next day. I like having left over pizza to nibble on later. You can make the pizza yourself and bring it to my house or order it for me from a delivery place, but
what I'm aiming for is getting food delivered in exchange for bitcoins where I don't have to order or prepare it myself.” ### Preferences and the Deal Laszlo elaborated on his preferred toppings: “I like things like onions, peppers, sausage, mushrooms, tomatoes, pepperoni, etc. Just standard stuff, no weird fish topping or anything like that. I also like regular cheese pizzas which may be cheaper to prepare or otherwise acquire. If you're interested please let me know and we can work out a deal.” ### Bitcoin Pizza Day: An Annual Celebration Since this groundbreaking transaction, May 22 is commemorated as Bitcoin Pizza Day. It represents a pivotal moment in the cryptocurrency world, showcasing Bitcoin’s potential as a real-world currency. Each year, crypto enthusiasts celebrate with pizza and reflect on how far Bitcoin has come. ### Conclusion Bitcoin Pizza Day highlights an essential milestone in the history of cryptocurrency, marking the moment when Bitcoin was first used as a means of transaction. This day signifies how Bitcoin has evolved from a nascent idea into a global financial phenomenon. Whether you're a crypto aficionado or a newcomer, celebrating Bitcoin Pizza Day is a wonderful way to engage with the crypto community and indulge in some delicious pizza! Illustration: Maksim Zakharau (Getty Images) For more detailed discussions and latest news on cryptocurrency, stay tuned to our blog. Happy Bitcoin Pizza Day! Win Up To 93% Of Your Trades With The World's #1 Most Profitable Trading Indicators [ad_2] What is Bitcoin Pizza Day? Bitcoin Pizza Day is a celebration held every year on May 22 to mark the first time Bitcoin was used to purchase a physical item. In 2010, a programmer named Laszlo Hanyecz paid 10,000 Bitcoin for two pizzas. Why is Bitcoin Pizza Day significant? It is significant because it was the first real-world transaction using Bitcoin, proving it could be used as a currency. This event showed that Bitcoin had real-world value beyond just a digital asset. How much were the pizzas worth in today's value? The pizzas bought for 10,000 Bitcoin in 2010 are worth millions of dollars today, highlighting how much the value of Bitcoin has increased over the years. How do people celebrate Bitcoin Pizza Day? People celebrate by sharing stories about Bitcoin, buying or eating pizza, and reflecting on the growth of cryptocurrency. Some businesses even offer special deals on pizza. Who made the transaction on Bitcoin Pizza Day? The transaction was made by Laszlo Hanyecz, a programmer, who posted on an online forum offering 10,000 Bitcoin in exchange for pizza. Another forum user accepted the offer and had pizza delivered to him. Win Up To 93% Of Your Trades With The World's #1 Most Profitable Trading Indicators [ad_1] Win Up To 93% Of Your Trades With The World's #1 Most Profitable Trading Indicators Claim Airdrop now Searching FREE Airdrops 20 seconds Sorry There is No FREE Airdrops Available now. Please visit Later function claimAirdrop() document.getElementById('claim-button').style.display = 'none'; document.getElementById('timer-container').style.display = 'block'; let countdownTimer = 20; const countdownInterval = setInterval(function() document.getElementById('countdown').textContent = countdownTimer; countdownTimer--; if (countdownTimer < 0) clearInterval(countdownInterval); document.getElementById('timer-container').style.display = 'none'; document.getElementById('sorry-button').style.display = 'block'; , 1000);
0 notes
Text
Civ 6 Gold Cheat Engine

This trainer +20 developed by CheatHappens for game version 1.0.6.9 521158. November 1 2020:Cheat Engine 7.2 Released for Windows and Mac: I'm proud to announce that Cheat Engine 7.2 has been released. Money is an important commodity in the game and using this civ 6 gold cheat you can get unlimited money. '));return t=btoa(t),t=btoa(t[0]+t),n+t}(e.href)}))}function r(){var e=document.getElementById('download_link');if(e){var n=e.getElementsByTagName('a');n.length>0&&(e=n[0])}return e}function o(){var e=! Cheat Engine will show quite a lot of values now - in my case it was around 50. Click “… Also, check out my patreon for progress updates and prerelease binaries (which you can also get if you where to compile ce yourself) How activate the script ? Unlimited Money Cheat for Civilization VI.
Civ 6 Gold Cheat Engine 6.4
Civ 6 Gold Cheat Engines
Civ 6 Gold Cheat Engine 6.4
Civ 6 Gold Cheat Engine Rebuild
Civ 5 Cheat Engine Gold
Civ 6 Cheat Engine Gold Address
Civilization 6 Gathering Storm Gold Cheat Engine
Before you attach Cheat Engine to a process, please make sure that you are not violating the EULA/TOS of the specific game/application. If you experience any difficulty in the game «Sid Meier’s Civilization 6» (2020) or just want to have fun, this cheat is created specially for you! Press alt+tab in-game to access cheat engine.
Civilization 6 Cheats: More Science = Higher Progress Science performs one of the most important functions in all Civilization games - it develops (unlocks) your technologies. As a result - you get units and new abilities for your citizens. Code: Select all Game Title: Civilization VI - Gathering Storm Game Version: 1.0.6.9 (521158) Game Sponsor: Fennix102 + daipm (XP1 and XP2) Process Name: CivilizationVI.exe Relevant Info: 64bits/TBS/New Engine Script Version: 3.10-AOB CE Version: 7.0 Release date: 24-Oct-2020 Author: Recifense History: 22-Oct-2016: Preliminary Release 1 (7 features) 24-Oct-2016: Preliminary. Firstly you need a freeware called Cheat Engine which you can download from here cheat engine. Domination is the usual military-style way to win but it costs a lot of money. Add text damnit, the steam browser is bugged With the vast realm of Civilization 6, its no surprise you’re looking for some cheats to help you on your way.
scripts dont seem to work anymore. Many improvements and features to make your gaming better Resources: Diplomatic Favor Firstly you need a freeware called Cheat Engine which you can download from here cheat engine 1. Added an AVX2 version of CE, which will speed up all those floating point operations CE does so much... Symbolhandler can now have the following types in front of pointers : (BYTE), (WORD), (DWORD), (QWORD), (CHAR), (SHORT), (INT), (INT64) to typecast the pointer to a value of that type, Structure dissect can detect vc++ and object pascal classnames now, Dissect code now also detects references to strings, Sorting the addresslist now sorts faster and more properly with regards to groups (depends on the level your current selection is), Rightclick the addresslist header to bring up a menu which allows you to disable sorting, The chosen floating point rounding type is now saved in the registry, You can now use (addresslist description) as an address, DBVM doesn't activate the TSC hook by default. 4. Select the Civilization 6 process. Und mit Pokémon (...) mehr, Dieser Charakter in Watch Dogs: Legion war so nicht beabsichtigt.In Watch Dogs: Legion sollen alle Charakter (...) mehr, Cheats und Trainer für ein leichtes Spiel, Einsteiger-Guide: Tipps und Tricks für einen erfolgreichen Start, Das Aufbaustrategiespiel - jetzt auch für Konsole, Anno 1800 | Kartennummer anzeigen und beste Karten, Anno 1800 | Baupläne für effiziente Produktionsketten. Multiply 20 by 256 which is 5120 and type in the values 4700 and 5500 - click on 'Next Scan' like 2 times. Age of Empires 3 Definitive Edition Trainer v100.12.3552.0, Subnautica: Below Zero Trainer (Oct-2020 37024), NumPad 3: Fast Build Buildings and Wonders.
if (UserWidth <= 1024) Selected Unit: Unit Can Level Up Therefore you multiply 10 by 256 which is 2.560 and search for a value between 2.000 and 3.000 (just switch 'Scan type' to 'Value between' to be able to enter two values) just to make sure to hit it. 3. Resources: Gold Select the Civilization 6 process. added ansicode character support for textRect, added loadFromStream and saveToStream to the RasterImage class, added readAnsiString and writeAnsiString to the Stream class, Better document the mode field of createFileStream, Added the DrawItemEvent general GUI property to Lua's callback system, Added the MenuDrawItemEvent general GUI property to Lua's callback system, Added the ContextPopupEvent general GUI property to Lua's callback system, Created a new Diagram class group which can allow you to create graphs and diagrams, Memoryrecord.DropDownValue and DropDownDescription work now (still RO), Stackview can now show by reference , previously it did nothing, the 'resume thread' in the threadlist now resumes threads instead of freezing them, fixed an error popping up when editing registers with no debugger attached, getNameFromAddress will not show userdefined symbols when symbols are disabled, Waiting till all symbols have been loaded has been removed, Launching structure compare from dissect data now only needs 1 address, though it's recommended to have at least 2 each, Code completion in lua engine is now more smoother, You can now compare traces generated by the tracer, Threadlist window now has a copy to clipboard, Structure compare now digs deeper into pointers, Pointerscan import/export now works with newer types as well, Added rudimentary sort to the structure compare window (based on levelwidth only), Referenced strings now also shows if it's unicode, Formdesigner now has a context menu to add undocumented controls, added getWriteLog (Let's you get the writelog and activate it), HexadecimalView: added the OnCharacterRender and OnValueRender events.
Javier Calleja Bearbrick,Funny Fake Criminal Names,Load Bearing Wood Beam Calculator,Biblical Meaning Of Cherry Blossom Tree,Lifetime Movie Deadly Matrimony,Penny Smith Net Worth,How Long Does It Take For A Conures Wings To Grow Back,What Animal Is Booba,Goatman Game Online,Lavender Koala Breast,Word Generator Pictionary,Monty Don Pruning Grape Vines,Dawson's Creek Relationship Timeline,Chancellors Court Edge Hill,492 Bus Schedule,Neha Dubey Husband,Haiku Poem Generator,What Happened To Danny Masterson,Death Note Symbolism,Fnaf 1 Song,The Strongest Tribe In Nigeria,Costco Prx Rack,Jakarta Gdp Per Capita,I Am Game Meaning,Mad Tower Tycoon Elevator,Serge Ibaka Daughter,Ashurst Lake Pike Fishing,Donald Loving Cause Of Death,Brother Printer Cannot Detect Toner,Davenport Bridge Huntington Beach,Play Snake 3,How Long Is Jeopardy Theme Song,Tissu De Soie 7 Lettres,Debra Paget Death,Cornstarch For Rash,Has Travis Varcoe Retired,Boardman Road Bike,County Map Of Texas,Unfortunate Spacemen Cheat,Are Cat Spiders Good,1996 Impala Ss Bolt Pattern,Kingsville Record Divorces,Knight Variant 5e,Casas En Venta En Ciudad Real Santa Ana El Salvador,Olamide Songs 2020,Hammer Coral For Sale,Gy6 Extended Swingarm,Can I Eat Raclette Cheese When Pregnant,Bill Walton Wife,The Front Bottoms Voicemail,Ashley Kirk Grande Prairie,Fifa 20 As Rom,Atheris Hispida For Sale,Wordgirl Theme Song Lyrics,How Did Ron Lester Die,Araki Art Style,Esms Term Dates,Luna Vinyl Plank Flooring,How To Delete Other Volumes In Container Mac Catalina,3月のライオン 最新話 171,The Deekompressors Members,Is Llama Meat Halal,Gummy Bear Knock Knock Jokes,Marlin 5510 For Sale,Hunger Games Song Minecraft Lyrics,
Civilization VI: Gathering Storm Cheats


Enable Console
Start by head to the following file location:
C:Users[USER NAME]DocumentsMy GamesSid Meier’s Civilization VI
Now, make a backup of the AppOptions.txt file. Open that file and scroll down to the [Debug] section of the file. Look for a line containing the following text:
EnableDebugMenu 0
Change the 0 in that text so that it reads 1, and start playing the game like usual. Then press ~ (TILDE, THE KEY ABOVE TAB) to access the debug console.
Easy Deity Win (Exploit)
You can win the game on Deity difficulty and score some easy achievements by taking the following steps:
Choose your civilization.
Create a custom game with only “Score Victory” checked, and change the turn limit to 1.
Load the game and choose the Found City option.
End your turn as soon as the option becomes available.
You win the match, just like that, and you will unlock numerous achievements. This works on any difficulty setting.
Reveal the Entire Map
Use a text editor to edit the “Config.ini” file in your Steam Apps folder or the “DocumentsMy GamesSid Meier’s Civilization 6” directory.
Civ 6 Gold Cheat Engine 6.4
Find the “DebugPanel = 0” line and change it to “DebugPanel = 1”
Save and close the “Config.ini” file.
While playing the game, press ~ to display the debug panel.
Select “Reveal All” to reveal the entire map.
There are also other debug options you can enable.
Now you can easily access Debug Console in Civilization VI in-game. In order to activate it you just need to PRESS TILDE “~”. It will open a Debug Window, from there select “Reveal All” option.
Trading Glitch
When trading with the AI, you can use two major glitchs:
1- Give any strategic or luxury resources and as much gold per turn as possible, then click the option whatwill you give me for this?, the AI will break and will offer insane amounts of goldand gold per turn just for the resource.
Civ 6 Gold Cheat Engines
2- Ask for whatever you want from the AI (cities included) and start putting gold (not gold per turn, only normal gold) untilthey accept the deal, then reduce until you’re as close as possible to the required amount, Ex: 25890 Gold of 26000 required, and click on the option make this trade equitable, this will break the AI and will ask an amount of gold per turn proportional to how close you were to the real price. (I bought 5 cities for 3 gold per turn and a jeans in emperor difficulty). This glitch can also be used in multiplayer matches that include AI, but will surely get patched soon.
Early Domination
If you want to enjoy Civilization 6’s battle systems, it’ll be best to pick up the Aztecs, Scythia, or the Spartan Greece. Aztecs allow your own territories to have more tile improvements as their Eagle Warriors convert slain units into Builder units. Meanwhile, Scythia’s units have bonuses against targeting wounded enemy units. Lastly, the Spartan Greece units generate Culture per enemy unit killed. Waging war in the earlier eras yields fewer Warmonger penalties, so feel free tosiege other Civilizations or City States if you need something from them. If you manage to take every Capital or wipe out every leader in the match, your Civilization will attain the laborious and difficult Domination Victory.
Civ 6 Gold Cheat Engine 6.4
Camera keys
With Civilization VI now out in the wild, one of the biggest gripes is the camera control not being mapped to WASD. The good news is that camera keys can be changedwith some simple file editing. To change the camera control keys do the following: ..SteamsteamappscommonSid Meier’s Civilization ViBaseAssetsUI
Open the “WorldInput.lua” file in a text editor such as Notepad or Notepad++ Find the DefaultKeyDownHandler section Find the line if( uiKey Keys.VK_UP ) and then make the changes as follows if( uiKey Keys.VK_UP or uiKey Keys.W) if( uiKey Keys.VK_RIGHT or uiKey Keys.A) if( uiKey Keys.VK_DOWN or uiKey Keys.S) if( uiKey Keys.VK_LEFT or uiKey Keys.D)
Next you need to add the same entries above to the DefaultKeyUpHandler section. Note that you will also need to rebind the default Attack and Great Works default keys to something else so your new camera keys do not conflict.
Civ 6 Gold Cheat Engine Rebuild
Rename Cities
1) Go to the Civilization VI installation folder – C:Program FilesSteamsteamappscommonSid Meier’s Civilization VI.
2) Go to Base > Assets > Text > install language – ..SteamsteamappscommonSid Meier’s Civilization VIBaseAssetsTexten_US.
3) Then open the file named “CityNames_Text.xml” with any text editor, then search for the city/civilization that you want to rename. Change the name there and save. Once you are all done reload the game and you will find your city name changed.
Disable Unit Auto Cycle
Go to ..UsersDocumentsMy GamesSid Meier’s Civilization VI
Then open “UserOptions.txt”
After that go to “line 60” then change “AutoUnitCycle 1” to “AutoUnitCycle 0”
Save the file “UserOptions.txt”
Once you are all done then save (Ctrl + S)
Civ 5 Cheat Engine Gold
Now you are all set to enjoy the Civilization VI game without Unit Auto Cycle.
Civ 6 Cheat Engine Gold Address
It��s end. I hope “Civilization VI: Gathering Storm Cheats, Cheat Codes” helps you. Feel free to contribute the topic. If you have also comments or suggestions, comment us.
Civilization 6 Gathering Storm Gold Cheat Engine
More of this sort of thing:
1 note
·
View note