#dopesheet
Explore tagged Tumblr posts
Visit Tumblr Blog
Explore Tumblr blogs with no restrictions, modern design and the best experience.
Last Seen Tumblr Blogs


Fun Fact
In February 2021, Tumblr had 518.6 million blog accounts.
Text


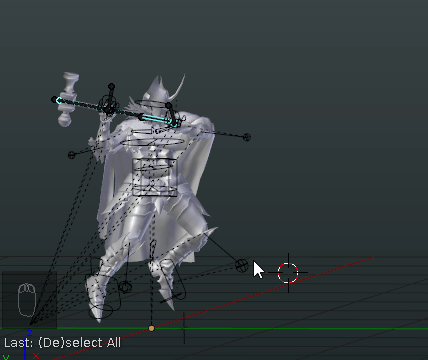
RELIVING THE HORRORS OF 3D PROGRAMS, BUT BOY, AM I LIVING‼️

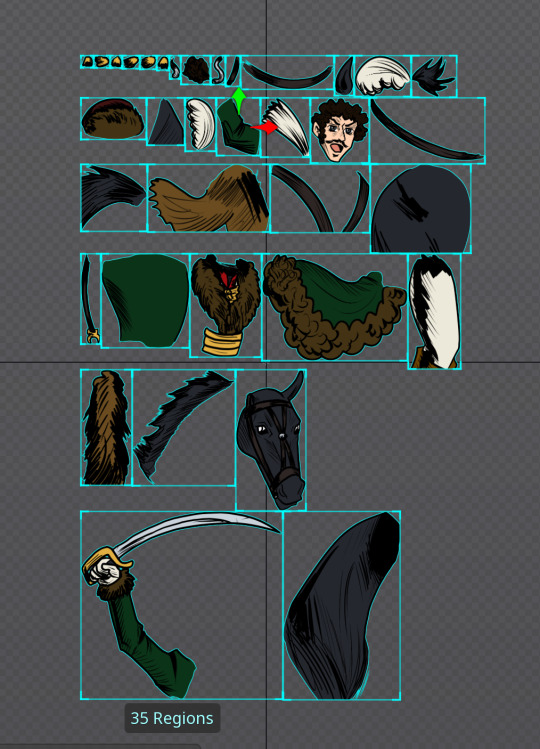
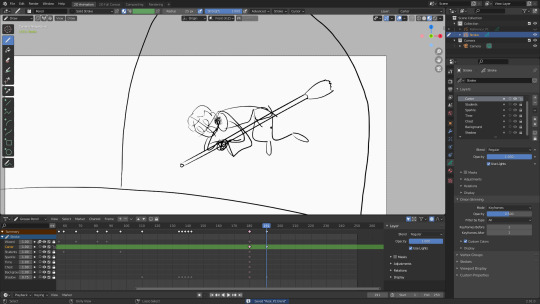
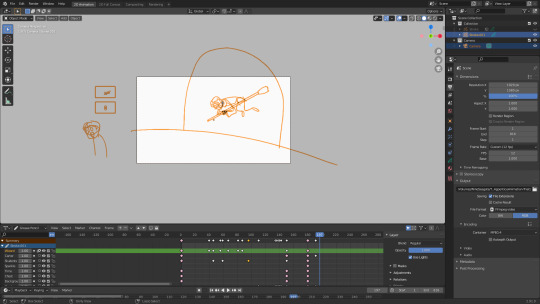
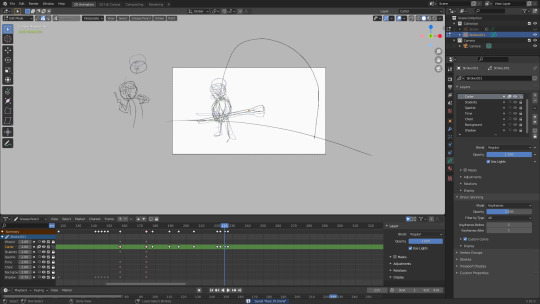
#eleven talks#this posemaking shit is easy! [<- had two consecutive breakdowns]#i told myself i'll set up properly and i was still yelling about not finding the tools#i was lost in the jungle of blender naked and afraid asking where the dopesheet was#this is the first pose of several and honestly im fucking proud it actually looks OKAY#but honestly the vyxated rig did the brunt of the work bc goddamn is it beautiful#the kind of rig i dreamed of when i was still studying#anyway if you can guess who the pose is for i'll give you uhhhh a crisp high five
2 notes
·
View notes
Note
Hello! Nonny from yesterday struggling with the rigs. I selected and reselected every joint and ik several times, locrotting them 3 times over, exported as animation using the traditional plug in, reimport and... Gone. Standard pose. I also made sure there are no yellow marks in the dopesheet as I read somewhere. With baking, same. Ditto for another IK'ed rig. I use 2.79 and s3py linked in the same place I got told to use 2.79.
Hello again! 😊 Have you made sure that you're only saving the data from the actual sim rig, and not the IK controllers themselves? I'm not entirely sure what else could be causing the issue for you. I tested it out myself with blender version 2.67 and 2.79, and both gave normal results when I imported the pose to the raw sim rig:
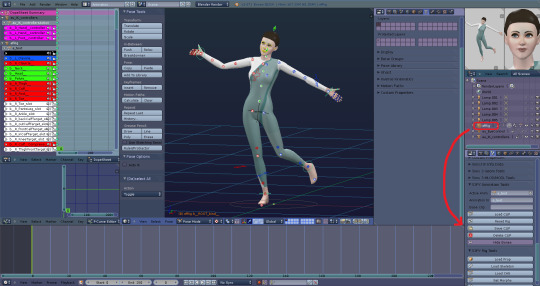

Also, just to mention, you can't import poses onto rigs that use IK constraints external from the rig, such as with my old rigs, because they are separate from the sim rig itself therefor the data doesn't get imported over to them. An example, I re-imported the same pose from above onto my sim rig:

19 notes
·
View notes
Text
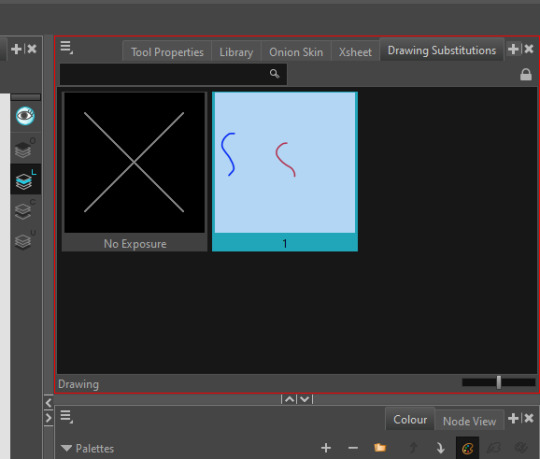
Toonboom workshop
Camera safe
blue flower render view
colour card for background
Thumbnail- Person figure on drawing layer, expands all drawn layers. Can change opacity.
Shift + increase exposure of a frame
1 to zoom out, 2 zoom in
, to the left, . to the right
Right click on grey area to add toolbar.
Mark drawings- K for keyframes, I for inbetweens, B breakdowns.
Pencil lines are vector base. Can go into the tool properties and change it's size. Select pencil stroke first to scale. Pencil is more changeable.
Dopesheet- + button top right corner. Displays timeline. ctrl D changes drawing name
+ button top- drawing substitutions to see all drawn frames. Press lock to unlock and delete frames.
ZeBirdBrain
Drawnshane
0 notes
Photo

#tipstrik Dope sheet atau X-sheet, apakah teman2 selalu menggunakan ini untuk membantu proses shooting animasi stopmo? Nah, kalo belum,mulai dipelajari yuk! Selain membantu membuat kerjaan jadi lebih efektif dan efisien juga mengasah logika gerak animasi kita, menghitung frame setiap gerakan baik dari ease in-out, slow in-out, antisipasi, timing dan spacing,bahkan semua elemen dalam adegan bisa dicatat dalam berlembar x-sheet. Repot? Gak juga, lebih repot kalo di tengah2 proses tiba2 bengong dan lupa atau bablas waktu pengerjaan gara2 keasikan nganimate semalam suntuk 😅 #lantinganimation #lantingstudio #studiolanting #dopesheet #xsheet #timesheet #animation #stopmotion #stopmotionanimation https://www.instagram.com/p/B20mqMLg2-R/?igshid=1k6cmsud3xdmv
#tipstrik#lantinganimation#lantingstudio#studiolanting#dopesheet#xsheet#timesheet#animation#stopmotion#stopmotionanimation
0 notes
Text
Exposure Sheets
In another fascinating behind the scenes look at the world of professional animation, Sawyer gives his overview of the edit and montage role of exposure sheets in "Exposure Sheets" #MarywoodArt #animation #illustration #exposuresheets #xsheets #dopesheets
In a complicated process like animation, tools like exposure sheets provide the structure necessary for the artistry on display to function as intended. Much like model sheets, exposure sheets serve a more behind-the-scenes role— often left unseen by the general public and instead exclusively made for internal use only. That said, you can understand why the general public would want to see a…

View On WordPress
#Animation#Art#blink#Cartoons#dopesheets#exposure sheets#Illustration#layout#Marywood University#model sheets#move#simpsons#talk#timer#twitch#Where Creativity Works#xheets
2 notes
·
View notes
Photo

Assignment 11 - Lip-Sync
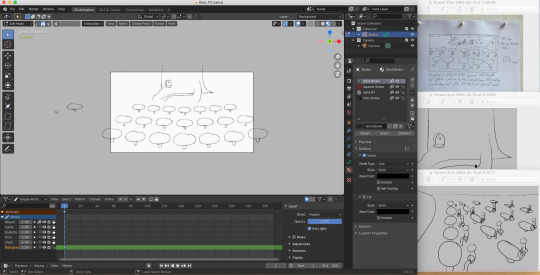
Dopesheet
This is the dope sheet for assignment 11. (The blue lines were how I kept track of where I was while I was shooting the line test.)
0 notes
Video
tumblr
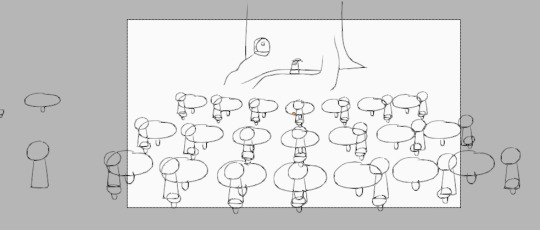
Assignment 13.
I have edited an audio clip and created a lip synced from a dope sheet.
0 notes
Text

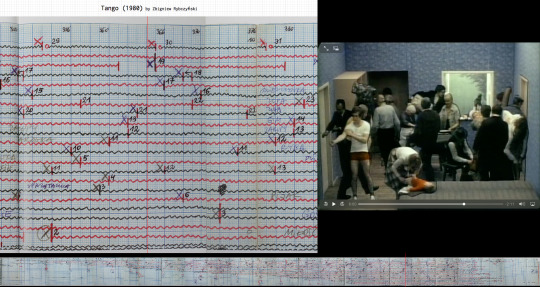
Tango
1981
Zbigniew Rybczyński
Link to video (I can't embed it because it's age restricted due to nudity and a sex scene) https://youtu.be/lo8O8lYDzIU
The first Polish Oscar winner shows the hypnotising dance of everyday people in an everyday, tiny apartment. Too many by far for such a small space, these characters wear the uniforms of all social classes and professions. We see a schoolgirl, a militia officer, a thief, a housewife, a student, a drunk...
They crowd in the tiny space to give viewers a condensed glimpse into life in the People's Republic of Poland, a satellite state of the Soviet Union. In real life, in addition to rationing and poor or no access to necessities and commodities, people would often have to endure overcrowding in small, modest apartments with the exact furniture as the animated film depicts.
The work astounds even more if you have a minimum understanding of how animation is produced and what the actual technical boundaries of production were in 1981.
Since it’s 2022 and we are used to an entirely different toolset, let’s make sure those are clear.
Tango did NOT have:
-digital recording technologies (they didn’t exist)
-digital post-production or retouching (idem)
- live preview of the sequence (impossible when shooting on film without video-assist)
-layered editing or compositing (no such computers and programs existed)
Tango did have:
-analog photography
-double projection techniques
-hand-cut masking
-meticulously calculated dope sheets
-madness
There are errors in the film which reveal some of the technique, and make the feat even more impressive. These errors remain in the final version because the only way to remove them would be to shoot the entire sequence again.
With more than 30 characters moving through the frame and narrowly avoiding each other in their mundane dance, Zbigniew Rybczyński had to plan the production of this short film with extreme precision. He used a dope sheet- in animation terms, this is a sheet of paper on which the animator can plan out his film frame by frame.
Dope sheets can look daunting, but with a little patience and concentration they are not too difficult to parse. There are traditionally 24 frames in a second. When an action happens, the animator may want to mark a specific frame as containing a specific moment in that action. If he would like, for example, a boy to spend exactly six seconds climbing through a window, then frame 1 would mark the beginning of the ingress, while frame 144 would be the one where both his feet are firmly on the floor inside. Twelve seconds or 288 frames later, the boy has retrieved his ball and disappeared again outside. And the cycle begins again.
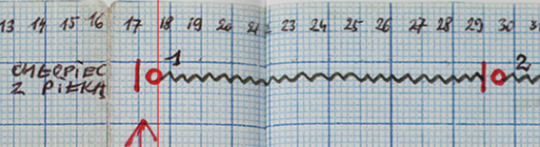
In addition to the classic dopesheet, Rybczyński also made a detailed action plan showing the room from above- a viewpoint never seen in the film itself.
Why write this down instead of just winging it? Well, when you have more than one moving element in your animation winging it can mean your meticulously planned animation is completely out of sync. It is difficult enough to keep track of the characters in Tango as a viewer- imagine the task of the animator!
If you want to see the dope sheet for Tango and follow along with the film in real time, check out the fantastic Data Driven Drawings website. The site is a collection of the practical work included Juan Camilo González's PHD dissertation. It features Tango alongside its dopesheet, and several other notations for animated films. Thanks to Juan Camilo González, we can see the behind the scenes madness of Tango much more clearly.
17 notes
·
View notes
Photo

In love with my new Elephant! 🐘 #redandblue #weekend #goodvibes #enjoyyaday #random #pipesmoking #elephants #newwave #ontothenext #saturdayvibes #creativity #creativemode #mynewbaby #followme #dopesheet #mjbanimations
#elephants#enjoyyaday#mjbanimations#pipesmoking#followme#newwave#ontothenext#dopesheet#creativity#goodvibes#creativemode#saturdayvibes#redandblue#weekend#random#mynewbaby
0 notes
Photo

Isolation has given me enough time to understand the full potential of #c4d #xpresso and it’s #rigging capabilities. Took my most recent #moi3d model and rigged it with #IK goals and #userdata #hud controllers. Should have this #personalproject wrapping here pretty soon. #3dart #mograph #dopesheet #animationtracks #keyframes #hardsurfacemodeling #motiongraphics (at McKinney, Texas) https://www.instagram.com/p/CAWvWFnnSNq/?igshid=jbbu8lwedfgt
#c4d#xpresso#rigging#moi3d#ik#userdata#hud#personalproject#3dart#mograph#dopesheet#animationtracks#keyframes#hardsurfacemodeling#motiongraphics
0 notes
Text
Animation pre-production

Dope Sheet

Story-Boarding

Starting to create assets
Pre-production for this animation now that the soundtrack is completed includes a Dope sheet, Storyboarding as well as asset creation so that I know what images and sections of animation need to appear in time with the audio.Making sure everything was timed I then cut up the entire clip into 14 sections/scenes to easily convey what’s being talk about in this part of the podcast. All this has been done with pen and paper so far but eventually the assets will be scanned and then put into Photoshop to edit and layer so they can then move in premiere.
All this planing will hopefully mean that I have a good quality and easy to understand animation at the end of the project, getting all of this done as soon as possible means I wont have to rush the actual animation process in Premiere once I get to it.
While a large chunk of the planning is now done there’s still a lot to work on, mostly with more assets needing to be made which can luckily be done at home as I’m not using a digital program. However with all the planning so far I’ve realized I’m not entirely sure how to use a dope sheet and that I also need more practice with storyboard as I’ve not really shown any camera movements, transitions or clear asset movements in the storyboard and more just single scenes which may hinder how much information is passed to me when I get to animation. This will definitely need to be worked on in a professional scenario as story boarders and animators are usually separate teams and therefore the storyboards need to show as much practical information as possible to get the animation that's wanted.
To improve in this part of the process I’d definitely have to look more into dopesheets and see both how to use them properly as well as how to use them in the most efficient way that will ensure that not just me, but everyone on a possible team that needs then information can understand them.
Storyboarding could also include more planning and frames in general to ensure that there aren’t any frames of either blank space or an elongated scene that may cause either a drop to the quality or loss of interest in that part of the video.
3 notes
·
View notes
Text
Install Blender 3.3 LTS On Ubuntu / Alma Linux & Fedora

This tutorial will be helpful for beginners to install blender 3.3 LTS On Ubuntu 22.04 LTS, Ubuntu 20.04 LTS, Pop_OS 22.04, Alma Linux 9, Rocky Linux 9, Fedora 36, and Linux Mint 21.
What is Blender?
Blender is a free and open-source 3D animation software program. It can be used for creating models, animating them, and rendering them into a movie or image. Blender is available on many platforms, including Windows, Mac, and Linux
Blender 3.3LTS Changelog
- Support for AMD Vega graphics cards and the new Intel Arc GPUs - A new system for hair grooming - New Curves object type that supports Sculpt mode and the flexibility of Geometry Nodes. - Grease Pencil keyframes are now displayed in the general Dopesheet Editor view For Complete Changelog refer to the release notes
How to Install Blender 3.3 LTS On Ubuntu / Other Linux systems?
Blender can be installed on Linux systems via 2 methods - Method 1: Via Snap Store - Method 2: Via Flathub Method 1: Via Snap Store Install SNAP Store on the system and install Blender 3.3 LTS sudo apt install snapd && sudo snap install blender — classic Method 2: Via Flathub Step 1: Install Flatpak on your system using the installation guide, if it is already installed you can ignore the step. Step 2: Install Blender from Flathub using the below command flatpak install flathub org.blender.Blender Step 3: Run Blender flatpak run org.blender.Blender

Conclusion
From this tutorial, you have learned how to download and install Blender 3.3 LTS on Ubuntu, Debian, Linux Mint, AlmaLinux, Rocky Linux, and Fedora Do let us know your comments and feedback in the comments section below. If my articles on TipsonUNIX have helped you, kindly consider buying me a coffee as a token of appreciation


Thank You for your support!! Read the full article
0 notes
Video
tumblr


this is the cutout animation that was done with team effort. We decided to follow the pirate theme and also pick a nursery rhyme called “The Wellerman for kids- A Twinkl Sea Shanty!” To prepare for this animation we had to cutout several character which fit the theme of pirates and other assets like ships, water, wind, thunder and rain. Then with the help of dopesheet I was able to create a lipsync for the pirate to speak. After recording we decided to compile all the images together and add the music in the background and timed it so it fits with the music and it is in sync
0 notes
Text
Step 1 to animating is making crimes against the dopesheet
god I am rusty AF

guess who suddenly got possessed to animate Murat at Eylau
I was attempting Jojo style, but it kind of ended up looking like the bastard child of Jojo, Darkest Dungeon, and Kaxen.
47 notes
·
View notes
Text
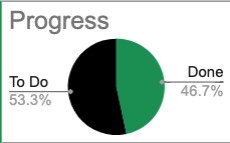
Post8- Month 2 Week 1: Animatics 75%
Plan:
Day 1: Corporate storyboard #21-25 into my animatics
Day 2: Corporate storyboard #26-30 into my animatics
Day 3: Corporate storyboard #31-35 into my animatics
Devlog - Week1
Wed 10 Mar
I forgot my USB at home, so I have to create a new file. Thankfully, I have to create a new set anyways.
Fri 10 Mar
I learned how to put the old assets into the new file, so that I don't have to redraw every chests and/or timer

Tues 16 Mar
I have to remake the file because the dopesheet broke down. I couldn't move the keyframes. Thankfully, I have maaaany copies to go back to.
0 notes
Photo

One thing I like about Blender is just how customizable it is. Here’s some add‑ons that I made that made my life easier when I’m making animations. I released all of these in MIT License so feel free to make use of them!
ToggleGhostFrames.py: Re-assignable hotkey for toggling visibility of Ghost Frames for current Armature. By default it’s assigned to F. I use this to quickly see if the arc of my weapon swings look right. I got tired of having to use the GUI for this, cause it’s taking me out of the zone when I want to concentrate on the animating, so I made a hotkey for it.

RestPoseToggle.py: Re-assignable hotkey for toggling between Rest and Pose Mode for selected Armature. By default it’s assigned to Shift-Q. This is just one of those things that I felt like having when I’m working on the rig.

SelectedKeyframesLength.py: Show number of frames of selected keyframes. Info is displayed at the rightmost area of the Dopesheet Header. Info is displayed by going to Dopesheet > Key > Get Selected Keyframes Length, or press Q. I use this to check how long my attack swings or recovery periods are, so when I’m making an attack combo where I want the swings to take the same time, I use this.

ShowActionNameIn3dView.py: Adds a label in the 3D View, showing the name of the Action currently being edited in the Dopesheet. The Dopesheet truncates the Action name if it’s too long. Not really helpful for me, and I tend to have long names for the attack animations. So I made this so I can still see what animation I’m in.
If you need help installing Blender add-ons, here’s a simple guide:

Open your User Preferences window
Go to the Add-ons tab
Click on the “Install from File…” button at the bottom and choose the file. It may be a .py file, or a .zip or .rar archive (you can select archives and Blender will extract it automatically for you).
To see the new addons, you may need to view only the “Testing” level add-ons. Or you could search for it by name using the search textbox at that upper-left area.
Once you find the add-on you want, click on their checkbox at the upper-right corner to enable them.
Click on “Save User Settings” so that Blender remembers your enabled add-ons.
53 notes
·
View notes