#dr sprite tutorial
Explore tagged Tumblr posts
Visit Tumblr Blog
Explore Tumblr blogs with no restrictions, modern design and the best experience.
Last Seen Tumblr Blogs


Fun Fact
In 2020, 27% of US Tumblr users had an annual household income of over $100,000.
Text

🎁 Day 9 of the DR Winter Gift Calendar has arrived with Sakura- and Aoi-themed gifts!
(A masterlist of all gifts will be posted at the end of the event!)

🌸 SAKURA - CUSTOM PHONE/TABLET ICONS
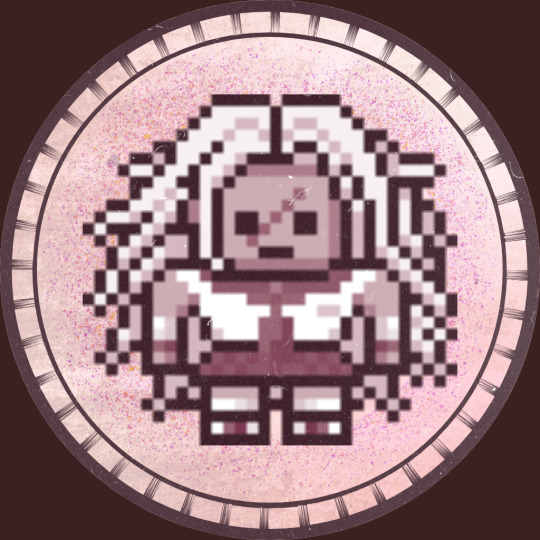
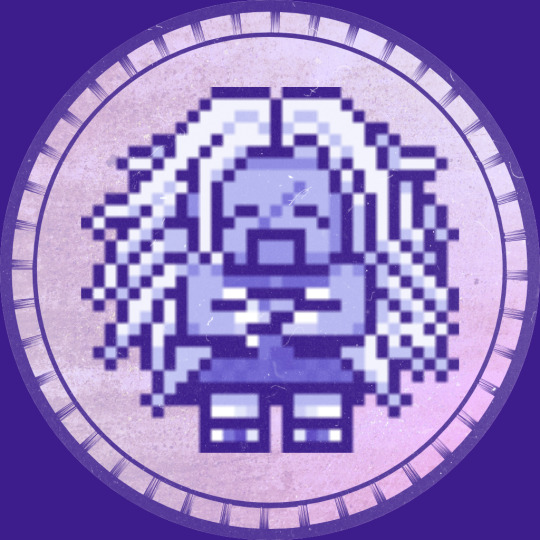
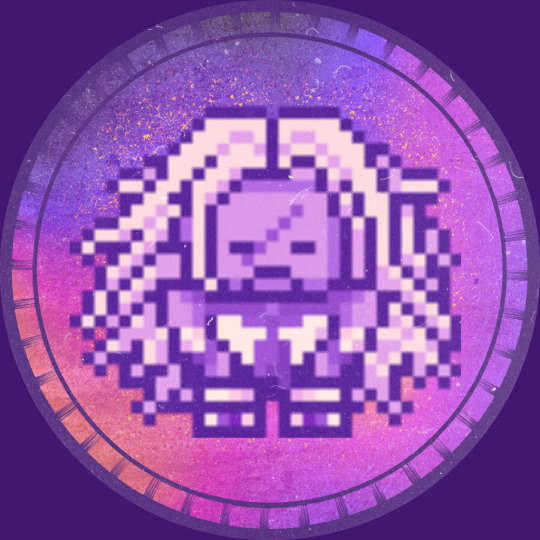


turn your phone into a shrine for The Best Girl That No One Ever Hated with 16 custom phone/tablet icons featuring her teeny-tiny blorbo sprite and a few of her favorite in-game presents! how adorbs! (there's more than the above few: these are just a Sample.)
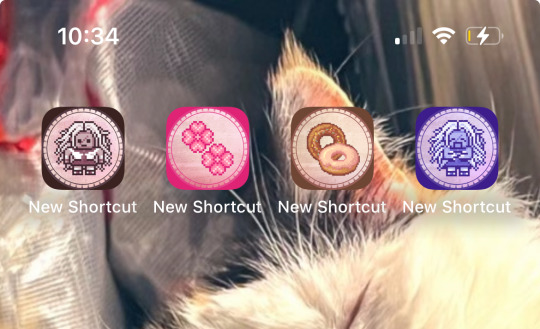
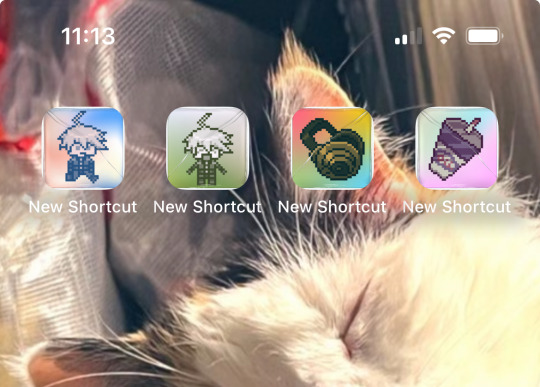
while these may look a little distorted when viewed at full size, they'll size down perfectly when you use them on your phone:
(note: i can't troubleshoot these icons as everyone's device is Extremely Different when it comes to customization. however, i recommend Googling your device for tutorials on setting these up. i'm sure there's plenty! please let me know if you need a different File Type as i can very likely quickly whip up a conversion for you.)
💝 [download as zipped PNGs] 💝
🏊 AOI - PRINTABLE HABIT TRACKER

fun fact: Hina's a touch airheaded but not irresponsible. Makoto in DR1 notes that she's often the first to show up to morning cafeteria meetings, and if you look in her room, she's got charts and exercise equipment galore. follow in her footsteps with this half-page Habit Tracker, to be used however you'd like!
it's 8.5"x5.5", and as noted with other printables, try using B&W mode and/or adjusting contrast if you don't have color ink (or if your printer just sucks). you have my full permission for any edits necessary.
💝 [download as a PNG or PDF] 💝
[thank you for the transparents: 1 ]
➡️ you may freely share, use, and edit these: just link back if you post them online!
[See other 2024 Winter Gift days at the tag #danganronpa❄️24!]
59 notes
·
View notes
Note
Sorry to bother you, but I'm completely new to pixel art and want to get better at it and your art is amazing. So many tutorials mention avoiding jaggies and doubles-- do you pay this much attention in your landscape pieces or is that more advice for sprites and smaller artworks? I'm a little lost :C
Hey there, Anon! This is a completely understandable question, and one that will definitely make you wonder the first time just starting out pixelart. For me atleast, jaggies and doubles, they're more in the realm of doing small sprites and small artworks. Say pieces that are 30x30 or 20x20, sprites that have a limited amount of pixels around, will definitely need more attention to every pixel placed; one pixel misplaced can have the effect of changing a lot about how the sprite looks at the end. That's for sprites and small pieces in general. But the beauty of pixelart in the case of bigger pieces that I work on, in my case, is that all of the jaggies and doubles talk don't really mean much anymore. It's just like working on a normal piece of digital art but you see squares and pixels! So TL;DR, if it's a small piece, you have to pay more attention to those things, jaggies and doubles. But if it's big pieces, definitely no need to worry on those small things unless you really wanna put in detail into everything. And thank you! Goodluck and enjoy the art <3
49 notes
·
View notes
Note
(Do you have any advice on making sprites for DR OCs like the ones you use in ASOOT? Some of them are like. Really good. Teach us your ways, o great one.)
//I just use this : P
//Poi is the one who's way more experienced at sprite creation than me
9 notes
·
View notes
Note
I love your edits! ❤️ Do you use photoshop? Also, do you have advice for someone new to making RC edits? Thank you if you reply! :)
I'm clubbing this with this ask.

Thank you very much :)
First of all, I do not use any tutorials. I started editing by shitty cropping sprites out of screenshots 🤣🤣
• I use picsart. Free version is not that good but mod gold version works good for me.
• I advise checking out these links for rc sprites
• I cannot exactly guide you in editing, but try editing mc clothing onto their sprites + haistyles and Expressions. make usage of layers in the editing app by shifting the sprites upwards and downwards.
• keep using the opacity filter to see if you're layering a sprite properly.
• filters help alot! experiment with them to hide any flaws.
and if you have any specific area you want help on, let me know!
7 notes
·
View notes
Note
Tutorial on how to see god!
Step 1: get a cup Step 2: pour in Sprite, Dr. Pepper, Pepsi, Orange Fanta, Minute Maid Lemonade, a tablespoon of water, ice, and rainbow sprinkles. Step 3: stir and sip
*drinks my concoction*
*dies*


3 notes
·
View notes
Text
DR Sprite Edit Tutorial!
So this has been in the making for a couple of months due to a lot of art blocks and stuff, but!! I think this will help some people who have asked for some advice on how to draw your ocs dr ocs in the DR style (or at least close to it)! I’m gonna try and make this as simple as possible without all the complicated steps!
Just to say it now, I use Paint Tool SAI and I have the download file as well for anyone who would like it as well. The download link will be at the bottom as well. This is gonna be long so bear with me!
Let’s get to it!
Okay so first off!! You wanna have a ref of your oc! I usually use dreamselfy cause it gives you a lot of options (I used the japanese version and the simulator to put it all together. If you guys want those links, I’ll put them down at the bottom for you guys.)
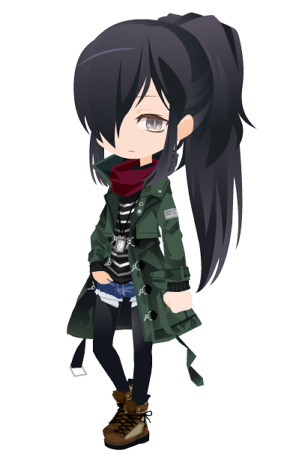
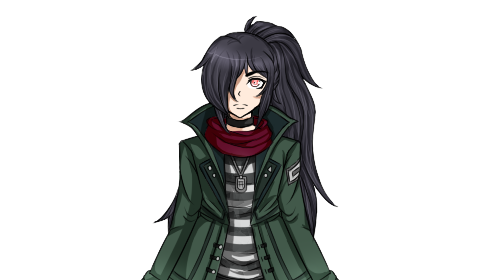
This is an old character of mine named Kagami that I’m gonna use, they needed a redesign and to be re-written so I thought this would be the best opportunity for them! They are non-binary and so I think the best base sprite to use is Ibuki’s! It fits their body type.

What I’m gonna do first in sai is load the sprite into it and lower the opacity and add another layer on top of it. (I also load the ref in there next to the base sprite so that I have something to look off and draw it how I want it.)
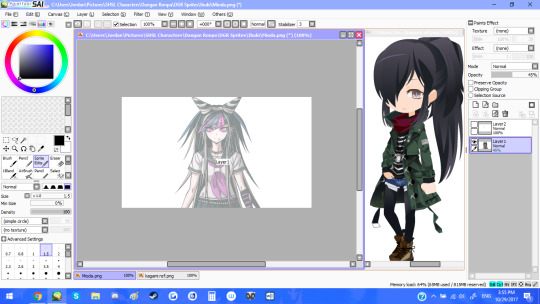
This is the brush I will be using for all the lineart:
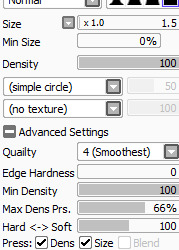
(I tend to keep my stabilizer on 3 so that it gives me a little more steady lines when i draw)
The first thing I do is trace one side of the sprite on the new layer. It’s important to remember to make sure the lines are clean and it’s okay to redo the line as many times as you need until you get it to how you want it!

After this I’ll take the layer, copy, paste it and then flip the layer and line it up to the other side like so:

Now before I do anything, I start on the face so that I won’t forget it later or that it doesn’t look too unproportional to the face when I draw the hair. I’ll repeat the same thing I did for the bust in the previous image and go from there.

If you see off to the left, I’ve made separate layers for the eyes, mouth and eyebrows. This is really important that you do this if you want to make expressions for your oc to use in posts and such! Plus it’s just nice to have it all separated. You’re going to now start drawing the hair! Now Kagami’s hair is really simple, I’m going to draw it as I see it until I get it to what I want it to look like! Make sure the hair is on a separate layer so that you can erase what you don’t need of the head.

Now that I have their hair done, I’m going to make sure that the hair is on another layer before making it invisible so that I can start on the clothing. You’ll add another layer and begin drawing on that. It’s important to note that clothing folds, it moves, and makes the character look a little bigger. It happens often that you can draw too many folds and wrinkles or too little. Points where limbs can move tend to have more wrinkles placed near them on clothing.

So i’ve drawn half the jacket, and to make it so much easier on myself, I’m going to copy, paste and flip it to put it on the other side, and then add the scarf and some other details to make it a little less like I copied and pasted it. (I ended up changing a few things because I am indecisive, but overall you should have a complete outfit on your oc.

What you’re going to have to do next is get rid of the excess lines from the bust layer and make it to where lines aren’t going through each other. You’re gonna wanna do that with the hair layer as well, erasing things that don’t need to be there. After some time of cleaning up lines and erasing, I now have the lineart of my sprite!

Now the next step is very important, it’s how you make your sprite transparent. Circled in Green is what you want to click on and you're gonna click on the outside of the sprite so that it looks like this:

Circled in green on the sprite is spaces where you want to use the select tool (that’s in the brushes) to fill in the empty spaces. After you get it filled in, you want to go to the top where it says ‘Selection’ next to the ‘Layer’ dropdown and click invert. Your sprite should look something like this:

The next thing you want to do is create another layer. Take the color white and use the bucket tool ON THE NEW LAYER. The sprite should be completely whited out. On that layer, you’re going to want to set the layer to multiply so that you can see the sprite again. That layer with the white on it, merge it with the lineart layer. Create another layer and set that layer to a clipping layer (circled in red). The layer should be set to ‘Multiply’ as well. Now what you can do is color on the sprite without having to erase! Like so:

This is what your layers should look like!

The clipped layer should be the layer you color on! I personally only use 1 or 2 layers to color so I’m just gonna do ahead and use 2 layers to make it easy. You want to use the first layer for the base color:

Make another clipped layer and met it to multiply so that you can start shading. You want to use colors that are a little bit darker so that the shading looks a little more natural. Rule number 1: NEVER shade with black, unless the base color you’re shading is black itself. It causes the shaded part to look muddy and you don’t want that. It’s hard to explain shading and how you do it because it depends on where your light source is. The light source on this sprite is coming in from the right, so most of the darker areas will be on the left.
Now when you color the eyes, you want to create another layer under the eye layer and color the inside of the eye white. Merge the eye layer and that layer you colored and create another layer on top of it and set it to ‘Multiply’. I would look up a ref of another dr character and see how the eye is colored and shaded there because I tend to do it a bit differently. After you’ve colored it, merge the two layers again and then you’re all set! You should now have a sprite!
When you go to save, save it as a .png file. It will prompt you with this:
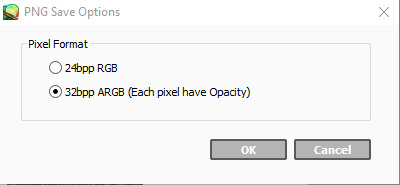
Click the second one so that it turns out like this: (If you drag it around you can see that there’s no white background, making it transparent!)
Congrats!! You did it! Sprite editing takes time to get used to and it's not always eyes, but all I can do is urge you to practice. It’s the only way you learn and get better. You don’t have to take everything that I said seriously, either. If there’s something that works better for you that you’ve found a lot easier, then do it! It’s all about doing it how you want to and what makes it fun for you! Art should be fun to draw, isn’t that the whole point?
I hope you guys found this really helpful!! I’m actually really impressed with this sprite it came out better than I thought.
Thank you for reading!!
Here are the links from the top!
SAI Download: [Link]
Dreamselfy Simulator: [Link]
Dreamselfy @Trade: [Link]
#fangan ronpa#fangan ronpa sprites#dr oc#dr oc sprites#dangan ronpa sprites#dr sprite tutorial#art tutorial#this is really long#i am so sorry
17 notes
·
View notes
Photo

I did this entirely bcos Gir would hate it it’s not like I’m a homestuck or anything b-baka
Unending bullshit under the cut
Benry is a cherub & an Heir of Rage
Gordon is human & a Knight of Doom
Coomer is an indigoblood troll & a Prince of Time
Tommy is a goldblood troll & a Sylph of Hope
Sunkist is Tommy’s lusus & a Rogue of Space do NOT question it they needed a space player or their session was doomed
Bubby is a tealblood troll & a Mage of Light
Bubby & Coomer r older than Tommy ergo the darker skin and orange eyes & horns of A D U L T T R O L L S
Anyway turns out if you try to mod Sburb to VR you glitch it hard enough to link up with a load of alternate universe aliens who knew lmao
I like to imagine Gordon loads into his game & is jst like Wow The Npcs In This Game Are Incredible he has no fucking clue his teammates are real ass aliens also playing a Videoed Game
When he finds out they’re real other ppl he’s like AGH WHAT !! You guys got custom avatars how did you do that >:((( he’s so fuckign dumb y’all
#hlvrai#homestuck#gordon freeman#benrey#benry#tommy coolatta#hlvrai bubby#dr coomer#uuhhhhhhhh#bluh lmao dont question these classpects they were kind of a rush job#i jst rlly wanted to draw cherub benry does it show#im not rlly happy w tommy & coomer in this but im Annoyed & can NEVER touch this piece again bcos it is FINISHED & DONE#also dont think too hard abt the typing quirks cause i know i sure didnt#coomers best lines jst all have fuckign Os in them so.#in a proper au i feel like it would be VERY funny to just have gordon tryna solo sesh & he ends up just. stuck in a doomed session#with all these fucked up sprites & denizens & shit#coomer would b a sprite obvs as the Tutorial Npc he is#i guess bubby would b a denizen ?? bcos i jst now thot abt tommy & benry being A Cherub and nearly yelled out loud#anyway noone wants 2 hear this shit welcome to my least popular hlvrai post#squiddlyart
114 notes
·
View notes
Text
struggling with another painting/cg style piece... how do people make this shit look natural
#doing exactly what these tutorials are saying and getting entirely different results#i say painting style but im working entirely off of dr cg tutorials#maybe i should work on sprite edits#....i would like to try dr sprite edits again sometime.... maybe soon? ??#i also have a gift to crochet a friend..... and i need to work on characters more...#it sounds like a lot.... except it isnt really. this is one of the slower weeks.#i just get bored quick. ive been bored all week so maybe thats why i feel like i have barely anything to do#servant speaks
1 note
·
View note
Photo


youtube
Enjoy a remade tutorial along with a new, bratty OC :D
600 notes
·
View notes
Note
hiii i have a question about your cheka !! did you use the professional or essential version of spine for it (im assuming you're using spine??) :0000 was debating on making some self indulgent sprites myself and i didnt know which version to buy
I use Professional! I don't use it as a professional anymore, but it works just as well for small silly things like fan-chibis. :D personally, I think the Professional features are absolutely essential (despite the cheaper version being called Essentials. it's a lie.) especially if you want to do a Twst-style chibi --I've stared at those little dudes for a looooong time trying to figure out how they work, and they're definitely using meshes, if not also constraints.
meshes are the big dealbreaker for me, since they let you weight the image to bones, and get actual deformation and bendiness:

(ignore the feather floating away, I didn't wanna fix it for the example :')
and of course, constraints are the other big thing! IK is the most obvious one:
but there's also ones that allow relative manipulation of other bones, paths, and all kinds of other fun stuff! I learned about keyable path spacing a while back and it absolutely blew my mind that you can just...DO that. god.

uhhhh yeah, sorry, I'm a Spine stan! I think Professional >>>> Essentials, although the price difference is, unfortunately, pretty steep (if it helps, I believe you can upgrade at any time for the difference in price, and for individuals it's a one-time purchase with perpetual free updates). it has a little bit of a learning curve, but once I got used to the UI I found it really intuitive, and there's plenty of documentation and tutorials!
tl;dr it's pretty expensive if you aren't using it professionally -- and you could definitely get good results using Essentials if you're clever about rigging -- but Professional is far and away the superior version.
#i...don't know what to tag this#sorry!#gif warning#gifs that i just discovered you can export with visible selection warning#i keep learning new cool things you can do in spine. i want to marry this program#anyway there's a couple of other professional-exclusive things like clipping masks and audio#but meshes and constraints are the super necessary big deal ones IMO#i want to touch the twst rigs. those INK DRIPS#i want to understand them#i think there's a really clever mixture of deformation and...shearing i think? going on#i-it's neat okay just take my word for it#me breaking out the jeweler's loupe to analyze some tiny anime gifs#spineposting
330 notes
·
View notes
Text

🎁 Day 15 of the DR Winter Gift Calendar has arrived with Tsumugi- and Keebo-themed gifts!
(A masterlist of all gifts will be posted at the end of the event!)

🧵 TSUMUGI - PRINTABLE FOLDER LABELS


behold! printable folder labels for keeping dossiers on all future Danganronpa participants your favorite cosplayers question mark? like the Himiko labels, these are 3.5" by 0.66" (that's to say, 3.5" by 2/3") and will fit on sticker paper or label paper with a little trimming.
💝 [download as zipped PNGs or a PDF] 💝
[thank you for the transparents: 1 ]
🤖 KEEBO - CUSTOM PHONE ICONS

keep the best little robo-boy right in your device at all times! maybe against his will even! just kidding! like the Sakura icons, these feature pixel sprite Keebo and a few of his favorite free time presents. the above examples are just a sample...there's 16 in all!
while these may look a little distorted when viewed at full size, they'll size down perfectly when you use them on your phone:
please enjoy this simple way of keeping robophobia out of your heart and in your phone instead!
(note: i can't troubleshoot these icons as everyone's device is Extremely Different when it comes to customization. however, i recommend Googling your device for tutorials on setting these up. i'm sure there's plenty! please let me know if you need a different File Type as i can very likely quickly whip up a conversion for you.)
💝 [download as zipped PNGs] 💝
➡️ you may freely share, use, and edit these: just link back if you post them online!
[See other 2024 Winter Gift days at the tag #danganronpa❄️24!]
48 notes
·
View notes
Text
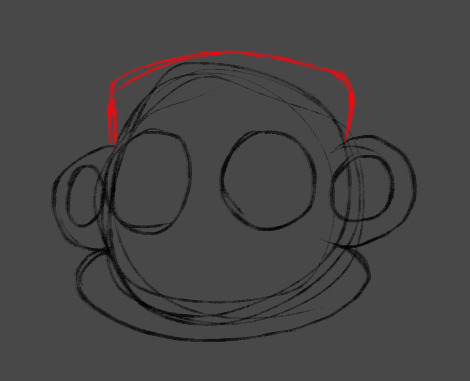
been asked how i draw shamura! i notice a lot of people also have trouble drawing them so here's a quick little tutorial for how i do it

step 1. circle

step 2. i usually do the main eyes first. also just circles

step 3. outer eyes! not the eye parts themselves quite yet, just the lids/flesh around it.
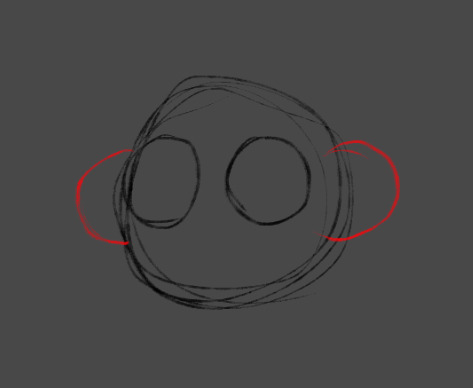
step 4. actual eye parts. these are smaller then the main ones, fit nicely into the

step 5. cheeks/jaw. i usually do the red line line in one go but circles for the cheeks can help!

step 6. top of the head. its just a soft, slightly curved rectangle
step 7. legs! i draw them a bit chunkier then they are in game but basically beans without the end. or noodles! im sure an actual reference of shamura would be good to know the actual placement of them, but i usually put the top ones above the eyes, second row at the eyes, and third between the cheek and eyes
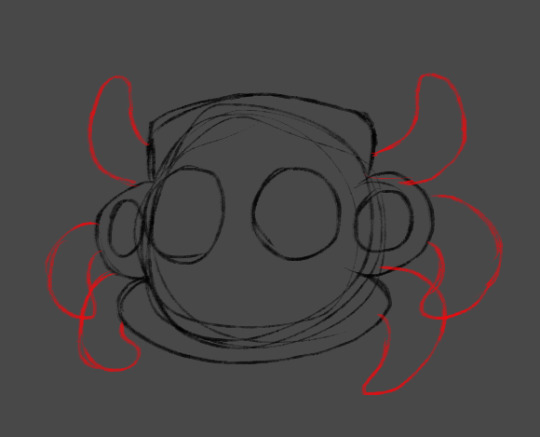
step 8. nose + mouth! their nostrils are pretty high up their face, above their eyes. the mouth is a weird shape, but its a curved triangle. or a triangle and a banana

step 9. teeth! they are shaped like teeth. shamura's fangs curve away from each other in their ingame sprite, but sometimes i draw them like how fangs usually lay down. i never claim to be super consistent

step 10. lines for the crown. make it taller then you think you need it! shamura's crown has a dip

step 11. the dip. connext the two ends of the crown and meet in the middle with a dip... dunno how else to explain it

step 12. eyes! shamura's pupils are slits so should be easy. the cresent moon shape can either be drawn directly, or a circle and cut out a bit of it
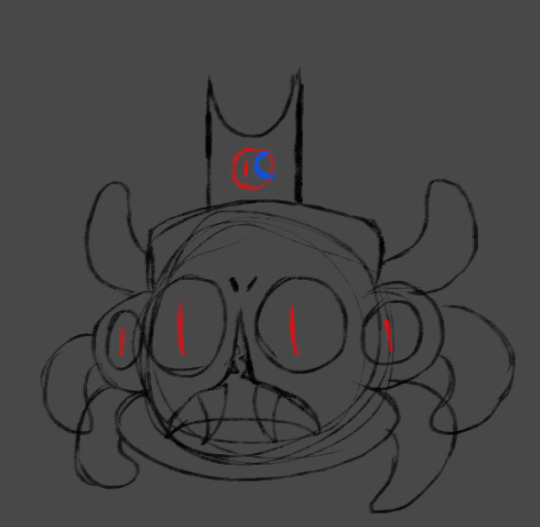
i think the rest is self explainitory. hopefully this helped at least one person break down their shapes!

tl;dr: shapes
136 notes
·
View notes
Note
How do you make your sprite edits?
Hey! I'm flattered that you're interested, that's very sweet of you <3 I'm sorry if this reply came later than you expected but I thought for this I'd made a small tutorial, so I had to get screenshots for the whole process and stuff ehfuerhgr
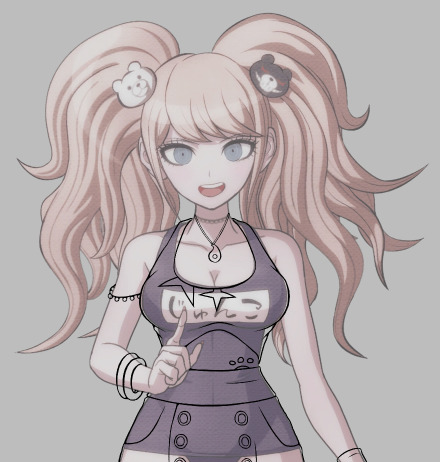
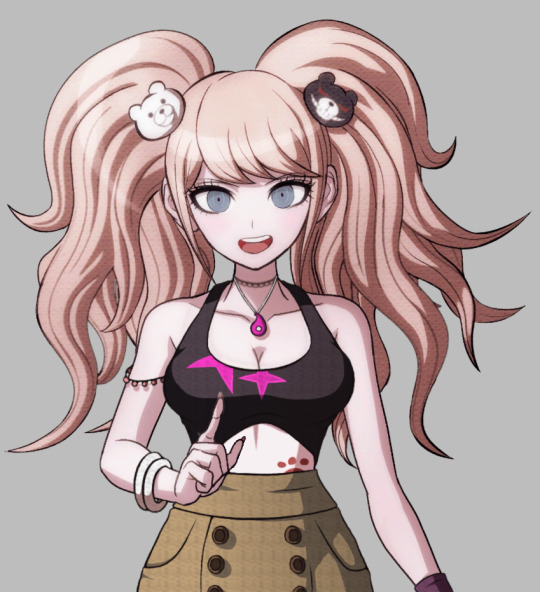
So first, I start with grabbing the DRS bathing suit sprite of the character I want to edit because those sprites have the least amount of detail for me to erase (for this example let's use Junko)

Then I turn the opacity down on her model and start a basic sketch of the outfit design on top of it on another layer. Because the base has a lot of dark lines and details, I change the colour of the sketch to bright red so it's easier to see the difference.

After that, I make a new layer and start the lineart. Because the artstyle uses inconsistent line length, I try to do the same with my lines (a good tip is to see how the line width looks on the original base and try to mimic it on your own lines, it may not be 100% accurate but it'll at least be closer to the original style than if you used the same width throughout)
Then, I add the colours and the shading. This part gets a little complicated, because instead of doing the base colours and the shading on the same layer, I make one layer for the shading and then create another layer for the colours, which I put underneath the shading layer so I can keep the shading consistent (another tip: follow the shadows on the original base where appropriate and then add any extra shadow for stuff like fabric folds. This is especially important if you're editing a female character because of the shading around their breasts)
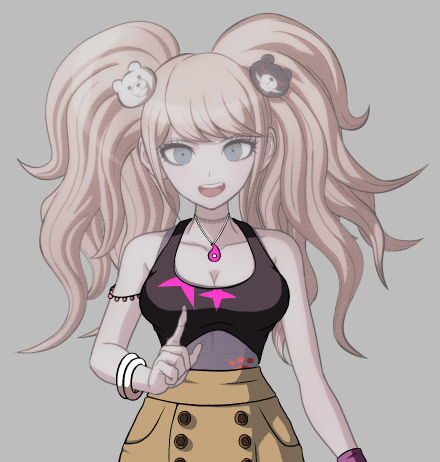
Next, I go back to the base and edit out any details from the original bathing suit that wouldn't be there with the new outfit (Junko's actually a good example for this, as her bathing suit covers her midsection but my outfit design doesn't, so I would have to edit it to look like it's exposed)
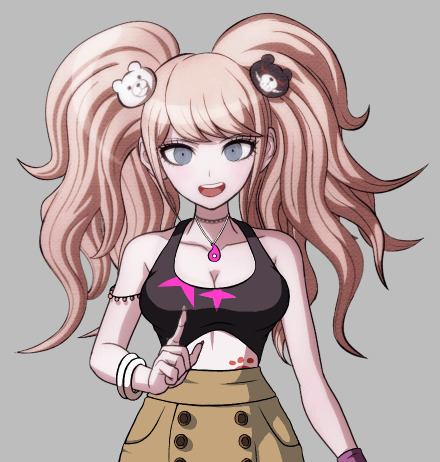
(Another tip is to add shading in accordance to the new outfit, such as the beaded armband in the picture above)
Buckle up for this part because it's a Lot-
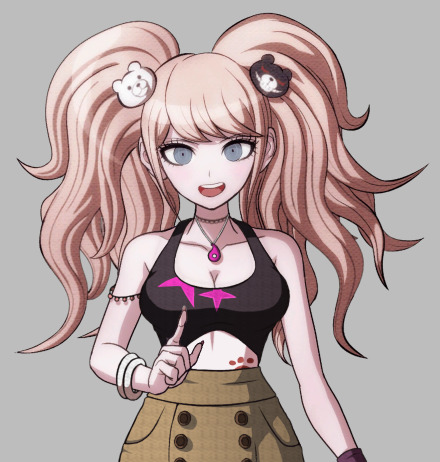
This part might be a little confusing because I realised after taking the screenshots that I might have done the process...out of order? Compared to how I usually do them at least lmao. So what I ended up doing was blurring the lineart and shading layers slightly to match the blurriness of the original sprite, merging those layers + the colour layer together, making yet another layer, choosing a dark colour that fits the palette of the original character and making a circular gradient over the outfit, as the original sprite also has a gradient.

Then I searched for the polka-dot texture you see in Junko's hair and overlaid it with the outfit, resized it, blurred it and set it's opacity to where it matches with Junko's hair as much as possible (thanks @sir-sunny for this tip!)
(The texture that I use is the first result that shows up on Google Images when you search 'danganronpa texture overlay', which was made by JLE42 on Deviantart, who says it's free to use)
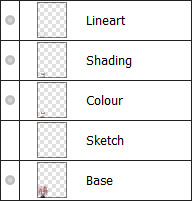
Generally I don't name my layers, and I usually delete the obselete ones as I go on, but for the sake of this tutorial I decided to keep them so y'all know what they look like. These are the result of this one edit:
(Before the gradient)

(After the gradient)
After that, I add every layer except the sketch layer together so it's one image (depending on the layering, I have to add certain layers in different orders so the last image is as neat as possible)
And there you have it! I'm sorry if this got hard to follow, this is my first real tutorial and I'm extremely bad at articulating myself efhiuerg. I hope it's at least enough for you to get an idea of how I work!
(Any messy bits I intentionally left in because the THH sprites are messier than the other games and I wanted to replicate the style as much as possible)
(Program is Firealpaca btw lol)
#Danganronpa#Danganronpa sprite edit#Sprite edit tutorial#Tutorials are harder than I thought :')#Still kinda fun tho!!
54 notes
·
View notes
Text
If The Straw Hats + Other One Piece Characters Were Famous Influencers
The Straw Hats + Law, Kid, Hancock, Ace, and Sabo as influencers.
Luffy:
•Niche: Food
•Makes content consisting of restaurant food crawls and meat mukbang ASMR.
•Favorite Brand Collabs: All of them
•Favorite Influencer Collabs: Ace and Sabo would appear as guests for ramen mukbang ASMR video.
•Side notes: Luffy is able to rack in a solid million views per video with his monstrous appetite, but often forgets that his job is to actually give a decent review of the restaurants he visits.
Nami:
•Niche: Fashion
•Makes content consisting of bikini try on hauls.
•Favorite Brand Collabs: Fashion Nova, Shein, & Pretty Little Thing.
•Favorite Influencer Collabs: Vivi would appear as a guest on vlogs where they would go shopping together.
•Side notes: Her viewers mainly consist of thirsty guys (Sanji), and said guys always splash the cash on her Onlyfans account.
Nami will also waste no time dragging shitty swimwear brands (Kylie Swim), after all they did ask for honest reviews. So long as she was getting paid, it didn’t matter.
Zoro:
•Niche: Fitness
•Makes fitness and protein shake tutorials
•Favorite Brand Collabs: Planet Fitness, Gymshark, Champion, Adidas
•Favorite Influencer Collabs: With Killer. The two often do challenges at the gym to see who can lift the most weights.
•Side notes: His 2nd stream on income is offering personal training. Link in bio to book a session.
Sanji:
Niche: Cooking.
•Makes cooking tutorials, TikToks, and just like Luffy, goes to restaurants to review the food.
•Favorite Brand Collabs: Olive Garden, Red Lobster
•Favorite Influencer Collabs: He sometimes invites Chopper along to try his sweets for a review.
•Side notes: Sanji sometimes fail to meet deadlines since he would be up all night watching Nami’s Onlyfans.
Robin:
•Niche: Luxury Travel
•Content from floating breakfasts, fancy suites, hot tubs, and fine dining.
•Favorite Brand Collabs: Marriott and Four Seasons Resorts.
•Favorite Influencer Collabs: With Hancock. She also liked the finer things in life. Instagram posts of them wearing robes, head wraps, and sharing glasses of champagne from their hotel room always performed well.
•Side notes: She’s one of the top travel bloggers of the Grand Line. Her travel recommendations include Sabaody and Water 7.
Franky:
•Niche: Drinks
•Franky gives the best soda drink recommendations. Some of his videos include mixing mentos with soda to make crazy cool explosions.
•Favorite Brand Collabs: Coca-Cola, Sprite, Dr. Pepper & Fanta.
•Favorite Influencer Collabs: None. He flies solo.
•Side note: Eventually moved away from content creating to becoming the new face of Coca Cola. Expect to see him in every commercial and advertisement. He’s living large at his TikToker sized mansion.
Brook:
Niche: Women’s Lingerie. Here me out!
•Brook’s obsession with panties took him pretty far. Expect to find videos of recommendations of his favorite high quality lingerie from cashmere, lace, and even satin. Men look to him for advice on what to get as gifts and women look to him for advice on what lingerie to buy to please their lovers.
•Favorite Brand Collabs: Calvin Klein and Savage X Fenty.
•Favorite Influencer Collabs: None.
•Side notes: If some woman calls him out for pervertedness, his fans would rush to Brook’s defense and drag them until they stop.
Chopper:
•Niche: Sweets
•Chopper was a fan favorite with his reviews on sweets. Expect to see cute little Tiktoks of his favorite sweet shops or candy and cake ASMR.
•Favorite Brand Collabs: Hershey, Haribo, Cotton Candy Brands
•Favorite Influencer Collabs: With carrot. Their exploits on Whole Cake Island made then go viral for eating cake from the Tea Party and managing to escape Big Moms wrath.
•Side notes: Although Chopper is beloved by many in the sweets industry, he is hated by Big Mom for managing to get more followers, subs, and taking her spot for cake commercials. She tries so many times to have his videos demonetized but always fails.
Ussop:
•Niche: Hair
•Does a lot of haircare tutorials to suit hair types that are similar to his own. He wants to make others feel seen too.
•Favorite Brand Collabs: Pantene & Garnier.
•Favorite Influencer Collabs: Jimbei. He has a similar hair type to his and will sometimes bring him along for hair care tutorials.
Side note: Eventually, Ussop was able to come up with his own unique hair care inventions which in turn made him very rich.
Jimbei:
•Niche: Self Defense
•Jimbei’s videos consist of self defense fighting moves in the form of karate. He’ll sometimes drop some tips on TikTok.
•Favorite Brand Collabs: Any brand that sells karate gear.
•Favorite Influencer Collabs: He definitely brings on Koala to demonstrate some karate moves.
•Side notes: Rather than looking for fame, Jimbei only wants to expand to a more human audience to stop discrimination against Fish Men.
Law:
•Niche: Health
•His content consists of ASMR doctor roleplay and facts about doctoring on his TikTok.
•Favorite Brand Collabs: None. He prefers just to get paid for the views he gets on his platforms. He does offer his own special services to add to his income.
•Favorite Influencer Collabs: Doesn’t Collab but will have bepo play a patient when he’s doing demonstrations.
•Side note: People in the industry like his style. Law was asked to guest star on a few episodes of Grey’s Anatomy.
Kid:
•Niche: Gaming
•Loves fighting snd violent games. Kid became a popular Twitch streamer after going viral for rage quitting for failing a mission in Call of Duty. Hates Twitch e-thots (jewelry bonnie and her food porn while she “games” on her PlayStation).
•Favorite Brand Collabs: Sony, Nintendo, Raid Shadow Legends.
•Favorite Influencer Collabs: None. Everyone is afraid of him.
•Side note: Kid was a valued guest at E3 until he got banned for getting into a fight with a fellow Twitch streamer for beating him at the Smash Tournament.
Hancock:
•Niche: K Beauty.
•Hancock is the most beautiful if not the most toxic name in the industry. She has a cult following and many haters who seek to have her brought down. Her videos consist of makeup and skincare tutorials. She also doesn’t hesitate to drag a brand she doesn’t like.
•Favorite Brand Collabs: None. All brands want her but she rejects them all nowadays.
•Favorite Influencer Collabs: She’ll bring on a random female guest to do makeup on. Mainly to humiliate and drag them if she spots any imperfections on their skin.
•Side notes: She now has her own K Beauty empire with a net worth of 2 billion berries. Now that she has everything, her one wish is for Luffy to move in with her and live comfortably together at her mansion.
Ace:
•Niche: Adventure travel
•Yknow those influencers who climb those risky. tall, high places for the gram? Ace is one of them. A lot of his videos also consists of death defying stunts like doing backflips on different balconies of tall buildings.
•Favorite Brand Collabs: Tourism boards.
•Favorite Influencer Collabs: Prefers to travel solo but wouldn’t turn down his brother Luffy if he asked to go with him on an adventure.
•Side notes: Ace is on thin ice with the PR people who hired him because sometimes he wanders off, passes out during a meal at a bar and forgets to create the content needed. It’s a good thing he’s charming, polite, and the fans love him, otherwise he would have been fired.
Sabo:
Niche: Luxury Fashion
•He’s very popular on TikTok, showcasing his favorite style through a series of cool dances and amazing transitions. This man managed to make hats with goggles a trend all over the world.
•Favorite Brand Deals: Gucci, Louis, and Versace
•Favorite Influencer Collabs: You know your doing well in the industry when you get Mihawk to be in one of your videos. He’s not going to dance though. Most likely going to collab with Sabo with a simple IG post of them in luxury clothing at a fashion show event.
•Side notes: Sabo became so popular, that he transitioned out of content creating and became a world famous model for luxury brands. His cover on Vogue earned him a cult following of fangirls.
#one piece#one piece x reader#straw hats#straw hat pirates#one piece imagines#one piece imagine#one piece headcanon#law one piece#luffy x reader#zoro x reader#ace x reader#sabo x reader#one piece nami#nami x reader#nico robin#wano arc#one piece scenario#boa hancock#straw hats x reader#franky x reader#brook x reader#one piece law#trafalgar law#kid one piece#eustass kid#roronoa zoro#sanji vinsmoke#sanji x reader
135 notes
·
View notes
Note
Do you have a tu-TORIEL on how to make pixel art?
I am definitely not making an outright tutorial, I think you're better off learning from someone who didn't go 5 whole years without making a single sprite until last month jgfhsgd
but I can at least share my process and hope that helps a little! since I didn't make a sprite for Monster Kid with the rest of my Swap MH dialogue sprites, I'll make one just for this post ✨
firstly I stick with using my tablet and SAI like the rest of my art since SAI has a pixel brush and layers are nice, but Back In The Day™ a mouse and MS Paint worked just fine for me. I know specific spriting art programs exist, but I've never looked into any so I can't speak for those.
before starting any sprites: references are key, especially for a specific style and an official character! for this I grabbed some of my own art, Monster Kid's battle sprites, and both their UT and DR overworld sprites - even though overworld sprites are a different style, having more examples of how a design gets condensed into smaller forms can still be useful.
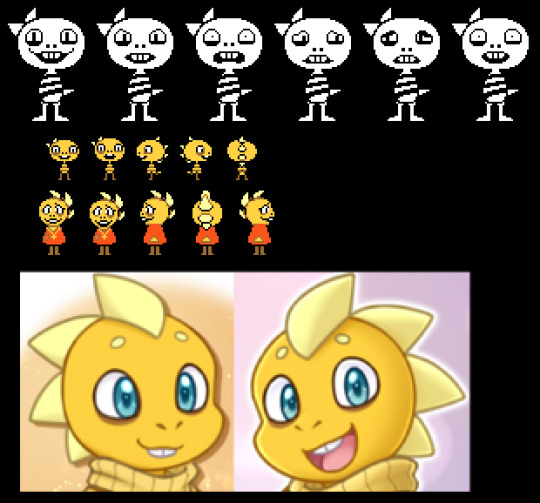
(unrelated but as I put these refs together I only now realised that MK's bigger eye marking isn't on the same side between their UT and DR versions. toby why)
anyway the base sprites don't take me long to make, so rather than explain everything for ages I'll just show each step:
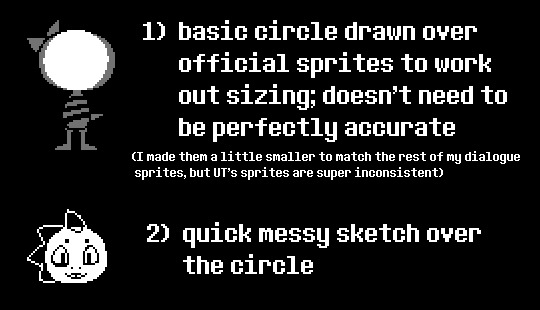
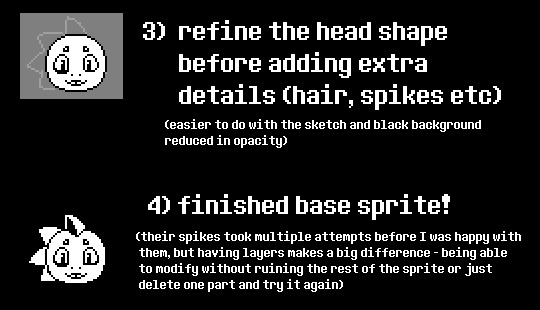

I uh, don't feel qualified to give out proper tips about pixel art, besides real basic stuff like mixing pixel scales isn't gonna look good. like the UT red soul sprite is iconic but the mismatched pixel sizes cause me Emotional Distress:
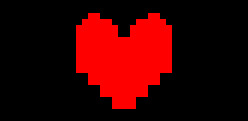
but I hope some of this was helpful? you should absolutely look up tutorials from people who know what they're talking about though!!
#having made a sprite for mk I now see why their front-facing ut sprites stylised their spikes in a way that people mistook for a ribbon#they were Not Easy oTL;;;; but I don't think imitating that stylisation would've worked for my sprites either#anyway I do Know a good amount of pixel art stuff I'm just out of practice and very bad at explaining things ahah#but it is something I've been able to do for years and it's nice coming back to it :]#I still remember starting out editing s/onic advance sprites and thinking pillow shading was the coolest style ever. when I was 11 gjhsdfsd#holoskart asks#pixels
13 notes
·
View notes
Note
Oh yea i do so

Nabures sahpree, Aliza’s mom
Star sahpree, Aliza’s dad
i used picrew since at that time i wasn’t good at sprite making ;-;
//I like their designs ^^
//It's okay to use things like Picrew to get character designs down, don't feel bad
//And speaking personally, this post actually really helped a lot with making my own DR character sprites:
//Just in case you need it. Always good to have on hand ^^
5 notes
·
View notes