#edit: HELP HOW DO I DO THE PREVIEW THINGY
Explore tagged Tumblr posts
Visit Tumblr Blog
Explore Tumblr blogs with no restrictions, modern design and the best experience.
Last Seen Tumblr Blogs


Fun Fact
In February 2021, Tumblr had 518.6 million blog accounts.
Text
custom font colors tutorial
note: this is for my bb @tobaccosunbxrst but also just wanted to post it to public for anyone curious on how to do custom fonts w html on tumblr. i originally made this tutorial privately for my mutual @certainlysyko so apologies for the silly choice of example text that i used lol. anyways.
so as we know, tumblr only has the following default color options for text:
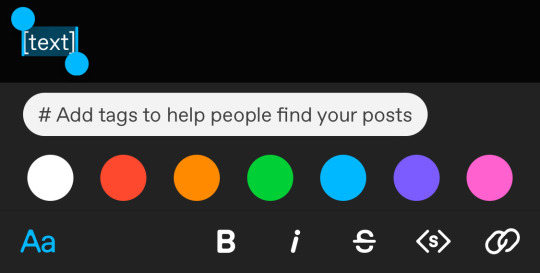
but what if we want some other cool colors like coral pink or cerulean blue or barf green?
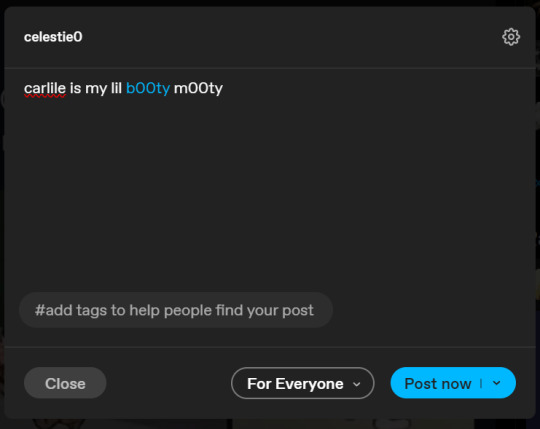
to do custom fonts, it’s very simple, but it needs to be done on pc/laptop (cannot be done on app). we are going to start with a post:
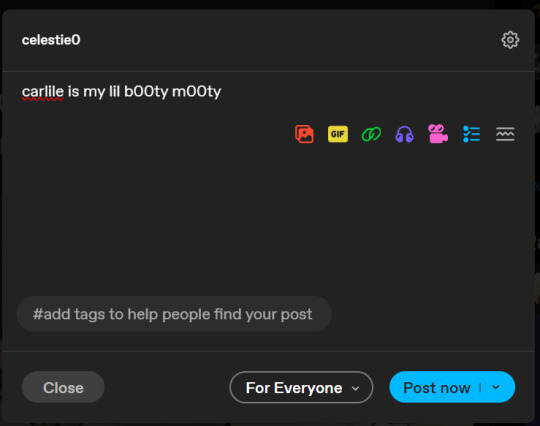
then, you’re just gonna change whatever word that you want the custom color for into one of the tumblr defaults. you do this by just selecting the text with your cursor and then tumblr’s default colors pop up. you can change into any of them, this just establishes the code in the html and makes it easy to spot
then you're going to go to the little settings thingy at the top right of the post (the settings wheel) and click on this drop down, then click on "html" which will switch it to html

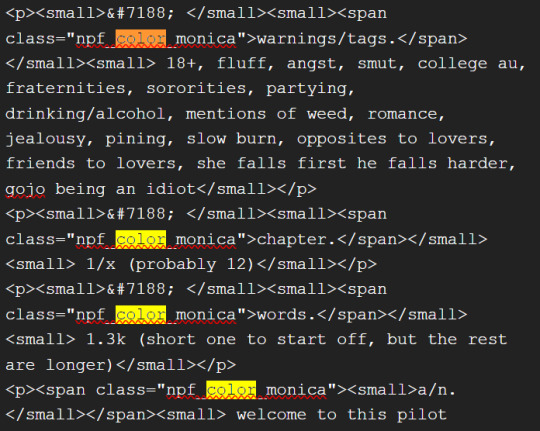
now it's in html. this looks very simple bc there is only one statement here. i’ll touch on how to deal with more lengthier blocks of html code later. but for now, note this section only:
<span class="npf_color_rachel">
this is ALL we need to work with in the code
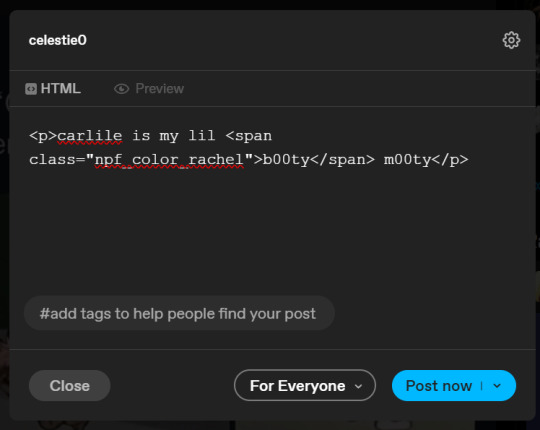
we're going to change it from
<span class="npf_color_rachel">
to
<span style="color: #[hex code]">
so, for example, something like
<span style="color: #81b7ce">
note. you can also just copy paste the lines above so you don’t have to type it out
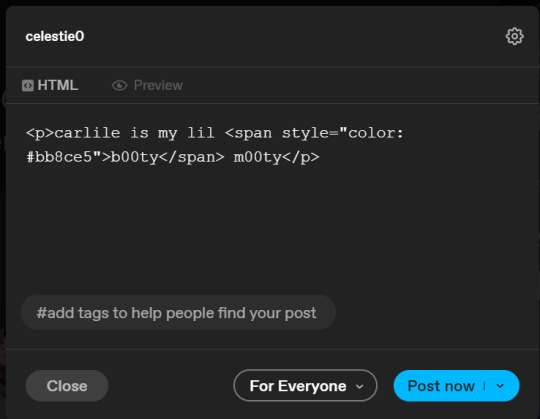
soooo all we did was delete the class=npf_color_rachel part and just replaced it with style=“color: #[hex code]
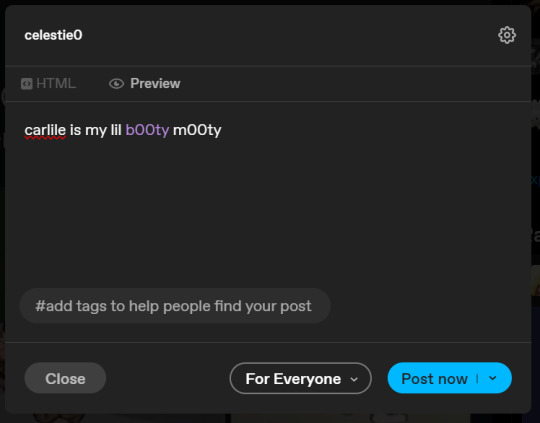
and here's the preview! all done :)
this is the website i use to find the hex codes. a hex code is basically those codes after the hashtag so like #81AACE (don't forget to input the hashtag)
now, for those lengthier posts i mentioned, you can use ctrl+f and search the word "color". it will show up any place on the post where you have a colored font (so do this after you’ve already changed all the places you want custom colors into default tumblr colors, like in the 1st step)
this way, you can easily find the places with <span blah blah> that you need to edit
here is an example of that in one of my posts:
and yeah! that’s basically it. disclaimer, i’m not a software engineer nor so i know much about tech haha, this is just for tumblr aesthetics
alright peace out! 🧚♀️✨ hope this is helpful
#tumblr#tumblr tips#tumblr html#tumblr hacks#tumblr colors#html#tumblr custom colors#tumblr girls#custom colors#tumblr tutorial#custom colors tutorial#html tutorial#hacks
227 notes
·
View notes
Text
~to the anon who asked how to make the gradient text I'm so sorry i accidentally deleted your ask after writing a whole essay😭 i hope you see this 😔🙏
i use this website, it's so easy to choose the colors and things you feel looks good to you and copy the loong code in the little box, if u need a specific color's hex code to match your theme you can find it in a website called imagecolorpicker.com it's so simple just select you image you want to match with and copy the code. (Idk why but i can't link it) anyways back to ur text's code we copied earlier, click the gear wheel icon in the top right corner of your post form and choose to switch to HTML. paste the code and edit it in the preview window and add your images and emojis if there's things you need to link ect.. but unfortunately you can't do all that from your phone the html thingy has to be done from the website preferably on a desktop (i use my laptop) , make sure you don't post it at once, save to ur drafts first to actually see if it worked just in case! love u hope this helped 😭💗
8 notes
·
View notes
Note
how do you make your blog look so cool and good on computer screen thing?? :')
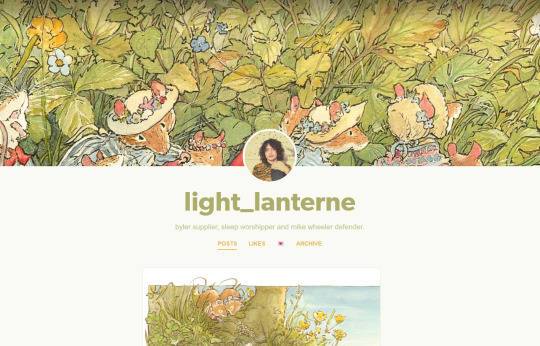
hello ! :] i'm not entirely sure i understand the question, but if you mean this,,,
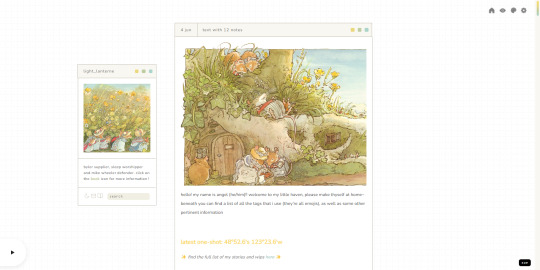
,,,then that's just my custom theme !!
you have to be on desktop to enable it (go to your blog settings and turn on the "enable custom theme" thingy that's near the top). once you do that, tumblr gives you a default theme that looks a lot like the one you already have ~
for instance, this is what my default would look like :S
it works, but it's not the most appealing in my opinion :\
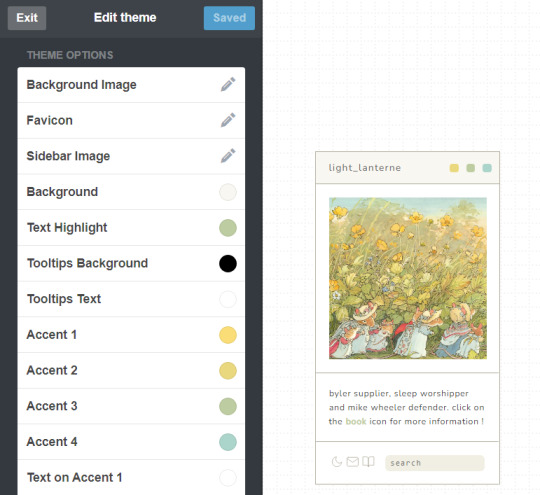
to change it, you need to once again go to the blog settings and click on the "edit theme" button. you are then taken to the customisation page, where you can make some adjustments to that default theme you're given,,,
,,,or you can change it to a completely different one ! :D
first, you need to find a theme you like. you can browse "tumblr theme" tag if you want, or go to theme-hunter and look around for stuff. there are a looot of themes with a lot of different styles to chose from, most of which are relatively easy to edit.
once you find something you like, you need to get the code. it's usually linked on the maker's post, near the top, and most of them take you to pastebin. you select the whole code and put it in your clipboard,,,
,,,and then add it to your blog. go to the customisation page i mentioned before, then click on this little button i've marked in the image.

once there, you just delete everything currently in there (at this point, the code for the default theme) and paste the code you picked instead.
update preview, save the changes, then go back to the main customisation page.
scroll down a little and you'll find the theme options and voilà ! you can edit the theme to make it into whatever you want :O for instance, the theme i have has a lot of colour options
you can also change out the font,,, or the images,,, there are a lot of options available; it just depends on the theme you picked :]
if you have some css and / or html knowledge, you can also change out some stuff in the code :O the sky's the limit ~
so yeah,,, that was a basic breakdown of how to apply a tumblr theme :] hope it was helpful !! if you need any help please don't hesitate to reach out :D also, please forgive me if i misinterpreted your question altogether or if this was too confusing. i'm not great at explaining this stuff u.u
although, even if i misunderstood, i highly encourage picking a nice theme for your blog ! it's a nice option to make your blog a bit more you or go along with your aesthetic (for instance, here's the theme i picked for my dark academia-ish blog). it's also really fun to edit these themes, in my opinion, so that's a bonus !! :]
more than anything, please do enable the custom theme thing. even if you keep the default theme, it's important to have that on because it allows you to use the archive, a vital part of blog navigation in this site :O
11 notes
·
View notes
Text
EDIT: results out now!
Wake up hermitblr, new survey just dropped! Who is your hermitcraft Guy?
https://forms.gle/URYeSiqFUDk9a6EMA
Major props to @theminecraftbee for both inspiring me to make this survey and essentially feeding me the questions to put on there lol
Survey closes March 5th at midnight CST (tentative date, I’ll update the survey description itself if I change it, depending on how many responses I get)
This is my first ever survey so if you see any typos no you don’t <3
#I’m jk please tell me if you see any typos it is past midnight I am SLEEPY#I hope this post is ok like I said this is literally my first ever survey I’ve made#that being said I’m really looking forward to any responses I get#alright serious tag time#hermitcraft#hermitcraft survey#hermitblr#I think that’s all I can tag it as?#ok thanks for your time#edit: HELP HOW DO I DO THE PREVIEW THINGY#all the cool surveys have the little preview thingy how do I do that#god I’ve used tumblr for what 7 years now?#and I still don’t know how to work it apparently smh my head
639 notes
·
View notes
Text
website update blog #12 (May 22nd, 2022)
hello! i'm back with some actual changes to the site now!
i apologize if the last website update blog was like...
hold on lemme check my tumblr-
wait a minute...
ALMOST 1 MONTH???
damn. well, i got some changes to show yall anyway sooo lets start!
last time i discussed my website, i told yall that i will remake the whole thing over, and THAT, is going to be my main focus.
so i moved the old files to a new folder called /legacy and made a new html file and css file.
i then thought of how im going to go about organizing this thing. i thought about it for an absurdly long time, and then i had an idea.
what if we organized it as such where the style of an html element can be changed just by using the "class" attribute?
its hard to explain so ill just show you what im talking about: (if you dont want to read this part just scroll down until you see the word SKIP HERE!)
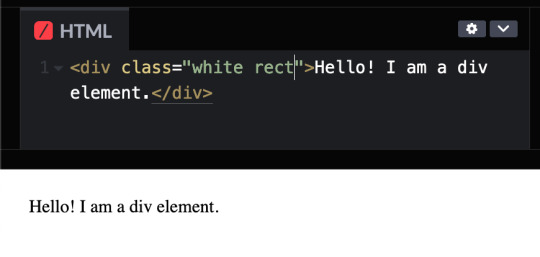
ill give you a div element:
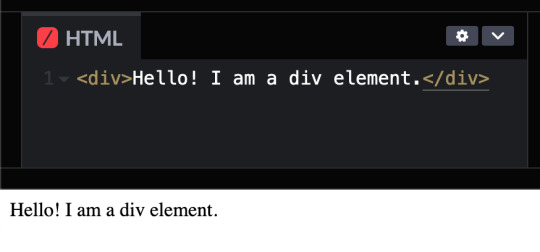
but i want to change how it looks, since its just bland text on the preview shown.
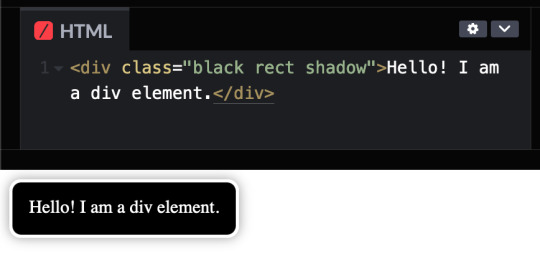
that's where these classes come in!

these classes are basically just there to change how any html's look! (with the help of the class attribute)
turning the div into a black rectangle with a shadow
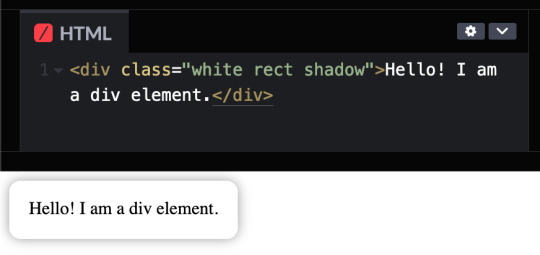
turning the div into a white rectangle with shadow
turning a div into a white rectangle (no shadow needed (although it looks like the rectangle isnt there anymore, but trust me, it still does)
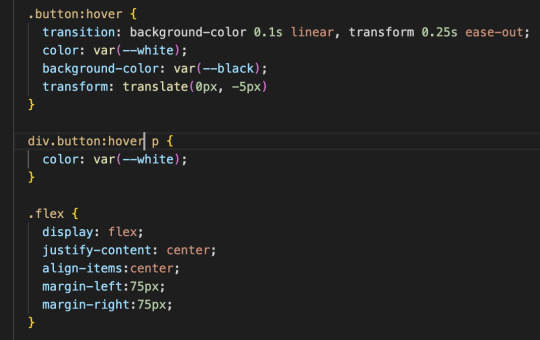
and more! you can do a whole lot with these combinations, and theres even more classes i havent told you yet, like the button and flex classes, but to put it simply, button adds a transition where the rectangle changes color from white to black and and animation that makes the rectangle slightly go up and flex is to arrange the rectangles in rows and columns.
SKIP HERE!
anyway back to the website...
this was the breakthrough idea that made recreating the website SO MUCH EASIER.
aaand after only 10 days, i finally finished!


i will now explain the changes i have made with the website (compared to my website before i recreated it)! it should be obvious but i will do it anyway.
- i added a github button!
this button serves two purposes:
its a button to redirect you to the github repository of the website!
its to get the /section buttons to actually look like they are centered. the main problem of the old navbar was that it did not look centered AT ALL, so i couldnt really center the thing without looking off and weird...

and now, with the github button, everything looks decent!

- changed the footer to look like a simple (rounded) rectangle at the bottom of the page.

this was to "solve" the problem which i had with the footer thingy which was that:
if i wanted the footer to fix on the bottom of the textbox,

but when i zoom out theres so much visibe dead space at the bottom.

and another thing, if i want the footer to stay at the bottom of the screen, it doesnt look like theres dead space, buttttt

the damn footer takes up 10% of the total screen space

so i had an idea...
what if we just contain it in a small rectangle instead of looking like the navbar?
it clearly does not solve the dead space at the bottom problem, but atleast it looks nicer than before and it doesnt look like the navbar anymore :D

oh and also
- I FINALLY FINISHED THE SLOOSHI PHOTO IN THE SIDE OF THE TEXTBOX AFTER LIKE 1 MONTH
YOU CAN SEE THE CHARACTER ON THE IMAGE I JUST SHOWED YOU IF YOU HAVENT NOTICED YET
THIS SHIT TOOK ME SO LONG TO ADD ARMATURES AND POSES AND I FINALLY FINISHED ITHBHRDJ FNJKCKXLM<
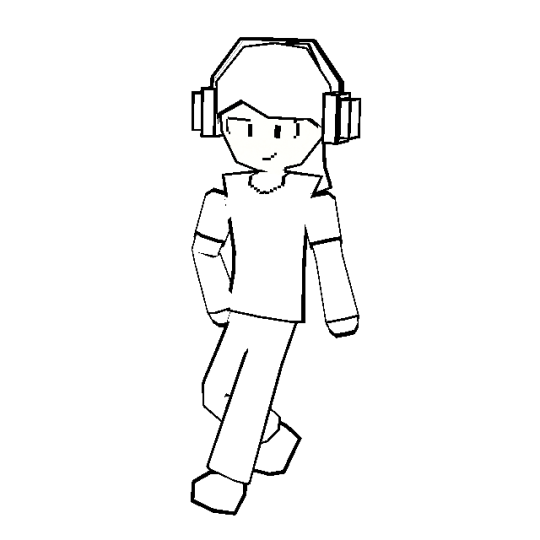
i just hope yall like it :>
aaaaaaand thats all that i have changed while recreating the thingy!!!
now the new stuff (theres only one):
- I added a new section on my website called sushiwt/lite!
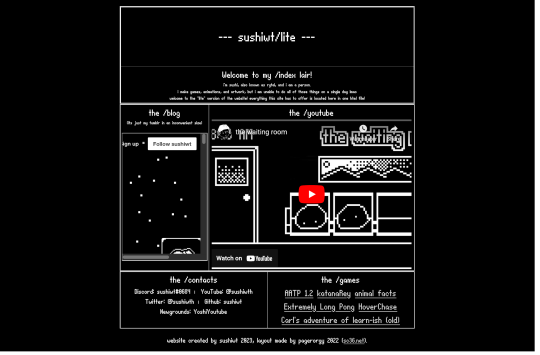
based on @pagerorgy's sc36.net (and by based i mean i downloaded the html file of the website and edited it), this WAS a temporary home while i was remaking it, but now its just a place where you can see EVERYTHING the site has to offer (in only 1 table)!
i apologize of the fact that this blog is so long, so heres a tl;dr
i remade the website with a convenient way to change the look of an element
i changed the footer's look, added big slooshi, and
added sushiwt/lite, everything in my site in one table
ok goobai :D
- sushiwt <3
7 notes
·
View notes
Text
how I make my gifs: a tutorial
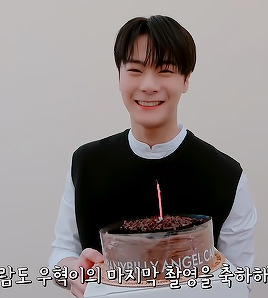
Hi everyone! Just in case someone asks in the future + for those curious, I'm here with a tutorial on how I make gifs! If you have any questions whatsoever, please do send me an ask! I’ll be glad to help! The gif I made with this tutorial is the one right here!
So... let’s start this tutorial with the programs I use.
Adobe Photoshop 2020 - To make the gifs, majority of the work is done in this program.
TopazLabs (Topaz DeNoise 6 and Topaz Clean 3) - To "denoise" and "clean" the gifs, as the names would suggest. Links for download: Topaz DeNoise 6 & Topaz Clean 3
KMPlayer (an alternative would be PotPlayer, or any other video playing program that allows you to capture the frames) - To capture the frames. - I use an older version of KMPlayer, though I don't know which exact version that is.
Now let’s continue onto how I use these programs to create gifs!
Step 1: After you’ve downloaded the necessary programs, download your video. The way to get the best gifs? Quality videos. That’s the first step. For K-pop performances, I recommend this website (the hq files are in .ts form, KMPlayer should be able to open these). Bookmark it! It’s really handy :) Get the video you want to make a gif from and open it in KMPlayer (or PotPlayer or any other program, but for this tutorial I’ll use KMPlayer). Open your video in said program and look for the part you want to make a gif of. Then press CTRL+G (I apologize because I cannot for the life of me remember if this was a standard shortcut or not)
Step 2: After pressing CTRL+G, you’ll be met with this screen:

I’ll briefly explain the numbered parts, but before that, these are my standard settings and just make sure you have them all the same and it should be good!
1: This is where your captured frames will be extracted to. I have them extracted to the standard folder, but you can change this if you want to. You’ll need this folder later when opening the frames!
2: Like it says, this is the image format. I use PNG in the highest quality, as the name would suggest, for the quality.
3: These are the amount of frames the program captures. Say you put in every 2 or 4 frames, you’ll get more choppy gifs. To get the smoothest gifs, put “every frame” (this in turn will increase the gif size as the amount of frames will obviously be bigger).
Once you’ve put in the correct settings and you’ve put the slider where you want the capturing process to start, press “start” (now, before you do this I recommend putting the video on mute as the audio will start to get kinda demon-y the longer you record lol save your ears pls). Then, when you’ve captured all the frames you need, pause the video, press CTRL+G again and click “stop” and close the pop-up/program.
Step 3: It’s time to open up Photoshop! Then go to File > Scripts > Load Files into Stack... (for older versions/another version I used in the past this one didn’t work and I had to use the “Load Multiple DICOM Files...” instead. It should work similarly though, if I remember correctly).
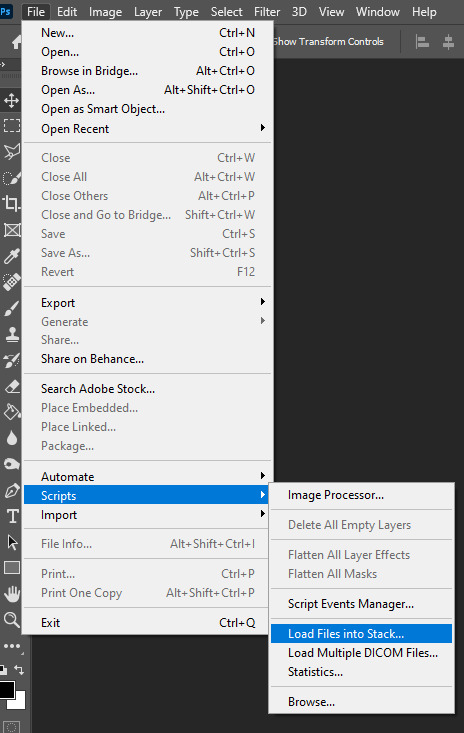
You then get a little pop-up that looks like this:
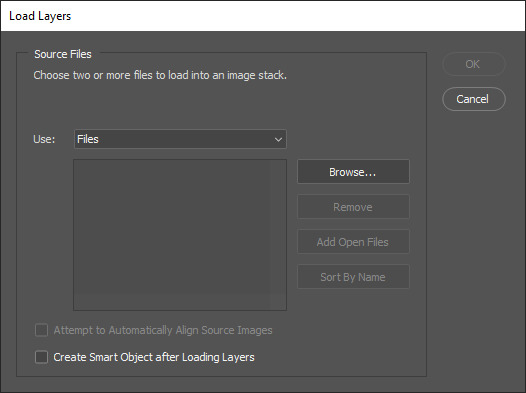
All you have to do here is click “browse” and navigate to the folder where your captured frames have been saved in. Select all the frames you need, wait for them to load in and then click “OK”!
Step 4: Depending on the amount of frames you’ve selected to load in, as well as the beefiness of your PC/laptop, the frames loading part might take a little while. Photoshop is importing every frame as a separate layer into one file, so just... grab a drink or something and wait a bit! When you’re done waiting, if you haven’t already, go to Window > Timeline. This will show you the animation timeline. For older Photoshop versions this is slightly different (I believe it’s called animation). Then click “Create Video Timeline” and click the 3 squares on the left bottom side (in older versions it’s on the right bottom side, not sure).
Step 5: After you’ve done all that, you’ll want to select all your layers. You can do this by pressing ALT+CTRL+A or going to Select > All Layers. With all the layers selected, you have to go to Layer > Arrange > Reverse. You only have to do this if you used the “Load Files into Stack” option!
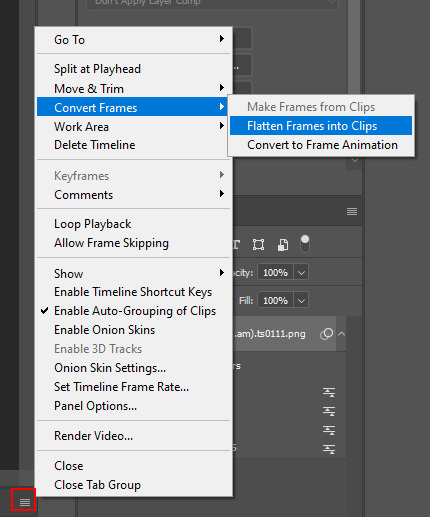
Step 6: After reversing all your layers, you’ll want to go to the three lines you see in the following screenshot, and click “Make Frames From Layers”.
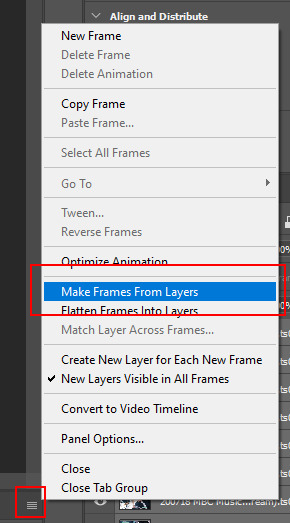
As the name suggests, this turns all the layers into frames. I don’t know why but the first frame will always be 5 seconds long, so to make it easy on yourself when you want to check your gif while editing, just put that on 0 for now. You can do that by clicking the seconds under the frame and clicking “No delay”. After this, check to see if you have the right frames and if you need to delete some (you can do this at any point in the process but I didn’t know where to put it in the tutorial oops).
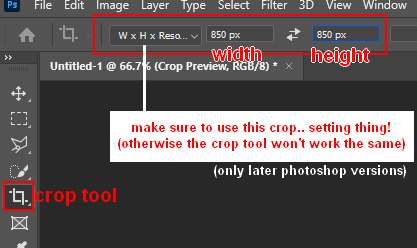
Step 7: Time to crop the gif to the correct size! For this gif I’m using as an example, I’m making it specifically for Twitter, so the sizes aren’t that obvious (for Twitter I usually use a width of 850 px to keep it sharp, for long size gifs (more height than width for example), I add a background so that it eventually still becomes 850x850 pixels). There’s many posts on Tumblr about the correct sizes for gif/photosets, but a brief rundown of my most used sizes: one gif spanning the entire width of the post has to be 540 px in width. Two gifs next to one another need to have a width of 268 px. I use these dimensions the most! For others, you can Google!
Step 8: After you’ve cropped the gif, you can do either of two things: either you first add the coloring of your choice and then sharpen the gif OR you do it the other way around. I usually switch these two around depending on how sharp the gif already looks before sharpening because I can’t stand looking at 2 pixels while coloring (lmao). For this one I’ll do the sharpening first.
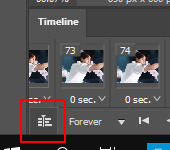
The whole sharpening process is actually quite simple but you need to make sure that you do the following little steps in the right order or else it won’t work! Select all the layers (CTRL+ALT+A or Select > All Layers) and then click this little thingy:
Then you’re going to Filter > Convert for Smart Filters
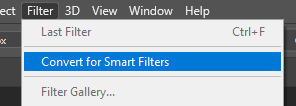
If you don’t do it in this order, your gif will end up... well, not being a gif and not moving. If that happens, track back in your history to see if you did it in the correct order! :)
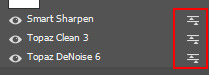
Step 9: The actual sharpening process! After clicking the “Convert for Smart Filters”, you’ll want to go to Filter again and find the Topaz Labs tabs. Personally, I usually do it in the order of DeNoise first and then Clean, but this is a personal thing, really.
I recommend playing around with the settings to see what fits the gif but here are my go-to DeNoise settings (tip: save these as a preset so you only have to click that for faster giffing!):
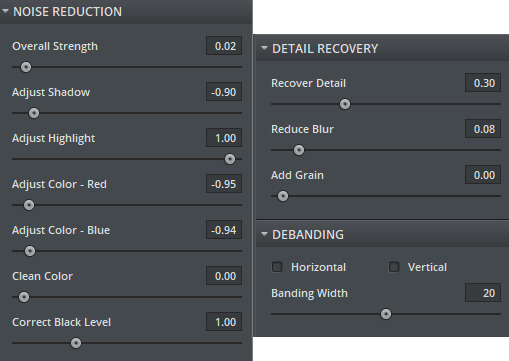
And my Clean settings:
Press OK when you’re done with these and then go to Filter > Sharpen > Smart Sharpen. These are my SS settings (just copy these, and again, save as a preset!):

Depending on how sharp you want the gif to be, you can input the same settings or go to this in the layers and change the percentage.
Now that we’re done with these... it’s time to flatten it! Just follow these little steps:
And then you wait. Again. I know.
Step 10: After playing the waiting game, you’ll click the three little squares again and do the same thing you did earlier: “Make Frames Into Layers”. Delete the first frame. Add a coloring of your choice (can be a PSD, can be your own coloring, etc. this is honestly just... playing around with things and see what it can do). After you’ve done coloring, select all your frames (same lines as previous screenshot except now you’ll see a “Select All Frames” option, click it!) and change the time to whatever you like (I usually go for 0.05, 0.06, or 0.07. Again, just play around with this!! Try different things!)
Step 11: Final step! Saving :) I use shortcuts a lot to make things faster so either press ALT+SHIFT+CTRL+S or go to File > Export > Save For Web. Not much to do here, just copy the following settings and save the file!
!!! NOTE: After making a new gif today I realized there’s a weird dotted border on the top of my gifs, it’s a bit difficult to explain but I had no idea what it was. Turns out that the reason why this showed up was because, as shown in the screenshot below, I had “Transparency” selected. If you’re experiencing this too, UNSELECT the transparency and it should be all good!
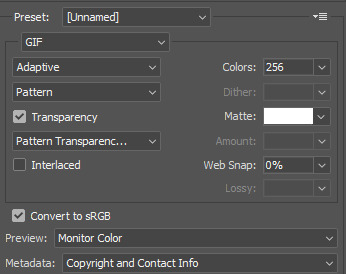
Also make sure that the “Looping Options” is set to Forever, or else your gif will play only once and then stop!
Tip: While making gifs for Twitter I at one point noticed that if I added in a white background, no matter what I’d do, it’d show up as yellow-y in the preview box. After googling I found that going to the options (1 in the screenshot) and then clicking “Sort by Luminance”, then double-clicking the lightest color (not the transparent one, 2 in the screenshot) and selecting white (or FFF) will get rid of this! This likely won’t be that useful for Tumblr gifs but just in case you ever want to have a white background...!

Then just... save, and upload to Tumblr! :)
Final note: Tumblr has a mix gif size of 3MB. If you have a gifset of 4 gifs you want to upload, all 4 gifs can be max 3MB each. Keep this in mind! If you’re over 3MB, delete a few frames and try again, or resize/crop your gif!
As it turns out, Tumblr has increased their gif size to 8MB, however, the quality tends to get compressed with larger gifs like that so per recommendation: keep them below 5MB! (thank you @yeoli for letting me know!)
I hope this helped! If you have any questions, feel free to send me a message and I’ll try my best to answer them.
75 notes
·
View notes
Note
hi! idk if you've already answered smth like this, but would you ever make a gif-making tutorial? i dont know where to start with gif-making >< but if not, it's totally cool! would you happen to know where i can learn how to make gifs like you? thank you!
sure! i absolutely would!! i’ll just do it under this ask haha
so for making gifs i use photoshop ( i run cc 2017 bc it was th only free version i cld get ldsfkhsdf) and vapoursynth!
first things first: getting the video you want to gif. obviously the better the quality of the video the better the quality of gif, so when im downloading from youtube i usually use a 4k video downloader
if its vlive i use soshistagram !!!
next step after youve downloaded your gif is to get the frame layers from the specific section that you want to gif. thats where vapousynth comes into play.
if you drag the video you downloaded into vapousynth, you choose the part within the video you want to gif, so say im remaking my last gifset id drag the video into vapoursynth put in like 00:05:40 (the starting time in the video where i wish to gif) and then like 00:00:03 (how many seconds of the video after the start i want vapoursynth to render) and then it’ll open up a tab that looks like this

from here this is where i usually do my cropping, sharpening and denoising – i use to use topaz labs but that shit hurt my computer like it would take so long for my computer to render it it wasnt even worth it. but i mean topaz labs is pretty good so if your computer is strong enough i definitely suggest looking into it. i just cant lmao.
okay after you choose the settings that you want (honestly the way i found my preferred settings was just by playing around w them!!), you copy and paste the coding in the white box in the right corner into the app that will open on your computer once you run vapoursynth it looks like this

you paste the code into the section that says ‘paste here what you copied from resizer’

and if the section of the video runs longer than you wanted (like the screen changes n u just want to cut it out) you can trim it in this app as well if you go to Script > Preview and find the first frame and last frame that you want in the gif. honestly i dont usually do this, i just delete frames in photoshop bc im lazy but then it obviously takes longer to render but . again. lazy.
ANYWAYS once you’re ready to render your video, you go to Script > Encode video and another screen will pop up. make sure you change the header section from ‘no header’ to ‘Y4M’ or it wont work. n then just press start and it’ll do its thing. on my computer it saves the video to my ‘output’ folder and its always titled ‘output.mov’ so it shouldnt be hard 2 find !!
ok !!!!!! hardest part is out of the way!!!!!!! wee!!!!!
now its time for photoshop *crowd boos*
once you’ve opened photoshop, you go to File > Import > Video Frames to Layers and find the video that you got from vapousynth ! once you do that this will come up

here you can cut down the video / limit the frames for its import. i usually limit frames only by 2 or i find it gets a lil weird, this helps a lot if your video is long and you want 2 get it all in the gif without missing parts while also staying under tumblrs gif limits (which i know have been made a lot bigger but i still try to keep mine around 3 MB). then once all thats Done just press OK n it’ll look like this !!

ok lets break this down
TIMELINE

timeline is basically where u go to adjust the speed of your gif. if you press on the three lines on the right side and press Select All Frames then you can click on the time (in the screenshot its 0.02) and adjust it. i usually go with 0.05-0.06. but it depends. again its all up to your preferences. you can also delete frames n stuff, thats usually what i do to trim down a gif.
LAYERS SECTION OR WHATEVER ITS CALLED

ok so these are all ur layers !!! usually i select them all and group them so its easier to manage. but this is where you’d add your colouring PSDs or text PSDs to spice up ur gif.
at the top where it says ‘Add an adjustment’ is where you can edit the colour of your gif, you can obviously mess around and make your own psd or even go Crazy and make a new psd for every gifset. but personally, out of laziness, i just searched tumblr for gif PSDs and used the one i liked the most, and through that i adjust it depend on what i think looks best for the gif im working with. psds make the gif tbh

like the difference... the spice.... the vibrance... its beautiful.
sometimes i use the sharpening action and in order to use the filters in photoshop you have to change it into a video timeline (see timeline section, at the left bottom corner theres that icon thingy beside where it says forever. just click that) then you select all your layers at the side and go to Filters > Convert for Smart Filters.
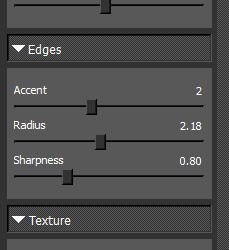
then you can go Sharpening and i usually use Smart Sharpen. and its again messing around until your satisfied with how the gif looks. this is my preset for it!

also through this you can blur out words in the gif (which obv u dont have to do its another preference thing i just personally prefer to do it) and once your gifs been converted for smart filters you can use the marquee tool to section off the part you want to blur and then go to Filter > Blur > Gaussain Blur and adjust the strength of the blur !
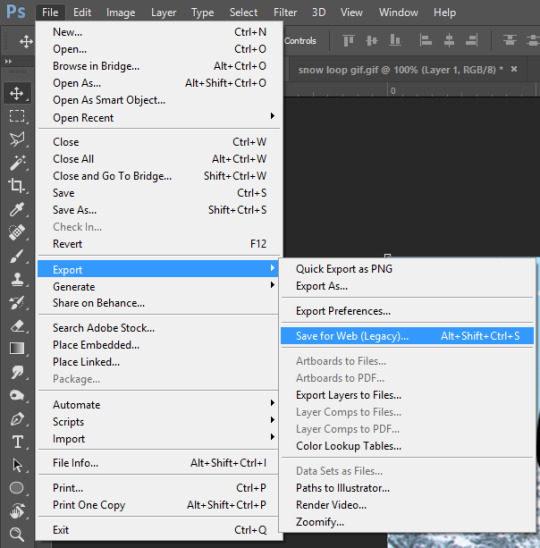
anyways. thats basically it???????? after your finished and you’re happy with how it came out go to File > Export > Save for Web (Legacy) and this will pop up

here you can see how many MB’s your gif is to ensure you dont go over. also adjust the presets on the side, thats just how i have mine obviously you can adjust yours to however you want them !
and make sure where it says “Looping Options” it says forever, or else your gif wont loop and you’ll want 2 rip ur hair out once u realize it.
n then boom
gif !
i hope this helped ???? n wasnt too confusing im rly bad at explaining things.. i also hope i didnt miss anything .. but i dont think i did. if you have any questions pls feel free to message me ill b happy 2 explain anything else im able to ^________^ !
1 note
·
View note
Note
Hi, I saw your "DOG, THE VICIOUS HELLHOUND" gifset and I have to ask, how did you make the words do that in the caption?
the post anon is referring to
hi!! it’s really complicated if you do it letter by letter so here’s a handy website for html color gradients. there’s a white window in the right lower corner, and you just put the text you want into the first box thingy and choose the colors you want next to it:

and then you click on ‘Run’ and it spits out the html code for the color gradient text in the lower box :D you’ll just have to select, copy, and paste it.
to get it into a tumblr post, you’re gonna have to go to the post settings (the little cogwheel in the upper right corner) and check the ‘html’ box. do not uncheck the html box after you’ve copy-pasted the text!!! then it’ll just go back to the way it was. you can click on ‘preview’ though to see what it looks like.
my caption in the dog post looks like this in html:

I put only half of the text into the box and hit ‘Run’ and then did the other half of the text so it’s a three color gradient. I like to make it bold* so you can see the colors better.
I hope this helps!!
edit: I don’t know why I did all that in caps, you don’t have to do it in caps 😂
#* <b> and </b>#ask#anonymous#tutorials#I guess#if you have any questions don't hesitate to ask!! <3
39 notes
·
View notes
Text
New Discovery! Or Something.
When I can’t focus on a reading and found my thoughts going elsewhere, writing happens! I apologize in advance, @langwrites, since I said I’d sleep after our conversation tonight. You can bonk me with a newspaper as much as you want tomorrow. And @ezzelbean, @hylianhick, I thought of you two when it came to this after this infamous post of mine. Here we go with preview thingies (which hasn’t been beta read like everything else I write)!
There’s bikes. And a certain Sohma Ox who doesn’t get named yet in dialogue because I didn’t get that far before needing to focus on other things.
Edit (8/15/2019): Fixed some of Kei’s dialogue based on Lang’s feedback and some bits of Tomo’s narration.
---------------------------------------
“K-Kei-chaaaaaan?”
A hand gently rubbed my back as the vomit was still exiting my systems. Even with my hanging over what looked like an inconspicuous local trash can, she still seemed up for humoring me. Thank god I had someone here in this new and weird city. “Yeah, Tomo-chan?”
I coughed the remnants of my lunch into the trash can before shaking my head, trying to get the black dots out of my eyes. “I th-think that’s the last time I come along with you to see a fuinjutsu experiment. Huuurgh…” I turned back to the trash can and coughed some stubborn blocks of digested things out. Ew. Motion sickness sucks. “I-I love you and the rest of Team Minato very much, but—”
“Any kind of ninja run movement and sudden teleportation makes lots of bad knots in your stomach and we can’t have that,” Kei said quietly, brushing my hair back so that it wouldn’t get in my face. “Mom would kill me before Hikari-bachan.”
I found myself coughing again while standing back up and Kei rubbed the top of my head. “I-I don’t think Miyako-bachan would kill you…”
Or Hikari-san either! Hisako piped up loudly with an obnoxious huff. Miyako’s nice!
Aye.
“Oh, trust me, Tomo, you haven’t seen Mom yell.” Kei rolled her eyes once I looked up at her. And she merely patted my head once my jaw dropped. “Don’t worry about it.”
“But—”
“Don’t,” pat, “worry,” pat, “about it,” pat pat. “You’re fine.” Kei brushed some stray bangs back from my eyes and I found myself closing my mouth. “Focus on what you have to do.”
“Okaaaaaaay.” I gulped down the lump in my throat and glanced around once I let go of the trash can. Skyscraper, skyscraper… ooh, there was a bike! A nice red bike! With a nice basket and a metal frame to protect the wheels, the rails sitting on the back of the seat, was it another seat for an extra passenger? And it was locked up properly with a U-lock and chain and everything! So pretty, just sitting on that stand a few meters away.
…Wait a second.
I closed my mouth and took a breath in an attempt to sound serious. “Please correct that to what ‘we’ have to do since last I checked, you’re seeing the same Tokyo-like city and there’s no other shinobi in sight, Kei-chan.” I paused from my head unconsciously turning to the marvelous exercise machine in the distance, and I found myself admiring the bike for a second. Then what left my mouth was a happy, “But there’s bikes and they’re shiny!”
Oh no. Hisako said. She looked close to blowing a gasket from laughing. We found a good Vy association.
My best friend rolled her eyes again, shrugging her shoulders through her Chunin vest and lightly bonking my head. “Duly noted. And what’s this about the bikes?”
“We don’t have any in Konoha last I checked! And that bike over there,” I pointed to it as much as I could to get Kei’s attention, trying not to grin like an absolute clown even in the face of all the pretty, “it’s well taken care of! With fully extended tires, the chain’s got no rust on it, and the paint!” I couldn’t help but squeal a little because some memories were coming back and they were good ones. “There’s no paint scratches! Like, Kei, do you know how rare that is?! People fall, bike gets scratched, it’s hard to paint back! There’s just like… it’s shiny. It’s so…” I glanced in the bike’s direction and found tears growing in the back of my eyes from the sight. So red. So shiny. “It’s so pretty… and rare.”
And admirable! Hisako cheered with a jump in her step. Seriously, where’s the owner…?
“Pretty rare?” Kei replied after a moment, glancing past my shoulder before patting my head again. “It’s just a bike, Tomo.”
“It’s still really pretty!”
“Hah,” Kei said quietly before lightly bonking my head again. “C’mon, you goofball, focus on finding a map before a bike. We’re still lost.”
“Muuuuu… don’t remind me!”
Kei’s eyes widened first. Then a voice suddenly spoke up over my other shoulder. “Hm. What’s this about my bike?”
And wait. Why did it sound like Saitama?
I turned around, took in the hair first, and blinked. “Yourbikeisprettyandhello, newperson!” left me in a rush first because social anxiety finally kicked in. “Th-That, uh,” the obvious new presence of male teenager simply smiled while stuffing his hands in his long overcoat’s pockets, “It’s nice. And… uh, not to be rude, but is that hair natural?” White and black wasn’t exactly a combination when it came to layers. And what was with the fur collar? He was tall too!
Was this a case of anime character design I never got to see as Vy or was I just deluding myself?
The boy gave me a quirked eyebrow and a tilt of his head. If not for the glint in his gray eyes, I’d think he was like Kakashi when it came to blank expressions. “How about I show you how it’s natural?”
“Eh?”
Kei had her face in her hands like Miyako-bachan in the times I fell asleep in the occasional meditation lesson. “Tomo. No. Don’t ask.”
Huh? “Why?”
“Just don’t. Trust me on this.”
Hisako then finished with, I’m confused too.
That was our first introduction to Sohma Hatsuharu-san.
#writing#fanfiction preview#hoshino tomoko#keisuke gekko#hatsuharu sohma#the sea and stars#long post#hisako#fruits basket
3 notes
·
View notes
Text
How to use Instagiffer
dificulty: ★ ★ ☆ ☆ ☆ You must need to download the app (obviously) and I recommend the portable version. (scroll down until ‘other links’ and click on portable pc version. its a zipped version and is secure). See how to start using the app (finding the exe file, after unzip) here. More instagiffer tutorials or related stuff here.
I had replied this as an ask, but decided to make a post because apparently you can have ‘keep reading’ buttons working on ask posts and the post is very long.
This is the gif result:


okay. So first, I want to gif this scene. I pause it, and the scene I want is at the mark of 10:23. So I go to the instagiffer, browse the anime episode (load video button) I want to gif and wait until it loads. I double click in the preview area (that black area with red borders), because when I type the number mark, it will start loading again, so is a pain to wait.
After I double click, whenever I made any change it will ask if that’s okay and if I want to load now, so I just say no and keep make changes:

First thing you need to do before editing your settings, is click on the settings tab and turn off the overwrite output gif everytime. If you’ll make, for example, a gifset, if this option is on, every gif you made will replace the one existent. Make sure to always turn that off. Another important thing, is to always keep the second option, social media warnings, on, so instagiffer will warn you if your gif will exceed tumblr or other social media (twitter, imgur) limit.

(I do this so automatically that I open instagiffer and my hand goes quickly there and turn overwrite off, lol)

In the step 2, is the part where you input your video mark, the scene you want to gif. Mine was 10:23. I learned that for better capture of that specific scene, I always need to put a earlier number. So always do that (if you video mark is 08:35, put 08:34). If you need a larger scene that 3 seconds, which is the default duration for the gif to fit tumblr’s limit, just change the 3.0 at the lenght section. Remember: the more seconds, most larger and heavier will be your gif, and tumblr’s limit is 2mb.
To delete useless frames, go to the frame tabs and click delete frames.


The frames deleted will be the ones between the two little squares (i this pic, square 10 and square 20, be carefull).
The smoothness, I recommend 10. Is a good frames numbers, and is the deafault. If you want a gif with more speed or less, change in the playback rate, at the bottom of the app.
I use 360p quality anime, I don’t download hd episodes because I like to save them in my pendrives. Even tough 360p is not the best quality to make best quality gifs, if you make a 500px wide gif and leave the fx & filters on, it will make a good quality gif, with no problem.

When you click in the fx & filters button, you’ll see a box with effects. The first one -enhance- is the effect that will give this nice sharpen and white shadow on your gif, making it look good, by default. You can turn this off, if your gif became a lot heavier, this will decrease its size. But personally, I like that effect, it makes a 500px gif look so neat and nice when resized by tumblr’s photoset.
If you want to use the enhance effect and still make your gif light, make sure to leave your gif with less than 24 frames. It will help you.
In the end (there are a lot of effects and you can also use captions, but this is not very complicated, so I will not go further about it), you just have to save the gif and see the size. If the size (weight) exceed tumblr’s limit, it will warn you, and all you have to do is delete more frames, turn off the enhance or decrease the quality toggle. Or if you don’t want to delete more scenes, or turn off the beautiful effect, you can just turn on the extra gif compression, on the settings tab.

It will decrease the colors of the gif (which is 250 by default), and make more dots. Sometimes this help a lot, but sometimes some gifs will look ugly, so if that happens, choose one of the options above.
That’s my result:

That’s it. I really hope this helps you. And that somehow you can understand more and the videos. Let me know if you need more help (about the captions thingy, idk). I’ll gladly try to help you asap.
12 notes
·
View notes
Note
hi! i was wondering how you make gifs. (not the "normal" subtitle ones, but the fancier ones, if that makes sense) you make such pretty ones, i love them so much! ♡♡ :)
hi!! thank you so much for asking! sorry this took so long for me to get to omg school has been absolutely tedious and i haven’t had time to make any new edits until now! since i was making a new header for my festive theme, i thought that i might as well answer this ask while i’m at it.
first off, the program i use is photoshop cc. highkey acquired it for free so if anyone ever wants help with that just dm me cuz it’s actually very easy to get
for this i’m just going to assume that you already know the basics of photoshop and giffing by how you phrased the question so i’m just going to jump straight into the step of putting the edit together and skip the removing background and stuff. (if any of you want a tutorial on the basics i’d be more than happy to put one together! just send me an ask!)

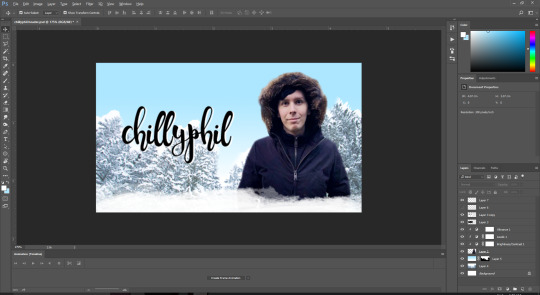
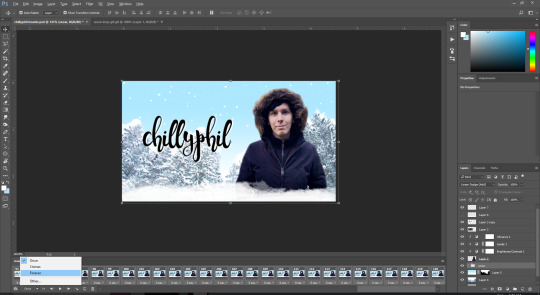
so this is how my photoshop is set up with the photo that i’ll be using for my header with the background removed and the colouring set.
usually i start with an extremely rough idea of what i want to do. like here i’m thinking of adding some snow, having a white bottom that would blend in with my mobile theme, and perhaps a blue gradient-ish background with some snowy pine trees blended in. since it’s a header i also need to find a good font to put my url in. i’m not going to do any fancy text animations though because those require editing in after effects and i’m kinda shit at after effects oops.
sidenote: my favourite site to find fonts on is dafont.com! the one i’m using in this tutorial is called seventeen! also because i can’t download the fonts directly, i screenshot the previews and a handy trick that i learned from this to easily remove a background of something with a solid white/black background is by changing the blending mode of the layer.
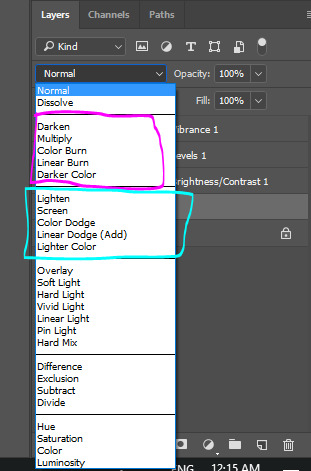
the options in the pink box are used for removing white backgrounds and the options in the blue box are used for removing black backgrounds.
(this will also be used later when adding the snow)
anyways, making the background is done with basic photoshop skills of moving and resizing stuff so i’m just gonna skip ahead to the animated snow part because that’s a new concept for people who haven’t made gif edits before.
(white border thing was created with one of these brushes)
wooo look at that! time for snow!
i already have a snow gif texture downloaded on my computer but i’ll show you how to find one!
first go to google images and search up “snow texture”. then use the handy dandy search tool option and select image type “animated” and colour “black”

scroll through some of the images and find one that you like!
then save the image to your computer and open it in photoshop.
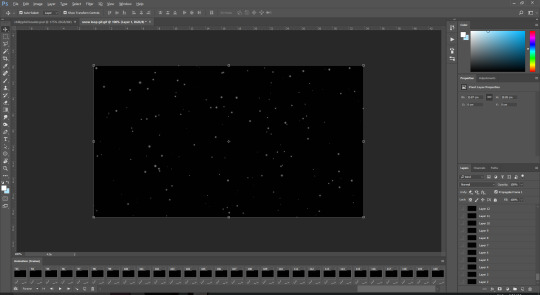
ew the one i have is 120 frames long :/
usually the sparkle textures that i have are around 29 frames long so this is going to be annoying :/
highlight all the frames in the animation panel (select frame 1 and then shift + click the last frame) and press the three line thingy at the top right of the panel. select copy frames.

then go back to the edit and create the number of frames needed to cover the entire snow animation (*cries in 120 clicks*)

there’s probably a faster way to do it but idk it so if any of you do know, please hit me up!!
anyways, after those painstaking clicks, select all of those frames and click on the three lines thingy and select paste frames
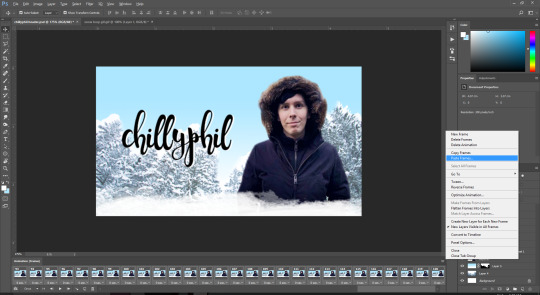
now this menu pops up:

select “paste over selection” and press ok
now it looks like this

MAKE SURE TO HAVE THE FRAMES ALL SELECTED STARTING FROM FRAME 1 TO THE LAST FRAME WHEN YOU DO THESE STEPS OR ELSE PHOTOSHOP WILL BE STUPID AND MESS UP YOUR EDIT BY APPLYING YOUR CHANGES TO SOME FRAMES BUT NOT ALL AND WE DON’T WANT THAT TO HAPPEN
select all of the snow layers and group them using the folder button in the bottom of the layer panel
then resize the snow layers to fit the area of the edit.
now we change the blending mode to remove the black background of the snow!
select the group that you put all of the snow layers in and change the blending mode to any of the options in the lighten section
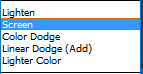
i personally like using screen for most things but i ended up using linear dodge (add) for this one because the background of my edit is very light in colour and the snow doesn’t show up that well if i use screen.

now we don’t want snow covering phil’s face so go and move the snow group layer below the layer of the pic used:
yay! now remember to select “forever” as the frame loop option and let’s export!
these are the export settings i use for basically all of my gifs:
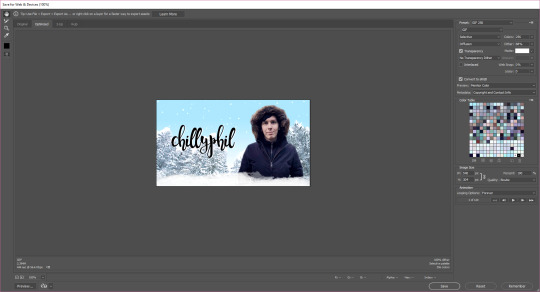
save it and there you go! you have your very own snazzy gif edit!

~ the finished product that i’ll be using as a header when i finally change over to my festive theme tomorrow ~
i really hope this helped! feel free to dm me or send me an ask if you have any more questions! :)
#gosh that took me an hour and a half to make lmao#tutorial#photoshop#perhaps i'll have a tutorial tag now#yuletidegays#jessica answers stuff#crap the screenshots of my full screen are wayyyyy too small sorry about that! i forgot about tumblr's dumb 500px width rule#resources
54 notes
·
View notes
Text
Does anyone know how to randomize ORAS roms?
I've looked up tutorials on it and it seems way too complex for my brain. Its all about dumping cartridges using complex equipment and writing lots of source code commands and stuff?? There doesnt seem to be a plug and play application like Universal Pokemon Randomizer for all the pixel based games. And not even a more newbie friendly editor like Tinke which has a visual interface with file folders and image previews and stuff. Every tutorial os a mile long and i cant even comprehend the first damn step...
It makes sense now why a lot of youtubers doing randomizers have "hey, [username] made this one for me!" in the first episode if it actually requires a super hacking friend to help you. How do i find a super hacking friend??? Do any of my followers have experience working with 3ds hacking or know anyone who does? I'm willing to pay you for your help! This looks SO complex i think it counts as a full time job!
Just to clarify i am really not looking for someone to explain to me how to do it, i think that ship has sailed. Ive tried really hard but im just not the kind of person who can do full 'find the hex value pointer number thingie' type hacking, i dont have the basic math and programming knowledge necessary for that. Praise be to people who make little app things that add visual interface to sprite exporting! What i'm looking for is someone who could do all that hacking for me and give me a randomized rom i could play on my channel. I dont have the complicated 3ds import export machine i only have an emulator on my computer. (And my 3ds is broken...)
But uhh yeah!! If thats possible!! I would love and adore you!! Itd be so cool to try a 3d version of this same original emerald nuzlocke, yknow?
And itd be ABSOLUTELY FABULOUS SUPER COOL if anyone knows how to do texture editing! There's no way i could do that myself even if i knew how to do it, i mean id have to manually change the images myself so i couldnt be surprised by randomized colours. Itd take a lot more work though cos i doubt theres any way to randomize it? But like ive seen randomizer nuzlockes where the hacker adds in one recoloured mon per dungeon or something. Or just edit in lemon lime wooper and everything else is normal, lol!
Ehhhh whatever i dunno!!!!
7 notes
·
View notes
Note
i have a very lame question. how do you do the colored text in a post? like in your scenario posts you have the name a color. pls teach me your ways
not lame, love! not lame at all.
you’ll have to go into html editing on the post– you can do this by going to the little gear at the top right corner, then to the text editor and change rich text to html.
to change the color, you just slap your text here! into the thingy and change the # to whatever color you want (i use hex codes, idk if they allow for other types of colors). you can check what it looks like with the preview!
once you edit in html, that post will be in html only (from my experience). so!! i hope that helps.
1 note
·
View note
Photo


I had some requested hairs pending, and now after what seems like 874517 years I am finally posting them!
MYOS mhair14 retextured
First up, an old MYOS hair requested anonymously here. This one gave me a lot of grief: it had a bazillion groups (half of which were completely useless), the texture files were tiny and blurry as heck, and it had some really weird parts that I had no idea what to do with (like those random braid thingies hanging off the sides). I nearly gave up on it, but then @digitalangels saved the day by suggesting that I enlarge the texture files and blank out the groups that aren’t used by the mesh. I also replaced the random braids by equally random dreadlocks in a surge of inspiration. The texture is still far from perfect, despite my best efforts… but this is an old mesh, it’s as good as it gets.
INFO: Retextured in Furbyq’s PookQ textures + Rented-Space’s 3t2 EA and Kijiko dreadlocks. Comes in all of Pooklet’s and Io’s natural colors (Swatch). Grey linked to black, five optional custom greys included.Toddler-Elder. Mesh by Myos included.
CREDITS: MYOS, FurbyQ, Pooklet, Io, Aweeshie, Hat, Rented-Space, CatOfEvilGenius.
*Additional credits: Digitalangels, for her kind help and suggestions.
Angles | DOWNLOAD (Sfs) | DOWNLOAD (Box)
Rented-Space’s 3t2 Romantic Style retextured
This one wasn’t requested, but I did it as a back-up option back when I wasn’t sure whether I could finish the Myos hair. Figured I might as well toss it into this post, as a bonus of sorts.
INFO: Retextured with Io’s edit of Pooklet’s textures and in both of their natural color palettes (Swatch). Grey linked to black, five optional custom greys included.Toddler-Elder. Mesh by Rented-Space included.
CREDITS: EA, Rented-Space, Pooklet, Io, Aweeshie, Hat, CatOfEvilGenius.
*Additional credits: @uranium-z for their sim Hiroyuki, who is modelling the black hair in my preview.
Angles | DOWNLOAD (Sfs) | DOWNLOAD (Box)
Raon FH64 dyed - naturals & unnaturals
Another requested hair. I had little to go by with this one (anon only asked for the hair to be ‘dark at the roots and light at the ends’), so I improvised a bit. The dyejob on the hair is inspired by these old retextures by Problematique - I actually had to handpiant the fringe, which is something I've never tried before. Mind you, my retextures don't look 100% like Bosie's, but I'm still happy with how they turned out. There's a handful of natural and unnatural color combos in the download, and I also included the .PSD I made for this purpose, to make further retexturing easier.
INFO: Base texture by Lace. Comes in a total of 20 color combos - 3 binned families and 8 additional custom colors (Swatch). Elders keep their colors, but there's a Mailbomb/Pipebomb combo included in the custom bin that can pass for elder grey. All files are tooltipped, compressorized and clearly named.There's a folder with pictures of each color included in the download, as well as a PSD file. Mesh by Raon included.
CREDITS: Raon, Lace, Pooklet, Io, FurbyQ, Aweeshie, Hat, CatOfEvilGenius.
*Additional credits: Bosie, for her dyed retextures of Raon 64 which I took inspiration from, and @marvelann for her sim Bruna, who is modelling the TNT-Flashpowder combo in the unnaturals preview.
Angles | DOWNLOAD (Sfs) | DOWNLOAD (Box)
XM Sims SueG mhair4 retextured
The third and final requested hair. Compared to the other ones, this was a breeze - and all thanks to @rented-space, who not only provided a nice base texture which I could use, but also edited the mesh to be for all ages (the original was only for teens and up).
INFO: Retextured with Pooklet’s v3 textures and in all of Io’s and Pooklet’s naturals (Swatch). Grey linked to black, five optional custom greys included. Toddler-Elder (was previously only for teens, adults and elders). Edited all-ages mesh by Rented-Space included.
CREDITS: SueG, Rented-Space, Pooklet, Io, Aweeshie, Hat, CatOfEvilGenius.
Angles | DOWNLOAD (Sfs) | DOWNLOAD (Box)
#sims 2#s2cc#ts2cc#sims 2 download#sims 2 hair#download hair#download#download female hair#download male hair#hair: straight#hair: curly or wavy#hair: dyed#hair: bangs#hair: braid#hair: medium#hair: short#mine
108 notes
·
View notes
Text
Embedded Content in Markdown
Markdown supports HTML, so if you need to, say, embed a YouTube video, you can just copy and paste the embed code from them, drop it into a Markdown document, and you should be good to go. With YouTube specifically, there are other options. But in general, you don't need to do anything special to embed third-party media in Markdown.
You do need to do whatever is necessary for that particular service though. For example, on CodePen, you visit any particular Pen to get the embed code, click "Embed" in the footer, choose options, and ultimately get the embed code. On Twitter, you click a down arrow thingy and choose Embed Tweet, then get forwarded to some other website where you choose options and ultimately get the embed code. It's different on every service.
That's the spirit behind gatsby-remark-embedder from Michaël De Boey, which I recently saw. It spells this out:
Trying to embed well known services (like CodePen, CodeSandbox, Slides, SoundCloud, Spotify, Twitter or YouTube) into your Gatsby website can be hard, since you have to know how this needs to be done for all of these different services.
So what this plugin does is allows you to drop a URL to the thing you're trying to embed on its own line, and it's magically transformed into embed code. For example, you put a URL to a Pen like this:
https://codepen.io/Coderesting/pen/yLyaJMz
...and you get:
<iframe src="https://codepen.io/team/codepen/embed/preview/PNaGbb" style="width:100%; height:300px;" ></iframe>
...by the time the content makes its way to the DOM.
As an owner of CodePen, I can't help but to remind you that doing it this way means you can't take advantage of having a theme or making it editable. But hey, I get it.
What I think is a smidge funny is that... this is exactly what oEmbed is. The whole spirit of oEmbed is, "Put a URL to a thing on its own line and we'll try to make it into an embed for you." It's a clearly defined spec and there is a clear source of data of sites that support the feature.
But I suppose it's a failing of oEmbed that people either don't know about it or don't use it. Even Embedly seems kinda dead-ish?
The post Embedded Content in Markdown appeared first on CSS-Tricks.
Embedded Content in Markdown published first on https://deskbysnafu.tumblr.com/
0 notes
Text
The film student’s thoughts on OUAT
As many of my longtime followers know, I’ve been a viewer of Once Upon a Time pretty much since the beginning. First, I was watching out of curiosity because uh, hello Disney was my childhood and I was interested in what ABC was doing to appeal to those of us who grew up with Disney. Then I became a film student and I started watching because a) it’s a highly watched show and b) my school has a good amount of grads working for Disney and were working on the show. *holds up sign voicing support for my people.*
Undercutting because this is a long post with a lot of jarble about episodic writing as I know from having classes from industry pros and things that could’ve fixed the storytelling whoops sempai made.
ABC shows and I have this “why am I here” type of relationship. OUAT is the only show that’s not AFV that I’ve stuck in there to watch. But like all previous shows I used to watch from them, this fell into the realm of WTF. If you look up the tag “Sempai Why” I bet 90% of that is OUAT related because there’s lots of problems with the storytelling among the handful of brilliant moments. Like for example, inconsistency with Emma’s gift for knowing who’s lying. That bugged the hell out of me, so many things could’ve been avoided or made more interesting if that was included, or if we knew the rules of that specific gift. Because hey, look, sempai seemingly forgot that Emma was the human lie detector during Jasmine’s arc and the gift went poof again when Rumple lied. Consistency is one of many, many things that I think is one of the reasons why some have stopped watching the show.
I still watch for the story but I’ll say this, as someone who has degrees in creative writing (scripts and prose) I look at the script previews and cringe. That is some really bad screenwriting. I’ve had near rant level feedback from teachers for doing less (example: writing too many details). And sure, when you’re the head writer you can do whatever you want but that was some really bad examples to follow for newbie writers. I honestly want to know the contents of their series bible (thingy with all of the plot rules and character writing rules - a big “thou shall do this and thou shall not do this” list) because these last two or three seasons have felt like they had no series bible to follow and the result is an awkward feeling in season six.
Am I sad to see that many of the key actors are leaving? Sure, I’d always hoped that ABC would bring in someone to clean this up. Franchises are very valuable and they’re stretched out for as long as humanly possible (example Doctor Who). But alas, ABC has shown me once again that I should avoid most of their series shows. They drag them out, even when there’s not enough story content to support one more season and watching it starts to feel like a chore rather than a pleasure. Granted, if some of the main story content was put into side shows/podcasts/Youtube specials, perhaps it could’ve worked.
Leaving everything in the same show while still adding more left things in a repetitive loop, and with OUAT being a flashback heavy show it got overused and more inconsistencies happened. Only new flashbacks I liked were in 6x12 and 6x13 because the material was fresh, and also David and Rumple are the two characters where their backstory is bound to have a lot of depth.
It would’ve been better storytelling if things were spread out - like a couple sections of the story were told via transmedia (across platforms) or at another time in the middle of the week (considering the viewership of the show, they could’ve asked for that and got it) and everything joined together for the main episode on Sundays. That way we would’ve seen more characters instead of having secondary characters brought in just for the heck of it.
Also, Sempai, I have a question? Where is Lion King? Wait, no don’t answer that. Your writers would ruin the first Disney movie I ever saw. Forget I said anything.
OUAT writer’s went too big. When I look at the level of detail the writers gave all of the characters in the beginning, technically everyone from the first season is a main character worthy of a side story that is solely there’s. Last season I was elated to see the completion of Ruby’s arc, but still rumbled that it took so long for the writers to get to that moment. That’s what I liked about OUAT in the beginning, the secondary characters didn’t start out feeling like they weren’t the main character. They had a consistent backstory that reminded us of their importance to the main story. (Example: Granny and Ruby are important to Snow’s story because they helped her.)
The fact the show’s gone on so long the main cast aren’t renewing contracts or aren’t getting renewed says that this has gone on too long. If I remember correctly, the original pitch was that things weren’t planned to go on past the showdown between Rumple and Pan. Things happen and popularity keeps things going but that’s when we see some...interesting...odd...inconsistant...repeditive (argh, take your pick, any of those would work) storytelling. I really hope my industry sempais take a fresh look and do a spin-off series with someone else as the main character (like say Henry as the protagonist, or Emma and Hook’s child) instead of trying to keep things how they are.
Now that I’m an educator for writing, perhaps I’ll tackle all the things OUAT could’ve done better or did right in a series of Youtube videos. Because there are loads more but I’ve written too much in this post.
I will try to watch the season finale live tomorrow night and if my brain gets triggered into editor mode I will not shut up. Seriously, it’s been a long time since I’ve edited another’s work and I am oddly in the mood to do a critique post on something.
#long post#film student moment#writer just went off on a long critque#I love the show but this is getting to be ridiculous#why sempai why
0 notes