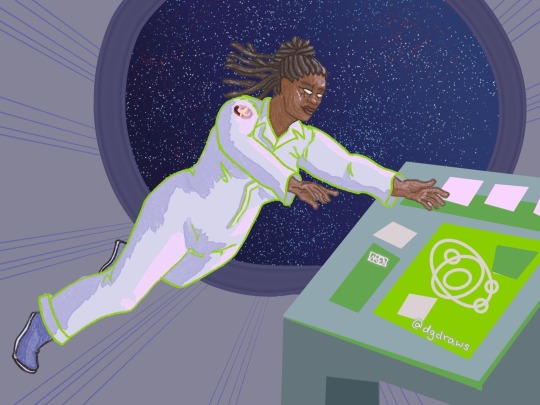
#experimented with vector + new brushes
Explore tagged Tumblr posts
Visit Tumblr Blog
Explore Tumblr blogs with no restrictions, modern design and the best experience.
Last Seen Tumblr Blogs


Fun Fact
Tumblr has 411 employees.
Note
Good morning/afternoon/evening! :D
🧡+Espilver for the ask game!
I really love your writing! It's so yummy if you know what I mean hehe, especially the espilver fanfics/oneshots! I must say you are one of my favorite authors :D
That is very kind of you, thank you for the compliments!💕💕
🧡 kissing in bed / lazy kiss / cuddling
"Do you think we're ever going to need a bigger bed?"
Pensively Silver studies the bed he and Espio have found themselves in- or rather, Espio's bed, really. Sure, when Silver had decided to stay in the past for good, the chameleon gallantly offered that the hedgehog was welcome to sleep in it. Together with him, as Silver would find out that very night; it had made a great day only better. But a lot of time has passed since then, and where the two of them had previously fitted perfectly snugly on the same mattress while laying on their backs as fluff and scales brushed together...
Sparks of cyan tugging Espio a bit closer so he doesn't topple right to the ground, what with how precariously he's teetering right at the edge of the bed, Silver hums. "You know, because of this."
Espio for his part merely raises an eyebrow as if he didn't nearly eat carpet two seconds ago. "Why? The two of us fit quite nicely, don't we?" follows, a gesture past their bodies following. Their bodies that are absolutely a bit taller and larger than when they met, and thus Silver pointedly prods Espio on his horn.
"You said I got broader shoulders. And I definitely got taller, too."
"I have not missed that," Espio, still the tallest between the two of them but secretly fearing to lose that spot, Silver heard from Vector once, nods sagely. "There is just one problem, love. Even if we need it... we can't pay for it."
"...Hm. Okay, good point." With how the Chaotix seem cursed to experience financial woes any other day, Silver can easily piece together that a whole new bed is perhaps not a main priority right now. That means they need to adapt until then; nothing he isn't used to, luckily. But... Scooting backwards as far as he can the hedgehog grimaces as his spines hits the wall far too quickly. Espio can lay down like this, if the both of them are on their sides-
Which allows for opportunities, Silver realises as his grimace flips right into a little grin. Promptly he scrambles around so he faces the wall instead, demanding psychokinesis tugging Espio right against the curve of his body. "But this will solve that, no?"
Espio knocks against him, a huff of breath sinking into Silver's mane as the chameleon flounders. "Silver-! Well, possibly," the response comes, followed by a bemoaning "However, I always sleep on my back, so we do need to find something for that."
Contently huffing as Espio's arm wraps itself around Silver's body the hedgehog nods. "I can sleep on your stomach tonight, then."
"Tenshi," the bemoaning-er response follows, "you also got heavier."
"So did you," Silver wastes no time in retorting, ears flicking madly. Not his fault that he's getting bigger and stronger by the day! But from what little he can crane his head around to glare at Espio he can easily glean the more amused little look on his beloved's face, a peck pressed between the two large quills on his head.
"Perhaps we can create something ourselves, with old furniture. We've got time to spare, after all. And then we can sleep in spacious comfort once more."
"First cuddles," Silver smugly orders, because he's found quite the comfy position like this, and he's not going to let Espio go until he's got his share of affection for rescuing the other's very life just now and also payment for these horrible teases. Luckily they can still fit on the bed in this way...
But if they do not anymore one day, he's really going to demand Espio get them more space to sleep in, Silver promises to himself.
Anything to safeguard these cuddles.
#saw this while eating dinner and I was immediately like 🥰🥰#Thank you anon! ^-^#silver the hedgehog#espio the chameleon#espilver#I quite like the idea that Silver starts out a bit scrawny for a hedgehog (model comparisons from Generations show Sonic is chubbier)#but then he stays in the past for longer and he gets a tad more broad and just fluffy with his quills and stuff haha
17 notes
·
View notes
Text
50 Free High-Resolution Texture Packs for Designers
New Post has been published on https://thedigitalinsider.com/50-free-high-resolution-texture-packs-for-designers/
50 Free High-Resolution Texture Packs for Designers
The number of options, directions, and aesthetic approaches you can take from simply adding a texture to your work is mind-boggling. Of course, not every design, photo, or video benefits from even the most subtle of textures, but you might be surprised at how a high-resolution texture can bring a design to life.
Knowing when to use a texture and which texture to use comes down to the flow of the design and the priority of information on the page. It is a good idea to keep certain textures in mind while working on a project, but don’t finalize them until you’ve seen the design as a whole.
Texture selection can be an involved and time-consuming process. Firstly, you have to search for that particular texture your design needs, and secondly, you have to test and tweak it to discover the one that actually works.
It is that search process we aim to help you with. We have a huge selection of free high-resolution textures for you today that are just shouting out for use in your next project.
14,000+ Actions, Brushes, and Layer Styles for Photoshop
Photoshop Actions & Brushes, Lightroom Presets, Illustrator Brushes, Procreate Brushes, and much more!
What are Textures?
Textures are visual and tactile elements that can add depth and dimension to your design projects, photographs, or videos. They provide a sensory experience akin to touching a textured surface.
They can range from a concrete wall’s rough, gritty feel to a silk fabric’s soft, smooth appearance. Textures add a layer of realism, creating an engaging visual and emotional connection with your audience.
How Can Textures Enhance Your Projects?
Textures can infuse your designs with visual interest and variety, breaking up monotonous or flat surfaces. Whether working on a website, print material, digital art, or video, textures can make your work stand out.
Different textures can evoke specific emotions. For instance, a wooden texture might convey warmth and rustic charm, while a metal texture could evoke a sense of modernity and strength. Understanding these associations allows you to communicate effectively with your audience.
Textures can add depth to your work, making them more realistic and relatable. This can be particularly important for product presentations or architectural renderings.
Free Paper Textures
10 Ripped Paper Texture Set (By TuomoDesign, PNG)
5 Glued Paper Textures (By Indie Ground, JPG)
6 Free Wrinkle Paper Textures (By Deezy, JPG)
16 Free Vintage Paper Textures (By Nassy Art, JPG)
10 Free Marble Paper Textures (By Nastia Smiyan, JPG)
Free Dirt & Grit Textures
18 Free Grit Textures (By Diego Arriagada, PNG)
Vintage Grit Textures (AI, EPS & PNG)
10 Free Dust & Dirt Overlay Textures (By GraphicsFuel, JPG)
14 Urban Textures (By Nova Design Co, JPG, PNG & EPS)
Free Vintage & Retro Textures
8 Free Vintage Textures (By Flash Graphics, AI & EPS)
10 Vintage Halftone Textures (EPS & PNG)
10 Vintage Noise Animated Textures (By Diego Darriagada, AE)
12 Film Dust Vintage Grunge Textures (By MiksKS, JPG)
24 Authentic 1930s Vintage Postcard Textures (By Spoon Graphics, JPG)
Free Grunge Textures
50 Grunge 4K Textures (By Erkan Kirdar, JPG)
24 Free Grunge Textures (By LTC Shop, PNG)
10 Free Digital Grunge Textures (By Pale Supply, EPS & PNG)
Blackview Free Vector Grunge Textures (By The Designest, PNG & EPS)
5 Subtle Grunge Vectors (By Liam McKay, PNG, EPS, SVG, AI & JPG)
10 Free White Subtle Grunge Textures (By GraphicsFuel, JPG)
Free Grain & Noise Textures
20 Subtle Grain Textures (By Bart Wesolek, JPG & PNG)
10 Film Grain Textures (By Arkadzi Ulitski, JPG)
5 Photocopy Noise Textures (By Indieground Design, JPG &PSD)
Free Abstract & Fractal Textures
10 Vivid Gradient Abstract Textures (By Unio Creative Solutions, AI & PNG)
8 Free Ethnic Abstract Textures (By Creative Veila, PNG)
8 Free Abstract Watercolor Textures (By Creative Veila, PNG & JPG)
5 Holographic Textures (By Indieground Design, JPG)
18 High-Resolution Fractal Textures (By Elliot Pessah, JPG)
Free Stone & Concrete Textures
20 Stone Wall Textures (PSD)
Vector Concrete Texture Pack (By Phil Goodwin, PNG & EPS)
5 High-Resolution Brick & Tile Textures (By Michael Hylton, JPG)
10 Old Wall Textures (By GraphicsFuel, JPG)
10 Marble Textures (EPS & PNG)
10 Free Concrete Textures (GraphicsFuel, JPG)
Free Metallic Textures
12 Free Copper Textures (By The Designest, JPG)
9 High-Resolution Metal Surface Textures (By Orman Clark, JPG)
Free Paint & Graffiti Textures
Free Artistic Paint Textures (By Deezy, JPG)
14 High-Resolution Graffiti Textures (By Orman Clark, JPG)
16 Free Sprayed Vector Texture (By Texture Fabrik, EPS & PNG)
Free Wood Textures
5 Free High-Resolution Wood Textures (By Isaac Gube, JPG)
12 Organic Textures (PSD & AI)
20 Organic Vector Textures (By GraphicsFuel, PSD)
10 Free Withered Wood Textures (By GraphicsFuel, JPG)
Free Wood & Paint Textures (By Eilert Janen, JPG & PNG)
Free Fabric Textures
9 High-Resolution Fabric Texture Pack (By Orman Clark, JPG)
25 Denim Textures (By Bart Wesolek, PNG & EPS)
6 Free High-Resolution Fabric Textures (By Design Instruct , JPG)
Free Black & White Textures
22 Textures on Black Backgrounds (By Media Militia, JPG)
Black & White Seamless Textures (By Timxez, JPG)
Free Miscellaneous Textures
100 Fire & Flame 4K Textures (By Hyperpix, JPG)
Seamless Vector Textures (By Timxez, EPS & PNG)
10 Chalk Textures (AI, EPS & PNG)
7 Plastic Textures (By Alessandro Silva, JPG)
How to Incorporate Textures into Your Workflow
Once you’ve found the textures that resonate with your project, integrating them is a straightforward process. Most photo and video software allows you to overlay textures onto your artwork. You can then adjust their opacity and blending modes to achieve the desired effect.
Remember to consider the context of your project when choosing textures. Whether you’re creating a vintage poster, a modern website, or an artistic masterpiece, textures can be your trusty companions on the creative journey.
By understanding the role of textures and experimenting with their application, you can breathe life into your work and engage your audience on a whole new level.
While it is true that you can use very subtle, unobtrusive textures, you should also keep in mind that some textures can draw the eye more than just a solid color. This means that it’s best to use textures that create contrast and highlight areas of the page that are important.
Related Topics
Top
#000#4K#ai#amp#Art#Color#concrete#course#Design#designers#dust#emotions#eye#flash#Free Templates#Free Textures#High-Resolution#holographic#how#how to#illustrator#it#life#Lightroom Presets#material#media#metal#mind#noise#One
21 notes
·
View notes
Text
Artfight Postmortem
as you may know, i am prone to reflection on my art and process and progress. herein, i'm gonna navel gaze a bit about artfight 2024.
top line: really enjoyed myself, did a bunch of new things and this was "The Year of Artist Friends" which is spectacular.
i completed 20 attacks this year, including my first ever mass attacks! altogether I drew 28 different characters (incl 4 of my own).
for the first time, I had *users* i wanted to attack, rather than just characters i'd gathered via search or discord. honestly, three years ago when i picked up the stylus i was just excited at the prospect of drawing for other people, period. artfight was a cool way to be in community without prerequisites. i didn't quite dare to dream i might make some real connections and make proper friends. and yet :) here we are! i went in with three 'art friends' and i'm leaving with at least three more
in addition to being the year of artist friends, this could be "the year of clip studio paint was on megasale a week before artfight" because i knocked out like 2 practice pieces before July 1st so i wouldn't be starting with completely unfamiliar tools, but i used/learned csp for the vast majority of my attacks. one i finished in krita (lonnie), and my final attack i only used krita.
definitely trial-by-fired myself! but it motivated me to explore csp, and most important, gave me a reason to practice practice practice. last year i drew almost exclusively humans, lots of full bodys, because i wanted to get a better grip on anatomy and drawing a variety of faces. it worked then, and, well, i think i learned more of csp in one month of artfight than i would have if i was just plodding through my personal projects for 33 days :) *looks at my wip folder with months old files* pretty sure.
ok i'm gonna look at a few faves/standouts now:


came in hot with 0tt0 here! the main brush for this one (froggy pencil) was a mainstay for the whole month. so versatile!!! and lovely texture. this isn't quiiite brat green but this was what made me go, hmm, what if i... did a few pieces inspired by this album i can't stop listening to?
and then i took a huge turn and just used a soft round brush for Desa and Iryna for my dear friend @bobomcfoe bc i really wanted to turn these out in something approaching my "usual style" of late and i feared getting too deep into the temptations of csp if i put them off. and, um, yeah i love them. i got sooo close to matching that angle but ahh i can see the tilt now! nonetheless, love these two, not least bc brookie has some of the most pleasing color palettes to work w :)


then on to Rosé and baby's first vector lines! you can RESIZE lines in csp. did you know that? i didn't know that. i did forget to use it as much as i could have in later ones though, so i still only kinda know it ig. and halftone shading! bc why not? another thing i really only did this once, but want to experiment with more
Rook here, for my new friend @gender-premium-tm, was me realizing how to use filters/filter layers in csp. now THAT is something i used a lot this month! also something i use often in krita. i must say, though the csp options are slightly more limited (afaik), they have oomph!


okay these two are my "explicitly brat pieces"! artfight keeps you moving, which i find really valuable, bc i could have dithered foreverrr over Lonnie's gif here. like, do i add his arm? maybe he should be wearing a shirt? or, what if i just draw him twice, instead of splitting the expressi--see it just never ends. and as i am always going on about, art is so precious bc it is a reflection of us when we make it. maybe for some future artfight i'll redraw this (as Lonnie's artist @wenmistry did for me with Ebon this year), but for july 2024, i'm amazed at how well i executed this for just 2.5 days of work! (i did forget his glasses, which realization gave me a different take on the composition, so this is high on my list of potential redraws)
and then Aagatha. this is in my top 3 for this year. the pink just works so well with the green and her artist added the song to her character playlist AND added the necklace to her actual dnd inventory. like. omg. the impact your art can have!!! how freaking cool is that???


two mass attacks! i was in a silly goofy mood. i feel like i really got a handle on vectors w the anthro mass attack, i adjusted every single point on that one by hand. weird what hyperfocus makes you do sometimes, but i learned a lot from that. mainly that i will probably never user vectors as my main linework tool. there are circumstances it is perfect for, and outside of that i'm good w my raster lines lol
which is exactly what i used for this other mass attack, featuring mostly my ocs. hey, sometimes you need to shake things up! i can see here the style starting to hew back to my "usual style", though i'm thinking that might have a lot to do with drawing 5 people very quickly. falling back on practiced techniques. and by this time i apparently knew csp well enough to reproduce them pretty closely! ooh, one thing this made me miss was the transform tool in krita. that floor was ROUGH to wrestle into place in csp.


purple and green turned up a lot this year!
Echo is my crowning achievement with the froggy pencil, most of the shading here is just layers w that. and one last nod to brat green :)
i've worked in the paper cut style before (both my pfp's use it) but i really exploited csp's clipping layers to make Scraps here. they did make me briefly forget how they work in krita when i switched back, so well done w that
i played with gradient maps a little earlier in the month but for Okanar i actually made my own gradient! really a useful tool for ref'ing real human skin tones to make non-human ones, without muddying them up too much.

finally, Chaos. this actually might be my favorite! ironically this is the one that i made in krita. it was like, ahh, yes my old friend. wait where is the scroll bar. ah, okay, yes my old friend... the line layer is set to burn which just makes the whole thing so warm (and the cause of the red outlines on the earrings). used my old sable brush, a pattern fill set to overlay... my old stomping grounds! but plus a rendering technique i picked up this month and some other random habits i picked up in csp (like copying a detail to a new layer, moving it where i want a copy, and drawing/tracing it back onto the original layer in the new position. nothing i couldn't have been doing in krita all along, but made easier by the tool layout in csp, and therefore now discovered by me. amazing how one integrates new knowledge. it's like magic sometimes!!!)
that was a good roundup! if you actually read this to the end, wow! and thank you! i hope it was interesting... and inspiring! bc i want to read about your process and reflections too! yes you! and plz tag me, i'm always down to gush about art XD
7 notes
·
View notes
Note
do you have any raw .drw files? how does its file size compare to a vector image / raster image of the same size / similar content? like ik vector files can be very small compared to a jpeg... storing timing info sounds simple to implement, but i wonder if it bloats up .drw file sizes?
Oooh, good question, and my answer uhh... got a little out of hand..
Here's the files in the folder for one of my drawings on the windows beta:

So we have the .drw file, the .sim file, a .csv file (this stores text data for my added title and description), and a .png and .sim for the thumbnail.
The .sim file is new to me, but looking at other files I believe the .sim files holds the individual layer data. Maybe the .sim stores the actual image data for display during drawing?
For example, heres the files for my haunter painting:

And here are the layers for the drawing in game (software?):

The sizes match up pretty well with the actual data on each layer!
(I should mention here that looking at file types and figuring out how they work is completely new to me so I could be getting some things wrong. I'm debating if I should reach out to the dev directly to check my work before starting this essay proper... but it's also been fun for me and my brain to try and figure this stuff out on my own)
Actually.. the sim files made me curious... if the main data is in the .drw file, what would happen if I delete the .sim files? Would the file still work?

First off, the thumbnail does not load, but the file still opens fine and the replay function still works.

And we still got all the layers no problem.

Hmm, if I save changes to the images, will it create .sim files?


It did! Huh!
Then uhh.. I don't really know what the .sim files do. If has something to do with display in game which is why the thumbnail didn't display. But I don't know where the layer files would be displaying if it's all based on the .drw. Maybe it's for file conversion? For uploading to the gallery? I don't know...
Anyways... back to the topic at hand, files sizes! The windows beta lets you export files as layered .psd files, .png files, and partial replay in uncompressed and compressed .avi!
So a quick reminder, here are the file sizes of the original image set up for Colors Live:

The .drw is pretty small!!
And here are my exports!:

The .drw is MINUSCULE compared to the .psd. And the .sim size falls between the two sizes of .png. Hmm, still don't know what's going on with that. Also for fun we can look at the size of an uncompressed two minute long .avi looks like. 4 million kilobytes, yay ^_^
Vector wise.. I'm actually not super familiar with vector programs (should probably brush up on them for this essay, huh?) so I'm not sure what exactly is comparable... I've had to use Illustrator this semester but I feel like Colors and Illustrator are approaching vector graphics in a very different way. Illustrator is saving data for vector objects, but Colors is saving data for brush strokes!
Well.. anyway we can open up one of my projects:

And we can stretch that layers panel all the way out so you can see all my layers and paths and objects:

And let's check the file size...

Yep! Pretty small!
For fun we can also convert that .psd I made into a .ai..

Yep! It's smaller!
Regarding file bloat... I think the devs did a fantastic job creating such a small file size and it's perfect for drawing on game consoles that usually have very limited space! However, my experience with Colors! 3D as a kid did have issues with file sizes.. Colors! was the biggest app on my 3DS and I constantly had to juggle uninstalling games and uploading and deleting paintings so I would have more room for new paintings. I did have quite a number of painting files... in various states of progress (as is typical) but storage space was a real issue for me. Now, were my SD cards only 2 or 4 gb big? Yes. Did I understand at the time that those were quite small for SD cards, even at the time? No. Does my experience mean anything then? I don't know.
Colors! 3D also had an issue were particularly lengthy paintings (were talking hitting the ~4 hour mark) would stop saving replay data. The replay would only play up until a certain point. I'm not sure why that is, based on what we know about .drw files I don't think it can be a limitation with the file type? That's kinda all it does? Maybe it's a limitation with the size of the 3DS memory that couldn't play the replays that long? Hitting that ~4 hour mark would also limit the amount of undos you were able to do so it could easily have to do with memory.
(Bit off tangent but undos take soooo long in Colors. And the more undos you do the longer they take! Colors didn't official start limiting the players undos until that ~4 hour mark but they were already limited by your patience)
Anyways, I will leave you with this, a link to the documentation of the .drw file format. It's only two and half pages long which I think is pretty short? Maybe you can find more info in there that what I can parse...
2 notes
·
View notes
Note
If you were to make a 2e style edicts and anathema for Lord Amberdale, what would they be?
Hmm, let's see...
Edicts: Experiment with new methods of achieving satisfaction, change the world--for better or for worse--in your pursuit of pleasure, encourage and assist others in their own pursuits.
Anathema: Deny yourself satisfaction and/or catharsis, waste or destroy what you or another could have enjoyed, hide your faith, harm or steal from an Amberdale (anyone within the bloodline, even if they don't take the name).
And as a bonus:
Minor Boon: Sometimes, it's key to enjoy the little things in life. Food begins to taste better, drink more sustaining, carnal acts more satisfying, and other small sensory delights begin blessing you. All these little blessings cause you to gain a +2 morale bonus to attack rolls, skill checks, and saving throws, which lasts until you disappoint your patron.
Moderate Boon: The Baron's presence rolls off of you like an intoxicating mist, drawing in an adoring crowd. You gain the Leadership feat, ignoring the normal prerequisites, and retain it so long as you remain in the Baron's good graces. Causing your Leadership score to fall may be considered an anathema, depending on what circumstances caused the loss of followers and/or your cohort.
Major Boon: A door to Paradise opens for you when you need it most, granting you rest and respite to face the coming challenges and to spur you to wish for a permanent stay. A nearby doorway or other form of portal allows you--and, if the Baron is willing, your allies--entry into his demiplane of Paradise. Anyone who enters is subject to five-star treatment, their every need and desire met by the attendants of Paradise. Guests are restored to full vitality; all hit point damage, ability damage, and ability drain is cured, and all negative conditions are removed. Though guests perceive their time within Paradise as extending for days or even weeks, when they exit (returning through whatever door they entered), they will find that a scant few minutes or hours have passed.
Minor Curse: The Baron's displeasure manifests in a way that's difficult to ignore. Food becomes less fulfilling, drink must be fought to keep it down, carnal acts become embarrassing or painful, and a thousand other terrible pains befall you. You become permanently sickened by this deluge, and nothing can alleviate or ignore this condition.
Moderate Curse: Magic can cure almost any ailment and sooth many woes, but the Baron knows of vectors of attack for which there is no defense and can cause a form of pain for which there is no cure. Earning this level of wrath causes your valuables to become permanently lost to you; the amount is always enough to be painful, and the method by which they leave you is always one that is humiliating and/or infuriating to you, such as losing a valuable magical necklace by tripping face-first into a pile of dung (with it vanishing upon you losing sight of it), or losing an enormous quantity of gold in a gambling blunder, or having your prized sword shattered in the midst of battle with a foe you should have had no issue in dispatching. No force but divine intervention can restore valuables lost in this manner, but appeasing the Baron may see them returned to you.
Major Curse: It's rare to earn the Baron's outright hate, as he takes little seriously and easily forgives, but some things are impossible for him to brush off. An Amberdale does not dirty their own hands, and this trend is one that remains with the Baron even now: he outsources his hate and washes his hands of the incident. You become the target of a group of 3 to 5 powerful assassins, who may not be mortal. They are thoroughly informed of your capabilities, resources, and habits, as well as the capabilities, resources, and habits of your allies, and they are often blessed in some fashion (typically financially) by the Baron to assure their upper hand when they finally catch up with you.
#asks#anonymous#original concepts#im gonna possibly start thinking of anathema/edicts and boon/curses for my deities from now on#some of these are fun
18 notes
·
View notes
Text
adobe illustrator..... bad....... this was my first experiment with illustrator as part of an exercise to try out a new program! i didn't like it! i'm fairly comfy with the adobe suit but illustrator is just... not.. good to use.... as my girlfriend put it, "it's less a learning curve and more a learning u-turn". but i'm relatively proud of my ability to trouble shoot and self-learn new programs that are objectively not user friendly though!
skills i used/learned: creating a pattern, creating a brush with that pattern, pen tool, creating vector shapes with curvature, adjusting artboards and resolution
3 notes
·
View notes
Text
Enhancing Images and Background Editing in Photoshop and Illustrator

Real editing is one of the essential skills one can have in the digital design and photography world. Be it any professional field, such as a graphic designer, filmmaker, or even as an enthusiast, mastering how to change background colors, remove backgrounds, or enhance images in these practices to take work beyond the ordinary. Thus providing tools such as PhotoCut for an easier and faster way to refine photos. This will sound more interesting as an article since it enables the reader to explore and learn about these techniques, from the basic edits to the most advanced enhancements.
Learn how to add a signature in Word documents.
Changing Background Color in Photoshop

Some of the richest ways to change the background color of images in Photoshop are Select Subject, Quick Selection Tool, and Layer Masks. Here is an elaborate step-by-step guide to doing it:
Step 1: Open the Image
Just open the required image in Adobe Photoshop.
To unlock the image's layer, double-click on it in the Layers window.
Also, duplicate the layer in case you want to keep the original image.
Step 2: Select the Subject
Go to Select-Subject, enabling Photoshop to automatically detect the subject.
It can also be selected using the Quick Selection Tool (Shortcut: W).
Step 3: Refine the Selection
Click on Select and Mask to refine the edges.
Use the Refine Edge Brush Tool to enhance the selection further.
Adjust Feather, Contrast, and Shift Edge settings for a smoother selection.
Step 4: Remove the Background
Once satisfied, click on Output to Layer Mask to separate the subject.
Add a new layer beneath and fill it with the desired background color using the Paint Bucket Tool (G).
Step 5: Adjust and Save
Modify color tones using Hue/Saturation (Ctrl + U) if necessary.
Experiment with Gradient and Pattern fills for creative backgrounds.
Save the final image in the required format (PNG for transparency, JPG for web use).
Changing Image Colors in Photoshop

Changing colors in Photoshop is referred to with the terms recoloring an object, lighting correction, or artistic effects. The tools best suited for the task include Hue/Saturation adjustment, the Replace Color option, and Selective Color adjustments.
Method 1: Using Hue/Saturation
Open the image and duplicate the layer to work non-destructively.
Go to Image > Adjustments > Hue/Saturation Ctrl + U.
Use the sliders to modify the colors.
Enable Colorize if you want to apply a single color overlay.
Adjust the Lightness to control brightness.
Method 2: Using Replace Color
Select Replace Color under Image > Adjustments.
To alter the color, use the Eyedropper Tool.
Set the Fuzziness to refine the selection.
Adjust the Hue, Saturation, and Lightness sliders to achieve your effect.
Press OK to apply the changes.
Method 3: Using Selective Color Adjustments
Choose from the drop-down of colors in the Base Colors.
Selective Color under Image > Adjustments.
For more precise adjustments, use the Cyan, Magenta, Yellow, and Black (CMYK) sliders.
Turn your serious photos into happy moments with PhotoCut’s Smile Filter.
Removing Background in Illustrator

Illustrator is a vector-based tool that allows precise background removal for logos, icons, and illustrations.
Using the Image Trace Feature
Open the image in Illustrator.
Select the image and go to Window > Image Trace.
Choose the High Fidelity Photo preset or adjust the settings for the best result.
Click Expand and then Ungroup to remove the unwanted background.
Delete extra background elements manually.
Using the Pen Tool for Manual Removal
Select the Pen Tool (P) and carefully outline the subject.
Close the path and convert it into a vector mask.
Use the Pathfinder Tool to separate the background.
Delete the unwanted sections and save the image with a transparent background.
Explore the easiest ways to add emojis to your photos.
Removing Background in Photoshop

Background removal has many ways in Photoshop, such as the Remove Background feature, Magic Wand Tool, and Pen Tool.
Using the Remove Background Feature
Open the image and go to Select > Subject.
Click on Remove Background under the Properties panel.
Use the Eraser Tool or Refine Edge Brush for better precision.
Using the Magic Wand Tool
Select the Magic Wand Tool (W) from the toolbar.
Click on the background to select similar colors.
Adjust Tolerance (default is 32) to refine selection.
Press Delete to remove the background.
Using the Pen Tool for Precise Selection
Select the Pen Tool (P) and outline the subject.
Convert the path into a selection and create a layer mask.
This method is best for complex images requiring precision.
Turn your photo into a cool cartoon avatar with PhotoCut’s AI Cartoon Avatar Maker.
Enhancing Images in Photoshop

Photoshop may be used to improve images. In Photoshop, picture improvement entails adjusting brightness, contrast, sharpness, and clarity.
Step 1: Adjust Brightness and Contrast
Select the command from Image > Adjustments > Brightness/Contrast.
Sliders will help keep light and darkness in balance.
Step 2: Use Levels and Curves
Open the menu Image > Adjustments > Levels (Ctrl + L).
Modify the input and output to refine the tonal range.
Step 3: Sharpen the Image
To accomplish this, navigate to Filter > Sharpen > Unsharp Mask.
To improve some elements, you may change the Radius and Amount.
Step 4: Use Filters for the Final Touch
Apply Camera Raw Filter for advanced enhancements.
Use the Dodge and Burn Tool to highlight or darken specific areas.
Using PhotoCut for Quick Edits

PhotoCut is an intuitive background removal and image enhancement tool that simplifies editing.
Using PhotoCut for Background Removal
Upload your image into PhotoCut.
Use Auto Remove Background for AI-based processing.
Fine-tune the edges manually for better precision.
Apply a new background color or pattern.
Enhancing Images in PhotoCut
Adjust contrast, brightness, and saturation quickly.
Finally, apply the filters and effects to improve the image quality.
To produce a depth-of-field effect, use the Blur Tool.
For later usage, save it as a JPG or PNG.
Conclusion
So, if you had Photoshop, Illustrator, and PhotoCut, you would have incredible tools at your disposal for image editing. Changing background colors, deleting unsightly details, and increasing image quality, all these require learning skills that would make your work stand out compared to others. To determine which tool or process best suits your needs, try a few. You'll eventually be able to work on photos as fast and effectively as an expert.
Create customized Disney characters with PhotoCut’s Disney AI Generator.
FAQs
Q1. How do I change my image's background color in Photoshop if the background is a solid color?
Ans. The straightforward way is to use the Paint Bucket Tool (G). Select the new background color that you want using the Foreground color picker, and then click on the background area you want in the image. Make sure Tolerance in the Options Bar is set properly so that the colors aren't bled into the main subject with it having the Tolerance set wrong. A low tolerance will only affect pixels very similar to the clicked color, while a higher tolerance will affect a wider range of colors.
Q2. My background isn't a solid color. How can I change it?
Ans. For more complex backgrounds, you'll need to isolate the subject first. Here are a few methods:
Quick Selection Tool (W): Quickly paint over the subject to select it. Refine the selection using "Select and Mask" (Select > Select and Mask).
Pen Tool (P): Creates a precise path around the subject. Convert the path to a selection (Right-click > Make Selection).
Object Selection Tool (W): Photoshop will automatically try to detect the objects in your image and help you make the selection. Refine the selection using "Select and Mask" (Select > Select and Mask).
Once the subject, inverse selection (Select > Inverse) is done to select the background. Then, fill the preferred background color using either the Paint Bucket Tool (G) or create a new layer filled with the color beneath your subject layer.
Q3. How do I change everything color-wise in an image?
Ans: By using a Hue/Saturation Adjustment Layer and tweaking only the main Hue slider. Be careful with unrealistic color shifts. Another option is a Gradient Map Adjustment Layer (Layer > New Adjustment Layer > Gradient Map). This maps the tones in your image to a gradient of your choice.
Q4. I only want to change the color of a portion of an object. How do I do this?
Ans. Use a Layer Mask with your adjustment layer. After creating the adjustment layer, a white mask will appear next to it in the Layers panel. Paint with black on the mask to hide the effect of the adjustment layer in those areas. Paint with white to reveal the effect.
Q5. How do I remove a simple vector background in Illustrator?
Ans. Here’s how you can remove a vector background in Illustrator:
Direct Selection Tool (A): Click on the background shape to select it.
Delete Key: Press the Delete key.
Q6. How can I remove part of an embedded photo if it's placed in my Illustrator document?
Ans. Here’s how you can remove part of an embedded photo:
Image Trace: Convert the photo into vector paths using "Image Trace" (Object> Image Trace > Make). Then, you can select and delete the parts of the tracing you don't want. This works best with simple, high-contrast images.
Clipping Mask: Draw a shape over the area you want to keep. Select both the shape and the image. Then go to Object > Clipping Mask > Make. This will hide everything outside the shape. This method does not delete the background, only hides it.
Edit in Photoshop: The best way is to edit the photo in Photoshop to remove the background (see below) and then place the image back into Illustrator with transparency.
Q7. How can I make the background transparent after removing it?
Ans. After creating the layer mask (see above), save the image as a PNG file. PNG supports transparency. If you save as a JPEG, the transparency will be replaced with a white background.
Q8. Is there a way to automate background extraction in Photoshop?
Ans: Yes, it comes with a built-in Remove Background option located in the "Properties" panel once you select any layer. Use the Adobe Sensei AI to perform such actions automatically. However, it usually requires manual refining using the best techniques for the best results.
Q9. How can I make the colors better in my pictures?
Ans. This is how you brighten the colors in your photos:
Vibrance/Saturation: Increase Vibrance a little, and that should brighten colors without looking unnatural.
Selective Color: Fine-tuning of colors under some specific color ranges(e.g., Reds, Greens, Blues, etc.).
Camera Raw Filter (Filter > Camera Raw Filter): The full set of color adjustment tools, which includes temperature, tint, hue, saturation, and luminance.
Q10. How do I reduce noise in images?
Ans. Reducing noise in images can be done here:
Camera Raw Filter (Filter>Camera Raw Filter): It has noise-reduction sliders for luminance and color noise in the "Detail" tab.
Open the tool and name it Filter > Noise > Reduce Noise. The Camera Raw Filter usually returns a better result, but this is an alternative possibility.
0 notes
Text
Essential Tools Every New Graphic Designer Should Know
Starting a career in graphic design is an exciting journey filled with creativity, challenges, and endless opportunities for growth. However, one of the biggest questions new designers face is: Which tools should I learn first?
The world of design is vast, but mastering the right tools early on can give you a strong foundation and help you stand out from the competition. In this blog, we’ll cover the essential graphic design tools every beginner should know, along with how you can kickstart your creative journey with expert guidance from DigiAdgency.
Why Are Design Tools Important for Beginners?
Graphic design is more than just creativity — it's also about execution. The right tools help you:
Bring your ideas to life more effectively.
Work faster and more efficiently.
Collaborate better with teams and clients.
Keep up with industry standards.
Deliver professional-quality work that meets client expectations.
Whether you're planning to work as a freelancer, join a creative agency, or build your own brand, having a strong grasp of essential design tools will give you a massive head start. (Need help growing your freelance career? Explore DigiAdgency’s digital marketing freelancer services.)
Essential Tools Every New Graphic Designer Should Learn
1. Adobe Photoshop
Best for: Photo editing, digital painting, and compositing.
Adobe Photoshop is considered the king of photo manipulation and raster graphics editing. It’s a must-know tool for any graphic designer. With Photoshop, you can create everything from simple image adjustments to complex designs and high-end graphics.
Key Features:
Photo retouching
Layer-based editing
Advanced filters and effects
Custom brushes and tools
2. Adobe Illustrator
Best for: Logo design, vector graphics, and illustrations.
Unlike Photoshop, Illustrator works with vector graphics, meaning your designs can scale up or down without losing quality. It's essential for creating logos, icons, typography, and complex illustrations.
Key Features:
Precision drawing tools
Advanced typography options
Powerful vector editing
Artboards for multiple designs
3. Canva
Best for: Quick designs, social media graphics, beginners.
Canva is a user-friendly, web-based tool perfect for beginners who want to create stunning graphics quickly. With thousands of templates, fonts, and stock images, Canva makes professional-looking designs accessible to everyone.
Key Features:
Drag-and-drop functionality
Free and premium templates
Collaboration features
No design experience required
(If you’re managing social media for yourself or clients, Canva can be a game-changer. For more growth tips, check out DigiAdgency’s services.)
4. Adobe InDesign
Best for: Print layouts, ebooks, magazines.
InDesign is a powerful tool for designers who work on multi-page layouts. It’s ideal for creating brochures, flyers, newsletters, and even long-format books.
Key Features:
Master pages for consistent designs
Text and image management
Export to PDF or digital publishing formats
Interactive PDF creation
5. Figma
Best for: UI/UX design, web design, team collaboration.
Figma has quickly become a favorite for web and app designers. It's cloud-based, which means multiple designers can work on a project at the same time. It’s perfect for UI (User Interface) and UX (User Experience) design projects.
Key Features:
Real-time collaboration
Prototyping tools
Responsive design features
Version history tracking
6. Affinity Designer
Best for: Vector and raster design alternative to Adobe products.
Affinity Designer is an affordable alternative to Illustrator, offering professional-level features for a one-time fee (instead of Adobe’s subscription model). It’s perfect for freelancers and small businesses.
Key Features:
Seamless switching between vector and raster workspaces
High-performance editing
User-friendly interface
No subscription fees
7. Procreate
Best for: Digital painting and illustration (iPad users).
If you love drawing or illustrating, Procreate is one of the best apps out there. It's intuitive, powerful, and designed specifically for touch devices like the iPad.
Key Features:
Vast brush library
Layered editing
Quick rendering speeds
Easy sharing of artwork
8. Trello or Asana (for Project Management)
Best for: Organizing design projects and client work.
Being organized is just as important as being creative. Tools like Trello and Asana help you manage design projects, keep track of deadlines, and collaborate with clients or team members effectively.
Key Features:
Task management
Project tracking
File attachment
Real-time updates
(Professional project management helps agencies like DigiAdgency deliver high-quality work efficiently.)
9. Google Fonts and Adobe Fonts
Best for: Access to professional typography.
Typography is a major part of design. Using high-quality, readable fonts can make or break your design. Tools like Google Fonts (free) and Adobe Fonts (subscription-based) give you access to hundreds of beautiful typefaces.
Key Features:
Wide variety of fonts
Easy integration into designs
Commercial use licenses
10. Wacom Tablet (Hardware)
Best for: Precision drawing and photo editing.
A Wacom tablet gives you the hand-drawn feel while working digitally. It’s a great investment if you’re serious about illustration, detailed editing, or custom artwork.
Key Features:
Pressure sensitivity
Natural pen feel
High precision for detailed work
How to Choose the Right Tools as a Beginner
Choosing the right tools depends on:
Your goals: Are you focusing on branding, web design, or social media?
Your budget: Some tools are free or affordable alternatives to premium software.
Your workflow: Choose tools that integrate well together.
Industry expectations: Familiarize yourself with the tools most commonly used by professionals.
Starting simple is key. Master one tool at a time before moving to the next.
Final Thoughts
Learning the right tools is essential to building a successful career in graphic design. From Photoshop for image editing to Figma for UI design and Canva for quick projects, each tool serves a unique purpose in a designer’s toolbox.
Consistency and practice are the real secrets behind mastering these tools. Start small, experiment often, and don’t be afraid to invest time in learning new skills.
If you’re looking to fast-track your journey as a graphic designer, team up with experts! Visit DigiAdgency for professional guidance. Whether you’re seeking freelance opportunities, exploring digital marketing services, or searching for the best digital marketing agency, we’re here to help you grow.
Start your creative journey today — because the world needs your designs!
Written by: Varsha Kohli Graphic Designer | Digital Marketer | Storyteller Visit DigiAdgency
0 notes
Text
The Best Apps to Maximize Your iPad’s Potential in Sri Lanka
Owning an iPad is just the beginning of an exceptional digital experience. With the right apps, you can transform your device into a powerful tool for productivity, creativity, learning, and entertainment. If you're looking for the latest Apple devices, visiting a trusted I Pads Store in Sri Lanka ensures you get access to the best models. Below are some of the must-have apps that can enhance your iPad experience.
1. Productivity Apps
For those who use their iPads for work or study, having the right productivity apps is essential.
Notability – A fantastic app for taking handwritten notes, annotating PDFs, and recording lectures.
GoodNotes 5 – Ideal for organizing digital notebooks with advanced handwriting recognition.
Microsoft Office Suite – Includes Word, Excel, and PowerPoint for seamless document editing and presentations.
Google Drive & Dropbox – Cloud storage solutions to keep all your important files accessible from anywhere.
2. Creative Apps
The iPad is a favorite among artists and designers thanks to its powerful creative tools.
Procreate – A leading digital illustration app with advanced brushes and layers.
Affinity Designer – A professional-grade graphic design and vector illustration tool.
LumaFusion – A high-quality video editing app that allows users to edit like a pro.
GarageBand – Perfect for musicians to create and mix music on the go.
3. Entertainment and Streaming Apps
For those who love entertainment, the iPad offers a range of streaming options.
Netflix & Disney+ – Watch your favorite movies and series in high definition.
Spotify & Apple Music – Enjoy seamless music streaming and playlist customization.
Kindle & Apple Books – Read ebooks and audiobooks anytime, anywhere.
Twitch & YouTube – Great for live streaming and watching videos on a large screen.
4. Educational Apps
If you want to learn something new, the iPad can be a great educational tool.
Duolingo – Learn new languages in a fun and interactive way.
Khan Academy – Offers thousands of free educational courses on various subjects.
Udemy & Coursera – Access professional courses from top universities.
TED – Watch inspiring talks from experts worldwide.
5. Utility and Customization Apps
Make your iPad more functional with these essential utility apps.
1Password – Securely store and manage passwords.
PDF Expert – Edit, annotate, and sign PDF documents.
Google Chrome & Safari – Browse the web efficiently with advanced features.
Darkroom – A professional photo editing app for stunning visuals.
Your iPad can be much more than a tablet—it can be your personal assistant, creative studio, or entertainment hub. Explore the best selection of Apple products at Celltronics.

0 notes
Text
The Ultimate Graphic Design Bundle: Elevate Your Creativity
In the ever-evolving world of digital design, having the right resources at your fingertips can make all the difference. Whether you're a seasoned designer or just starting, a well-curated graphic design bundle can provide everything you need to create stunning visuals efficiently. In this blog, we'll explore the importance of graphic design bundles, what they typically include, and how they can supercharge your creative projects.
Why a Graphic Design Bundle Matters
Graphic design is an art that blends creativity with technical skills. A high-quality design bundle saves time, enhances creativity, and ensures consistency across your work. Instead of spending hours searching for fonts, templates, and graphics, you can access a ready-made collection tailored to meet diverse design needs.
Time-Saving
One of the biggest advantages of a design bundle is the time it saves. Designers no longer have to create elements from scratch or scour the internet for resources. With a single download, you can access a variety of assets that streamline your workflow.
Cost-Effective
Individually purchasing design assets can be expensive. A well-packaged bundle offers premium resources at a fraction of the cost. This makes it an excellent investment, especially for freelancers and small businesses looking to enhance their branding without breaking the bank.
Enhanced Creativity
A thoughtfully crafted bundle contains diverse elements that inspire creativity. Having access to different fonts, textures, and illustrations allows designers to experiment with new ideas and create visually striking compositions.
What’s Included in a Graphic Design Bundle?
A great bundle typically includes a mix of essential design elements that cater to various creative needs. Here’s what you can expect:
1. Fonts and Typography
Typography is a fundamental aspect of design. A design bundle often includes:
Script fonts for elegant and handwritten styles
Sans-serif fonts for modern, clean aesthetics
Serif fonts for a classic, professional look
Decorative and display fonts for unique branding
2. Icons and Illustrations
Hand-drawn or vector illustrations enhance any design project. Bundles often include:
Flat icons for UI/UX projects
Hand-sketched illustrations for organic designs
Infographic elements for data representation
3. Textures and Patterns
Textures and patterns add depth and personality to designs. These can include:
Watercolor textures for artistic effects
Grunge overlays for a vintage touch
Geometric patterns for modern design aesthetics
4. Mockups and Templates
Mockups are essential for showcasing designs in a professional manner. Many bundles feature:
Branding mockups for logos and business cards
Social media templates for Instagram, Facebook, and Twitter posts
Website and mobile UI kits for seamless digital design
5. Stock Photos and Backgrounds
High-resolution images and backgrounds can elevate your design. Bundles may include:
Abstract backgrounds for web and presentation designs
Lifestyle stock photos for social media and marketing materials
Nature and urban photography for creative compositions
6. Actions, Brushes, and Presets
Photoshop and Illustrator resources help designers create effects effortlessly. These might include:
Photoshop actions for quick photo enhancements
Illustrator brushes for hand-drawn aesthetics
Lightroom presets for professional photo editing
How to Use a Graphic Design Bundle Effectively
To get the most out of a design bundle, follow these tips:
1. Organize Your Assets
After downloading a bundle, organize files into folders by type (fonts, mockups, icons) to easily locate them when needed.
2. Customize Elements to Fit Your Style
While design bundles provide pre-made elements, customization is key. Adjust colors, tweak typography, and experiment with layer effects to make assets uniquely yours.
3. Use Bundles Across Multiple Projects
A single bundle can be repurposed across multiple design projects. Whether designing a brand identity, creating social media graphics, or working on a website layout, leverage your assets effectively.
4. Stay Updated with Trends
Graphic design trends evolve rapidly. Choose bundles that include contemporary elements to ensure your designs remain fresh and relevant.
Where to Find the Best Graphic Design Bundles
There are several reputable platforms offering high-quality design bundles, including:
Envato Elements – A subscription-based platform with unlimited downloads.
Creative Market – A marketplace for unique and handcrafted design resources.
Design Bundles – Offers exclusive, discounted bundles for designers.
Adobe Stock – Provides premium design elements for professionals.
Conclusion
A well-assembled graphic design bundle is a game-changer for any designer. It saves time, boosts creativity, and offers a cost-effective way to access high-quality resources. Whether you’re working on branding, social media graphics, web design, or marketing materials, investing in a great design bundle can elevate your work to new heights. Start exploring today and unlock limitless creative possibilities!
0 notes
Note
12, 27 and 37 for Espilver :>
My bois!💕
12. How did they get together?
I wrote a whole fic about this (New Beginnings), so I'll summarise the main ideas of that ^-^ After the events of Rivals 2, Espio deems Silver too injured to travel back to the hopefully-saved future, and thus takes his new friend along to the Chaotix Detective Agency to recuperate. There he learns that Silver's social skills and knowledge about the world of the past are basically non-existent... not helped by the fact Sonic's putting himself square into the whole situation, and Silver can't stand him! Slowly Espio and his friends teach Silver about how living in the past works while unravelling more about his experiences in a ruined future, while Espio increasingly realises he's having feelings for Silver. Silver himself is also aware the way he feels about Espio is different than for the others, except he cannot put that in words yet, and he's got enough to worry about anyway with the future and the idea his time-travelling might have caused a paradox. There's a lot more going on, but eventually the two of them put their feelings into words, and decide they want to stay together in the past and thus become a couple. New Beginnings is 195k words long, so this is the very short version, but basically tl;dr Silver stayed in the past after Rivals 2 with Espio and things went from there.
27. What other couple would your otp get along with?
Hmm... maybe Vector and Vanilla? I don't think about the two of them much, but Vanilla would adore doting on Silver and Espio for sure, haha. And I can see Silver be good friends with Blaze as well once they meet, so if Blaze ever gets a partner, he'll probably do his best to befriend that person as well.
37. How do they cheer each other up?
Silver takes the angle of distractions: Espio is gonna get nuzzled, cuddled, tickled, or just have his ears be chatted off so he doesn't get to think about what is bothering him. I can see Espio be the type who just seethes in silence when it's about something he cannot have much influence over or after he got brushed off by the others, so in that way, Silver helps him get out of his mind and back into the world. Espio has long learned to be careful with his explanations about what was making him unhappy after he calmed down, because Silver can react quite passionately towards it! (Aka, he'll go in guns blazing and it might just make things worse, but at least Espio thinks it's funny and in that way gets cheered up even further, haha.)
Espio takes the more conventional route of comforting and thinking of a solution. He'll go sit with Silver and generally show him he's there to help out, and once Silver is ready for it, they'll talk it through and he'll help Silver to come to a satisfying end of the situation. It's a good balance for Silver to help calm down, since I can see him feel his anger or sadness much more strongly than Espio does.
#Silver's got a temper on him so when Espio points out like 'Vector did not listen to my ideas' or something there's an 85% change Silv just-#-goes right in to holler at Vector haha#100% ineffective but Espio appreciates Silver's devotion to ensuring he's happy#espio the chameleon#espilver#silver the hedgehog#thanks for the ask!🍀
6 notes
·
View notes
Text
Tips for Mastering Software in Graphics Design Courses

Although graphic design is a visually driven field, knowing how to use the right software is frequently what creates those breathtaking images. In the current era, digital tools are the artist's brushes and palettes, from Illustrator's mastery of vector graphics to Adobe Photoshop's pixel-perfect manipulations. Gaining proficiency with these programs may be essential for students taking graphics design courses in order to realize their full creative potential and succeed professionally.
Best Graphics Design Course in Coimbatore
1. Embrace the Fundamentals
Make sure you understand the fundamentals of the software before attempting more complex methods. Learn how to use the menus, interface, and basic tools. Understanding these fundamentals early on will facilitate future software learning because most design programs share them.
Discover tutorials and online resources: There are many beginner-friendly tutorials available on sites like YouTube, Skillshare, and LinkedIn Learning to help you get started.
Make use of the integrated help features: Don't undervalue the help and documentation sections of the software. They frequently offer shortcuts and useful information.
Work on easy projects to get experience: To become comfortable with the tools, begin with simple tasks like modifying text, applying colors, and creating shapes.
2. Hands-On Practice is Key
You can't become an expert in software just by theory. The development of muscle memory and tool fluency requires regular, practical practice.
Allocate specific time for practice: Even 30 minutes daily can have a big impact on your learning.
Recreate existing designs: To gain an understanding of the methods and processes used, try to recreate designs you find inspiring.
Play around with various features and tools: Don't be scared to experiment with the different features of the software. You might find undiscovered treasures and create your own distinct look.
3. Master Keyboard Shortcuts
A designer's secret weapon for speed and efficiency is a keyboard shortcut. Gaining knowledge of these shortcuts can greatly improve productivity and streamline your workflow.
Let's start with the basics: Make an effort to commit frequently used actions, such as saving, undoing, zooming, and tool selection, to memory.
Make a cheat sheet: Make a list of the most important shortcuts and keep it close at hand for easy access.
Consistently practice taking shortcuts: Make a conscious effort to integrate shortcuts into your workflow until they come naturally.
Best Graphics Design Course in Coimbatore
4. Seek Feedback and Learn from Others
Never hesitate to share your work and ask classmates, teachers, or online groups for comments. You can discover new skills and pinpoint areas for development with the use of constructive feedback.
Engage in design communities and online forums: Ask questions, share your work, and interact with other designers to get their opinions.
Attend workshops and design events: Participate in design events and seminars to network with other designers and get knowledge from seasoned experts.
Accept constructive criticism: Consider criticism as a chance for improvement.
5. Develop a Project-Based Approach
The greatest method to reinforce your learning and develop a good portfolio is to use your software talents on actual tasks.
Begin with your own personal endeavors: Investigate your own original concepts and take use of them to hone your software abilities.
Accept internships or freelancing: Work on actual projects for customers or organizations to obtain real-world experience.
Work along with more designers: Collaborate on projects with other designers or students to broaden your skill set and learn from one another.
6. Stay Updated with the Latest Versions
With frequent releases of new features and upgrades, design software is always changing. You can be sure you have access to the greatest tools and workflows by keeping up with the most recent versions.
Sign up for software updates: To remain up to date, turn on automatic updates or periodically check for new releases.
Examine the latest features and capabilities: To increase your creative potential, spend some time learning about new tools and upgrades.
Keep up with trade journals and blogs: Keep up with the most recent developments in software trends and best practices.
7. Utilize Online Learning Resources
A wealth of educational resources for graphic design software may be found on the internet. Utilize these resources to enhance your studies and quicken your learning process.
Examine online tutorials and courses: A variety of software-specific courses are available on platforms such as Skillshare, Coursera, and Udemy.
Subscribe to YouTube channels and design blogs: A lot of designers post helpful tutorials, hints, and suggestions online.
Participate in online design forums: Interact with other designers on sites like as Dribbble and Behance to gain inspiration and knowledge from their experiences.
Best Graphics Design Course in Coimbatore
8. Don't Be Afraid to Experiment
Experimenting and pushing the limits of design software's capabilities is one of the finest methods to understand it. Never be scared to experiment, defy convention, and find your own distinct style.
Experiment with different tools and settings: Examine the software's features and see how they work together.
Try out several design philosophies: Try designing in diverse aesthetics and venture outside of your comfort zone.
Accept failures as teaching moments: Don't let failures deter you. See them as opportunities to develop and learn.
9. Focus on Workflow Efficiency
Concentrate on streamlining your process for optimal efficiency as you gain more software expertise.
Organize your projects and files: To prevent confusion and time wastage, create a structure for naming and storing your files.
Make use of libraries and templates: To save effort and ensure consistency, create reusable templates and libraries for popular design elements.
Automate repetitive processes: To make repetitive tasks like exporting files or resizing photographs more efficient, investigate automation features or plugins.
Conclusion
You may become proficient with the software required for your graphic design education and start a lucrative and satisfying career in the creative business by paying attention to these pointers and practicing often. Keep in mind that learning software is a continuous process, so embrace the process, maintain your curiosity, and never stop discovering the limitless potential of design.
#Best Graphics Design Course in Coimbatore#Graphics Design Course in Coimbatore#Graphics Design Course
0 notes
Text
Transforming Raster Images: A Guide to Using Image Trace in Adobe Illustrator
Image Recreate: Frequently Asked Inquiries Explained
1.How do you master in Illustrator?
To master Illustrator, practice regularly by exploring its tools and features. Follow online tutorials, take courses, and work on personal projects to apply what you learn. Experiment with different techniques, such as vector drawing and typography. Join design communities for feedback and inspiration. Lastly, stay updated on new features and trends to continually enhance your skills.
2. What is the first step to creating a vector graphic in Illustrator?
The first step to creating a vector graphic in Adobe Illustrator is to open the program and create a new document. You can choose the size and orientation of your canvas based on your project needs. Once your document is set up, you can start using tools like the Pen, Shape, or Brush to create your vector graphic.
3. What is the most important tool to master in Illustrator?
The most important tool to master in Illustrator is the Pen Tool. It allows you to create precise paths and shapes, which are fundamental for vector graphics. Understanding how to use the Pen Tool effectively enables you to design intricate illustrations, logos, and custom typography, making it essential for any Illustrator user aiming for versatility and creativity.
4. How do I become an Illustrator step by step?
1. Develop your drawing skills through practice.
2. Choose a style that reflects your interests.
3. Create a portfolio showcasing your best work.
4. Learn digital tools (like Adobe Illustrator).
5. Network with other artists and potential clients.
6. Consider taking courses or attending workshops.
7. Promote your work on social media and freelancing platforms.
8. Seek feedback and keep improving.
5. How to vector an image in Illustrator?
To vector an image in Illustrator, use the following steps:
1. Open the image in Illustrator.
2. Select the image and click on "Image Trace" in the top menu.
3. Choose a preset or adjust settings to achieve the desired detail.
4. Click "Expand" to convert the trace into a vector.
5. Edit the vector paths as needed. Save your work.

Visit: VS Website See: VS Portfolio
0 notes
Text
8 Best Illustrator Tools for Graphic Design in 2024

In the ever-evolving world of graphic design, Adobe Illustrator remains a staple for creating stunning visuals. As we move into 2024, the landscape of design tools within Illustrator continues to expand, offering designers more flexibility, creativity, and efficiency. Whether you're a seasoned professional or just starting, these eight Illustrator tools will elevate your design game to the next level.
1. Pen Tool
In Illustrator, the Pen Tool is used to create new vector objects and lines. It provides us the capability to make custom shapes, curves and complex designs. Another improvement of the Pen Tool happened in 2024, this time with Adobe introducing smoother curve control that enabled designers to create intricate paths without using as many anchor points. This update saves time, and also gives more polished designs.
2. Shape Builder Tool
The Shape Builder ToolFor designers who create intricate illustrations by merging basic shapes, the shape builder tool is indispensable. Making it easy to add, minus and intersect shapes. 2024 NEW — The most recent upgrade for 2024 includes advanced snapping options, which is very useful in speeding up complex shape manipulation.
3. Gradient Tool
Shadows play a crucial role in giving that gradient look feel to your designs. The gradient tool is a wonderful asset employed by illustrators while creating color blends in subtle transitions. Other new gradient types within the tool in 2024 are free-form gradients that allows creation points at arbitrary positions and enable users to define colors along paths for a more organic look. By introducing these improvements, you have even more creative freedom to create interesting ways in which one gradient transitions into another color and can bring a new level of depth toward developing your design solutions.
4. Appearance Panel
The Appearance Panel makes it super easy for designers to apply numerous fills, strokes and effects in a non destructive way on one single object and be able to edit each layer independently. This tool has been enhanced in 2024 to be easier for users with the new features of layering effects and complex design handling. Being able to save and store appearance styles is a real time-saver, especially when you are consistently applying the same style across many different elements throughout your projects.
5. Artboards
Artboards are a must in Illustrator, they allow you to keep your workspace clean and help manage multiple design output. We also tweaked the Artboards tool, improved some of its alignment and distribution options so that you can take even better control of projects with multiple design variations (like social media graphics, banner ads or print layouts) in 2024. It is quite useful when you have to quickly change the size of multiple artboards and reshuffled them around, especially in high-speed design workflow.
6. Brushes Panel
Illustrator gives a large group of brushes with various purposes extending from vector brush strokes to surfaces and designs. 2024NEW BRUSH LIBRARIES AND CUSTOMIZATION OPTIONSCreators have more brushes to work with, including textures and effects. The panel has also been streamlined with new brush convenience, making the brushes you use most accessible and easier than ever to create custom designed styles.
7. Type Tool
Another type of tool that many graphic designers use is the Type Tool in Illustrator, which gives us more complex text manipulation options. Phillip: The Type Tool has also had a major upgrade in 2024, with support for variable fonts and much-improved text flow capabilities. With these updates experimenting with different font styles, weights and sizes will be more straight forward — making sure your text elements are both beautiful to look at while being read.
8. Adobe Sensei Integration
Illustrator is increasingly Adobe Sensei-ified — the company’s AI and machine learning technology. In 2024, Sensei powers even more smart suggestions and automates repetitive tasks. Auto-colors, pattern-making and layout suggestions are just a few of the features that will help to reduce design time so you can use what really matters— creativity! As a result, this AI-driven method improves the efficiency and assists designers in realizing more significant professional results faster.
Conclusion
Now as 2024 is in progress, Adobe Illustrator has developed new creations and given graphic designers great tools to put their ideas into realization. Whether you are leveraging the raw control of Pen Tool or using your creativity aided by Adobe Sensei, these 8 tools will be a milestone helping any designer to keep pace with time. From logos, illustrations and complex layouts all the way to learning how to design just like what we would print out from a printer sitting in-between of SSH terminal commands.
0 notes
Text
Discover AI-Assist Art With Adobe Firefly On NVIDIA RTX PCs

Uncovering AI-Assisted Art With Adobe Firefly Programs Using NVIDIA RTX RTX PCs and workstations with over 100 AI-powered capabilities opens up countless opportunities for content makers.
Applications from Adobe Creative Cloud that leverage NVIDIA RTX GPUs are meant to boost users’ creativity by enabling them to work more quickly and concentrate on their work. With their smooth integration into current creative workflows, these tools offer power and precision together with increased productivity.
Consider the Light
Generative AI uses existing data to learn and produce new data in the form of text or visuals. It facilitates the generation of material that accurately visualizes and matches user descriptions while also helping to open up new creative possibilities.
Adobe Firefly series of creative generative AI models helps creative processes using generative AI by providing fresh approaches to ideation and creation. They were trained on licensed content, such as Adobe Stock Images, and public domain content whose copyright has expired, using NVIDIA GPUs. They are intended to be safe for usage in commercial settings.
Adobe Firefly Photoshop
The most widely used creative programs from include Adobe Firefly functionality.Image Credit To Nvidia
With the help of straightforward description prompts, the Generative Fill tool in Adobe Photoshop makes it simple to add content from photos. Users can also upload a sample image to obtain image results that are more similar to their intended output with the most recent Reference Image feature, which is presently in beta.
With the Crop tool, artists can use Generative Expand to stretch the border of their image and fill up larger canvases with newly added content that automatically blends in with the original.
Neural filters that are accelerated by RTX, like Photo Restoration, allow for intricate modifications including applying artificial intelligence to style transfers and coloring monochrome images. Based on research from NVIDIA, the Smart Portrait filter enables non-destructive manipulation using filters.
Using the most recent version of the Adobe Firefly Vector Model, Adobe Illustrator’s Generative Shape Fill (beta) enables users to quickly fill shapes with colour and detail in their own unique fashions, speeding up design workflows. Designers may quickly generate a vast array of editable and scalable vector graphic alternatives by simply matching the style and colour of their own artwork with Generative Shape Fill.
With just a text prompt, designers may quickly experiment with unique colour schemes and themes for their vector artwork with Adobe Illustrator’s Generative Recolour function.Image Credit To Nvidia
NVIDIA and Adobe will keep collaborating to enable sophisticated generative AI models, with an emphasis on deep integration into the programs used by the top creators worldwide.
Taking Action on Video
Adobe Premiere Pro is a well regarded and potent video editing software.
With the aid of RTX acceleration, the Enhance Speech tool employs AI to enhance dialogue snippets and eliminate extraneous sounds, resulting in a polished recording. On RTX PCs, it is up to 4.5 times quicker.
Another tool in Adobe Premiere is Auto Reframe, which intelligently reframes video footage for various aspect ratios by using GPU acceleration to find and track the most relevant elements in a film. Prior to starting the video editing process, Scene Edit Detection automatically locates the original edit locations in a video.
Graphics
In many visual effects and compositing operations, separating a foreground object from a backdrop is an essential step.
A new feature in Adobe After Effects isolates an object using a matte, allowing for selective effect application to the foreground and background replacement.
Artists can apply strokes to specific parts of the background and foreground elements by using the Roto Brush tool. With fewer clicks and cleaner cutouts, After Effects creates a segmentation border between the foreground and background objects using that information.
Producing 3D Product Images
Adobe Firefly answer for 3D material writing, texturing, and rendering is the Substance 3D Collection, which enables users to quickly produce incredibly photorealistic 3D content, including models, materials, and lighting.
Finding the ideal setting for the goods to live in can take some effort, but it can be appealing to visualize designs and products in relation to a location. This problem is resolved by the Adobe Firefly-powered Substance 3D Stager’s Generative Background tool, which enables artists to swiftly examine created backdrops to combine 3D models.
Stager can automatically adjust the lighting and perspective to the created background after an environment has been chosen.
AI-Powered Material Authoring
The Substance 3D Collection includes Adobe Substance 3D Sampler, which is intended to convert photos of surfaces and objects into photorealistic 3D models, high-dynamic range ambient lighting, and physically based rendering (PBR) materials. Sampler is making it simpler than ever for artists to experiment with variations while generating materials for anything from product visualization projects to the newest AAA games, thanks to the recent release of new generative processes powered by Adobe Firefly.
With Sampler’s Text-to-Texture tool, users can create tiled graphics by providing comprehensive text prompts. Then, using any Sampler filter or the machine learning-powered Image-to-Material functionality, these created images can be tweaked and turned into photorealistic PBR materials.
Similar to this, Image-to-Texture allows tiled textures to be created from reference photos, offering an additional means of inspiring and producing variations from already visual information.
Using text prompts, Sampler’s Text-to-Pattern tool creates tiling patterns that can be used as base colours or as inputs for different filters, such the Cloth Weave filter, which creates unique fabric materials. RTX GPU-powered generative AI technologies in the Substance 3D Collection are all intended to speed up ideation and creation for 3D artists.
Captivating Photographic Elements
The AI-powered Raw Details tool in Adobe Lightroom enhances the image without affecting its original quality by producing sharper detail and more precise edge renditions, improving colour rendering, and reducing artefacts. When fine details are visible on large monitors or printouts, this function comes in handy.
Super Resolution doubles the linear resolution while producing an improved image that is comparable to Raw Details. This indicates that the enlarged image will contain four times as many pixels overall, or twice the width and height of the original image. This is particularly helpful for boosting cropped imagery’s resolution.
With a single click, users can construct intricate masks for speedier editing thanks to AI-powered, RTX-accelerated masking tools like Select Subject, which removes individuals from an image, and Select Sky, which captures the sky.
Read more on govindhtech.com
#AIAssist#AdobeFirefly#NVIDIARTXPCs#RTXPCs#GenerativeAI#NVIDIAGPUs#artificialintelligence#generativeAImodels#3Dmodels#machinelearning#AI#news#technews#technology#technologynews#technologytrends#govindhtech
0 notes