#garden blog
Text

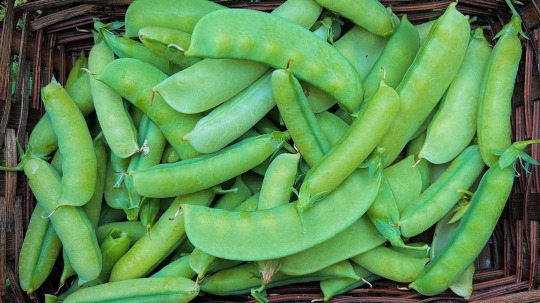


I planned on leaving these peas to mature as seeds for next year, but when I visited the garden for the first time in 3 days this morning, I noticed that all the plants pushed out new flowers. I guess we're eating peas tonight.
13-Aug-2023
#peas#snow peas#gardening#garden#cottagecore#gardencore#garden 2023#harvest#growing food#simple living#farmcore#homestead#homesteading#garden blog#garden journal#vegetable garden#plant community
244 notes
·
View notes
Text
I wanna read there
#garden#garden blog#gardening#flowers#gardening blog#in the garden#floral#flower#flower bed#flowercore#cottage core#attic bedroom#room inspo#roomdecor#reading#books
115 notes
·
View notes
Text
Visited the Vampires (Read: Got my yearly bloodwork done; it did not go smoothly this round despite having my usual Nurse. She overshot the vein and had to guide it back in. It hurt. I almost passed out. But I was laying down, so I didn't. Huzzah!). My Husband took us to one of our favorite Coffee places to get a Matcha Latte with Oat Milk as a consolation prize afterwards (and I finally got to meet the Muslim lady working there). So it made up for it. Thank HaShem that's over until next year and I don't have any more blood work to do, though.
It looks like it's going to rain today, so I'm not sure how much I'll actually do gardening wise. I'd like to at least get the rest of the pots cleaned out and get the Tobacco seeded for the Hummingbirds, however; at bare minimum, that's needed. It'd also be nice if we wound up finding their feeder, but at this point we may just have to ask my Father in Law if he has any ideas- or just buy a new one.
«Oklahoma - Region 2» ⬩ «Grow Zone 7a» ⬩ «Heat Zone 8»
#Personal#2024#Alphabet Soup#Garden 2024#My Garden#Gardening#Gardenblr#Plantblr#Gardeners On Tumblr#Gardeners Of Tumblr#Disabled Gardener#Disabled Gardening#Green Witch#Green Witchcraft#Witchy Gardening#Garden Blog#Oklahoma
16 notes
·
View notes
Photo
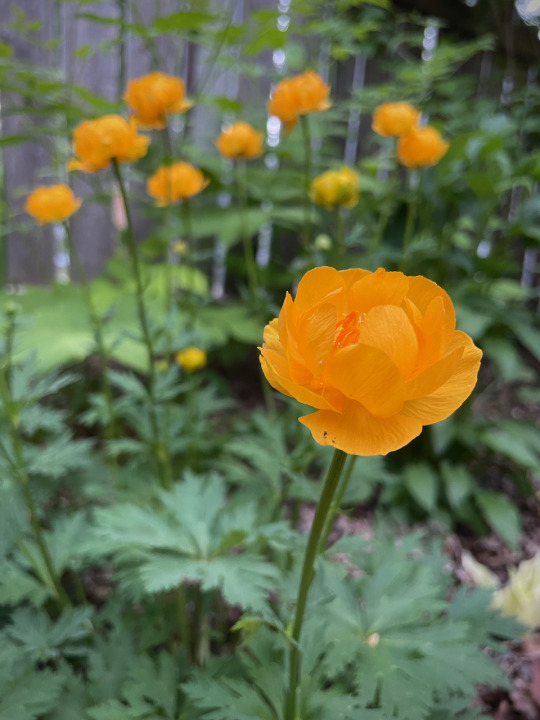
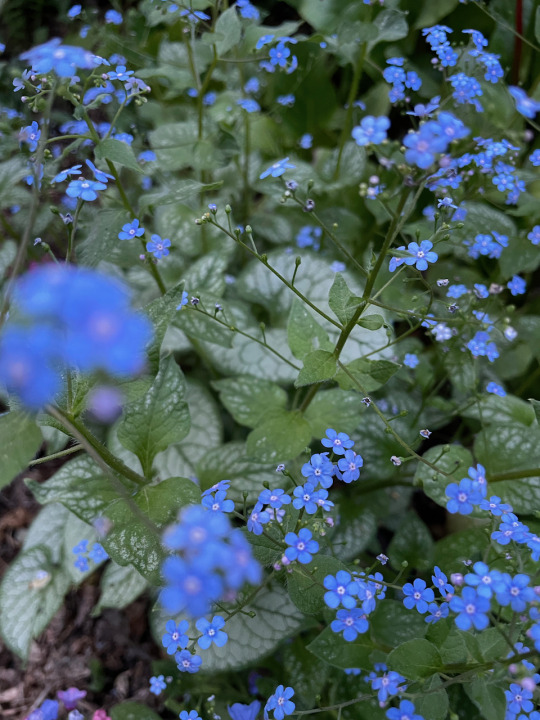


Trollius (globe flower), brunnera (Siberian bugloss, great forget-me-not), lilac, Pompom, different lilac, late May.
29 notes
·
View notes

Text
Blog #2 - Nothing left for me to do but plants
Great! We made it to blog #2! I made the pictures last saturday but didn't have time/didn't feel like making the post the day and the day after. I'm just happy I'm actually starting this right now. I'm still trying to create a good format for this, so I will probably experiment with this until I find something I'm satisfied with that doesn't take too much time to do. Pictures are also something I didn't think about. I want to have pictures of the plants from the same angle so you can actually see the progress they make, but that's actually very hard to do. Then there's also the lighting that keeps changing. I'll try to be more careful when making pictures from now on, to try to make them more consisted. Anyway, here's the update for week 2(?):
Name: Trachella
Species: Trachelospermum
Planted on: Match 8th 2024
Last time(March 8th 2024):

Now(March 16th 2024):

Not a lot to report on with her. She does look kind of yellow in the picture, but that's just because it was a very sunny day when I took the picture. While her growth isn't very noticeable in these pictures, I think it's better like this. She'll grow quite a bit this year and her progress will eventually become more visible in contrast
______________________________________________________________
Name: Cynthia
Species: Hydrangea macrophylla
Planted on: June 4th 2023
Last time(March 8th 2024):

Now(March 16th 2024):
Cynthia is still doing great. Her leafs are growing back extremely fast! I trimmed the twigs that didn't look very good while being carefull to not cut the ones that started to grow leaves. I read that that stimulates growth.
I did find some white mold on the dirt around her while checking the soil:
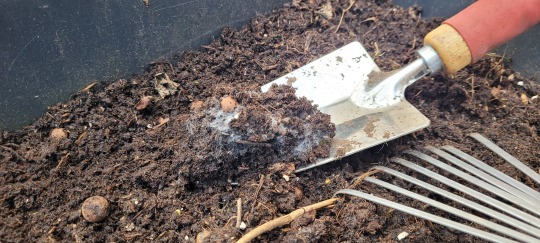
I did kind of panic at first and stated to remove it. I eventually did some research, and it seems to be saprophytic fungi. These fungi are responsible for digesting dead plant matter and create nutrients for the soil. This does let me to believe that the dirt is quite healthy in the planter. Or at least, I hope so.
______________________________________________________________
Name: Cammy
Species: Campanula Portenschlagiana
Planted on: June 4th 2023
Last time(March 8th 2024):

Now(March 16th 2024):
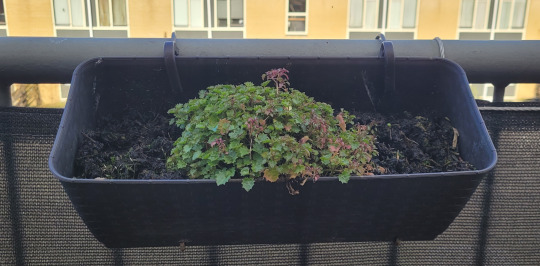
Not much has chanced since last time. She should eventually grow some flowers, but I think it's just not the right temperature yet. We'll see eventually.
______________________________________________________________
Name: Victor
Species: Vinca minor "Alba"
Planted on: Match 8th 2024
Last time(March 8th 2024):
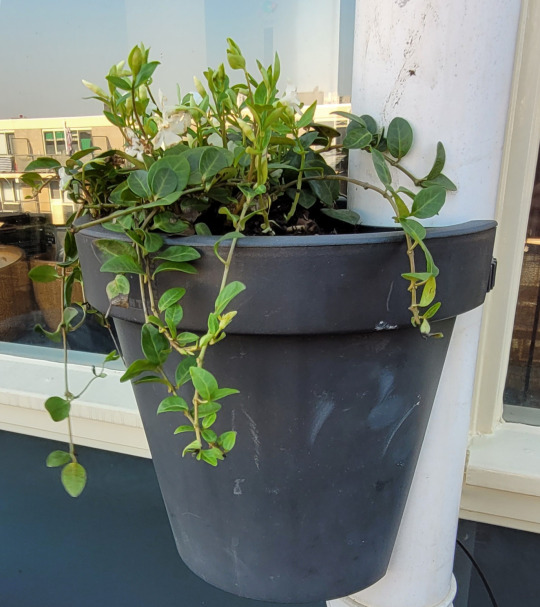
Now(March 16th 2024):

Victor is doing better than I hoped! Even more of his flowers have started blooming and he seems to take well to the new pot. My hope is that the twigs will get very long and hang down from the planter. It'll look great!
______________________________________________________________

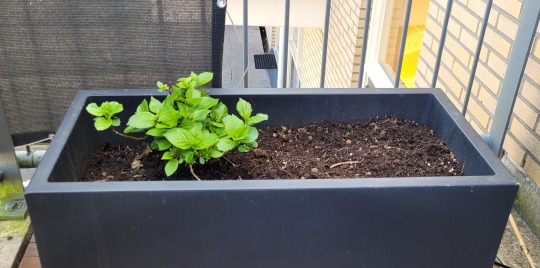
Name: Sam
Species: Lavandula munstead
Planted on: Match 8th 2024
Sam is the new plant I was talking about last week. I had to buy a new planter because the one I already had was broken from the bottom. I don't know why I didn't buy a lavender earlier because I really love the smell of them. I really hope they'll take well here!
_____________________________________________________________
And than's the update of last week, just a day late. I think I'm also going to post about some random stuff related to my gardening "experience". It's in quotes because I don't want it to sound any bigger than it is. I'm done with this post now so i'll just conclude it here.
So, see you next week!
#Trachelospermum#Hydrangea#macrophylla#Hydrangea macrophylla#Campanula Portenschlagiana#Campanula#Portenschlagiana#Vinca minor “Alba”#Vinca#Vinca minor#plants#gardening#garden blog#balcony garden#lavender
2 notes
·
View notes
Text
got some growth progress pictures this morning!

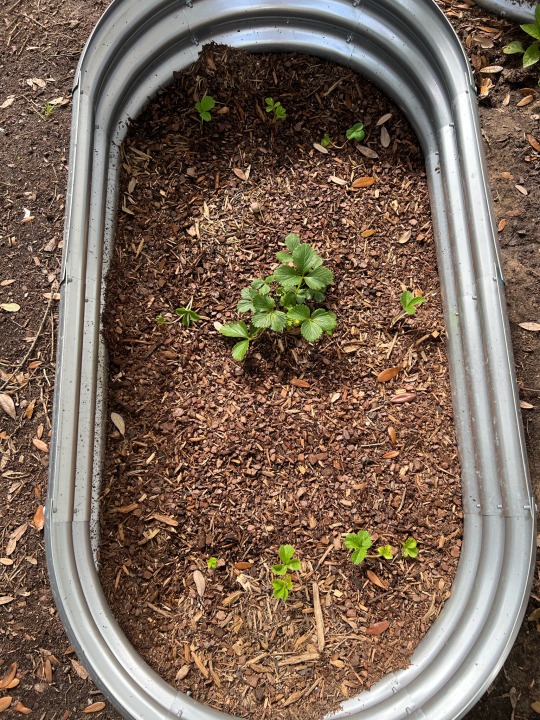
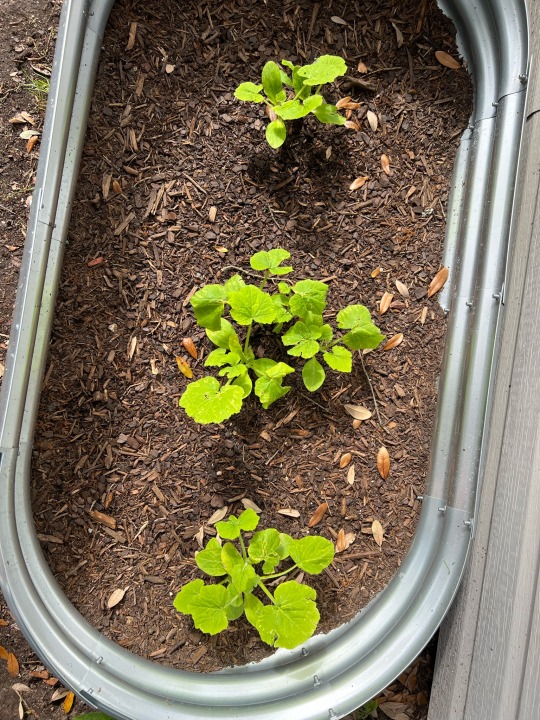
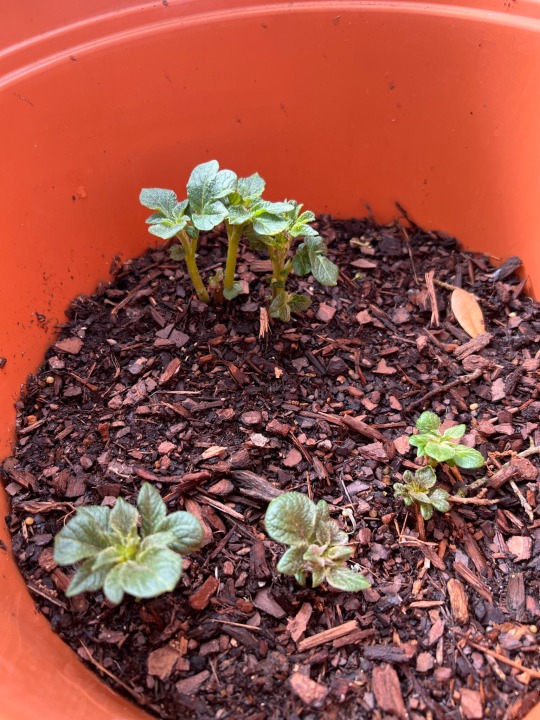

squash, strawberries, zucchini, potatoes, and tomatoes
13 notes
·
View notes
Text
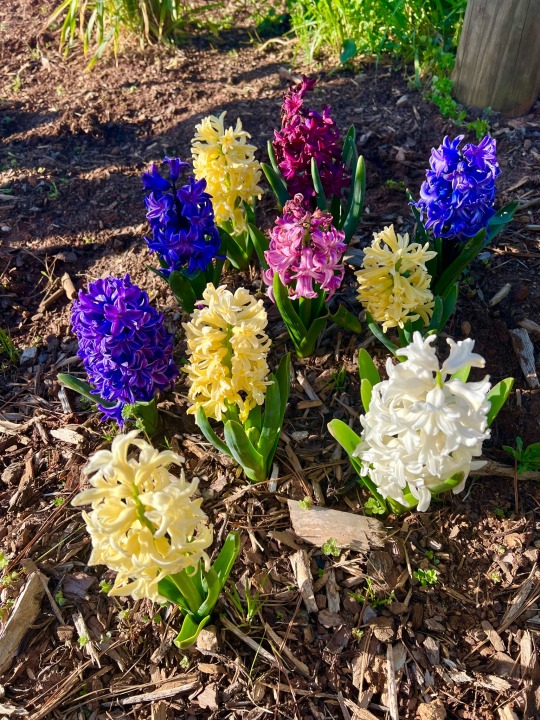
3/11/24 ~ Flower bulbs we started at school back in November 💞
#flower tubers#cut flowers#flower bed#sustainable gardening#vegetable gardening#starting seeds#growing food#plant life#veganuary#grow organic#grow your own food#gardening tips#organic gardening#garden blog
4 notes
·
View notes
Text
Food Gardening Friday: Herb Harvesting

For the fullest flavor, harvest herbs before they flower. If you've been harvesting branches all season, your plants probably never get a chance to flower. However, by late summer, even herbs that have not flowered will start to decline as the weather cools. This is a good time to begin harvesting and drying your herbs
How to:
-Cut healthy branches from your herb plants.
-Remove any dry or diseased leaves. Yellowed leaves and leaves spotted by a disease are not worth drying. Their flavor has already been diminished by the stress of the season.
-Shake the branches gently to remove any insects. There are always hitchhikers and since you won't be thoroughly washing the stems, you want to get rid of as many as you can now.
-If you've picked your herbs while the plants are dry, you should be able to simply shake off any excess soil. Rinse with cool water only if necessary and pat dry with paper towels. Hang or lay them out where they will get plenty of air circulation, so they can dry out quickly. Wet herbs will mold and rot.
-Remove the lower leaves along the bottom inch or so of the stem. You can use these leaves fresh or dry them separately.
-Bundle 4 - 6 stems together and tie as a bunch. You can either use a string or a rubber band. -The bundles will shrink as they dry and the rubber band will loosen, so check periodically that the bundle is not slipping. Make small bundles if you are trying to dry herbs with high water content, so they get air flow between the branches and do not rot.
-Punch or cut several holes in a paper bag. Label the bag with the name of the herb you are drying
-Place the herb bundle upside down into the bag. You can include the loose leaves you removed from the bottom inch of the stems if you like.
-Gather the ends of the bag around the bundle and tie closed. Make sure the herbs are not crowded inside the bag.
-Hang the bag upside down in a warm, airy room.
-Check in about two weeks to see how things are progressing. Keep checking weekly until your herbs are dry enough to crumble and ready to store.
When to Harvest Your Herbs for Drying
-For the fullest flavor, harvest herbs before they flower. If you've been harvesting branches all season, your plants probably never get a chance to flower. However, by late summer, even herbs that have not flowered will start to decline as the weather cools. This is a good time to begin harvesting and drying your herbs.
-Cut branches in mid-morning. Let the morning dew dry from the leaves, but pick before the plants are wilting in the afternoon sun.
-Do not cut the entire plant, unless you plan on replacing it. You should never cut back by more than two-thirds or remove more than about one-third of a plant's branches at one time.
Storing dried herbs:
-Store your dried herbs in airtight containers. Small canning jars work nicely. Zippered plastic bags will do as well.
-Be sure to label and date your containers.
-Your herbs will retain more flavor if you store the leaves whole and crush them when you are ready to use them.
-Discard any dried herbs that show the slightest sign of mold. It will only spread.
-Place containers in a cool, dry place away from direct sunlight. There are amber colored canning jars that block sunlight to help withhold damage.
#botanical science#garden blog#garden#gardening tips#gardening#homegrown#homemade#horticultural science#herbs#herb drying#craft#home crafts#diy#biology#biodiversity#nature#food tips#food#cooking#preserving#spices#health#food growing friday#food garden
21 notes
·
View notes
Text


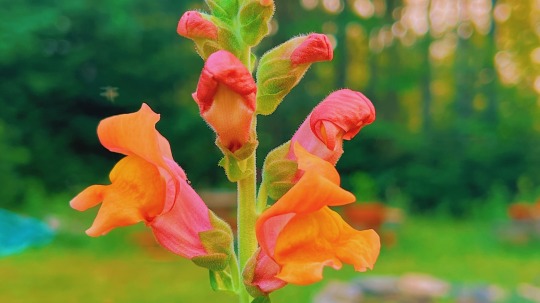
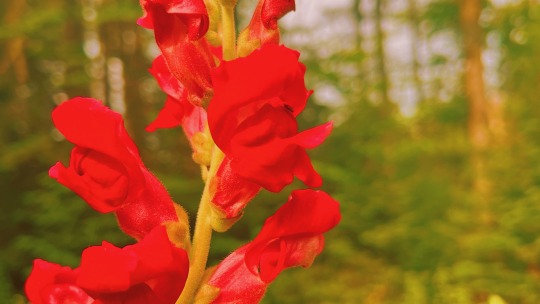
Snapdragons
25-Jul-2023
#snapdragon#flower garden#flowers#gardening#gardeners on tumblr#gardencore#plantblr#plant community#plants#garden#garden 2023#plant blog#garden blog#colorful#flora#botanical
203 notes
·
View notes
Text
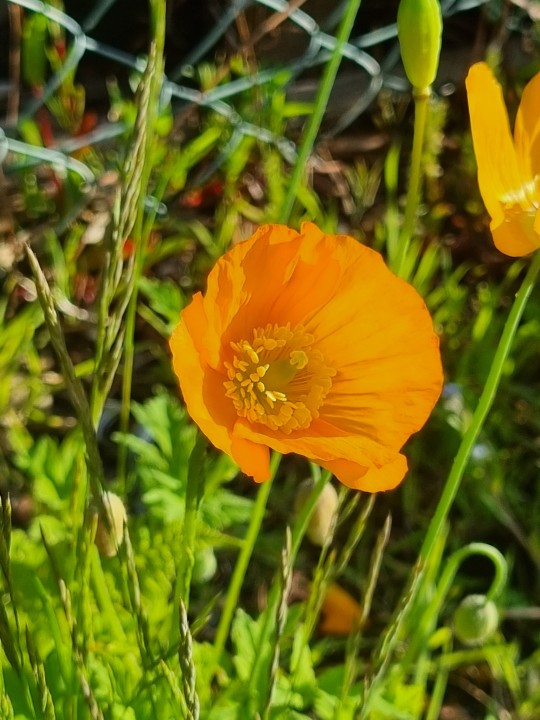
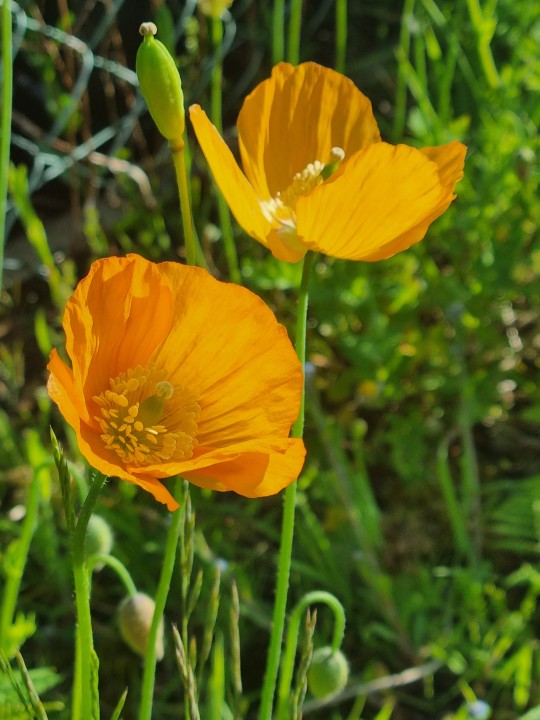
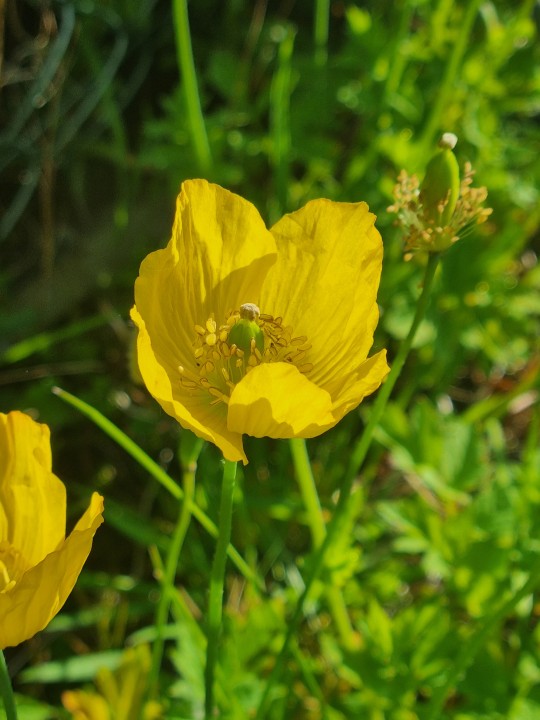
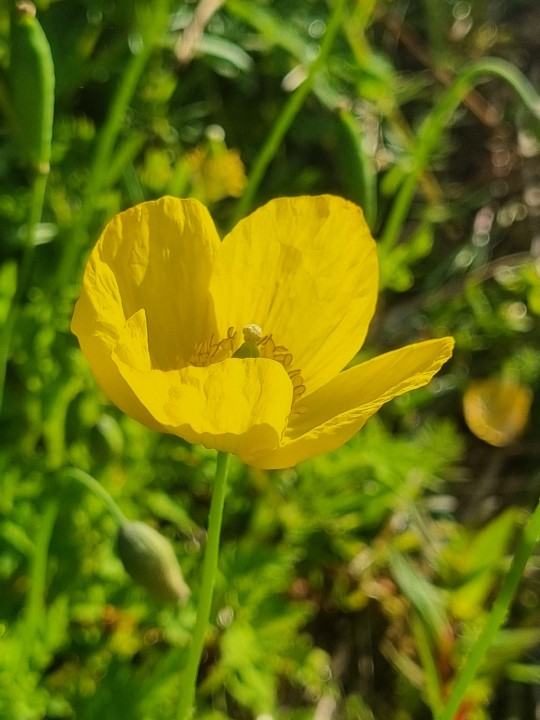
Some of the poppies growing in other parts of the garden.
5 notes
·
View notes
Text
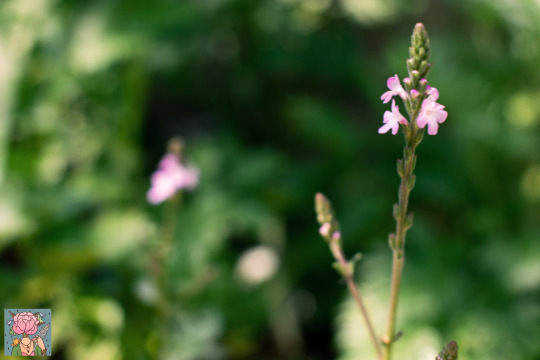
The Vervain was so hard to photograph; the Taproot that it forms may be over 3 feet deep, but the plant itself is surprisingly tiny- as are its flower spikes. I don't really have a good macro setup that'd make it any easier (and I'm not really sure how to buy lenses that fit my camera right; I did buy a Macro Lens at one point when I first started out, but it wound up being too small despite the product listing saying it'd fit it 😩).
For what it's worth, though, the photo I did manage to get last year during the 2023 growing season isn't the worst ... Just not the best.
Pictured: Common Vervain (Verbena Officinalis)
📸 Photography © Me, Anna Katherina
#Personal#2024#Garden 2023#My Photography#Photographers On Tumblr#Lensblr#Oklahoma#Gardening#Gardenblr#Plantblr#Garden Blog#Gardeners On Tumblr#Gardeners Of Tumblr#Disabled Gardener#Disabled Gardening#Green Witch#Green Witchcraft#Witchy Gardening
12 notes
·
View notes
Text
propagation in water.
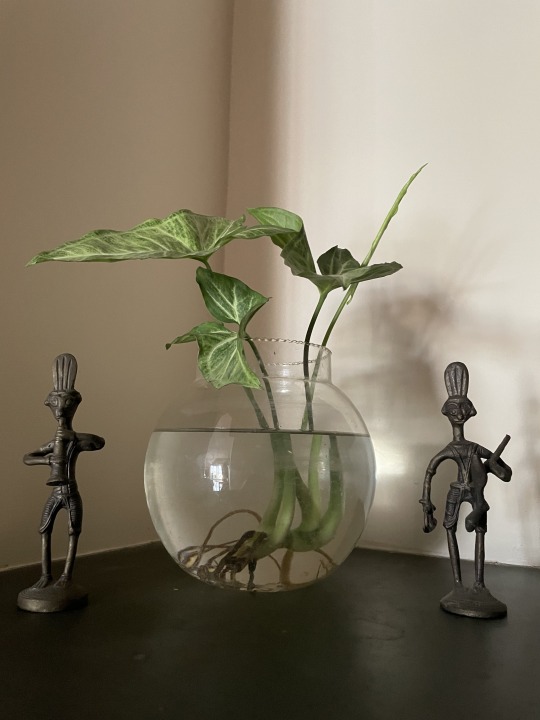


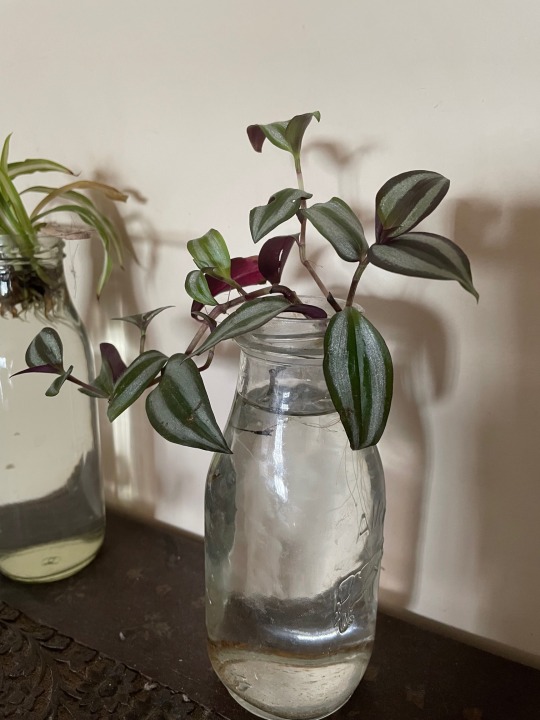


the one thing that drew me to try out water propagation was how very simple it seemed. and, no surprise, it really is that easy!
first, you have to take a cutting of the plant you want- and be careful. cuttings aren't just a random piece of stem you take, it is a stem with leaf nodes. without leaf nodes, the stem is useless and will not grow.
the plants which i took cuttings from include the spider plant, money plant, wandering jew, Brazilian joy weed and the arrowhead vine.
next, you put the cutting in any container with tap water (non chlorinated water) and place it where there is plenty of sunlight. avoid direct sunlight and 80% of the time the cuttings should survive.
and thats it! the cuttings will develop roots in about a week or 10 days, and they require no supplements at all. just the cutting and tap water- thats really all you need.
these cuttings can later be planted in soil outside or you can keep them as houseplants- as i have chosen to do. this way, i dont have to worry about watering them regularly, and i finally found a use for all my milkshake bottles!
keep planting, friends. i guarantee you, it just gets better.
#harvest#garden blog#gardenblr#gardener#gardening#garden#gardening tips#go green#grass.#green#green thumb#homegrown#vegetable#plantlife#plantes#save the planet#planting#plants#cottagecore#cottage aesthetic#cottage witch#fairy cottage#cottage chic#grandmacore#farmcore#farm aesthetic#homecooking#kitchen#plantblr#plant posting
43 notes
·
View notes

Text

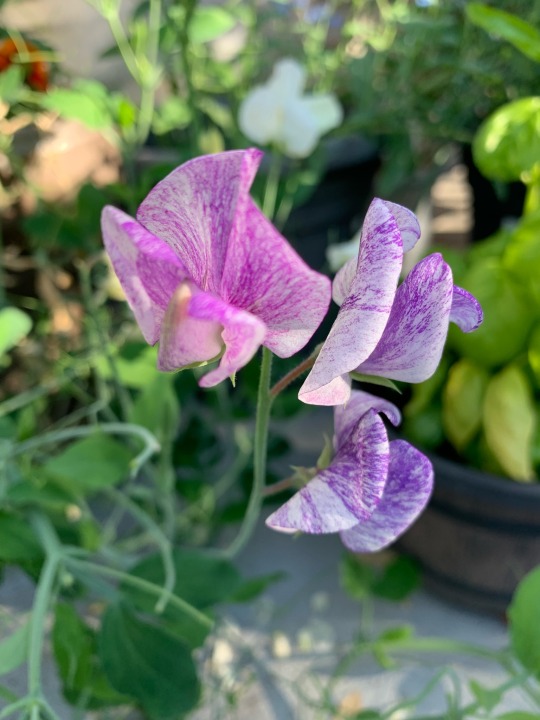

Sweet Pea
#garden#gardening#urban gardening#container gardening#flowers#garden blog#plantblr#urban garden#container garden#sweet pea#variegated
42 notes
·
View notes
Text
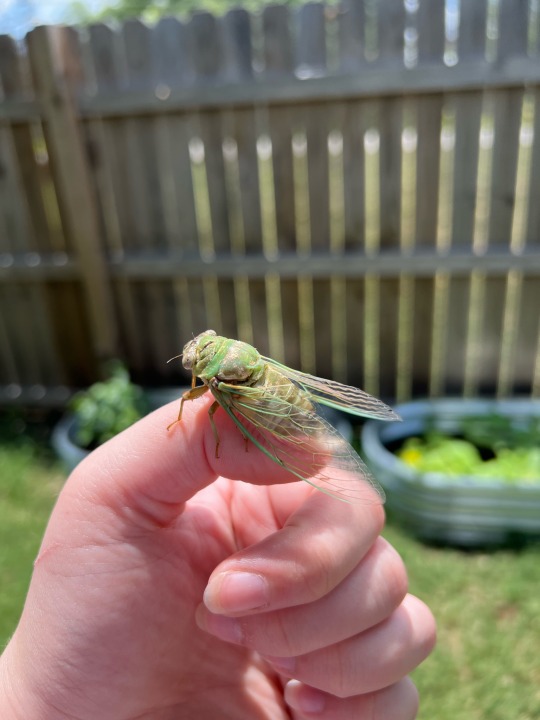
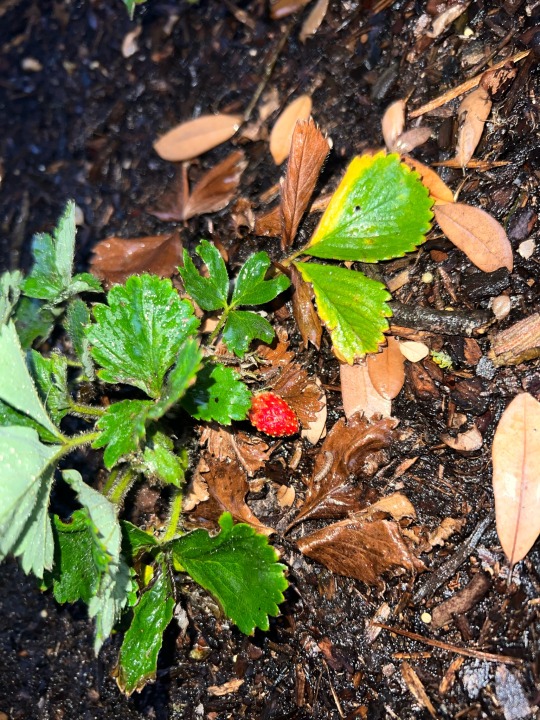
little friends and tiny berries
7 notes
·
View notes
Last Seen Blogs

thathawaiianchick
*needs caffiene*

printinkling
Inkling

leftie-overthinker
Awkwardly inclined

lumosinlove
lumosinlove

cactusdraw
Naredrawsxd