#hack cosplay
Text


"I wouldn't have made it this far without you. What am I to do when you start doubting yourself?"
BlackRose was my number one dream cosplay as a kid! I loved .hack//Infection, Mutation, Outbreak and Quarantine so much. I originally made this costume in 2015, but this is my rebuild from 2020. For the armor, everything was made out of EVA foam, and the breastplate base was an old strapless bra I had lying around. I re-purposed the tights, loincloth fabric, and wig (just re-styled it) from my 2015 cosplay, as well as the sword that was built with the help of my brother-in-law back then too. Everything else was created new, and since I was furloughed at the time I had all the time in the world to get everything perfectly how I wanted.
I even designed the tattoos myself on Illustrator! They're available for purchase on my ko-fi.
Photos by my partner & edits by me
#dothack#dot hack#.hack#hack#.hack//infection#.hack//mutation#.hack//outbreak#.hack//quarantine#.hack//imoq#imoq#blackrose#blackrose cosplay#cosplay#hack cosplay#.hack cosplay#dot hack cosplay#dothack cosplay#armor#armor cosplay#big sword#wendee lee#cyberconnect2#bandai#bandainamco#retro#retro cosplay#playstation#playstation 2#ps2#ps2 cosplay
162 notes
·
View notes
Text
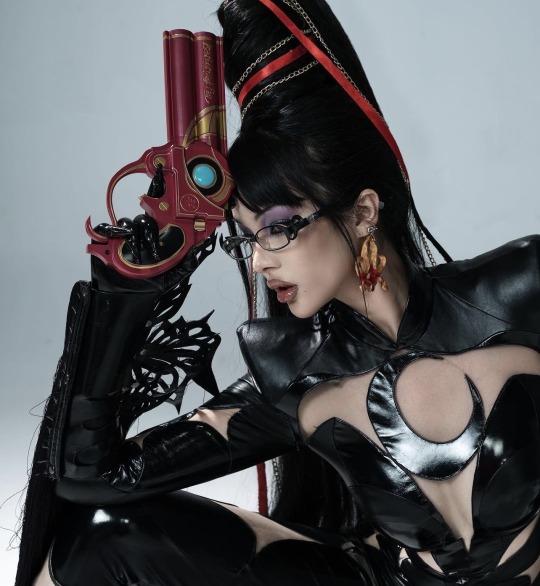


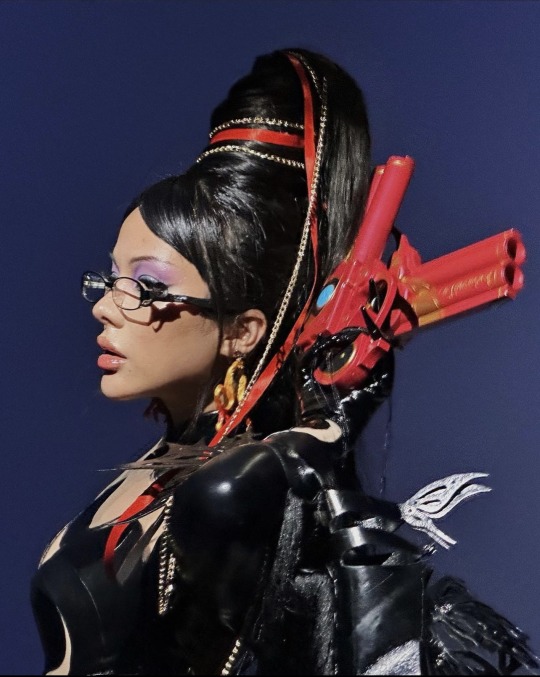


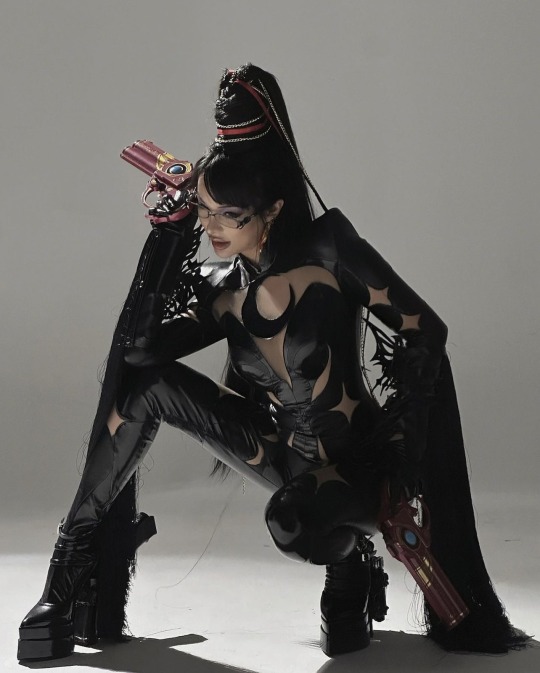
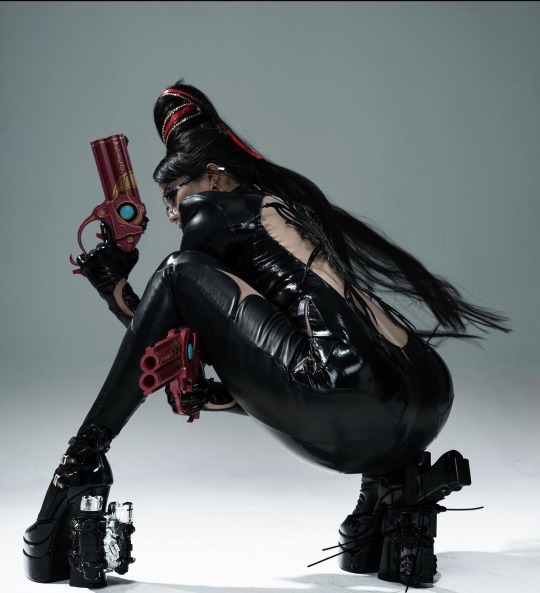

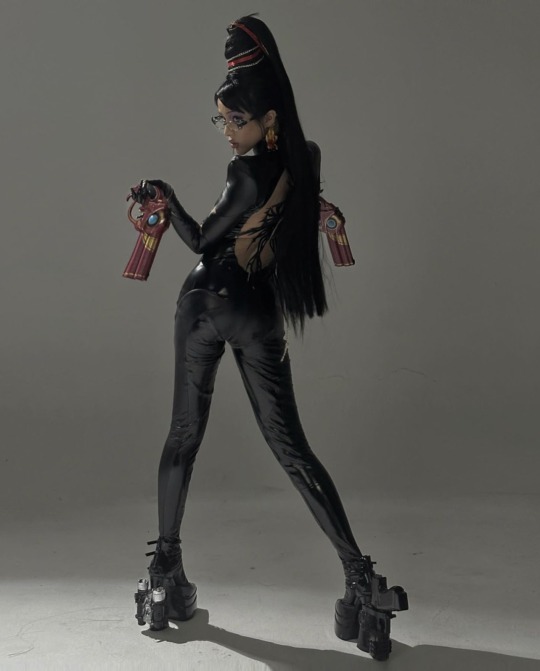
#fashion#bayonetta#playstation#nintendo#photography#fashion model#gaming#anime#modelshoot#girls with guns#gunslinger#hack n slash#sega#platinum games#witch#aesthetic#cosplay#costume#dreamcast
406 notes
·
View notes
Text
And… it’s done!
Took just over a week and the seam ripper got a workout but the Dark Eyes coat mark II is finished:


I had to make a few more adjustments/corrections as I went along:
The day after I set in the sleeves I noticed that the right shoulder dart was slightly too far forwards, which meant the sleeve head and shoulder pad had to come out so I could unpick the top of the seam and move it to the right place, something that helpfully removed the one little tuck I’d ended up with at the same time. Unpicking resulted in the fabric tearing so I had to take some extra on the seam when I restitched it, but this actually hid some of the holes from where I’d taken out the topstitching the day before which was a plus so I won’t complain! I also took the sleeves up by 3/4 of an inch when they proved too long even for someone with gibbon arms, an adjustment I must have made before but didn’t make a note of on the pattern.
Because I’m never satisfied I changed the collar again, rounding the ends slightly as it still looked too pointed. It was too high as well but I think I may have taken a bit too much off when I cut it down; not much I can do about it now. After I’d attached everything and topstitched I realised that it wasn’t meeting the lapel on the left side by about a centimetre which meant yet more unpicking to put it right. The edges aren’t sitting completely flat, something that’s annoying but that’s my fault for not rolling them over far enough when doing the topstitching.
The front edges were sticking out at an angle towards the bottom so I took some more off the seam to level them out.
When I made my first version, not knowing what the lining looked like I used up some ladybird satin I had left from a coat I’d made a few weeks before but this time I went for plain navy lining fabric which I think is probably more accurate (I could be wrong, of course; for all I know Paul’s hiding a funky lining in there. I know I would!):

I thought I’d put some photos of the two versions side by side so you can see the differences. The major changes were: returning the back side panels and creating the belt; shortening and shaping the collar; adding the pocket detail and the false bound holes behind the second row of buttons; topstitching round all eight buttonholes. I also felt when wearing it that the first coat was too short so I increased the length by a couple of inches. With hindsight I wish I’d narrowed the lapels a bit as they’re a lot wider than the collar but by the time I noticed it was too late to change as I’d already made the bound buttonholes. Never mind!
For comparison, old coat on the left, new on the right:


Overall, I’m really pleased with the way it’s turned out. It looks much more like the original, which is what I wanted, and though there may be tweaks I’d make if I was able I always feel that way; I’m never 100% happy with anything I make as I can always see room for improvement.
Obligatory dodgy mirror selfies to finish; I’ll try and get some better pics if I manage to wear it out somewhere in the next few weeks. You’ll probably have noticed that my version buttons up the opposite way round and that’s because - apart from the frock coat where it didn’t matter - I’ve never worked with mens’ patterns and changing the crossover would just confuse me. The shirt and waistcoat for my NotD cosplay both button this way and I wear my watch chain on the other side as well; I think that’s probably partly what Paul was referring to when he said upon seeing me in May that it was like looking in a mirror!


#i had sore fingers from sewing the hem and the buttons#it’s not easy pushing a needle through faux leather#i could have done with one of those pads sailmakers used to wear on their hands#but it’s done and i’m happy#sfs’s adventures in sewing#vogue pea jacket hack#doctor who#eighth doctor#8th doctor#dark eyes#sewing#cosplay
41 notes
·
View notes
Text
I went outside once more lol


——
Plus, I have an update!!
——
Behold!!


My answer to the flapping loincloth!
Results are mixed.
Pros:
- doesn’t flap in the wind willy-nilly
Which means that I don’t have to fix it constantly nor do I have spend money buying supplies. Yay ^<^
Cons:
- The skirt still flies up when I spin.
Welp.
Le tags: @skyethewolfwizard @slimylittlemaggot @mayhem-moth @ladyofspoons @the-trash-eating-llama
#incomplete ganyu cosplay#cosplay#note: I’m uploading it here because I didn’t want to take away attention from the gfm campaigns#i went outside again series#skirt craft hack arc
41 notes
·
View notes
Text
I got a ton of new followers recently so not all of you know my favorite sewing machine hack
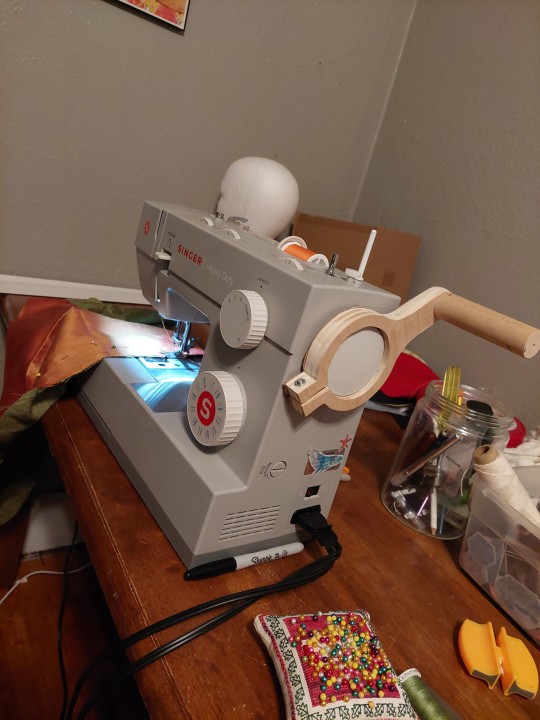
Handsewing too slow and uneven? Project too fiddly for machine speed? Need to constantly adjust needle placement but want to keep your wrists? Enter the Hand Crank. A friend made it out of wood but I bet you could 3d print one of these bad boys no problem.
When I was living off my sewing it literally saved my wrists.
486 notes
·
View notes
Text

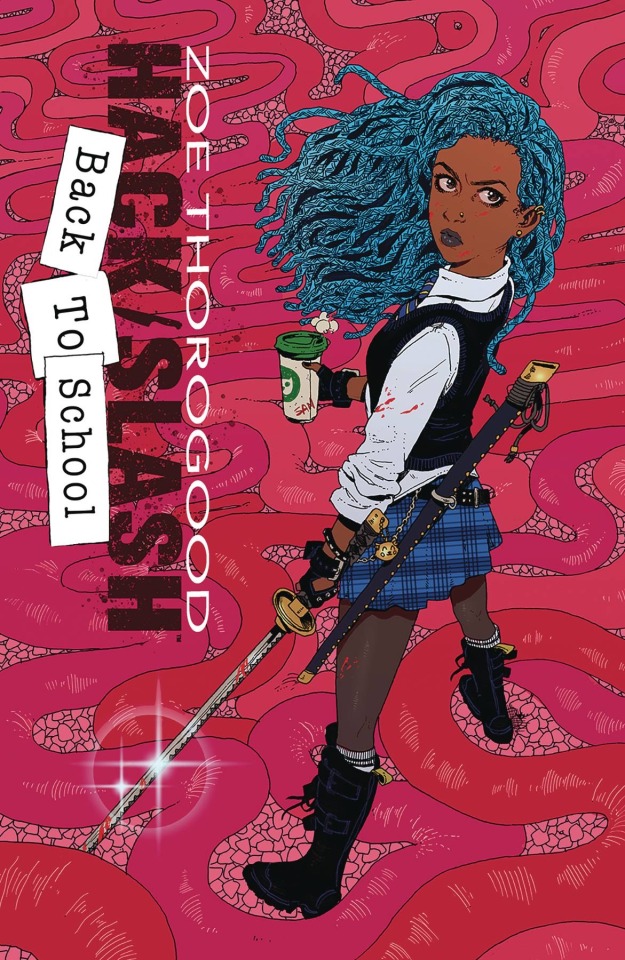


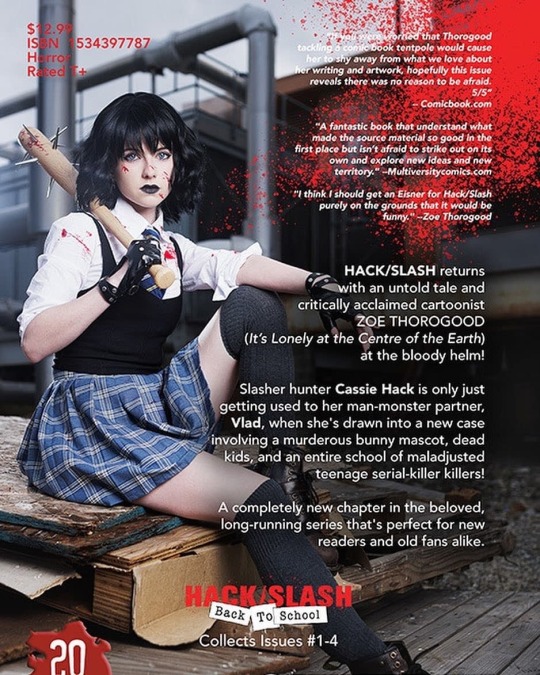
"I think I should get an award for Hack/Slash purely on the grounds that it would be funny."
Hack/Slash: Back to School #1-4 + TPB by Zoe Thorogood (also cosplaying as Cassie on the back cover of the TPB and writing her own pull quote)
35 notes
·
View notes
Text


02.14.23
happy valentine’s day to all who celebrate,,, 💌💌 i have midterm papers due this weekend but i also have an anime convention im going to that’s been in the works for a while :’) i’ll let y’all know if i prevail
🎧 : no surprises - radiohead
#i’m about to be in my cosplay sitting in a corner of this convention center hacking away at my keyboard trying to meet word count#studyblr#dark academia#deskinspo#study motivation#mine#light academia#college
201 notes
·
View notes
Text
Making Vex and Grog
These costumes are near and dear to my heart because they get a lot of love when we wear them.
Vex'ahlia is definetly one of my lazy-girl looks because she uses my hair, natural eye-color, and the peices are super comfortable. I made my Pauldrons from fur, cutting out the shape, sewing right sides together and then attatching them on with safety pins. The tunic is a dress from Amazon that I butchered. I cut a slit up the side, made it shorter, deepened the neckline, added the blue trim to the sleeves and collar, and then added the pin to put it all together. This whole costume was about $70 dollars (including the boots), and is so worth it.
HACK: For elf/fairy ears, attach them with a thin layer of eyelash glue where they make contact with your skin so they stay on all day and you do not lose them.
Grog was a bit harder, but so much more rewarding. His battle kilt is made from a 7 dollar Kylo Ren belt we got from the Disney store outlet. Then I got some leather-looking cotton fabric and glued it to the inside to connect it, added the front peice, and then made the "buckle" out of craft foam from Micheals. Then I added the trim to make it look barbarian-y. His "skin" is a shirt that I painted with his tattoos, and bodypaint I did on my boyfriend. This entire costume took about $50 dollars to make, and it looks so good!
HACK: Remember to set. Set. Set. That makeup with powder and spray so it does not budge.

©2024 Perez, Ashley
11 notes
·
View notes
Text

exclusive cosplay cover to Hack/Slash Back to School
Cassie Hack cosplay by Zoe Thorogood
16 notes
·
View notes
Text


"That wasn't Aromatic Grass...right?" 👀🌿🌱🌾
I got so annoyed at Elk saying that every time I went to a dungeon w/him😂
Here's some Elk photoshoot pics from last year. Thanks again to @royalspacefish for gifting their cosplay to me!
📷My partner Raph, edits by me!
#cosplay#cosplayer#cosplayers#cosplay photoshoot#game cosplay#video game cosplay#retro#retro game cosplay#dothack#dothack cosplay#dot hack#elk#dot hack cosplay#hack cosplay#hack#dothack imoq#.hack//imoq#.hack//infection#.hack//outbreak#.hack//mutation#.hack//quarantine#elk .hack#ドットハック
29 notes
·
View notes
Text


We livin the dream (driving a subaru)
22 notes
·
View notes
Text
New Dark Eyes jacket progress report #2!
I’m happy to say that the back went together without a problem (wish I could say the same about the sleeves, but more on that later). When I made my first version last year i had no idea what the back actually looked like so I opted to take out the princess seams on the pattern and forgo the belt as I thought it would be too much of a faff to do in pleather. This time, having finally seen a couple of pics that (sort of) show the back I decided to be more accurate, which involved making a belt with a buckle. Fortunately I had some practise with buckles and eyelets when I made the belt and gaiters for my NotD cosplay so I knew what I was doing. On the gaiters I made the mistake of punching holes which ended up being slightly too big so I had to secure the eyelets with fabric glue; this time I just made small slits with a seam ripper and pushed them them through so that they fitted snugly. The belt came together quickly, and I was very surprised that with the help of a handy knitting needle I could actually turn two tubes of this fairly thick fabric the right way out!


When I cut out the pieces I was intending to place the belt at the existing point on the pattern, between the back side panels. Looking closer, however, I realised that on the original coat the back is just two pieces and the belt actually starts at the side seams so I just measured the extra distance and extended the belt pieces accordingly.


I made a few small adjustments to the fit when I stitched front and back together, taking the sides in and curving up towards the underarm seam to give it a bit more shape as I don’t like garments to be too boxy; I’m on the small side so I tend to get drowned in fabric otherwise.
Back and front together I attached the collar…
…and took it off again. This pattern has a collar and stand, which I junked and drafted a soft collar when I made my first version last year. Looking back at photos afterwards, however, I realised I’d made it too long and narrow so, wanting to rectify this, I - you guessed it! - shortened and widened the collar piece. After I’d tacked it on I still wasn’t happy as it was a bit too pointed so off it came and I ran up another one having taken some off the end. Left is the first attempt, right the second:


I’m happier with it now!
Yesterday I spent wrestling with the sleeves. Setting in sleeves is not my favourite job and in this sort of fabric it’s especially tricky. There’s no way to do it without using pins so I just have to accept holes around the sleeve. I’m not expecting anyone to get close enough to see them!
As you can’t press faux leather because it’s essentially plastic, the only way to flatten seams is to topstitch them. This is fine as long as you can get the seam under the sewing machine, but on a sleeve it’s impossible to do both because once you’ve sewn the second seam you have a tube. So, I topstitched the outer seam and tacked the seam allowances of the under seam to the sleeve. It’s not as flat as the topstitched seam, as you can see here, but it’s not as bouncy as it would be otherwise:

It was something of a fight to get the sleeves into the armholes but I managed it eventually with just one very small tuck! For all the other seams I pinned inside the seam allowances as I hate working with quilting clips, but here that went out of the window as when you’re easing in sleeves you need a lot of pins! Fortunately as I needed to take an extra centimetre at the top they didn’t make much of a mark. I did though make the mistake of deciding to topstitch the seams and had to unpick when I realised I needed the seam allowances to attach the sleeve heads. This means I’m left with holes all the way round but as I said above, I’m hoping no one will get close enough to notice! I can live with it; I’d rather have a properly-fitting coat with needle holes than one that looks wrong with none.
Et voila: one inserted sleeve:

Once the sleeves were in it was time for shoulder pads. The first coat and jacket I made had no tailoring in them (I grew up in the 80s and connected shoulder pads with power suits and Joan Collins so left that part out) and it showed. I don’t go for full-on pad stitching and hair canvas but you do need both shoulder pads and sleeve heads to make the sleeves hang properly and I as I’m hollow-chested I always add a shield made from wadding as well so that the front doesn’t collapse:


And that’s the shell completed!

Now I have to do half of it all over again to construct the lining!
#sfs’s adventures in sewing#vogue pea jacket hack#doctor who#eighth doctor#dark eyes#sewing#cosplay#8th doctor
16 notes
·
View notes
Text
Warning: Skirt shows off groin

Image in place.
—
Note: this is a showcase of how my solution did not prevent my skirt from flashing my groin.
I honestly thought that the stone chess table was high enough to negate the groin shot.
I thought wrong.
Le tags: @the-trash-eating-llama @ladyofspoons @skyethewolfwizard


Reference photos lol
6 notes
·
View notes
Text
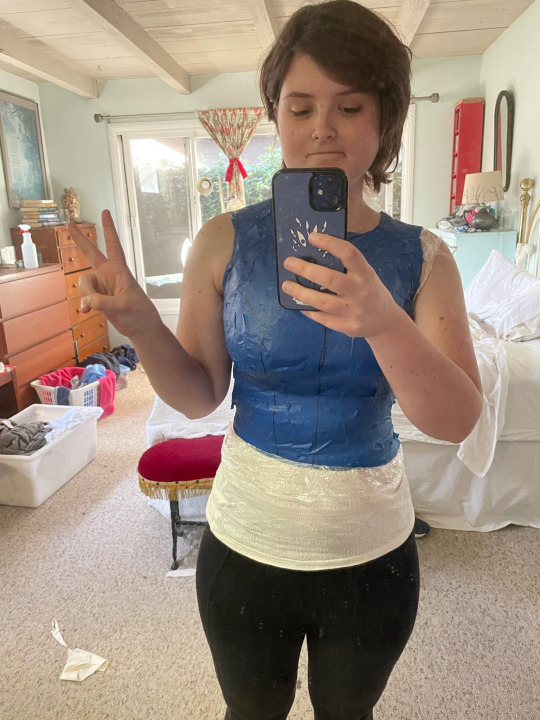
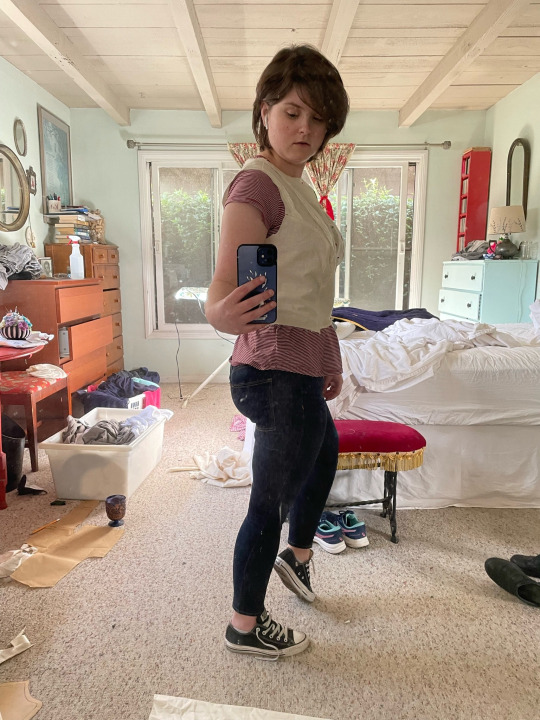
Making a Masking Tape Pattern
It's an old cosplay hack. You wrap a part of your body in plastic wrap (cling film), and then apply duct tape or masking tape over the plastic wrap until it fits to your body. You can then draw on the shape of the garment and seams, and it should fit perfectly to your measurements.
Over the weekend I was attempting to use a bodice pattern I already had to make a leather chest plate for a D&D Ranger Cosplay. After several failed mock ups, in which the curve for the princess seam just wouldn't sew flat, I gave up and looked for a different pattern. My usual online sources for free patterns failed me, and I decided to try my hand at this age old cosplay hack.
Step 1: Wrapping Yourself in Plastic Wrap and Tape.
I was able to wrap the plastic wrap around my entire torso, but not so much by upper back. For that I required the help of my mom. I was able to apply the tape to my front half, but for the back I once again needed the help of a second person.

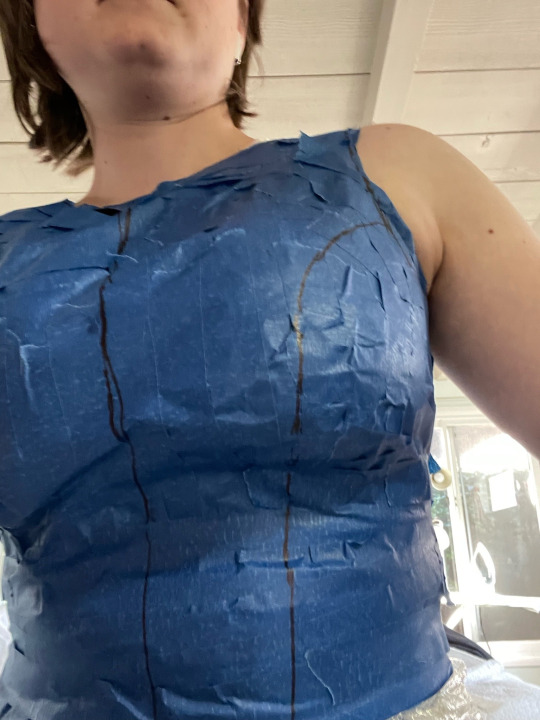
Step 2: Marking the Seams
Once I was wrapped in tape, I took a sharpie and drew on where I wanted the seams. I marked a center front line, a center back line, a shoulder seam line, and a side seam line. I also marked a front and back neckline, and drew on the curve of the princess seam so that it curved over my bust to my waist to account for the natural curve of my bust.
Then my mom cut me out of the tape up the center back line. Note, be sure you are thoroughly wrapped in plastic wrap before you start applying tape. I didn't do as good a job as I thought I did, and disaster struck.

Thankfully the tank top I was wearing was one I'd had since high school, so losing it wasn't the end of the world, but maybe wear an old shirt you don't care about if you do this, just in case.
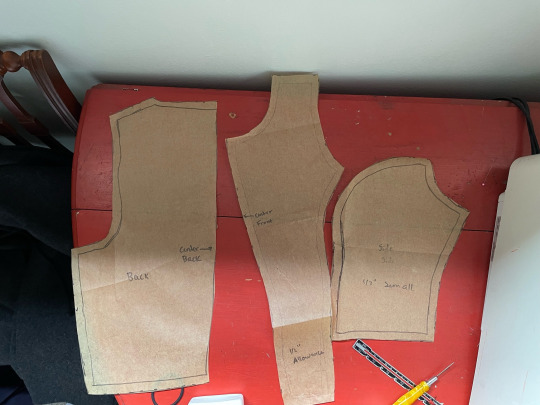
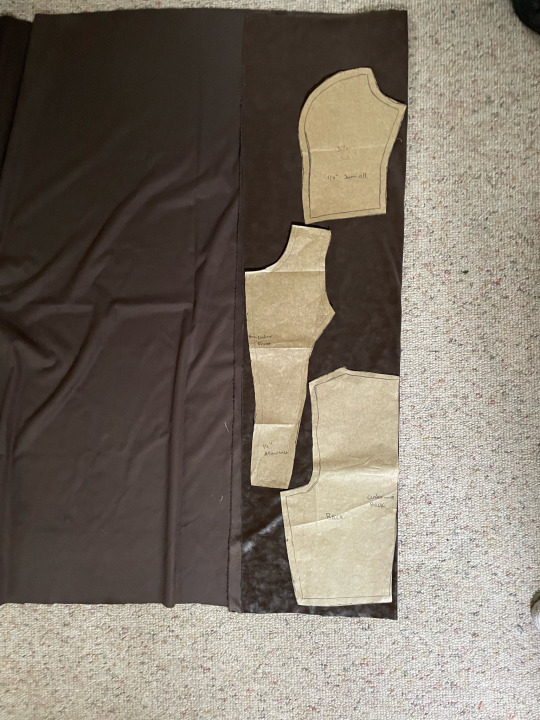
Step 3: Making the Pattern
Once free of my masking tape cocoon, I cut apart the shell along the seam lines I drew. That left me with three wobbly tape pieces. The seam over the bust held its 3D shape once cut apart, so I added a notch in the curve to make it lie flat.

Then I traced the shapes onto some parchment paper (but any big enough piece of paper will do) and added half an inch all the way around to allow for the seams and hems.
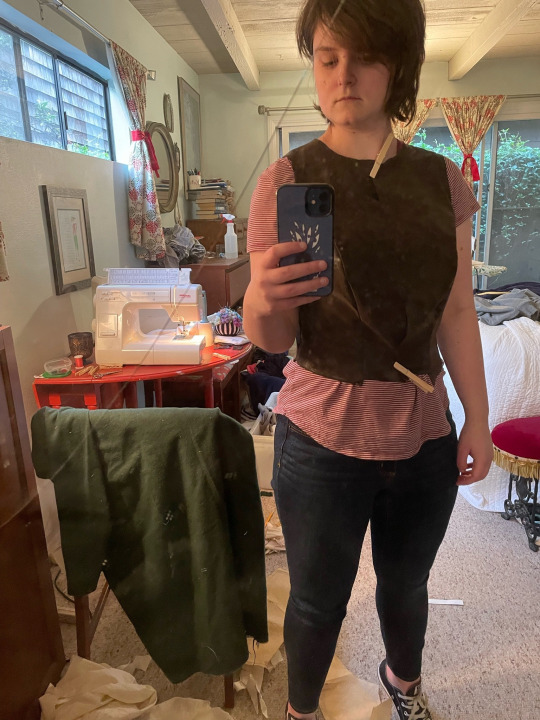
Step 4: Mock Up
Before I cut into the very expensive fake leather I bought, I wanted to make sure the pattern fit. So I cut apart a mock up from another project to make a mock up for this one.
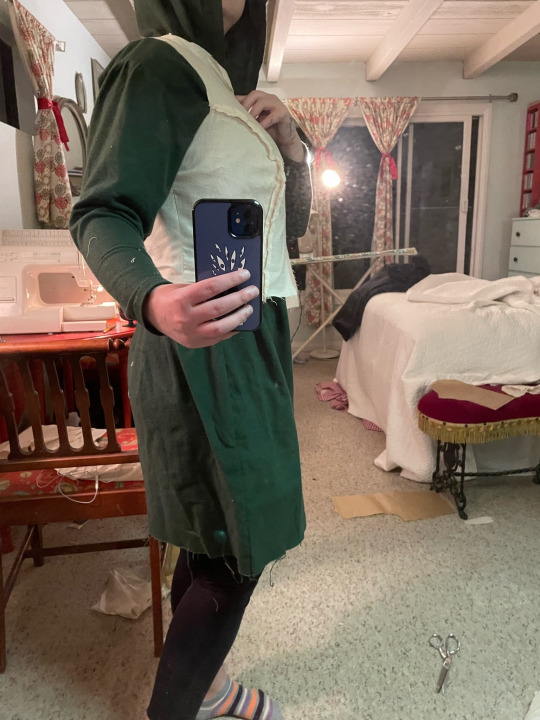

Half of it fit great, half of it came out super wonky, but at that point I'd been working on this for 6 hours straight, so I decided to wait and fix it the next day. I got up the next morning and cut another mock up and stitched it together.
This time it fit perfectly, and I cut into the leather.
Step 5: Final Fabric
I cut out the pattern one last time, this time in the fake leather I purchased.
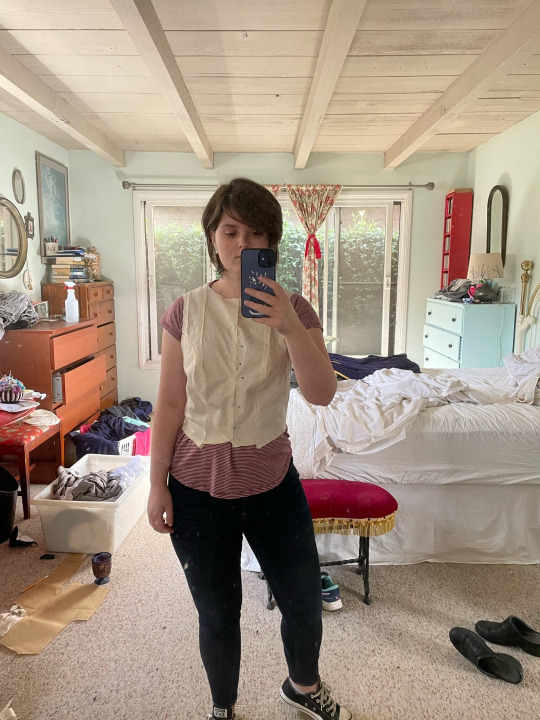
Then I stitched it together, and tried it on using clothes pins to hold it shut.

As you can see, it fits perfectly. I have some buckles coming, and then I'll be able to finish it!
Normally I would have saved this for when I completed the project, but I was really excited and proud that I learned a new technique! I wanted to share that excitement with you.
#sewing#sewing hacks#sewing project#sewing patterns#cosplay#d&d cosplay#dnd 5e#dungeons and dragons#cosplay hack#sewing adventures
107 notes
·
View notes
Text
2B the machine also said to hurry
#do you like my hacking#I’m almost out of these#I actually made them all in one night#tip’s toks#tipsy scales cosplay#nier automata#9s
20 notes
·
View notes
Note
Hi there! I was wondering how you made the mask for your Baron from the Baronies cosplay? I'm thinking about cosplaying them myself and I wanted to know whether you had any tips you could share. Thank you!
Hey, thanks for asking! I made the whole Baron cosplay on a whim over the course of like four days, so there's a lot of things I would do differently if I made it again. That said, here's how I made the mask!

The mask itself was a circular frame I made out of craft wire, with strips of construction paper curving across it to give it shape. And then I, uh, duct taped some sunglasses in there so it would actually stay on my face lol. There's definitely better ways to do this, I was just working with what I got.

The outside was a single piece of model magic that I rolled out really thin, and then cut out the eyes/mouth/scars with a crafting knife. The big tip I have here is for the eyes--use cheesecloth! It's the best thing ever! Cheesecloth folded/layered many times is still pretty easy to see through when it's right up against your eyes, but gives the appearance of solid cloth from a distance. I just dyed some a dark grey/black, and stuck it between the paper frame and clay.
I hope that helps! Best of luck making the roëmænce partnær!
#ever since i discovered the cheesecloth hack ive been invincible#side note on that--my brother works as an engineer and they use cheese cloths for like. cleaning really small parts.#and we bonded over neither of us using cheese cloth to make cheese.#anyways i hope this helps! feel free to reach out if you have questions!#delightfullyquirkydoodles#cosplay#are we human or are we cosplayer#baron from the baronies#badger post#badger answers
4 notes
·
View notes
Last Seen Blogs

marcyvampire
★ ׂ .𓆩𝑴𝑨𝑹𝑪𝒀𓆪. 𔐬 𝆬

rambles-ofthe-forsaken
Ready To Disappear

donnanobal
FANTASTIC

nursemaybelle052688
💉nUrSE_mAy🩺

teeworlds-aimbot-0-6-2-domq
🔥 teeworlds aimbot 0.6.2 download (PC free) P3L?