#letsencrypt
Explore tagged Tumblr posts
Visit Tumblr Blog
Explore Tumblr blogs with no restrictions, modern design and the best experience.
Last Seen Tumblr Blogs


Fun Fact
The KCSC sent more than 20K requests to delete posts related to prostitution and porn to Tumblr from January to June 2017.
Text
Gibt es bereits jemanden, der buypass.com statt Let's Encrypt auf einem Server betreibt?
Bei https://www.buypass.com handelt es sich um ein Norwegisches Unternehmen aus Oslo, mit deren kostenlosen SSL Zertifikate Server abgesichert werden können.
Gullhaug Torg 2d, 0484 Oslo, Norwegen
Die Installation erfolgt mittels certbot und sieht übersichtlich aus.
Certbot installieren:
sudo apt update sudo apt install certbot
Bei Buypass CA registrieren: Registrieren Sie Ihre E-Mail-Adresse bei Buypass CA mit Certbot. Dieser Schritt ist notwendig, um ein Konto bei Buypass zu erstellen:
sudo certbot register --server 'https://api.buypass.com/acme/directory'
Sie werden aufgefordert, Ihre E-Mail-Adresse einzugeben und den Nutzungsbedingungen zuzustimmen. Alternativ können Sie eine Einzeiler verwenden, um diesen Prozess zu automatisieren:
sudo certbot register -m '[email protected]' --no-eff-email --agree-tos --server 'https://api.buypass.com/acme/directory'
SSL-Zertifikat erhalten: Verwenden Sie Certbot, um das SSL-Zertifikat für Ihre Domain zu erhalten. Ersetzen Sie example.com durch Ihren tatsächlichen Domainnamen:
sudo certbot certonly --webroot -w /var/www/example.com/public_html/ -d example.com -d www.example.com --server 'https://api.buypass.com/acme/directory'
Dieser Befehl weist Certbot an, die Webroot-Methode zur Domain-Validierung zu verwenden und den Webroot-Pfad für Ihre Domain anzugeben1.
Automatische Erneuerung einrichten: Certbot kann Ihre Zertifikate automatisch erneuern. Um die automatische Erneuerung einzurichten, können Sie einen Cron-Job hinzufügen. Bearbeiten Sie die Cron-Jobs für den Root-Benutzer:
sudo crontab -e
Fügen Sie die folgende Zeile hinzu, um den Erneuerungsprozess zweimal täglich zu planen:
0 0,12 * * * /usr/bin/certbot renew --quiet
Dies führt den Erneuerungsprozess täglich um Mitternacht und Mittag aus und stellt sicher, dass Ihre Zertifikate immer aktuell sind.
#LetsEncrypt #buypass #sslzertifikat
Diese Angaben sind natürlich ohne Gewähr. Die Verwendung erfolgt auf eigene Gefahr.
0 notes
Text
Install Lets Encrypt Certificate on Windows with Certbot
Install Lets Encrypt Certificate on Windows with Certbot
Install Lets Encrypt Certificate on Windows with Certbot Let’s Encrypt provides free, trusted SSL certificates, widely accepted by many authorities and browsers. The certificates are signed by the Internet Security Research Group (ISRG) Root X1, ensuring a high level of trust. Certbot, a command-line tool developed in Python, makes it easy to request and renew these certificates from Let’s…
#Certificates#Import certificates#Let&039;s Encrypt#Lets Encrypt#Lets&039;s Encrypt#LetsEncrypt#Microsoft Windows#ssl certificate#Windows#Windows 10#Windows 11#Windows Server#Windows Server 2012#Windows Server 2016#Windows Server 2019#Windows Server 2022#Windows Server 2025#X.509 certificates
0 notes
Photo
WordPress: 6 Step Setting Up a Secure and Optimized Website on Nginx
0 notes
Text
Unlocking the Power of SSL Wildcard Certificates: How to Use WSL and Ubuntu Image to Secure Your Synology DSM
In the realm of web security, SSL (Secure Sockets Layer) certificates play a pivotal role. They provide an encrypted link between a web server and a browser, ensuring all data passing between the two remains private and secure. Within the family of SSL certificates, a powerhouse stands out – the SSL Wildcard Certificate. As the name suggests, this certificate covers not only a single domain but all its subdomains too, making it a versatile and cost-effective solution for businesses with a wide web presence.
The SSL Wildcard Certificate is represented by an asterisk () before the domain name. This wildcard notation allows the certificate to secure unlimited subdomains under the primary domain. For instance, if a certificate is issued to ".domain.com," it will secure "mail.domain.com," "login.domain.com," "blog.domain.com," and so forth without needing separate certificates for each.
But what happens when you want to secure your Synology DiskStation Manager (DSM)? This is where the power of an SSL Wildcard Certificate shines. By integrating it with your Synology DSM, you can ensure comprehensive security across all your Synology services.
Why SSL Wildcard Certificates are Important for Securing Synology DSM
Synology DSM is a robust and versatile operating system for Synology NAS (Network Attached Storage) devices, allowing users to manage and protect their data efficiently. However, like all systems connected to the internet, it is vulnerable to cyber threats. This is why securing your Synology DSM with an SSL Wildcard Certificate is essential.
When you use an SSL Wildcard Certificate, you're not just securing one service or domain; you're securing all your subdomains under one umbrella. This means that whether you're accessing your files via FileStation, managing emails through MailPlus, or sharing photos via Moments, your connection is secure. This universal coverage reduces the risk of cyberattacks, data breaches, and identity theft.
Moreover, an SSL Wildcard Certificate helps in building trust with your users. It validates your identity, proving to your users that they are indeed interacting with a secure, authentic Synology DSM. This boosts user confidence and can lead to increased user engagement.
Understanding the Basics of Let's Encrypt and Synology Let's Encrypt
To create an SSL Wildcard Certificate, we turn to Let's Encrypt, a free, automated, and open Certificate Authority (CA). The magic of Let's Encrypt lies in its simplicity and automation. It provides domain-validated certificates, including wildcard certificates, using an automated process designed to eliminate the current complex process of manual creation, validation, signing, and installation of certificates for secure websites.
Synology DSM supports Let's Encrypt natively. This means that you can request, renew, and manage your SSL certificates from Let's Encrypt directly within the DSM interface. However, for wildcard certificates, the process is slightly more complicated as it requires DNS validation. This is where the Windows Subsystem for Linux (WSL) and Ubuntu Image come into play.
Step-by-step Guide to Creating a Wildcard Certificate with Let's Encrypt
Creating a wildcard certificate with Let's Encrypt involves a few steps. First, you need to set up the Windows Subsystem for Linux (WSL) on your Windows machine. This requires a few steps, including enabling the WSL feature, downloading a Linux distribution (like Ubuntu) from the Microsoft Store, and setting up a new Linux instance.
Once you have WSL and Ubuntu set up, you can proceed to install Certbot, a tool designed to simplify the process of obtaining and managing Let's Encrypt certificates. With a few commands in the Ubuntu terminal, you can install Certbot and its DNS plugin for your DNS provider, which will be used to automate the DNS validation process required for issuing a wildcard certificate.
After setting up Certbot, the final step is to generate your wildcard certificate. This involves running a command that tells Certbot to request a wildcard certificate for your domain, using the DNS plugin to handle the required validation. Upon successful validation, Let's Encrypt will issue your wildcard certificate, which you can then find in the specified directory on your Linux instance.
Using WSL (Windows Subsystem for Linux) and Ubuntu Image for Certificate Creation
Using WSL and Ubuntu Image is a powerful way to create an SSL wildcard certificate. WSL allows you to run a Linux environment directly on Windows, without the need for a dual-boot setup or virtual machine. This means you can use Linux tools, like Certbot, on your Windows machine, making the process of creating a wildcard certificate much simpler and more efficient.
On the other hand, the Ubuntu Image provides a full-fledged Ubuntu environment, complete with a command-line interface. This means you can run Ubuntu commands directly on your Windows machine, providing further flexibility and efficiency when it comes to creating your wildcard certificate.
Together, WSL and Ubuntu Image provides a powerful, streamlined platform for creating SSL wildcard certificates. They provide all the tools and capabilities you need, all within a familiar Windows environment, reducing the complexity and time required to secure your Synology DSM.
Configuring Your Synology DSM for SSL Wildcard Certificate Installation
Once you've created your wildcard certificate using WSL and Ubuntu Image, the next step is to configure your Synology DSM for its installation. This involves uploading the certificate to your DSM and assigning it to your services.
First, you need to log into your DSM and navigate to the Control Panel, then to Security, and finally to the Certificate tab. Here, you can upload your new wildcard certificate, which consists of the certificate itself, its private key, and the chain of trust.
After uploading the certificate, you need to assign it to your services. This means telling your DSM which services should use the new wildcard certificate. By assigning the wildcard certificate to all your services, you ensure that they are all secured with the same, consistent level of encryption.
Testing and Verifying the SSL Wildcard Certificate
After installing the SSL wildcard certificate on your Synology DSM, it's important to test and verify that it's working correctly. This involves checking that all your services are accessible via HTTPS and that no security warnings are shown when accessing them.
To test your certificate, simply try accessing your services using their HTTPS URLs. For example, if you have a service at "mail.domain.com," try accessing "https://mail.domain.com." If the page loads without any security warnings, then your wildcard certificate is working correctly.
Additionally, you can use online SSL checkers to verify your certificate. These tools will check the validity of your certificate and its chain of trust, ensuring that it's correctly installed and trusted by browsers.
Troubleshooting Common Issues During the Certificate Installation Process
Despite the simplicity and automation provided by Let's Encrypt, WSL, and Ubuntu Image, you may still encounter issues during the certificate installation process. The most common issues include validation failures, certificate upload problems, and certificate assignment errors.
Validation failures occur when Let's Encrypt is unable to verify your domain ownership. This usually happens due to incorrect DNS settings. To resolve this issue, double-check your DNS settings and make sure that they match what's required by Let's Encrypt for DNS validation.
Certificate upload problems, on the other hand, occur when you're unable to upload your certificate to your Synology DSM. This can happen due to incorrect file formats or permissions. To resolve this issue, ensure that your certificate files are in the correct format (PEM) and that they have the correct permissions (readable by the DSM).
Finally, certificate assignment errors occur when you're unable to assign your certificate to your services. This usually happens due to incorrect service settings. To resolve this issue, double-check your service settings and make sure that they allow for custom SSL certificates.
Benefits and Advantages of Using SSL Wildcard Certificates for Synology DSM
The benefits and advantages of using SSL Wildcard Certificates for Synology DSM are numerous. First and foremost, they provide a high level of security. By securing all your subdomains with a single certificate, you ensure that all your services are protected with the same level of encryption, reducing the risk of cyberattacks and data breaches.
Second, SSL Wildcard Certificates are cost-effective. Instead of purchasing individual certificates for each of your subdomains, you can secure all of them with a single certificate, saving money and reducing administrative overhead.
Finally, SSL Wildcard Certificates are versatile. They can be used with any service on your Synology DSM, providing a flexible and scalable solution for securing your data and services.
Final Thoughts
In conclusion, securing your Synology DSM with an SSL Wildcard Certificate is a powerful and efficient way to protect your data and services. By leveraging the power of Let's Encrypt, WSL, and Ubuntu Image, you can create and install your wildcard certificate, ensuring a high level of security across all your subdomains.
While the process may seem complex at first, the benefits and advantages of using SSL Wildcard Certificates for Synology DSM far outweigh the initial learning curve. They provide a high level of security, are cost-effective, and offer unmatched versatility, making them an ideal solution for any Synology DSM user.
So, don't wait. Harness the power of SSL Wildcard Certificates today and protect your Synology DSM with the security it deserves.
John
0 notes
Text
Object permanence

I'm on a 20+ city book tour for my new novel PICKS AND SHOVELS. Catch me in DOYLESTOWN TOMORROW (Mar 1), and in BALTIMORE on SUNDAY (Mar 2). More tour dates here. Mail-order signed copies from LA's Diesel Books.

#20yrsago KGB Guide to London released by MI5 https://web.archive.org/web/20050303022107/https://www.nationalarchives.gov.uk/releases/2005/highlights_march/march1/default.htm
#20yrsago Euro software patents reanimated through corrupt officials 0wned by Microsoft https://yro.slashdot.org/story/05/02/28/2223232/eu-commission-declines-patent-debate-restart
#20yrsago Deluded Sony music exec can’t read his own study https://constitutionalcode.blogspot.com/2005/02/us-market-not-antagonistic-towards-drm.html
#20yrsago Greedy DRM vendors want more in royalties than the total market for digital music https://web.archive.org/web/20050912194259/http://www.usatoday.com/tech/news/computersecurity/2005-02-25-drm-infighting_x.htm?POE=click-refer
#10yrsago Ad-hoc museums of a failing utopia: photos of Soviet shop-windows https://memex.craphound.com/2015/02/28/ad-hoc-museums-of-a-failing-utopia-photos-of-soviet-shop-windows/
#10yrsago Your voice-to-text speech is recorded and sent to strangers https://www.vice.com/en/article/strangers-on-the-internet-are-listening-to-peoples-phone-voice-commands/
#5yrsago How to lie with (coronavirus) maps https://pluralistic.net/2020/02/28/pluralistic-your-daily-link-dose-28-feb-2020/#cartonerd
#5yrsago Let's Encrypt issues its billionth cert https://pluralistic.net/2020/02/28/pluralistic-your-daily-link-dose-28-feb-2020/#letsencrypt
#5yrsago Clearview AI's customer database leaks https://pluralistic.net/2020/02/28/pluralistic-your-daily-link-dose-28-feb-2020/#petard
#1yrago When private equity destroys your hospital https://pluralistic.net/2024/02/28/5000-bats/#charnel-house

9 notes
·
View notes
Text
ok since i've been sharing some piracy stuff i'll talk a bit about how my personal music streaming server is set up. the basic idea is: i either buy my music on bandcamp or download it on soulseek. all of my music is stored on an external hard drive connected to a donated laptop that's next to my house's internet router. this laptop is always on, and runs software that lets me access and stream my any song in my collection to my phone or to other computers. here's the detailed setup:
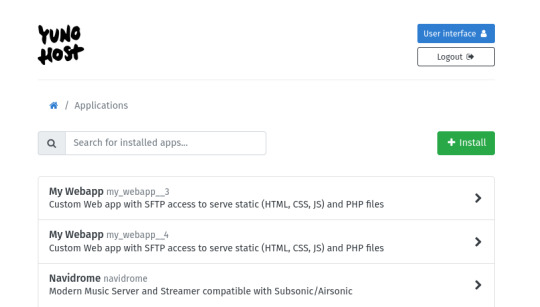
my home server is an old thinkpad laptop with a broken keyboard that was donated to me by a friend. it runs yunohost, a linux distribution that makes it simpler to reuse old computers as servers in this way: it gives you a nice control panel to install and manage all kinds of apps you might want to run on your home server, + it handles the security part by having a user login page & helping you install an https certificate with letsencrypt.
***
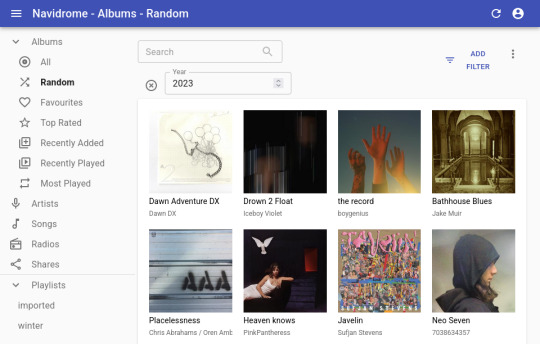
to stream my music collection, i use navidrome. this software is available to install from the yunohost control panel, so it's straightforward to install. what it does is take a folder with all your music and lets you browse and stream it, either via its web interface or through a bunch of apps for android, ios, etc.. it uses the subsonic protocol, so any app that says it works with subsonic should work with navidrome too.
***
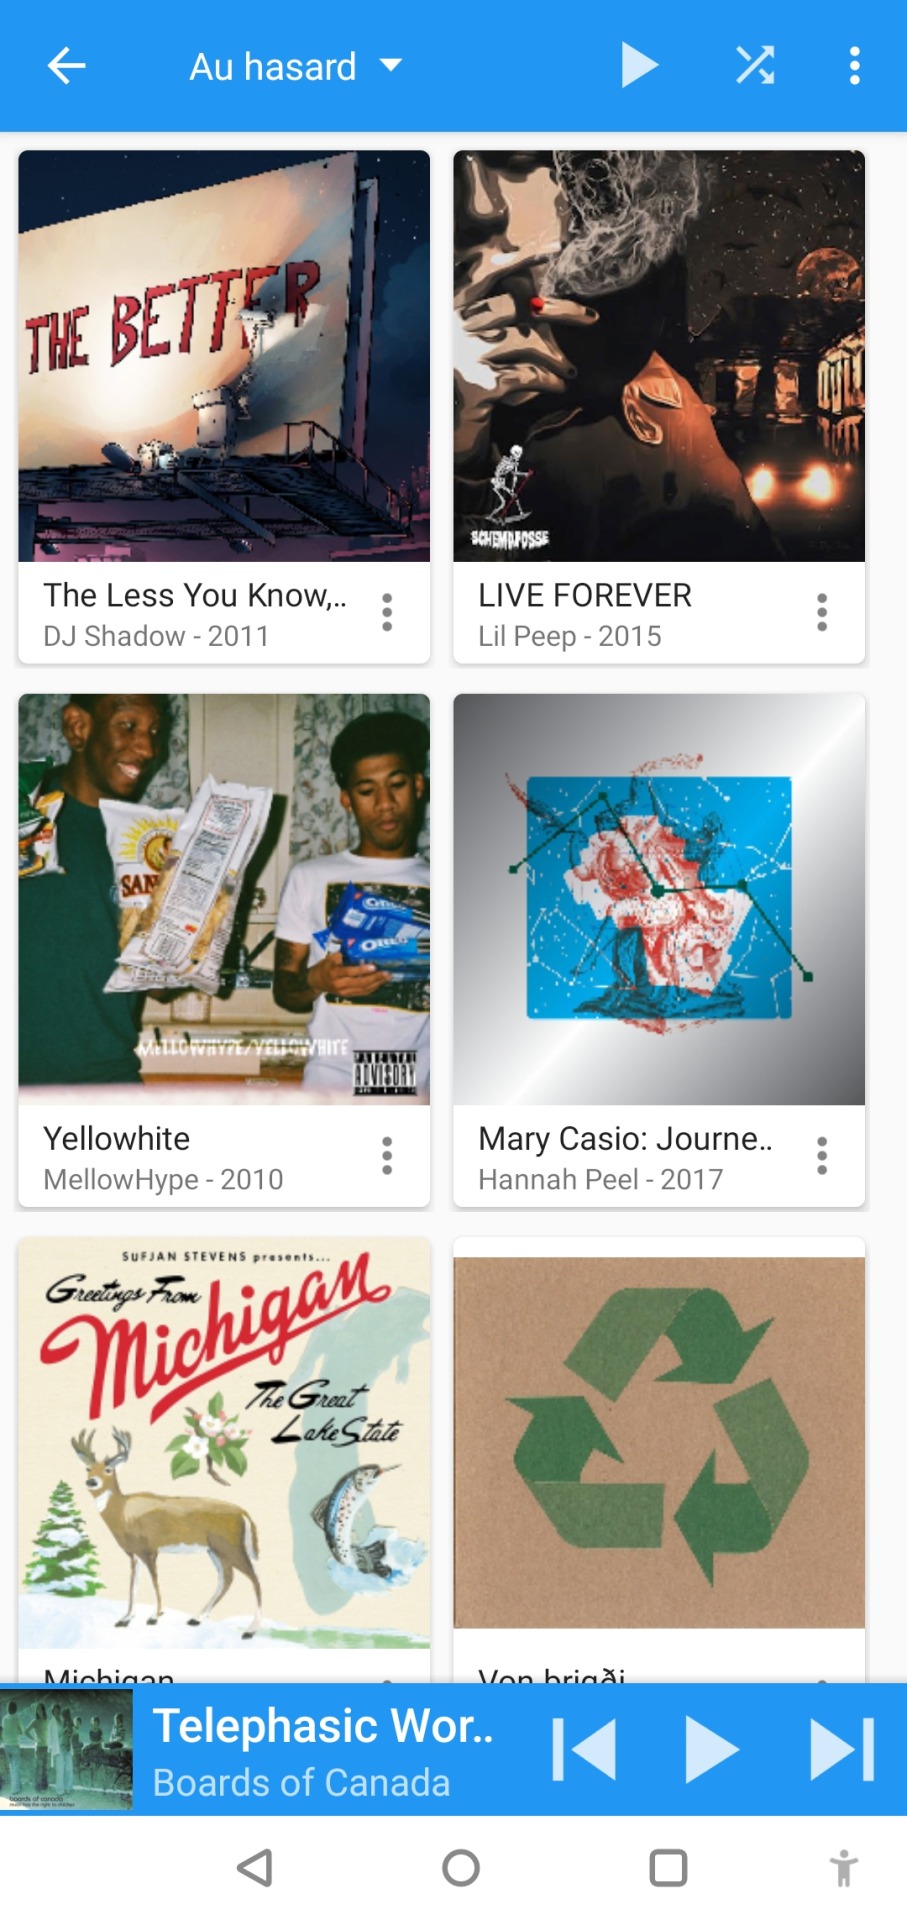
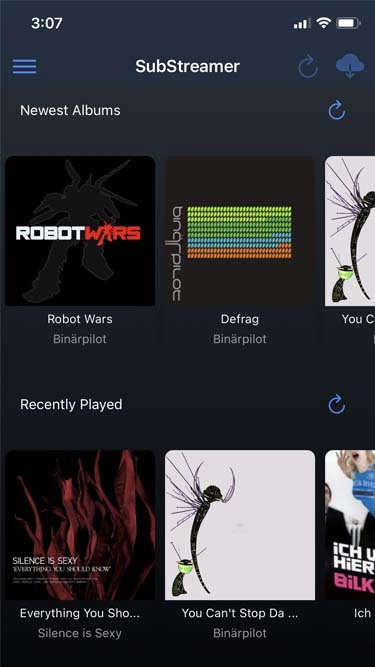
to listen to my music on my phone, i use DSub. It's an app that connects to any server that follows the subsonic API, including navidrome. you just have to give it the address of your home server, and your username and password, and it fetches your music and allows you to stream it. as mentionned previously, there's a bunch of alternative apps for android, ios, etc. so go take a look and make your pick. i've personally also used and enjoyed substreamer in the past. here are screenshots of both:
***
to listen to my music on my computer, i use tauon music box. i was a big fan of clementine music player years ago, but it got abandoned, and the replacement (strawberry music player) looks super dated now. tauon is very new to me, so i'm still figuring it out, but it connects to subsonic servers and it looks pretty so it's fitting the bill for me.

***
to download new music onto my server, i use slskd which is a soulseek client made to run on a web server. soulseek is a peer-to-peer software that's found a niche with music lovers, so for anything you'd want to listen there's a good chance that someone on soulseek has the file and will share it with you. the official soulseek client is available from the website, but i'm using a different software that can run on my server and that i can access anywhere via a webpage, slskd. this way, anytime i want to add music to my collection, i can just go to my server's slskd page, download the files, and they directly go into the folder that's served by navidrome.
slskd does not have a yunohost package, so the trick to make it work on the server is to use yunohost's reverse proxy app, and point it to the http port of slskd 127.0.0.1:5030, with the path /slskd and with forced user authentification. then, run slskd on your server with the --url-base slskd, --no-auth (it breaks otherwise, so it's best to just use yunohost's user auth on the reverse proxy) and --no-https (which has no downsides since the https is given by the reverse proxy anyway)

***
to keep my music collection organized, i use beets. this is a command line software that checks that all of the tags on your music are correct and puts the file in the correct folder (e.g. artist/album/01 trackname.mp3). it's a pretty complex program with a ton of features and settings, i like it to make sure i don't have two copies of the same album in different folders, and to automatically download the album art and the lyrics to most tracks, etc. i'm currently re-working my config file for beets, but i'd be happy to share if someone is interested.
that's my little system :) i hope it gives the inspiration to someone to ditch spotify for the new year and start having a personal mp3 collection of their own.
34 notes
·
View notes
Text
Letsencrypt will kill SMTP server auth following Chrome CA policy change
https://social.wildeboer.net/@jwildeboer/114516238307785904
0 notes
Link
#Automation#backup#cloudstorage#collaboration#dataprivacy#database#Docker#filesharing#HTTPS#Install#Linux#networking#Nextcloud#Nextcloudsetup#open-source#reverseproxy#Security#self-hosted#Server#systemadministration
0 notes
Text
wwwだけリダイレクトされてた!? 独自ドメインとNginxの罠
ある日、ふと自分の独自ドメイン bigfanofdisney.com にアクセスしてみると、なんと「Welcome to nginx!」のページが表示されてしまった……。
一方で、www.bigfanofdisney.com にアクセスすると、ちゃんとTumblrのブログにリダイレクトされてる。
「えっ!? なんで `www` だけ期待通り動いてるの……?」 その時の混乱と、仕組みをきちんと理解して設定を直した経験を、この記事に備忘録としてまとめておこうと思います。
問題:ドメインによってアクセス先がバラバラだった
自分の環境は以下のような構成になっていました:
サブドメイン blog.bigfanofdisney.com: Tumblrブログ本体
www.bigfanofdisney.com: ちゃんと blog. にリダイレクトされる
ルートドメイン bigfanofdisney.com: なぜ���Nginxの初期ページ(Welcome to nginx!)が出る
同じドメインなのに、なぜか挙動が違う。この正体は、実は以下の2つに隠されていました:
DNS(ドメインの向き先)
Nginx(Webサーバー)の設定
原因1:DNS設定がバラバラ
ドメインには「www」付きと無しで、別の設定ができます。 たとえば、次のようなDNS設定がされていたとします: bigfanofdisney.com → 自分のVPSのIPアドレス www.bigfanofdisney.com → TumblrのCNAME (domains.tumblr.com)
この場合、www 付きのアクセスはTumblrへ飛びますが、裸のドメイン bigfanofdisney.com はVPS上の Nginx に届いてしまいます。
つまり、見ている場所がそもそも違うのです。
原因2:Nginxが意図したリダイレクトをしていなかった
Nginxの設定ファイル(/etc/nginx/sites-available/default など)には次のような記述が必要でした:
server {
listen 80; listen [::]:80;
server_name bigfanofdisney.com www.bigfanofdisney.com;
return 301 https://bigfanofdisney.com$request_uri;
}
server {
listen 443 ssl;
listen [::]:443 ssl;
server_name bigfanofdisney.com www.bigfanofdisney.com;
ssl_certificate /etc/letsencrypt/live/bigfanofdisney.com/fullchain.pem;
ssl_certificate_key /etc/letsencrypt/live/bigfanofdisney.com/privkey.pem;
include /etc/letsencrypt/options-ssl-nginx.conf;
ssl_dhparam /etc/letsencrypt/ssl-dhparams.pem;
location / {
return 301 https://blog.bigfanofdisney.com$request_uri;
}
}
ところが、当初はこの設定がコメントアウトされていたり、途中で切れていたりと、正しく動作していなかったのです。
その結果、Nginxはデフォルトの「ようこそ!」ページを出してしまっていたというわけです。
解決策:Nginxに正しいリダイレクトルールを設定する
修正方法は次の2ステップです:
Nginxの設定ファイルで、すべてのリクエストを blog.bigfanofdisney.com にリダイレクト
設定反映後、nginx -t で文法チェック → sudo systemctl reload nginx
さらに、DNS側でも `bigfanofdisney.com` と `www` を同じ方向(VPS or Tumblr)に合わせておくことで、挙動が安定します。
まとめ:ドメインの「入り口」って意外とややこしい!
今回のように、DNSとNginxの両方の設定が一致していないと、意図したWebサイトにたどり着かないということが起こります。
とくにTumblrなどの外部サービスと独自ドメインを組み合わせる場合、wwwと裸ドメインの扱いに注意が必要です。
アクセスが集中してから気づいては遅い!ということで、 すべてのバリエーションでドメインが想定通り動くかは、あらかじめ確認しておきましょう。
このブログ「BigFanOfDisney.com」では、こうしたインフラ構築やデプロイの知見���発信していきます。
次回は、Let's Encryptを使ったSSL証明書の設定について書こうと思います。
📌応援はこちら → BuyMeACoffee.com/lira_dev
0 notes
Text
Gibt es bereits jemanden, der buypass.com statt Let's Encrypt auf einem Server betreibt?
Bei https://www.buypass.com handelt es sich um ein Norwegisches Unternehmen aus Oslo, mit deren kostenlosen SSL Zertifikate Server abgesichert werden können.
Gullhaug Torg 2d, 0484 Oslo, Norwegen
Die Installation erfolgt mittels certbot und sieht übersichtlich aus.
Certbot installieren:
sudo apt update sudo apt install certbot
Bei Buypass CA registrieren:
Registrieren Sie Ihre E-Mail-Adresse bei Buypass CA mit Certbot. Dieser Schritt ist notwendig, um ein Konto bei Buypass zu erstellen:
sudo certbot register --server 'https://api.buypass.com/acme/directory'
Sie werden aufgefordert, Ihre E-Mail-Adresse einzugeben und den Nutzungsbedingungen zuzustimmen. Alternativ können Sie eine Einzeiler verwenden, um diesen Prozess zu automatisieren:
sudo certbot register -m '[email protected]' --no-eff-email --agree-tos --server 'https://api.buypass.com/acme/directory'
SSL-Zertifikat erhalten:
Verwenden Sie Certbot, um das SSL-Zertifikat für Ihre Domain zu erhalten. Ersetzen Sie example.com durch Ihren tatsächlichen Domainnamen:
sudo certbot certonly --webroot -w /var/www/example.com/public_html/ -d example.com -d www.example.com --server 'https://api.buypass.com/acme/directory'
Dieser Befehl weist Certbot an, die Webroot-Methode zur Domain-Validierung zu verwenden und den Webroot-Pfad für Ihre Domain anzugeben1.
Automatische Erneuerung einrichten: Certbot kann Ihre Zertifikate automatisch erneuern. Um die automatische Erneuerung einzurichten, können Sie einen Cron-Job hinzufügen. Bearbeiten Sie die Cron-Jobs für den Root-Benutzer:
sudo crontab -e
Fügen Sie die folgende Zeile hinzu, um den Erneuerungsprozess zweimal täglich zu planen:
0 0,12 * * * /usr/bin/certbot renew --quiet
Dies führt den Erneuerungsprozess täglich um Mitternacht und Mittag aus und stellt sicher, dass Ihre Zertifikate immer aktuell sind.
#LetsEncrypt #buypass #sslzertifikat
Diese Angaben sind natürlich ohne Gewähr. Die Verwendung erfolgt auf eigene Gefahr.
0 notes
Text
2022: Aeropostale Philippines (via Shopify and Facebook): LetsEncrypt R3 SSL Certificate (September 2022 to December 2022) | As E-commerce Coordinator --- @aeropostale @shopify

0 notes
Text
SSL Cert Automation
SSL/TLS certificates are absolutely vital to the web. Yes, even your homelab, even if everything is local-only. I wholeheartedly recommend buying a domain for your homelab, as they can be had for ~$5/yr or less depending on the TLD (top-level domain) you choose. Obviously a .com domain is going to be more expensive, but others like .xyz are super affordable, and it makes a lot of things a whole lot easier. I recommend Cloudflare or Porkbun as your registrar; I've also used Namecheap and they're good but lack API access for small accounts. And please, PLEASE for the love of god DO NOT USE GODADDY. EVER.
First of all, why is cert automation even important? Most certificates you will purchase are issued for a one year period, so you only need to worry about renewal once a year, that's not too bad right? Well, that's all changing very soon. With issuers like Letsencrypt ending expiry emails, and the push to further shorten cert lifetime, automation is all the more needed. Not to mention Letsencrypt is free so there is very little reason not to use them (or a similar issuer).
"Okay, you've convinced me. But how???" Well, I'm glad you asked. By far the absolute easiest way is to use a reverse proxy that does all the work for you. Simply set up Caddy, Traefik, Nginx Proxy Manager, etc. and the appropriate provider plugin (if you're using DNS challenge, more on that later), and you're good to go. Everything you host will go through the proxy, which handles SSL certificate provisioning, renewal, and termination for you without needing to lift a finger. This is how a lot of people do it, and there's nothing wrong with doing it this way. However, it may not be the best solution depending on the complexity of your lab.
If you know a thing or two about managing SSL certificates you might be thinking about just running your own certificate authority. That does make it easier, you can make the certs expire whenever you want! Woo, 100 year certificates! Except not really, because many browsers/devices will balk at certificates with unrealistic lifetimes. Then you also have to install the cert authority on any and all client devices, docker containers, etc. It gets to be more of a pain than it's worth, especially when getting certs from an actual trusted CA is so easy. Indeed I used to do this, but when the certs did need to be renewed it was a right pain in the ass.
My lab consists of 6 physical computers, 3 are clustered with each other and all of them talk to the others for various things. Especially for the proxmox cluster, having a good certificate strategy is important because they need to be secure and trust each other. It's not really something I can reasonably slap a proxy in front of and expect it to be reliable. But unfortunately, there's not really any good out of the box solutions for exactly what I needed, which is automatic renewal and deployment to physical machines depending on the applications on each that need the certs.
So I made one myself. It's pretty simple really, I have a modified certbot docker container which uses a DNS challenge to provision or renew a wildcard certificate for my domain. Then an Ansible playbook runs on all the physical hosts (or particularly important VMs) to update the new cert and restart the application(s) as needed. And since it's running on a schedule, it helps eliminate the chance of accidental misconfiguration if I'm messing with something else in the lab. This way I apply the same cert to everything, and the reverse proxy will also use this same certificate for anything it serves.
The DNS challenge is important, because it's required to get a wildcard cert. You could provision certs individually without it, but the server has to be exposed to the internet which is not ideal for many backend management type stuff like Proxmox. You need to have API access to your registrar/DNS provider in order to accomplish this, otherwise you need to add the DNS challenge manually which just defeats the whole purpose. Basically certbot request a certificate, and the issuer says, "Oh yeah? If you really own this domain, then put this random secret in there for me to see." So it does, using API access, and the issuer trusts that you own the domain and gives you the requested certificate. This type of challenge is ideal for getting certs for things that aren't on the public internet.
This sure was a lot of words for a simple solution, huh. Well, more explanation never hurt anyone, probably. The point of this post is to show that while SSL certificates can be very complicated, for hobby use it's actually really easy to set up automation even for more complex environments. It might take a bit of work up front, but the comfort and security you get knowing you can sit back and not worry about anything and your systems will keep on trucking is pretty valuable.
0 notes
Text
Bảo Mật Website Với Chứng Chỉ SSL Miễn Phí – An Toàn & Tiết Kiệm!
Chứng chỉ SSL giúp bảo mật dữ liệu người dùng, tăng độ tin cậy và cải thiện SEO cho website. Nếu bạn muốn bảo mật website mà không tốn kém, SSL miễn phí là lựa chọn hoàn hảo!
✅ Lợi ích SSL miễn phí:
Mã hóa dữ liệu, bảo vệ thông tin người dùng.
Cải thiện thứ hạng SEO.
Xây dựng lòng tin với người truy cập.
Miễn phí, dễ dàng cài đặt.
📌 Nhà cung cấp uy tín: Let’s Encrypt, Cloudflare, ZeroSSL.
👉 Xem bài viết đầy đủ tại đây: https://hostmastercom.wordpress.com/2024/11/26/tong-quan-ve-chung-chi-ssl-mien-phi-nhung-dieu-ban-can-biet/
#SSL #BaoMatWebsite #HTTPS #LetsEncrypt #Cloudflare #WebsiteSecurity
0 notes
Video
youtube
How to install PHP 8.4 + Nginx in Ubuntu 24 with SSL via Letsencrypt
0 notes